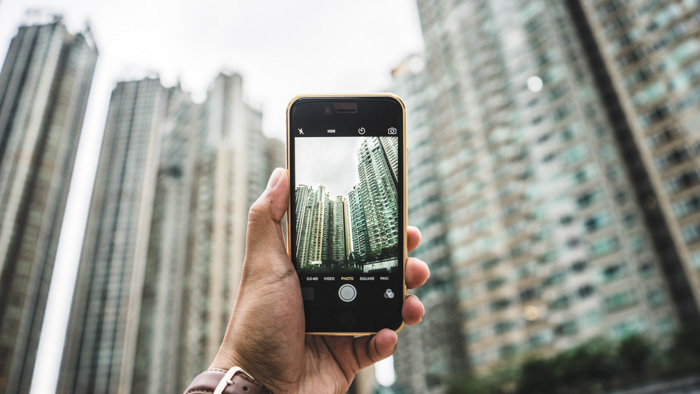
Smartphone cameras are constantly evolving and improving. They don’t have as many limitations for photography as they used to.
Many of them now have a manual mode that allows you to take creative shots like long exposure photos.
In this article, we’ll show you how to shoot long exposure iPhone photos. We’ve also included handy tips and tricks when using smartphone or iPhone cameras.

What is a Long Exposure iPhone?
When capturing a picture, a small gate called a shutter opens and allows light to pass through.
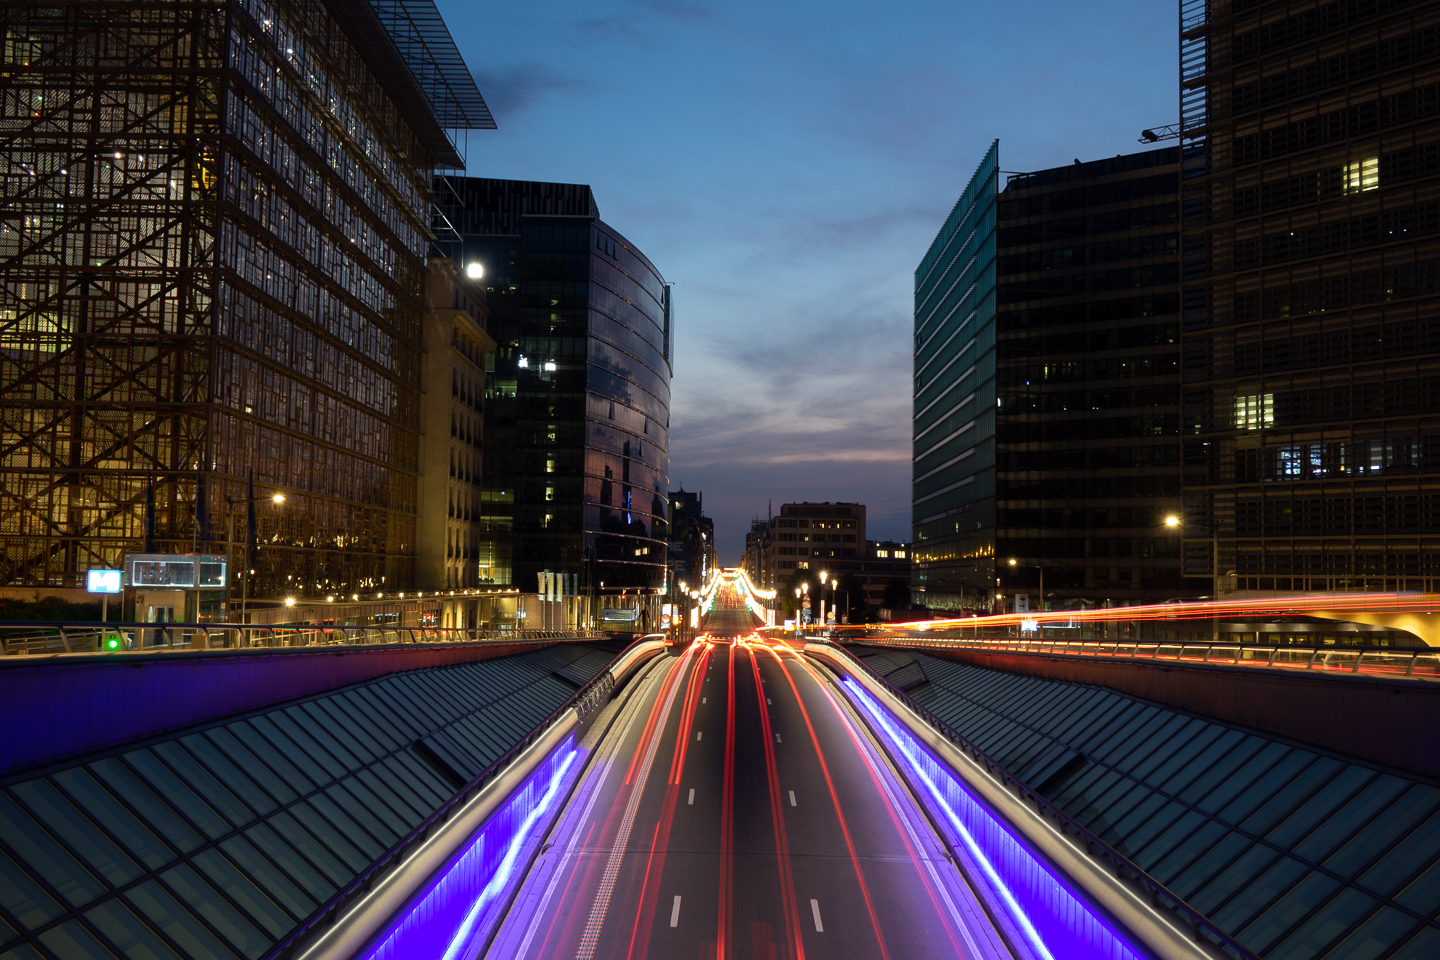
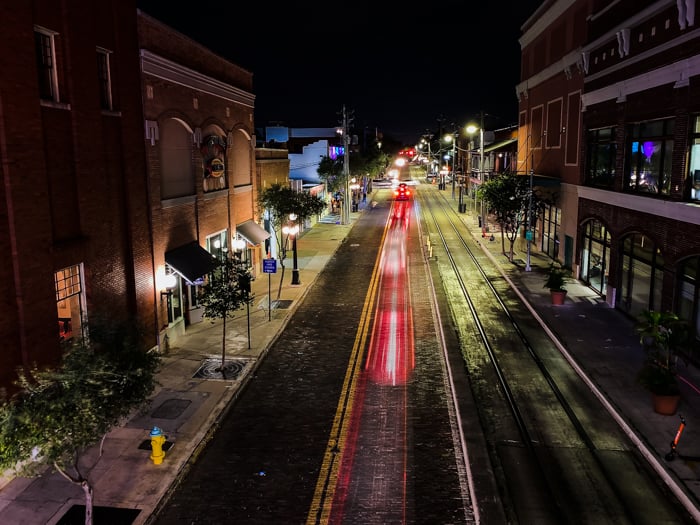
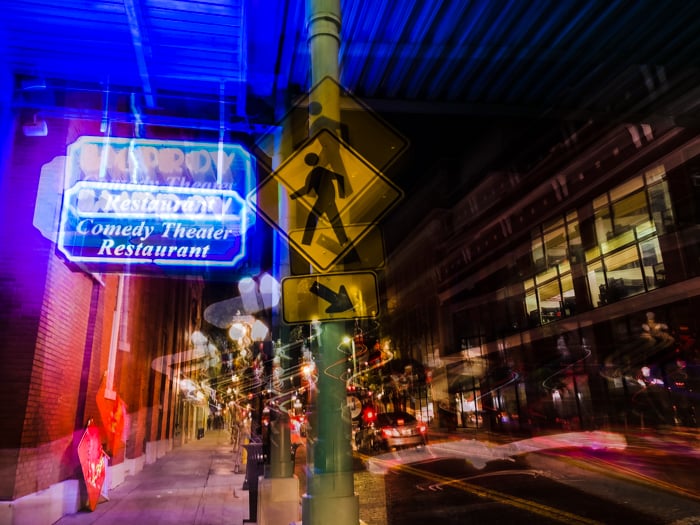
At a slow shutter speed, the shutter is open for a longer time. This means that moving lights will create light trails in your image. In most cases, the longer the exposure, the longer the trails in your image. This is known as long exposure photography.
You can use this process to make beautiful and creative pictures.
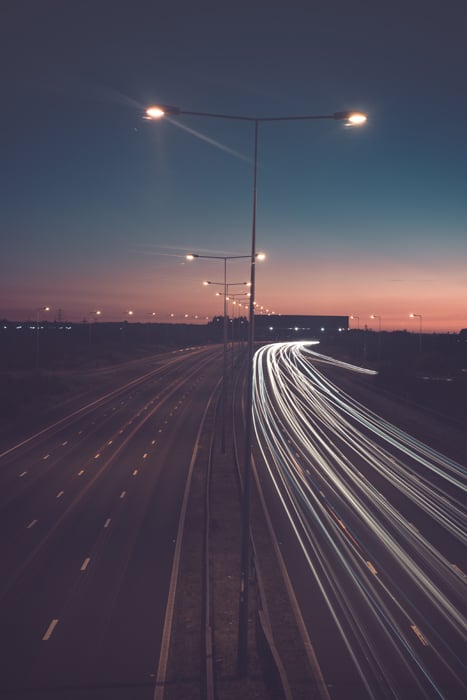
There are plenty of scenarios where you can use long exposures. Apart from creating light trails, you can also use long exposures in night photography. This is because long exposures help gather more light in your image, which is useful in low-light scenes.
For instance, you can try a long exposure when shooting landscapes at night. There's no way for you to light up the sky with artificial lighting, especially when you're in secluded areas.
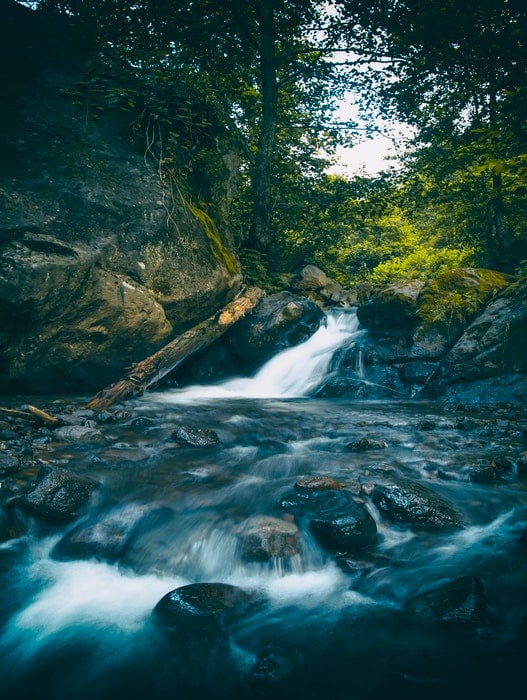
You can also use long exposure for capturing celestial bodies such as clouds and stars. Since they move across the sky, they will register as light trails and create ghostly elements in your camera. Long exposures are also great for capturing moving bodies of water such as river streams and waterfalls. When you open up your shutter, the motion of the water ends up looking smooth and creamy.
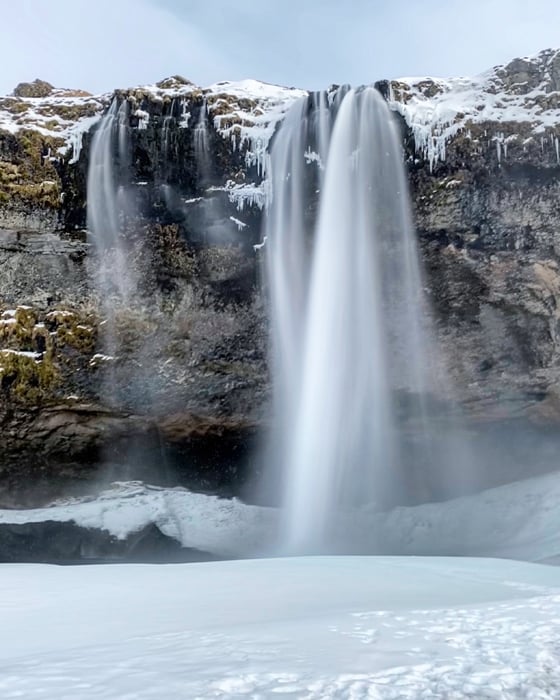
Photo by Dora Jokkel
How To Shoot a Long Exposure with iPhone
1. Use a Tripod to Stabilize Your iPhone
Using long exposure requires keeping the shutter open for a long time. If you don't keep it stable, it will produce blurry images. So how do you solve this problem?
The solution for getting the best iPhone long exposure photos is using a tripod. Since you don't have to hold your phone, you can guarantee your image will look sharp. We have an article covering our favourite iPhone tripods here.
In low lighting conditions, a tripod will help you capture quality photos. The ISO and low-light capacity of smartphones are poor. This causes serious loss in image quality if you shoot high ISO pictures with your iPhone camera. A tripod can help you compensate for this downside of using a smartphone camera.
To set up your phone on a tripod, you'll need a tripod mount. It's a small gadget that clips onto your device. It also has a thread at the bottom which you can screw onto the tripod. You can read our guide to iPhone tripod mounts here.
You could use a mini tripod, which is easier to carry around for travel. Or you can work with a regular iPhone tripod if you need a taller and more stable system.
Remember that mounting your phone on a tripod alone is not going to prevent camera shake. You'll need to either use a self-timer or a remote to ensure you don't accidentally move your device while shooting.

2. Apply a Long Exposure Effect in Live Photos
Long exposure can be tricky, even when using a regular camera. If you're not ready to learn all the technical aspects of the technique yet, you can try Live Photos first.
Live Photos is a feature on the iPhone that lets you take a series of photos and turns your shot into a short video clip. But you can also use it to apply all sorts of built-in effects on your native Camera app, including long exposure pictures.
To activate Live Photos, turn on your iPhone Camera app and select Live Photos at the top of the screen. It has a circle symbol with concentric rings in it. Once you select it, you can start taking photos by pressing the red button.
Go to your gallery and look for the photos you took using Live Photos. Select the photo you like and swipe up to reveal Effects. Scroll to the right and tap Long Exposure. Your iPhone then applies a "long exposure" effect to your image.
Since your iPhone applies the effect automatically on your photos, you don't have control over the result of your image. But it's the easiest way to experiment with long exposure on your iPhone.
What's great about it is that you can easily revert to the original photo if needed.

3. Use Third-Party Apps to Create Stunning Long Exposures with iPhone
If you want to have more control over your iPhone long exposure images, your best approach is to use a third-party app.
There are plenty of great apps to choose from if you want to create long exposure on iPhone. Some of the best ones you can use include Camera+ 2, Slow Shutter Cam, and Procam 7.
We used Camera+ 2 to capture several of the images featured in this article!
To access Slow Shutter Mode in Camera+ 2, tap the Presets button at the top center of the screen and select Slow Shutter.
Once you're in Slow Shutter Mode, go to the bottom of the screen where you can find the shutter speed and brightness scales.
Swipe left or right to change the shutter speed or the brightness. You can start with 2 seconds and keep moving up until you're satisfied with the exposure.
Remember that the longer your shutter speed, the longer and brighter the light trails. In most cases, you'll need at least 6 seconds to get decent trails.
4. Experiment With ND Filters to Take Daytime Long Exposures
In most cases, long exposure only works in low lighting. If you shoot iPhone long exposures during the day, you'll often end up with overexposed images.
But what if you need to take photos when the sun’s out? You'll need to use Neutral Density (ND) filters. Think of them as sunglasses for your camera to block the light.
ND filters come in different optical densities, which affects how much light they let through. For example, ND2 has an optical density of 0.3. This is equivalent to 1 f-stop reduction. ND4 has an optical density of 0.6 and 2 f-stop reductions and so on.
To keep it simple, remember that the higher the number, the less light that gets through.
There are special ND filters for smartphones that range from ND2 to ND400. But you can also use regular ND filters used for full-size cameras.
They won't fit on your phone’s camera lens since they're meant to fit larger lenses. But you can always hold them up to your lens while taking photos.
In most cases, anything between ND16 to ND64 is enough to create a long exposure image in daylight. On an overcast day, ND16 would be sufficient. But you might need ND64 or higher if you shoot in bright sunlight.
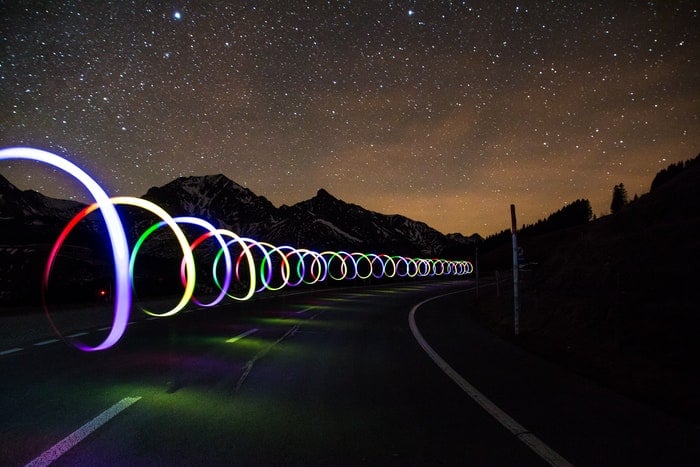
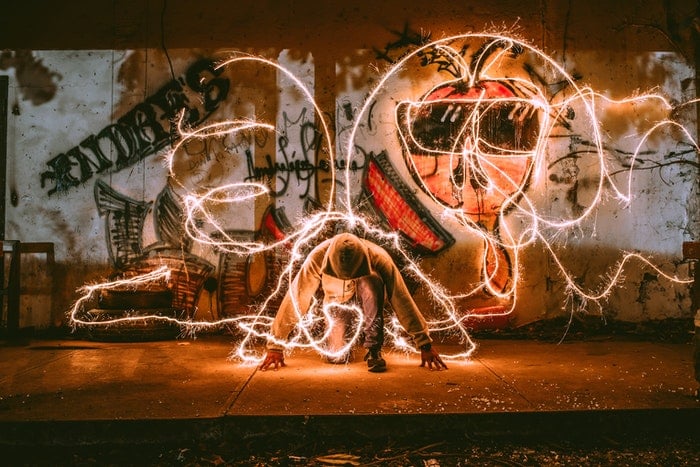
5. Get Creative With Light Painting
Long exposure is also a great technique to try light painting. Light painting uses the same concept of capturing the movement of lights at night by opening the shutter for a long time. The only difference is that you get to control the movement of the light.
To start light painting, place your phone on a tripod and set the shutter to at least 6 seconds. Now activate the self-timer and get in front of the camera.
Once the camera goes off, “write” something in the air with a flashlight or any small torch or light source. You'll end up with light trails in the shape you drew in the air.
Remember that you're creating a mirror image when light painting. In other words, everything will show up reversed in your camera when you're drawing something.
To avoid this issue, doodle backwards so you end up with the correct picture. This applies even when you're writing words in the air.
6. Shoot Without a Tripod for Cool Motion Effects
You don't always have to place your iPhone on a tripod when shooting long exposures. If you want to experiment with different effects, you can take it off and see what you get.
Of course, you can always swirl the camera around while taking a long exposure shot. But you can also try other methods that can give you somewhat more predictable results.
For instance, you can swipe your camera in one direction while the shutter is open so you can create straight lines. Or you can also shoot as you’re walking towards your subject.
Doing so creates a double image. It looks like you were zooming in as you were taking the shot.
No matter what you choose to do, don't be afraid to make mistakes. It's a great way to learn how long exposure works and gain more control over the process.
Tips for Editing Long Exposure iPhone Shots
Your long exposure shots may already look cool straight from the camera. But to get the most out of your photos, you'll need to edit them.
You can use regular editing apps such as VSCO or Adobe Lightroom Mobile. They have all the basic tools you'll need to enhance your long exposure images.
When editing your pictures, feel free to crank up the contrast. You can also darken the blacks and the shadows to make the light streaks pop. But don't overdo this, as digital noise may start to appear.
You should always make sure that you don't lose any detail in the image when editing. Apart from that, you should also pay attention to the colors. If they start to look a bit off, dial back your adjustments.
Conclusion
Learning how to shoot long exposure with a smartphone is a great option for beginners. Once you become familiar with how the technique works, you'll find it easier to do on a regular camera as well.
Even if you stick to smartphone photography, you’ll be amazed at the creative possibilities of long exposure!
If you want to learn more about shooting with long exposure, check out our Infinite Exposures eBook!