Street photography is all about capturing life and telling a story with your images. And it can be a great way to practice your composition skills. That’s because you don't have the luxury of staging or rehearsing shots.
But that’s the beauty of street photography. You have to shoot what you see. It forces you to look at the world and the people in it differently. And this is a great opportunity to create some amazing compositions.
Continue reading for our top 11 tips to help you improve your street photography composition.
Our Top Street Photography Composition Tips
Below are our top tips for taking your street photography to the next level.
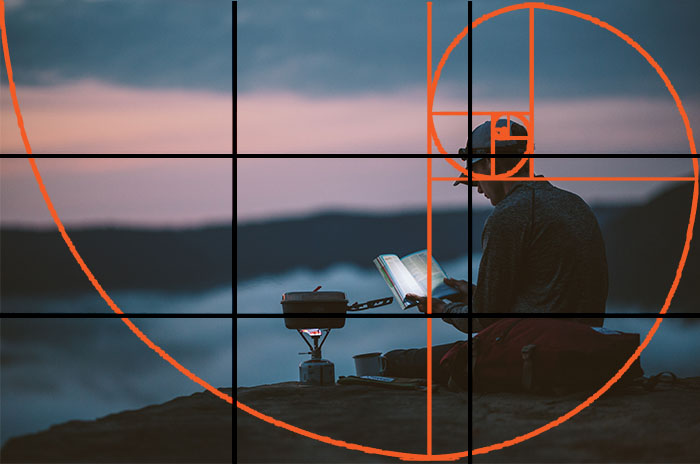
1. Use the Rule of Thirds
The rule of thirds is one of the most commonly used composition guidelines in photography. This rule exploits the human eye’s natural tendency to gravitate to a certain area.
By mentally breaking an image down into parts, you’ll become much more aware of subject placement. This allows you to take control of the focal points in an image.
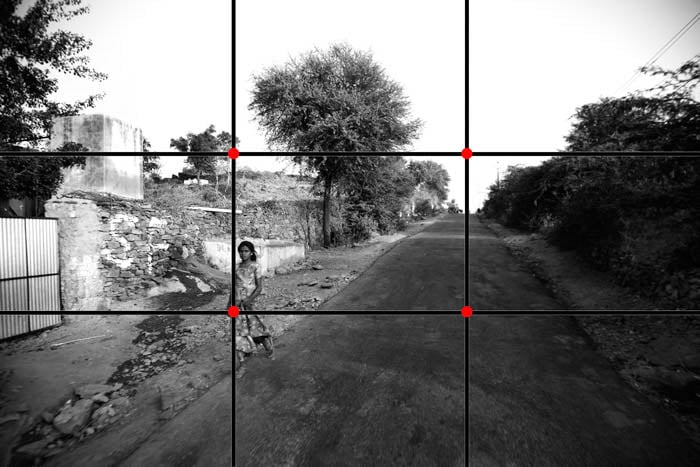
To apply the rule of thirds, imagine you’re dividing the image you see through your viewfinder into three rows and three columns, or nine equal parts. The intersections of the grid show the four points that a viewer’s eye tends to seek out. Placing points of interest on these points creates balance and maximizes viewer impact.
In an image comprised of multiple subjects, the bottom-right point is the strongest, and the upper-left point is the weakest. You can see examples of this in film and television. This way, you can emphasize a single subject depending on where you place it.
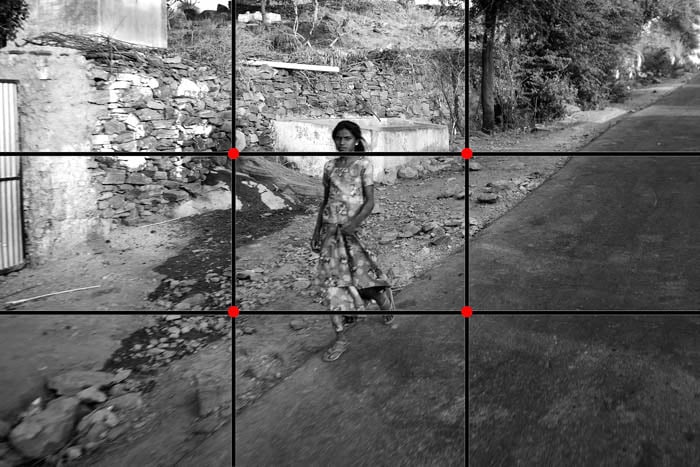
When an object is alone in an image, the strongest position is the left-hand line. This is because Western culture is predisposed to reading an image from left to right. You may want to take this into account when photographing cultures that read right to left.
In the case of portraiture, another general rule is that your subject should be on the opposite line of the direction that they’re looking in.
If your subject is looking to their left, they should be positioned to the right of the frame. This gives the photo more depth and avoids making the subject look bored. Instead, allowing this extra space in the frame creates lead room in your photo.
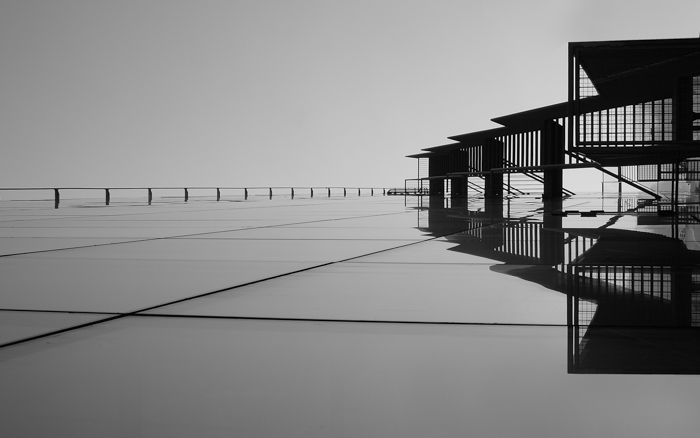
2. Include Negative Space
Sometimes what you leave out of a photograph can be more important than what you leave in.
As photographers, we choose what to include and exclude in a frame. Incorporating less into a photograph can give a subject emphasis and breathing space. This helps capture and hold the viewer’s attention.
Positive space is the subject, while negative space is the unoccupied area in an image. Too little negative space results in cluttered photos, with every component in the image competing for attention.
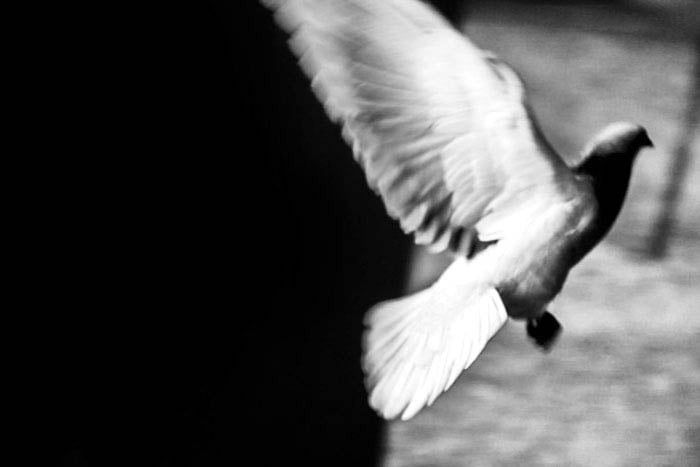
In the image below, the negative space puts greater emphasis on the subject. Which, in this case, is the dove taking flight. The motion of the subject is offset by the area in which the eye can rest. This offers greater interest to the subject without distraction.
The negative space also introduces a sense of mystery. Where does the image end? Where was it taken? And where is the dove going?
A more cluttered image would deliver too much information, turning an observational photograph into a casual, everyday image.
3. Should I Use a Shallow or Deep Depth of Field?
There are endless opportunities to explore depth of field in street photography. Knowing how your aperture and focal length affect depth of field is a must for any photographer.
Like the human eye, a camera can only focus its lens on a single point. However, there will still be an area in front of and behind this single focus point that appears sharp in an image. This in-focus zone is called the depth of field.
The depth of field isn’t a fixed distance. It changes in size depending on your camera settings. And depending on your subject, you may need a shallow (where only a narrow zone appears sharp) or deep (where more of the picture appears sharp) depth of field.
As an example, you would generally want a landscape photograph to have a deep depth of field. But when you want to draw attention to a particular detail in an image or add a greater sense of depth, you can use a shallower depth of field.
Setting your camera to a wide aperture (like f/2.8) will give you a shallower depth of field, whereas an aperture of f/22 will give you a deeper depth of field. By combining your aperture and focus settings, you can create dynamic images that tell a greater story.
4. Use Zone Focusing for Faster Shots
One important aspect of depth of field in street photography composition is zone focusing. Capturing candid subjects while maintaining sharp focus is one of the most difficult aspects of street photography. You can use the auto focus setting on your camera. But it might not be fast enough to capture an image the very second you see it.
Zone focusing is prefocusing your camera to a certain distance, then photographing subjects as they enter that range.
To zone focus, you’ll need a lens with a manual focusing meter. This shows you the distance that the camera is focused at. Simply set your lens to manual focus and decide what distance you would like your subjects to be sharp at.
It may take some time to determine the exact lengths of the focal range. I set up a tape measure to figure out the distance of the focal range. This gives me a good idea before I go into the field.

5. Use Leading Lines to Draw the Eye
Leading lines are another great way to add depth to your street photography. It means using lines in an image to guide the viewer’s eye around a photograph. They add a new dynamism that gives an image a sense of direction or flow. It can also lend order or disorder to an image, affecting the photograph’s overall emotion.
Road stripes, handrails, fences, bridges, shadows, horizons, footpaths, and buildings are common examples of leading lines used in street photography composition. More organic sources like pointed fingers and gestures can also be used as leading lines.

In this image, the leading lines of the cage lead the viewer’s gaze to the main subject of the image, the cat.
6. Include Texture to Connect the Viewer
Touch is one of the five main senses, and texture connects a viewer to the world. Visual imagery draws on powerful associations to create an interesting and evocative piece of work.
In street photography, there are plenty of opportunities to photograph subjects with texture. Some examples include weathered boards or peeling paint.
The easiest way to convey texture within a photograph is to focus on detail. Finding textures in street photography is easy. There are hundreds of examples surrounding us at any given time. But finding an interesting textural piece worth photographing is a little harder.
Try and concentrate on eye-catching colors or patterns. Investigate the makeup of the city. Once you start seeking out these textures, your eye will become trained to easily spot potential photographs.
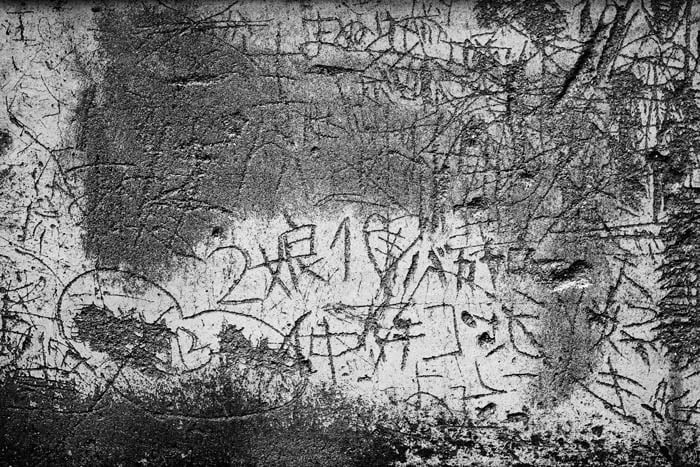
Due to our associations with touch, the scratchy etchings marking this piece of concrete can create a haptic experience.
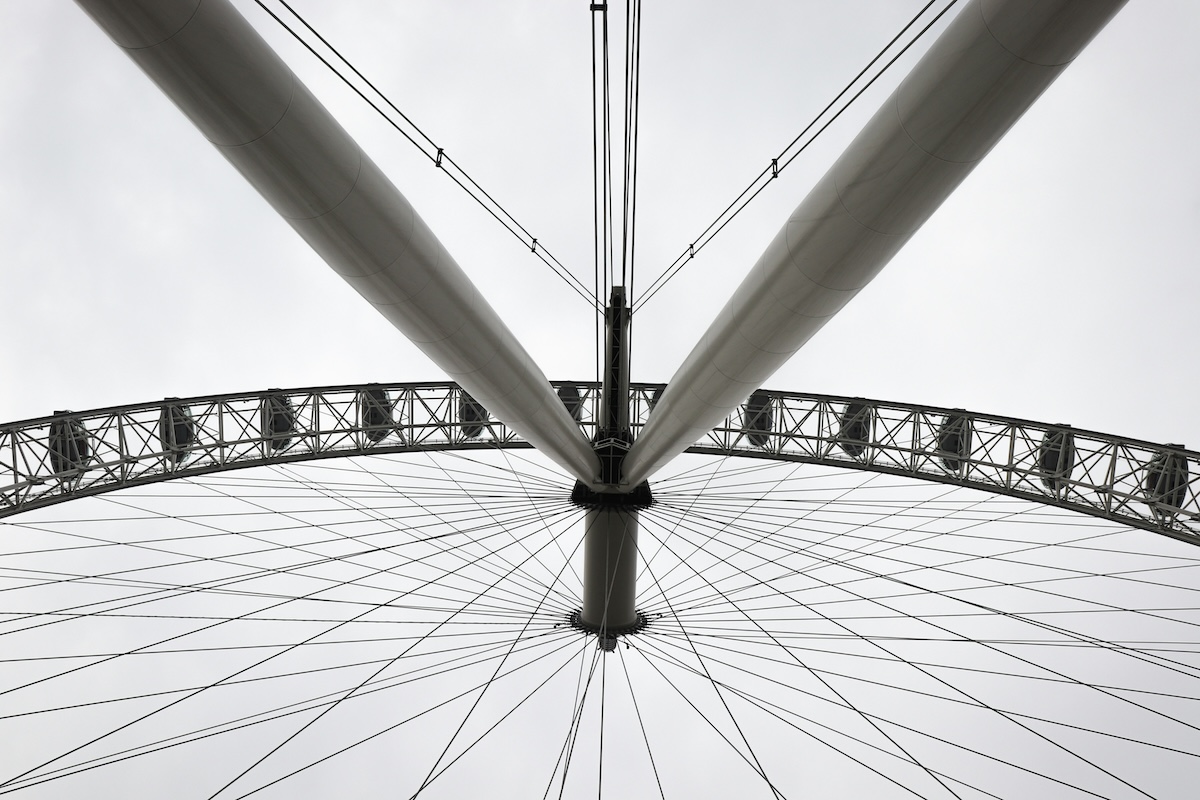
7. Use Patterns and Repetition
Patterns come in endless shapes and sizes. But they all fall under the heading of a repetitious subject matter. Patterns can provide order to a scene or add to the chaos of our urban landscape.
Because humans are hardwired to identify patterns, there is something both soothing and unsettling about a pattern. They make us wonder about the rhythm of our environment. They invite our eyes to dance across the image.
In street photography, patterns can be shapes, colors, or objects. And they can be either organic or manmade. Manmade patterns like brickwork, stairs, parking lots, or buildings are a great place to start.
Soon you’ll find that, just like with texture, your photographic eye will quickly become trained to see the world through patterns. It’s a great way to refresh your photographic style.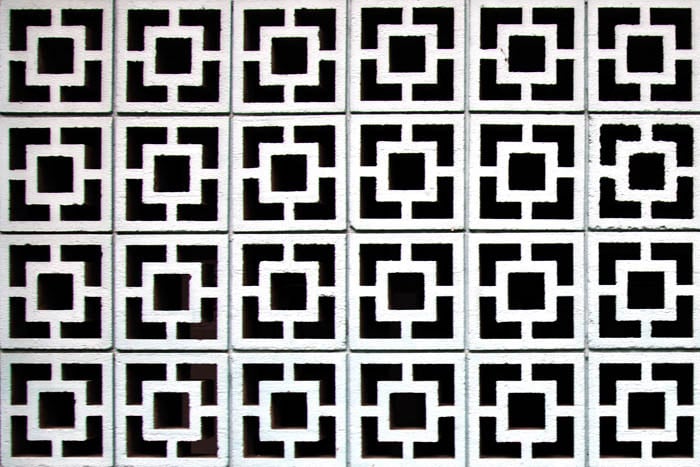
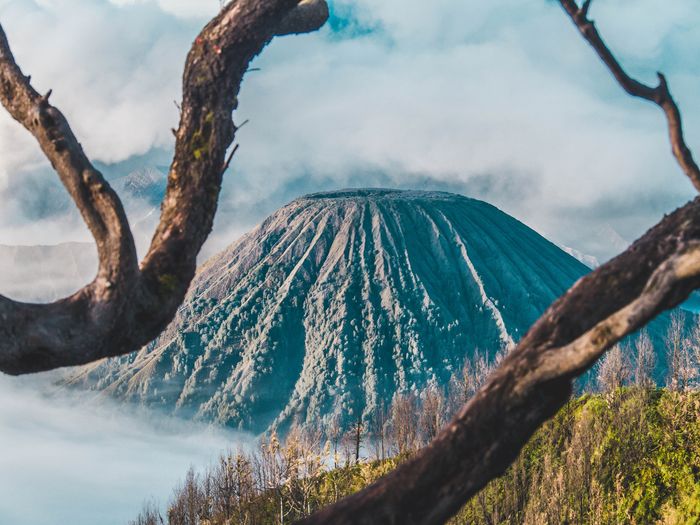
8. Choose Your Frame Wisely
Framing for photography composition creates a self-contained image, like a photo within a photo. Essentially, you are crafting a frame within a frame to deliberately bring focus to a subject. This adds narrative and a sense of voyeurism.
Framing uses the principles of design to add an extra layer of interest to an image. You can also use it to mask less attractive areas of a photograph. It also directs the viewer’s eye straight to the points of interest.
Composing an image using framing can take a little bit of scouting around. Start by seeking out windows and doors, which are common frames in street photography.
You’ll find that a lot can happen even in the most confined spaces in the urban landscape. Framing these events adds a layer of importance or weight to the subject.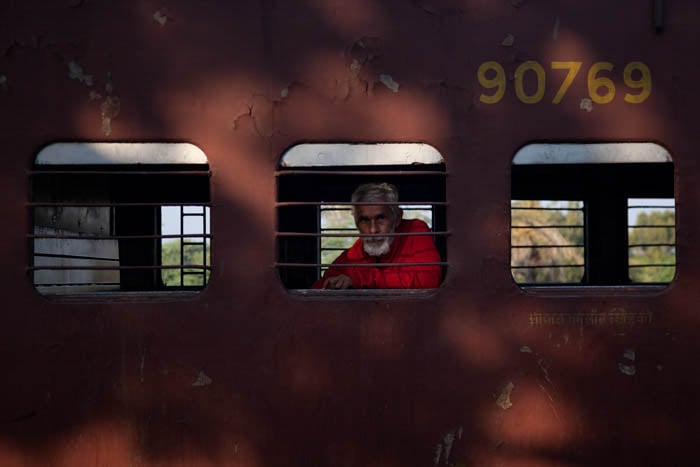
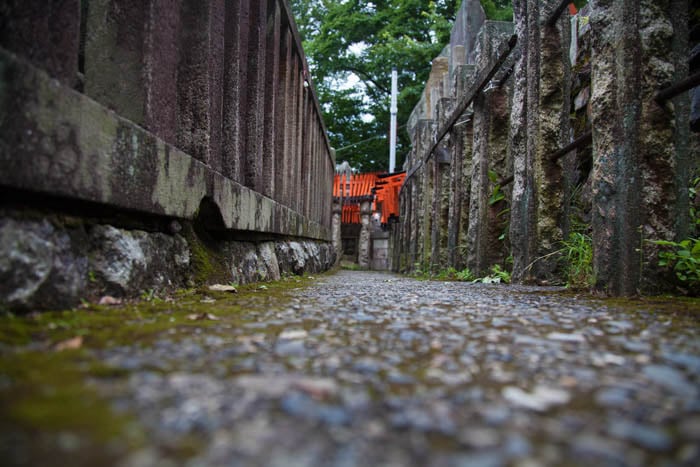
9. Change Your Perspective
Sometimes approaching something from a different angle can reveal a subject in a whole new light. Unusual perspectives impact the experience of both the viewer and the photographer in a unique and engaging way.
Perspective involves training your photographic eye to recognize unique opportunities and respond to them in interesting ways! If you find yourself lacking inspiration, try placing your camera on the ground and taking a few shots.
Perspective means getting physical with your photography practice. And remember that changing the perspective of a photograph is always an option. Don’t waste the opportunity to make the most of a shot!
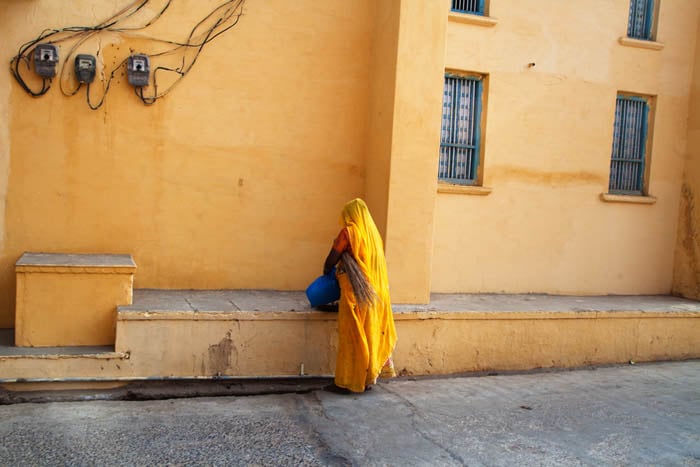
10. Use Color to Grab Attention
Choosing between a color or a black-and-white image is a compositional choice. And each has its pros and cons. Color has the power to signify time and emotion through a single or combination of hues. Just as we associate warm colors like red and orange with comfort or heat, we relate to the colors in a photograph.
This provides the viewer with clues about the image to create a more immersive experience. Color also has the power to grab a viewer’s attention. This is because it appeals to our evolutionary tendency to seek out and respond to intense colors.
If you are trying to indicate a certain season or emotion, color would be your best bet. However, if your image looks too busy with too many colors happening at once, you may want to consider converting to black and white.
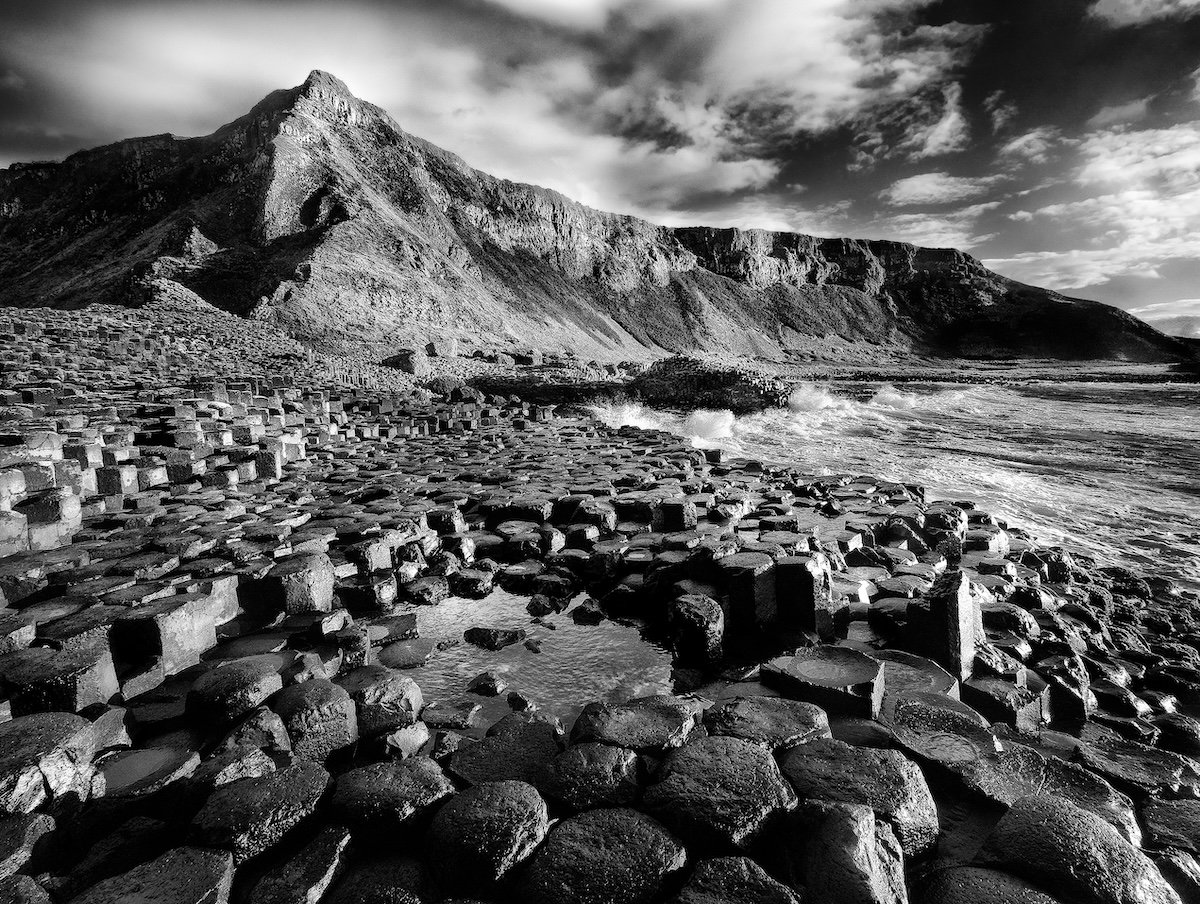
11. Go Black and White
Due to its association with documentary and street photography, black-and-white images generally evoke a sense of seriousness. A black-and-white color scheme also appears to be more timeless than color images. They are free from color schemes associated with particular types of film, processes, or trends.
This timelessness is important in street photography composition. That’s because it helps maintain a sense of relevance and poignancy over history.
Many photographers prefer black-and-white images because they distance the subject from reality. In street photography, an image of the world in monochrome is foreign to our color vision. This gives us a reason to pause and investigate an image more carefully.
Due to the lack of cues that color photography provides, the viewer will tend to pause on a black-and-white photograph to read what is happening in the image. This slower viewing time means that a photographer has more time to communicate with the viewer.
Conclusion—Street Photography Composition Tips
It may be true that rules are meant to be broken. But getting to know photography composition is an important way to hone your photographic skills. Understanding composition will help you create more compelling and naturally balanced images for street photography and have fun while doing it!