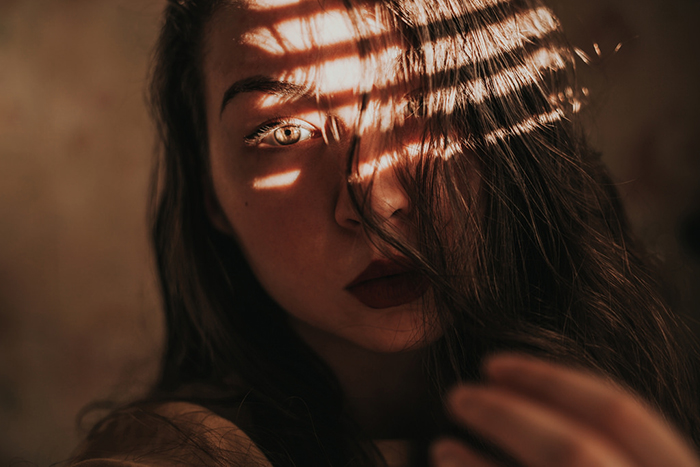
A blurred background draws the focus to what's important. It also often plays a part in differentiating the professional portrait from the casual snapshot.
But how, exactly, do you create a blurry background? Through a mixture of gear, settings, and subject placement.
Here's how.
What You’ll Need to Create a Blurred Background
The gear that you use will make that blurred background easier or more difficult to achieve. While getting that background blur isn't all about the gear, it's a big part of the equation.
Here's the gear that's best for background blur, and why.
Camera With a Larger Sensor
This can be a mirrorless or DSLR camera.
The larger the camera sensor is, the easier it is to get that background blur. That's why you see smartphone companies creating fake background blur through software in portrait modes. The sensors are so small that it's difficult to create that background blur in camera.
A full frame camera will get you the most background blur (unless of course you have the budget for medium format). But even a budget DSLR or mirrorless camera or a compact camera with an APS-C sensor inside will still offer a good amount of that background blur.
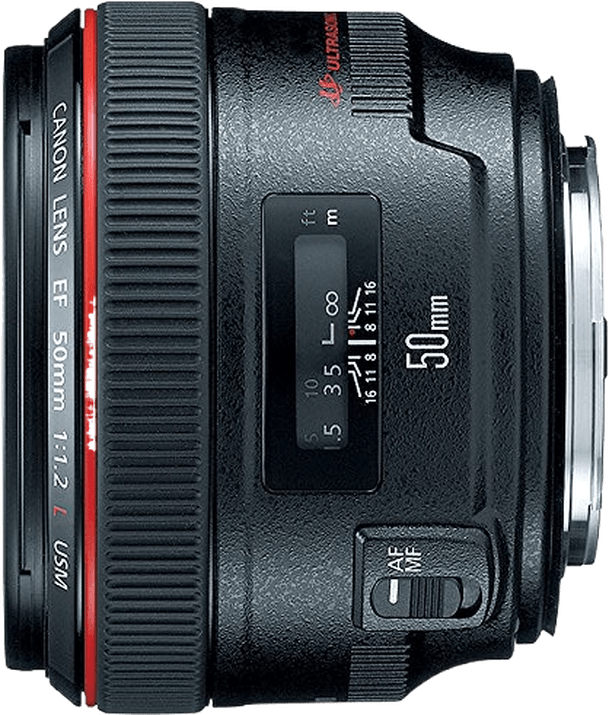
Wide Aperture Lens
The aperture of the lens is one setting that helps create that background blur. But different lenses have different aperture settings available. Ideally, for a blurred background, you should use a lens that has at least an f/2.8 aperture available.
Lower f-numbers will offer even more blur. A 50mm f/1.8 is even better, with several manufacturers offering options for less than $300.
An f/1.4 is even blurrier, but these lenses sit at a much higher price point.
Telephoto Lens (Optional)
Contrary to popular belief, a lens with a longer focal length doesn't actually create more blur. However, the longer the focal length, the more compressed (or closer) that background appears.
That brings that blur closer and tends to exaggerate the blur more than short lenses.
Background blur is exaggerated with a longer lens. But it's still possible to get nice background blur with a wide angle lens.
Note that portrait photographers also tend to prefer longer focal lengths. These also tend to be more flattering.
How to Blur a Background Using Aperture
Gear is part of the equation, but the camera settings are just as essential. The camera setting that determines that background blur is called aperture. This refers to how wide (or narrow) the hole in the lens is.
Aperture is designated by f-numbers; higher numbers mean a smaller lens opening. An f/1.8 is a wide aperture, and f/11 is a narrow aperture.
A wide aperture will create what's called a shallow depth of field. In an image with a shallow depth of field, very little of the image is in focus.
There may be an inch of distance in the image that's sharp, and the rest of the objects outside that range is blurred. That shallow depth of field is key to getting that background blur.
The narrower your aperture is, the more of the image is sharp. That tiny bit of distance that's in focus at f/1.8 expands as you increase the aperture.
A wide aperture creates that soft, blurred background. A narrow aperture leaves more of the image in focus.
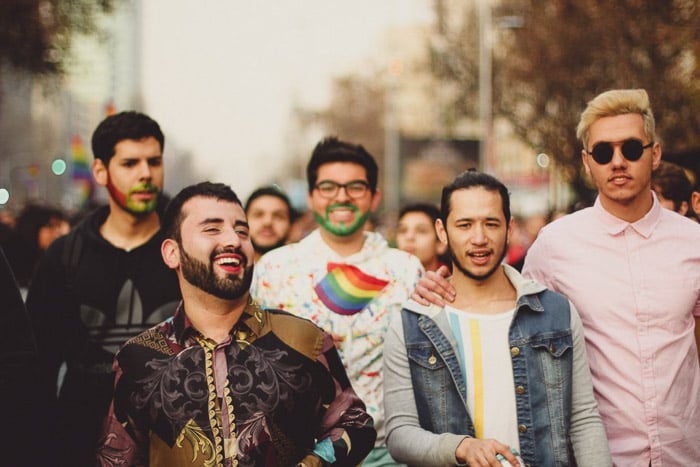
Just because a wide aperture creates that blurred background doesn't mean you always want to shoot portraits at the widest aperture that your lens allows. If you shoot a group photo at f/1.8, most of the group won't be in focus.
That additional depth of field is needed when taking portraits of more than one person, unless everyone is standing the exact same distance from the camera.
Even when photographing a single person, don't leave the aperture at the widest possible setting. A narrower aperture might be necessary to get both eyes in focus if the subject is standing at a slant.
The portrait background is an important part of the image in environmental portraits, for example. So use a narrower aperture to keep more of those background details intact.
So how do you adjust the aperture for that background blur? Use aperture priority mode on your camera, or, manual mode for more advanced users.
Every camera is a bit different. But typically in that aperture priority mode, one of the control wheels on the right side of the camera adjusts aperture. On some cameras/lenses, the aperture control is around the lens barrel.
You should see those f-numbers change as you move the control. This will be either on the screen or displayed on the viewfinder. If you're unsure, consult your camera's user manual.
As you adjust your aperture, make sure the shutter speed doesn't fall too low. You'll end up with an entirely different kind of blur (and not a pleasant one either).
As a guideline, you should be using a shutter speed with that bottom number at or higher than the lens you are using. A 50mm lens should use at least 1/50th handheld, for example.
If the shutter speed drops too low while in aperture priority mode, increase the camera's ISO.
Aperture priority mode will get you started shooting those blurry backgrounds. But manual mode will help you balance it all and control the entire exposure. Learn more about manual mode here.
How to Blur a Background With Subject Placement

Aperture and gear plays a big role in how blurred that background looks. But there's one more piece to the puzzle on soft backgrounds and it's the simplest of the bunch.
A lens focuses based on distance something the same distance from the camera as the subject will be just as sharp.
The farther away the background is from the subject, the blurrier that background will be. If you take a portrait of someone leaning against a brick wall, even at f/1.8, that wall will only be slightly blurred.
Try taking a portrait of someone standing several feet in front of that same wall. The wall will create a much softer background.
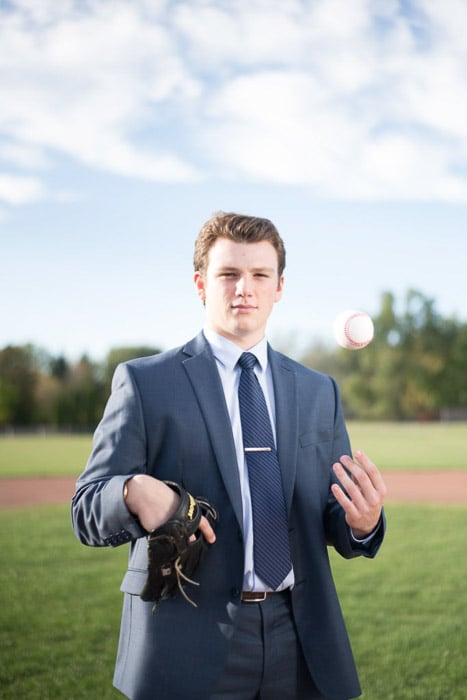
Try moving the subject farther away from the background. Or add more empty space between the subject and the background. This will help create more of that blur.
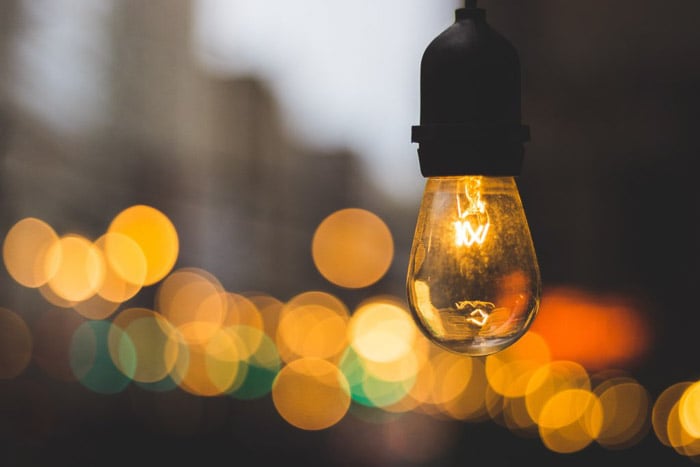
How to Create Bokeh in a Blurred Background

Bokeh is a photography term that stems from a Japanese word meaning blur. Bokeh refers to the quality of the blur in an image. But it's often also associated with the circular, out-of-focus points of light in an image.
Those blurry lights often create an excellent background. This leaves many new photographers asking how to create bokeh.
The answer is simple create that background blur using gear, aperture and distance. But use a background with many points of light.
Christmas lights or twinkle lights in the background, for example, create excellent bokeh.
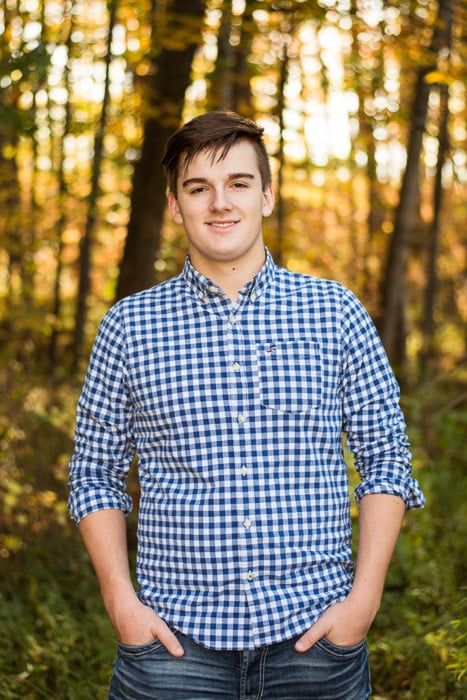
Twinkle lights aren't the only way to create bokeh. Highlights or bright points in the background can also be rendered as circular bokeh. For example, the sun hitting the leaves on a tree in the background.
The lights of a city skyline, the glow of a crackling fireplace, a crumpled piece of tinfoil there are many different ways to create bokeh. You just have to find it and mix with aperture, subject placement and gear.
Learn to look for lights and highlights. Then you'll be able to find easy backgrounds that create excellent bokeh.
Conclusion
A blurred background is created through a mix of gear, aperture, and subject placement. Photographers can combine all three to create the most background blur. Or you can mix and match to what's available.
If you don't have a wide aperture lens, you can create more distance between the subject and the background. If you want the subject posed against a brick wall, you can use a wide aperture lens. It will make that background as soft as possible.
Remember, blurry backgrounds are a mix of:
- Gear (wide aperture lens, larger sensor)
- Aperture (lower numbers mean more blur)
- Distance between the subject and the background (more distance means more blur)
Adding in lights or simply highlights from the available natural light, adds circular, blurry lights to create excellent bokeh.
Used together, a blurred background can hide away all the distractions and draw the eye to the subject.