Do you want to take your black and white photos to the next level? Read on for some great black and white photo ideas!
Understanding manual camera settings, composition, and lighting is a great start. But this article goes beyond basic black and white photography tips and into more advanced ones.
It’s time to up your game and put some wow factor in your shots. Here’s how.
Our Top Black and White Photo Ideas
Photograph Towards the Sun for Dramatic Monochrome Images
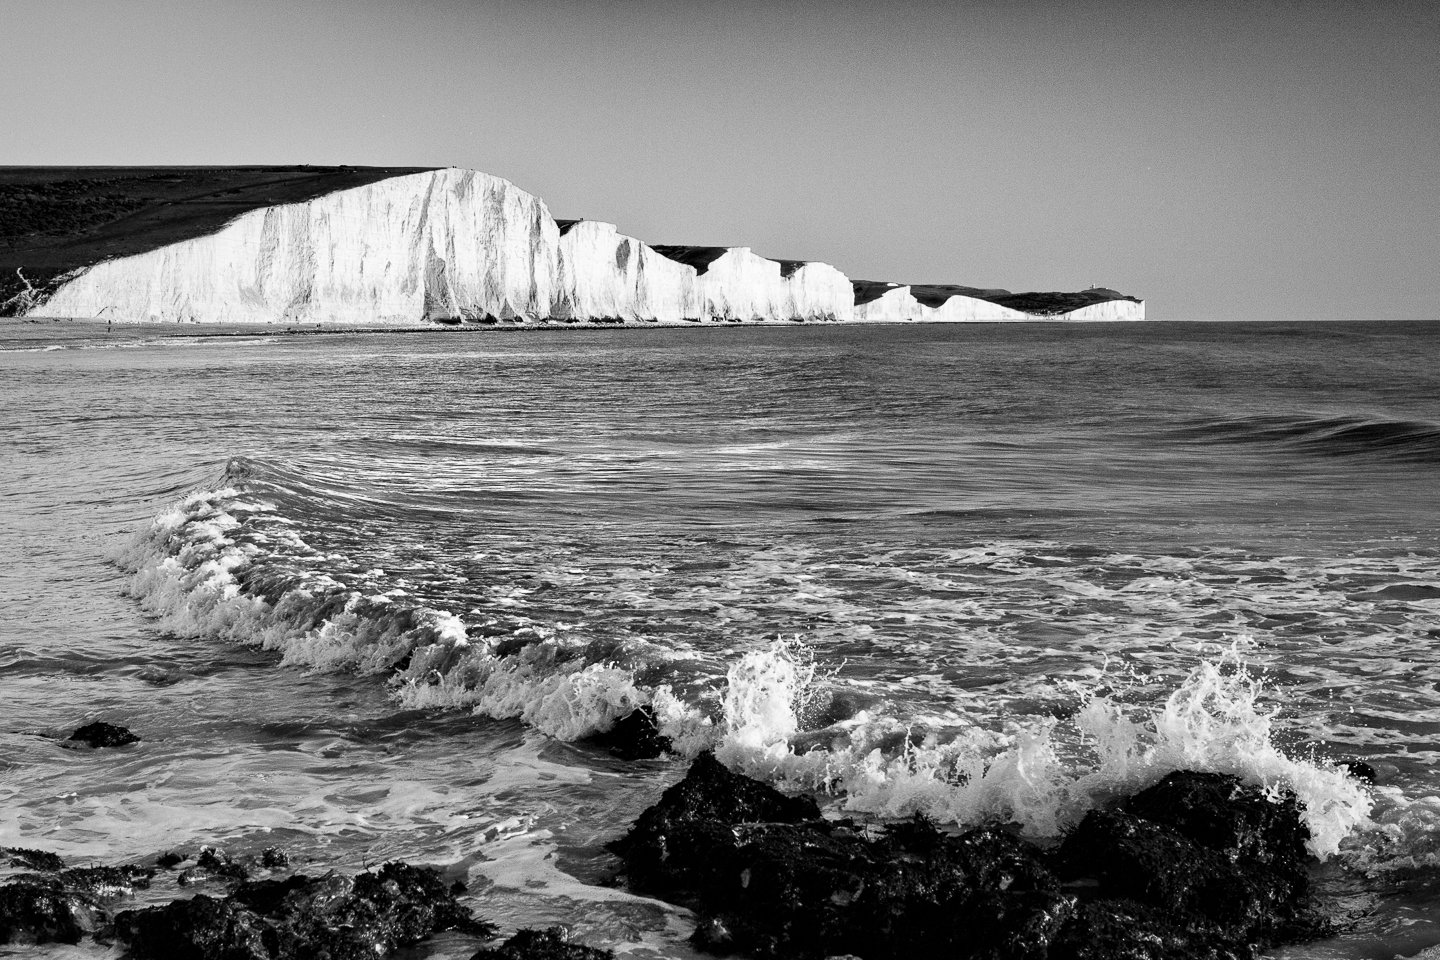
Contre-jour (or “against daylight”) is one of my favorite techniques. I use it to convey atmosphere and introduce drama into my black and white photos.
It also means I don’t have to restrict myself to photographing in the golden hours.
Next time you’re out there, point your camera towards the light source. You’ll be able to capture interesting shadows and silhouettes. And you can emphasize the all-important lines and shapes.
Keep your ISO at 100 and narrow the aperture.
The shutter speed often needs to be increased too. This means you can photograph very sharp “freeze-frame” moments.
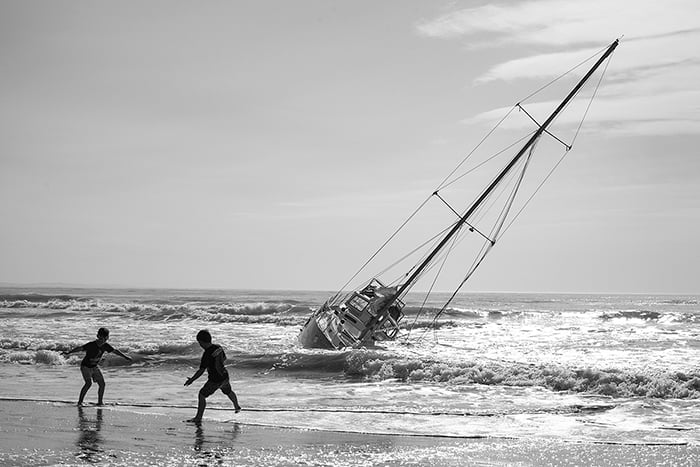
New Brighton Beach, New Zealand. © Heather Milne
Don’t Overcook Your Black and White Photographs
The reason you need to know how to use photo editing software is so that you know how not to use it. Just because you can, doesn’t mean you should. And there are some photos that can’t be saved, no matter how hard you try.
We’re not talking about experimental abstract photography here. That’s when you can play with those sliders ’til your heart’s content.
When you’re creating monochrome landscapes or black and white photography portraits, don’t over-process. This is distracting and disrespectful to the subject matter.
Use post-production to ensure there are true blacks, true whites, and a full tonal range of gray. Be gentle with the sliders, and try adjusting the color tones in the black and white mix.
Don’t rely only on adjusting clarity, contrast, highlights, and shadows.
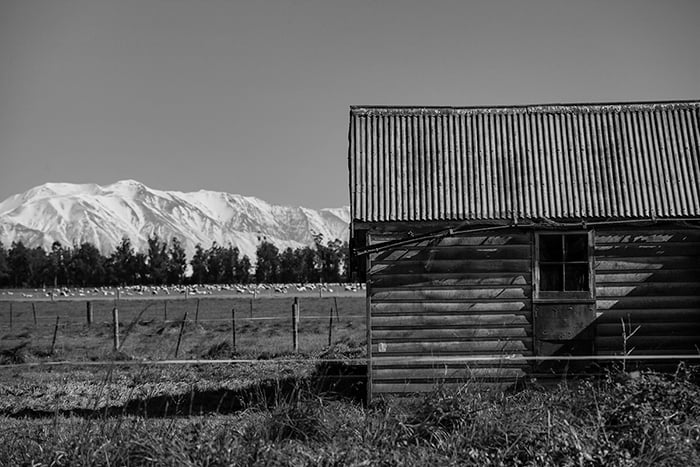
State Highway One in the early afternoon, Canterbury, New Zealand. The blue and yellows were darkened in the black and white mix. The clarity and dehaze was slightly increased. © Heather Milne
Look For Lines, Everywhere
Black and white photography relies on composition. This is what draws our eyes in and around the frame. Leading lines in particular can be sneaky.
It’s easy to find lines when photographing city architecture or a remote country road. Try exploring how the sneakier, subtle lines intersect. Use those to lead to your subject in your black and white photos.
If you’re lucky, you can work with these lines when you’re in the middle of your shoot.
If you notice the lines in post-production, crop accordingly. The point is to gently emphasize them to enhance the photograph. You can use these whether you’re creating a black and white profile picture of yourself. Or a complex portrait of five children.
You’ll be surprised at how you can harness the power of lines to produce a black and white picture with impact.
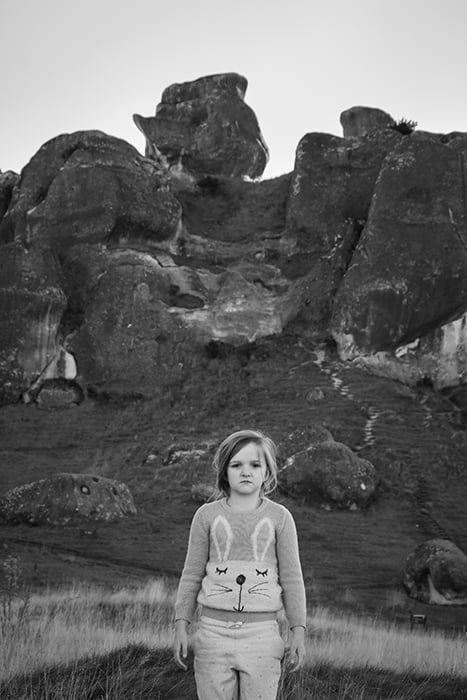
Elise at Castle Hill, New Zealand. Lines in the limestone behind point down towards her. The line of pale grass also points in towards her from each side. © Heather Milne
Get Abstract With Black and White Nature Photos
Your local environment has been photographed countless times. All from similar viewpoints. Time to do something unique!
Photoshop is your best friend when it comes to abstract black and white nature photography.
Turn your creativity up a notch. Force repeated lines and shapes with collages and cropping. Start with a close-up or macro photo that includes negative space. Convert it to black and white and experiment with the tones and contrast.
Duplicate the photo and use the transform tool (Ctrl+T, Cmd+T) to flip it vertically and/or horizontally. This will create a mirror effect.
This technique provides loads of opportunities to explore lines and shapes. And you get to try new compositions, all from the comfort of your desk.
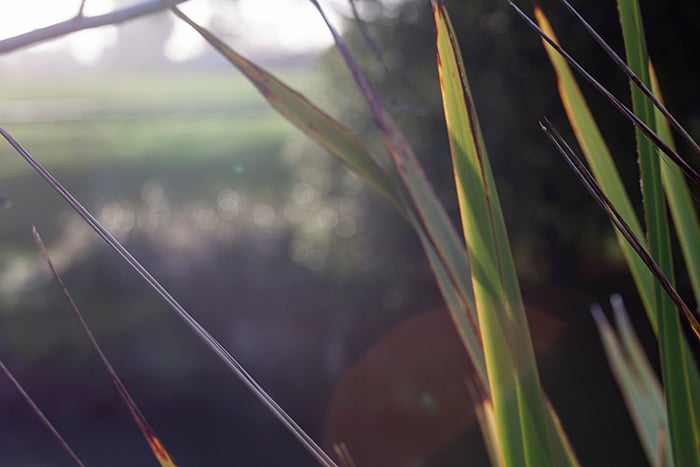
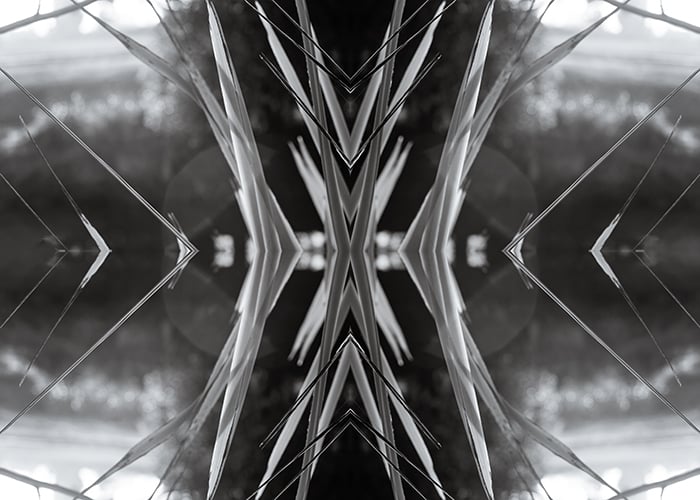
A different interpretation of Harakeke flax on the banks of the Ōpāwaho River, Christchurch, New Zealand. © Heather Milne
Avoid Banding in Black and White Photography
Banding describes the unwanted lines that pop up when you’ve photographed large blocks of color. The blue sky, for example.
Instead of a smooth transition between subtle changes of tone, there’s a “band.”
It means there aren’t enough tones available in your photo. These tones ensure a seamless, graduated transition.
Banding can look very obvious in black and white photos. But there are a few things you can try to fix it:
- Shoot in RAW.
- Work in 16 Bit (Image > Mode > 16 Bits/Channel).
- Avoid compressing your photograph too much (keep it saved as a large Photoshop file).
- Add a tiny bit of noise from the filter menu (create a new layer, apply the noise to this one, then adjust opacity to control the noise further).
- Use the Gaussian Blur filter (as above, use a fresh layer and adjust opacity).
Photograph Your Unique Story
One theory about photography is that “everything has already been done.” It can be difficult to find original ideas and techniques.
This is where your unique stories and points of view shine. Find a story that is relevant and important to you.
With black and white photography, you have the ability to tell a narrative with clarity and emotion. Color photography just can’t achieve that.
Our eyes are drawn to highlights, shadows, and lines. The distraction and complexity of color can overshadow these elements.
My favorite black and white photographers include Marti Friedlander, Henri Cartier-Bresson, and Walker Evans. They all demonstrate immaculate technique. But they also capture meaningful moments in time that inspire and mobilize people.
You can imitate their techniques, but the moments in time are completely unique.
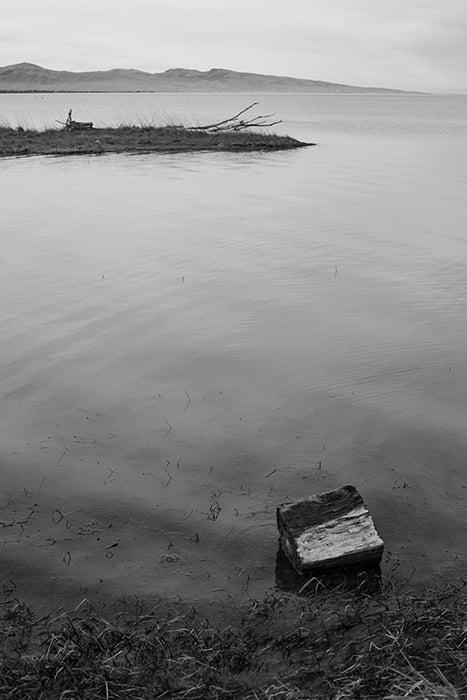
Te Waihora I, part of a photo essay about the environmentally eutrophic Te Waihora (Lake Ellesmere) in Canterbury, New Zealand. © Heather Milne
Split-toning and Monochromatic Photography
Monochrome photography includes a subtle introduction of color.
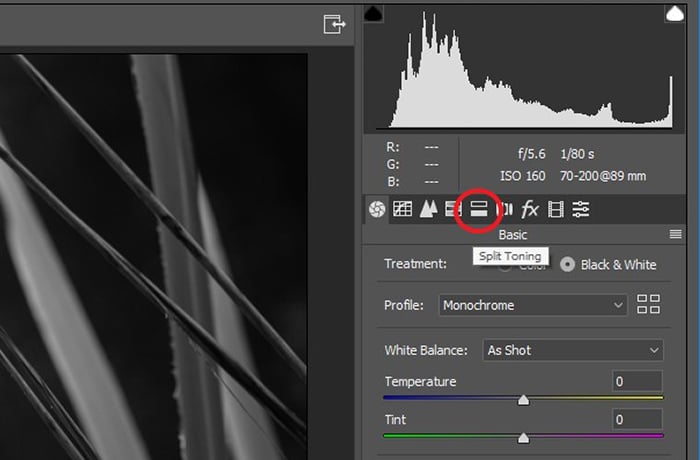
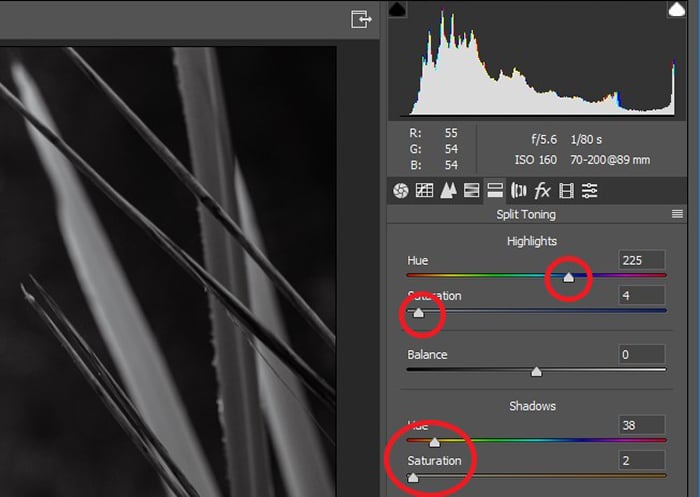
I usually incorporate color through split toning in Camera Raw or Lightroom. This allows you to choose different color tones for the highlights and shadows at different intensities.
My go-to combination for many photographs is blue and orange. Blue provides a silver tone to highlights in black and white nature photography.
And orange/brown add warmth to skin tones. But I do tend to leave contre-jour photos as plain black and white.
Curves for Black and White Photography
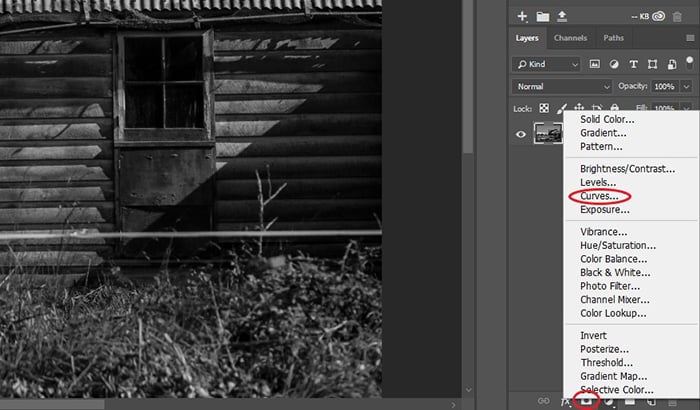
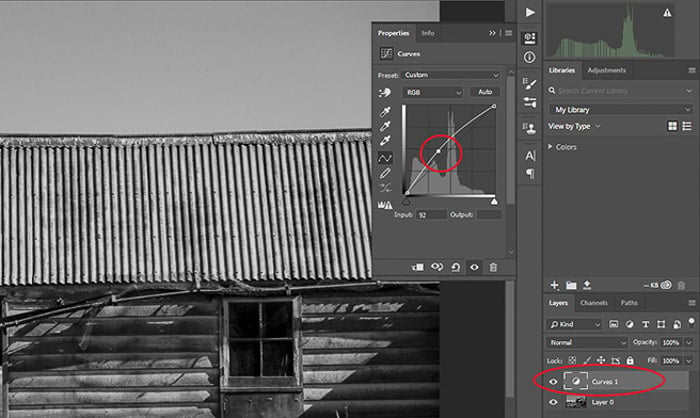
A good way to avoid “over-cooking” an image is to use a Curve layer to make adjustments.
This is a great tool for black and white and monochromatic photography. It allows you to carefully control and visualize changes. And you can tweak contrast, clarity, highlights, and shadows.
Add the curve layer, then move the point in the graph to see how the image changes.
Not happy with the effect? Either reduce the opacity of the layer or delete the curve layer.
Conclusion
With digital photography, there is no excuse not to try fresh techniques. Or to explore new themes for your black and white photography.
Some of my favorite photography experiences have been happy mistakes. These have encouraged me to research different black and white photography tips and ideas.
Get inspired by your own stories and environment, and learn some new post-production tricks. And get out there to make some happy mistakes of your own!

