Boudoir photography is intimate portraiture shaped by lighting, posing, and the subject’s choices. You can make a session work with one window, a simple background, and a few poses. The first step is agreeing on the pictures your client wants and the boundaries of the shoot.
This boudoir photography guide takes you from that first conversation to lighting, camera settings, direction, and editing. It also explains how to plan a session without expecting your client to know how to model.

- Master a profitable photography niche to establish your brand
- Learn to price your services for maximum profitability
- Discover free methods to attract and retain long-term clients
A Boudoir Photography Guide: What Is Boudoir?
Boudoir photography creates intimate portraits, often in a bedroom or a studio arranged to feel like a private room. Clothing, expression, framing, and light establish the mood. Lingerie is one option, but a robe, shirt, or other clothing can work too. Nudity is not a requirement.
If a client asks for “erotic boudoir” or “erotic photography,” ask them to show you the style they mean. Discuss reference images and the intended mood instead of assuming a label tells you how much someone wants to reveal. This guide focuses on planning and photographing adult portraits.
Some clients want photographs for themselves. Others want an album or a gift for a partner. Ask how the finished pictures will be used, then plan the framing and delivery around that purpose. Permission to take the photographs should never be treated as permission to publish them.
Top Boudoir Photography Tips
Ask your client what they like about the example images they bring. Is it the window light, clothing, expression, or setting? Also ask what they do not want photographed. You do not need to make them list insecurities to plan a session.
Explain the shoot before it starts. Agree on who will be present, provide somewhere private to change, and make it easy to pause or skip a pose. Demonstrate directions yourself and ask before touching the client or adjusting clothing.
Keep the first setup simple so you can concentrate on the person. Show a few successful frames if they would like to see them, and ask which direction they prefer. Change your angle or the pose in response to their feedback.
You can also use props that are meaningful to your model to add emotional depth. Work with the person’s preferences when making flattering photos of different body types.
For more ways to plan and direct a session, read our full article of boudoir tips.

Brian Lawson (Unsplash)
Lighting and Posing for Boudoir Photography
Start with one light source and one comfortable pose. Make a test frame, check the face and background, and change one thing at a time. This makes it easier to see what each adjustment does.
Lighting
For a first indoor setup, place your subject beside a window and turn their face partly toward it. Check where the shadow falls across the face. If direct sun makes the contrast stronger than you want, use a sheer curtain or move to a part of the room outside the sunbeam.
A white reflector opposite the window can lift the shadows. Move it closer for more fill or farther away for deeper shadows. For a darker look, limit light from other windows and let the unlit side fall into shadow. Keep an eye on bright patches on the skin as you change the angle.
Direct sunlight is also a creative option. A strip of sunlight or a patterned shadow can form part of the composition. Choose it because you want that harder edge, rather than treating all window light as soft.
If daylight is limited, try one continuous light or a flash with a softbox. A continuous light lets you see the shadow placement before taking the picture. With flash, use test frames to judge it. You can also bounce a flash off a nearby white wall or ceiling; a colored surface can add a color cast.
Add another light only when it has a job, such as separating dark hair from the background. More lights do not automatically improve a portrait. Finally, emphasize your boudoir lighting choices through the direction and contrast you choose on set, then carry that look into your edit.

Nirta Boo (Pexels)
Poses
Give one instruction at a time. “Turn your shoulders toward the window” is easier to follow than “look more confident.” Demonstrate the pose, let the client settle, and then adjust the hands or gaze. Do not ask them to hold a strained position while you change equipment.
Use these three starting positions to build a short sequence:
- Standing beside a window: Ask the client to turn slightly toward the light and relax their shoulders. Give their hands a resting place, such as the edge of a robe or a chair back.
- Sitting on a chair or bed: Check that they feel supported. Try a small turn of the torso, then vary the gaze without rebuilding the whole pose.
- Reclining on a bed: Let the client choose a comfortable side or supported position. Check the arrangement of hands, pillows, and clothing before taking a wider frame and a closer portrait.
From each position, photograph a wider view, a portrait, and a detail if the client wants one. Move yourself before asking for another pose. A small change in camera height or framing can give you another picture without extra effort from the subject.
Use our boudoir poses as starting points, then adapt them to the client’s movement and comfort. A pose that works for one person is not a rule for everyone.

Boudoir Photography Inspiration
Choose a small set of reference images with your client before the session. Discuss what each example contributes: a lighting pattern, a pose, a color palette, or a crop. You can borrow a starting idea without promising to reproduce another photographer’s image.
Ideas
Boudoir photography can range from glamorous portraits to intimate couple sessions. DIY boudoir photography at home is a way to practice lighting and framing with the space you already have.
Experimenting with themes like bridal, maternity, or “dudeoir” can add variety to your portfolio. The key is making your subject feel comfortable and confident in front of the camera.
Use flattering poses, soft lighting, and minimal props to keep the focus on their natural beauty. Capturing the connection between couples or the miracle of pregnancy can result in meaningful images.
For more boudoir photography ideas, compare the settings and moods in our examples. Pick a direction that suits the client and the available location.

Marlon Alves (Unsplash)
Blogs
Look at complete sessions as well as single portfolio images. Notice how photographers create variety through changes in expression, framing, and light. Client stories and behind-the-scenes posts can also show how a session is prepared and directed.
Our collection is a great resource for finding the best boudoir blogs to follow. Study the decisions behind an image rather than using another photographer’s pictures as your own portfolio.

(Pexels)
Boudoir Photography Gear and Props
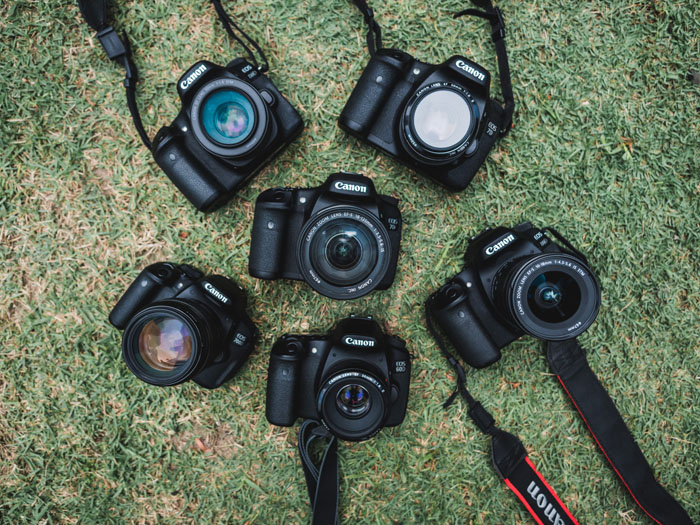
A camera you know how to use, a lens that fits the room, and controllable light give you a starting kit. You can practice framing and direction with a smartphone too. Try your existing setup before buying equipment.
If the room is too dark or daylight changes during the session, you may want to invest in a flash or a portable LED. Test the setup before your client is ready to pose.
Photo Equipment
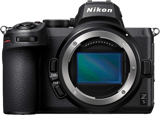
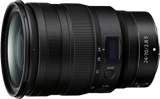
Lighting tools help control the direction and contrast of the light. The Nikon Z5 is a full-frame mirrorless camera. The Z 24-70mm f/2.8 S lens offers a constant f/2.8 maximum aperture across its zoom range. These are options for the kit below, not requirements for starting boudoir photography.
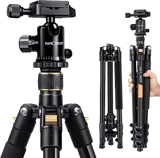
A tripod such as the K&F Concept model can hold the framing steady while you give directions. Keep enough room to move around it. Reflectors, flashes, and LED panels give you different ways to shape the light. For a colored-light setup, try gels and check how the result looks on the skin.
Here is our recommended kit for boudoir photography.
Camera Settings
For window light or a continuous light, try manual exposure with 1/200 s and f/4 as a starting point for a mostly still subject. Adjust ISO to suit the light, then make a test frame. These values are a practice setup, not settings that will work in every room.
Check the eyes at full magnification. If movement is blurred, use a faster shutter speed and adjust ISO or light level to compensate. If too little of the face is sharp, use a smaller aperture, such as f/5.6, and check again.
Focus on the nearer eye for a portrait. Use eye-detection autofocus if your camera supports it, but confirm the result. A tripod holds the camera steady; it does not stop the subject moving. With flash, stay within the camera and trigger’s supported sync settings unless you have set up a compatible high-speed-sync mode.
Nikon’s portrait guidance explains the exposure, focus, and flash checks behind this approach. Match white balance to the light, and avoid leaving a colored room lamp on unless you want its effect in the picture.
Props
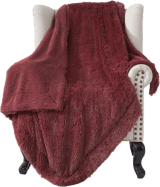
Give props a purpose. A blanket can add texture or provide coverage. A mirror can add another viewpoint, but check it for unwanted reflections of equipment or people. A robe or shirt gives the client something to hold without adding clutter.
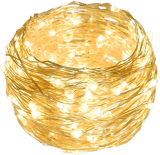
Faux fur blankets and fairy lights can suit a softer set. Wigs and makeup can support a planned change of style. Ask the client which, if any, fit the look they want.
Discuss themed props such as blindfolds and handcuffs before the session. They are optional and should never be a surprise or an expectation. Here are the props we recommend for boudoir shoots.
Checklist
Agree on the wardrobe first. Lingerie is an option if the client wants it. Include comfortable options and a cover-up for breaks.
Before the session, check charged batteries, spare cards, the light setup, and the background. Have water, hair ties, a brush, and any agreed accessories ready. Keep the changing space private and the walking route free of bags and cables.
What to bring to a boudoir shoot can vary with the session. Send the client a short list of what is provided, what to pack, and where to arrive so there are fewer decisions on the day.

John Lord Vicente (Unsplash)
Editing Boudoir Photographs
Start by selecting frames for expression, focus, and pose. Compare pictures from the same setup together so you can choose variations rather than delivering several near-identical frames.
Correct exposure and white balance before adding a strong color treatment. When adjusting vibrancy over saturation, compare the skin with your starting image instead of assuming a higher setting is better. Keep the color consistent across the session.
Agree on retouching preferences with the client. Avoid treating body reshaping or removing permanent features as the default. If you retouch skin, check that texture remains and that the result matches the agreed style. Review both wider images and close crops before export.
Frequently Asked Questions
Is boudoir photography only about nudity?
No. Pose, expression, clothing, and light can establish an intimate mood. Agree on coverage before the session and keep to the client’s choices throughout it.
What camera do I need for boudoir photography?
Start with a camera you can focus and expose reliably in the available light. A lens that fits the room and a manageable lighting setup matter more than buying a particular camera for your first session.
How do I make a boudoir client feel comfortable?
Explain the session beforehand, agree on boundaries, and give one posing direction at a time. Offer breaks and ask before touching the client or adjusting clothing. Let them skip any pose.
What props work best for a boudoir shoot?
Choose props that fit the client’s idea and give them something to interact with. A robe, blanket, or familiar piece of furniture may be enough. Extra props are optional.
Starting a Boudoir Photography Business
Practice the complete session before offering it as a service: consultation, shooting, selection, editing, and private delivery. A few portfolio pictures do not show whether that whole process works for a paying client.
Becoming a Boudoir Photographer
Start with a business plan that covers your services, target clients, equipment costs, delivery process, and marketing. Decide what the session includes and explain that before a client books.
Compare photography insurance options for the work you plan to offer. Check the policy’s scope rather than assuming every photography activity is covered.
Build a portfolio with permission to show the selected pictures. Create a website that explains your style, what happens during a session, and how clients receive their images. If you use printed promotion, design eye-catching business cards that reflect your current photography style.
Our boudoir photography business guide takes those planning steps further.

Dushawn Jovic (Unsplash)
Working With Clients
Confirm who will see the photographs, how you will deliver them, and who can access any proofing gallery. Agree separately on any portfolio or social use. Do not assume that hiding a face makes an image anonymous; tattoos, clothing, or a location can still identify someone.
Keep the communication professional from the enquiry to delivery. Tell the client who will be present, respect requests for breaks, and follow the retouching choices you agreed. Protect their files and keep access limited to the people who need it.
The ASMP code of conduct sets out professional duties to respect subjects’ privacy and protect client information. For session-specific advice, read our tips for how to work best with boudoir clients.

Nick Karvounis (Unsplash)
Conclusion
Plan your first boudoir shoot around one window or light, a few agreed poses, and a client who knows what to expect. Check the light and focus, give one direction at a time, and use their feedback to shape the next frame. Build variety through expression and framing before adding more equipment or props.