Sports photography is one of the important yet undervalued photographic genres. If you’ve ever tried to capture sports with a camera, you know how difficult it is. But sports fans might not realize how vital a sports photographer’s work is to their enjoyment of any athletic event.
Sports photography is one of the most difficult disciplines to master. But that’s not to say anyone can give it a go. It’s one of the most enjoyable types of photographers for amateurs to try out. It also offers one of the most reliable routes if you’re pursuing a photography career.
Our article covers everything you need to know about sports photography. We also cover specialist camera settings and the appropriate gear for the best results. Let’s start so you can hit the ground running with your sports photography!
Sports photography involves using a camera to capture live sporting events. These events can be amateur or professional, from football matches to motorsports races. You can also cover swimming galas, track meets, and wrestling tournaments.
The main purpose of sports photography is to capture the key moments. Not all fans can attend every game or event, so we need sports photographers to cover them.
Sports photographers connect us to our favorite teams and athletes, letting us follow their journeys. Whether reading a magazine or scrolling on social media, we are there for the exhilarating wins and the crushing defeats.
But sports photography doesn’t only focus on professional sports. You can use your sports photography skills to record your child’s football game. Or you can cover local sports teams for the local paper.
You can also branch out into other areas of photography. Covering press conferences is like event photography. You can take portraits of players and athletes for editorials. And by working with clothing brands, you can venture into sports fashion photography.
The following sections go over the specifics of sports photography. Click on the links within the text to see the full articles on each topic.
We’ll start by looking at the technical side of sports photography. Photographing fast-moving athletes isn’t easy, so you must master your camera settings.
I’m sure many of our first attempts at sports photography resulted in nothing but a mess of motion blur. But once you learn which camera settings are best for fast sporting action, you’ll have nothing but sharp shots.
Your camera’s burst mode is particularly useful in this genre of photography. Most smartphones also have burst mode, so you don’t need to buy an expensive mirrorless camera to shoot sports.
Let’s look at using your camera for sports photography in more detail.
Mastering your camera settings is key to success in sports photography. With so much going on and at such a fast pace, it’s easy to miss important moments. And with the wrong settings, you can end up with unusable results.
Using a fast shutter speed is of the utmost importance. When you use a shutter speed that’s too slow, fast-moving players or apparatus appear blurry. Using faster shutter speeds removes the risk of motion blur and ensures sharp shots.
With a fast shutter speed, you need to compensate by using a wider aperture. It has the added effect of giving you a blurred “bokeh” background, which can look great in sports images.
A wide aperture also helps to isolate your subject within the image. This isolation is ideal when shooting individual players in a busy stadium.
You must also increase your ISO, especially if you’re shooting indoors or at night. Of course, you don’t want too much digital noise, but sports photography can cope with more noise than other genres.
These are the three basic settings within the exposure triangle. Our full article provides even more detailed information on the best camera settings for sports.
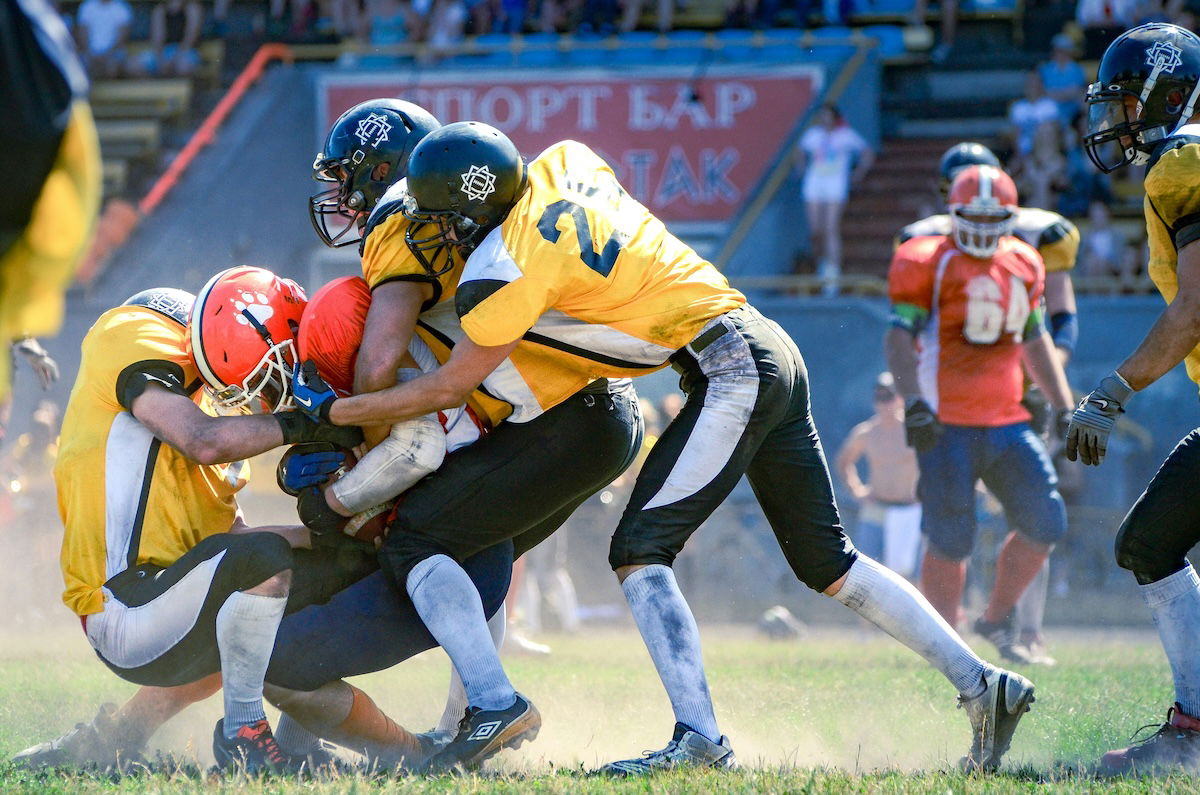
Nikon D5100, 195mm, f/4.8, 1/2,500 s (seconds), ISO 800. Victoria Prymak (Unsplash)
Burst mode is a camera setting that captures multiple photos in quick succession. This feature is great for photographing fast-moving subjects, like sports or wildlife.
To use burst mode effectively, ensure you have to keep up with the camera’s speed. Look for a Class 10, UHS Class 1, or UHS Class 3 card. Next, find the burst mode setting in your camera’s menu or on the physical shortcut buttons.
Burst mode works best with continuous autofocus (AF-C or AI Servo) to keep the moving subject sharp. To start shooting, press and hold the shutter button until you’ve captured the action. Burst mode is a helpful tool for improving your action photos.
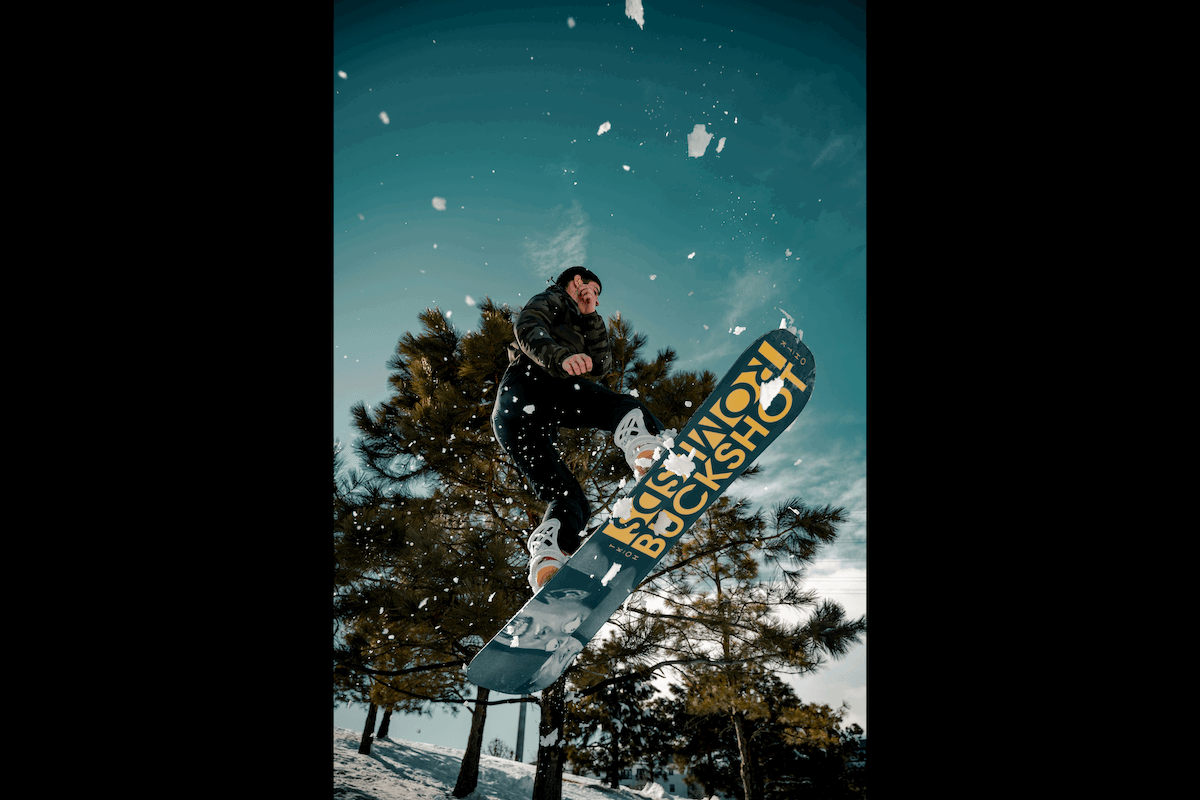
Nikon Z6, 24mm, f/4.0, 1/2,500 s, ISO 320. Colin Lloyd (Unsplash)
iPhone’s burst mode is a great way to capture action shots with your smartphone. Press and hold the shutter button, and your iPhone takes rapid shots. Burst mode ensures you don’t miss the perfect moment.
Predict your subject’s movement and compose your shot for the best results. Keep your subject focused by tapping the screen where you want to focus. And make sure you have plenty of light to avoid blurry photos.
You can also get creative with burst mode. Try using a fisheye lens attachment to get closer to the action. Or use the panning technique to create cool motion blur effects. After you’ve taken your burst of photos, you can use editing apps to enhance them or even create GIF animations.
iPhone’s photo burst opens a world of creative possibilities for capturing action shots.
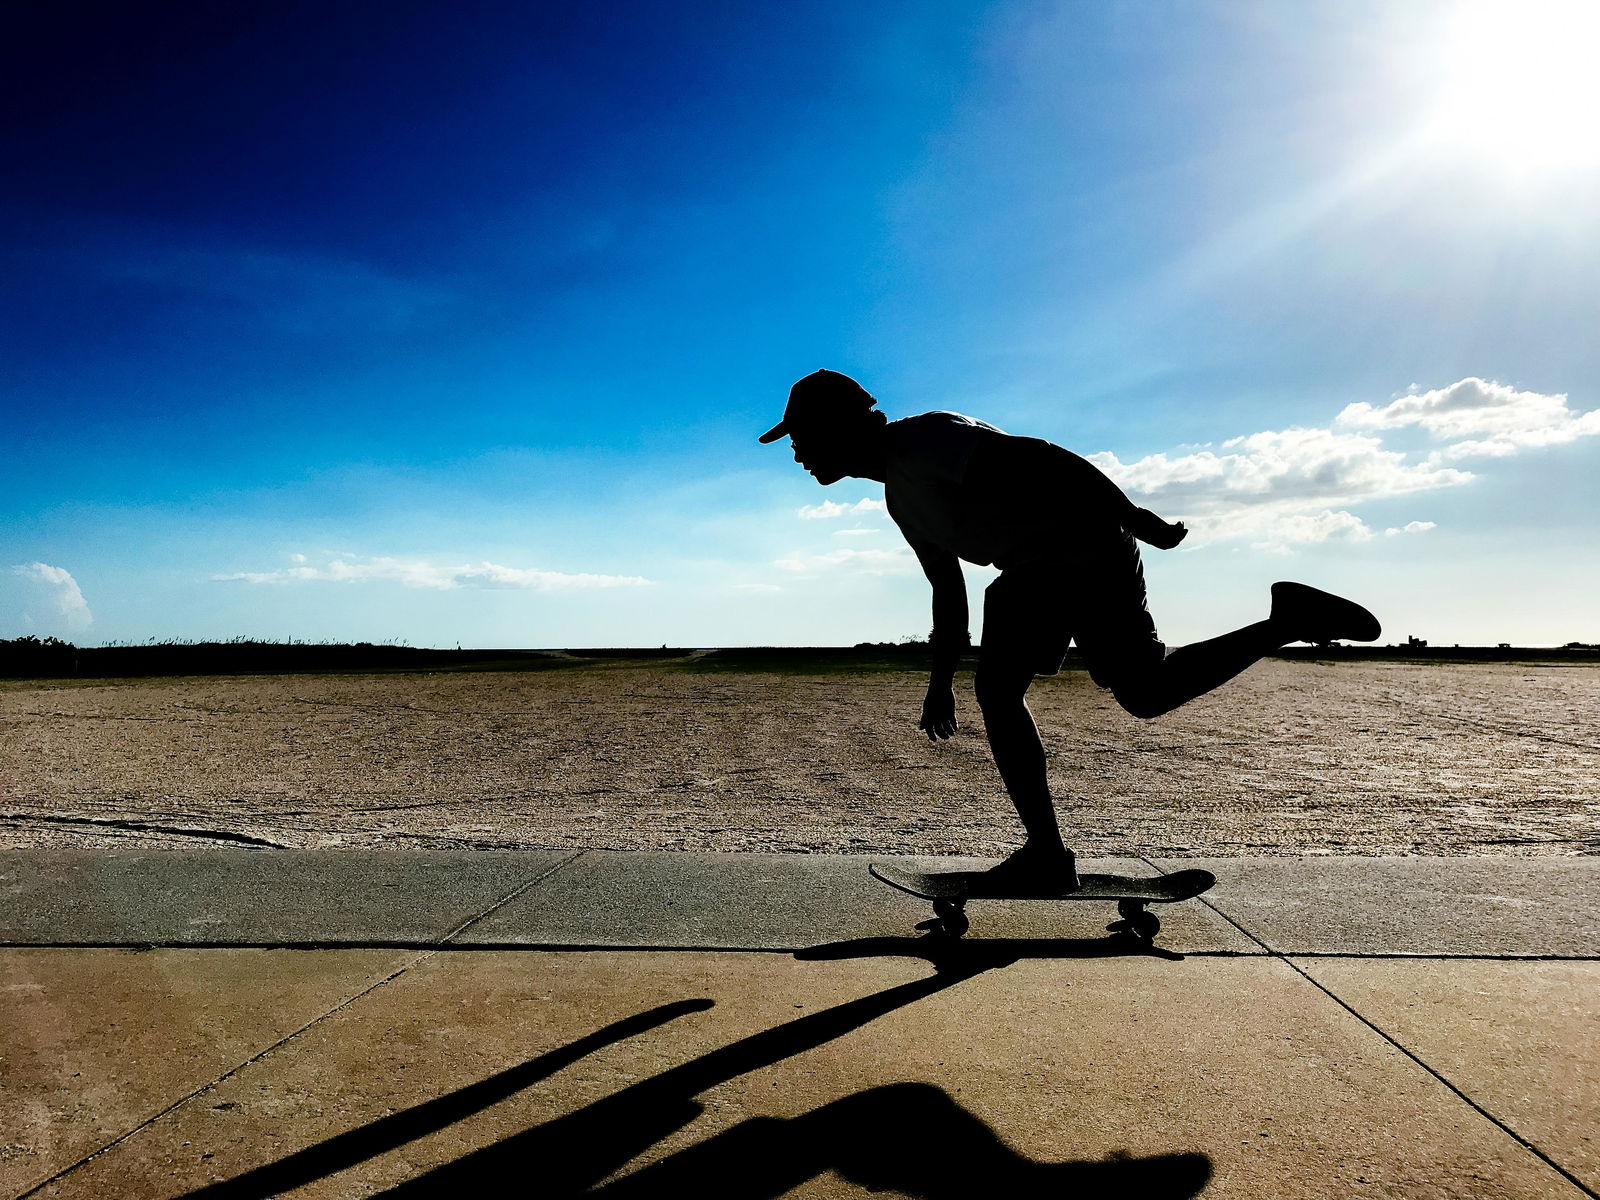
© Chad Verzosa
High-speed photography is an exciting way to capture fast-moving subjects. First, practice at home with simple setups like splashing water or popping balloons. Use a fast shutter speed of at least 1/500 s to freeze the action and avoid blur.
Choose a wide aperture like f/2.8 for a shallow depth of field that keeps the subject sharp while blurring the background. Raise the ISO to maintain proper exposure, even in bright daylight.
When shooting sports or other fast action, use continuous focusing modes to track moving subjects. Shoot in JPEG format for a larger buffer to capture more frames in a burst. Compose shots using the rule of thirds for more dynamic, artistic results.
If you’d like to learn more about high-speed photography, we have a detailed guide that covers the topic in-depth.
Panasonic Lumix GX85, 102mm, f/22, 1/60 s, ISO 200. Antoine Gravier (Unsplash)
Motion blur happens when a camera’s shutter stays open for a long time, causing moving objects to appear blurred. Some photographers try to avoid it, but motion blur can convey action and create surreal scenes.
To capture motion blur, use a manual camera and a tripod. Set a slow shutter speed, like 1/60 s for fast subjects or several seconds for waterfalls. Experiment with different speeds to get the right amount of blur.
You can also use panning to follow a moving subject with your camera. This movement keeps the subject sharp while blurring the background. Other creative ways to use motion blur are capturing moving clouds, star trails, and light trails.
To learn more about motion blur, check out our in-depth guide.
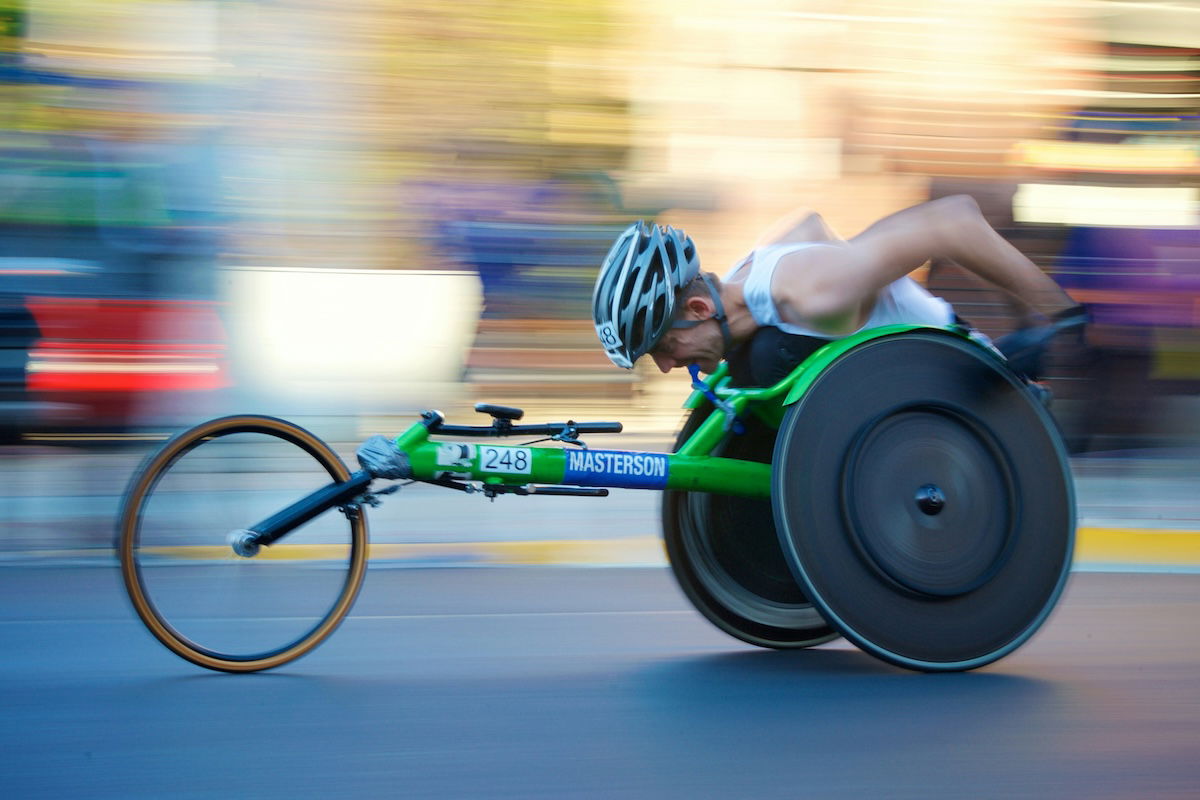
Nikon D700, 90mm, f/22, 1/13 s, ISO 400. Seth Kane (Unsplash)
GoPro cameras are perfect for capturing action-packed adventures and stunning landscapes. Their compact size and durability make them ideal for outdoor activities. Plan your photography by scouting locations. And consider lighting conditions for the best shots.
Use burst mode to capture fast-moving subjects. Burst lets you take multiple shots quickly, ensuring you don’t miss the perfect moment. Experiment with different angles and perspectives. You want to create dynamic compositions that draw the viewer’s eye.
Learn about the various GoPro camera modes and settings to optimize your photos. Time-lapse modes let you capture beautiful sequences. ProTune settings give you manual control over exposure and color.
You can take amazing GoPro photography with the right techniques and a creative eye. They’ll uniquely showcase your adventures!
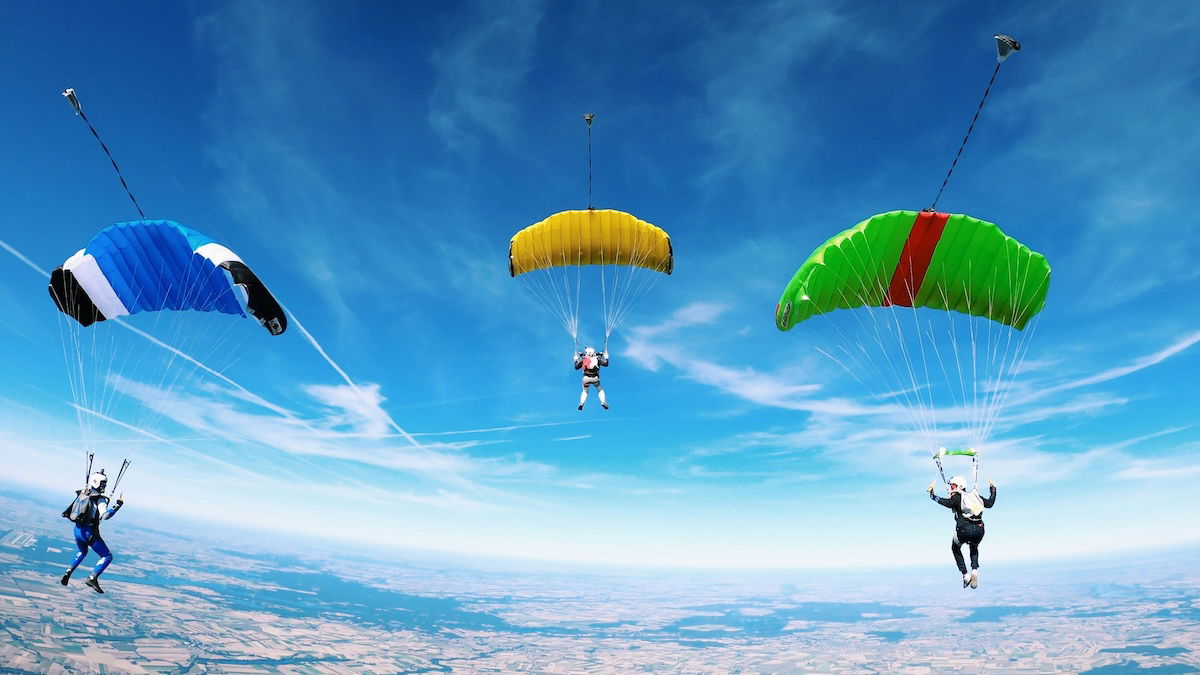
GoPro HERO5 Black. Kamil Pietrzak (Unsplash)
Sports photography is a broad field that encompasses many different styles and techniques. You can shoot any sport, from baseball to boxing, and each sport requires different skills, knowledge, and equipment.
In the following sections, we discuss the details of covering specific sports. If you already have a favorite sport you want to cover, you can learn more about it in the dedicated article. But you can also learn something from each niche. It will give you a broader knowledge of sports photography.
Find a spot with a clear view of the action to capture the best softball and baseball photos. Use a fast shutter speed of at least 1/500 s and a higher ISO to freeze motion. Burst mode helps you catch the perfect moment, like when the bat hits the ball.
Set your autofocus (AF) to continuous or single-point mode for sharp shots. Zoom in close with a telephoto lens to see facial expressions, but keep the composition wide enough to show the play.
Anticipate the action by watching the bases and being ready for key moments. Look for shots with the ball and players’ faces to showcase the baseball action. Baseball photography takes practice, but our list of tips will help you improve your shots at the next game.
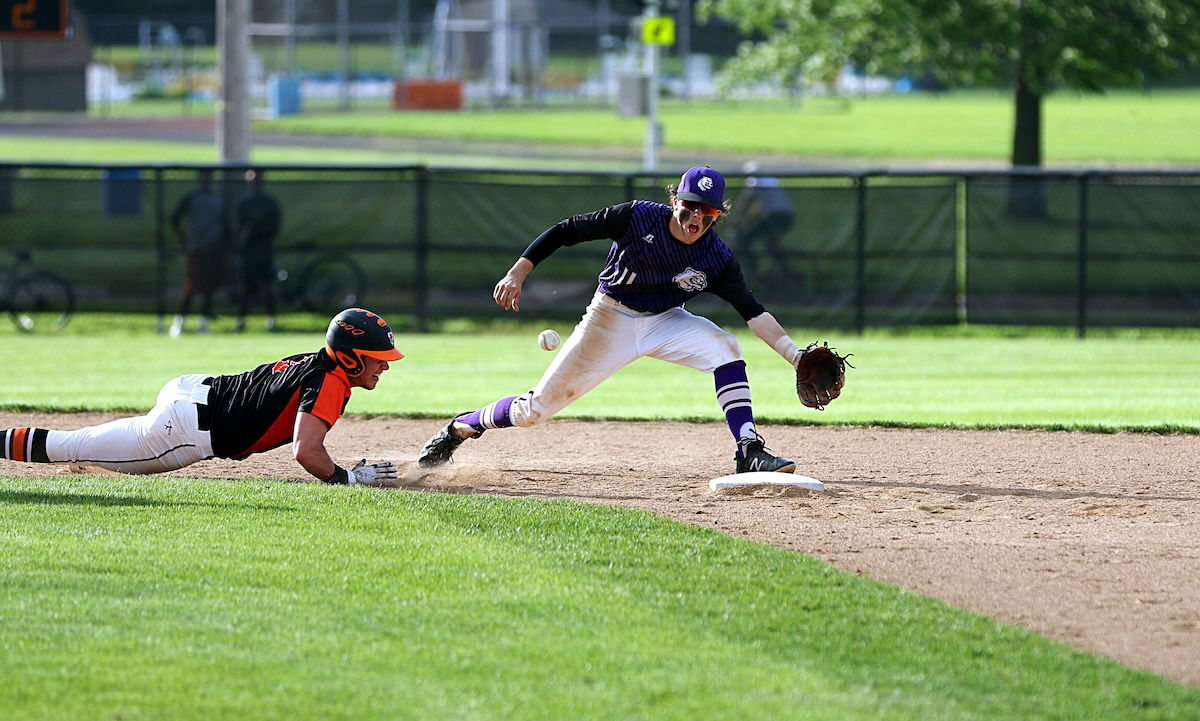
Canon EOS 7D Mark II, 200mm, f/3.2, 1/4,000 s, ISO 320. Chris Chow (Unsplash)
Basketball is a sport usually played indoors, which presents a unique set of challenges for a photographer. To avoid motion blur, use shutter priority mode and set the speed to at least 1/500 s.
Open your aperture wide (f/2.8-f/4) to let in more light. Increase your ISO if needed, and fix any digital noise in post-processing.
Use autofocus and focus on areas of high contrast. More AF points help you focus more accurately. Use continuous AF mode to track moving subjects.
Try back-button focus to focus and shoot faster. Use burst mode during key moments to get the best shot. Shoot in JPEG to fit more photos on your memory card.
Move around the court to find the best vantage points. Fill the frame with the players and capture their emotions. To learn more about basketball photography, check out our in-depth guide.
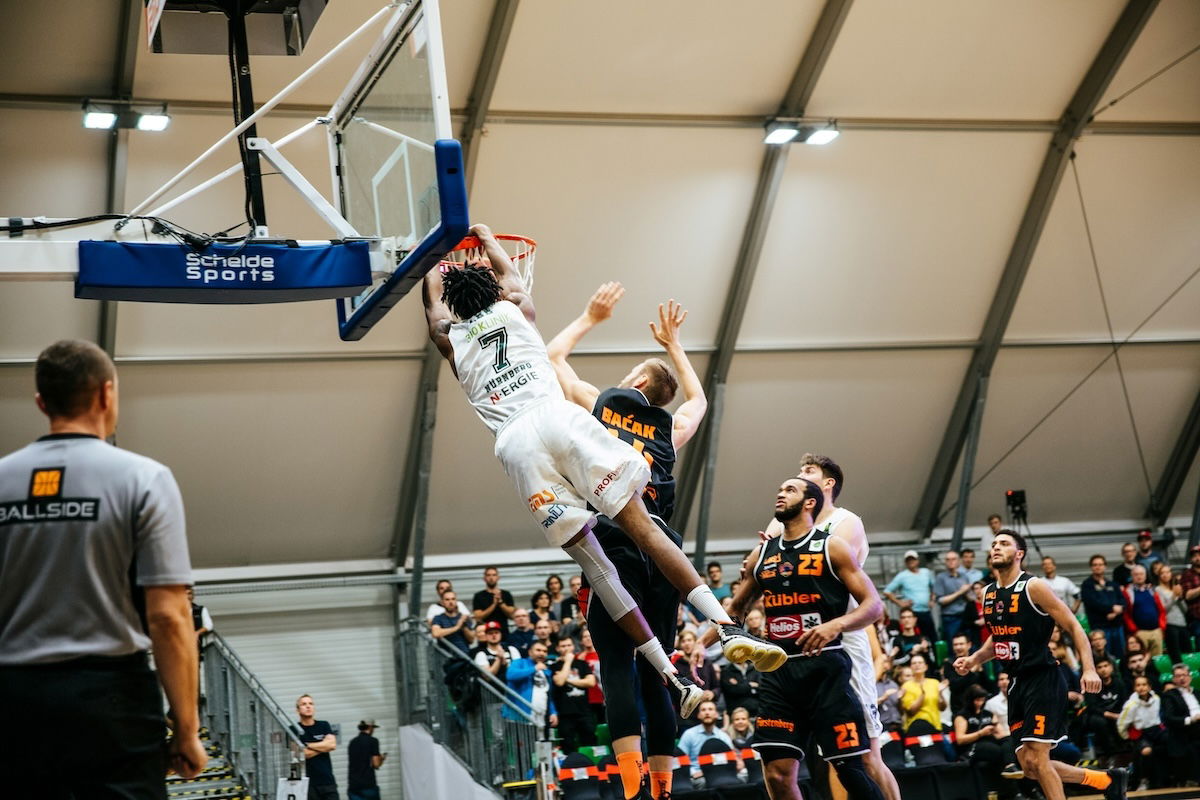
Canon EOS 5D Mark III, 63mm, f/2.8, 1/320 s, ISO 800. Markus Spiske (Unsplash)
Using a long telephoto lens is essential for soccer photography. A 70-200mm lens is a good starting point, but super-telephoto lenses in the 400mm range are better for larger stadiums.
Use a fast shutter speed of at least 1/800 s to capture players in action and minimize motion blur. Adjust your aperture and ISO to best highlight your subjects.
You can use a wide aperture, like f/2.8, to isolate a single player from the background. Use a smaller aperture for multiple players to keep them all in focus. Increase ISO if your images are too dark.
Knowing the game helps you anticipate key moments to photograph, like goals, tackles, and crowd reactions. Move around to get a variety of perspectives, and keep both eyes open while shooting to avoid missing any action. See our full article for more tips on soccer photography.
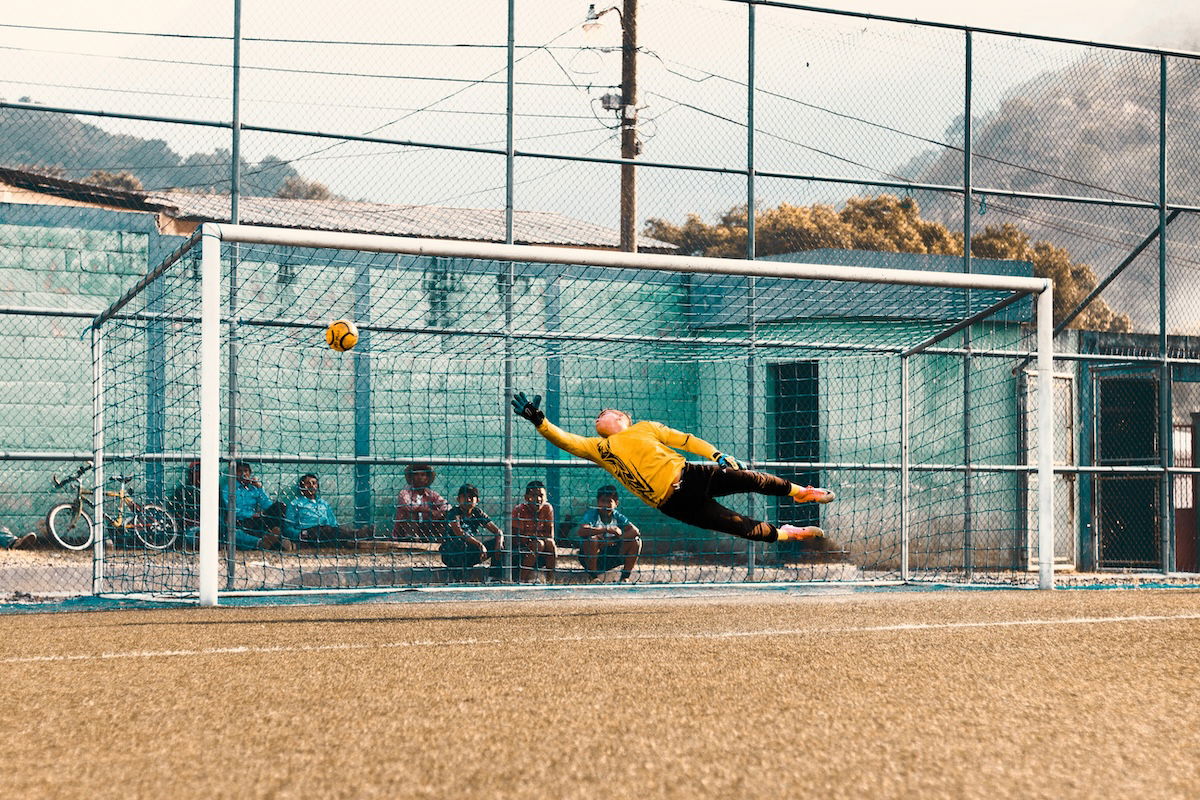
Canon EOS 7D, 50mm, f/2.5, 1/1,600 s, ISO 200. Álvaro Mendoza (Unsplash)
Boxing photography captures the raw power and emotion of this physical sport. To take great boxing photos, use a fast shutter speed of at least 1/500 s to avoid motion blur.
Increase your ISO to compensate for low light in the venue. And use a wide aperture like f/2.8 or f/4.0 to make the boxers stand out.
Shoot from a low angle to emphasize the boxers’ strength and superiority. For variety, take both wide shots and close-ups, using a zoom lens for sharp details and a wide-angle lens for atmospheric photos.
Capture the humanity of the boxers by taking candid photos during breaks or emotional moments. If you’d like to learn more about boxing photography, our full article is the place to go.
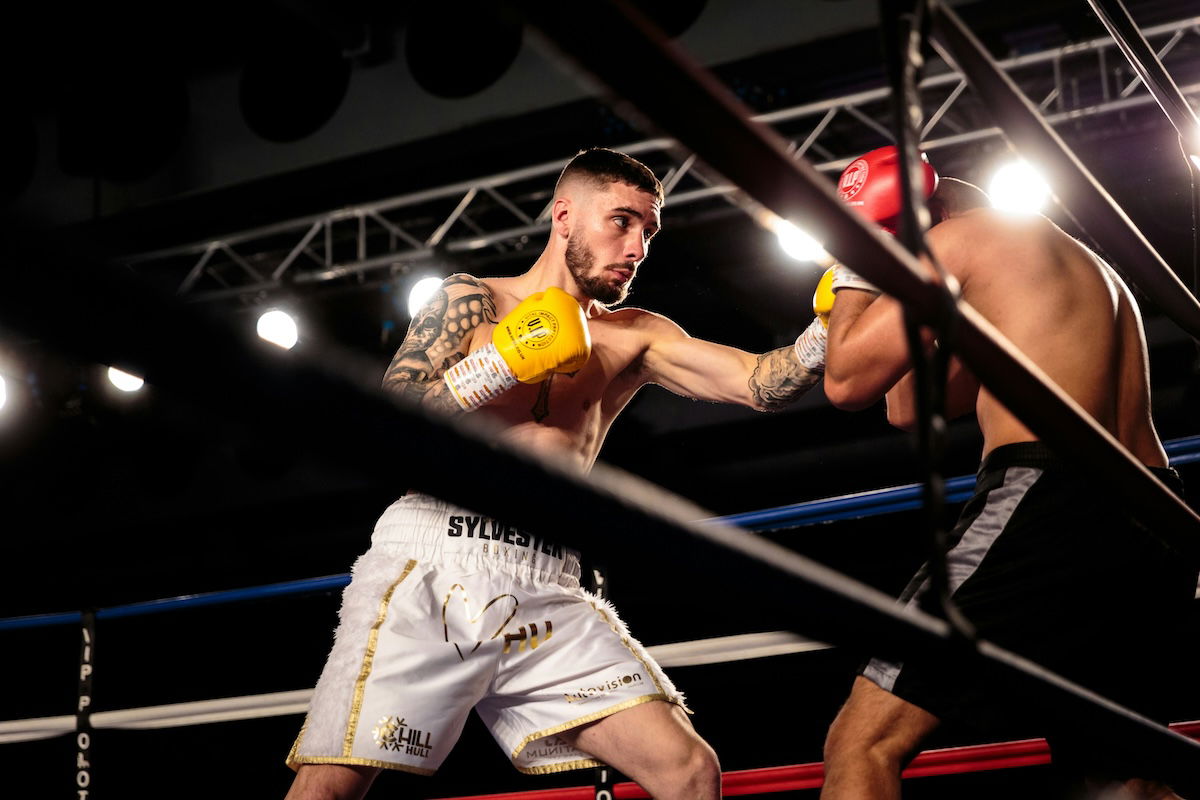
Canon EOS 60D, 85mm, f/2.0, 1/320 s, ISO 1,000. Chris Kendall(Unplash)
Use a 1/700 s or higher shutter speed to capture stunning surf photos. These settings ensure the surfers are sharp and give you images full of detail. Experiment with composition to create dynamic shots that tell a story.
Shooting from the water can yield unique perspectives, but make sure you have the right waterproof equipment. Aim to snap photos at dawn and dusk for the best color and light. Use a polarizing filter to minimize reflections on bright, sunny days.
Don’t forget to capture the surf lifestyle beyond the action. Portraits of surfers and shots of them relaxing on the beach can add personality to your images. To learn more about surf photography, read our in-depth guide. It’s a good place to place to start.
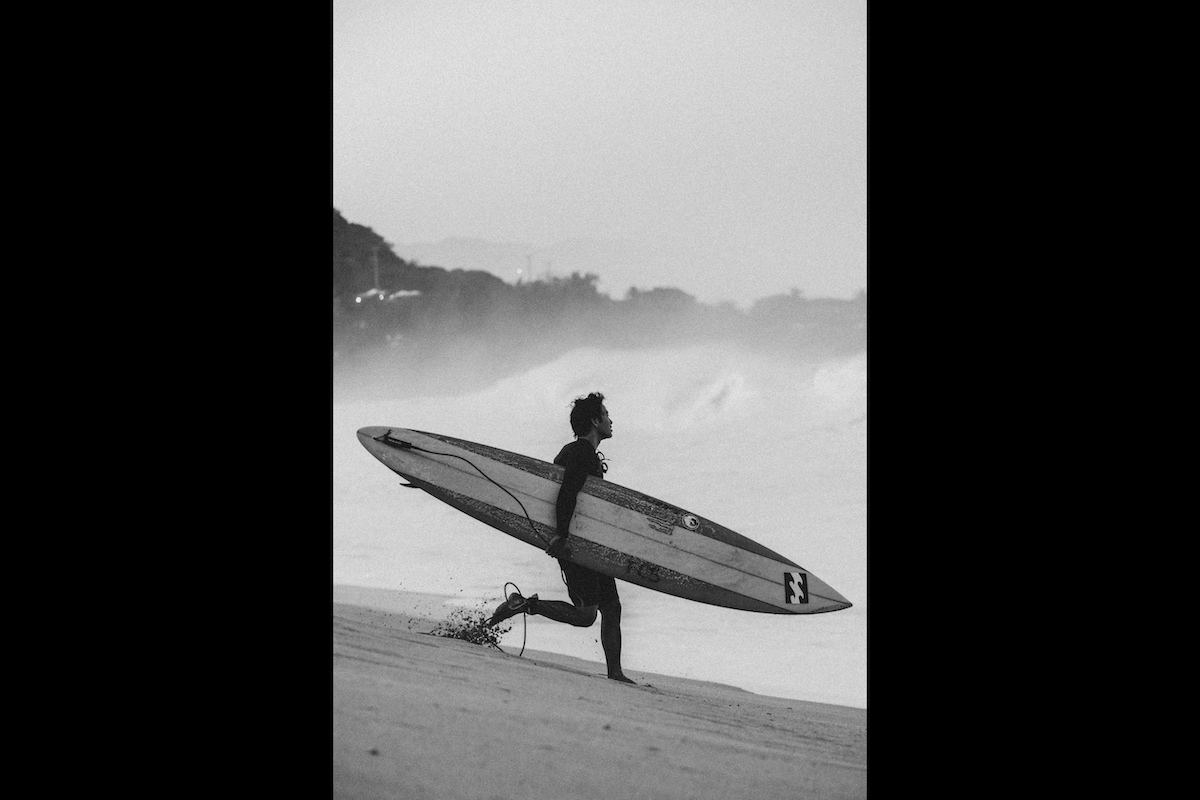
Canon EOS R, 119mm, f/3.5, 1/1,250 s, ISO 16,000. Chris Lehr (Unsplash)
Swimming photography captures the grace and power of swimmers in action. To get the best shots, use a camera with a high burst rate of at least 12 photos per second. This burst helps you freeze even the quickest strokes with clarity.
A telephoto lens is important for swimming photography. Since you’ll be far from the action, a long telephoto lens, like 100-400mm, lets you get close-ups of the swimmers. Consider even longer focal lengths like 600mm or 800mm for larger pools or to capture more details.
Knowing the different swimming events helps you take better photos. Each stroke and race type has a different approach.
For example, shooting a freestyle event is harder than a breaststroke. It’s because the swimmer’s face is often hidden in freestyle. Understanding the sport lets you adapt your technique to get the best shots.
To learn more about swimming photography, dive into our detailed article.
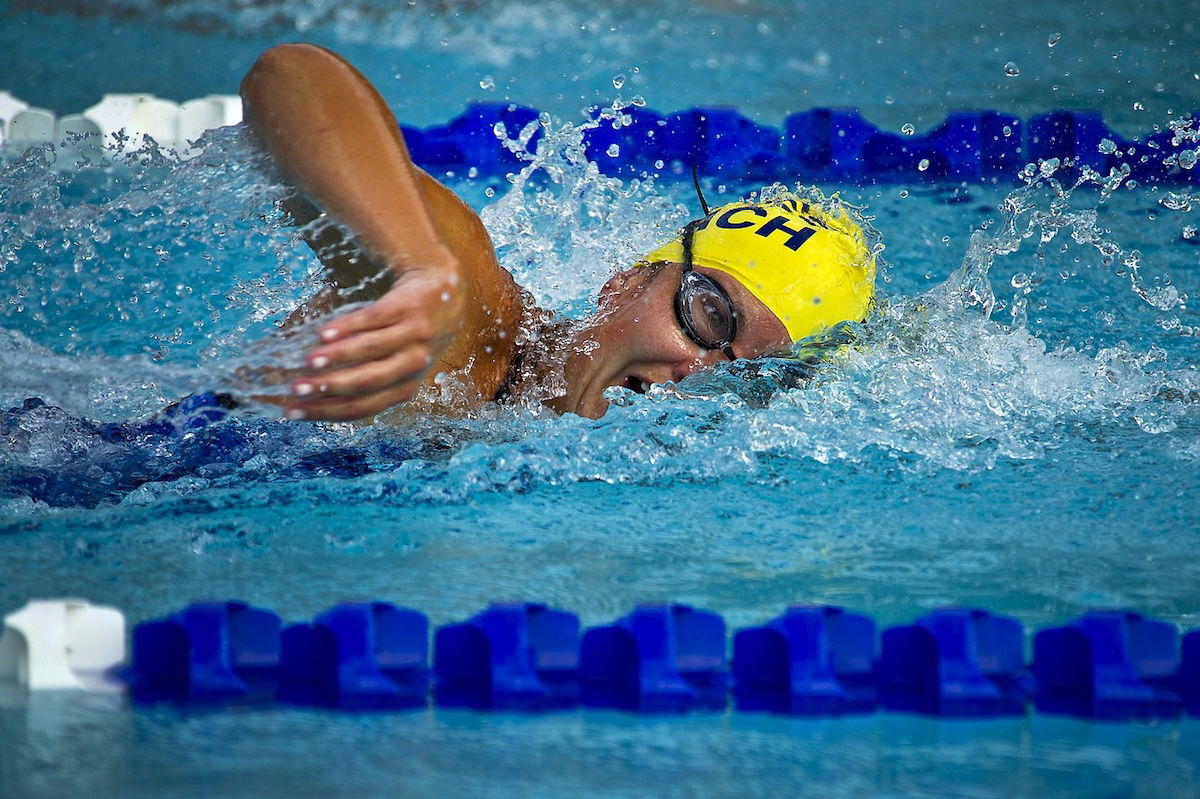
Nikon D3s, 330mm, f/5.3, 1/1,250 s, ISO 160. (Pexels)
Yoga photography captures the grace and strength of yogis in various poses. The right techniques, equipment, and creativity are needed to create stunning yoga images.
Use a digital camera with manual settings to change the aperture, shutter speed, and ISO. A tripod, , backdrops, and cleaning supplies for the yoga mat are also helpful. Research yoga poses beforehand and pick locations that work well with your model.
Your camera settings vary depending on the pose. Use a shutter speed between 1/250 and 1/125 s for still poses and faster speeds for moving poses. An aperture of f/4.0 or f/5.6 keeps your subject sharp while separating them from the background.
Experiment with different angles, distances, and poses to make your photos unique. If you want to learn more, we have a full guide to yoga photography.
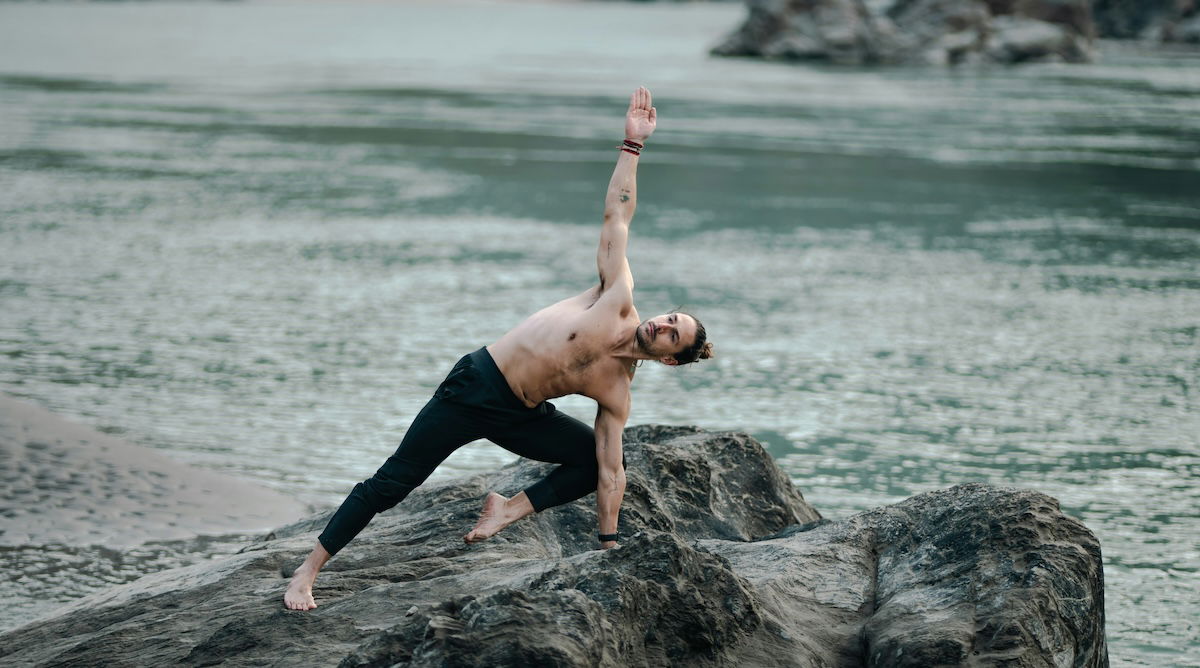
Sony a7 IV, 85mm, f/1.4, 1/200 s, ISO 50. Jaspinder Singh (Unsplash)
Skateboard photography is all about capturing the thrill and energy of the sport. Find unique vantage points like climbing to a spot or crouching down to take the best shots. Shooting from the skater’s point of view can also give an authentic glimpse into the action.
Experiment with different camera angles to convey the excitement of skateboarding. Low angles add height and drama, while shooting from above can provide a fresh perspective. Always try to get the skater’s front-facing side in the frame.
A fast shutter speed is key to freezing the skater’s motion and capturing the perfect moment. Shoot in shutter priority mode so your camera adjusts the aperture automatically.
For those interested in learning more about skateboard photography, our in-depth article is the perfect place to start.
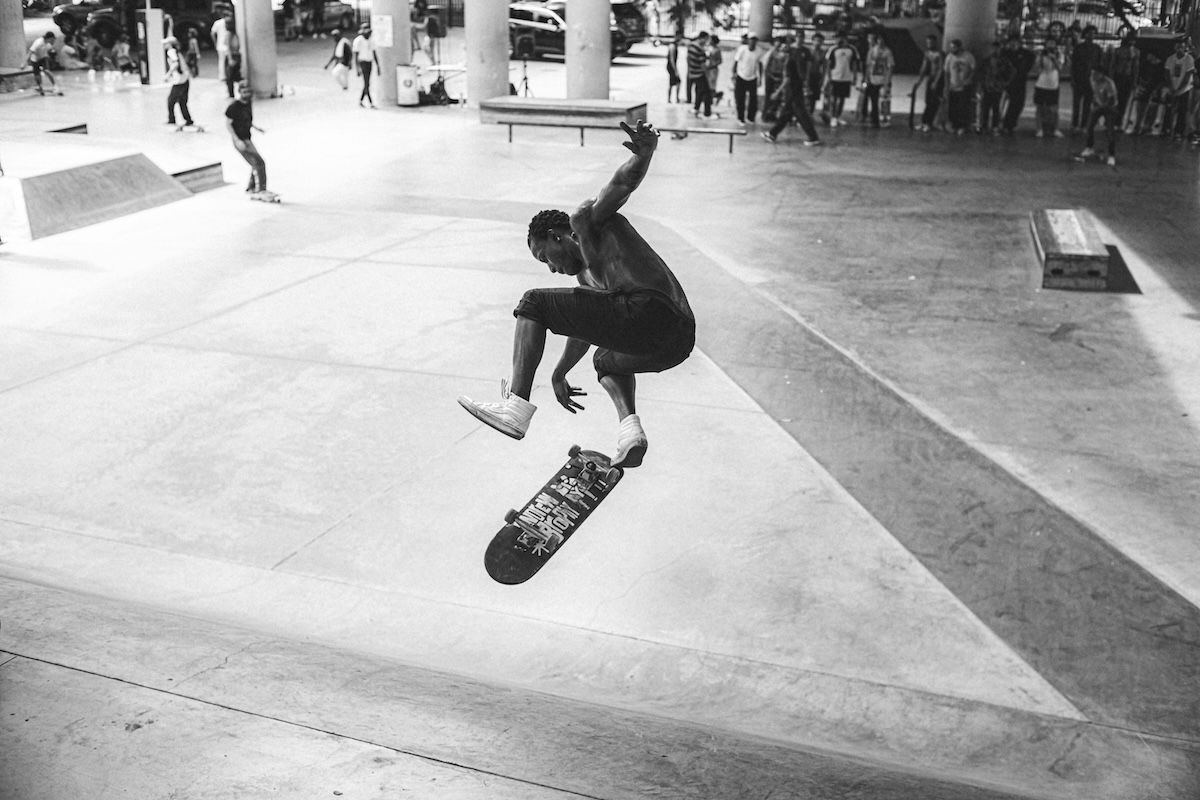
Leica M10, 3.4mm, 1/1,000 s, ISO 3,200. Frankie Cordoba (Unsplash)
Whether you’re in Paris, London, or New York, there are a few things you need to know before you start photographing the marathon.
Use a telephoto lens to get close-up shots of runners without being in the way. Something like a 70-200mm lens works well. Set a fast shutter speed of at least 1/500 s to freeze the action and avoid motion blur.
Choose a location with the sun behind the runners for warm, well-lit photos. Corners and the tops of hills are good spots to capture emotion and interaction with the crowd.
Use burst mode to take multiple shots as runners pass by. Keep your ISO low for the best-quality images if the weather is good.
Use continuous autofocus mode to track moving subjects. Be mindful of what you include in the frame, like a crowd of people, and avoid cutting off limbs. A monopod can also help stabilize your camera without taking up much space.
To learn more about marathon photography, check out our detailed guide.
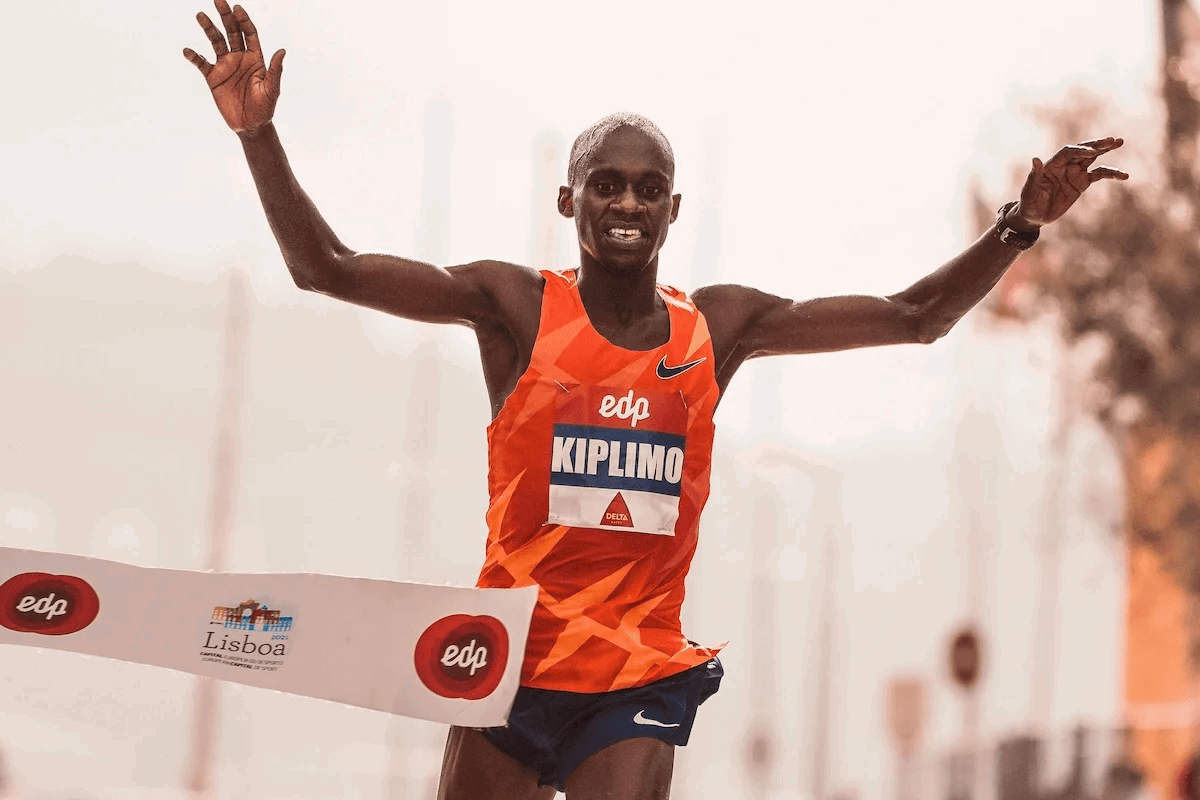
Sony a7 III, 294mm, f/5.6, 1/2,000 s, ISO 250. Run 4 FFWPU (Unsplash)
Capturing the thrill of cycling requires the right camera settings. When they’re moving fast, use a fast shutter speed of at least 1/1000 s. Continuous autofocus and burst mode help you get sharp shots of moving cyclists.
Panning is another great technique for conveying motion in cycling photos. Set your camera to shutter priority mode and choose a slower shutter speed between 1/30 and 1/125 s. Track the cyclist with your camera. Then, press the shutter for a sharp subject against a blurred background.
Experiment with different angles and perspectives to add variety to your cycling images. Get low to the ground to emphasize the size of the bike and rider, or find a high vantage point for a unique birds-eye view.
Finally, it’s good to focus on the cyclists’ facial expressions to capture the emotion and intensity of the sport. If you want to dive deeper into the world of cycling photography, our full article has plenty of tips and techniques to explore.
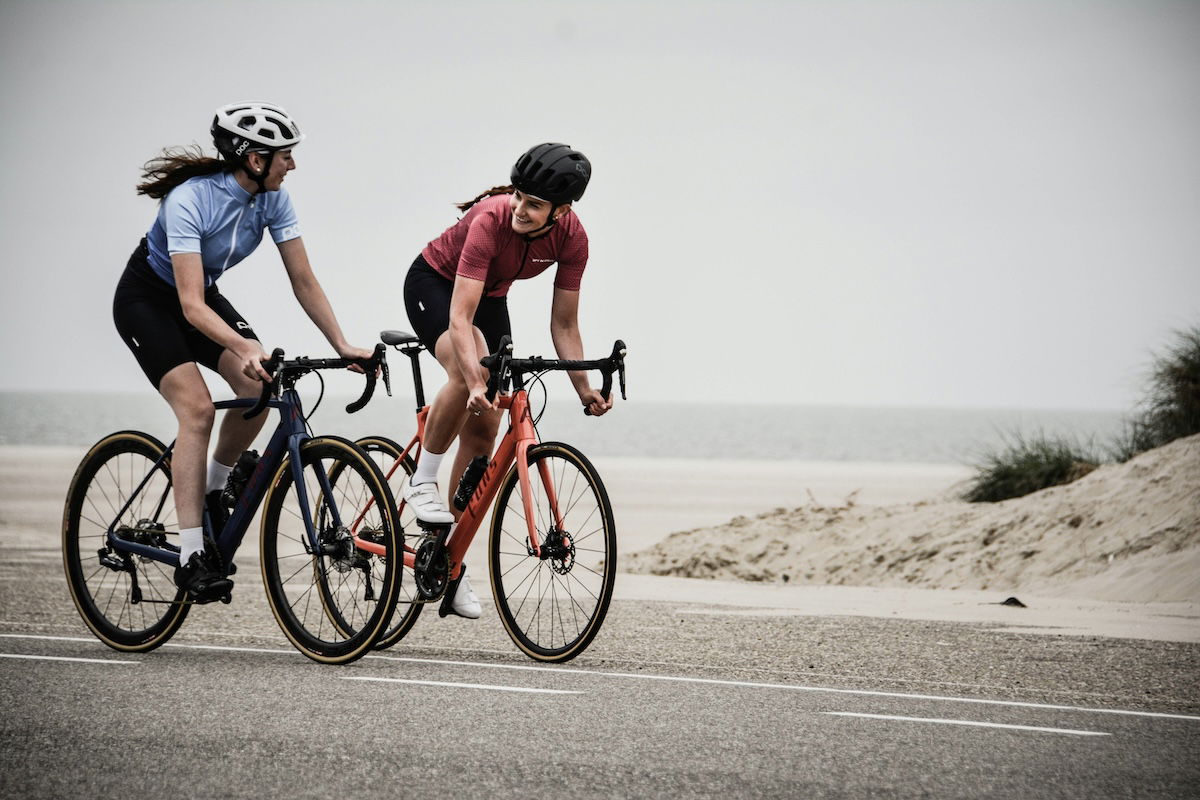
Nikon D7100, 150mm, f/5.6, 1/250 s, ISO 1,250. Coen van de Broek (Unsplash)
A telephoto zoom lens like 70-200mm is great for capturing figure skaters. To freeze the action, shoot with a large aperture of f/4 or f/2.8 and a fast shutter speed around 1/1000 s. Increase your ISO to compensate for the darker exposure.
Move around the rink to experiment with the available light. Backlight can create elegant silhouettes, while side light adds mystery. Zoom out for wide, atmospheric shots that show the setting. Use a narrow aperture like f/11 to keep everything in focus.
Photograph faces, outfits, and skates to capture the details. You can even document the entire experience, from preparations to accepting prizes afterward.
Motion blur is another great technique for conveying movement and creating abstract images. For the most flattering results, photograph simple moves when the skater is comfortable and can smile.
Learning some figure skating photography techniques helps you cover figure skating events professionally.
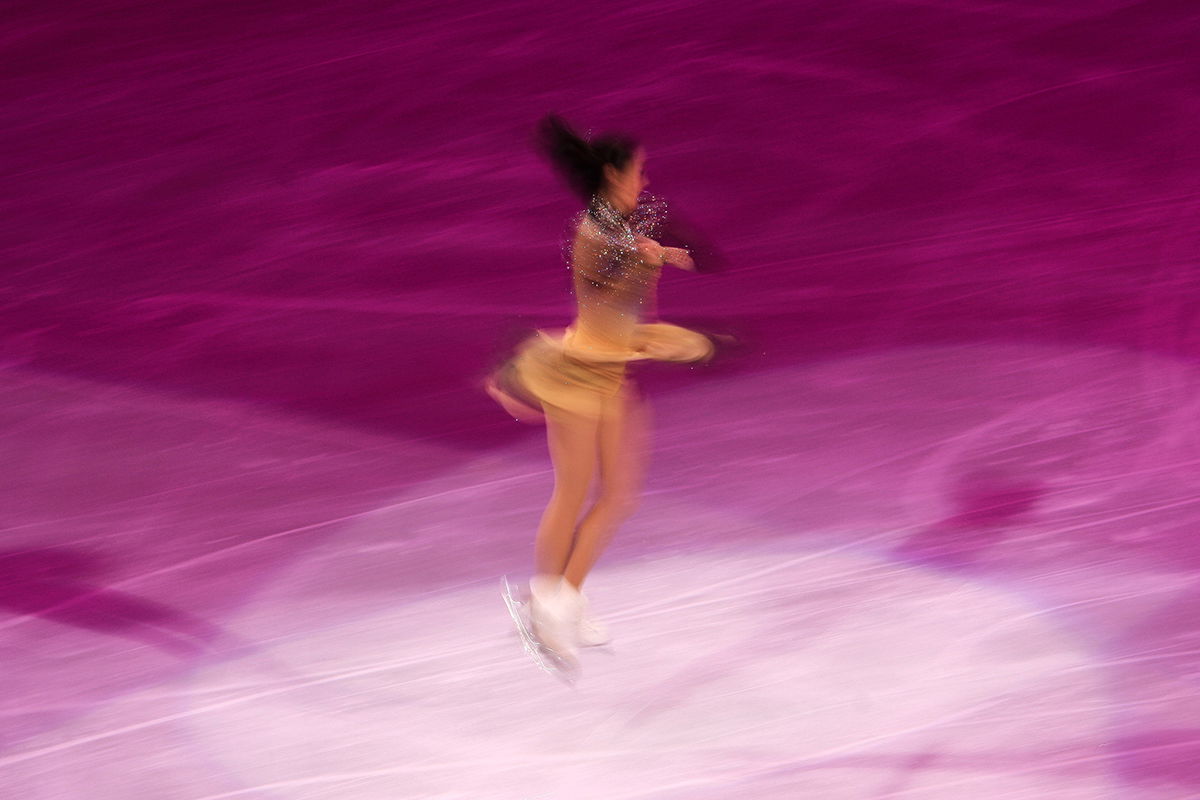
Canon EOS 40D, 200mm, f/11 , 1/20 s, ISO 200. Rod Long (Unsplash)
Ballet photography captures the elegance and grace of dancers. To emphasize movement, use motion blur and a slow shutter speed. Create double exposures to express emotions and show various poses in one photo.
Focus on details like hands, accessories, and shoes to make your photos more interesting. Use a single light source to create breathtaking silhouettes highlighting the dancer’s movements. Experiment with outdoor locations and props like flour to add creativity to your portraits.
We cover some of the best ballet poses. These include the First Arabesque, split leaps, sitting splits, and mid-pirouette. There’s also the outstretched leg with hands below the chest and the cross position. These poses showcase the ballerina’s flexibility, balance, and artistry.
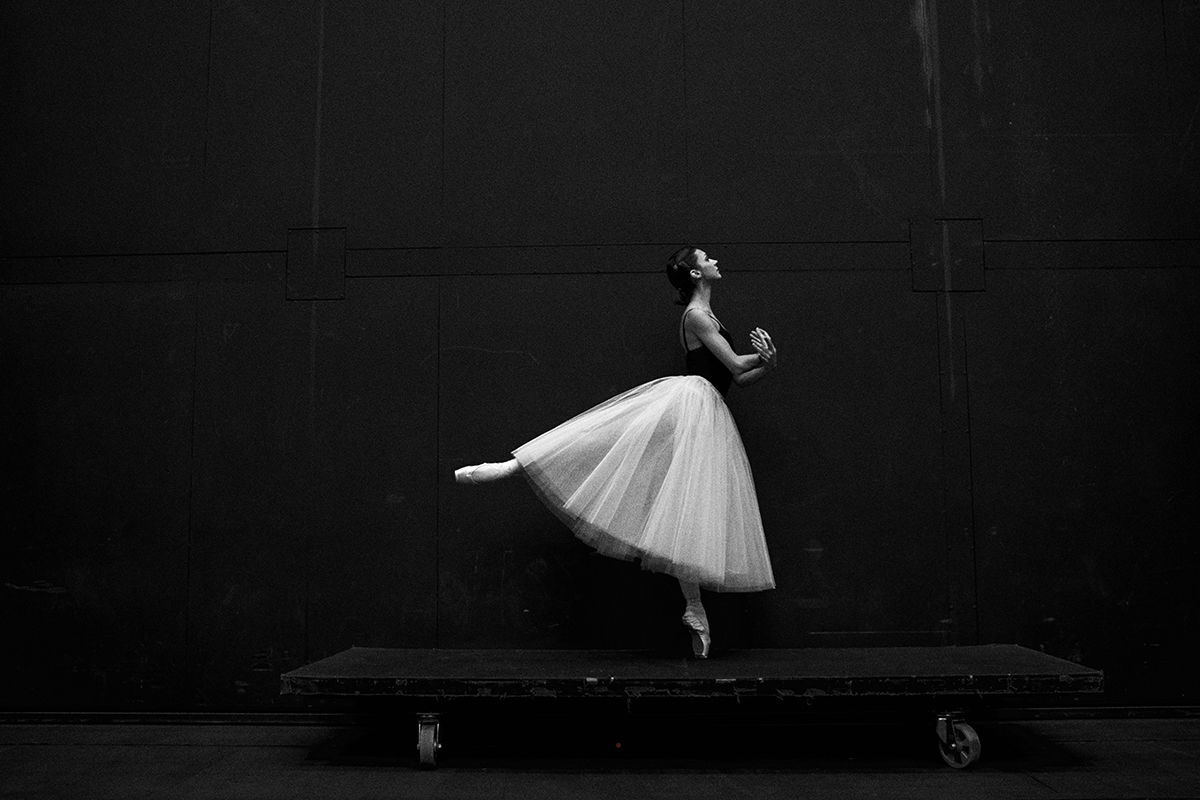
Sony a7R II, 35mm, f/2.0, 1/125 s, ISO 3,200. Sergei Gavrilov (Unsplash)
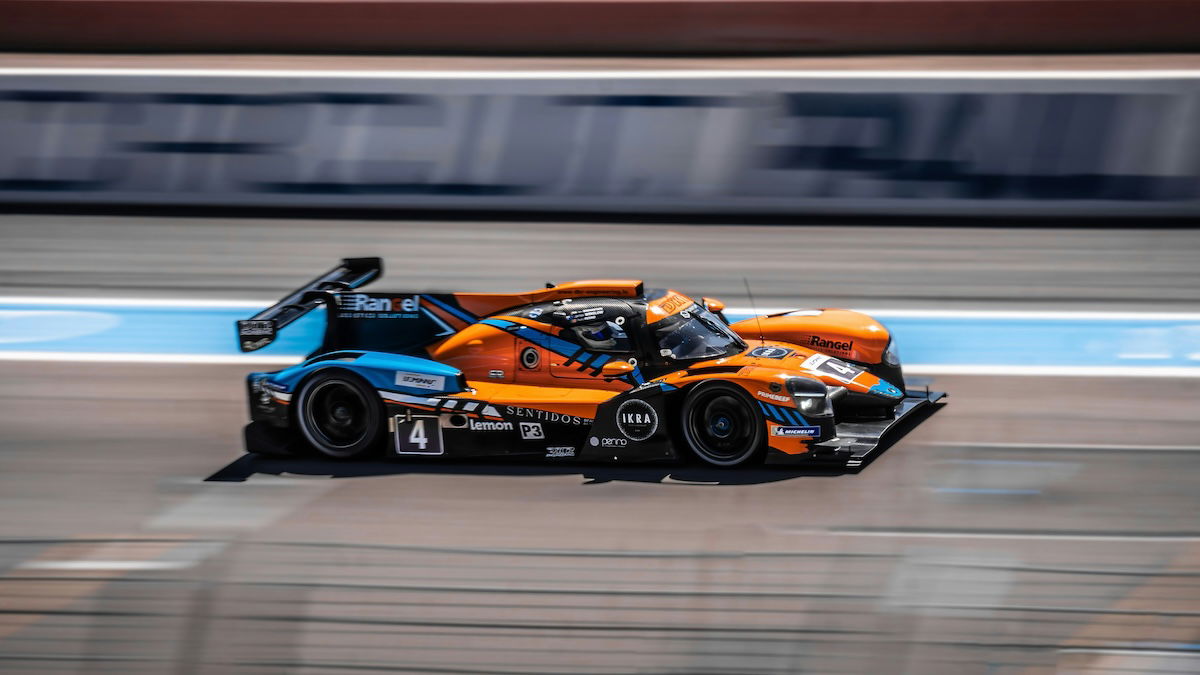
Capturing the excitement of motorsports requires the right gear and techniques. A telephoto zoom lens, like 70-300mm, lets you get close to the action at a safe distance. Pair a fast shutter speed around 1/500 s with continuous autofocus to freeze motion and keep your shots sharp.
Panning is another way to convey the thrill of speed in your photos. Follow the moving subject with your camera using a slower shutter speed, like 1/160 s. This pan blurs the background while keeping the subject sharp, creating a sense of motion.
Experiment with different angles and compositions to add variety to your shots. Get creative and capture the crowd’s excitement or the checkered flag at the finish line. For more tips on motorsports photography, check out our in-depth guide.
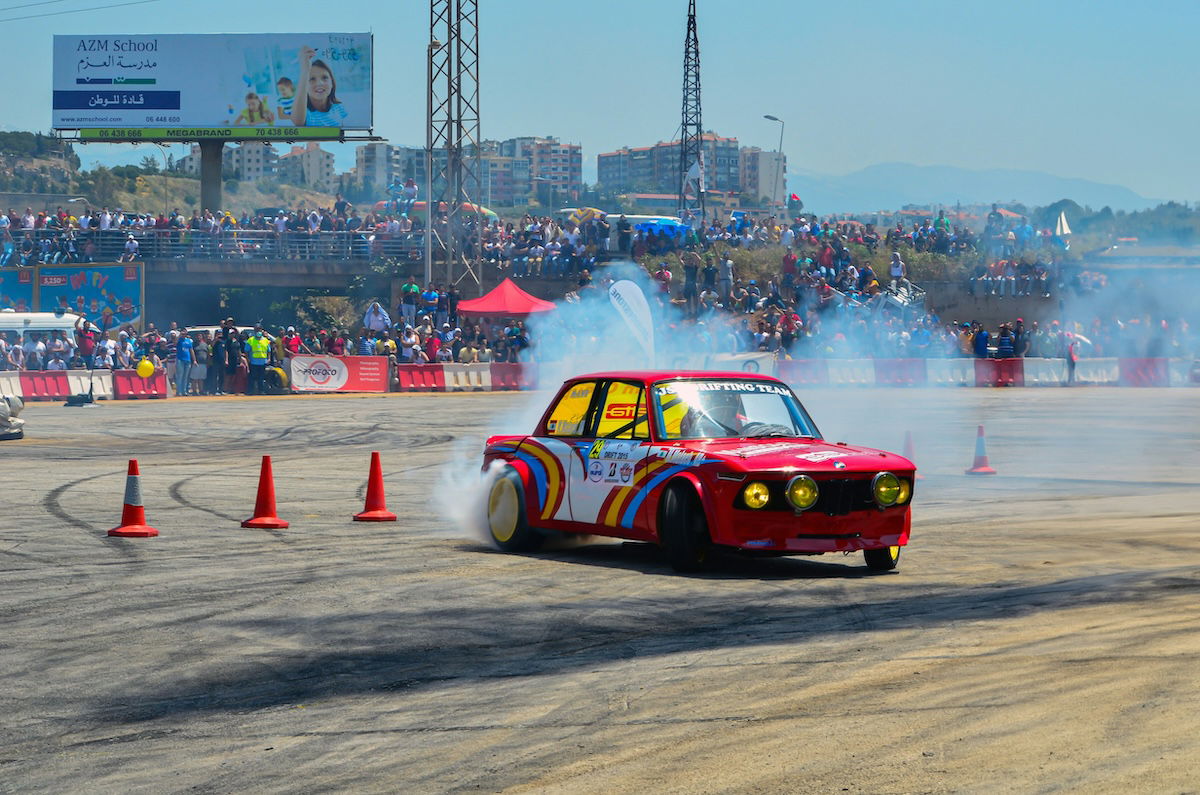
Nikon D5100, 58mm, f/16, 1/250 s, ISO 320. Ahmad Bader (Unsplash)
Aviation photography captures stunning images of aircraft in flight or on the ground. It requires a keen eye for detail, patience, and the ability to anticipate the perfect moment. With the right equipment and techniques, you can start capturing breathtaking shots of planes soaring through the sky.
Choose a versatile zoom lens that lets you capture wide-angle and telephoto shots. A sturdy tripod, , and camera filters can also improve your shots.
Position yourself beneath or slightly to the side of flight paths and use designated plane spotting sites. Set your camera to continuous shooting mode and freeze the action with a fast shutter speed.
Look for moments when aircraft fly lower than usual. Take-off or landing at airports or airshow flyovers are good times.
With grounded planes, focus on the details of the aircraft. Zoom in on rivets and for abstract images. Or photography pilots and mechanics for environmental portraits.
Learn more in our full post on aviation photography and airshows.

Sony a7 IV, 400mm, f/6.3, 1/3,200 s, ISO 320. Isaac (Unsplash)
It’s important to choose the right sports photography equipment. The has fast autofocus, high ISO performance, and continuous shooting.
Full-frame cameras are more robust. But APS-C cameras are less expensive and have a crop factor that gives extra reach.
Fast, high-quality lenses are also key. Prime lenses are sharper, but zoom lenses offer more flexibility. Look for lenses with wide apertures like f/2.8 to shoot in low light.
Don’t forget important accessories like rain covers, a sturdy backpack, and a monopod for stability. With the best sports photography equipment, you’ll be ready to capture all the action.
The best underwater cameras are compact, easy to use, and waterproof (of course). The Olympus Tough TG-6 is our top pick for its rugged design and excellent image and video quality. It’s waterproof down to 49 ft (15 m), shockproof from 6.9 ft (2.1 m), and crushproof up to 220 lbf (100 kgf).
The TG-6 has a 12 MP sensor, 4x optical zoom, and can shoot 4K video at 30 fps. It also has built-in Wi-Fi and GPS for easy sharing and geotagging. The underwater HDR mode and white balance simplify getting great shots in challenging conditions.
Whether you’re snorkeling, diving, or just playing in the pool, the Olympus Tough TG-6 is a reliable choice. For more info on the best underwater cameras, click the link to view our full list.
The GoPro HERO12 Black is a fast and powerful action camera. Its new GP2 processor delivers 5.3K video and 27 MP photos. The HyperSmooth 6.0 system also provides excellent image stabilization.
The HERO12 Black can shoot 8x slow-motion video and has a front screen for easy framing. It’s waterproof to 33 feet without a case. Other useful features include horizon leveling, livestreaming, and timelapse modes.
The HERO10 Black remains a top pick at a lower price. But the Hero12 is a great choice for anyone who wants a high-performance action camera. Check out our detailed guide to .
Are you looking for a GoPro alternative? The DJI Action 2 is our top pick. It has a unique modular design, 8x slow motion at full HD, and great image stabilization.
The Insta360 GO 3 is the smallest action camera available. It’s light enough to clip to clothing and comes with a case that has a remote control. The Akaso EK7000 is a great budget option, offering 4K video at 25 fps and a watch-style remote control.
If you’d like to learn more about GoPro alternatives, our full article provides extra info and helps you find the best action camera for your needs.
The best lens for sports photography should have a telephoto zoom and a large focal length. Image stabilization and a low max aperture are also important.
That’s why the Canon EF 70-200mm f/2.8L IS III USM, Nikon AF-S DX 18-300mm f/3.5-6.3 VR, and Sony E 70-350mm f/4.5-6.3 ED G top our list. The is exactly what a versatile sports photographer needs.
The 70mm end is great for wider environmental shots and snapping portraits of athletes. The 200mm end provides the magnification you need to get close to the action from the sidelines.
Image stabilization also lets you use slower shutter speeds with less risk of blur. It’s ideal for night matches and indoor sporting events. A lower max aperture, like f/2.8, gives you more options in low-light situations. You can also use faster shutter speeds for action shots.
If you want to learn more about lenses for sports photography, we have a detailed guide that covers everything you need to know.
The best Canon lenses for sports photography help you capture the action with precision and clarity.
The Canon EF 70-200mm f/2.8L IS III USM is a top pick for its quick autofocus and versatile focal length. Its constant f/2.8 aperture performs well in low light, and the built-in image stabilization keeps shots sharp.
The Canon RF 100-400mm f/5.6-8 IS USM is a great option for those needing more reach. This lens has an impressive zoom range to capture distant subjects. The autofocus is fast and accurate, and the 5.5-stop image stabilization helps when shooting handheld.
Other standout lenses include the RF 70-200mm F/2.8L IS USM for low-light performance. And the RF 100-500mm F/4.5-7.1L IS USM is excellent for its extensive zoom range.
No matter your needs or budget, a Canon lens helps you capture amazing sports photos. Check out our in-depth guide to learn about the best Canon lenses for sports photography.
When capturing fast-paced sports action, having the right lens is key. The best Nikon lenses for sports offer quick AF, effective image stabilization, and versatile zoom ranges. Our top picks are the Nikon Z 70-200mm f/2.8 VR S and the AF-S 70-200mm f/2.8E FL ED VR.
Photographers praise the Z 70-200mm f/2.8 VR S for its quick, accurate autofocus. And its constant f/2.8 aperture makes it great for low-light shooting.
The AF-S 70-200mm f/2.8E FL ED VR delivers exceptionally sharp images across its zoom range. Both lenses are weather-sealed for reliable outdoor use.
Other notable options include super-telephoto lenses like the Z 180-600mm f/5.6-6.3 VR for capturing distant subjects. And the Sigma 70-200mm f/2.8 DG OS HSM | S, a popular third-party alternative.
Nikon lenses for sports photography come in various focal lengths and apertures. There’s an option for every sports photographer’s needs.
Sony offers a range of lenses perfect for sports photography. The Sony FE 100-400mm f/4.5-5.6 GM OSS is a top pick, with its versatile zoom range and quick autofocus. The built-in image stabilization helps capture sharp shots, even in low light.
The E 70-350mm f/4.5-6.3 G OSS is a great choice for APS-C cameras. It’s lightweight and has a broad zoom range, making it easy to capture distant action. The fast autofocus keeps up with fast-moving subjects.
Consider the Sony FE 70-200mm f/2.8 GM OSS II if you need a lens that excels in low light. The bright f/2.8 aperture and optical stabilization let you shoot at slower shutter speeds without blur.
Check out our in-depth guide to .
The Sigma 70-200mm f/2.8 DG OS HSM is a versatile telephoto zoom lens. Its fast f/2.8 aperture throughout the zoom range makes it great for low-light shooting and creates a shallow depth of field. It’s for DSLRs, but you can use it with an adapter for mirrorless cameras.
This lens is built to last, with durable construction that includes weather sealing. The lens’s autofocus is quick and accurate thanks to the hypersonic motor (HSM). It also has an optical stabilizer (OS) to reduce camera shake and allow slower shutter speeds.
The Sigma 70-200mm f/2.8 produces sharp images with minimal chromatic aberration. It’s a great choice for sports, wildlife, and portrait photography. Check out our in-depth review to learn more about the 70-200mm f/2.8.
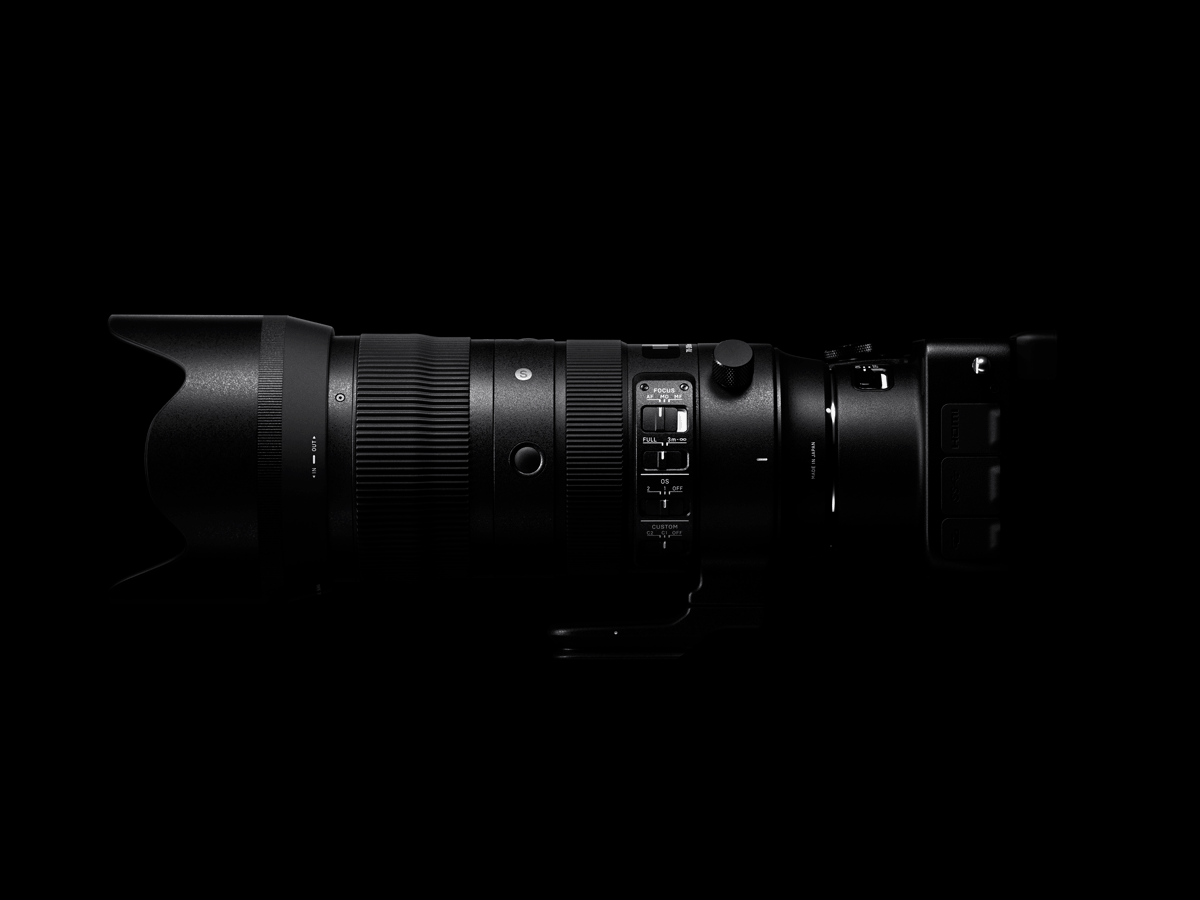
Sigma 70-200mm f/2.8 DG OS HSM for Canon, Nikon, Sony, and Sigma DSLR cameras
Monopods and tripods support your sports photography camera but have some key differences. A tripod has three legs and is more stable, making it ideal for long exposures. A monopod has one leg and is more mobile, perfect for action shots.
A monopod is your best bet if you need to move around quickly. It’s lighter and easier to set up than a tripod. But a tripod is the way to go if you want to shoot seconds-long exposures, like blurring sports action.
Some tripods convert into monopods, giving you the best of both worlds. Some monopods have small support legs for added stability. Check out our in-depth guide to learn more about the differences between a monopod and a tripod.
Monopods are great tools for sports photographers who need extra stability but want to stay mobile. They’re lighter and more portable than tripods. Monopods are perfect for sports, wildlife, and event photography.
When choosing a monopod, look for one strong enough to support your camera and lenses. Carbon fiber and aluminum models are lightweight yet durable.
Some monopods have extra features like quick-release locks and padded grips. Others have retractable feet for added stability on uneven ground.
The best monopod that’s right for you depends on your budget and the type of photography you do. But with options at every price point, it’s easy to find one. It improves your shots and makes your life as a photographer easier.
Lightroom sports presets are a quick way to improve a batch of sports photos with a click. They work like filters, adjusting details like exposure, color, and clarity to give your images a polished look.
Installing and using Lightroom presets is simple. You can find many free and paid options online, like the Workout Lightroom Presets that create an airy feel and soften skin. The Canon Sports Photography Presets are also popular, offering color and black-and-white options.
When choosing a preset, consider the lighting and environment of your sports photos. Water sports may benefit from the Vibrant Colors HDR Lightroom Preset. The Grungy Sports preset works well for dramatic, cinematic shots.
With so many presets, finding the perfect look for your sports photography is easy. For more information about Lightroom sports presets, check out our in-depth article.
Sports photography keeps us connected to the sports we love. These photographers capture our favorite sports’ actions, emotions, and behind-the-scenes moments.
From surfing to skateboarding, basketball to baseball, these people immerse us in the sports and lifestyles we admire. They have the skills to freeze fast-paced action and the creativity to reveal the personalities of athletes and fans.
Explore the portfolios of these influential photographers. Whether you’re a sports fan or an aspiring photographer, they’ll inspire you. If you want to learn more about the exciting world of sports photographers, check out the full article.
Surf photography captures the beauty and power of the ocean. The best surf photographers have a unique ability to freeze time, showcasing the waves and surfer in a sculptural way.
These photographers often evoke the feeling of being in the water. They point their camera toward a surfer poised on their board, hanging onto the wave.
Some photographers take a less extreme approach. They capture surfers enjoying smaller waves and relaxing on their boards past the break. Others focus on the beach lifestyle, perfectly capturing the essence of surf culture through their lens.
From big wave surfing to abstract forms created by the ocean, these photographers deliver a wide range of stunning images. Check out their portfolios to see incredible work from surf photographers. Follow them on social media for a daily dose of ocean inspiration!
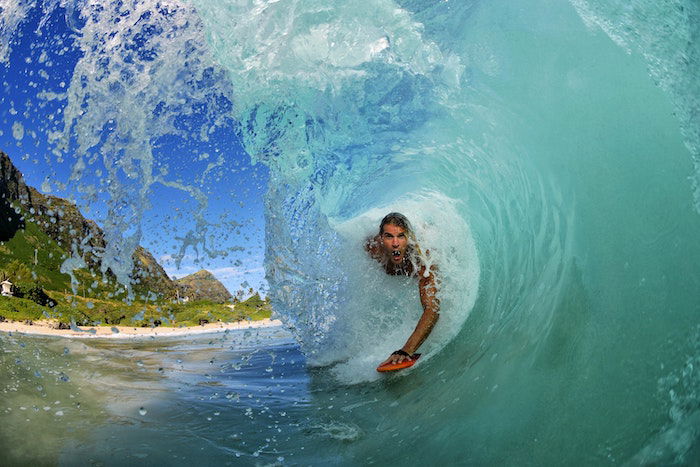
Nikon D7200, 10.5mm, f/6.3 , 1/1,600 s, ISO 200. Drew Farwell (Unsplash)