Ever wonder how to create a tilt-shift effect without buying special lenses? You can do that with freelensing! Our article shows you how it works and how to use it for your photography.
What Is Freelensing in Photography?
Freelensing is a technique that involves detaching the lens from the camera mount. It produces effects similar to a tilt-shift lens.
When using a lens normally, you can only blur the foreground and the background. If you remove it from its mount, you can select specific areas to be in focus regardless of where they are in the frame.
If you’re taking portraits, you can blur out everything except the person’s head. And if you want, you can even focus on just the eyes or the nose.
This phenomenon happens because removing the lens alters its plane of focus. That’s the area of sharp focus for a lens. When the lens is in its normal position, its focus plane is parallel to the camera sensor. That’s why you get distinct blurry foregrounds and backgrounds.
Once you detach your lens and move it around, the plane of focus hits different parts of the sensor. As a result, it creates an effect akin to tunnel vision.

What Are the Best Lenses for Freelensing?
First, you need an interchangeable lens camera. And some lens types work better than others when it comes to freelensing. If you have a camera and lens with fully automatic features, then there’s a good chance you can’t use them at all.
Freelensing relies on a lens’s ability to open or close the aperture independently. Some newer lenses automatically close the aperture when you detach them from the camera. That means it won’t let you take any pictures at all!
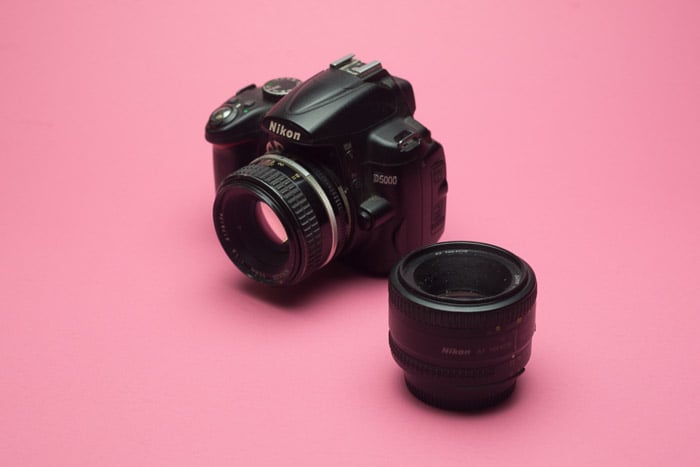
You can solve this issue by using an old film photography lens instead. Older lenses are mechanical. Most have aperture rings that let you change the aperture whether they’re attached to the camera or not.
You don’t have to get a fully mechanical lens. You can also use one with auto features if it has a manual aperture ring. Popular camera brands such as Nikon or Canon have a wide range of lenses with manual controls you can try for freelensing.
But what if you have a digital SLR brand such as Sony that doesn’t have old mechanical lenses? The simple solution is using a lens adapter to fit third-market lenses. Or you can simply place a loose-fitting lens close to the mount instead.
And if you’re wondering, “Can you free lens with a mirrorless camera?” the answer is “Yes.” But you’ll want to be more careful using a mirrorless camera in dusty environments because it has less sensor protection without a mirror.
How to Do Freelensing
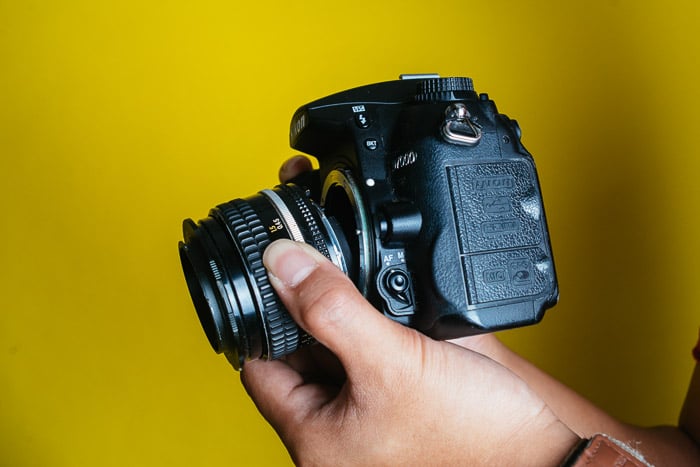
Freelensing may sound technical, but it’s easy to do, even for beginners. As mentioned, simply remove the lens from your camera and move it around to produce creative blur effects.
You can tilt the lens up, down, left, or right to select your focus area. It requires a bit of experimentation to pinpoint the sharp area in your frame. Take your time to adjust your lens until your main subject is in focus.
The secret is not to detach the lens from the camera entirely. Otherwise, everything in your frame looks blurry. Once you twist and detach the lens, ensure it remains in the mount. Just pull it away enough to let you tilt it around slightly.
If everything looks blurry, your lens is too far from the mount. So, readjust accordingly until a fraction of the frame is in focus.
You can also try reverse freelensing. This is where you turn your lens around so it’s reversed. This creates a macro photography effect. If you want to try a more stable version of reverse freelensing, read our article on how to use lens reversing rings.
Recommended Camera Settings for Freelensing
It’s always best to use manual settings when freelensing. After all, you effectively turn off all the automatic settings once you detach your lens from the camera.
To make it easy for you, start with Aperture Priority mode first. Set the aperture and let the camera decide which shutter speed to use.
Next, find an area you want to photograph and half press your shutter to get your camera’s exposure reading. Take note of the shutter speed and then switch to Manual mode.
Move the camera dial or change the settings responsible for the shutter speed. Keep scrolling or adjust the settings until you reach the same value you noted in Aperture Priority.
So why switch to Manual mode when you’re using the same exposure values as Aperture Priority? After you remove the lens, it won’t be able to communicate with the camera anymore.
As a result, you either get an error or end up with badly exposed shots. Manual mode solves all this by letting you shoot without the lens attached. It’s also a great way to get used to manual settings in general.
How to Focus Your Lens
Again, when freelensing, your lens’s autofocus will not work since it’s not attached to the camera. So, it’s best to learn to use manual focus to ensure your subject stays sharp.
Focusing while the lens is not attached can be challenging. So, to keep the process simple, determine focus while the lens is still mounted to your camera.
After your main subject is focused, detach the lens and start tilting it around. You’ll see the focus area change as you move the lens.
Stay in the same position when taking photos, and ask your subject to do the same. Otherwise, everything will be thrown out of focus. You may have to refocus your lens once again.
Since there’s space between your lens and camera, don’t be surprised if you encounter light leaks. To counter this issue, move to a spot where the light doesn’t directly hit your camera.
Even if you do this, there’s no guarantee to get rid of it completely. So, just enjoy the unpredictability it brings to your photography.
Take Advantage of Light Leaks
Light leaks are ugly in most cases. But they can also create interesting looks if you learn how to use them to your advantage. The secret is to ensure the lens flare doesn’t obstruct your main subject. And you can do this by turning on your Live View.
After you detach your camera, move around to see where the light is leaking into your frame. Ideally, you want it on the corners or sides. Stop and take a photo when you see a nice light leak on your screen.
This doesn’t always work. But at least you can place the light leak, especially if it is unavoidable.

How to Avoid Dust Spots When Freelensing
Freelensing isn’t a practice that camera manufacturers would recommend photographers do. It produces cool effects. But it can affect the performance of your camera if you’re not careful.
A critical issue when freelensing is that your sensor could gather dust. When there’s a gaping space between your lens and camera, all sorts of particles can get in. Consequently, your pictures could end up with many tiny spots caused by dust on the sensor.
DSLR sensors are sensitive to dust. But you should even be more careful if you own a mirrorless camera. As mentioned, this is because it doesn’t have the protection of a mirror (however minimal) that DSLRs have.
To avoid this problem, only do freelensing in places with minimal dust. If you’re in dusty places like beaches, deserts, or even old buildings, you’re better off not using this technique.
Also, only remove your lens when you’re ready to take pictures. After you’re done, immediately place your lens back on to lessen your chances of getting a dirty sensor.
It also helps if you take your camera to a professional for regular sensor cleaning. Or clean the sensor yourself. That way, you can always be sure your sensor is spotless.
How to Recreate Freelensing With Apps or Software
Not too keen on getting dust on your sensor? Using your favorite photo editing software or editing app, you can always fake a freelensing effect.
Freelensing uses the same principles as the tilt-shift technique. The only difference is that you use a regular lens instead of one with special optics.
Thankfully, a few smartphone editing apps like Snapseed feature a tilt-shift effect in its Lens Blur tool. All you have to do is tap the tool and select the blur settings to adjust them.
You can recreate the same effect using Radial Blur in Photoshop or Radial Gradient in Lightroom Classic.
In Lightroom Classic’s Develop mode, click the Masking icon (Shift+M) and select the Radial Gradient (Shift+W). Then, drag out the Radial Gradient mask to the area you want to keep sharp. You can also use the dots to resize and readjust the mask.
Now, return to the adjustment panel and click the Invert box to invert the mask. Next, lower your sharpness. Then, go to the Feather slider and drag the toggle to the right until the transition becomes less obvious.
Check the Show Overlay box to check how much of the photo is blurry. The blurry areas will become red so you can see them better. If you want to change the amount or location of blur, simply readjust the mask or settings again. Once you like what you see, click Done and export your photo.
Creating the freelensing effect with software or an app won’t be as good as doing it for real. But at least you can do it in post-processing if you’re uncomfortable removing your lens.
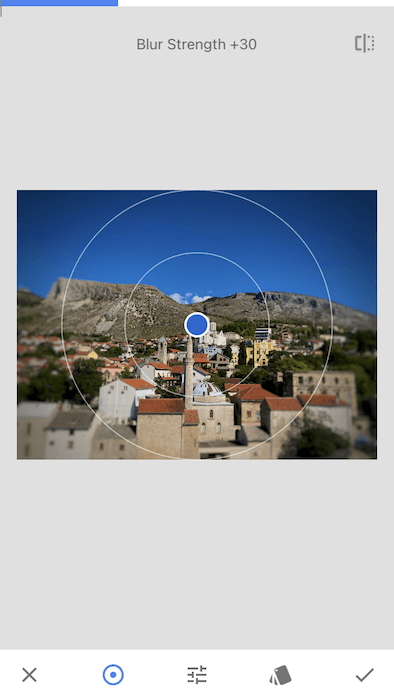
Snapseed Lens Blur tool being used for a tilt-shift effect.
Conclusion: What Is Freelensing?
Freelensing is one of the most useful photography techniques you can learn to shoot creative photos. The best thing about it is that it’s easy to do and creates surprising results.
Although doing it has potential dangers, that doesn’t mean you shouldn’t try it. Just try to do freelensing in dust-free environments and keep your camera sensor clean. And above all, enjoy the process!


