Navigating the world of Photoshop can often feel like trying to decipher a foreign language, especially when it comes to photo editing. With a vast array of tools, adjustments, and filters at your disposal, it might be overwhelming to figure out where to start. This article aims to simplify the process and guide you step by step on how to edit photos in Photoshop. From setting up your workspace to applying filters, we will walk you through everything you need to know to enhance your images and bring your creative vision to life. Whether you’re a novice just starting out or an intermediate user looking to brush up on your skills, this comprehensive guide will be your roadmap to mastering photo editing in Photoshop.
Step 1. Setting Up Your Workspace
To begin editing photos in Photoshop, you first need to set up your workspace. This involves arranging panels and customizing the toolbar to suit your needs.
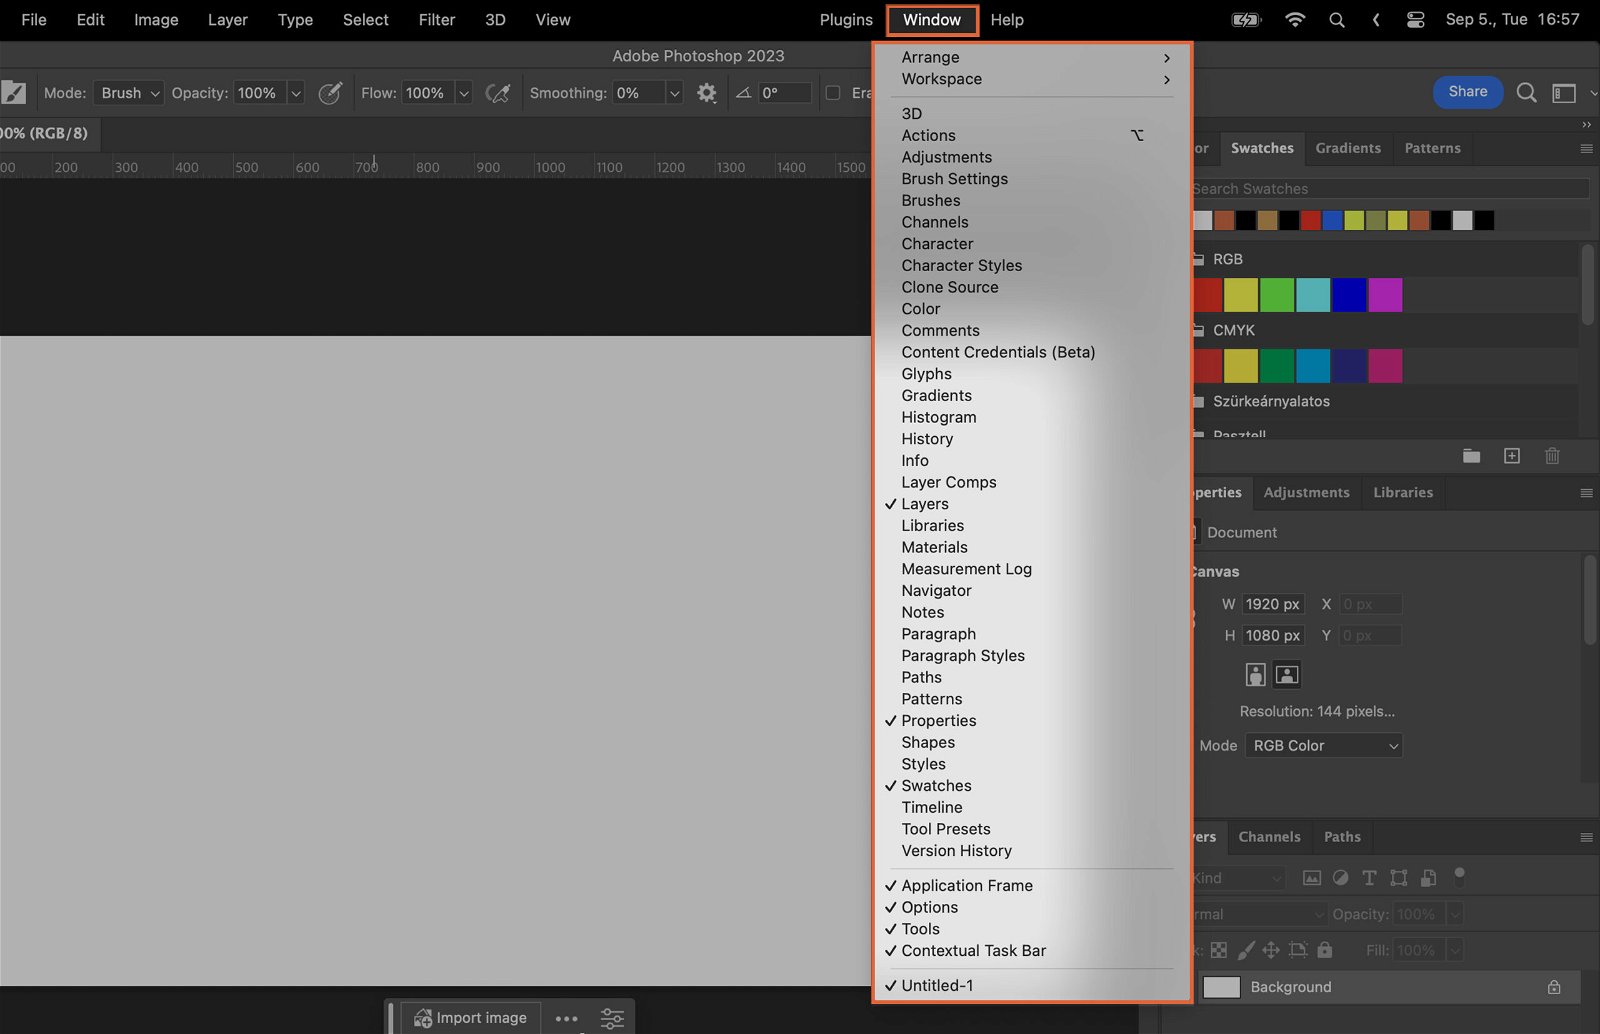
Step 1.1 Arranging Panels
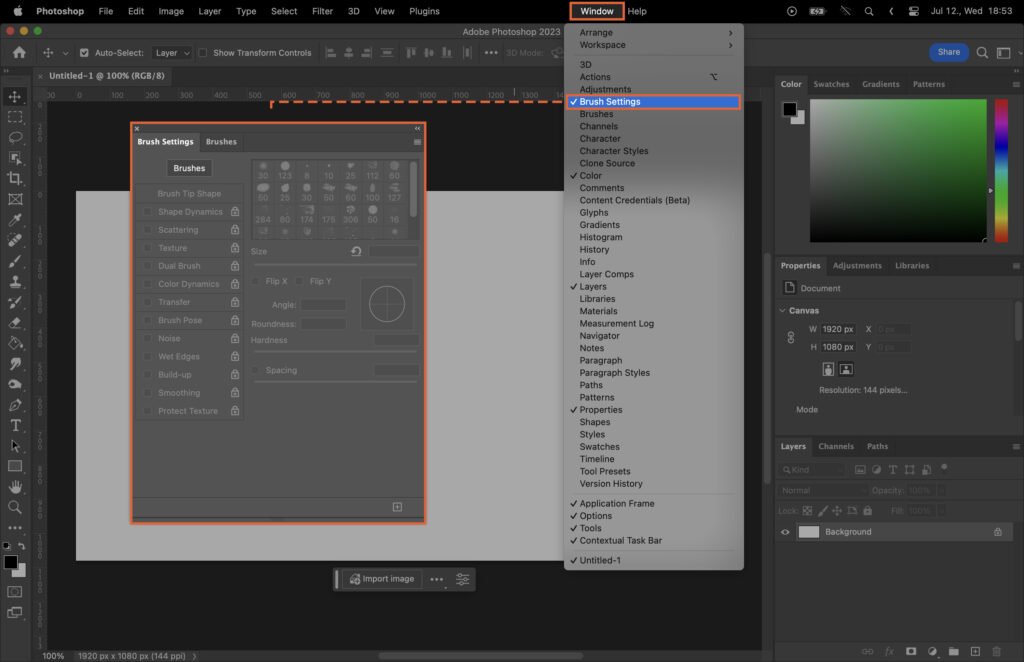
Panels in Photoshop contain features like layers, channels, and paths. You can rearrange these panels by clicking and dragging them. To add a panel, simply go to ‘Window’ in the menu bar and select the one you need.
Step 1.2 Customizing Toolbar
Customizing the toolbar will make your workflow smoother. Click on the three dots at the bottom of the toolbar, then select ‘Edit Toolbar’. From there, you can add, remove, or rearrange tools.

Step 2. Understanding Layers
Layers are key in Photoshop. They allow you to work on different parts of an image without affecting others.
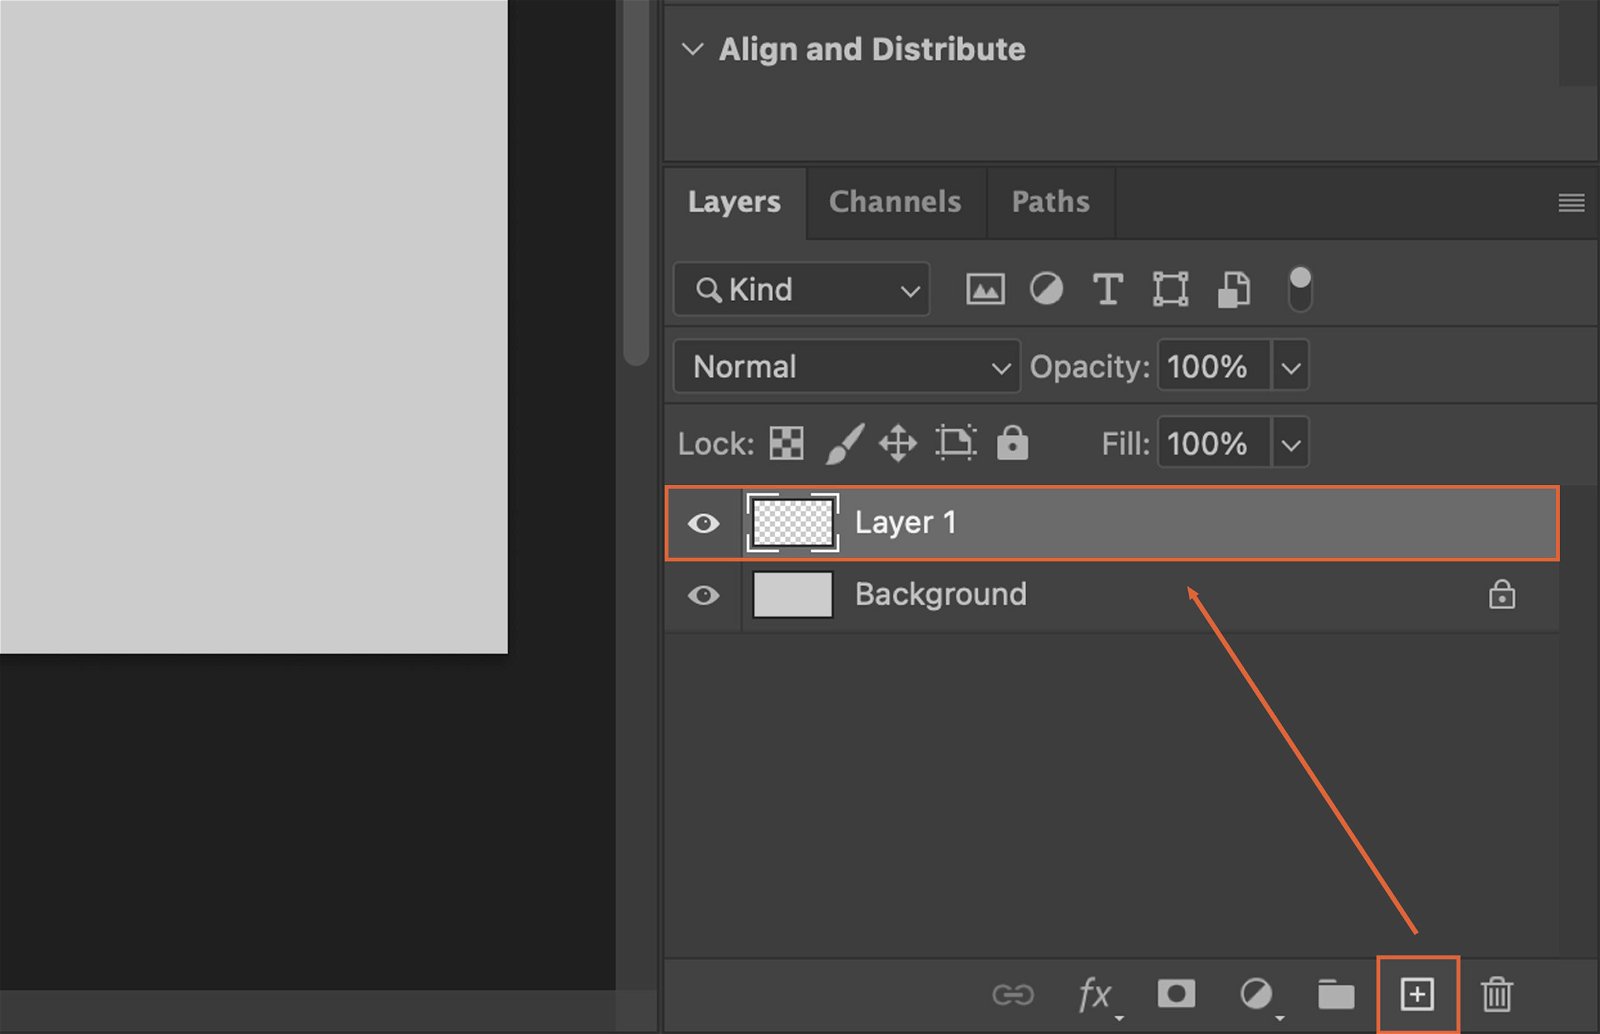
Step 2.1 Creating New Layers
To create a new layer, click on the ‘New Layer’ button at the bottom of the layers panel. You can also use the shortcut ‘Shift + Ctrl + N’.
Step 2.2 Organizing Layers
Organizing layers is important for complex edits. You can rename layers by double-clicking on them, and group them by selecting multiple layers and pressing ‘Ctrl + G’.

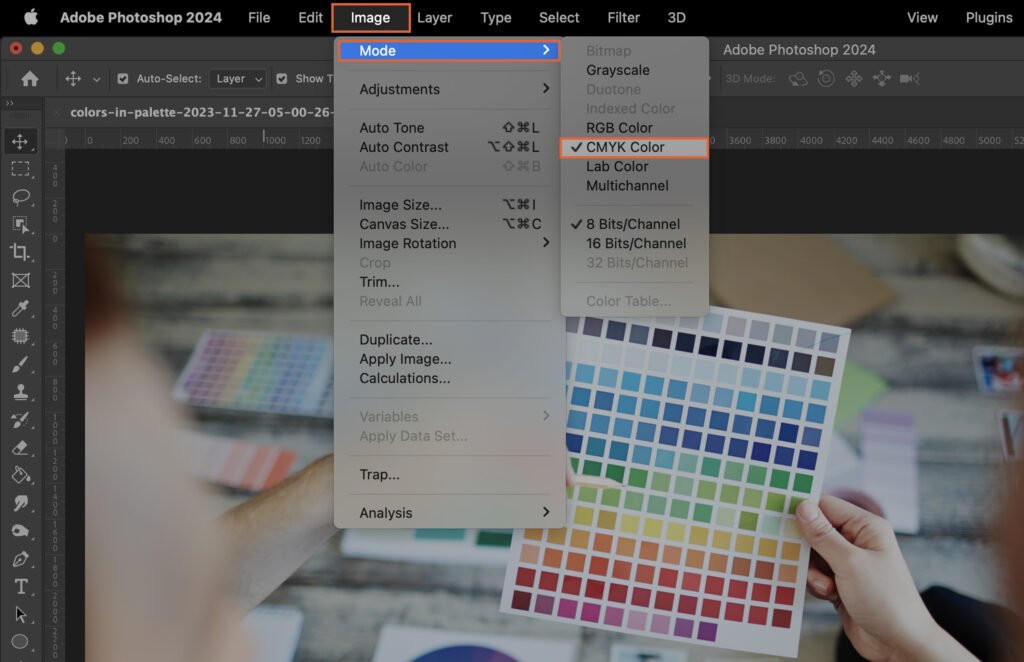
Step 3. Image Adjustments
Adjustments can enhance your image’s lighting, color, and overall look.
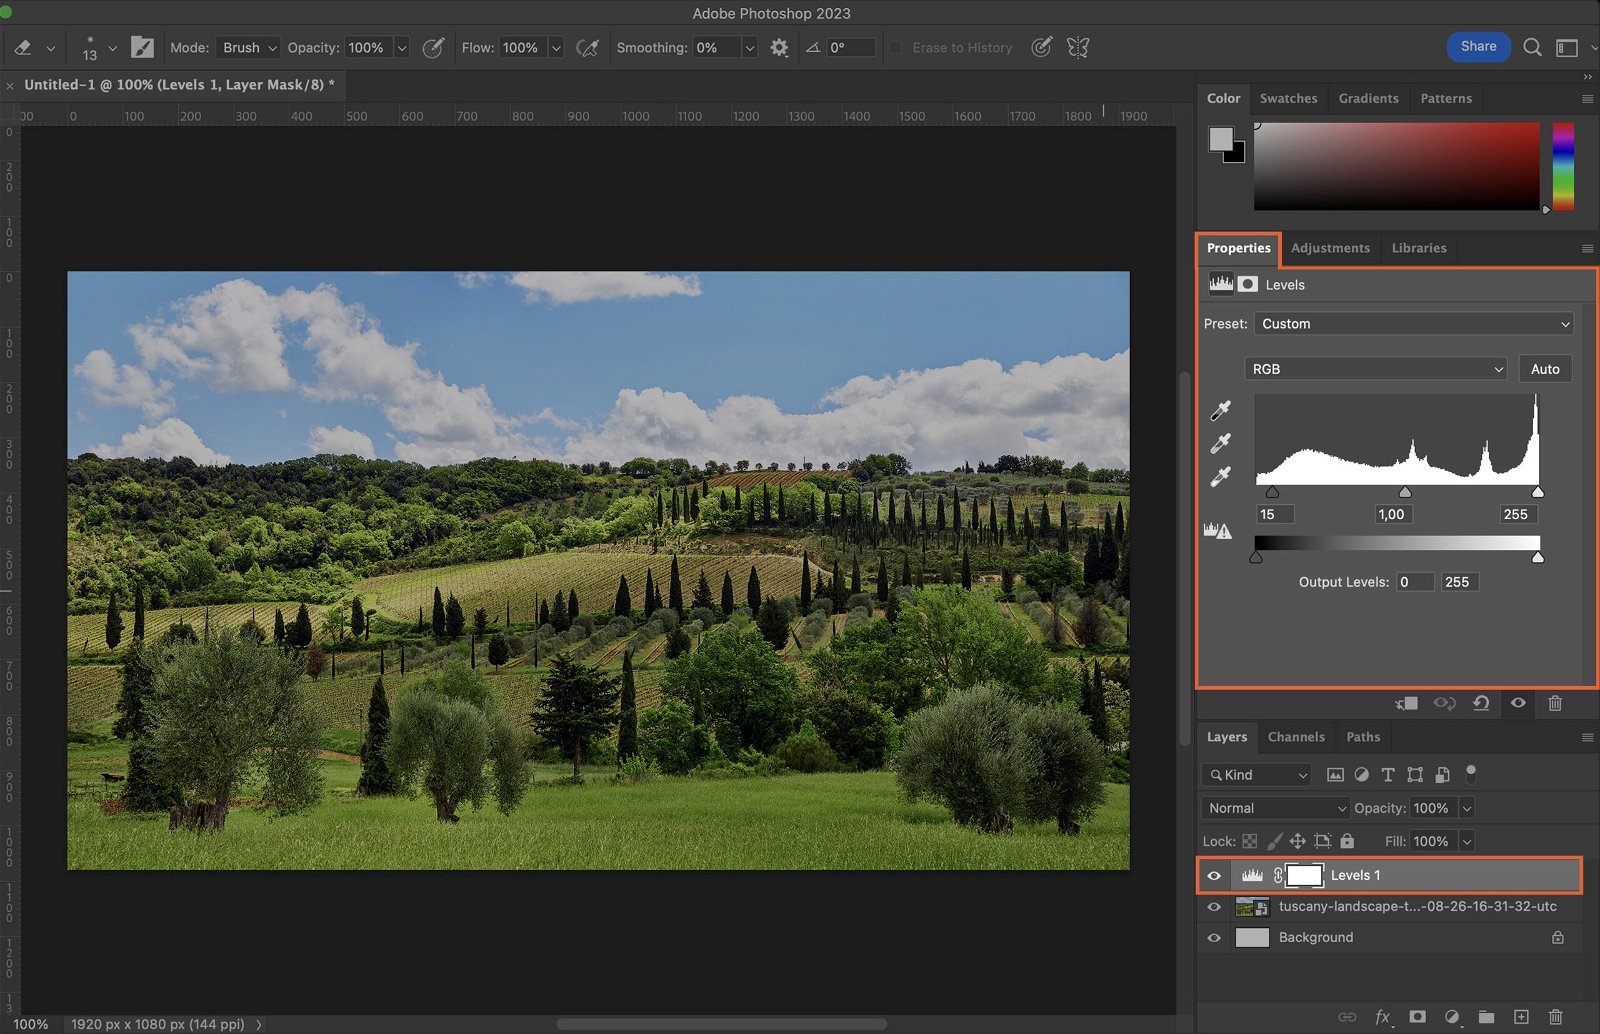
Step 3.1 Levels Adjustment
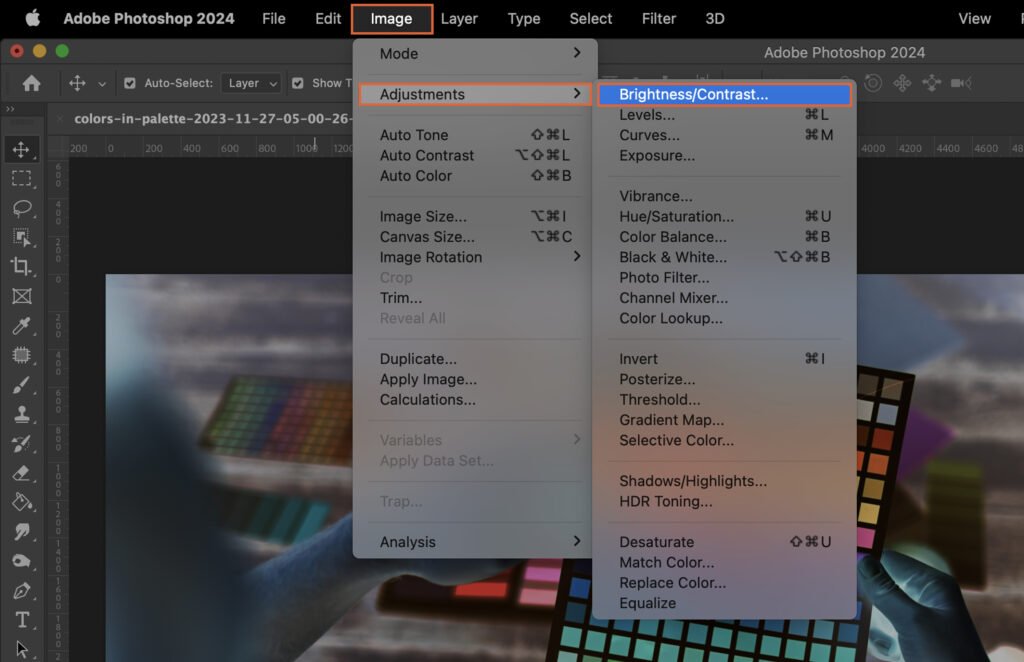
Levels adjustment allows you to adjust brightness, contrast, and tonal range. Go to ‘Image > Adjustments > Levels’ to access this feature.
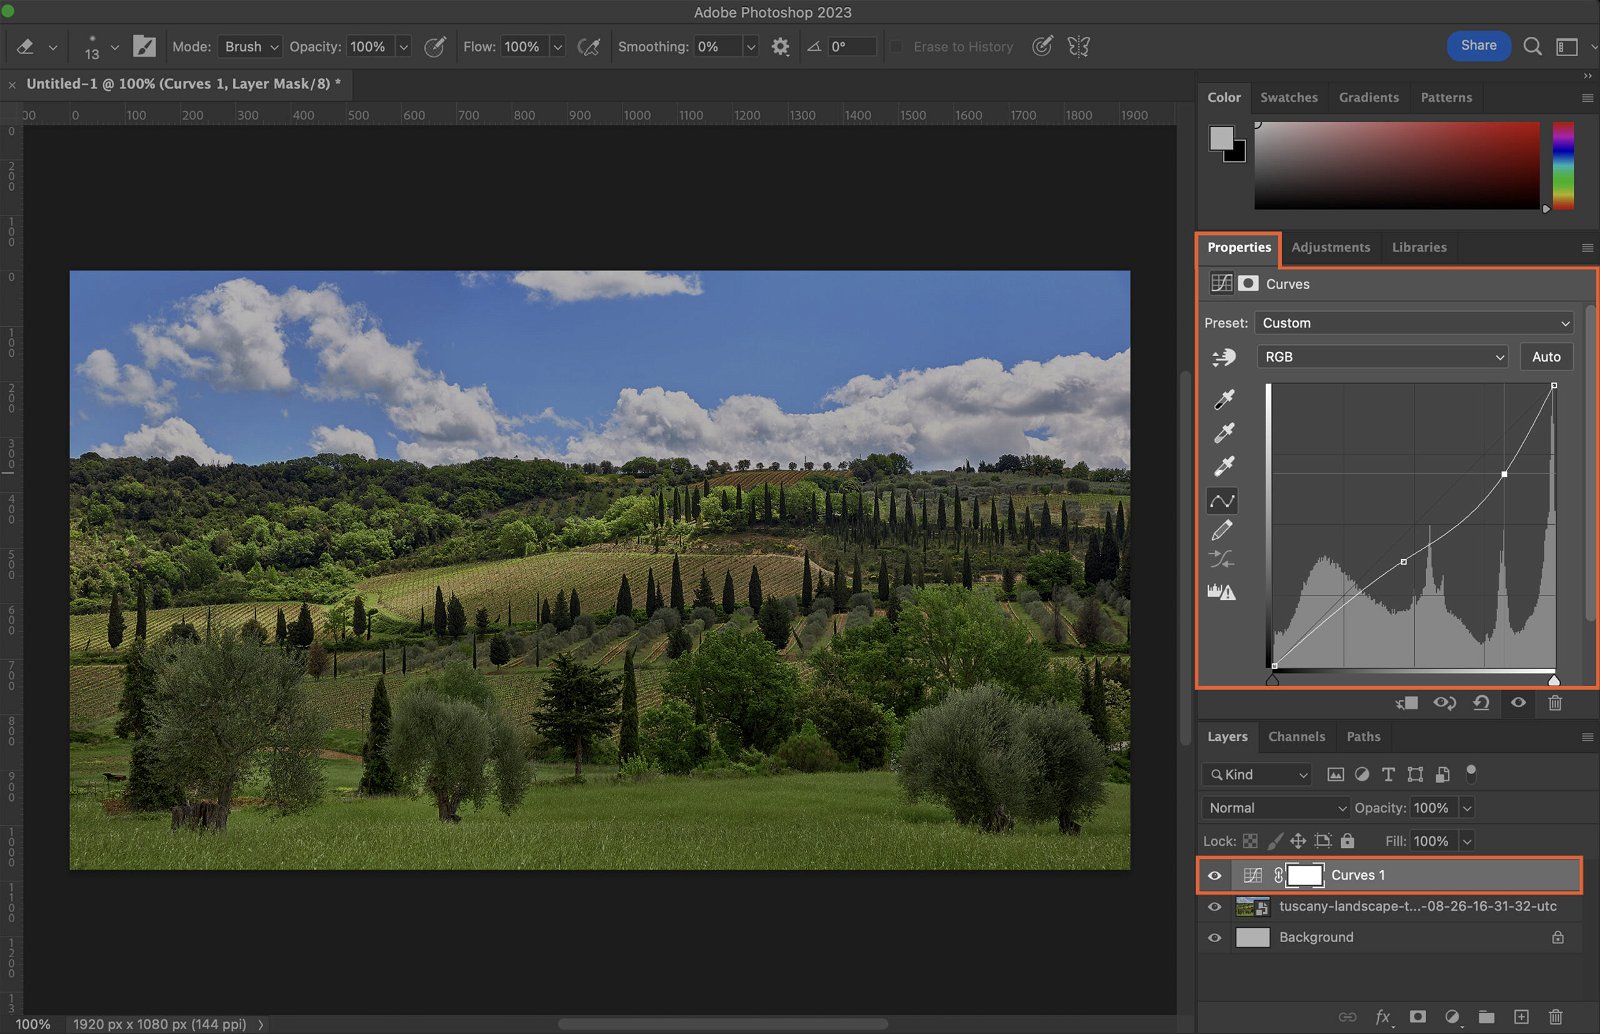
Step 3.2 Curves Adjustment
Curves adjustment lets you adjust the brightness and contrast in more detail. Access it via ‘Image > Adjustments > Curves’.
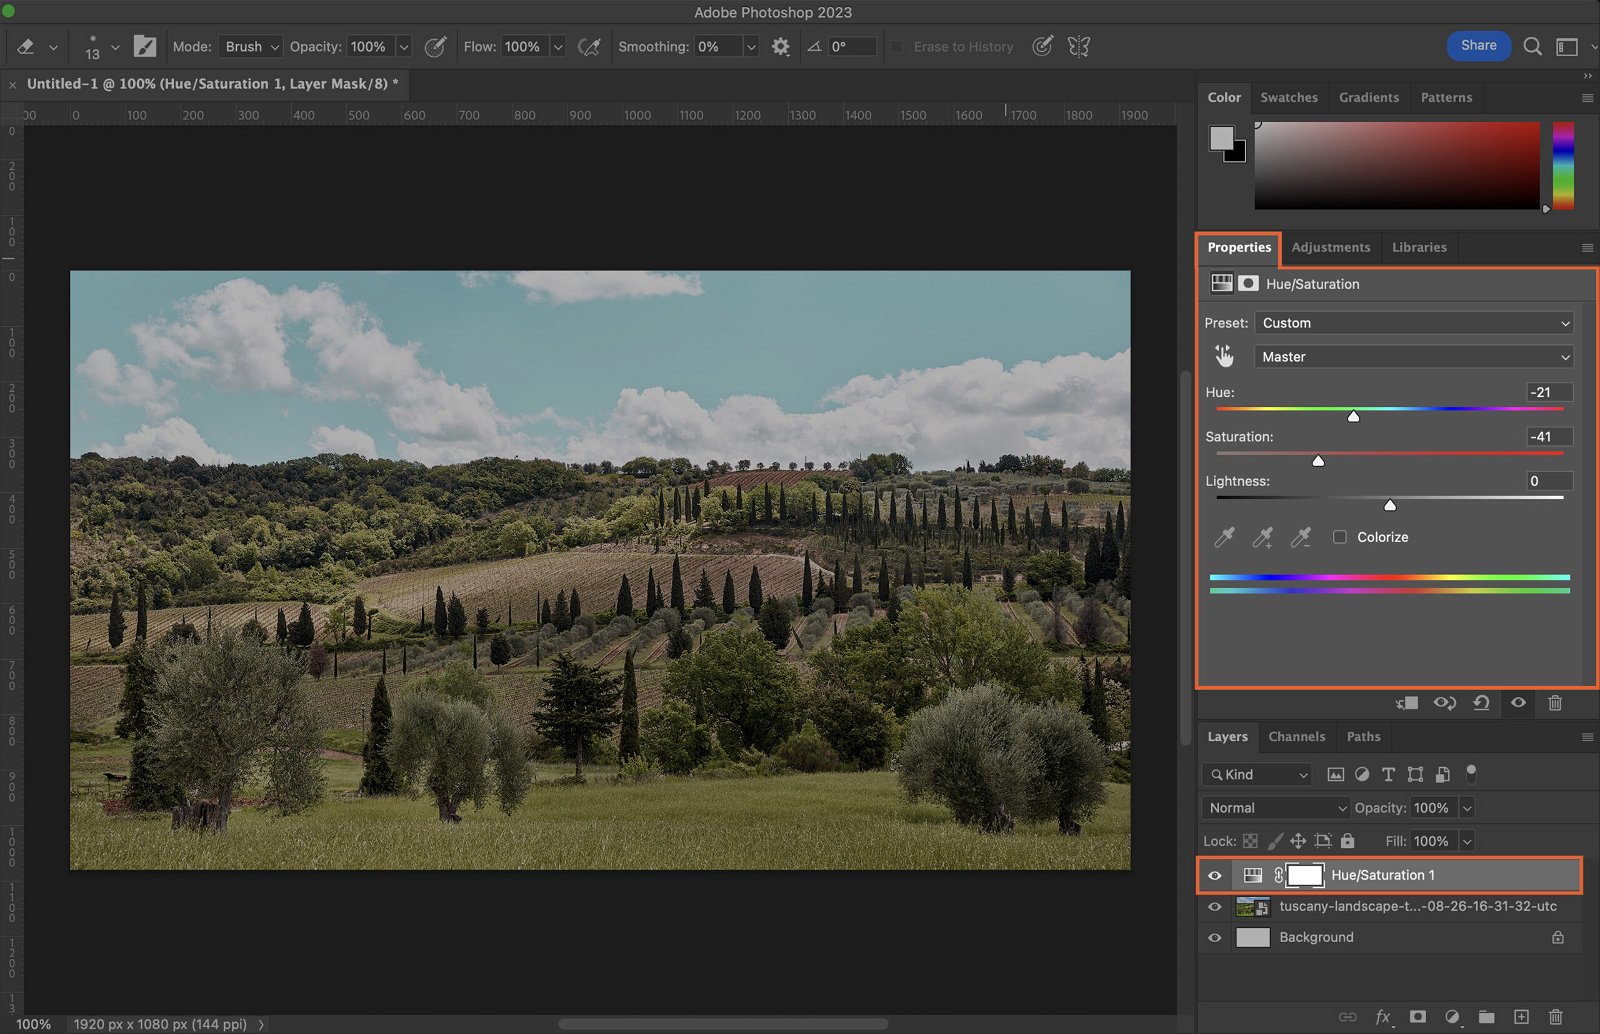
Step 3.3 Hue/Saturation Adjustment
This adjustment changes the image’s color balance. Access it via ‘Image > Adjustments > Hue/Saturation’.
Step 4. Selection Tools
Selection tools allow you to select specific areas of your image.
Step 4.1 Using Lasso Tools
The Lasso Tools let you make freehand, polygonal, and magnetic selections. Select the tool from the toolbar and draw around your desired area.

Step 4.2 Using Marquee Tools
Marquee Tools let you make rectangular, elliptical, single row, and single column selections. Choose the tool from the toolbar and draw your selection.

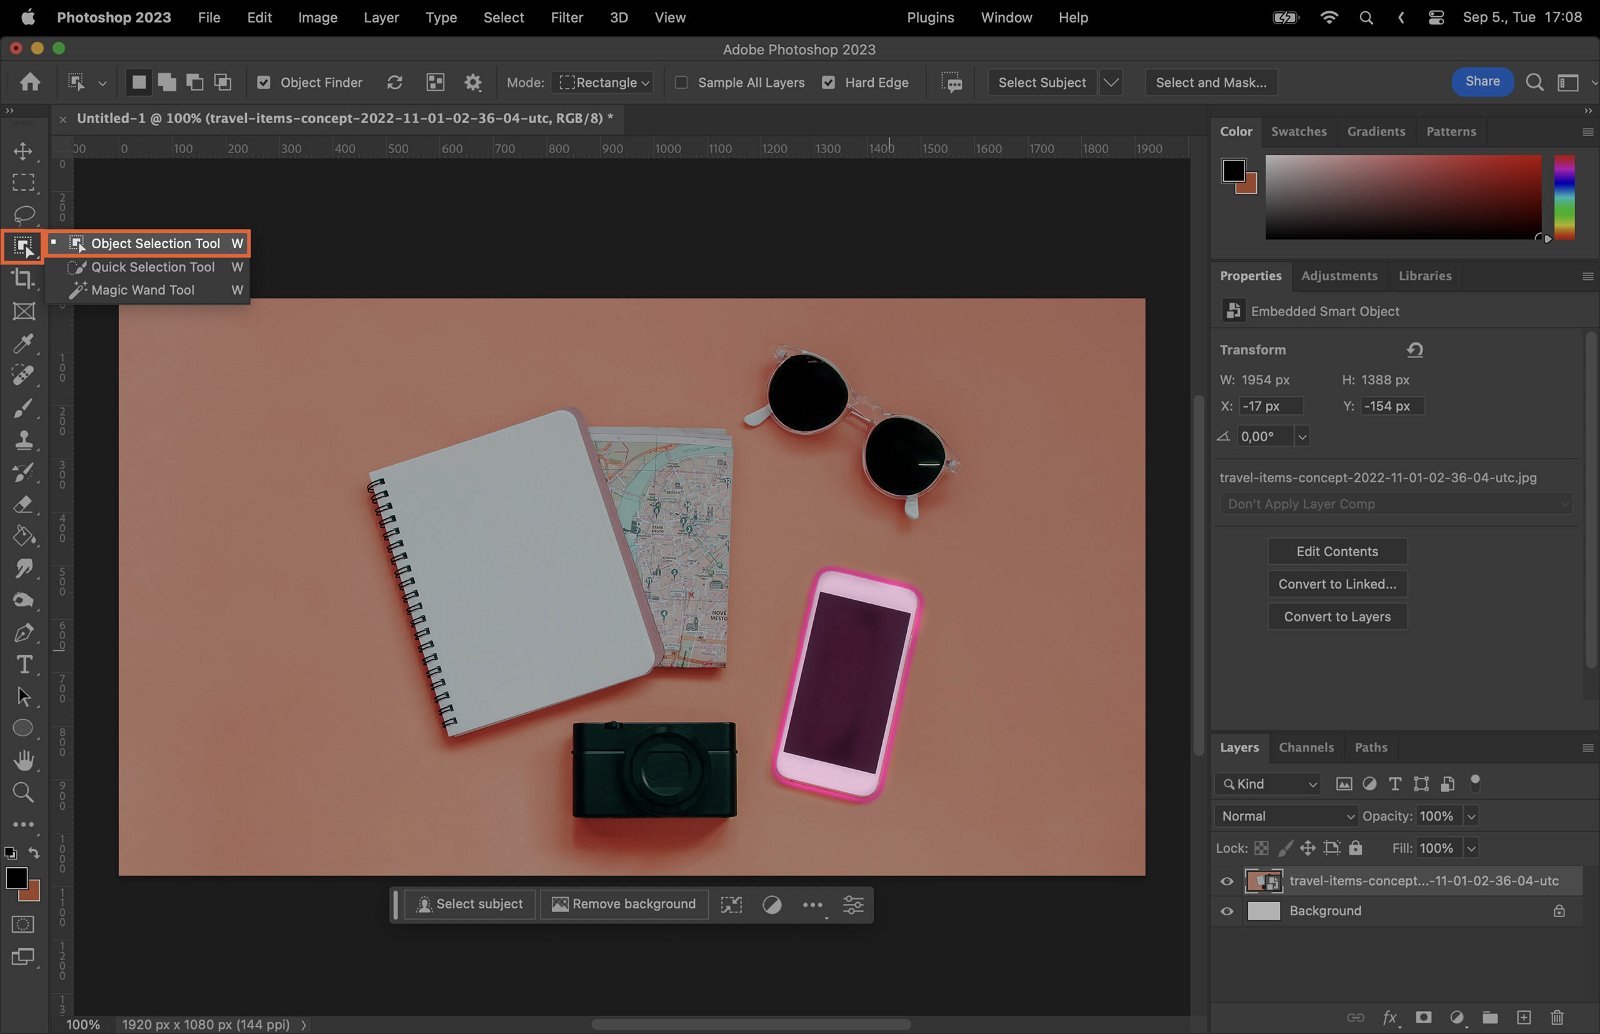
Step 4.3 Using Object Selection Tool
The Object Selection Tool in Photoshop is a powerful selection tool that uses artificial intelligence to automatically select objects or subjects within an image with just a few clicks.
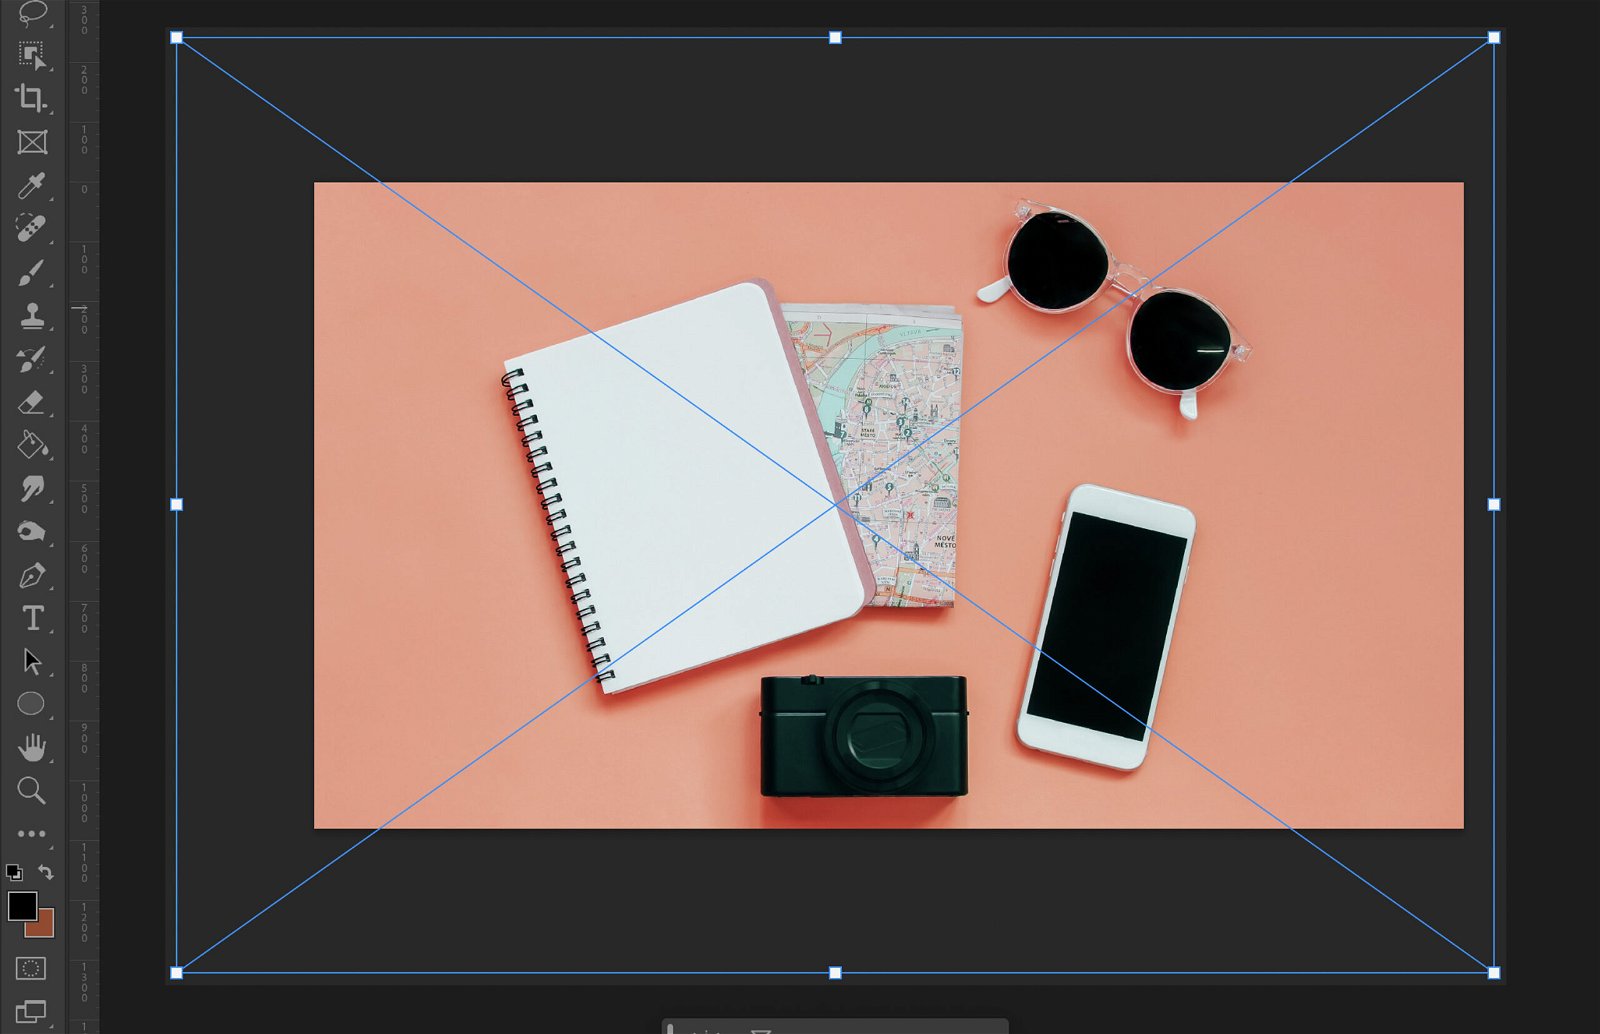
Step 5. Cropping and Resizing
Cropping and resizing can change your image’s composition and dimensions.
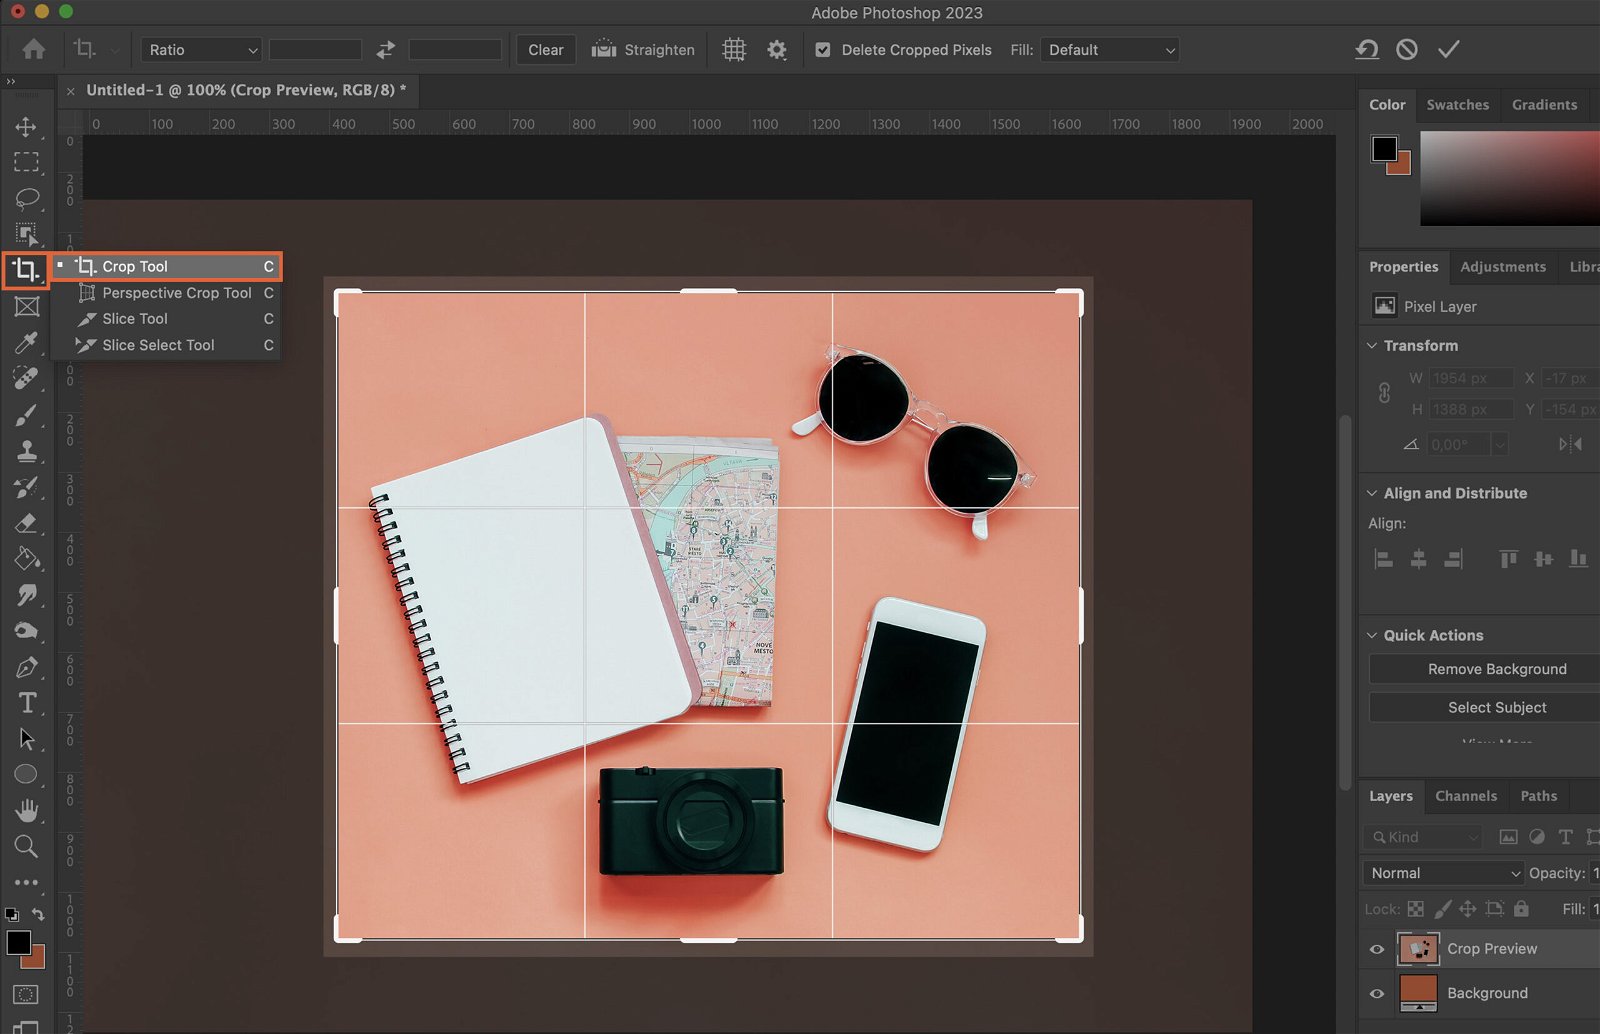
Step 5.1 Using the Crop Tool
The Crop Tool lets you trim and change the shape of your image. Select the tool, then drag the corners or edges of your image to crop.
Step 5.2 Using the Free Transform Tool
The Free Transform Tool changes the size and perspective of your image. Access it via ‘Edit > Free Transform’ or use the shortcut ‘Ctrl + T’.
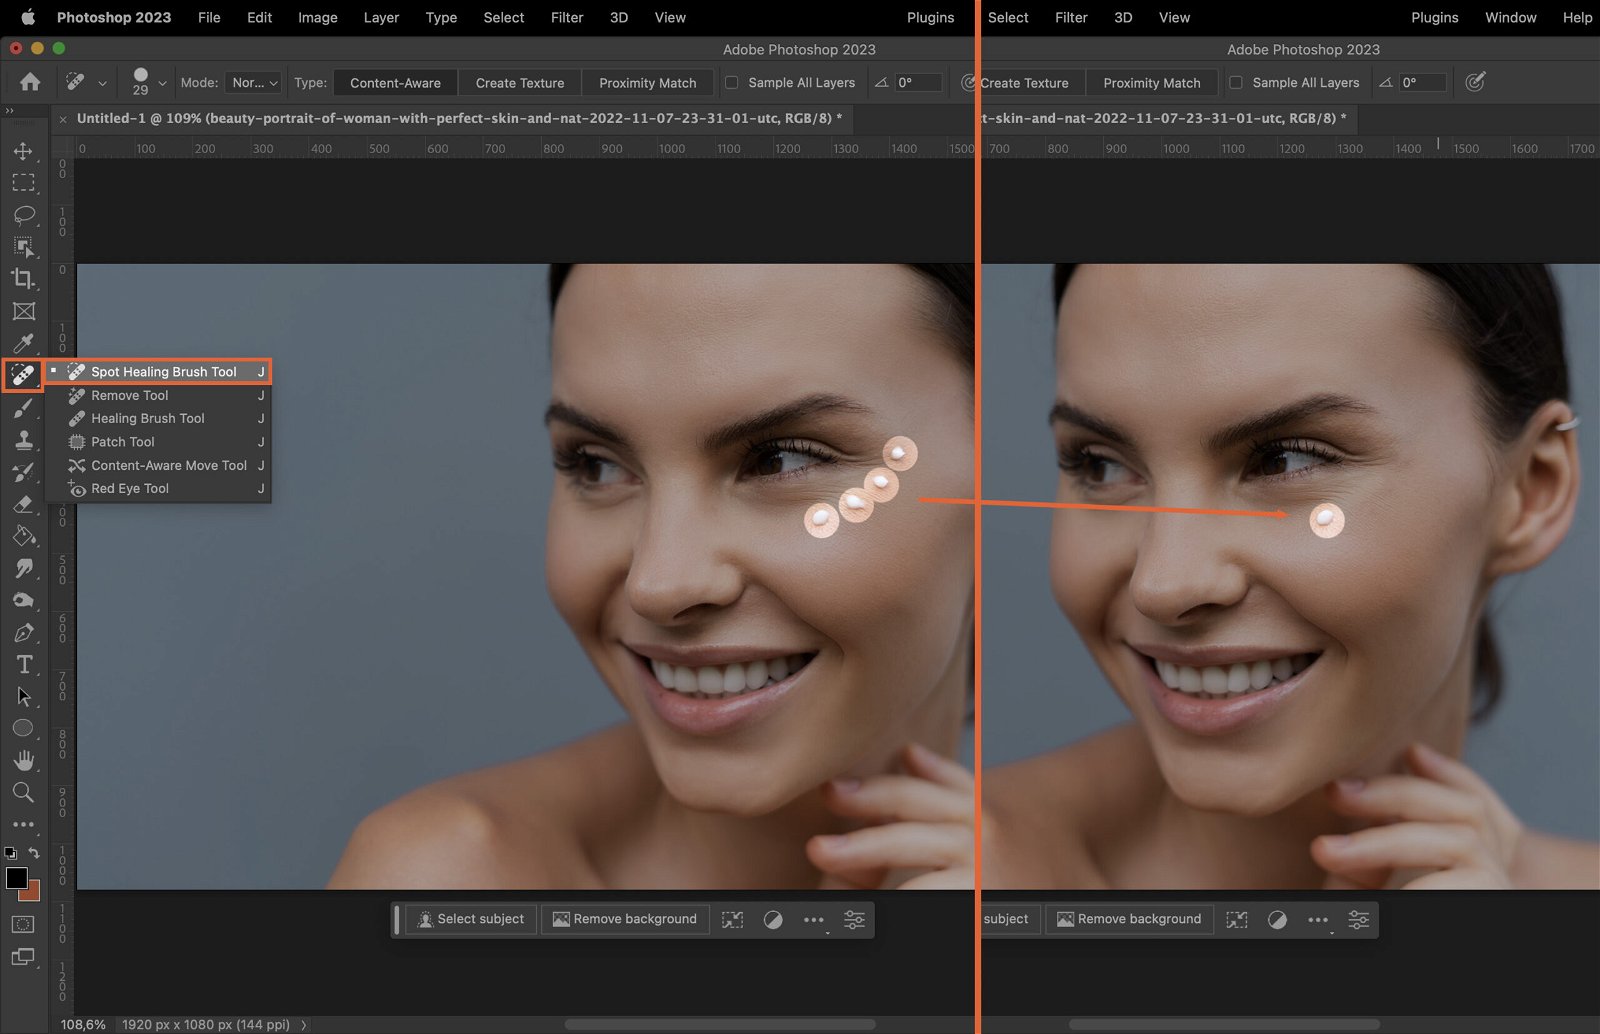
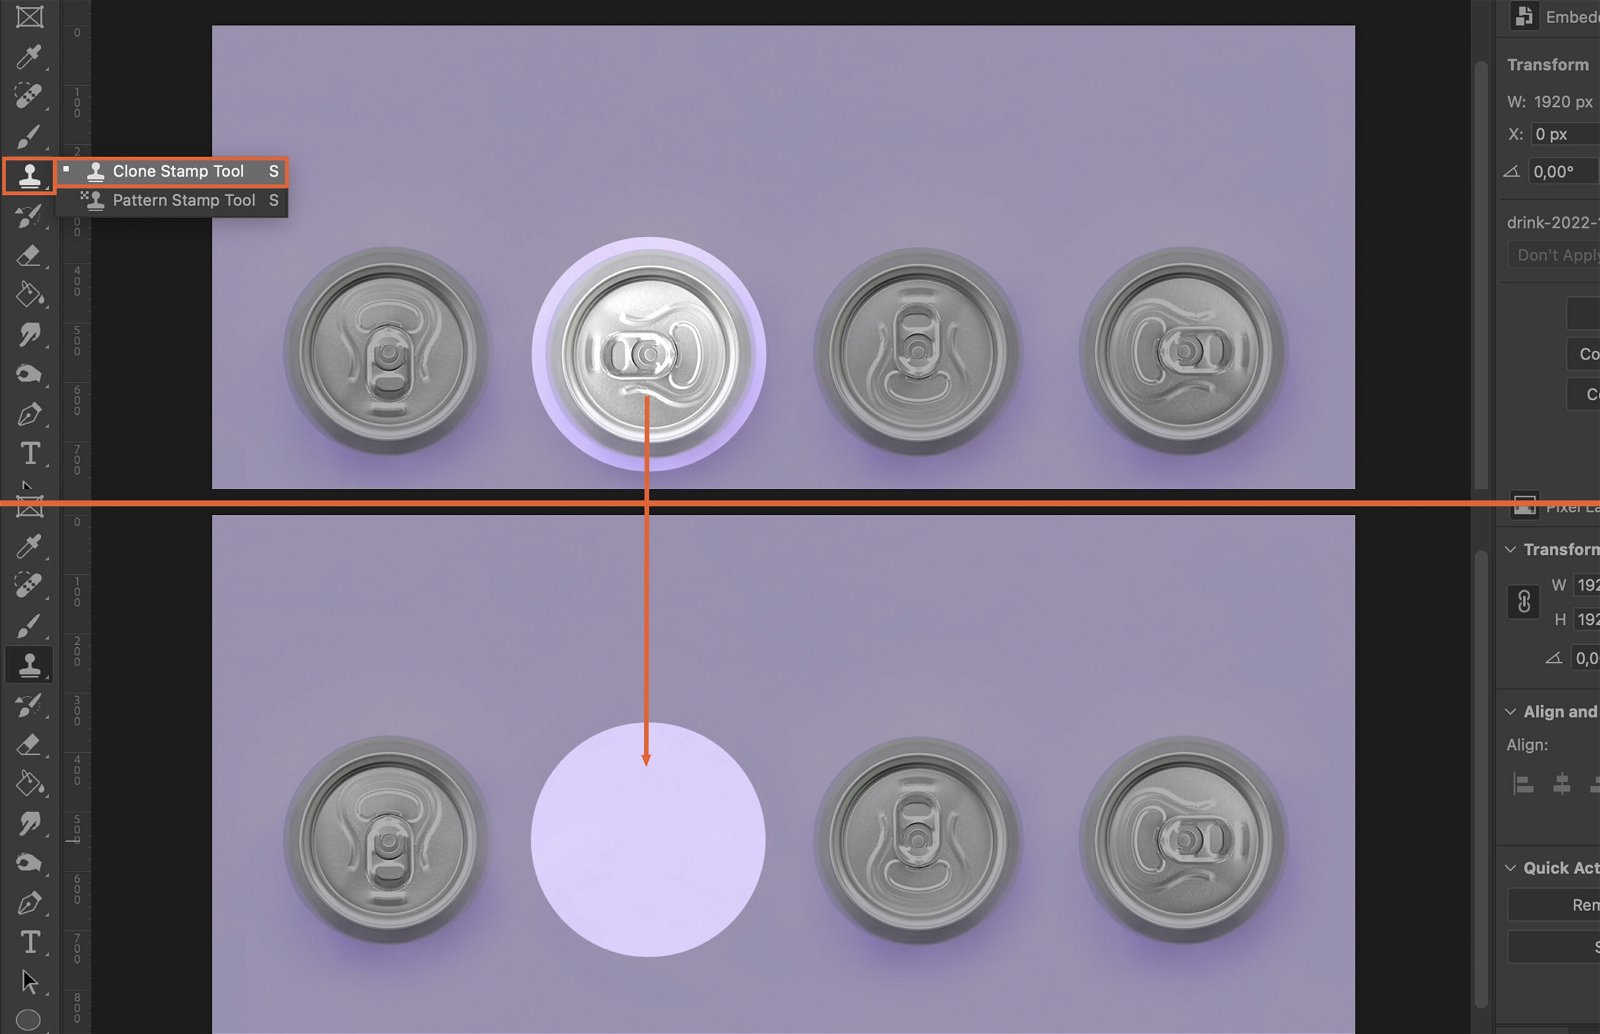
Step 6. Retouching Tools
Retouching tools help you fix imperfections in your image.
Step 6.1 Using the Spot Healing Brush
The Spot Healing Brush quickly removes blemishes and imperfections. Select the tool, adjust the brush size, and click on the area you want to fix.
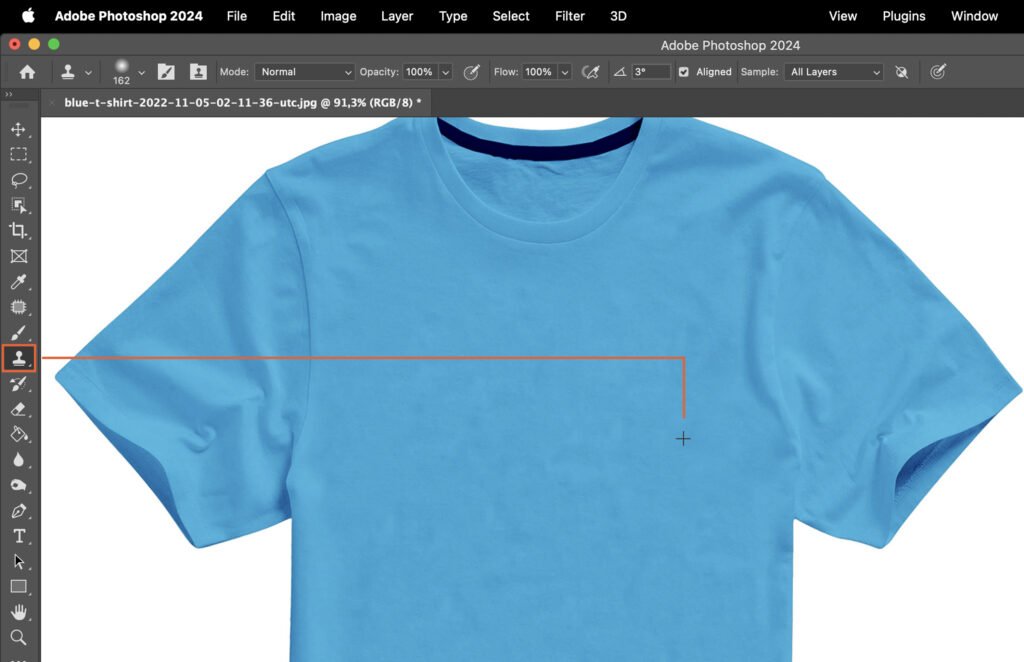
Step 6.2 Using the Clone Stamp Tool
The Clone Stamp Tool lets you duplicate parts of an image. Hold ‘Alt’ and click to select your source area, then paint over the area you want to cover.
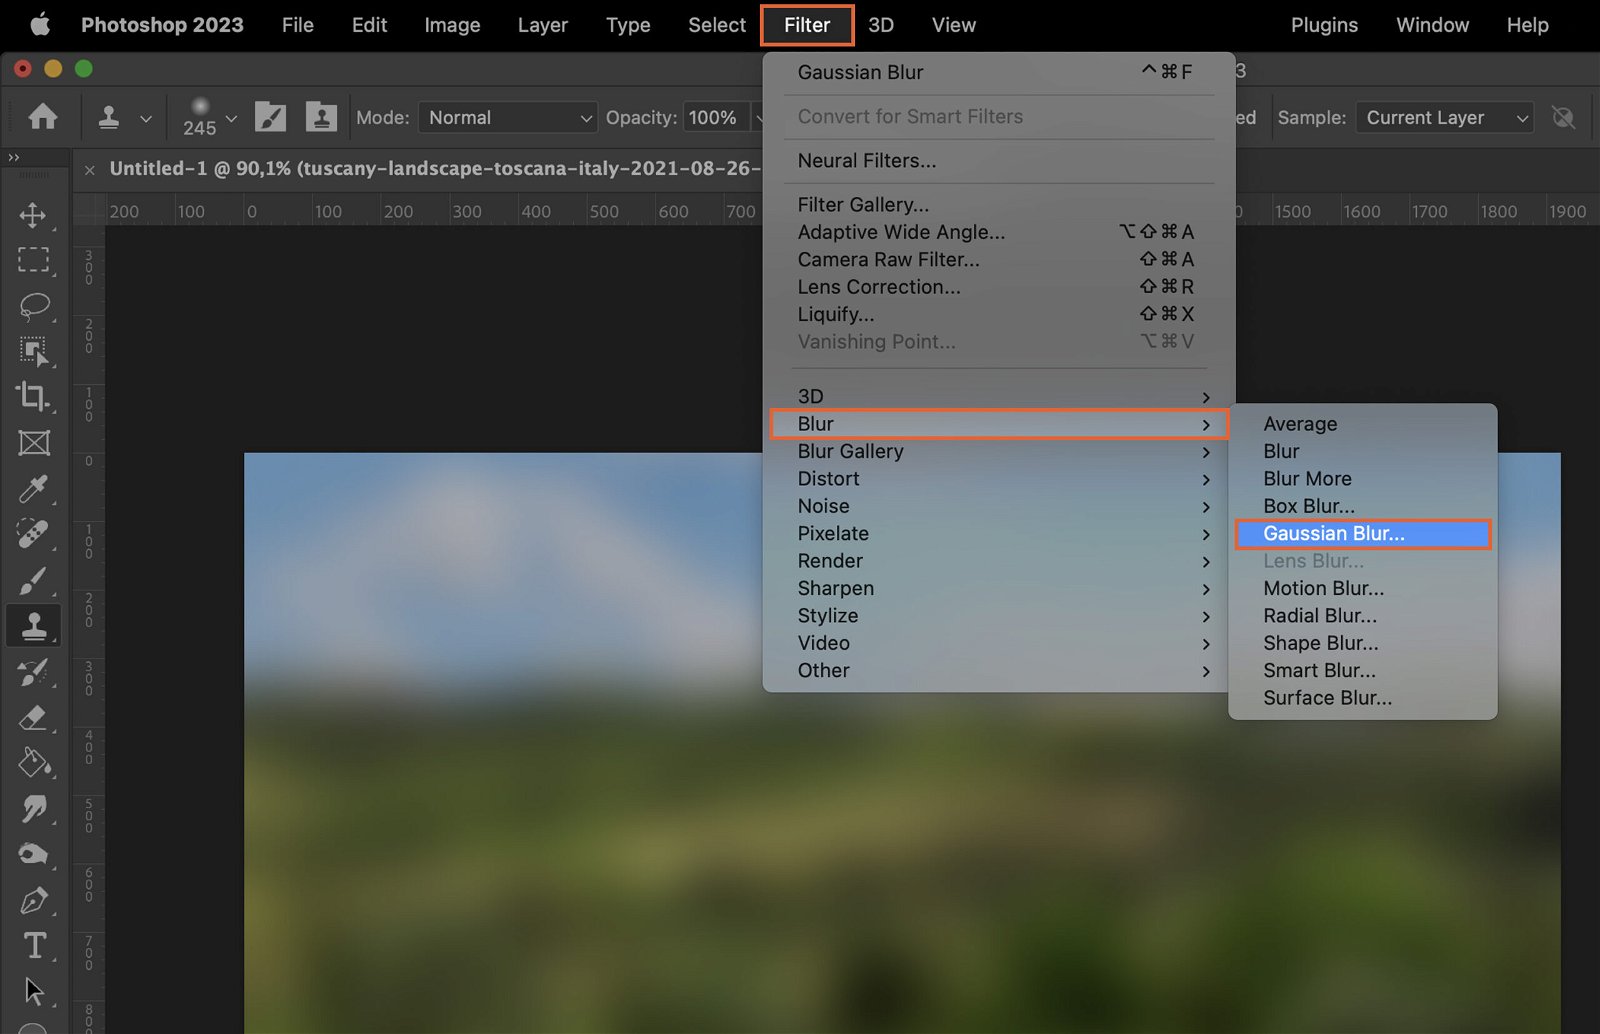
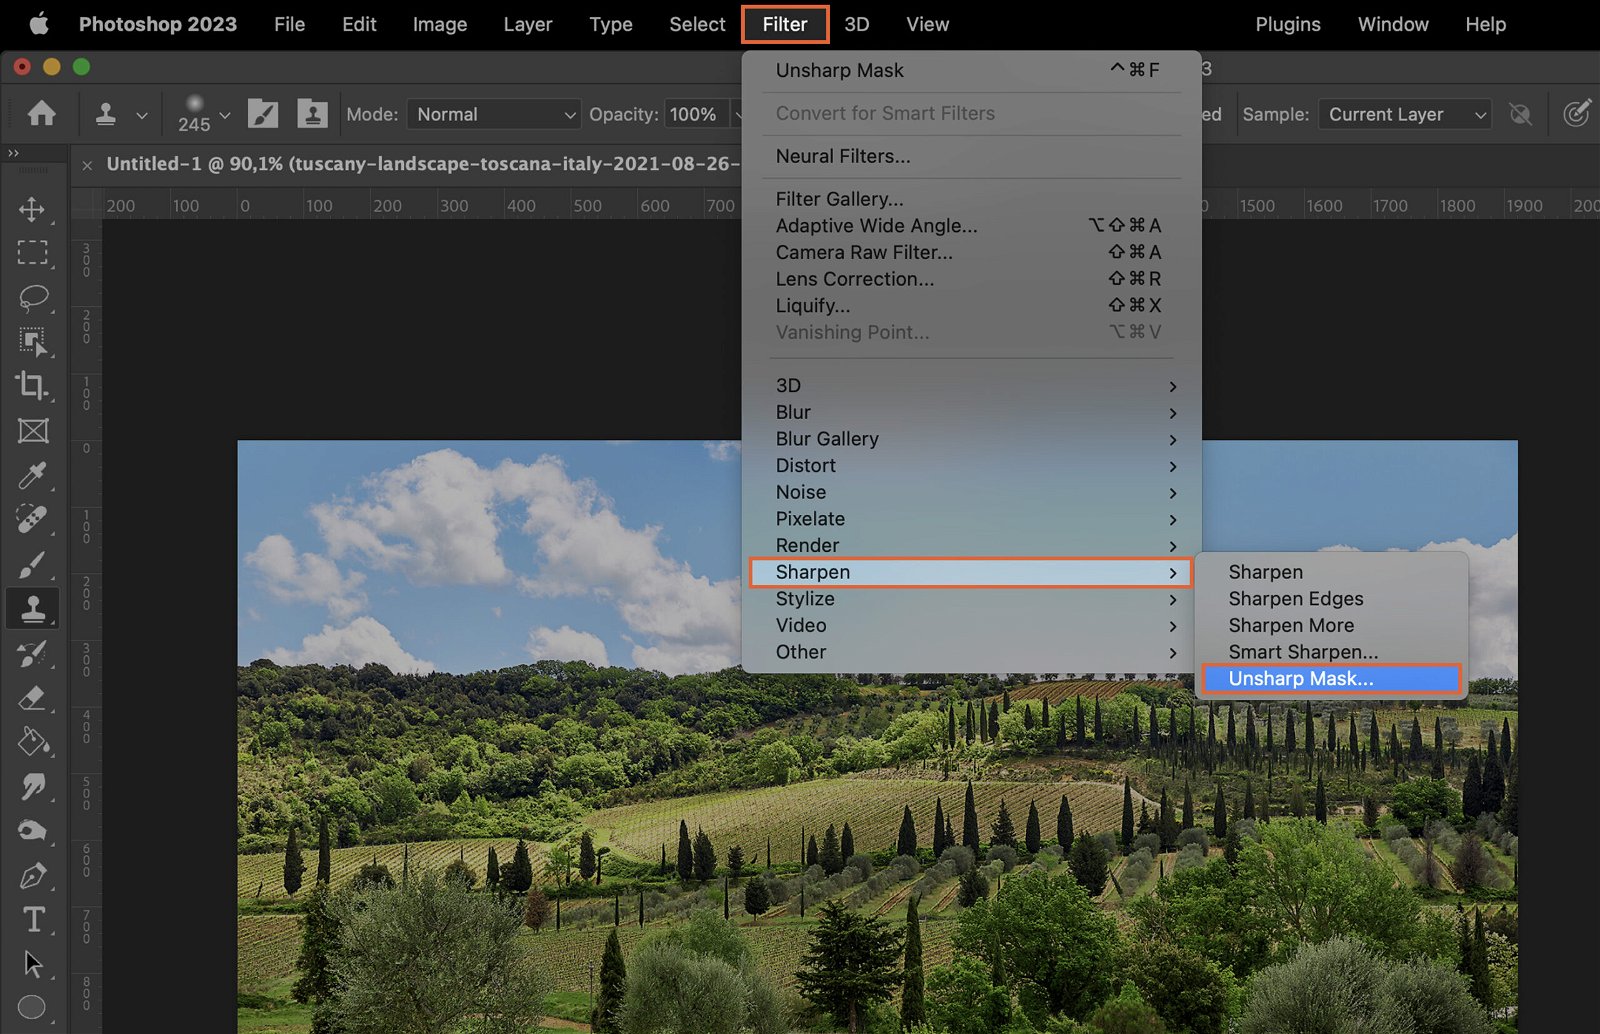
Step 7. Applying Filters
Filters can add unique effects to your image.
Step 7.1 Using Blur Filters
Blur filters soften parts of your image. Go to ‘Filter > Blur’ to access different blur filters.
Step 7.2 Using Sharpen Filters
Sharpen filters add clarity to your image. You can find them under ‘Filter > Sharpen’.
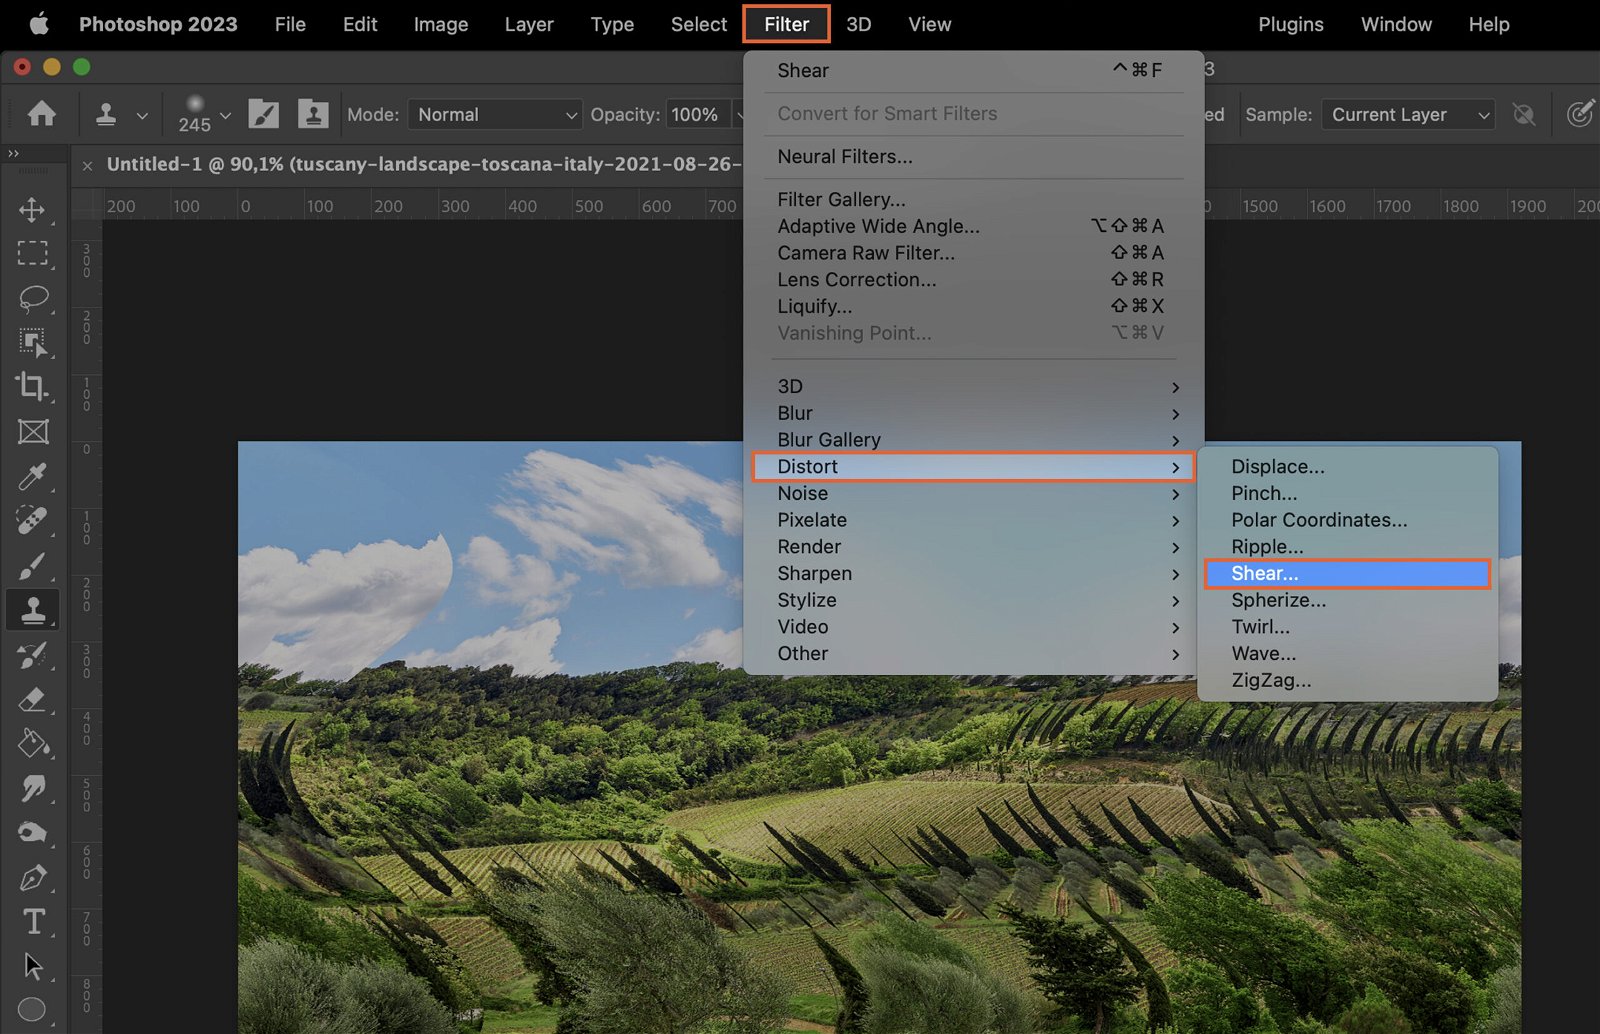
Step 7.3 Using Distort Filters
Distort filters warp your image in creative ways. Access these filters via ‘Filter > Distort’.