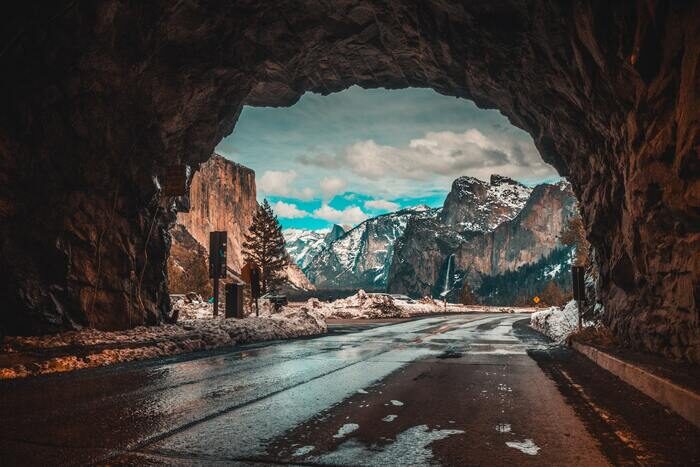
Photographing the night sky is not only about the Moon, planets, stars, deep sky objects, or the Milky Way. Comets and meteors are also some inspiring objects worth photographing.
This article will show you how to photograph meteor showers so you can get started with meteor photography.
How to Photograph Meteor Showers: What are Meteors and When Can You Capture Them?
Meteors are space debris that burn in the atmosphere when falling to Earth. While burning up, they leave behind a light trail across the sky.
Extremely bright meteors are called Bolide meteors.
If the meteor is large enough to make it to the ground, what remains is called a meteorite.
Meteorites can scar the landscape, like in the case of Meteor Crater in Arizona. It was created around 50,000 years ago from a 50m impactor and is more than 1km wide in diameter and 170m deep.
But (fortunately!) this doesn’t happen very often.

The famous Meteor Crater, in Arizona (US). Image Credit Wikipedia.
More often, meteorites are found on the ground in the form of small, iron-rich rocks. As a curiosity, the best hunting ground for them is Antarctica. They are easy to spot on the icy ground.
Meteorites fall on all bodies in the solar system. They are responsible for the many craters that make the Moon such an interesting object to photograph.
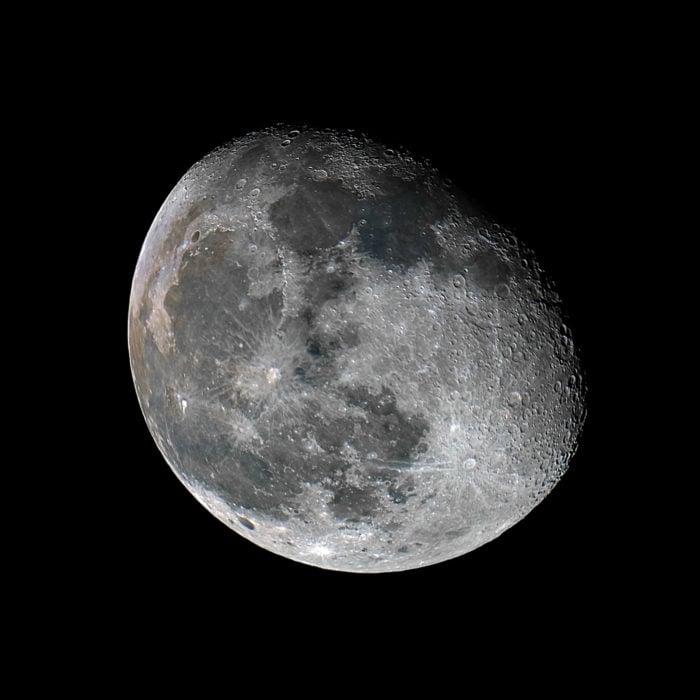
The battered surface of the Moon is the result of billions of years of meteorite impacts.
On Earth, meteors fall all year round. But they are more frequent during certain days of the year when the Earth’s orbit crosses the “busy” parts of the solar system.
Those periods are known as meteor showers. There are nine main meteor showers in the year, named after the constellation where they seem to originate from.
These are:
- Quadrantids (Begin January)
- Lyrids (End April)
- Eta Aquaridis (Begin May)
- Perseid (Mid August, might be the most famous one)
- Draconis (Begin October)
- Orionids (End October)
- Geminids (Mid December)
- Ursids (End December).
The exact dates change from year to year. Check this calendar to see when the peak of each meteor shower occurs.
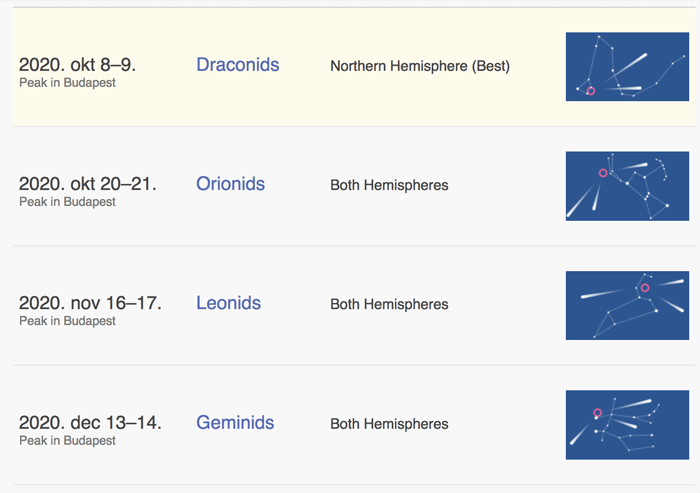
Calendar of the meteor showers for 2020. Credit (https://www.timeanddate.com/astronomy/meteor-shower/list.html).
How to Photograph Meteor Showers
Photographing a meteor shower is a bit of a hit-and-miss process. This is because most meteors are small, and their trail lasts only for fractions of a second.
You can’t really hope to photograph them by triggering your shutter when you see the trail.
But by using long exposure, the task becomes quite straightforward. Frame the active part of the sky (called quadrant) and capture several long exposures of the sky. Hopefully, you’ll snap a picture of a meteor!
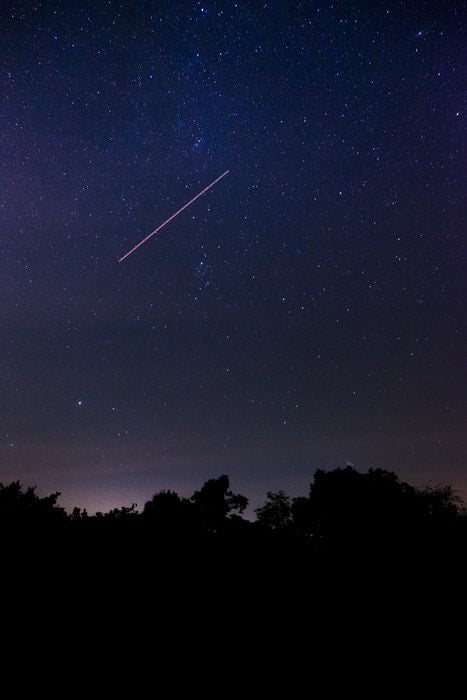
Photo by Henrik Pfitzenmaier on Pexels
What Equipment do You Need for Meteor Shower Photography?
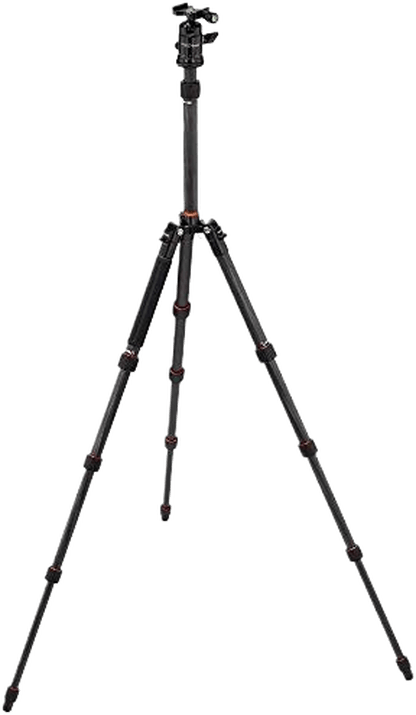
You don’t need a lot of equipment for meteor shower photography. Mount your camera on a tripod and grab a wide-angle lens or, even better, a fisheye lens. These will help you frame most of the sky, especially if you have a crop sensor camera.
The tripod should be a solid one. If your camera does not have a built-in intervalometer, a remote shutter/intervalometer is a must-have. It will automate the process of taking a long series of images one after the other.
If you are shooting in a cold and humid environment, you should use a lens heater strip powered with a power pack. Or place a hand warmer on the lens with a rubber band. By slightly heating up the front element of your lens, you will prevent dew from forming on the lens.
Also, ensure you have a high capacity memory card to store your images and that your battery is fully charged.
For long sessions in cold weather, keep a spare battery in your pocket to keep it warm and swap the two regularly.
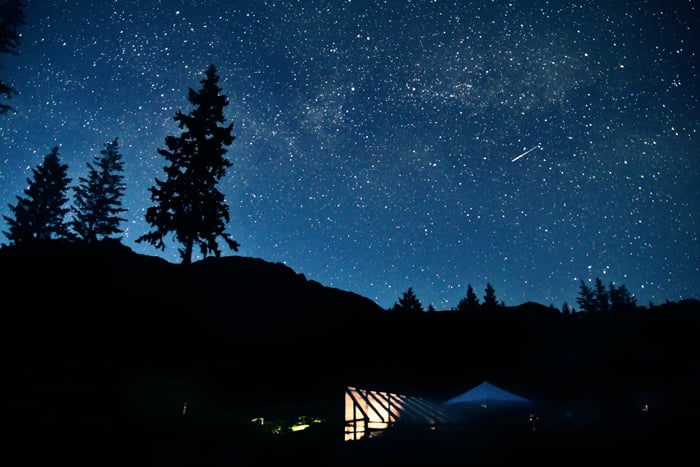
Photo by Alan Chen on Unsplash
Best Camera Settings for Photographing Meteor Showers
For meteor pictures, we can use the same settings as for star photography. Let’s detail those a bit more.
Exposure Time
You’ll need a wide aperture to collect as much starlight as possible in a short period of time.
You need to avoid star trails as they would distract from the meteor’s trail. If you are shooting from a fixed tripod, you should calculate your maximum exposure time using the 500 rule.
ET=500/(CF*FL)
ET is the maximum exposure time (in seconds) before star trails will be noticeable.
CF is your sensor crop factor (1.6 for Canon APS-C, 1.5 for Nikon APS-C, and 2 for micro four-thirds cameras). And FL is the focal length of your lens in mm.
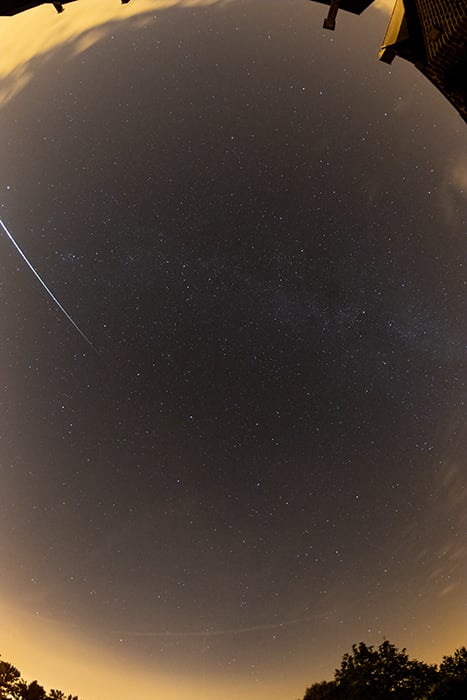
The image below was taken with an Olympus EPL-6 MFT camera and Samyang 7.5 f/3.5 fisheye lens. The exposure time was, therefore, 500/(7.5*2)=33 sec. We used 30 seconds to be more conservative.
You can see there are no star trails and that the fisheye helps packing the frame with lots of interesting subjects.
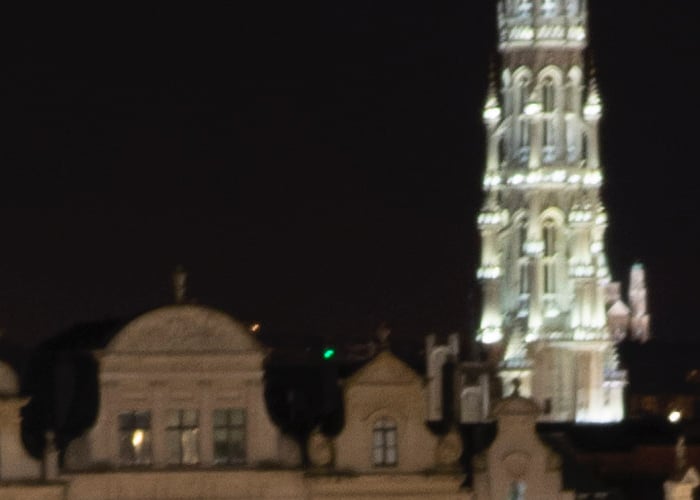
In the image below, we were lucky enough to capture one meteor, visible next to the chapel steeple below the Great Orion Nebula (“M42”).
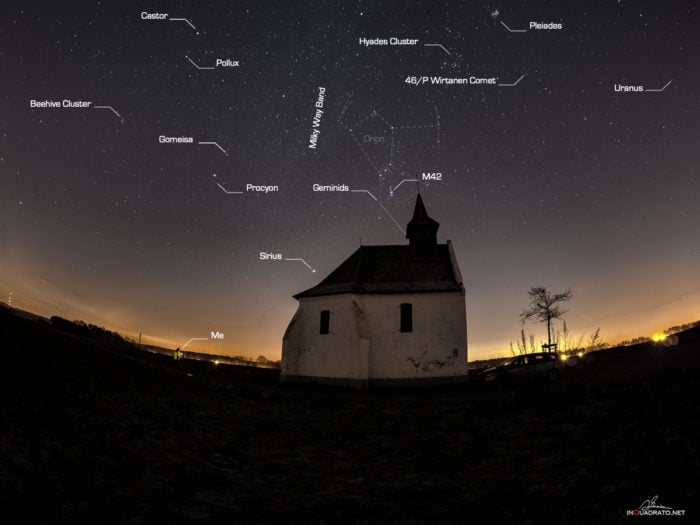
A small chapel near the Belgian town of Busval makes the perfect foreground for fisheye astrophotography.
ISO and Aperture
A value around ISO 1600 is a good starting point for meteor photography. Use the widest aperture possible, but be careful, as a wide aperture can cause lens aberration when used in open scenes. This will result in blurred or distorted images.
In this case, it is better to close your aperture a little. Lens aberrations are difficult to correct in post-processing.
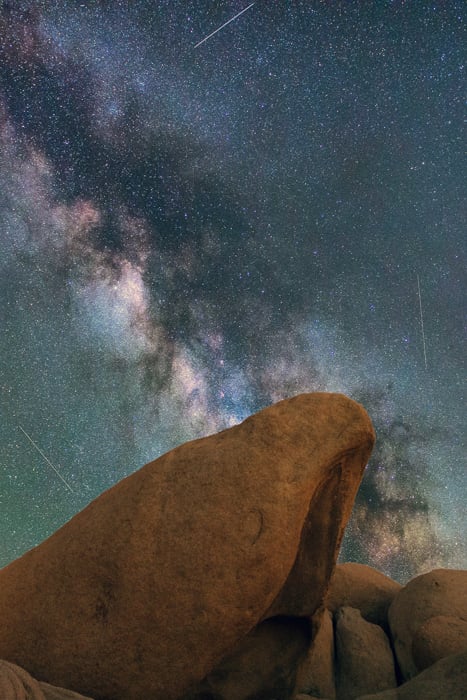
Photo by Lauren Macneish on Unsplash
Image Stabilization and Autofocus
With your camera is sitting on a tripod, you can disable image stabilization. If you don’t disable it, certain cameras will try to compensate for movement that is not there and will blur your photo.
This motion blur came from the camera trying to compensate for non-existent movements.
Autofocus will also not be of any help. Disable it and use manual focus on a bright star. Use the magnification focus aid on your live view screen to help you focus.
Look for these classic signs that your star is in focus:
- Chromatic aberration is at its minimum;
- The star size is at its minimum; and
- More faint stars are visible on the screen.
You can also try to place a kitchen sieve in front of the lens and look for a sharp diffraction pattern around the star.
Strong and sharp diffraction patterns from a kitchen sieve placed in front the lens will appear when your image is in focus.
Meteor Shower Location and Composition Tips
Most meteors leave only faint trails. A dark location will maximise your chances of capturing more of them.
As for the composition, if you are using a wide-angle lens, you will often include some foreground.
When you have the foreground in the frame, make sure it’s interesting and complements the sky. This could be a building, a lone tree, or yourself.
Be sure to frame the area of the sky from where the meteor shower originates. If you look at that spot sideways, you will have the meteor crossing the sky from side to side.
If you can frame it so that it is in front of you, then you will have the meteors coming towards you. This will add a 3D feeling to the image.
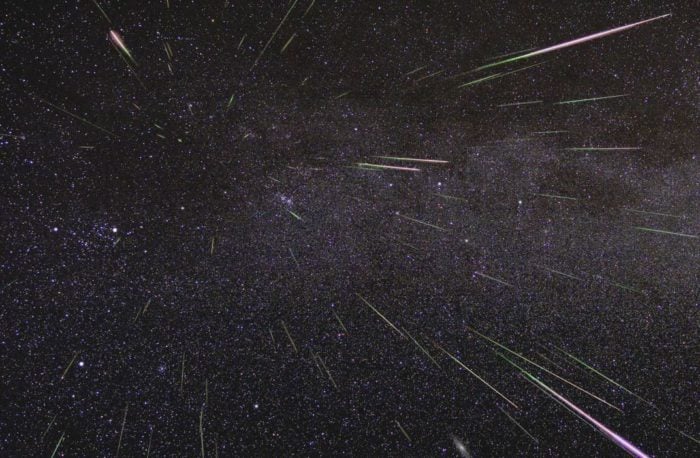
Perseid meteor shower. Image credit: Nasa/JPL
All-Sky Photography
All-sky photography is a kind of photography where you use a fisheye lens to frame only the sky.
Traditionally, this is done with an astro-camera fitted with a fisheye lens, placed under a plexiglass dome and connected to a computer.
You can achieve a similar result with your camera and a fisheye lens aimed at the zenith.
All-sky photography. Image credit: Bart Declercq.
Stacking Frames for Meteor Photography
Despite the name, meteors will still be a rare event during a meteor shower. A good shower can peak at 60-70 meteors per hour. But many meteors can be so faint that light pollution renders them invisible.
Be prepared to stay in the field for some hours.
If you want to improve your odds to photograph meteors and if you cannot get many meteors in your single exposures, stack them together to obtain something like the image below.
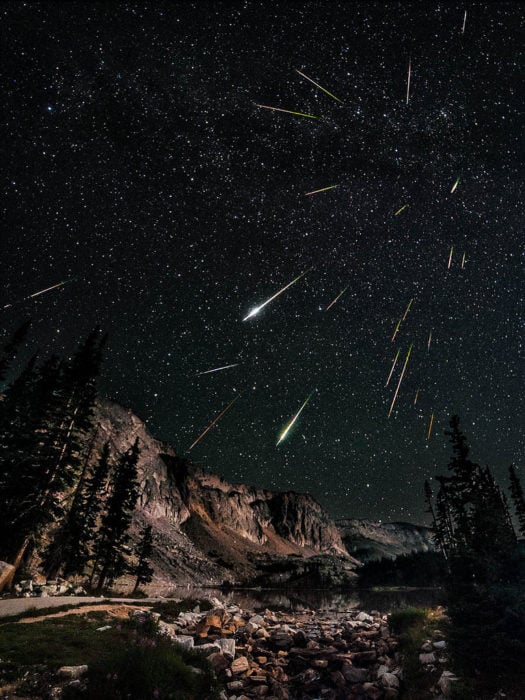
A nice nocturnal landscape showing many meteors coming towards the photograph, adding a 3D feeling to the image. Image credit: David Kingham.
When is not a Meteor Shower?
It is easy to spot a meteor in the field. But once you are home reviewing your images, you can be unsure whether a light trail in the sky is a meteor or not.
Other possible sources of light trails in the night sky are planes, satellites, and the ISS (International Space Station).
Planes are easy to identify as their trail is not continuous. It’s a series of dots, and you can even see the red and green light.
If the plane is approaching an airport, it will be low and its strong front light can be on. This will leave a very obvious trail.
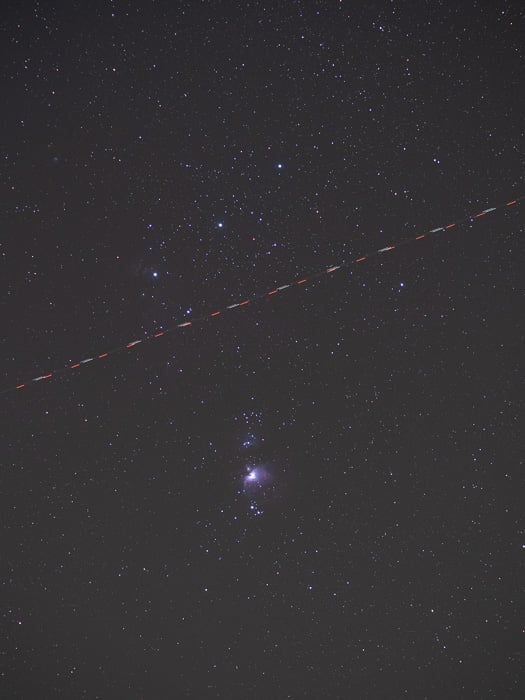
Image photobombed by a plane approaching Brussels International airport.
Satellites are rather faint, and they are much higher than planes. So they leave a very short trail on your frame.
A trail from a meteor will only appear in a couple of frames at most. In the case of satellites, planes, and ISS, you will be able to track their path across multiple frames. This is regardless of the exposure time used.

Two small trails from artificial satellites are barely visible in this shot.
Conclusion
If you are after something different with night photography, try and check out the next meteor shower! This is a great way to capture unique nighttime landscapes.
Following our tips on how to photograph a meteor shower, you’ll have every chance of coming home with some great images.
Are you interested in learning more about sky photography? Check out our Shooting Skies eBook!