Motion blur is the streaking or smearing recorded when a subject or camera moves during an exposure. A slower shutter speed gives that movement more time to show. Keep the camera still to blur a moving subject, or follow the subject to blur the background.
You can use the effect for racing cars, flowing water, clouds, stars, and light trails. For photographers who want to take sharp images, the same controls work in reverse: shorten the exposure and keep the camera steady.

- Learn to photograph waterfalls, waves, sunsets, and stars effortlessly.
- Discover how to balance movement and stillness in your shots.
- Master exposure settings easily, with or without a filter.
What Is Motion Blur?
Motion blur is a visual effect in photography caused by movement during the time the camera records an image. It can come from the subject moving, the camera moving, or both. Even a short exposure can show blur if the movement is fast enough.
This differs from background blur caused by shallow depth of field. Motion blur follows movement; an out-of-focus background is soft because it falls outside the focused area.
Decide which part of the picture should stay sharp:
- Blur the subject: hold the camera still while a dancer, vehicle, or flowing water moves through the frame.
- Blur the background: pan with a moving subject so it stays in roughly the same place in the frame.
- Blur the whole scene: deliberately move the camera during the exposure to make an abstract image.
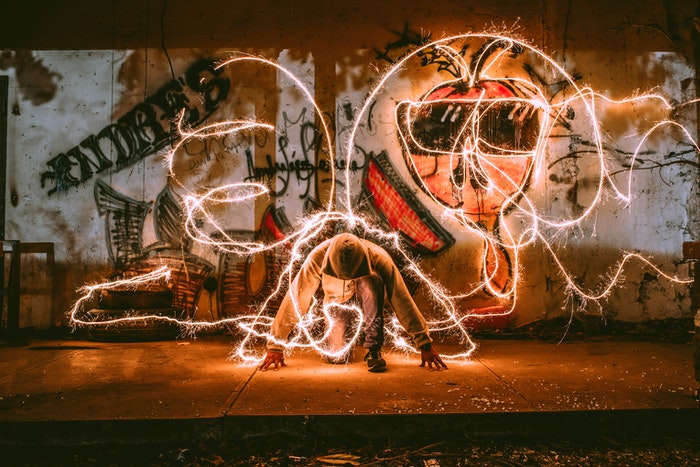
Bright moving lights can leave streaks or light trails. Other subjects may appear smeared, partly transparent, or softer along their path. You can use these effects to show speed or create surreal scenes.
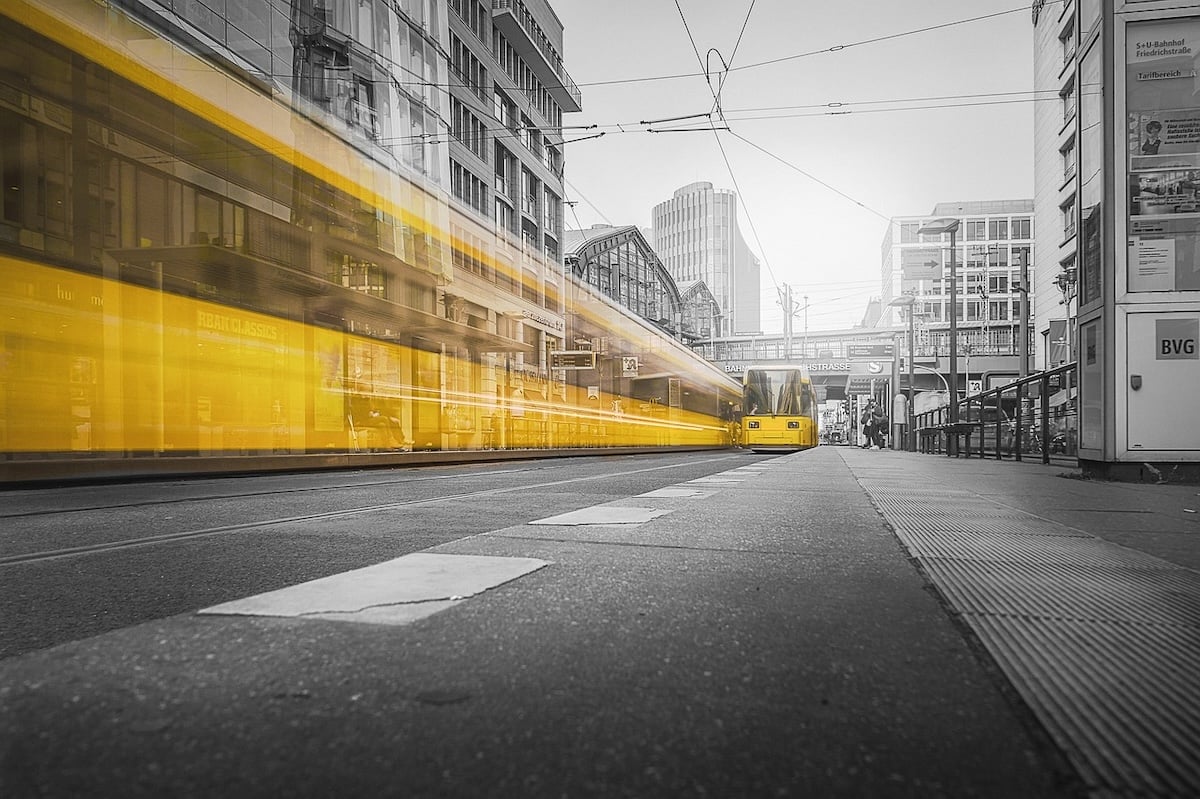
Sony a7, 28mm, f/9.0, 6 seconds, ISO 200. Tilgner Pictures (Pixabay)
Camera Gear for Motion Blur Photography
Use a camera that lets you choose shutter speed. Shutter priority (S or Tv) is enough to get started; manual mode is useful when you also want to set aperture and ISO yourself. It is the exposure time, rather than how long the aperture is open, that controls how much movement you record. Our long exposure guide covers this in more detail.
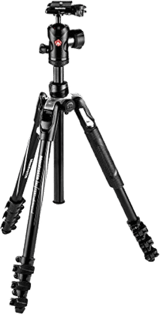
Use a tripod or another firm support when the background must stay sharp during a slow exposure, such as a waterfall, skyline, or star-trail shot. A self-timer or remote release helps avoid movement from pressing the shutter button. A tripod does not stop a moving subject from blurring.
For panning, you need to move the camera smoothly with the subject. You can shoot handheld or use a support with a head that allows the movement. For abstract camera movement, that movement is the point.
If the slow shutter speed makes the picture too bright, reduce ISO and choose a smaller aperture (a higher f-number), as appropriate for the scene. If it is still too bright, you need neutral density filters to reduce the light reaching the sensor. An ND filter lets you use a longer exposure in bright conditions; it does not create blur by itself.
We have articles on the best options for buying a tripod or ND (neutral density) filter.

6 Best Ways to Capture Motion Blur
Start with shutter speed, then choose a technique to suit the subject and the part of the scene you want to keep sharp.
1. Set the Shutter Speed for an Intentional Blur
To create intentional blur, set the shutter speed slow enough for movement to register. Shutter speed is the length of the exposure: 1/30 s records movement for twice as long as 1/60 s.
A fast shutter speed can freeze action, while a slower shutter speed gives movement more time to blur. There is no single boundary between the two. The result depends on the subject’s speed, its direction and distance from the camera, your framing, and whether you move the camera.
Start using shutter priority or manual mode. Choose a shutter speed, make a frame, then check both the blur and the brightness. For a fast-moving subject, 1/60 s can be a starting experiment, not a guaranteed setting. Shorten the exposure if too much detail disappears; lengthen it if you want more movement.
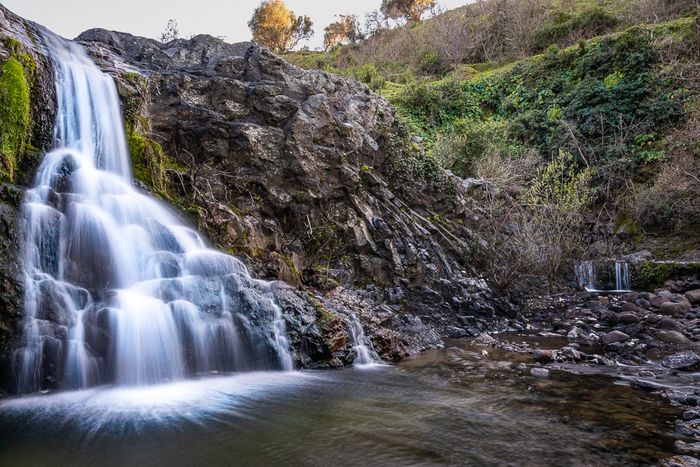
For motion blur in a waterfall, compare a fraction of a second with an exposure of several seconds. Keep the camera supported so rocks and foliage can remain sharp. The waterfall below shows softened water at the caption’s recorded 1/4 s exposure; you do not always need a multi-second exposure to get this effect.
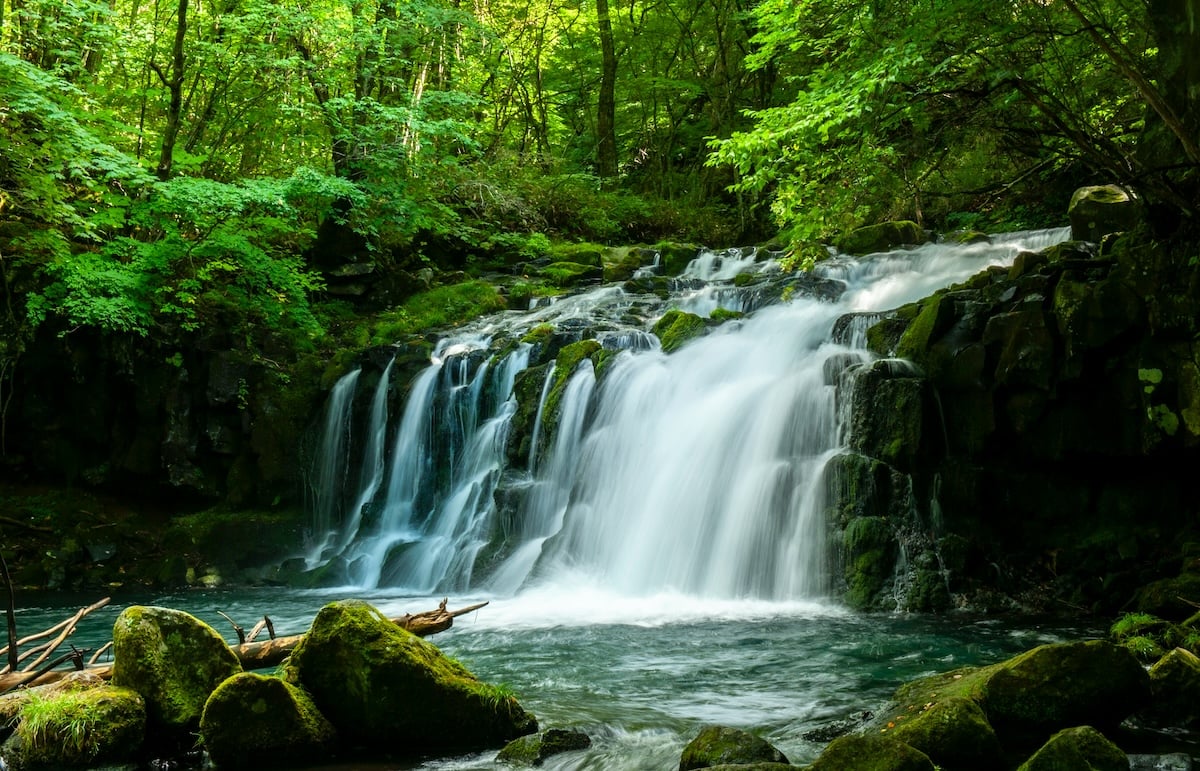
Nikon D700, 50mm, f/22, 1/4 s, ISO 200. 渕木 幹雄 (Unsplash)
For a long exposure landscape, I often begin with 20 seconds (if I can still get proper exposure). I then review the shot and adjust the time from there. That is an initial test for the effect I want, not a setting for every landscape.
The dancing photo below records 1/30 s. Movement in the skirt gives a sense of action while the face is more clearly defined. To try a similar effect, ask your subject to keep their head as still as possible while moving clothing or limbs. Support the camera if your own movement blurs the parts you want sharp.
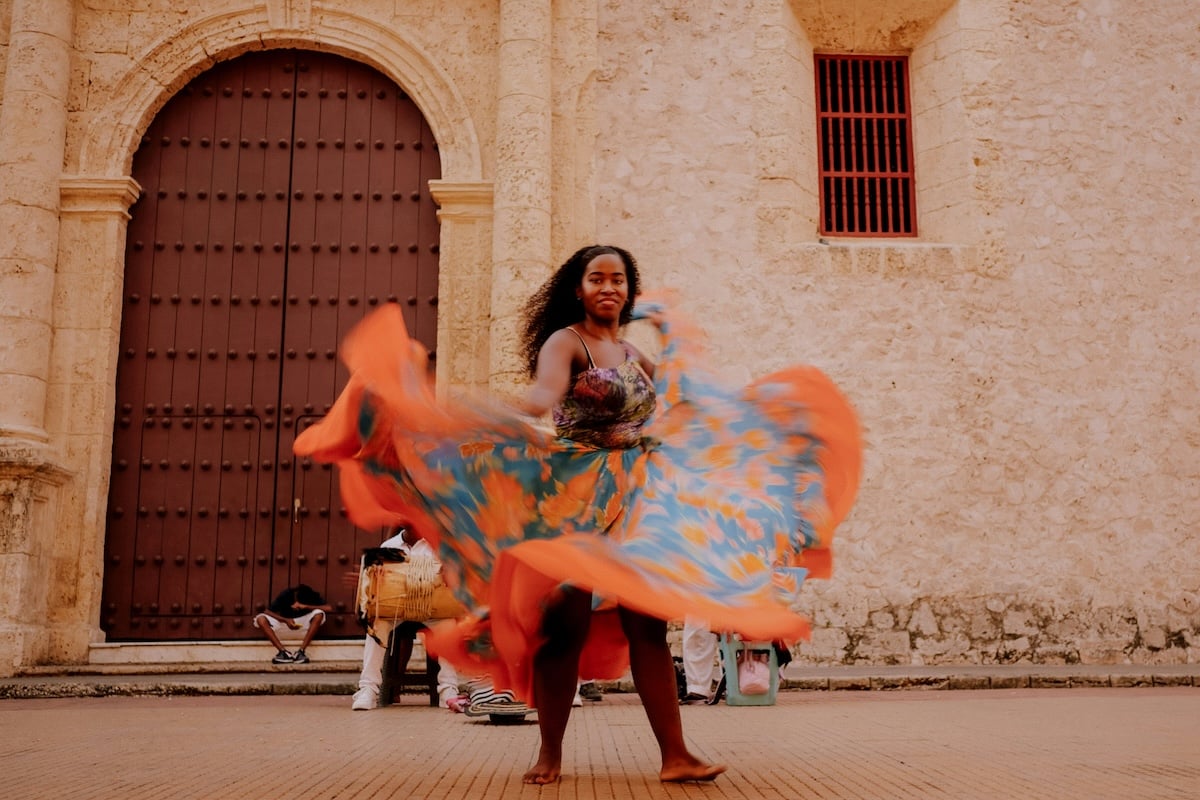
Fujifilm X-T5, 23mm, f/2.0, 1/30 s, ISO 250. Shelby Murphy Figueroa (Unsplash)
2. Use Panning to Capture Motion Blur
Panning a shot means following a moving subject with the camera during the exposure. The aim is to keep the subject in the same part of the frame while the background streaks behind it. A car may look relatively sharp while its wheels still blur.
There is no requirement to use 1/30 s or slower. Canon’s panning guide gives possible starting points from 1/8–1/15 s for walking subjects to 1/125 s for fast vehicles. For a car at ordinary street speed, try 1/60 s, then adjust to the subject and the effect you want.
- Choose a subject with a predictable path and a safe place to stand.
- Focus on the subject. Continuous autofocus can track changes in distance; you can also prefocus where a predictable subject will pass.
- Follow it smoothly before pressing the shutter. Keep moving through the exposure and after it ends.
- Review the part that should be sharp. If it is too smeared, try a shorter exposure or a smoother pan. If the background looks too static, try a longer exposure.
Handheld panning gives you freedom to follow the subject. A tripod or monopod can also help if it allows a smooth pan; a locked camera cannot track the subject. Expect some misses, especially at slower shutter speeds.
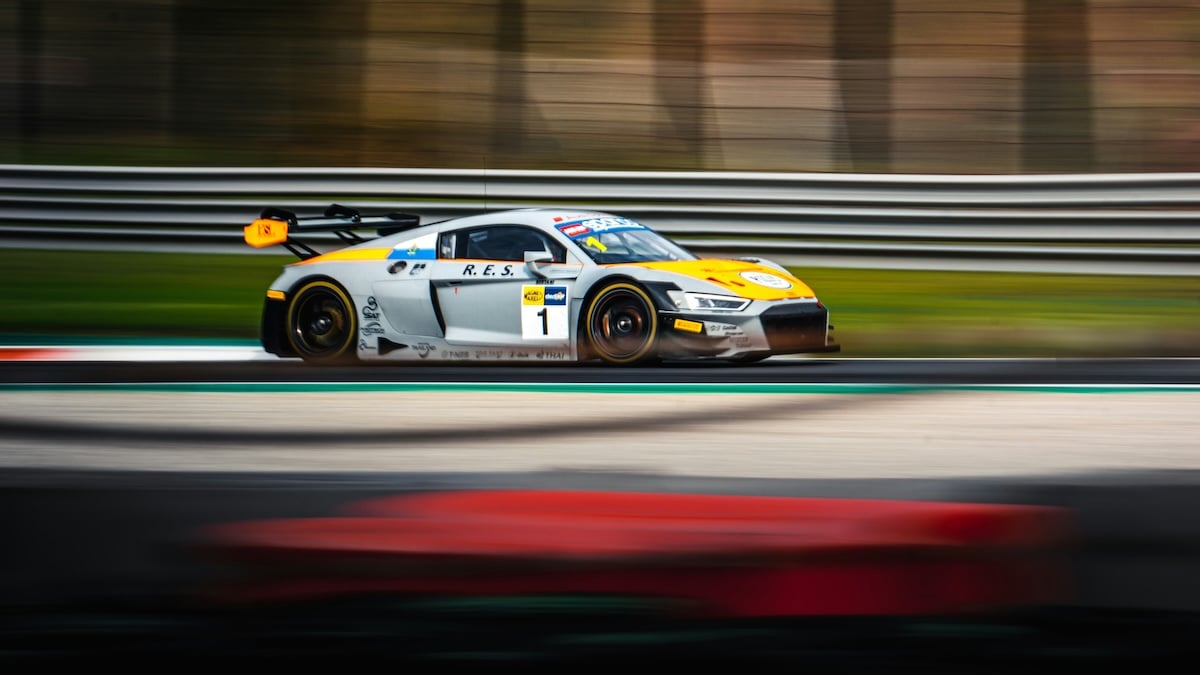
Sony a6000, 210mm, f/20, 1/30 s, ISO 100. Isaac Maffeis (Unsplash)
Long telephoto lenses help you fill the frame from farther away, but they are not essential for panning. Choose a focal length that gives you room to follow the subject. A wider view can work when the action is close.
For fantastic abstract photos, try intentional camera movement (ICM) without tracking a subject. Move the camera during the exposure, such as a smooth vertical sweep through trees. Moving it only before the exposure begins will not record a motion streak.
The cherry blossom image below is an example of the abstract effect. You can also simulate a directional streak using the motion blur filter in Photoshop, but adding blur afterward is a separate editing technique.
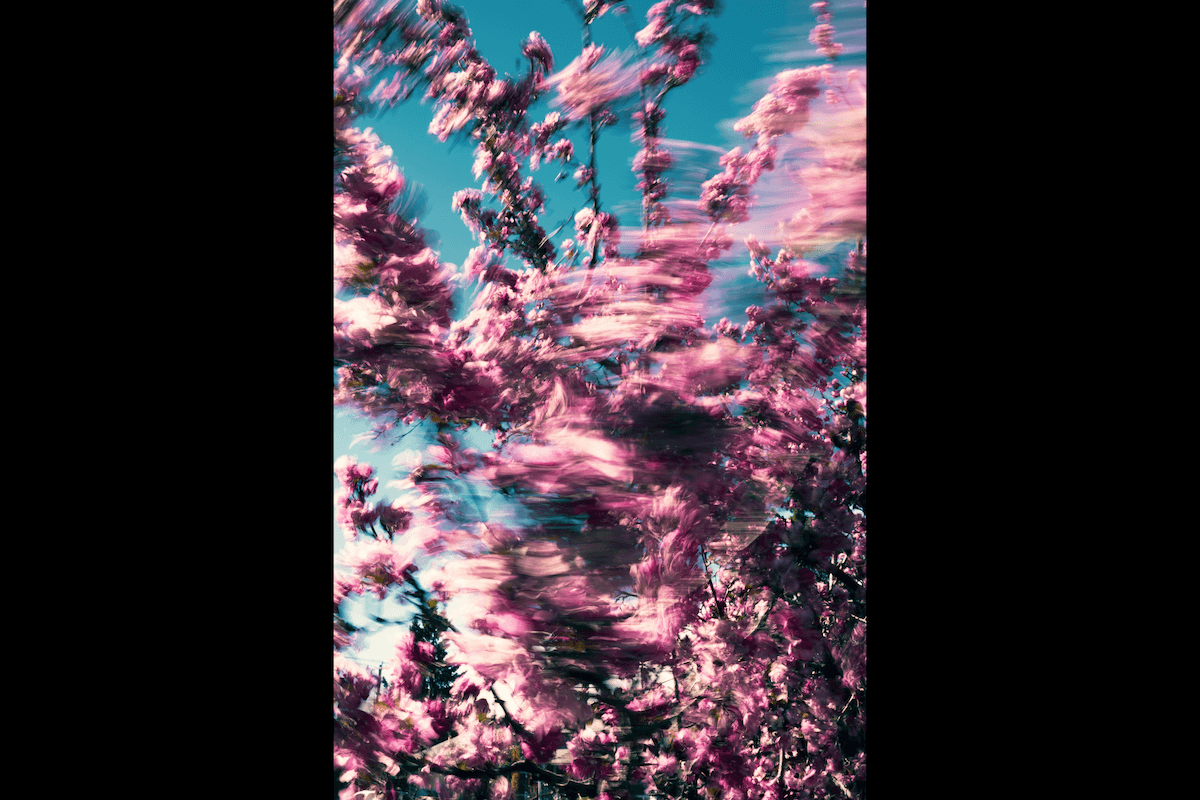
Nikon Z6 II, 43mm, f/22, 1/10 s, ISO 50. Ryunosuke Kikuno (Unsplash)
3. Capture Cloud Movement for Unique Blur
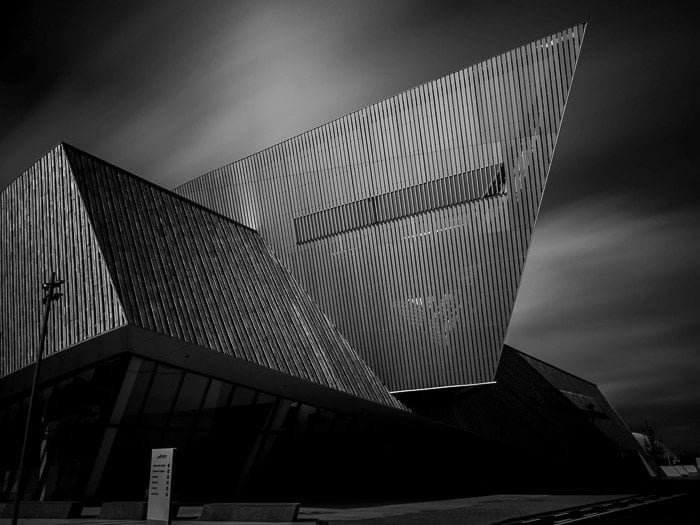
Capturing clouds adds movement to architectural and landscape scenes. Mount the camera on a firm support so the buildings and foreground stay still while clouds move through the exposure.
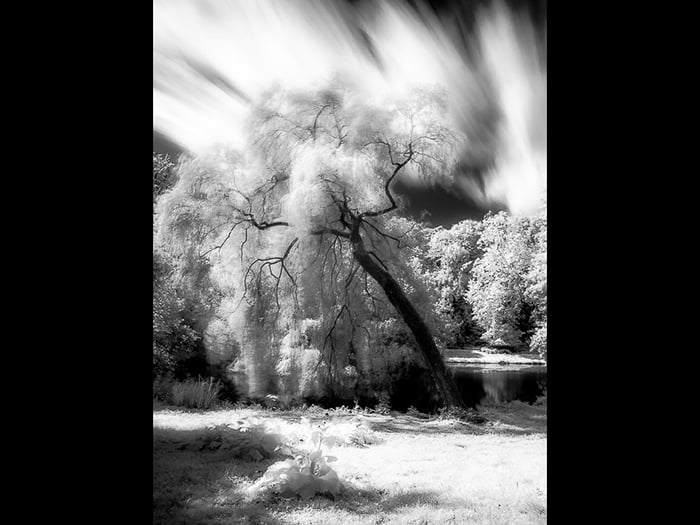
Try a longer exposure, then check whether the clouds have moved enough to form streaks. Their speed and direction determine how much time you need. Using ND filters can make that longer exposure possible in daylight. If the clouds barely move, a slow shutter speed alone will not give you dramatic trails.
The first image below is the new congress center in Mons, Belgium. It was taken with my Olympus OM-D EM-10 using a 14-42mm kit lens with stacked B+W ND 106 and ND 110 filters.
The second image is an infrared long exposure of about 20 seconds in a city garden. I used a Panasonic Lumix DMC-GF2 Micro Four Thirds camera with a kit lens and HOYA R-72 infrared filter.
4. Use Motion Blur for Nocturnal Landscapes
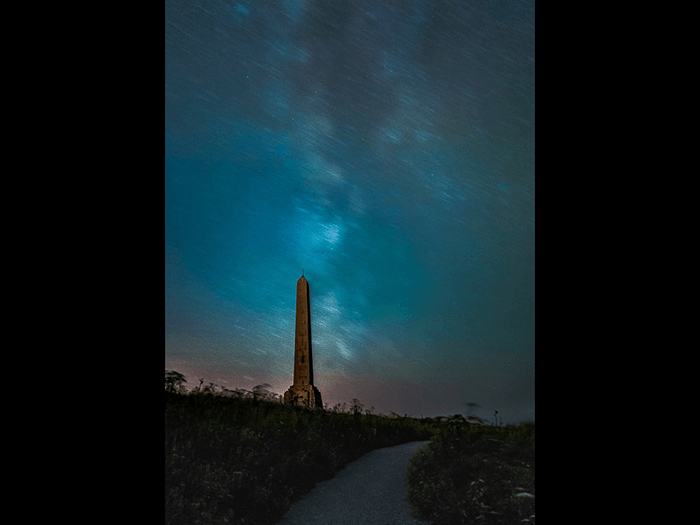
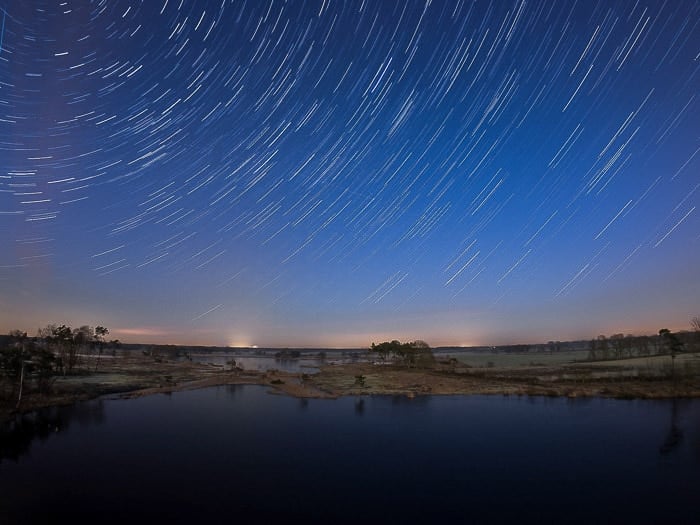
Earth’s rotation makes the stars appear to move across the sky. With a stationary camera, a long exposure records that movement as trails. This is different from trying to keep the stars as sharp points.
To create star trails, use a stable tripod and compose a foreground that can stay sharp. Longer total capture time produces longer trails. You can make one long exposure or combine a sequence of frames, as shown in Nikon’s star-trail guide.
Fifteen seconds is not a universal star-trail setting. Visible trail length depends on exposure time, focal length, and where the stars are in the sky. Review a test image and increase the total capture time for the trail length you want, while keeping the sky from becoming too bright.
For a sequence that shows movement over time, see our guide to Milky Way timelapses. For composition and exposure after dark, read our how-to article on night landscape photography.
The first photo below is of the Milky Way trail above Cap-Blanc-Nez, France. It was taken with a Sony RX100 Mark II for about three minutes.
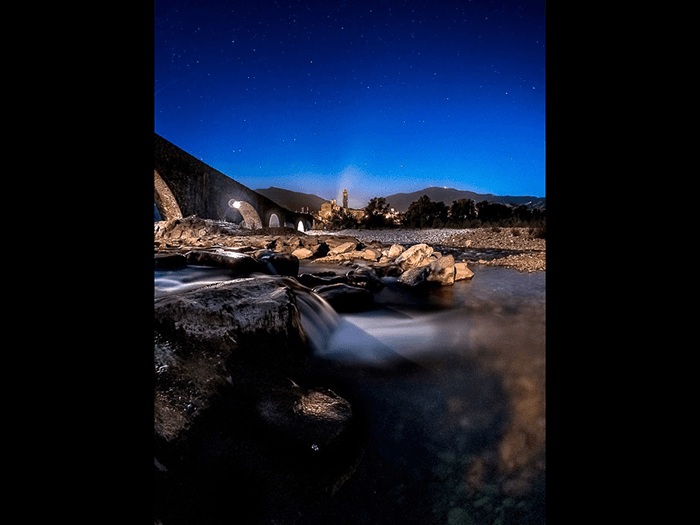
The second image shows star trails on marshland near Turnhout, Belgium. It was taken with an Olympus OM-D EM-10 and a Samyang 7.5 f/3.5 fisheye lens. The total shooting time was about 30 minutes. The final image captures a night sky with a waterfall.
5. Experiment With Water Motion Blur
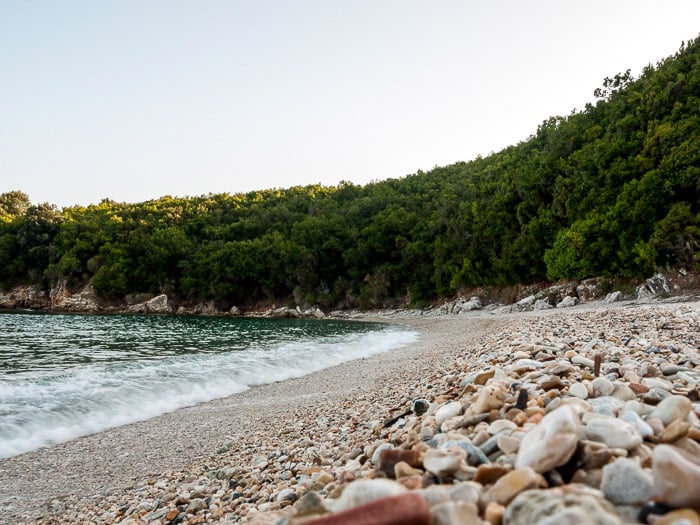
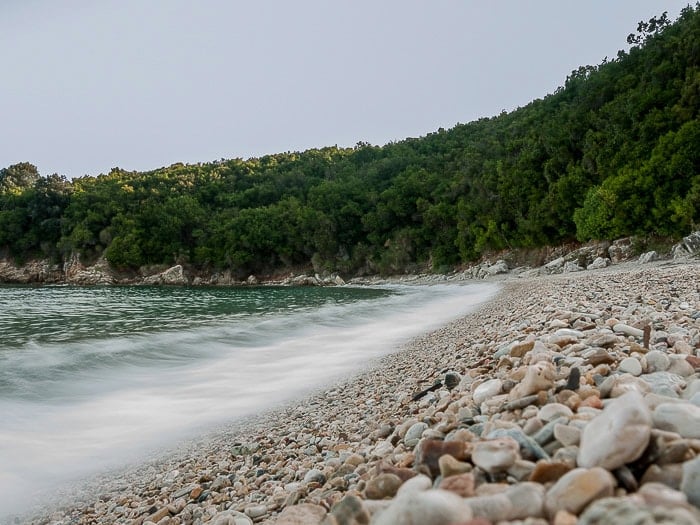
Try experimenting with your shutter speed while capturing rivers, seas, and oceans. A short exposure can preserve detail in breaking waves, as in the first photo below. A longer exposure blends the water’s movement, as in the second. Use a tripod when you want the shore and other stationary details to stay sharp.
These photos were taken at Avlaki Beach (Kerkyra, Greece). I used my Panasonic Lumix DMC-GF2 with the 14-42mm kit lens.
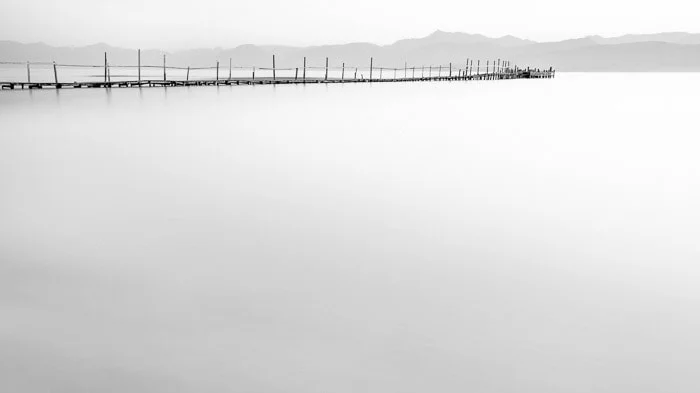
You can even use longer exposures to completely smooth the waves, creating the appearance of a flat sea. How much texture remains depends on the waves and the exposure time. If you love this effect, check out our Infinite Exposures course to create awesome long-exposure shots!
I used this technique at this dock in Kalamaki Beach at dawn. The long exposure smoothed away the waves, resulting in a motionless, zen-like, minimalist image. I used a Canon 50D with an EF-S 10-22mm f/3.5-4.5 USM lens.
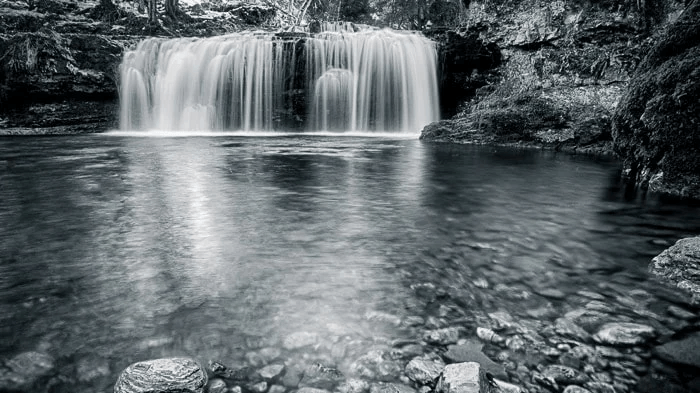
Fast-moving streams of water, like waterfalls and rivers, can also assume a silky appearance. The second image below is the Ferrera Waterfall in Italy by Alessandro Torri. He used a Canon EOS 50D with a Tokina 11-16mm f/2.8 AT-X 116 Pro DX lens.
6. Capture Motion Blur With Lights
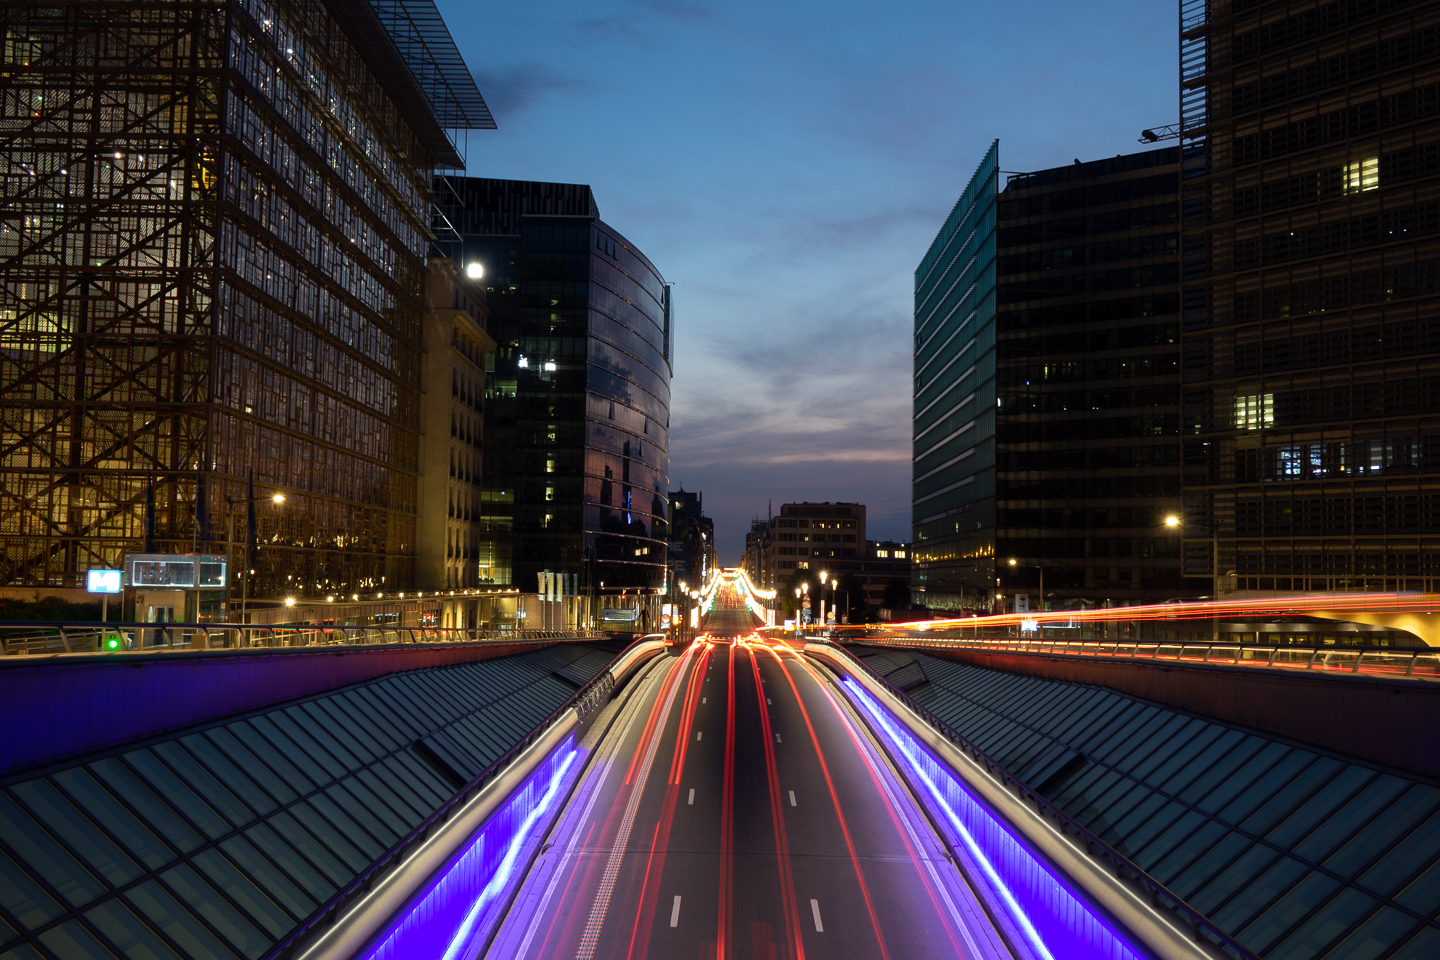
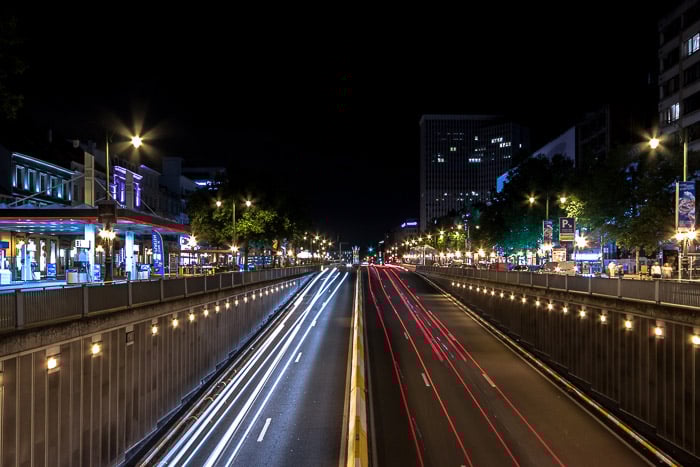
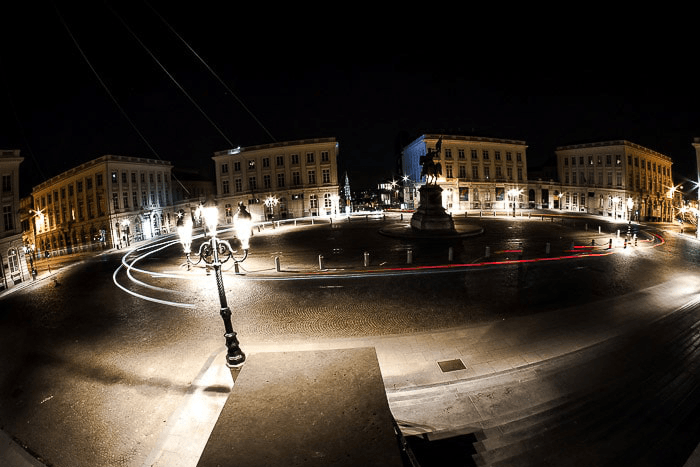
With the camera fixed, moving headlights and taillights can trace a trail of lights through a long exposure. The vehicles themselves may be faint or absent because they spend little time in any one part of the frame; they do not always vanish.
Choose a firm support and frame the route the lights will follow. Start the exposure as traffic enters the scene, then review the length of the trails and the brightness of the lights. A longer exposure can extend the trails if vehicles keep moving through the frame. If a vehicle stops, its lights may form a bright spot instead.
The first image below is the Boulevard de Waterloo at night in Brussels, Belgium. I took it with a Panasonic Lumix DMC-GF2.
You can create an urban carousel by capturing the passing traffic framing a roundabout. I took the second photo in Place Royale in Brussels, Belgium. Again, I used the DMC-GF2. But this time, I used the Samyang 7.5 f/3.5 fisheye lens.
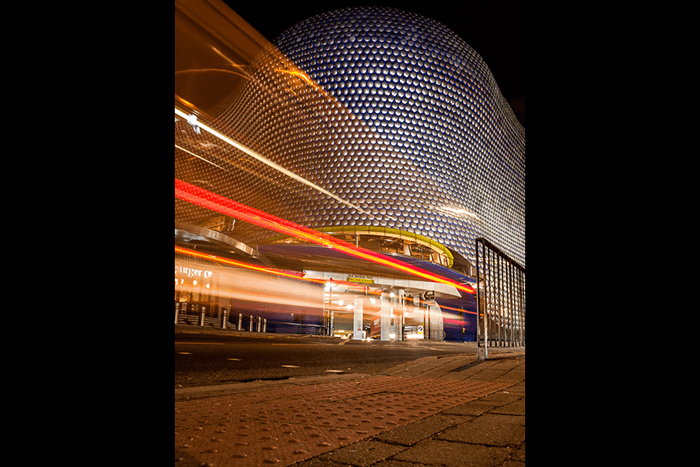
You can also uniquely present famous landmarks by capturing light trails in front of them. I shot light trails against the Bullring shopping center in Birmingham, UK (third image). I again used my Panasonic and a 14-42mm kit lens.
Conclusion: Motion Blur
Motion blur lets a still photo show movement. Choose what should stay sharp, then control shutter speed and camera movement to suit that choice. Keep the camera supported for moving water and light trails; follow the subject for panning; move the camera deliberately for an abstract result.
Make a test frame and change one setting at a time. More blur usually calls for a longer exposure, while less blur calls for a shorter one. Check brightness as well as movement. You can also add the effect with editing software like Adobe Photoshop.
- Learn to photograph waterfalls, waves, sunsets, and stars effortlessly.
- Discover how to balance movement and stillness in your shots.
- Master exposure settings easily, with or without a filter.