Night photography can lead to some amazing images. But photographing stars can be tricky.
In this article, we will cover the different types of star photography and the gear you might need. We’ll cover camera settings, certain types of star photography, finding a location, and setting up your shot.
We use some specialised terms when talking about astrophotography. Check out our useful astrophotography glossary for the most common terms.
Let’s get started with the necessary settings and a list of gear you’ll need.
Camera Settings for Star Photography
Camera settings vary depending on the type of night sky photography. Let’s start with settings that are similar across different types of star photography.
Shoot in Manual mode. You’ll need to be able to change aperture, shutter speed, and ISO independently.
Set your camera to manual focus. It is usually too dark for autofocus to work for star photography. Later in the article, we’ll show you a couple of different ways to focus on the stars.
Shoot in RAW format. Post-processing is essential to making the most of star photography. Gather as much information as possible in a RAW file.
Many photographers suggest turning off the internal stabilization when putting your camera on a tripod. But not all photographers agree.
Turning on your camera’s noise reduction is also a debated setting. This feature reduces the noise created by using a high ISO. The camera takes a completely black photo and merges it with your image. Unfortunately, this doubles the exposure time.
If you set your shutter speed for 30 seconds, your camera will take 60 seconds to process the image. Many photographers prefer to use other noise reduction techniques in post-processing.
 The well known Orion Constellation is hovering over this winter landscape.[/caption]
Recommended Gear for Star Photography
You’re going to need some specific camera gear for star photography. The best gear to use depends on the type of night photography you’re doing. We’ll start with a list of recommended gear that is useful for most forms of night sky photography:
- A digital camera with a good ISO performance – We’ll be talking more about the importance of ISO later in the article. ISO performance is especially important when photographing the Milky Way. As ISO on new versions of digital cameras improve, so does the ability to make star images.
- A sturdy tripod – Camera shake will show in the long exposures needed to capture star photos.
- A fast lens with an aperture of at least f/2.8 – A lens with a narrow aperture captures less light. The wider you can open the aperture of your lens, the more light hits the sensor. Lenses for photographing the night sky often have apertures of f/1.4, f/1.8, f/2.0, or f/2.8.
- A Condensation Prevention Lens Heater – Cool night can create condensation on the front of the lens. This heater warms the lens and prevents water condensation.
- Smartphone – Many useful star photography tools are available as smartphone apps. We’ll recommend a few in this article.
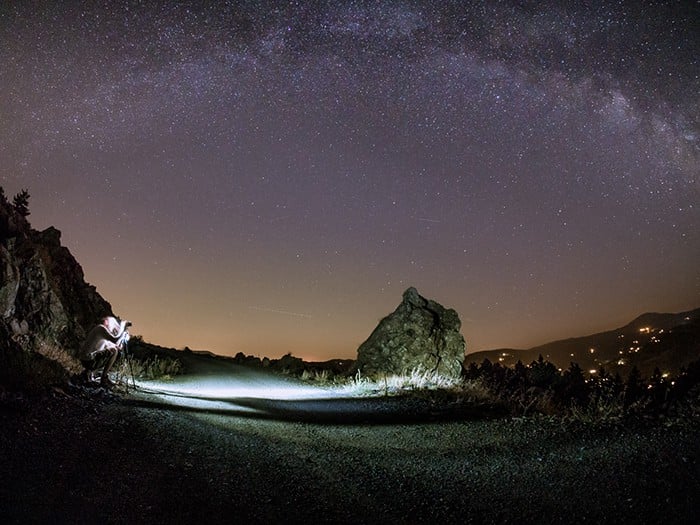
- Headlamp with red light option – A headlamp is useful for navigating at night or adjusting settings. But turning on a white light will ruin your night vision. Use a headlamp that casts a red glow if you need a bit of light on the ground or your camera.
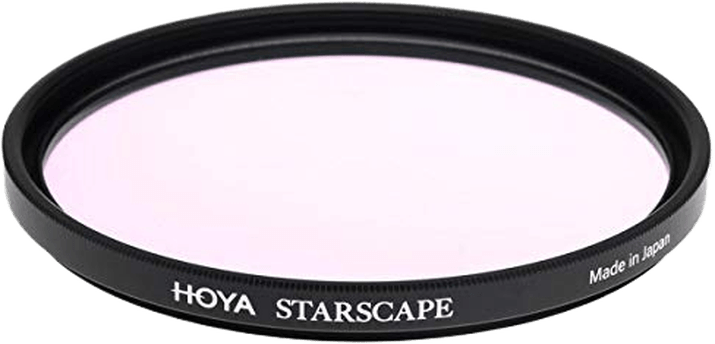
- Light Pollution Reduction (LPR) filter – LPR filters help counteract the orange glow in the sky from light pollution. LPR filters include Hoya Red Intensifier or Nisi Natural Night.
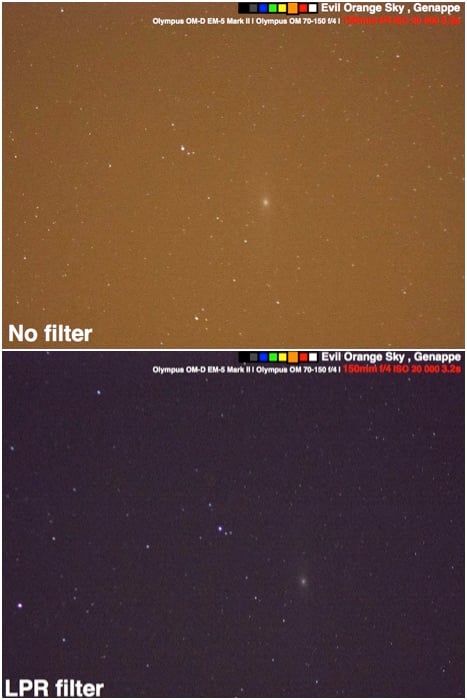
Diptych comparing trying to photograph the Andromeda galaxy under a heavily polluted sky with and without an LPR filter.
Other gear, like the following, is useful for some types of astrophotography:
- Remote Shutter with Intervalometer – Some forms of star photography need shutter speeds longer than the 30-second time limit of most digital cameras. To open the shutter longer than 30 seconds, you’ll need a remote trigger. Buy one with an intervalometer. An intervalometer automatically controls your camera. You can set it up to take a series of photographs of a certain time duration at a pre-determined interval. We’ll need this feature to photograph star trails.
- Low-level LCD light – Low-level LCD panels are used in astrophotography to light foreground elements. The light doesn’t need to be bright to be effective.
- Wide-angle or telephoto lens – The optimal focal length of the lens depends on the type of photography you’re doing. For moon and DSO photography, you’ll want a long telephoto lens. A 400mm-800mm lens will get you started. Most photographers use a wide-angle lens for the Milky Way, star trails, and other forms of starry landscapes. These lenses are usually in the 8mm to 24mm range.
- An equatorial tracking head – This is a specialised tripod mount that moves the camera to follow the star movements. The tool allows you to extend exposure time without having to worry about star trails.
Types of Star Photography
There is no one-size-fits-all procedure for night sky photography. Each kind of star photography has its own set of rules, optimal gear, and camera settings.
Star Trails
Star trails are the easiest type of starry night photography you can do. As the earth rotates, stars appear to move. Star trail photography captures this movement by using long exposure settings. The photographic technique is like photographing light trails created by moving vehicles. But there are a few extra steps to photographing star trails that we’ll go through in a minute.
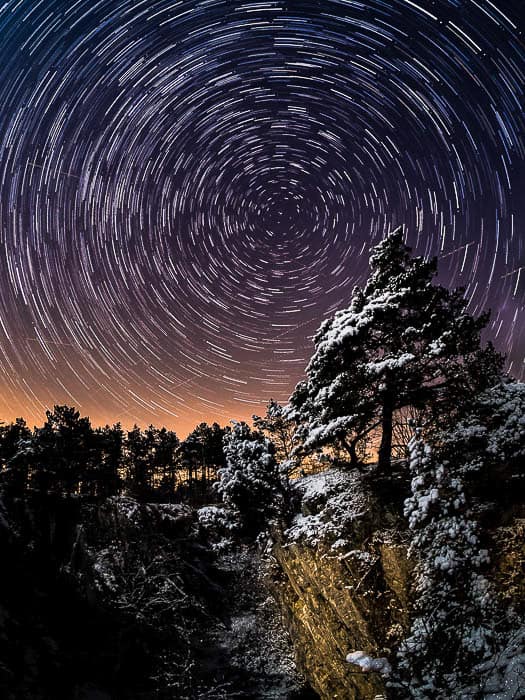
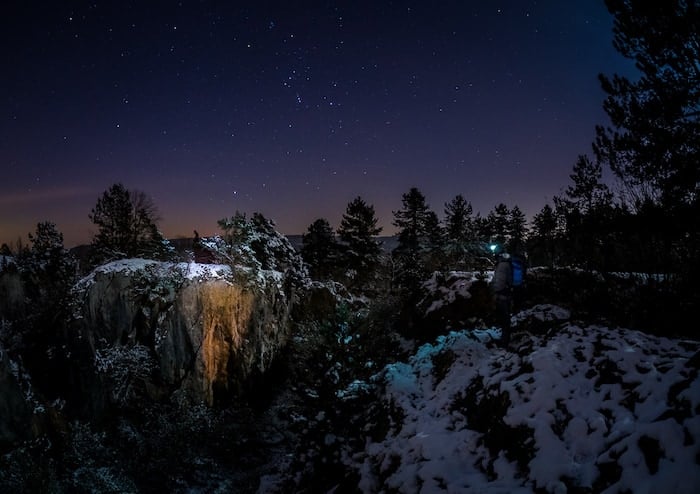
The lone pine tree on the cliff makes a strong foreground for a classic star trail centered on Polaris. The Moon was shining on the left, lighting the cliff and the foreground.
To photograph star trails, you’ll need the following gear:
- Tripod
- Lens heater
- LPR Filter
- Intervalometer
- Wide-Angle lens
Set your camera’s aperture to f/2.8 and ISO to 400.
For star trails, we recommend taking a series of long exposure photos over about an hour. The stars will move enough in an hour to create a nice circular movement. But you can’t leave your shutter open for this length of time. A 60-minute exposure will blow out your image.
This is where your intervalometer is useful. Set up the intervalometer to take a series of images, each 30 seconds long, with 1 second between images. The short interval between photos reduces gaps in the trail. You can take just over 100 images in an hour.
In post-processing, stack these images together. This will create a circular star trail pattern.
If you are in a very dark place, you can try a 10-minute exposure time.
See our article ‘Post-Processing Astrophotography: All You Need To Know‘ on how to do this.
Milky Way Photography
Starry landscapes and Milky Way shots are a bit more demanding than star trails. These types of photographs feature the night sky usually as a background to a landscape. We are part of the Milky Way galaxy and can see the pattern of stars for about half of the year. Most photographers want to capture the galactic core of the Milky Way.
To capture the Milky Way, you have to freeze the stars’ movement in the sky. Depending on the focal length of your lens, you will see stars begin to blur in your photo after only a few seconds. This means carefully balancing shutter speed with ISO.
A selfie with the Milky Way.
To photograph the Milky Way, you’ll need the following gear:
- Tripod
- Fast, wide-angle lens
- Lens heater
- LPR filter
- LCD light
Set your camera’s aperture to f/2.8 or wider and ISO to 3200. Many of the newer digital cameras can handle a much higher ISO. Go as high as you feel comfortable with your camera.
Your shutter speed depends on the focal length of your lens. When photographing the Milky Way, we want to freeze the stars’ motion. Shutter speed needs to be long enough to capture stars on a dark night, but not so long that the stars begin to trail. This is a tricky balance.
We use the 500 Rule to figure out how long we can leave the shutter open before the stars smear.
In the 500 Rule, divide 500 by the focal length of the lens. For instance, if you’re using a 14mm lens, divide 500 by 14.
500 / 14 = 35.7 seconds
You should be able to leave the shutter open for 35 seconds before the stars start to blur.
But there’s a problem with the 500 Rule. The rule was developed for film cameras. Looking closely at the stars on a digital image shows that they are already starting to blur at 35 seconds. With digital cameras, a 300 rule is probably better.
300 / 14 = 21 seconds
Because the shutter speed is limited, a camera with high ISO performance is particularly important.
Deep Space Objects
Photographing deep space objects (DSO) is a lot more challenging. DSO are bright star clusters, nebulae, or galaxies other than the Milky Way.
Some photographers mount a camera to a telescope. But long telephoto lenses will capture bright star clusters like the Pleiades. Photographing bright nebulae like the Orion and Cygnus constellation is also possible. The most difficult subjects are galaxies, due to their small size and low light. A notable exception is the Andromeda Galaxy. With the right settings, the camera can see what we can’t see with the naked eye.
We’ll limit our discussion of photographing DSO in this article. But we have an extensive article on how to photograph DSO.
You can also go check out these composition tips for DSO astrophotography if you want to learn more.
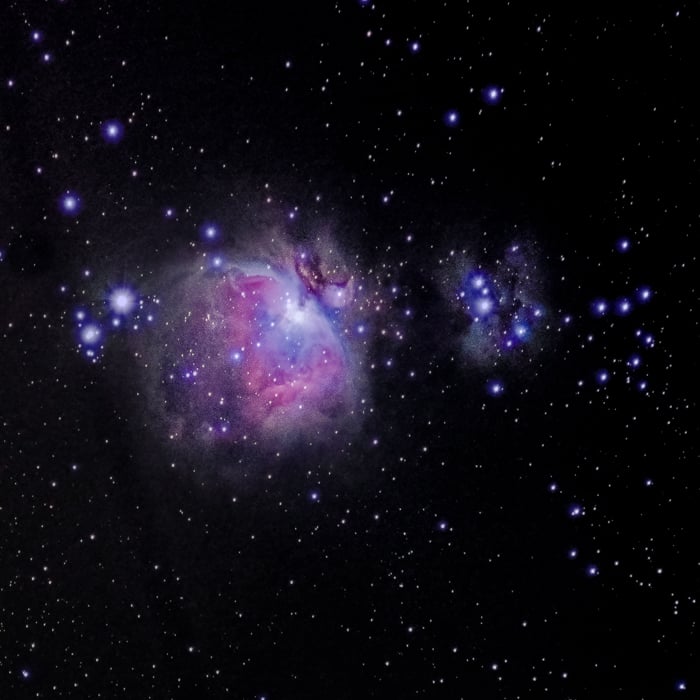 The Great Orion Nebula, perhaps the most spectacular jewel of the winter sky in the Northern Hemisphere.[/caption]
To photograph deep space objects, you’ll need the following gear:
- Tripod
- Fast, telephoto lens
- Smartphone
- Equatorial tracking head
The camera settings for DSO photography are like photographing the Milky Way (f/2.8 or wider and ISO to 3200).
The 500 rule still applies. But using a telephoto lens will greatly reduce your shutter speed. Using a 200mm lens reduces the maximum shutter speed to 2.5 seconds.
This shutter speed isn’t long enough to capture distant starlight. An equatorial tracking head allows us to increase exposure. It moves the camera to follow the star movement. This allows you to capture longer exposure shots of the night sky without star trails.
If you’re using an equatorial tracking mount, you’ll have to set it up properly.
This article will help you: ‘SkyWatcher Star Adventurer Review | Astrophotography Equatorial Tracking Mount‘.
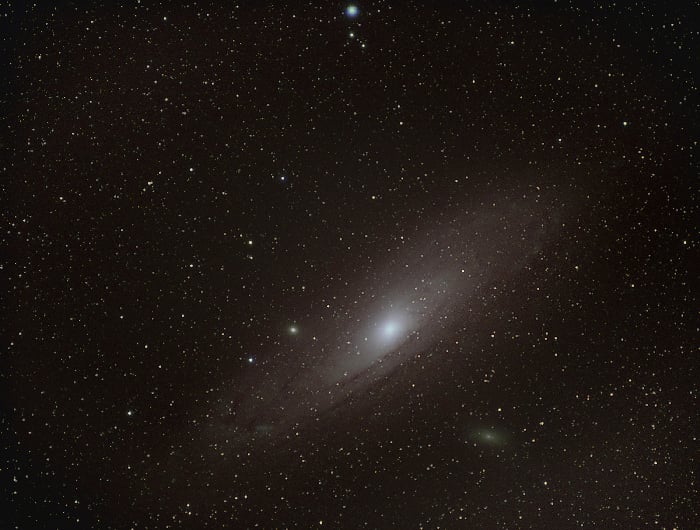
The Andromeda Galaxy is one of those bright and large DSOs that can be easily photographed with standard photographic equipment.
Scouting a Location for the Best Starry Skies
The night sky is all around us, but some locations work better than others for creating good star photography.
You’ll need to find a location with dark skies. City light pollution obscures the stars. Use a tool like Dark Site Finder to find areas away from city light pollution.
It’s also important to keep track of the phases of the moon. A full moon is bright and will obscure the stars. Most star photography is best at or near the new moon.
It’s also important to know where stars and galaxies will be in the sky. For instance, the Milky Way is visible in the northern hemisphere from about March until November. It will rise in the southern skies. Apps like PhotoPils, Stellarium, or Sky Guide tell you exactly where and when the galactic core of the Milky Way will appear above the horizon.
When scouting a location, look for an interesting foreground element in the landscape. Star photography looks great behind a building, a rock formation, mountain peaks, or lone trees. Foreground elements can be in silhouette or lit by a low-level LCD or moonlight.
PhotoPils and The Photographer's Ephemeris (TPE) have a virtual reality setting. Point your phone’s camera at a scene and the apps will show you where the moon or the Milky Way will rise in relation to a foreground element.
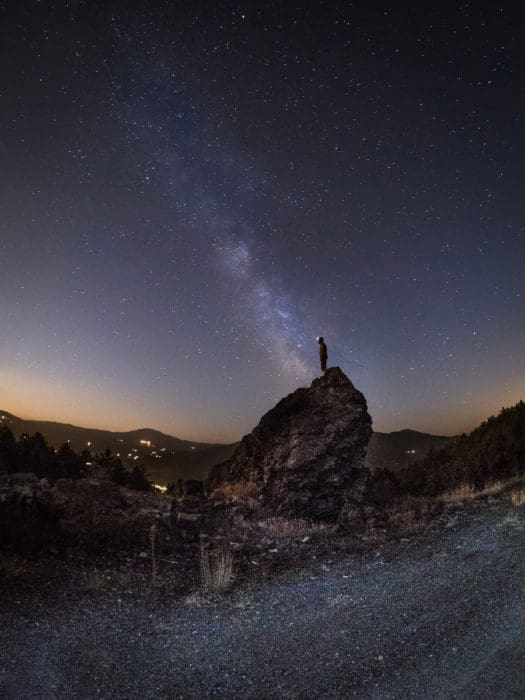
If nothing looks interesting, photograph yourself in silhouette against the sky. A human figure will give a sense of scale to the image. It will also help the viewer connect with your photo.
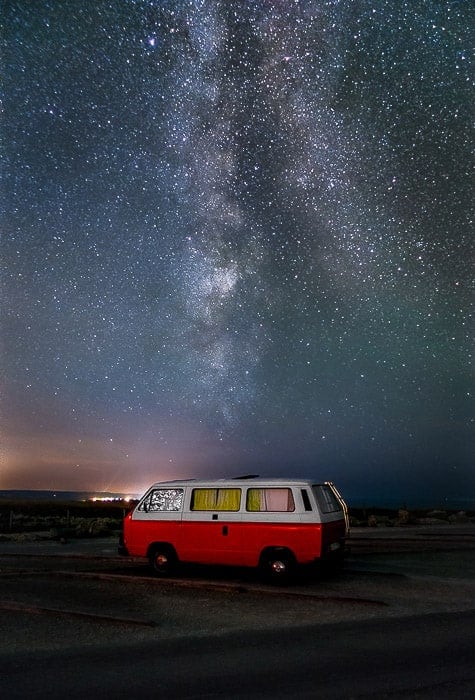
A lucky shot thanks to this van parked right in front of the Milky Way.
Setting Up for the Shot
Once you’ve found a location, it’s time to go out in the field and set up your star photography shot.
First, check the weather and the phases of the moon. Choose a clear night near the new moon. Cloud cover and moonlight obscure the night sky.
Set up and level your tripod. Don’t fully extend all the leg sections. Start extending the segment with the largest diameter first. If possible, spread the legs a bit. This reduces the chance that you will tip it over if you bump it in the dark. You can further stabilize the tripod by hanging your camera bag or a weight from your tripod. For best results, the weight should touch the ground rather than free-float in mid-air.
Set up your intervalometer and tracking mount if you are using these tools.
If you have a zoom lens with no locking mechanism, tape down the zoom ring. The weight of the lens will not slowly change the focal length during the session.
How to Focus on the Stars
Achieving focus on stars can be a bit tricky. The stars are faint, and the infinity mark on many lenses is only a guide, not a true focus point.
To focus on stars, use live view and magnify the brightest star you can see. Increase the ISO if that helps. Turn your focus dial until the star size shrinks to its minimum chromatic aberration (purple fringe). You’re looking for the point at which the star becomes the smallest pinpoint of light. Blur creates a halo around the star. Removing blur (focusing) shrinks the star.
Lighting up a distant tree or rock will also help you focus. If the light is bright enough you might be able to use autofocus. Make sure the object is far enough away that you are focusing to infinity.
If you are doing DSO photography, a more precise focusing tool is a Bahtinov mask. This is a special mask placed in front of your telescope to create diffraction spikes around the brightest stars. The perfect focus is achieved when all the spikes cross on the bright star you are considering.
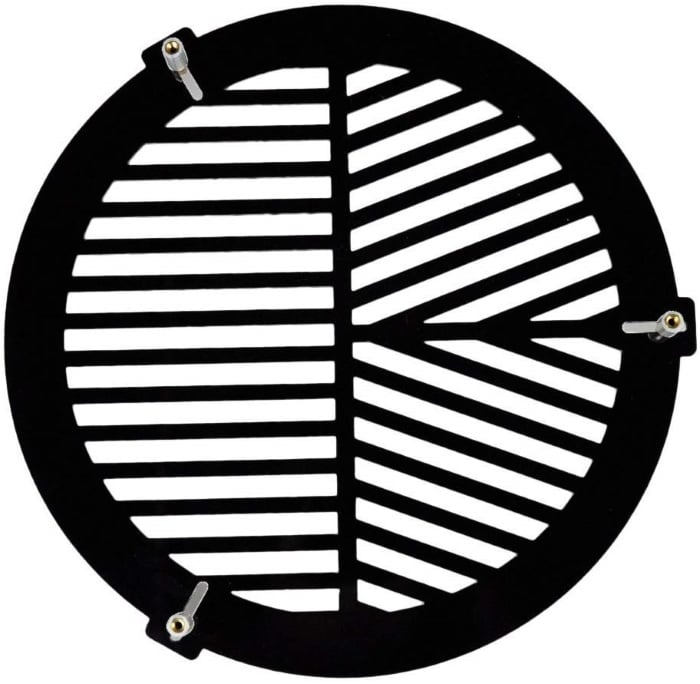 A Bahtinov mask[/caption]
For those of us shooting with photographic lenses, there is a simpler tool we can use to focus: a kitchen sieve. Put it in front of your lens and when you see strong, contrasted diffraction spikes, you are good to go.
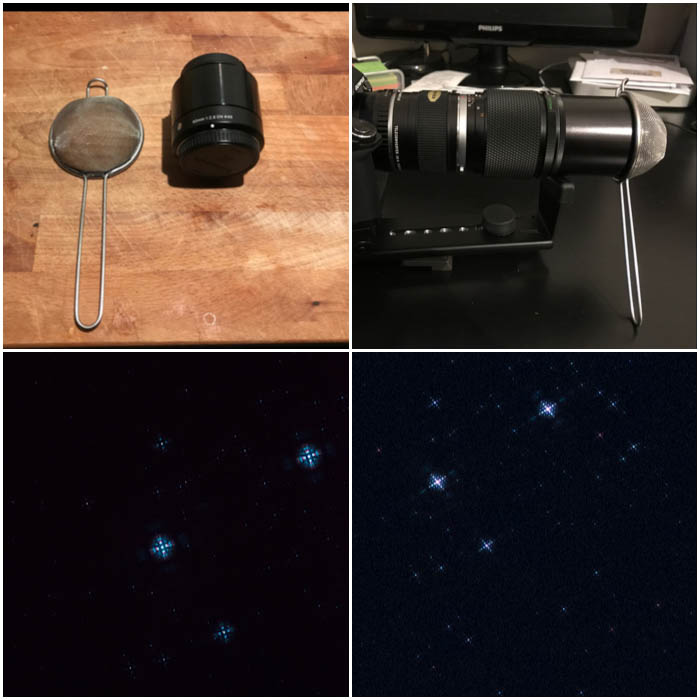 Focusing with a kitchen sieve.[/caption]
Once you are happy with your focus, you can tape down the focusing ring with some gaffer tape. This will help you avoid moving it when you mount filters or reposition the camera.
To help beginners work fast in the field, we created an infographic on how to focus when taking pictures of stars. Either save the infographic on your phone as an image or print it. If you fold it, the printed version will have the size of a credit card.
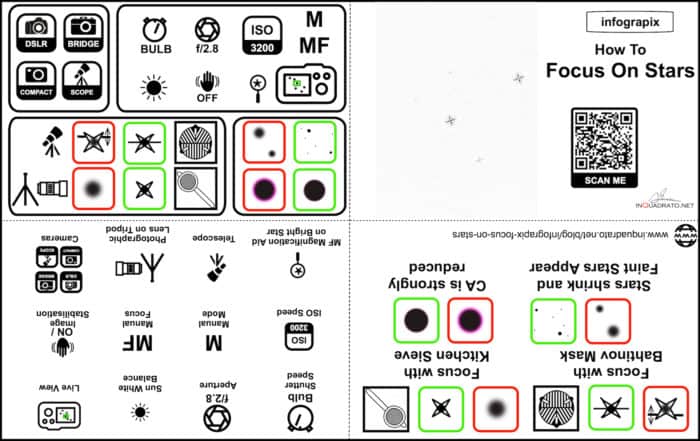 Infographic on how to focus when taking pictures of stars[/caption]
Frame the Photo
Once your tripod is set and your focus is good, it is time to frame your target.
With star trails and starry landscapes, framing is like with any classic landscape composition.
Take a test shot using a very high ISO around 10,000. This sample shot allows you to check the composition. Make sure your horizon is level and the foreground element is in the right place in the frame. The test image will have too much noise. But it helps you frame the scene without waiting 30 seconds for a long exposure.
If you’re lighting the foreground element, you may not be able to see the illumination with the naked eye. Remember that you’re taking a long exposure. The light will intensify with exposure time.
In some situations, it may be better to expose for the foreground element separately. This may mean exposure time of a couple of minutes. You can combine the foreground image with the night sky image in post-processing.
 Preparing for some Milky Ways shots.[/caption]
If you are after DSO photography, identify your celestial target. Then double-check that its path across the sky will stay unobstructed.
Take the Shot
Once you’ve checked your composition, lower the ISO and exposure time to the correct camera setting and take another test shot.
Use this image to check that your stars are in focus, sharp and round. Unless, of course, if you are shooting star trails. Make sure that highlights aren’t clipped.
The settings we’ve suggested are a general starting point. If you are not happy with the result, feel free to experiment with different camera settings.
To reduce noise in the image, some photographers take a series of 10 to 12 images of the same scene. In post-processing, they use programs like Starry Landscape Stacker to merge the images together. The program adjusts the stars to remove the movement, then compares the frames to reduce noise.
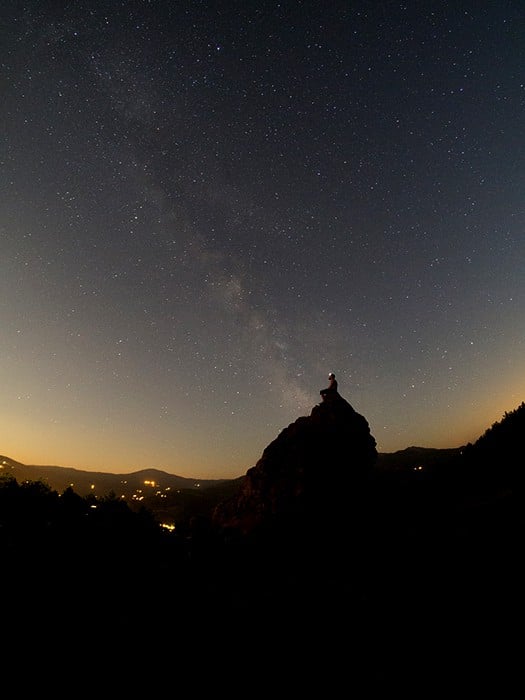
A man sitting on a rock under an impressive star-filled sky
Conclusion
Capturing star pictures is not the easiest skill to master. But when you do, you will get breathtaking images.
Camera settings vary depending on the type of star photography. Exposure time is determined by the focal length of your lens. High ISO values are often needed to balance out limited exposure time.
Specialized equipment like intervalometers and tracking heads help photographers extend the exposure time.
If you loved taking star photos and want to learn more, try our Milky Way Mastery course!!