Every landscape photographer should learn how to edit their photos. The problem is that there are countless Photoshop landscape tutorials available. And not all of them are that good.
I’ll show you the basics of everything you need to know on how to Photoshop landscape photos.
A Guide to Photoshop Landscape Editing
You can edit your landscape photos in a million different ways. That’s also why a lot of photographers go too far and create something that doesn’t look anything like the original scene.
It’s important that your landscape photos look natural. The main purpose of editing landscape photos in Photoshop is to correct your camera’s mistakes and the limitations of the sensor. If you want the best results, it’s important to shoot in RAW.
Shooting RAW will give you the most editing options from all the tools and functions that Photoshop offers.
1. Start to Edit in Camera RAW
Here’s my basic workflow when I edit a landscape in Photoshop.
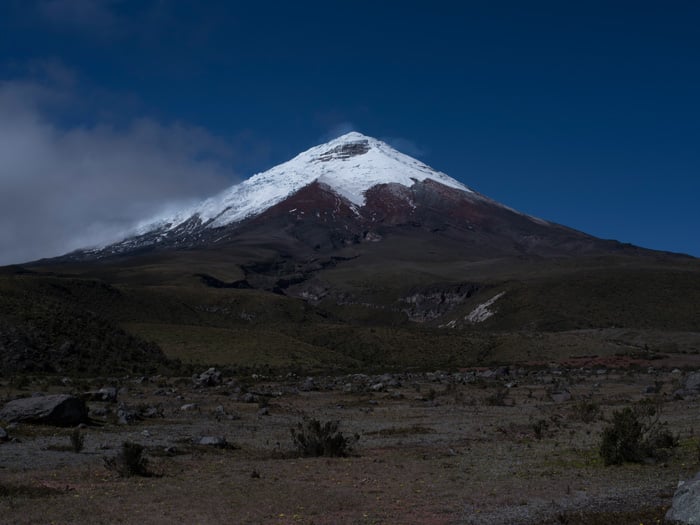
I’ll use this photo of the Cotopaxi volcano that I took.
Step 1. Set the Right Exposure
The first problem with this photo is that I had to underexpose it by a few stops in order to keep the detail and texture of the snow.
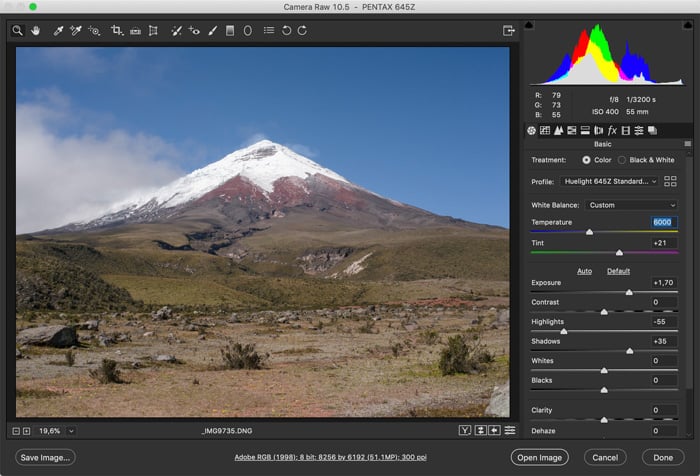
Open the RAW file in Photoshop. Camera RAW will pop up. Use the Exposure slider and set it so the overall photo looks correctly exposed.
In my example, I’m not paying attention to the snow at the moment.

Step 2. Adjust the Shadows and the Highlights
After setting the exposure, some parts of the photo might not look right. In my case, the snow areas are blown out. Use the Highlights or Shadows slider to bring back texture and detail in those areas.
It doesn’t have to look perfect yet, we’ll add finishing touches in Photoshop.
Step 3. Adjust the White Balance
It was a very sunny day, and the camera corrected the white balance a little bit too much. The scene looked warmer when I took the photo. Use the White Balance slider to make the overall photo look warmer or cooler.
Twilight shots, for example, often look better when there’s more blue in the photo.
Step 4: Saturation and Colors
The colors look a little bit too flat. I want them to pop a little bit more. Use the Vibrance and Saturation sliders to adjust the colors and overall look of the landscape photo.
Don’t go overboard here. It’s OK to experiment with these sliders, but try to keep the colors realistic and natural. Try to stay as close to the original scene as possible.
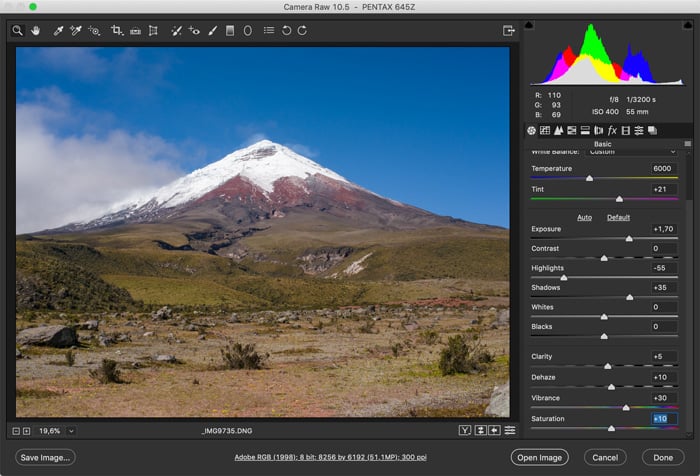
Sometimes, there’s a lot of haze in the distance. This affects the contrast of your landscape photos. Use the Dehaze slider to add contrast again in those areas of the photo.
2. Finish Editing in Photoshop
Always edit the final details in Photoshop. Some Photoshop landscape tutorials go way too far. I like to keep it simple.
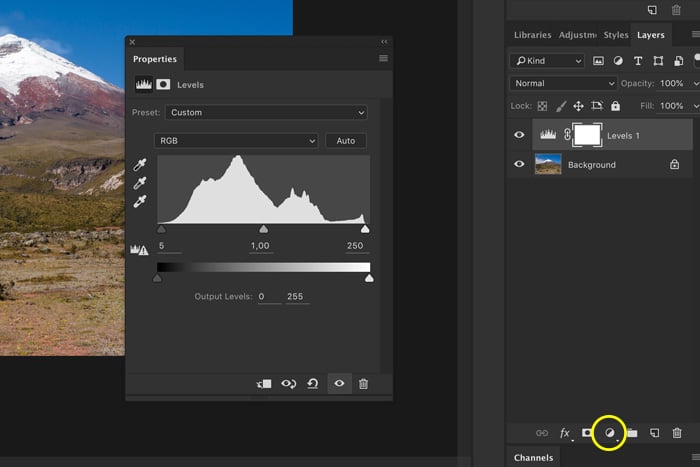
Step 1. Adjust the Levels
Click on the "Add Adjustment Layer" icon and select "Levels."
Click on the carrots (circled in yellow) in the Levels window and drag them inwards. This will increase the contrast of the photo.
In my example, I need to drag the white triangle inwards quite a bit to get the contrast of the overall photo right.
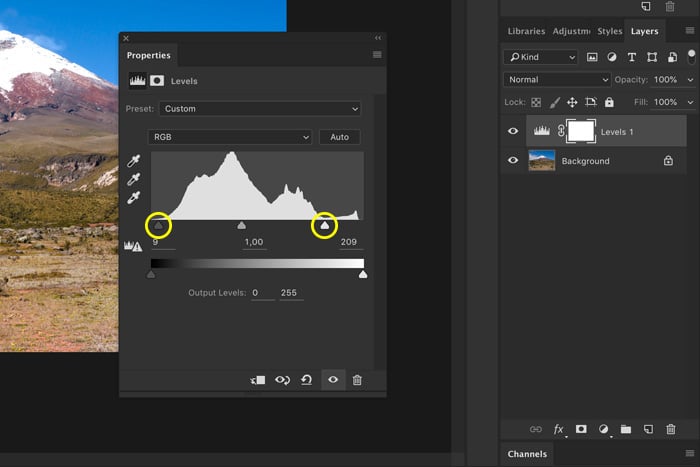
However, this affects the highlights of the photo. So, we have to correct this.
Step 2. Bring Back Highlights
Select the Brush tool from the sidebar and set it to "Darken."
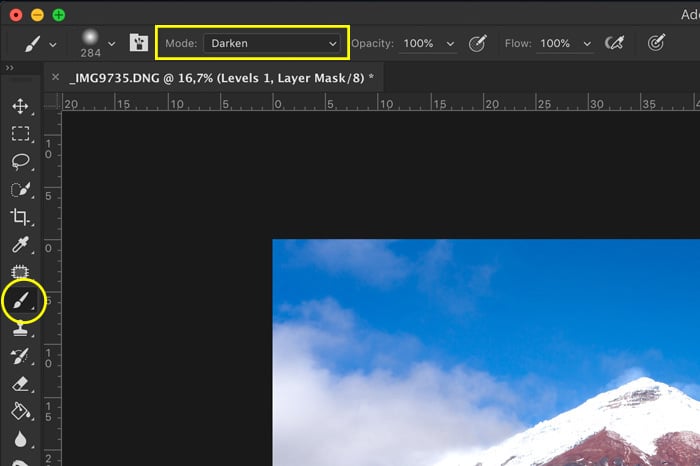
Now, the brush will only affect the highlights in the photo. Make sure to select the mask thumbnail of the Levels adjustment layer.
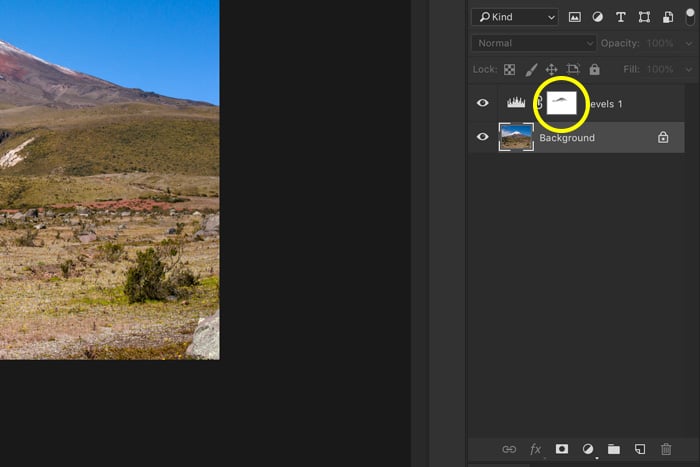
Start painting over the highlights in the photo. The color of the brush should be set to black, and in the mask thumbnail, you’ll see the changes.
Because it was such a sunny day, I don’t mind that the snow "glows" a little bit. But there should also be a hint of texture.
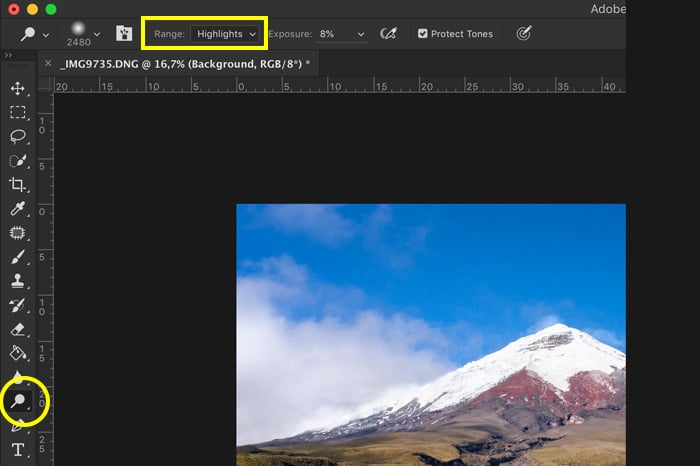
Step 3. Dodge and Burn
Now we can use the Dodge and Burn tools to lighten or darken certain areas of the photo. Dodge lightens and Burn to darkens. I used the Dodge tool to brighten up the foreground of the photo.
Select either one of the tools and start painting over the photo. In the top menu, you can choose if you want to affect the highlights, midtones, or shadows of your photo.
You can always undo it with Cmd + Z (Ctrl + Z for Windows).
Step 4. Crop
Finally, crop the landscape photo. Select the Crop tool and set an aspect ratio. Usually, you want to keep the original ratio.
Sometimes, the photo might look better when cropped to 16:9 or square, for example. Drag the corners of the photo until the crop is perfect.

And that’s it. These are some of the basic edits you should know and start experimenting with.

Conclusion: How to Edit Landscape Photos in Photoshop
Photoshop has so many tools and functions that it might look overwhelming, but it doesn’t have to be.
Stick to basic Photoshop landscape tutorials to keep your photos from looking fake and overcooked.
With just a few tools, you can make your landscapes look naturally beautiful.