Landscape photography can be one of the most rewarding genres to shoot. But it’s not as simple as pointing your camera in a pretty direction and hitting the shutter button. A great landscape photo requires careful composition, correct exposure, and often some post-processing. In this article, we’ll share 11 tips for how to edit landscape photos to perfection.
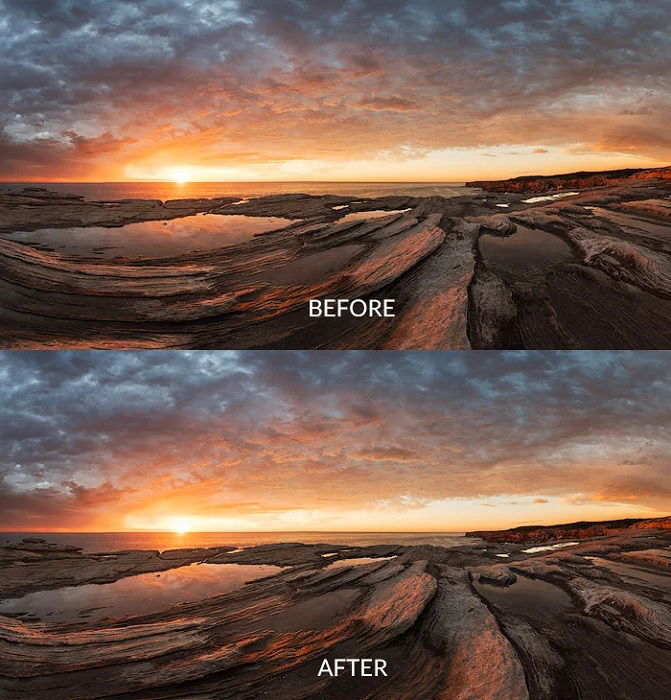
Adobe Lightroom and Photoshop offer the best tools for landscape photo editing. And one of the best recent additions to the toolset has to be the dehaze filter.
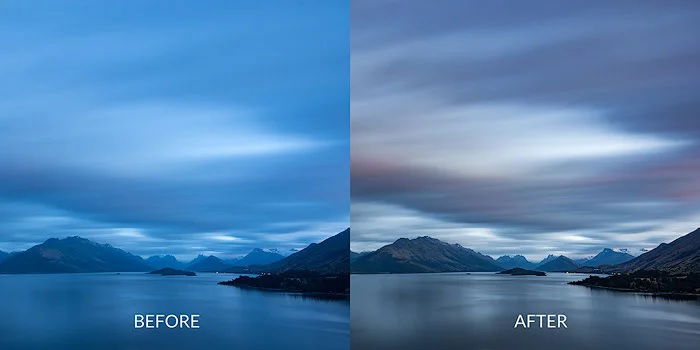
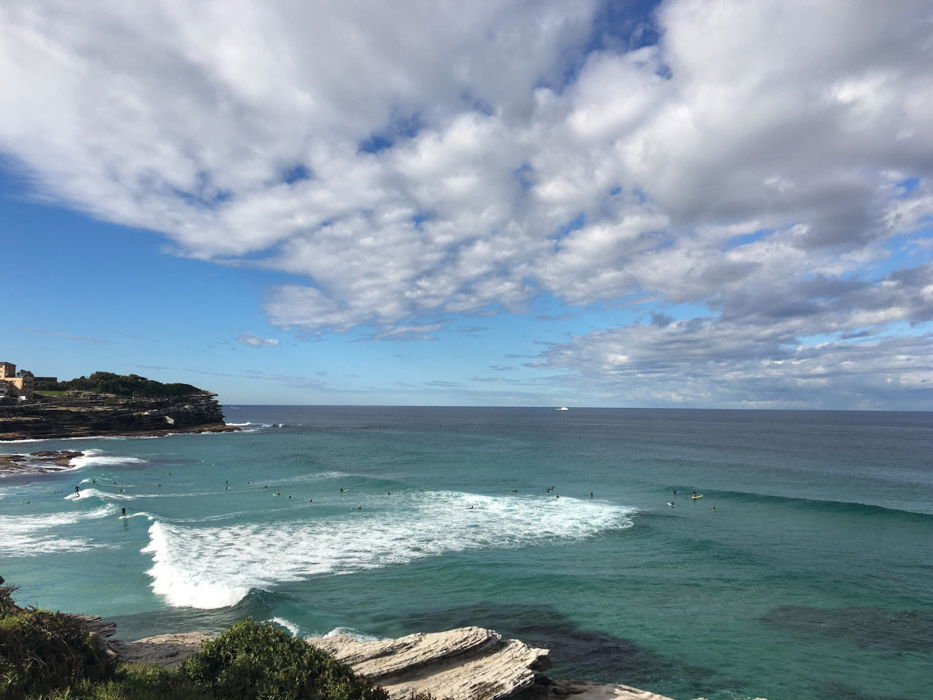
It offers some unique features that you can’t easily utilize for nature photography using other filters. As the name states, the filter reduces the haze in the photo.
It’s best to use when you have a hazy, rainy sky that looks grey and dull. Just a little shift of the slider to the right creates unbelievable detail.
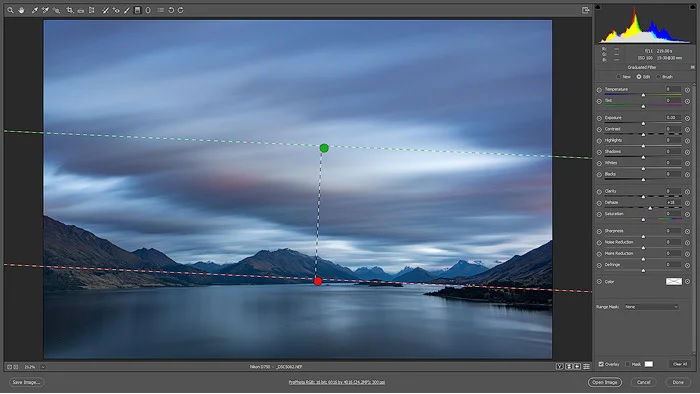
It’s easy to overdo it with the filter. Either pay attention to all parts of the photo or adjust locally using a Brush tool or a graduated or radial filter.
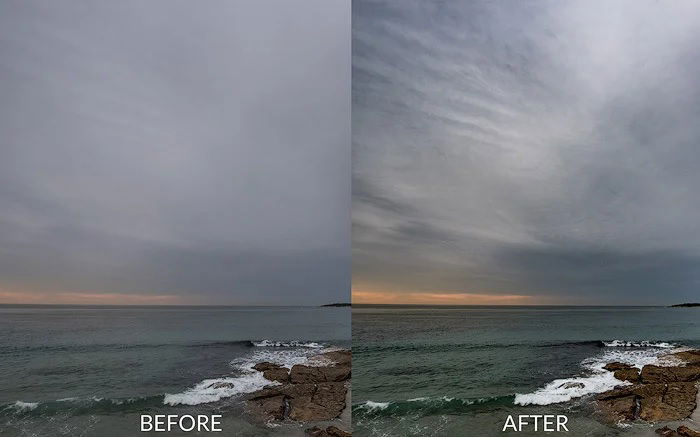
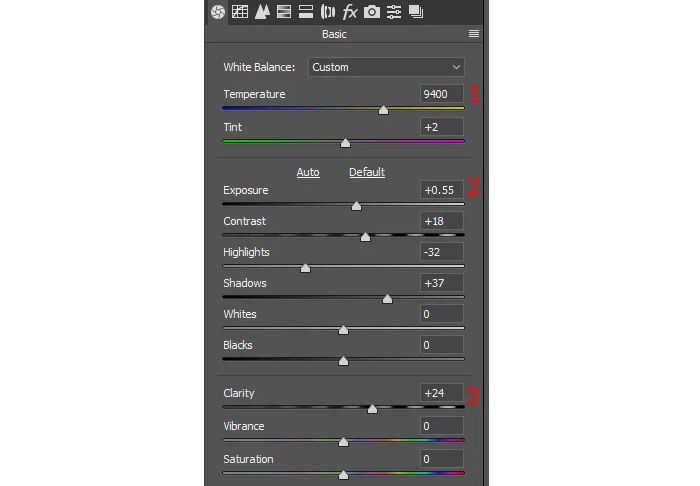
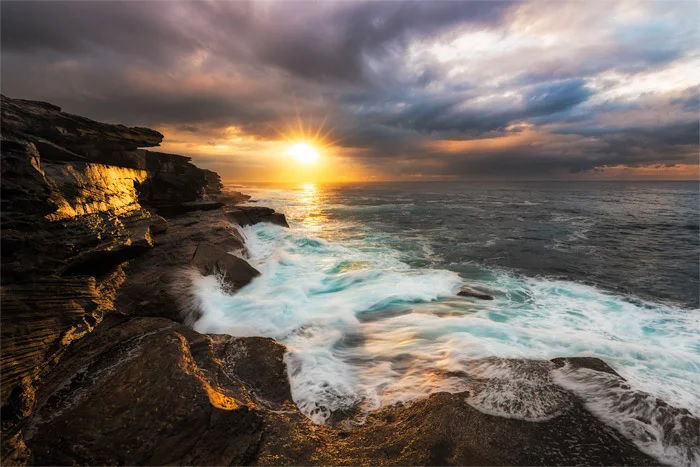
You can see the exact setting I used in the image below.

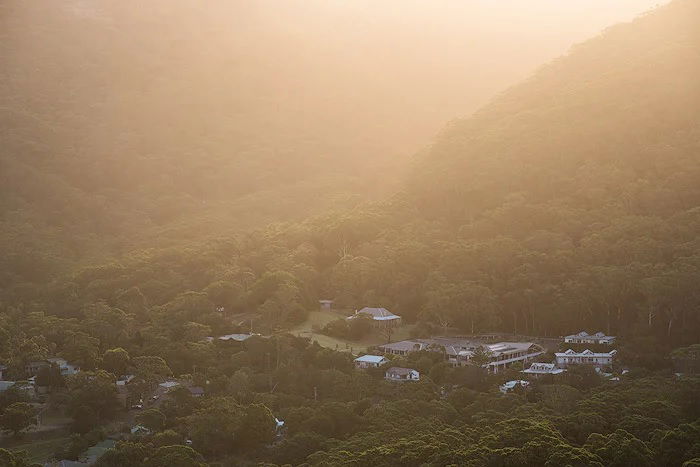
Another use is to increase the haze by shifting the slider to the left. I recommend dehazing locally by using a radial filter to add some haze in the distance, hence creating an aerial perspective.
You can also make a global dehaze adjustment. This adds an airy feel to the photo. But in this case, you need to increase the contrast to compensate.
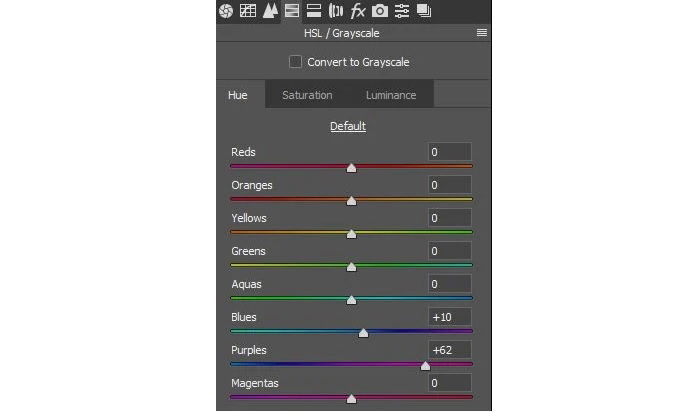
There are a few ways to improve the colors in your landscape photography. First of all, during the raw conversion, navigate to the HSL tab in the Hue section.
This section allows you to change the hues of the colors in your photo. For instance, you may want to shift green towards cyan to make it more emerald than yellow.
Or you may want to move the yellow slider to the left to make it more orange and separate from the rest of the photo.
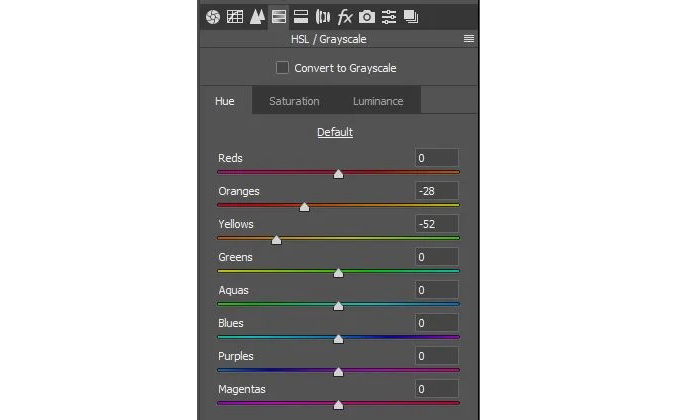
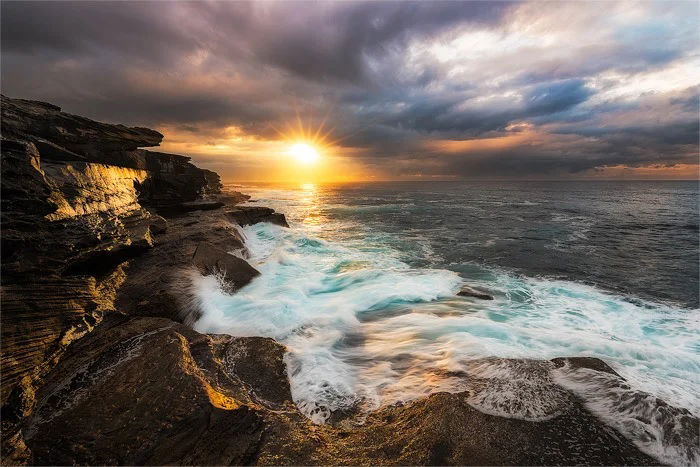
For a sunrise or a sunset, I usually shift yellow to the left and sometimes move orange to the left to bring out the reds.
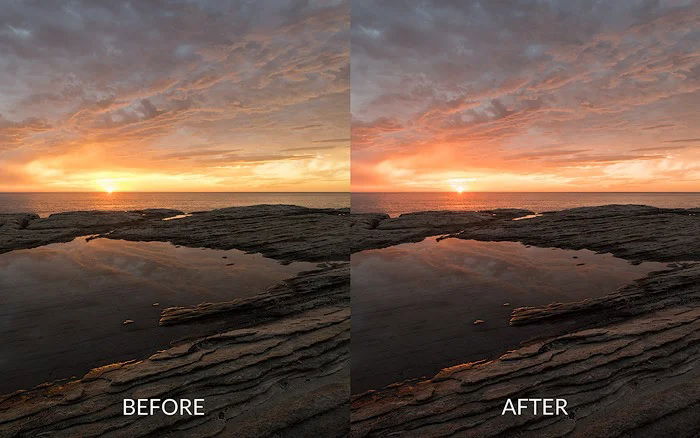
These are the values I used for the color enhancement above:
Also, in the luminance section, it’s safe to make the blue and cyan darker to darken the sky and make the clouds pop. These actions have the same sky-darkening effect as a polarizing filter.
The important thing to note here is that the saturation increases when you darken the color. After darkening, navigate to the saturation tab and decrease it for the same colors.
Another cool tip is to use the Targeting tool. Select it, click anywhere on the photo, and drag your mouse to the left or right. It will pick the proper amounts of colors and change the sliders accordingly.

If you’re after a quick fix for sky replacement, Luminar Neo could be the software for you. It’s an AI-powered program. And the sky replacement tool is one of its key features. You’re limited to the sky options in the program, but it’s a one-click operation.
Adobe Photoshop still gives you the best options for manual sky replacement in landscape photography. All the Layer and Brush tools give you creative control to create a seamless composite image.
We’ll show you how this is done by master landscape editor and Expert Photography collaborator Zach Doehler.
You need two images for your landscape composite—the original landscape and the sky you want for the final image.
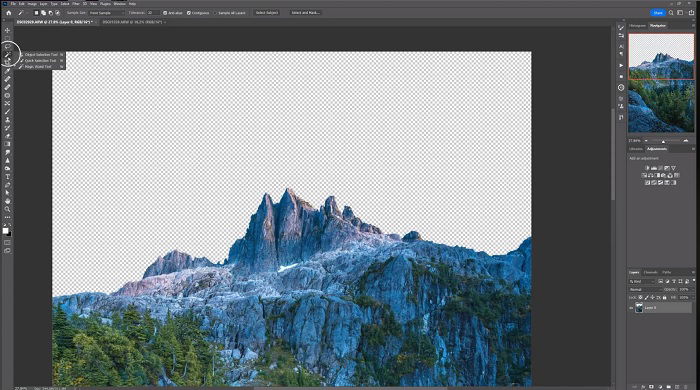
Open the landscape image in Photoshop and remove the original sky. You can use the Magic Wand tool to select the sky, then delete the highlighted area by clicking backspace/delete.
The wand works well if the line between land and sky is clearly defined. If not, you might want to use the Eraser tool to do it manually.
Once you’ve cut out the sky, add the other sky image as a new layer. You might need to resize it if it doesn’t quite fit. Then you need to position it in the way you want. The sky layer needs to be below the landscape layer to avoid any visible overlap.
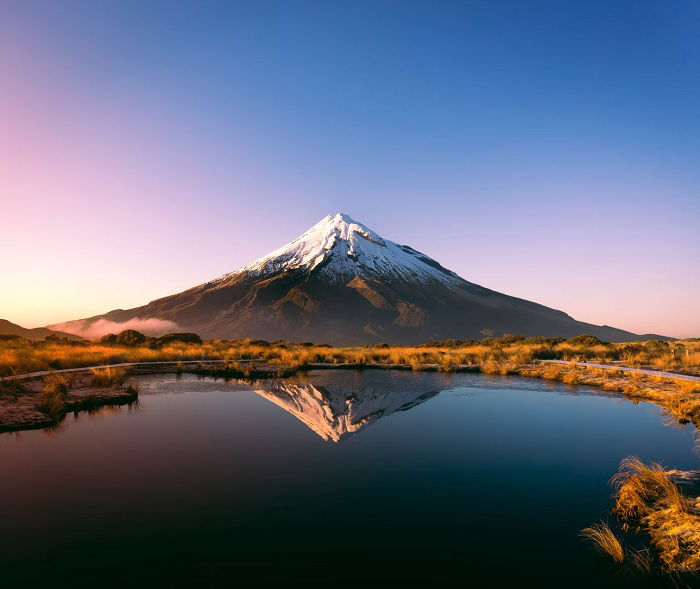
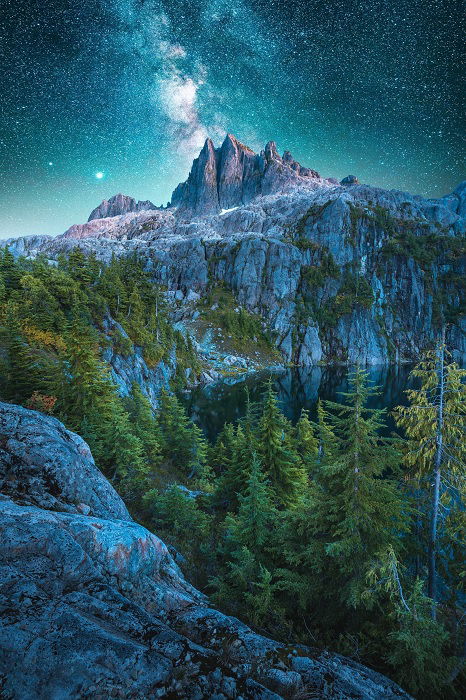
You can choose any sky you like for the replacement. You can change a cloudy scene to blue skies. Or you can change day to night. In our example, Zach added a milky way night sky into his mountainous landscape.
Whether you’re shooting landscapes, portraits, or product photography, you should be shooting in RAW. A RAW file carries far more information than a JPEG. And they give you much more freedom and control when it comes to photo editing.
The other implication is that you need to edit in RAW converter as much as possible. Adobe Lightroom is the best on the market. When you edit during the conversion, you still keep all of the thousands of tones stored in a RAW file for smooth tonal transitions.
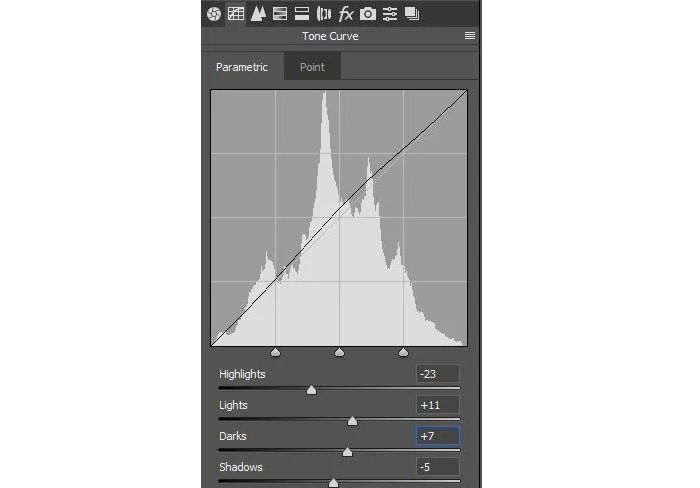
Here are the changes I made in this photo (all in RAW):
The final step is to set the profile to ProPhoto, or at least AdobeRGB. And I set it to 16 bit before finishing the conversion and transferring it into Photoshop.
These color profiles offer a better range than sRGB. You’ll have better quality files in the end. Only convert to sRGB and 8 bit before saving the final file or preparing a web version.
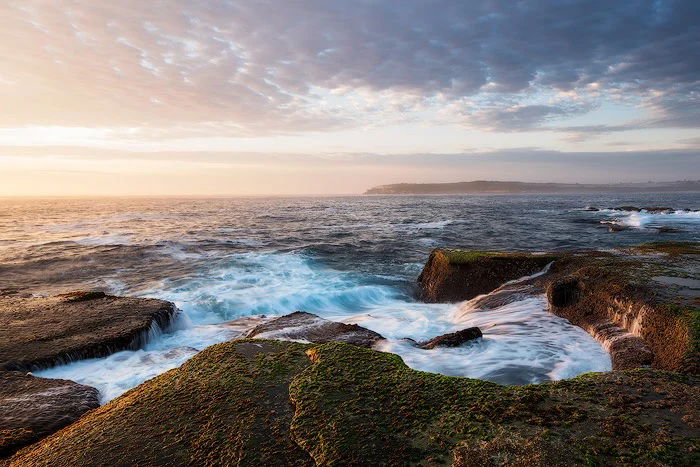
There is a quick and easy way to add a glowing effect to your photo. This effect works particularly well for light and shiny objects, like clouds or water-soaked rocks.
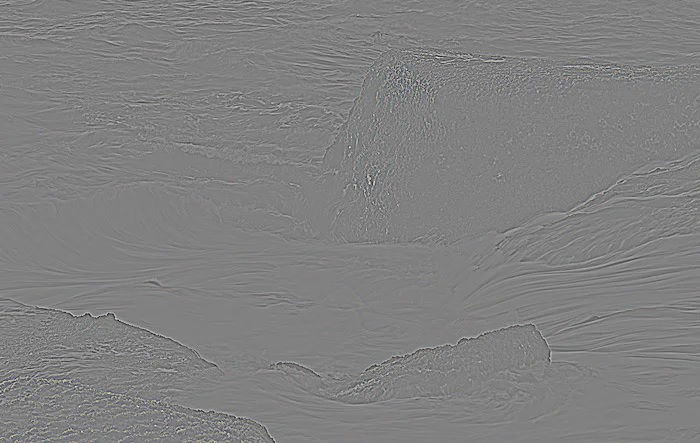
To add this effect, start by making a copy of the merged image. You can use Ctrl+Alt+Shift+E. This will combine all the layers into one master layer.
Copy this merged layer again so you have two layers. You can use Ctrl+J for this action.
Make the top layer active. Go to the Filters > Other > High Pass. You need to select a radius that reveals the most details. The best value is typically around five pixels, but you should experiment to find what works best for your image.
When you downsize the images, they can get blurry. Even if you choose Bicubic resampling, the results still might be disappointing. Sometimes the sharpening looks too crude and inelegant. And you want your images to look their best when you post them online.
Here is an easy way to sharpen your images for web publishing:
Method 1: Using Sharpen
Now evaluate the results. If the photo is too sharp, revert a few steps. Try two sharpens instead of three.
If the photo is not sharp enough, copy it into another layer, and apply sharpen again. Then adjust the opacity until it looks perfect.
These are our results.

You should always try and capture perfect composition when you’re taking a picture. But once the photo is on your computer, you can still enhance or adjust the composition.
The first thing to use is the Crop tool. It has several pre-built overlays so that you can check the leading lines and overall layout. Run the Crop tool and have a look at the menu on top to select the overlays.
You can also cycle through them by pressing the “O” button. To change the alignment within a single overlay, press Shift+O.
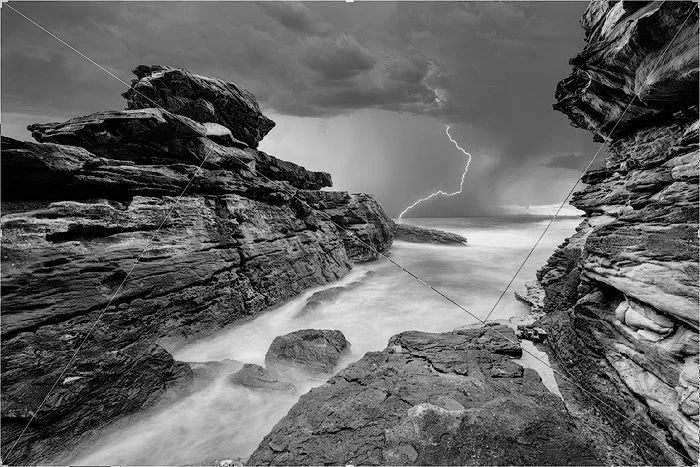
The Overlays menu gives you excellent tools for enhancing your composition skills. You can choose between the rule of thirds, golden ratio, and triangle overlay. These form a foundation on which you can build your landscape composition.
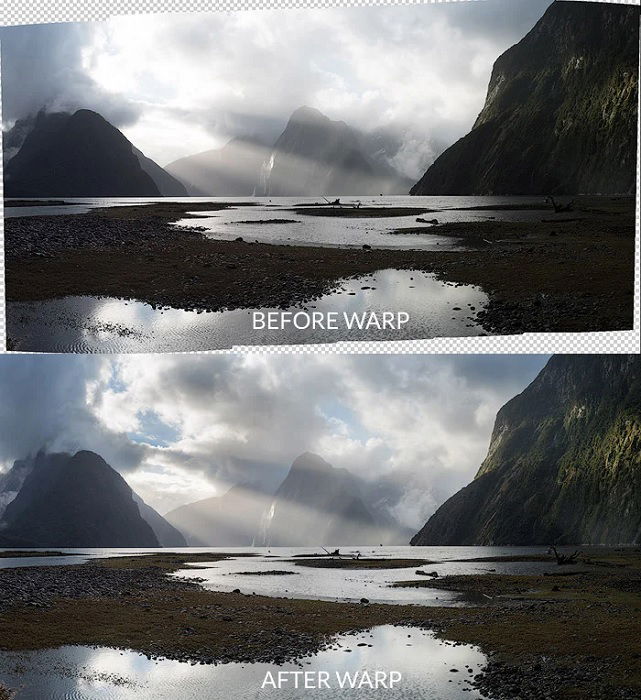
Another great way to fix the composition is the Warp tool. Select the whole image, go to Edit > Transform > Warp, and drag the edges. You can also select part of the image to warp it. But in this case, we copied it to another layer first.
Sometimes the Transform tools produce a single-pixel transparent line on the edge of your selection, and it’s hard to get rid of. In the case of a copied layer, this thin line will be filled with the background layer.
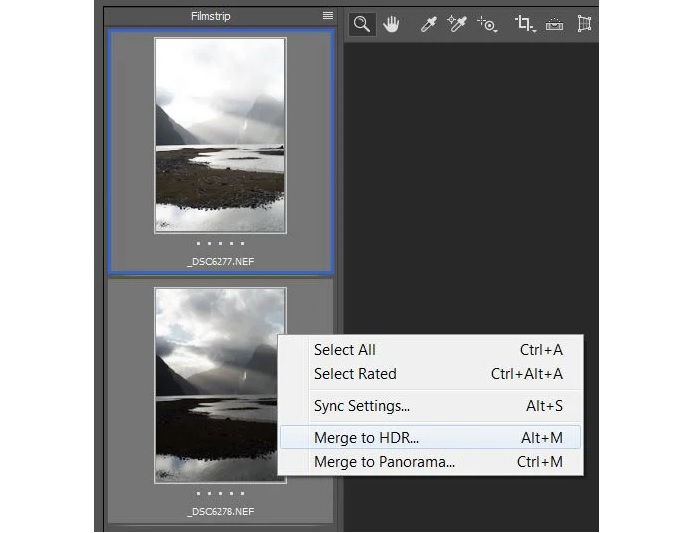
Panoramic photos can be nasty when they also have bracketing. The traditional approach would be to load all of them into Photoshop, merge each pair separately, and only then merge them into a panoramic. This approach gives the most control but takes the most time.
I suggest using something simpler than that. Open all panoramic component images into the raw converter.
Select the first pair of bracketed shots, right-click, and Merge to HDR. Photoshop and Lightroom photo editing do a good job merging these layers.
Typically, you’ll need to disable de-ghosting as it can cause problems during this process.
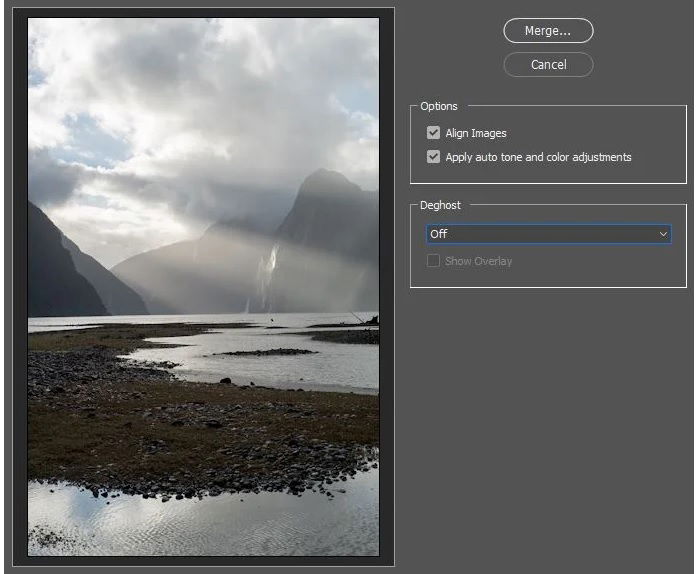
It’s up to you whether or not to enable the basic editing check box. If it’s enabled, the algorithm will shift some sliders for you within the raw conversion. Click OK and save it as a DNG file.
Repeat for every pair until you have all blends as DNG files. Deselect all RAW files and select all DNG files instead. Right-click > Merge to Pano.
If all goes well, you’ll get the stitched pano. Try different modes to see which one you like the most. You can try a few options for comparison.
Finally, use Boundary Warp to fix the curved lines and edges.
If it cannot merge your pano automatically, you’ll need to open all of the DNG files in Photoshop and merge them in there. You can also use other tools like Autopano.
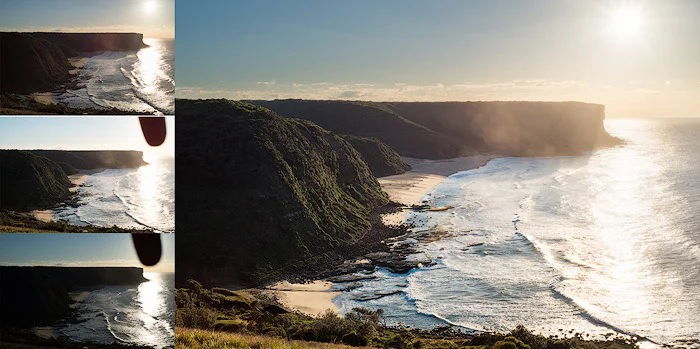
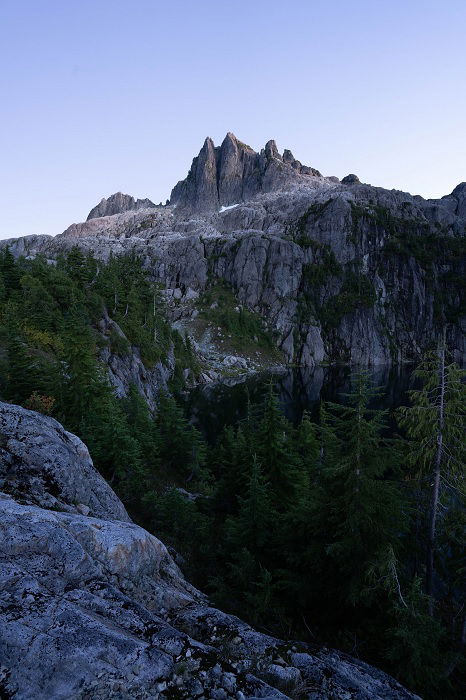
Lens flare appears when an active light source appears inside your frame. It can also appear if the light source is on the outside edge of your frame. It affects the colors and contrast and can be a distraction in your photograph.
Any lens with a glass coating can produce flares. If you’re using a very high-quality lens, you might experience less flare. But there’s no way of avoiding it completely. But you can remove it when editing your landscape photos.
The best trick is to take several photos when you’re shooting with your camera. You create one shot with the sun in the picture. This shot may include bracketing too.
The second shot is the same composition with exactly the same settings. The only difference is that you cover the light source with something. I usually use my finger, but it can be anything you have available.
This simple method saves the contrast and the colors, and you can easily blend exposures later during editing.
Ok, so you’ve started doing bracketing instead of the graduated filters. But what’s next? Now you need to learn how to merge shots into a new shiny HDR (high dynamic range) image. There are numerous ways to do that.
Select multiple exposures in Lightroom, click Merge to HDR, and enjoy. But be careful. This process doesn’t always produce the best results. And it doesn’t work when you need to create an HDR shot from a single exposure after converting it twice with different values.
Choose the Quick Selection tool from the tool panel, then carefully select the sky. Use Alt+Click to deselect a portion of the selection or Shift+Click to add to it. The smaller the circle’s radius, the less it will select. It’s better to use a smaller radius for the finer details.
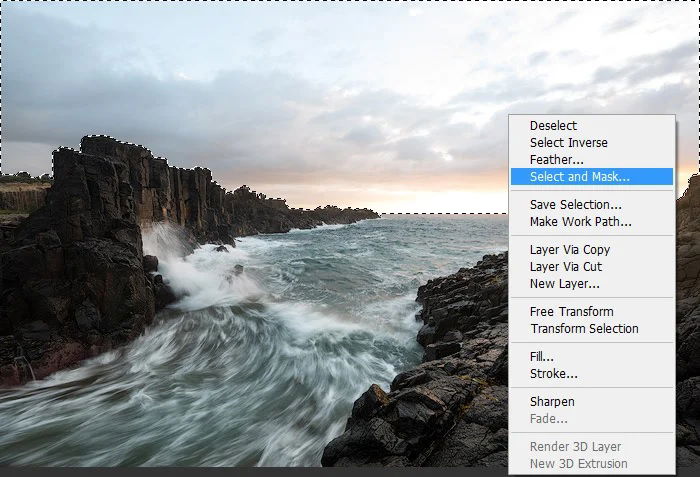
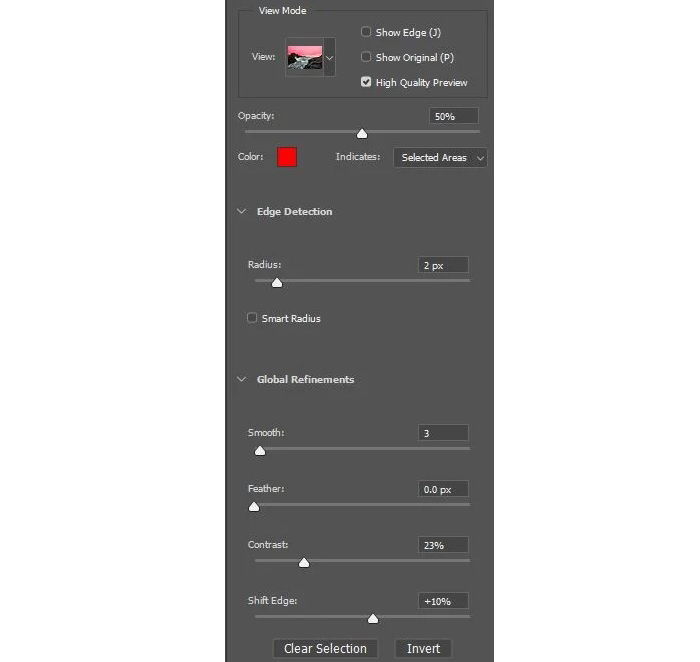
After the selection, right-click on the photo. Choose Select and Mask tool to fine-tune the selection. The right values here are a two-pixel radius and a one-pixel feather.
Use the Shift Edge slider to shift the selection edge out of the current position. I found that around 20% Shift Edge works best for the sky selection.
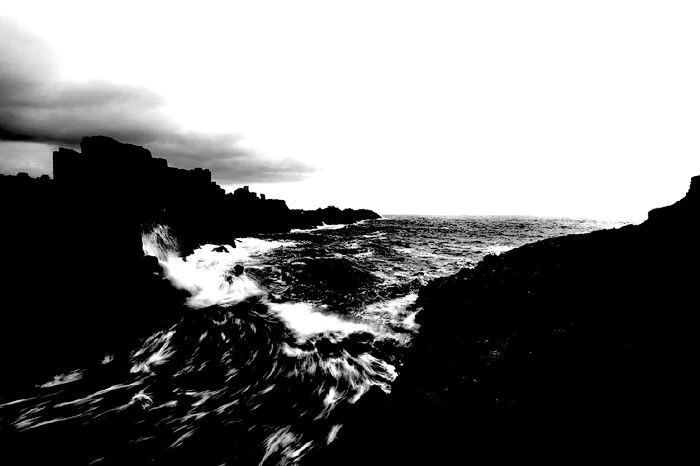
The is the most advanced and modern technique. There are numerous implementations available—TK Panel (Tony Kuyper), RayaPro (Jimmy McIntyre), and ArcPanel (Anton Averin). I prefer the TK Panel, but the general idea is the same across all of them.
You need to select the zone that covers most of the sky. Typically, you just click through different zones to find the right one.
Then you need to fix it using the Levels adjustment to exclude anything from the foreground. Then apply it to the darker layer.
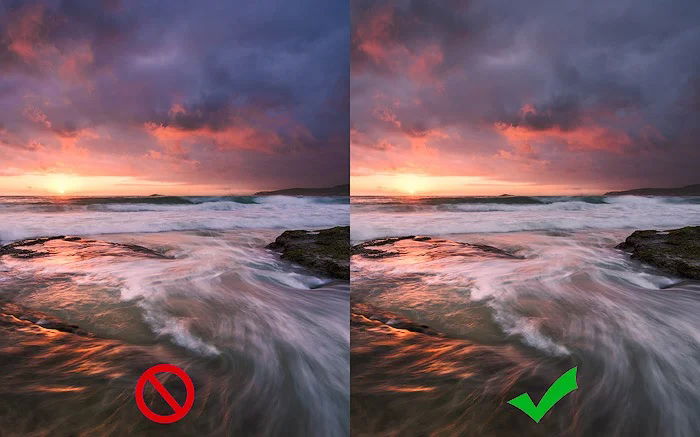
This saturation advice is my favorite. Even many professional photographers have issues with it. Your image should look like a photograph, not a kid’s painting! The best way to avoid this is to keep the saturation settings low.
Use the Vibrancy slider if you need to make the colors pop. Saturation pulls the strongest colors making them even stronger, while Vibrancy adjusts more of the secondary colors. This way, you’ll get more tones and half-tones without the eye-popping effect.
This is because the saturation naturally increases when you boost contrast. The more you edit the contrast in different parts of your image, the more color you get. I often desaturate parts of the image to accentuate the viewer on the one primary color.
For instance, you have a bright sunrise with red clouds. I would reduce the luminance of the blue tones. This action naturally increases the saturation, so I would go and desaturate blue tones in the HSL tab. This way, the blue helps the red pop, increasing the warm tones of the sunrise.
If the blue were just as strong, it would look unnatural. And the viewer wouldn’t know if I’m trying to emphasize the sunrise or how blue the sky is.
Landscape photo editing is an integral part of modern digital photography. It puts more power in the photographer’s hands. And photo editing allows them to express themselves more freely in their artwork.
There is such a thing as going too far. But everyone has different opinions about how much is too much. The main thing is that you edit your landscape photos well.
We’ve given you some of the best tips on how to edit landscape photos. Now you can replace skies and create HDR images that will impress anyone. Take the time to learn the steps and soon you’ll be a master of landscape photo editing.
![P38 [Lead gen] sidebar banner Related course v1](https://expertphotography.b-cdn.net/wp-content/uploads/2022/05/P38-Lead-gen-sidebar-banner-Related-course-v1-300x295.jpg)
![P38 [Lead gen] Sidebar Banner Offer 1](https://expertphotography.b-cdn.net/wp-content/uploads/2022/05/P38-Lead-gen-Sidebar-Banner-Offer-1-300x245.png)
![P38 [Lead gen] Sidebar Banner Offer 2](https://expertphotography.b-cdn.net/wp-content/uploads/2022/05/P38-Lead-gen-Sidebar-Banner-Offer-2-300x245.png)