Photography posing starts with one comfortable position and a few small adjustments. Tell your subject where to stand or sit, give their hands something to do, and change one thing at a time. You don’t need a new pose for every frame.
This guide brings together portrait, couple, group, family, and specialist posing advice. Start with the directing steps below, then use the sections that match your shoot. The linked guides provide more pose examples and instructions.


How to Direct Photography Poses
Before choosing a pose, ask what the pictures are for and how your subject wants to appear. A business headshot, a playful family photo, and a fashion portrait call for different expressions and body language. Ask about any positions they find uncomfortable.
Build a pose in this order:
- Choose the spot. Check the light and background before asking your subject to hold a position. Move yourself if a branch or sign appears to grow out of their head.
- Set the base. Offer a standing, seated, or leaning pose. For a standing portrait, try a slight body turn and a comfortable weight shift. Demonstrate the movement yourself.
- Place the hands. Give one small task: “Rest your hand on the chair” or “Hook your thumb into your pocket.” Let the fingers settle instead of arranging each one.
- Adjust the face. Ask for a small turn toward the light, then tell them where to look. Take one frame and check the chin, expression, and focus.
- Make a variation. Keep the body position and change the gaze, hand position, or framing. Let your subject move and reset between pictures.
Use specific directions such as “Turn your shoulders toward the window” instead of “Look more natural.” Describe the movement you want, without criticizing someone’s body. Ask before making any physical adjustment.
The sections below cover general posing tips, individuals, pairs and groups, families and children, women’s portraits, and specialist shoots.
General Posing Tips
Start with these approaches to expression, hands, and body position. Each section links to a guide with more examples.
Natural Poses
Talk to your subject while you set up. Ask about their interests and explain what you’ll photograph first. Someone who knows what happens next has fewer decisions to make in front of the camera.
Watch how they stand or sit before giving instructions. Keep a position that already suits them and make a small adjustment, such as turning a shoulder or moving a hand. Show the pose yourself if a spoken instruction causes confusion.
For movement, ask them to walk a few steps, adjust a jacket, or handle a familiar prop. Photograph the action and the pause afterward. With couples and families, suggest a handhold or hug only if everyone wants that contact.
Relaxed poses give you more ways to work with those everyday movements.

Use props for relaxed poses
Natural Smiles
A long-held smile can look strained. Give your subject a break between frames, keep talking, and watch for the expression that follows an answer or a laugh.
Ask about a favorite place, person, or activity. If a joke falls flat, move on. A quiet expression can suit the portrait better than a grin, so take both if your subject is comfortable.
Let them wear an outfit they like and choose a setting where they feel at ease. For a family, a familiar game or a parent just beside the camera can draw attention without repeated calls to “say cheese.” You can learn more tips for getting people to smile for pictures in our smile guide.

Posing Hands
Start by giving the hands a purpose. Ask your subject to hold a jacket lapel, rest a hand on a chair, or put a thumb in a pocket. If the fingers look tense, pause and let them shake out their hands.
Check the position through the camera. A hand reaching toward the lens can dominate the frame; bring it back toward the body if that isn’t the effect you want. Turn the hand slightly to compare its edge with the broad side of the palm.
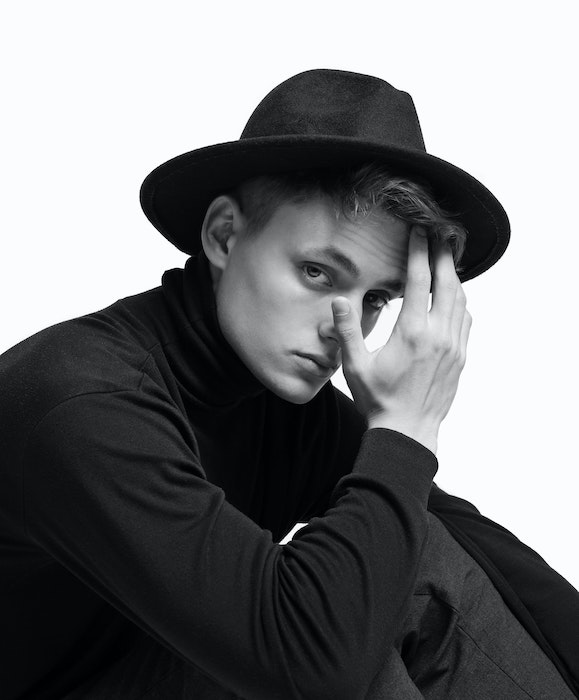
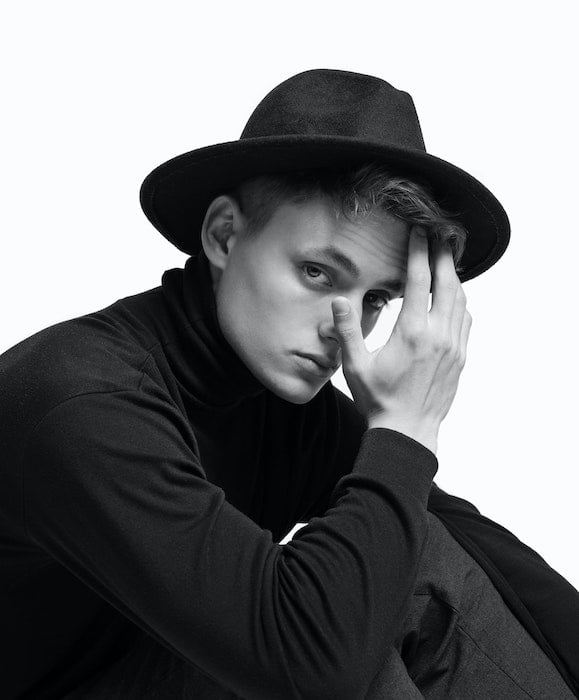
For a hand beside the face, ask for a light touch so it doesn’t press into the cheek. Leave room around the hands when framing, then choose a deliberate crop. Try different positions for each hand instead of forcing symmetry.
See our complete hand-posing guide for more placements for portraits and close-ups.

Sitting Poses
Start with a stable chair or bench and ask your subject to sit in a position they can hold comfortably. Try a slight turn, both feet on the ground, and one hand resting on a thigh or the chair.
For a more attentive expression, have them lean forward a little from the hips. For a quieter portrait, turn them sideways and let an arm rest along the chair back. Change their gaze before moving the whole body.
On steps or the ground, try different knee heights and a loose arm around the legs. Check that the pose is comfortable before asking someone to cross or tuck their legs. Two people can sit side by side, back to back, or turned toward each other.
You can learn more about sitting poses for individuals, couples, and groups in our sitting guide.

Selfies
Choose the frame first: a close portrait, a waist-up picture, or a full-body view. Then try a small shoulder turn, a look over one shoulder, or a hand resting in your hair.
For eye contact in the finished picture, look at the lens rather than your image on the screen. Take a second version looking away. Compare camera heights instead of assuming one angle will suit every face.
If you use a selfie stick, set the framing before you settle into a pose. Check the edges of the frame when including friends, pets, or the surroundings. Keep your position secure while you concentrate on the screen.
Our selfie poses guide has more expressions and framing ideas to try.

Posing Individuals
For one-person portraits, choose a small set of standing, seated, and leaning positions. Ask how formal or casual the pictures should feel, then vary the hands, gaze, and crop within each position.
Headshots
Start with your subject sitting or standing comfortably, with their shoulders settled. Ask them to turn their body slightly while keeping their face toward the camera. Compare that with a straight-on version; the purpose of the headshot should guide the choice.
Check the chin from the camera’s position. Pulling it back or tucking it tightly can emphasize a double chin. Try “Bring your face a little toward me, then lower your chin slightly.” Keep the movement small and stop if it feels strained.
Take versions looking into the lens and just off-camera. A wall or chair can give a nervous subject somewhere to rest, but check that their shoulders haven’t crept up.
You can learn more about headshot poses for business and personal portraits in our headshot guide.

Posing Females
Choose poses to fit the person and the brief. A direct, square stance can convey confidence; a body turn, a seated lean, or a look over the shoulder gives you a different shape to work with.
Try one hand in a pocket, elbows resting on a table, or arms raised for a fashion portrait. Ask the model to move into the pose rather than hold a rigid position from the start. Check the hands and shoulders before taking the next frame.
For an informal portrait, offer a comfortable seat or ask the model to lean against a wall. Floor poses, curled-up positions, and squats are optional choices, not requirements. Let the subject decide which movements suit them.
Our female poses guide gives you more references to adapt to your shoot.

Posing Males
Match the stance to the picture’s purpose. For a business portrait, try a standing body turn, a seated lean, and loosely crossed arms. For a casual session, add hands in pockets, an outfit adjustment, or a walk toward the camera.
Give the model a task such as fastening a jacket or resting a hand on a railing. Take a frame after the movement settles, then change the gaze or move your camera position.
Check that a seated lean doesn’t lift the shoulders toward the ears. A hand near the face can frame the expression, but it should stay there lightly. None of these poses is limited to men; use the ones that fit your subject.
You can explore male poses further in our portrait-posing guide.
Posing Pairs and Groups
Start by deciding how the people relate to each other in the picture. A couple may want close contact, friends may prefer a shared activity, and a formal group may need everyone facing the camera. Ask before choosing the pose.
Posing Couples
Begin with the couple standing side by side, holding hands if they wish. Take one picture looking at the camera and another looking at each other. Then ask them to walk slowly together while you keep their faces in view.
For a closer pose, have them turn toward each other or let one partner stand just behind the other. Offer a hug, a forehead touch, or a kiss on the cheek as options. Don’t assume every couple wants to kiss for the camera.
Add an activity they enjoy, such as dancing or sharing a drink. You can photograph a turn or a small step without asking for a lift or a balancing act. For seated pictures, let them settle first and adjust the space between their shoulders.
You can learn about couple poses in-depth in our couple-posing guide.
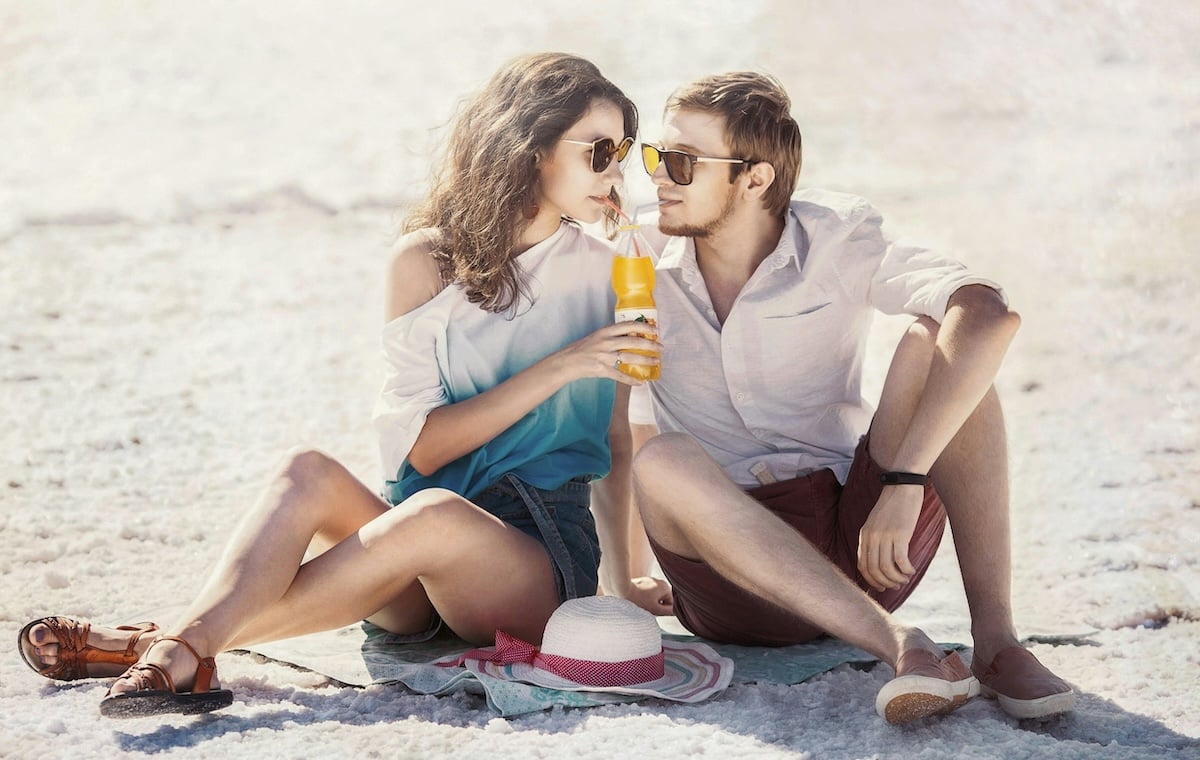
Posing Best Friends
Ask friends what they enjoy doing together and build the first pictures around that. They might sit talking, walk side by side, or recreate a favorite movie pose. A shared reference gives them something to react to.
Try sitting back to back or standing shoulder to shoulder, then change where each person looks. For a closer frame, ask them to bring their heads nearer while keeping their bodies comfortable. Let them choose whether to hug or link arms.
For movement, use a walk, a dance, or tossing autumn leaves. Photograph the laughter between attempts as well as the pose itself. Keep the activity on stable ground instead of relying on jumps from furniture or one person lifting the other.
Friend poses offer more starting points for pictures of two people or a friendship group.

Christmas Couples
Give a Christmas couple something festive to do: hang a decoration, wrap a present, or sit together beside the tree. Photograph their hands at work, then ask them to turn toward each other for a portrait.
You can include your pets if the animals are comfortable joining in. Have the couple sit together and let the pet settle beside them. Keep decorations out of the way of the pose.
For an outdoor session, try a walk through the city lights or a side-by-side portrait in a snowy setting. Indoors, use festive hats, jumpers, or a wrapped gift to connect a familiar couple pose to the season.
Our guide to capturing the magic of Christmas as a couple has more scene and activity ideas.

Posing Groups
Choose a background where faces won’t be lost among signs, branches, or bright patches. Set the group’s position before you start fine-tuning individual hands and expressions.
Shooting from a higher angle can help reveal faces hidden behind the front row. Check from the camera that you can see everyone’s eyes; ask a hidden person to move into a gap.
Use seats or steps to vary head heights. A loose triangle shape gives you one arrangement to try, but don’t force people into an uncomfortable pattern. Keep the rows close enough to feel like one group.
Check faces in the front and back rows for focus. Take several frames to catch blinks, then inspect the edges for cropped hands or feet. If you add flash, check the light across the whole group instead of assuming a fixed light angle will cover everyone.
Our guide explains the right group photo techniques, from arranging people to checking the finished frame.
Posing Family and Children
Agree on the family’s priority pictures before the session. Start with a simple arrangement, then leave time for children to move, play, and take breaks.
Family
Ask which people and combinations the family wants photographed. Check whether anyone needs to sit, whether children prefer staying close to a parent, and how much time you have.
Have a shot list ready, but stay flexible. Begin with everyone seated or standing together for one camera-facing picture. Then ask them to look at each other, share a hug if they wish, or walk hand in hand.
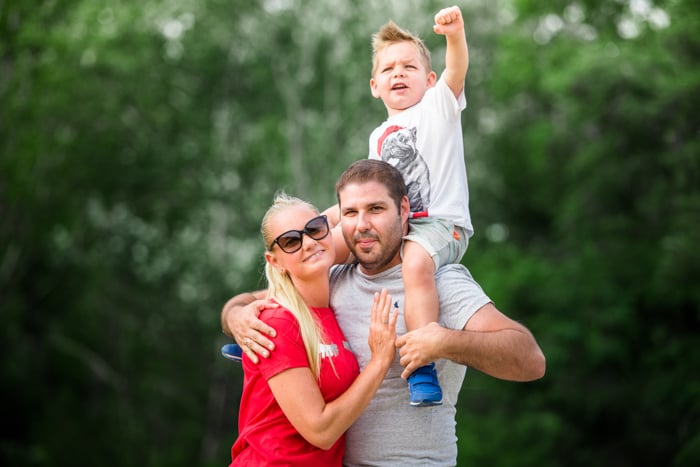
Move to the child’s eye level for a different view. Take a wider frame with the family’s surroundings, then come closer for hands, expressions, and small interactions. Keep babies supported by a parent rather than asking for a lift just to vary the picture.
Family photo poses give you more arrangements to adapt to the people at your session.
Toddlers and Children
Prepare the camera before asking a child to join the scene. Explain the activity in a few words and give them time to respond. A game often works better than repeatedly asking them to hold still.
Try following the child’s lead: photograph the activity they choose, then suggest one small change. For movement, check that your shutter speed freezes the action and use continuous autofocus or burst shooting when appropriate.
Offer a familiar toy, a floor-level game, or a stable seat. A parent beside the camera can play peek-a-boo or make a face. Pause if the child is tired or no longer wants to take part.
When working with siblings, ask them to talk, sit together, or show each other a toy. You can explore kids’ photo poses more deeply in our child-posing guide.


Newborns
Newborn posing needs specialist handling; a list of pictures is not training. For a first session, photograph a parent holding the baby with their head and neck supported, or take close-ups without rearranging the baby.
Do not use nursing pillows to prop a baby for photographs. The U.S. Consumer Product Safety Commission says to avoid using them for propping, lounging, or sleep.
Keep a caregiver beside the baby and never force a pose. The side-lying photograph below is not a safe-sleep recommendation. For sleep, follow CPSC safe-sleep guidance: place the baby on their back in an appropriate sleep space with only a fitted sheet.
Treat Newborn poses as references to discuss with a trained newborn photographer, not positions to copy from a finished image.

Posing for Women
Use the look your subject wants as the starting point. Beauty, maternity, and swimwear sessions have different aims, but the same approach applies: show the pose, ask about comfort, and make small changes together.
Women’s Beauty
Decide what the beauty portrait should show: makeup, hair, skin, jewelry, or an overall look. Share examples or a mood board so the model and any makeup artist or hair stylist understand the brief.
Begin with the face toward the light, then try a small head turn and a change in gaze. Check whether the pose hides the feature you’re photographing. A hand near the cheek can frame the face, but keep it from covering makeup or pressing into the skin.
Agree on clothing, styling, and any physical adjustments before shooting. A beauty team can help with the look; the pose still needs to serve that look. Our guide has more tips on beauty photography for planning and photographing the session.

Maternity
Ask the subject which positions feel comfortable and offer a seat between standing pictures. Start with a gentle body turn so the bump’s outline is visible, then compare a side-on view.
Try one hand above the bump and one below it. Ask the subject to look toward the hands, at the camera, or toward a partner. Change one element at a time so you can take several pictures without moving to another spot.
For a silhouette, place the body in profile and check that the hands and arms don’t hide the outline. Use a standing or seated position the subject chooses rather than asking for a deep bend or prolonged balance.
You can learn more about maternity poses in our maternity-posing guide.

Bikini
Agree on the mood, clothing, and boundaries before a swimwear shoot. Let the subject choose which poses they want to try and provide a private place to change.
Start on firm ground with a small step forward and a slight turn. Try one hand resting on the head, both hands in the hair, or a look over the shoulder. Change your camera position to compare the shapes before asking for a different stance.
Seated, kneeling, and lying poses are options if the surface and position are comfortable. A twist or arch changes the body’s outline, but it should never be forced. Avoid promising that one pose will slim or flatter every body.
Use our list of bikini poses to choose references together before the session.

Niche Photography Posing
Adapt the pose to what the picture needs to communicate. Clothing may be the focus of a fashion image, while a wedding portrait may center on the couple’s connection. Use these sections to plan the difference.
Fashion
Read the clothing brief before deciding on a pose. Check whether the picture needs to show the garment’s outline, a fabric detail, or how it moves. An arm or prop that hides the main feature may work against the image.
Start with a front-facing stance, then compare a body turn, a wall lean, and a seated pose. Ask the model to make a small step or turn if movement is part of the brief. Photograph the transition as well as the settled position.
For a close portrait, try a change in gaze or a hand framing the face. Mirrors and other props should contribute to the idea rather than fill an empty hand automatically.
Our fashion poses guide provides more references for standing, seated, and close-up pictures.

Lifestyle
Choose an activity and setting that belong to your subject’s life: cooking, reading, walking, or spending time with family. Ask them to begin the activity, then watch for expressions and gestures rather than directing every movement.
You can still guide the scene. Suggest a spot with better light or ask someone to turn slightly so their face is visible. Then give them time to return to what they were doing.
Take a wide picture showing the setting, a closer portrait, and a small detail such as hands at work. Keep the activity recognizable so the pictures tell the same story at different distances.
You can learn more about lifestyle portraits in our guide to photographing people in their surroundings.

Wedding
Agree on the couple’s priority portraits and family combinations before the day. During the session, use a few comfortable poses and change the framing, hands, and gaze. Leave time for the couple to return to their guests.
Engagement
Begin with the couple facing each other or standing at an angle, with one person turned toward the other’s side. Explain those positions instead of relying on names such as “T-bone” that they may not know.
Try a hand resting around an arm, a side-by-side seat on steps, and a slow walk together. Keep their hands visible where they add to the connection, and check that one face isn’t hidden by the other’s shoulder.
Add romance with the almost kiss if the couple wants that picture: ask them to move close and pause before touching lips. A look or laugh afterward can give you another frame without a new pose.
Use our article on engagement photo poses to choose more standing, walking, and seated ideas before the shoot.

Groomsmen
Start with the group getting ready. Photograph a tie adjustment, cufflinks, or a shared look in the mirror, then step back for the interaction around the groom.
For a group portrait, arrange the groom near the center and vary the others’ head heights using seats or steps. Check that every face is visible and take one frame with everyone looking at the camera.
Then try a walking picture or a formation that fits the group’s personality. Matching socks or a shared joke can provide a prompt, but don’t require a performance from people who prefer a quieter portrait.
You can learn more about photo ideas for groomsmen in our guide to getting-ready pictures and group portraits.

Wedding Day
Start with the couple side by side or facing each other. Ask them to settle their hands, then take versions looking at the camera and at each other. Explain each adjustment so they don’t have to guess what to do.
For a closer pose, try linked arms, a hand on a shoulder, or one partner standing behind the other. A seated version gives you another composition without a complicated move.
Photograph rings, clothing, and hands as separate details. If you use a veil, check that the couple can still see and move comfortably. Walking or a small dance can add movement without asking for lifts, dips, or standing on a bench.
Learning more wedding poses helps you prepare options while leaving room for the couple’s own gestures.

Boudoir
Agree on clothing, coverage, poses, and boundaries with the subject before the session. Start with a seated pose, a light touch to the hair, or a reclining position they choose. Show a reference and let them adapt it.
Use the light to support the mood. Window light is one option; soft, subtle artificial lights give you another. If the setup includes curtains or filters, take a test frame before posing. The subject’s comfort still decides the pose.
Check in before each change in clothing or position. Ask for a small turn or a hand adjustment rather than assuming the next picture should be more revealing. Stop or switch the pose whenever the subject wants.
You can learn more about boudoir poses in our pose-reference guide.

Put the Posing Guide Into Practice
Choose three starting positions for your next shoot: one standing, one seated, and one with movement. Practice explaining each in a few words. During the session, keep the position that works and vary the hands, gaze, and framing before moving on.
Check the person as well as the picture. A pose only works for the session if your subject can hold it comfortably and wants to be photographed that way.