8 Ways to Master Perspective in Photography (Smartphone Too)

One of the best ways to unlock the creative potential of your smartphone is to learn about perspective in photography.
You’re restricted to one lens and can’t change the aperture. But used correctly, you can still take stunning photos with any smartphone.
Read on to find out how to use perspective for amazing photos with any camera!
8 Ways to Master Perspective in Photography
We demonstrate photography perspectives with a smartphone. But these principles apply to any camera.
1. Find a Bird’s-Eye View
This is the most striking way you can change your perspective. It’s no surprise that drone photography has become so popular. A bird’s-eye view is the most important angle you use.
There’s no reason you shouldn’t use this angle in smartphone photography, too. You don’t need to attach your phone to a flying device to do it!
The following are some ways you can apply this angle to your smartphone work:
- Food Photography: This is a great angle for food photography. It involves holding the camera over the food and aiming down. This is the simplest form of bird’s-eye photography. And it is the easiest to achieve.
- Architecture Photography: Architecture photography can work very well looking down. You’ll get dramatic results if you can find a location to get this perspective. Architecture photography works best at wide angles. Your smartphone might not have the widest focal length. But you can deal with this by stitching photos together using an app for panoramic photos. A favorite for this type of photography is the spiral staircase.
- Rooftops: There are many options for getting photos from a rooftop in an urban setting. You’ll often find viewing galleries in tall buildings or towers. You can always try to gain access to tall apartment buildings. It helps a lot if you have a friend living in one of these buildings. Some rooftop bars and cafes offer great potential as well. You’ll need permission if you decide to bring a tripod, though.
- Take Flight: If you travel, you’ve almost certainly flown in an airplane. Get that window seat and get some photos from really high up in the air! For a more romantic and slower way of flying, hot air balloon flights are amazing. As you float across the sky, you’ll also have plenty of time to size up the best photos.
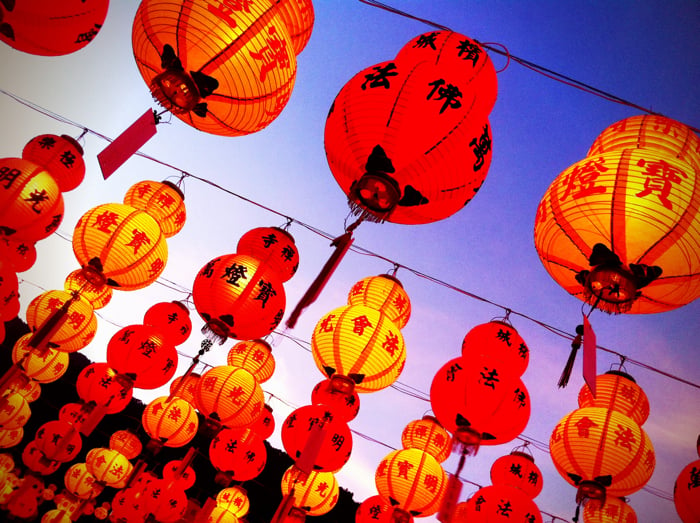
A photo taken of Chinese lanterns in Malaysia. These always look nice when photographed from a worm’s-eye perspective, especially when they’re in lines.
2. Use a Worm’s-Eye View
At the opposite end of the spectrum is the worm’s-eye view! As you’ll no doubt have guessed, you’ll be photographing up towards the sky this time.
This type of photo is taken at street level. Photographing the sky alone won’t make the most interesting photo.
You’ll need to find subject matter and locations that work well for this angle:
- Trees: Trees can make great subjects for this point of view. You’ll be able to work with the networks of branches. They create interesting patterns. If trees are tall and close together, you’ll also be able to use the tree trunks as leading lines through your frame.
- Tall Buildings: The urban jungle also offers plenty of options for worm’s-eye photography. Tall buildings that are close together also make excellent subjects. You should look for foreground elements you can incorporate into your worm’s-eye photo. These should frame taller main subjects.
- Ceilings: Architectural details can often be found on the ceilings of historic and sometimes contemporary buildings. A worm’s-eye view can often be ideal for capturing these types of images.
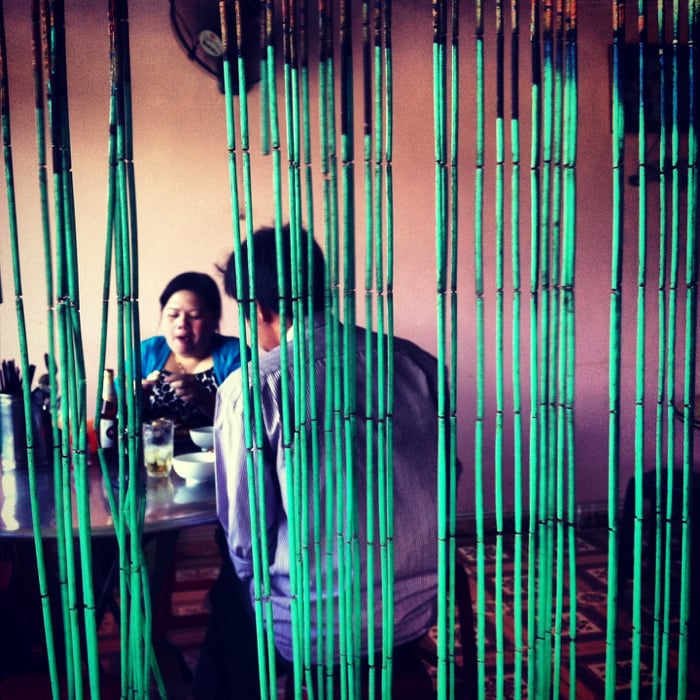
Here the woman is perfectly framed by the doorway blind.
3. Use Framing to Strengthen Perspective in Photography
The use of correct framing can strengthen your photo. Smartphone photography, in many ways, is the purest form of photography. You can’t fall back on advanced camera techniques like zoom or bokeh.
You’ll need to train your eye to see composition details like framing. You’ll find opportunities to frame your subject in many places. The following are only some ideas:
- Door or Window Frames: A simple method to frame portraits involves putting the person in a doorway or within a window frame. These are natural frames that are easy to spot.
- Tree Tunnel: In locations where you find two rows of trees next to each other, you’ll see a tree tunnel where the branches interlock. This makes a great place to frame a photo. Think of a cyclist riding along a road with trees on both sides of the road.
- A Gap in a Fence: A gap in the fence is a good candidate for a frame. You must ensure there is a compelling main subject that the gap in the fence frames. The wider your focal length is, the better for this type of photo.
- Empty Frame: Find an empty picture frame, and use this to frame your subject. You can handhold it. If it’s a small frame, take it anywhere you go!

The low angle shows lots of detail in this utility hole cover. The photo also has depth as those patterns fade into the background.
4. Use a Low-angle for a Different Perspective in Photography
Taking photos on your knees doesn’t have to mean a worm’s eye viewpoint. Changing the angle so you photograph from ground level can dramatically change the photo.
Things like flower stems will look much more dramatic with a lower camera angle. They’ll appear very tall. Not only that, but you’ll also notice some perspective distortion.
A railing may appear thin and narrow. But when you get down to a low angle with it, it will become bigger. It’ll dominate the foreground area of your photo much more.
Use a smartphone to take photos from these low angles. You’ll be able to place the photo right near the ground. Use live view while taking the photo.
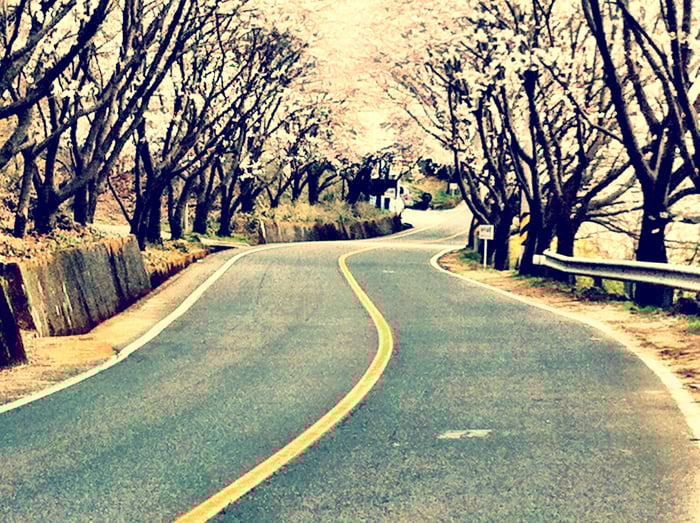
This photo benefits from the eye-level angle. It has a strong leading line from the road. A lower angle would detract from the s-line this road is providing.
5. Use a Regular Perspective From a Standing Position
A standing position is one of the main perspectives you’ll use. It’s worth exploring all the other angles you can take a photo from. You’ll learn much about what works in photography by doing so.
That’s not to suggest you abandon this traditional angle, though. Always look to take the obtuse angles. There will be plenty of times when this perspective is the best. Knowing when that’s the case is also an important photographic skill.
So in what might this type of photo work best?
- A Strong Composition: The photo already has a lot of good composition elements in it. It has a strong leading line, perhaps uses the rule of thirds, and there is a strong main subject. In fact, changing to a new angle could detract from the image. Keep to a regular angle.
- A Balanced Frame: Changing the angle to include more sky could unbalance the frame. A regular standing position gives you the perspective you’ll be most familiar with. A bit like using a 50mm lens gives you an angle of view similar to your eyes. There are times when a normal photo can be a real strength.
- In the Art of Subtraction: When applied correctly, many angles mentioned here will strengthen the photo. Don’t add unnecessary, extra elements to the frame, though. For instance, don’t use a lower angle. Remember to keep your photo simple.
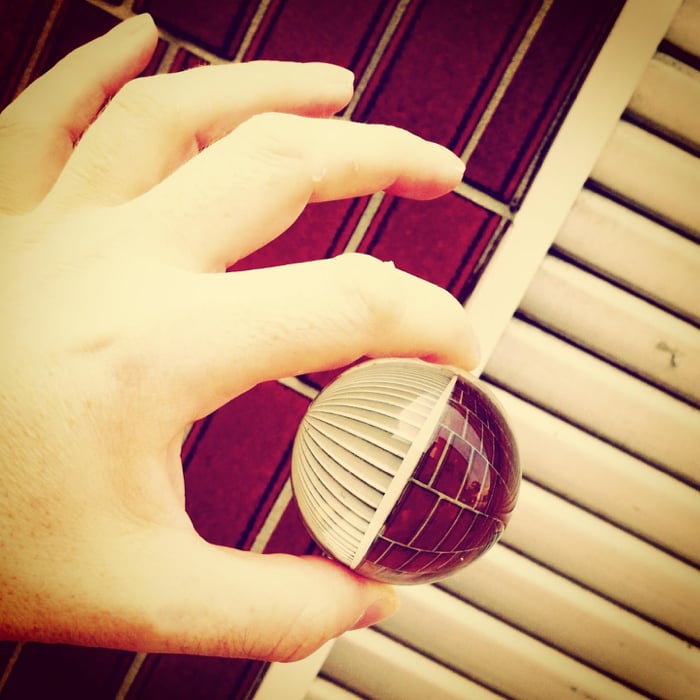
Refraction photography has great potential. Here the details in the background have been inverted within the ball.
6. Photograph Through Transparent Objects
Using transparent objects for perspective photography can lead to some very interesting results. One of the most popular new forms of photography is lensball.
This object is used for refraction photography. It’s not the only way refraction can be practiced.
Other objects will give you refraction as well. And you can use them with smartphone photography, too.
- Lensball: This is a great tool for many forms of photography. It works as an external lens optic. And it does change the perspective by 180 degrees! You’re working with glass with fish-eye-like properties and an inverted image within the glass!
- Wine Glass: A wine glass is another glass object that is interesting to use. Fill this with water, and you have an object with the same properties as a crystal ball.
- Prism: You can also use a prism for refraction photography but slightly differently. You can use it to project a rainbow. It’s also possible to photograph through it. You’ll end up with an image that looks like a double exposure.
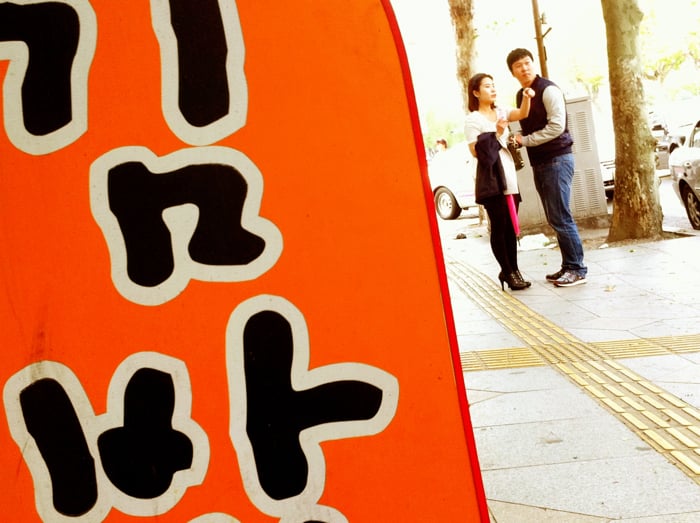
In this photo, the sign on the right was used to divide the frame along the two-thirds position. The photo was taken in South Korea, a fact grounded by the Korean writing on the sign.
7. Focus on the Foreground
Giving your photograph a sense of depth is a great thing to do with perspective photography. You can achieve this by focusing on an object in your image’s foreground. You can make this foreground object the main subject in your image.
Use the foreground as a frame or leading line. It’ll take the eye up to the main subject in your photo. If there is a large separation between your foreground element and the background, you may even produce bokeh.
Your smartphone will have a large aperture. Blurring the background is possible. This can be especially attractive in the evening when city lights are on.
Experiment with a cityscape as the background of your image.
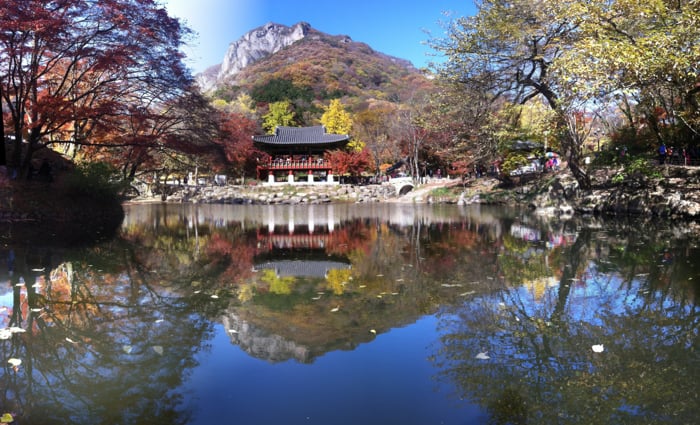
This pond works very well for reflections and is often flat. It provides the perfect mirror, with the temple and mountain in the background. The perspective is wider than an ordinary smartphone can provide. Stitching several images together through a smartphone app was required.
8. Use Reflective Objects
Reflective surfaces can do wonderful things with reflection. Reflection photos are a lot of fun to work with. Several locations will give you the chance to take this type of photo.
You’ll need to decide whether you include both the reflected and normal images in the same photo, with the reflection being upside down.
It can be worth just including the reflection. This might be the case with a puddle or reflection on glass.
You’ll often get a stronger reflection at lower angles to the ground with all reflections. Experiment and see which angle works best.
The following are locations you can experiment with.
- Body of Water: A body of water always has the potential for reflection. The key is that it needs to be flat. The larger the body of water is, the less often this occurs. That means the smallest puddles will have reflections. But you’ll have less water reflection to work with. Ponds, rivers, and lakes all offer good potential. You’ll need to visit when there is little or no wind.
- Glass: Glass will reflect. It’s easy to find good reflections on glass in an urban setting. If you photograph the glass head-on, you’ll pick up the reflection behind you. You may well be in the picture, and details behind the glass will often be seen. Photograph the glass side on and close to the glass. You’ll see the side reflection and the scene the reflection is from.
- Marble: Marble is a great surface for reflection. Its smooth surface works well for this. In fact, any stone surface with a polished look has reflective potential. If it happens to have been raining, this becomes one of the best surfaces for capturing reflections.
Conclusion: Ways to Master Perspective in Photography
There are many ways to get more interest from a particular photography location. A change of angle is almost always possible. It is one of the best ways to achieve this result.
You’ve now read about all the different photography perspectives you can use. Are there any here you particularly enjoy using yourself? Is there a new angle that you’ll use in the future to take your photography in a new and interesting direction?
We’d love to hear your thoughts on this topic. Feel free to share your photos taken from different angles in the comments!
Check out our e-books for different perspectives on pet and childhood photography—Perfect Pawtraits and Dreamy Childhood Portraits!