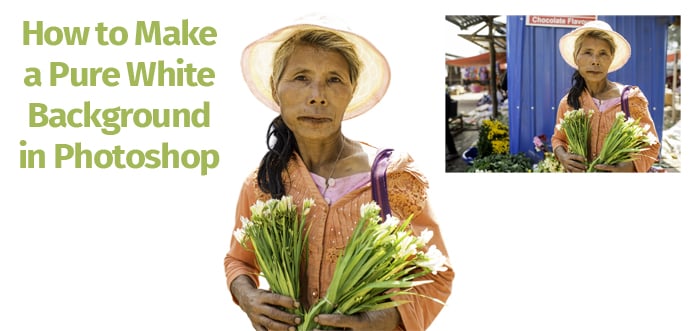
Making a white background in Photoshop is a simple process, but it can be tricky to get the results you want if you’re not familiar with the tools and techniques. In this tutorial, we’ll show you how to make a background white in Photoshop using layers and adjustment layers.
How to Make a Background White in Photoshop
White background photography sells well on stock photo websites.
Designers love it because an all white background can be integrated into any layout.
You can also switch a white background for another color or background image.

© Kevin Landwer-Johan
Amazon has staunch requirements for having photos with a blank white background. So do many other online sales platforms.
Being able to create photos with a pure white background is essential.
Photos with an all white background look great on web pages. If you have a website or blog and use photos with off white backgrounds it will not look professional.
Here is an example of a portrait made against a white background. The light on the background is not even.
This becomes very obvious when it’s placed on a web page with an all white background.
How to Choose the Right Photo for a White Background Image
Choosing or creating your photo is the first thing you need to do, even before you open Photoshop. Some photos are far easier than others to change to a pure white background.
Having your subject against a clean, uncluttered background will help. Good contrast between your subject and the background (figure to ground) also helps.
This will make it easier to extract the subject from the background.
The background might be too varied or cluttered. The selection tool you will use in Photoshop will not work as well. And you will have to spend more time to correct it.
Having your subject a good distance from anything in the background is helpful. This way you will be able to use a narrow enough aperture setting. Your subject will be in sharp focus and the background out of focus.
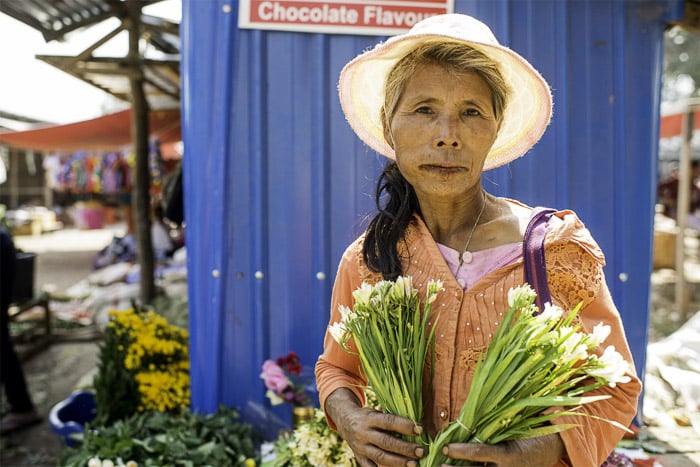
In the photo below the background is not suitable. Masking will not work well and you’ll need to do more work to correct it.

© Kevin Landwer-Johan
The subject is also not clearly defined. Her hands are obscured. This will look odd when you remove the background.
Make sure the edges of your subject are in sharp focus. This will make the extraction process more effective.
When you have a blurred edge on your subject the selection tools in Photoshop will not be so precise.

© Kevin Landwer-Johan
How to Make a Background White in Photoshop
Step 1. Open Your Photo
Open your photo in Photoshop in the highest resolution you have.
Using a low resolution photo will make it more difficult to get a good clean edge separation.
© Kevin Landwer-Johan
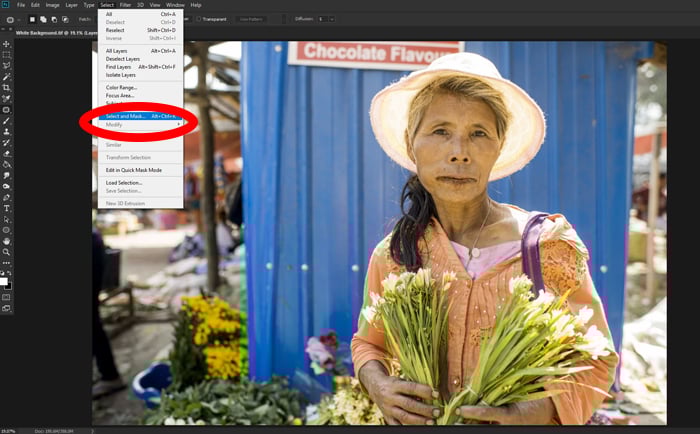
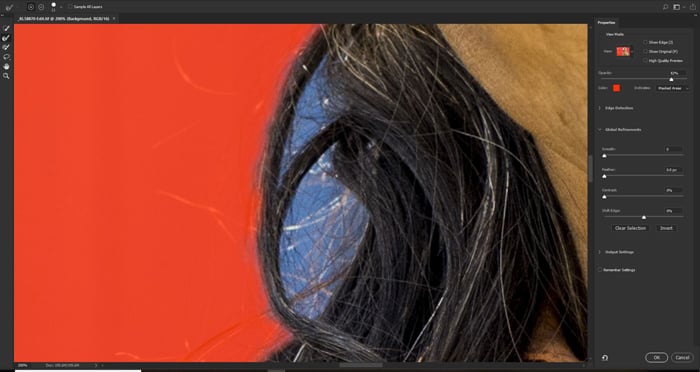
Step 2. Select a View Mode
From the Select menu choose the Select and Mask tool. Then select a View Mode from the Properties panel on the right, at the top.
I prefer to use the Overlay mode as it allows me to see the selection area clearly.
© Kevin Landwer-Johan
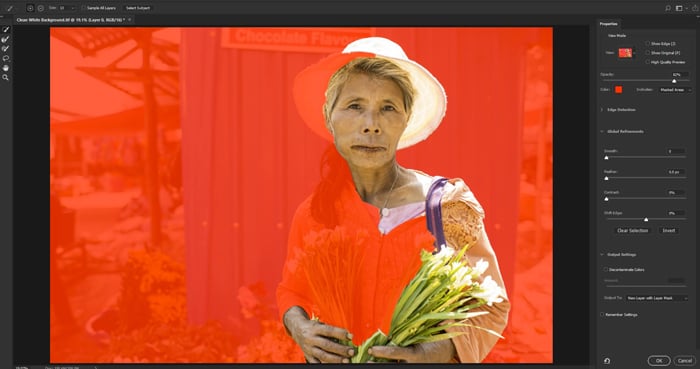
Step 3. Make Your Selection
Choose the Quick Selection tool. This is on the left of your screen.
Use this to draw around on the inside of your subject.
It may take Photoshop some time to show the selection. This depends on the size of your photo and the speed of your computer.
Be patient. Draw a little and wait until you can see the result.
© Kevin Landwer-Johan
This may take some practice. As you draw, look at the areas that are being auto selected.
You will notice parts of your subject that are the same color, tone or texture are being selected.
This is why it’s important to choose a photo where your subject doesn’t blend into the background.
Most tutorials on creating a pure white background use an image with a very clean and clearly defined subject.
I have purposely chosen a photo that is not so easy. This will serve to show some of the challenges in making a blank white background. And how to overcome them.
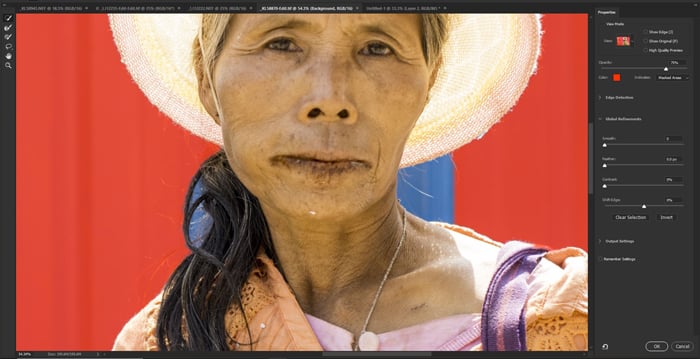
As you continue to draw you may find some of the background is also being selected.
Once the subject is selected you can choose the Refine Edge brush from the left of your screen. Then you can paint over these areas so they show the mask again.
© Kevin Landwer-Johan
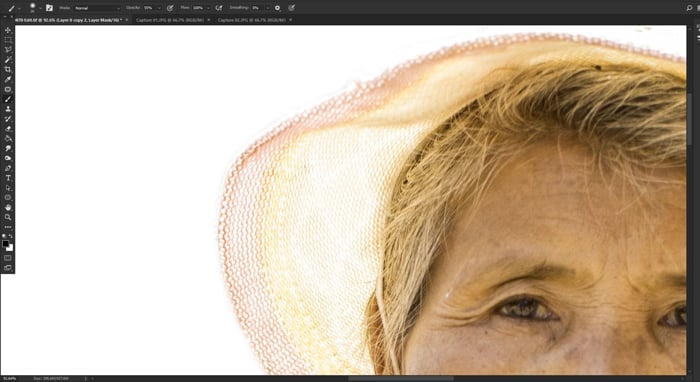
Zoom in to an edge of your subject. You may see it is a little fuzzy and not cleanly separated.
Go around all the edges of your subject using the Refine Edges brush to make the edges more distinct.
You can adjust the properties of this brush by right clicking or from the menu at the top left of your screen.
© Kevin Landwer-Johan
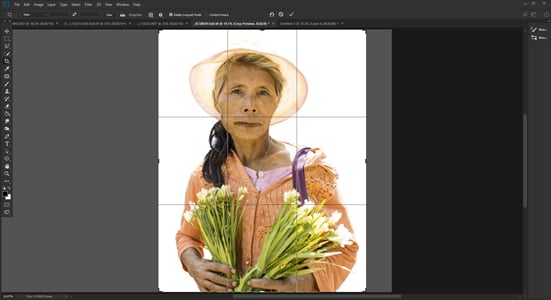
Step 4. Move the Image Back to the Main Photoshop Screen
When you are satisfied with the way your image looks, it’s time to output it and return to the main Photoshop screen.
From the Output To selection box near the bottom right of your screen, choose New Layer with Layer Mask. Click OK.
You have now created a new layer with the background masked out. This will be set above your original layer.
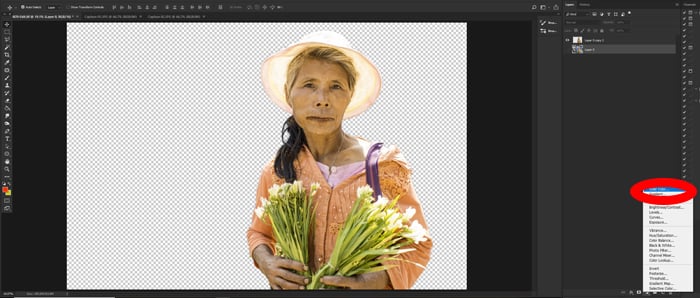
Step 5. Add a New Solid Layer
Click on your original image (which is now hidden.)
From the Create New Fill or Adjustment Layer icon at the bottom of you Layers Panel, select Solid Color.
Set the color to pure white and click OK. This creates a white layer in between the two layers you already have.
© Kevin Landwer-Johan
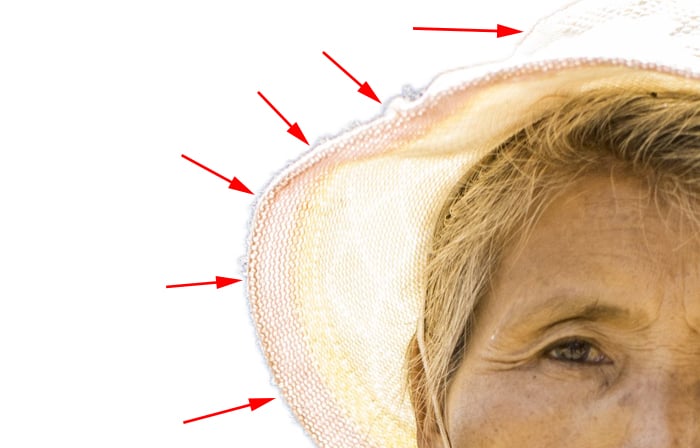
Step 6. Refine the Edges
The selection tool is not perfect, especially if you have some fuzzy edges.
If your subject has very clean and defined edges, you can skip this step.
With the photo I have chosen it is necessary to look at the edges and clean them up.
© Kevin Landwer-Johan
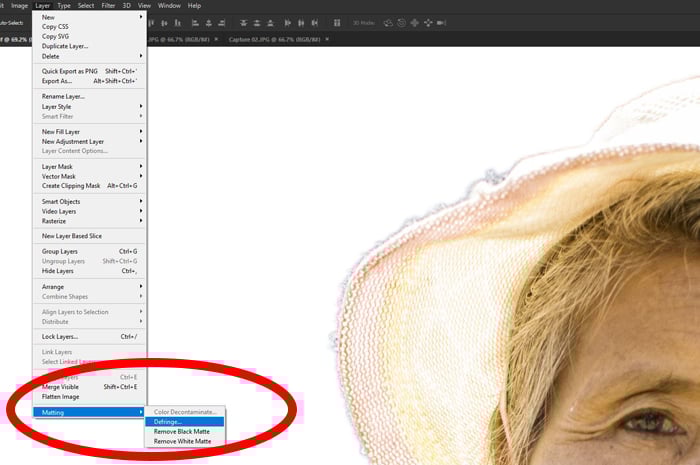
From the top Layer menu, select Matting, then Defringe. Select the number of pixels. I used 10 for this image.
This will vary based on the size of your image and the amount of cleaning the edges require.
You will see most of the fringing around your subject is cleaned.
© Kevin Landwer-Johan
You can also choose Matting, then Remove White Matte. Do this if Defringing is not effective enough.
- There are many variables which will effect the amount and type of edge cleaning required. Some of these are:
- The contrast between your subject and the original background
- If the edges of your subject are smooth or fuzzy.
- If the edges are sharp.
- Whether the light on the subject and background is the same.
- How clear the background is.
Experiment with the different settings to discover which options work best.
Step 7. Manually Perfect the Edges
© Kevin Landwer-Johan
Depending on how successful the automated cleaning was in Step 6 you may still have some work to do. Zoom in and view the edges of your subject at 100%.
Are they clean enough? Is there still visible fringing that you need to remove?
If there is you will need to clean it manually.
Add a new Layer Mask by clicking the icon at the bottom of the Layers Panel. Select the Brush tool and set the color to black and Opacity to about 50% with a soft edge.
Zoom in to a point at the edge of your subject and begin to paint out any visible fringing.
Setting the brush to 50% with a soft edge makes this process more gentle.
If you were to use a hard edge and 100% opacity it’s very easy to end up with edges that are too harsh and sharp.
Step 8. Crop Unnecessary White Space
Now you have a pure white background you can crop in close to your subject.
If you are using the photo on a web page or will be clear cutting it, you will not need any superfluous background.
© Kevin Landwer-Johan
Consider if you want to place your photo on a colored background or print it. If so, you may want to keep the space around your subject or add more.
Now you have a clean white background adding more space is very easy.
Set the background color on the Tools Panel to white. From the top Image Menu choose Canvas Size. Choose where you want to anchor the canvas size.
I have chosen the left side so the canvas will expand out to the right. Set the amount you want to expand your canvas size. Click OK.
This will enable you to make your photo the exact size you need.
It is easy to add text, graphics or other images into the extra white space you have created.
© Kevin Landwer-Johan
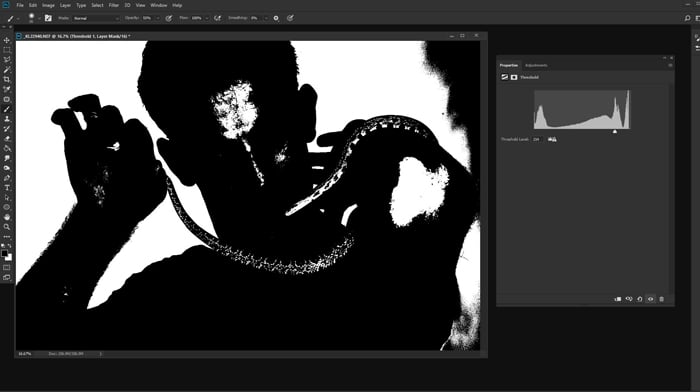
How to Check If Your Background Really Is White
If you have taken a photo against an all white background, it may not be pure white. To check this, click on the Create New Fill or Adjustment Layer icon at the bottom of the Layers Panel.
Choose Threshold.
Under the histogram in the Properties tab that appears, drag the slider towards the right. Watch to see if the background remains solid white. If it turns black, you do not have a pure white background.
Looking to see if there is a spike in the histogram at the right edge will give you some indication. If the spike is not hard against the right edge your white is not pure.
© Kevin Landwer-Johan
Conclusion
However you choose to achieve a white background, paying careful attention to the edges of your subject is vital.
If there is unnatural looking contrast around the edges it will look sloppy and ineffective. It’s important to pay attention to the edges of your frame also.
If the white is not pure it will not look so good when placed on white web page or other white background.
Using Photoshop makes pure white background photograph possible with any photo.
The quality you are able to achieve will often depend on how much time you have to give the task.