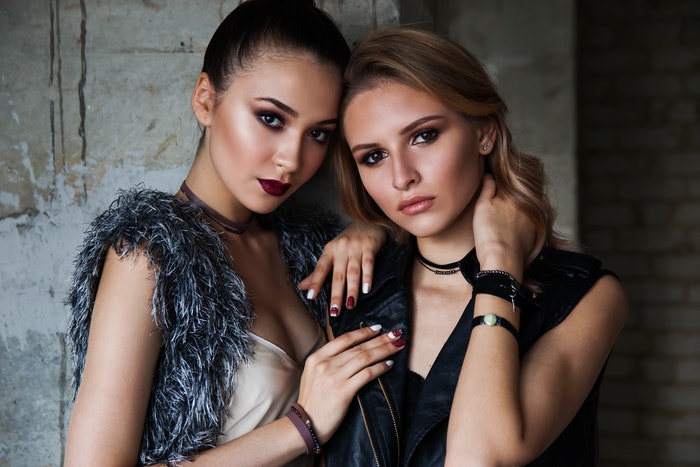
Commercial fashion photography is a dynamic field featuring beautiful models and products. Retouching is an integral part of the process that can make or break a commercial fashion image.
Commercial Fashion Photography: What Software Should I Use to Retouch Photos?
Most commercial fashion photographers retouch in Capture One Pro or Lightroom and Photoshop.
Lightroom is a global editor. It’s best for culling and organizing your photos and for applying edits to the whole image. There are targeted adjustment tools that allow you to work on small portions of the picture. But Lightroom is best at tackling adjustments to the entire image at once.
For high-end photography, you need Photoshop to clean up the image and refine it. Fashion photography is about creating an idealized image. It needs to look polished and bring out the best in the clothing and the model.
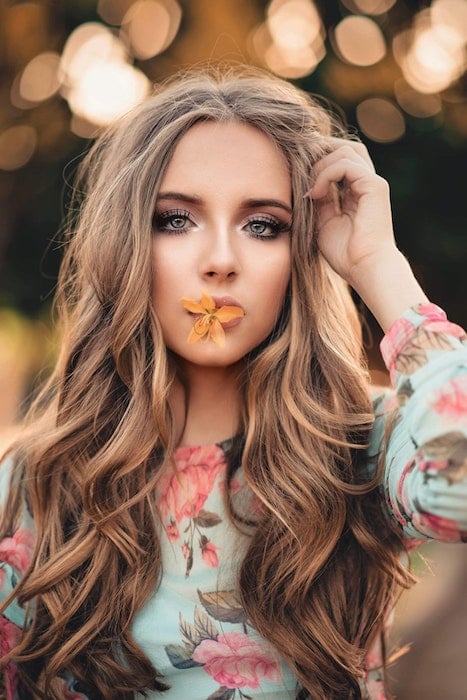
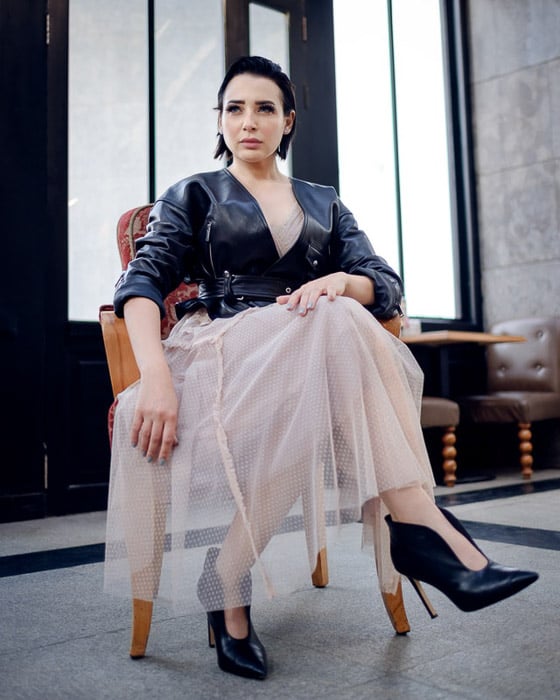
Photo by Renato Abati
Retouching Fashion Photography in Lightroom
You can do all your retouching in Photoshop, but many photographers find it easier to do most of their editing in Lightroom. You can then open up the image in Photoshop to give it that polished look.
Lightroom helps you stay organized. This is one reason why it’s so popular and so many people use it in tandem with Photoshop.
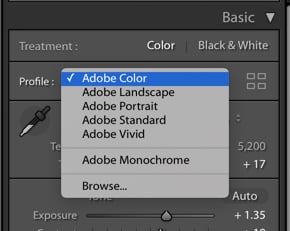
Choose a Color Profile
Once you have chosen the photographs that you want to retouch, start by selecting your preferred Color Profile in Lightroom. This is where your camera’s color profiles will appear.
You should do this before you start editing, as it will have a significant effect on the decisions you make. Your choice will make a considerable difference in color and contrast.
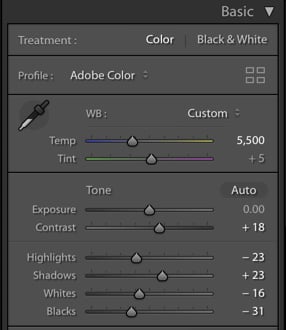
Use The Basic Panel in Lightroom for Small Changes
The next step is to correct your White Balance. Keep in mind that White Balance can be set in-camera to be 100% accurate, or can be used creatively. For example, if your style is warmer in tone, you can push your white balance above 6000+.
Then make your edits to the Highlights and Shadows, and Whites and Blacks in the Basic Panel.
If your image doesn’t look correctly exposed in these areas, then you can adjust the exposure, but I don’t recommend to start there.
These basic adjustments can make a big difference in your image. It’s best to tweak them individually rather than boosting the brightness of the whole picture right out of the gate.
Adobe intends for you to work your way down the panels for the recommended Lightroom workflow. But you’ll find that you may have to jump back and forth between panels and sliders to get the final look that you want.
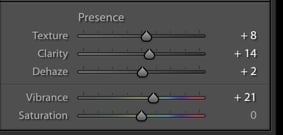
Which Elements to Adjust in the Presence Panel
When retouching in Lightroom, I recommend using the Vibrance slider instead of Saturation.
Vibrance lifts the mid-tones. Saturation boosts all the color in the image, which can make it look unnatural and clownish. If you do choose to use the Saturation slider, watch how it affects your picture as you move the slider. A maximum of +10 is usually more than enough.
Be sure to add Clarity, which will boost the contrast in the image. The best retouching is often the result of layering various effects at low numbers, rather than adding a high amount of any one tool, such as Contrast.
To create contrast, you can use a combination of Contrast, Clarity, Texture, and the Tone Curve.
Tweak The Tone Curve
A lot of new photographers tend to shy away from the Tone Curve in Lightroom, but this is the single most powerful tool you can use.
The Tone Curve is a graphical representation of the tones found throughout your image. By making tweaks to the curve, you can greatly influence how the shadows and highlights look.
The most common tweak to the Tone Curve is a shape that resembles a soft S.
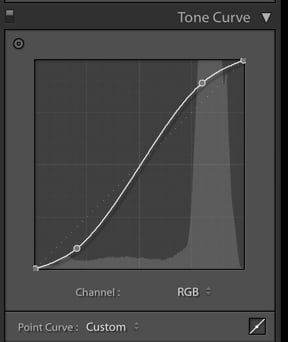
Start by lifting up the curve in the middle when in the Point Curve. This will give a boost to the mid-tones and brighten the image. Pull the curve down in the bottom quarter of the curve or so, to deepen the shadows. These simple tweaks can make your image immediately look more dynamic.
If you’re new to the Tone Curve, try playing with the sliders in the Region Curve. This won’t give you as much control as the Point Curve but will help you make significant changes to the aesthetic of your image.

photo by Mihai Stefan
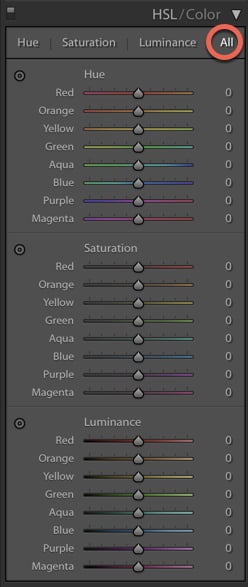
Adjust the Color in the HSL Panel
Whether you choose to adjust in Lightroom or Photoshop, the color will have a huge impact on your image. Color is an aspect of composition and has a huge impact on the aesthetic of your photo. You may like a desaturated look to your images or images with deep color and a lot of contrast.
Unless your aesthetic is quite warm, you might want to bring the orange saturation down a bit in your photos. It tends to look too strong. Also, pay attention to the Luminance sliders. They can have a bigger effect on the look of your image than the Saturation sliders as they control the brightness of individual colors.
Use Split Toning for Highlights and Shadows
Split Toning is a Lightroom tool that you can use to great effect when it comes to post-processing. Split Toning adds color toning to the highlights and shadows individually, based on luminance.
However, note that a little goes a long way.
To add split toning, hold down the >Alt/Option key while you move the sliders for Highlights and Shadows. This will allow you to see the variations for each color and pre-visualise how it will look applied to the image. ,
Dial-in as much saturation as you feel appropriate for the image. This is usually a low number. A small amount is often all you need to make your images pop.
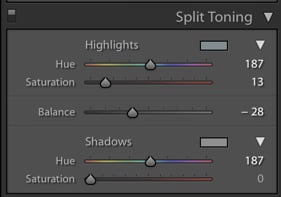
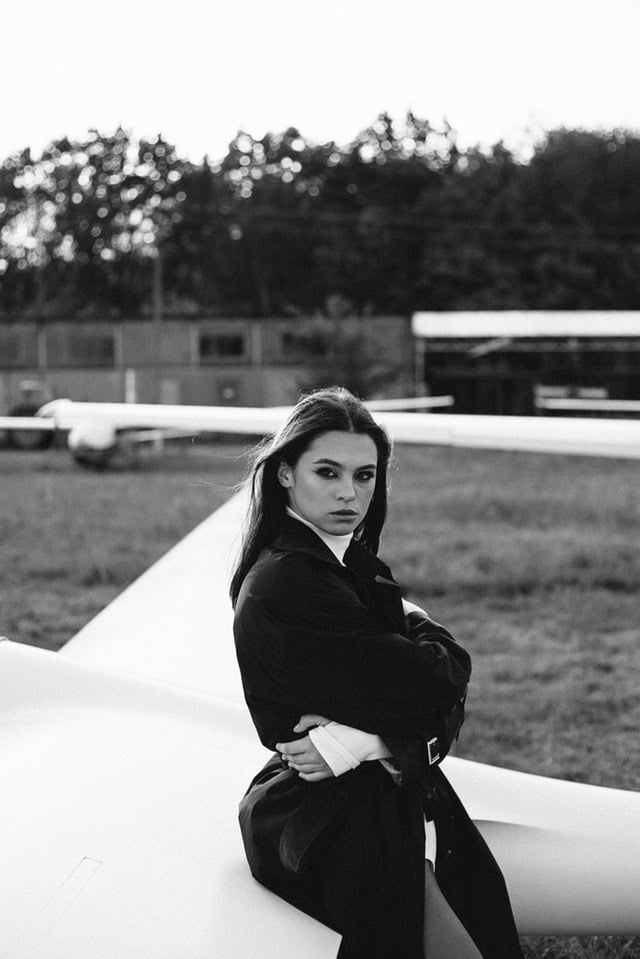
In the image below, split toning was added to give the image a different feel by adding warmth.
Split Toning used to add warmth for a different feel.
Sharpen Selected Areas With the Sharpening Mask
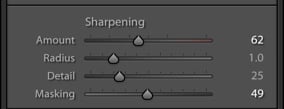
A good default for sharpening in Lightroom is +50. But to have more control over the amount of sharpening that is applied to your photo, use the Sharpening Mask.
Sharpening Mask will allow you to sharpen only the parts of the photo that need it. In photography, you don’t necessarily have to sharpen every part of the photo, like the background. You can simply concentrate the sharpening on your subject. This is where Sharpening Mask comes in.
Set your Sharpening Amount to around +50. Hold down the Alt/Option key while you slide Sharpening Mask to the right. You’ll see that your image turns to black and white, kind of like an x-ray. The white part is showing you what is being sharpened.
Choose the amount that looks good to you. Perhaps somewhere between 70-90 might be adequate.
Sharpening should be the last step in your Lightroom edits.
How to Perfect Your Image in Photoshop
Once you have completed these steps in Lightroom, it’s time to open the image in Photoshop.
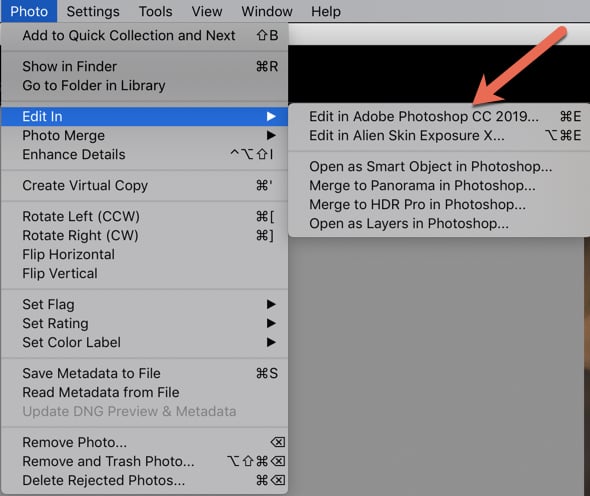
Go up to >Photo and choose > Edit In
Choose >Edit in Photoshop from the dropdown menu. This will open the image in Photoshop.
There are many tools and options for retouching your fashion images. The foundation is a clean image, so start with cleaning techniques.
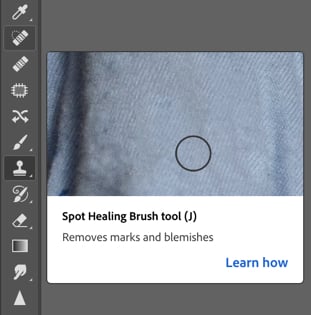
Zoom in on your image at 100%. Remove any dust on the sensor, and blemishes and imperfections on the model’s skin. The best tools to do this are the Spot Healing Brush, the Healing Brush, the Patch Tool, and the Clone Stamp Tool.
The Healing Tools
The Spot Healing Brush and the Healing Brush tool are both incredibly useful when it comes to cleaning up your images, with a small difference. With the Spot Healing Brush, you don’t need to select sample pixels from a particular area to fix a small blemish. Photoshop does that for you, allowing you to touch up dust and small areas rapidly. Lightroom has a similar tool, but using it repeatedly will slow down its performance by a lot. It’s better to do this type of cleaning technique in Photoshop.
Be sure to remove even the smallest blemishes from your image. Once you get rid of all the small flecks, you’ll be surprised at what a difference it makes and how polished your photo will look.
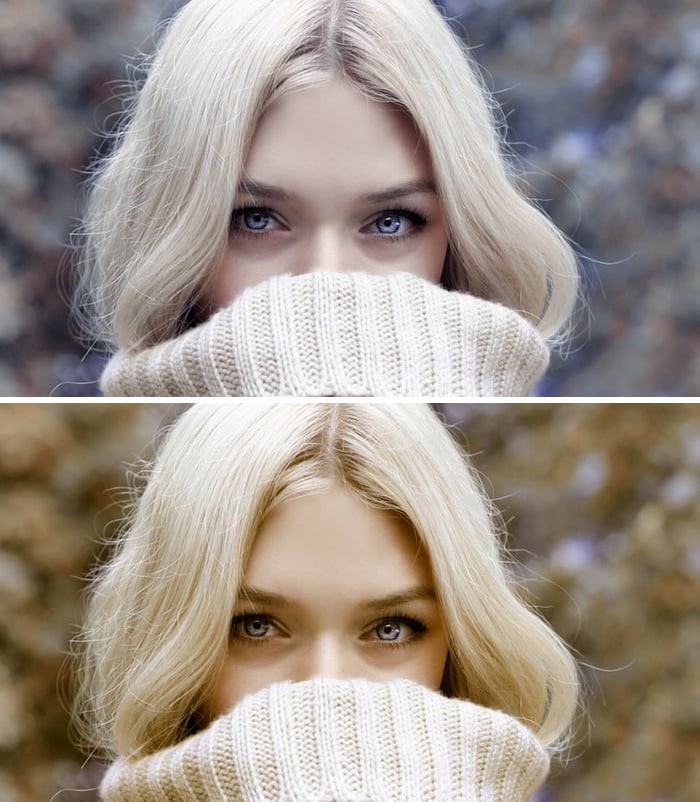
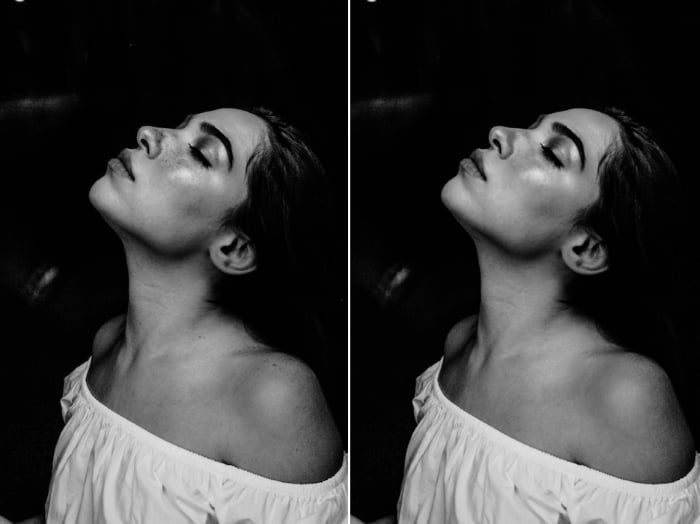
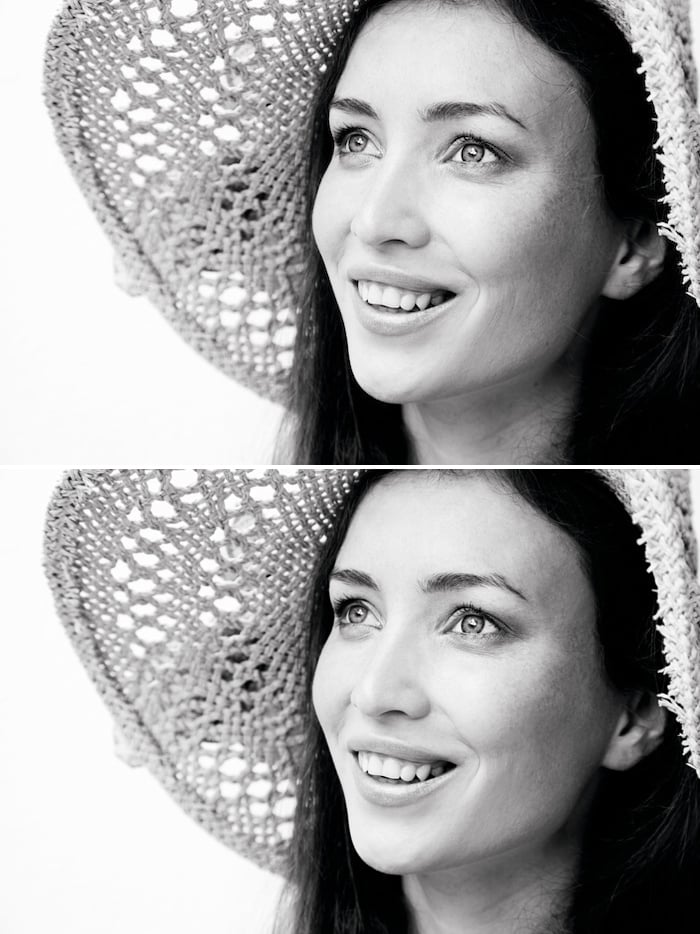
For example, in the image by below, I removed the freckles on the model’s skin using the Spot Healing Brush. I used the Healing Brush to make selections on the tip of the nose for a smoother look, as this area was more shadowed. Otherwise, the Spot Healing Brush is more than enough for this type of correction.
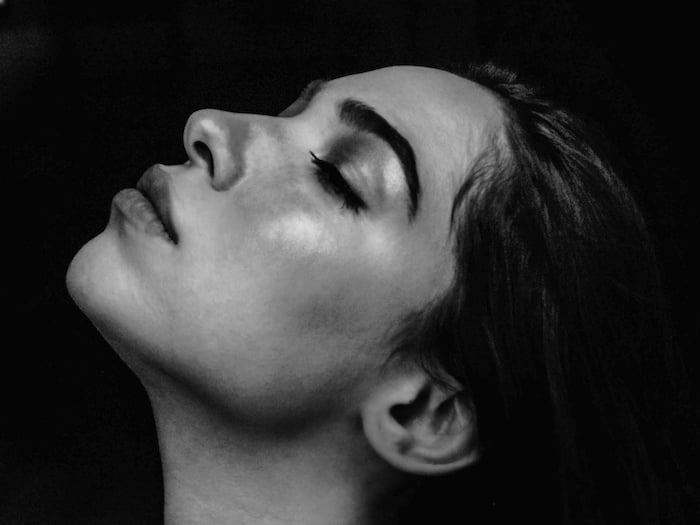
Here is a close up of the model’s face. Simply removing the freckles made the image look more polished without making the skin look unrealistic.
The Patch Tool
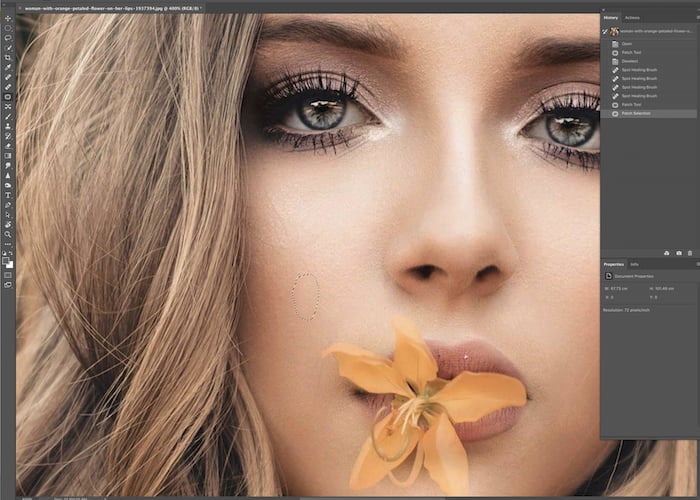
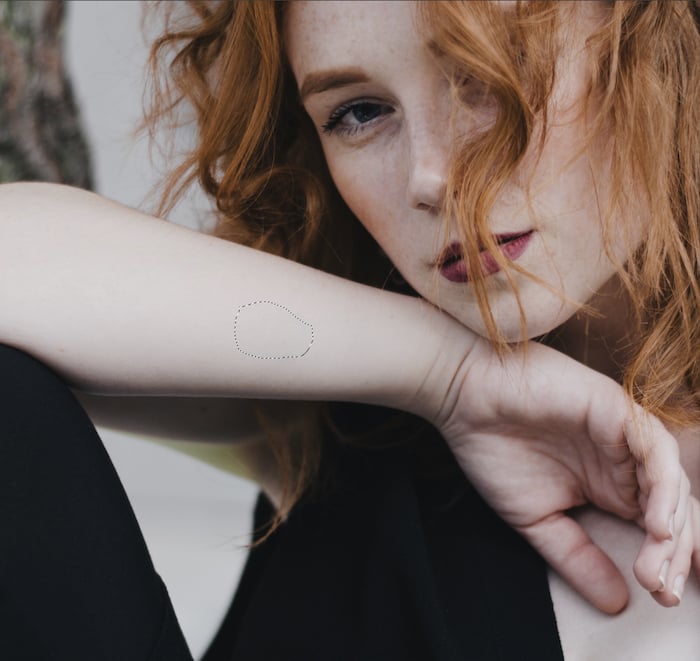
The Patch Tool is one that you’ll use again and again. It’s perfect for quickly removing larger flaws in your image with a selection from another part of my photo. I often use it on backgrounds to get rid of any flaws, as well as larger blemishes on a model’s skin.
With the Patch Tool selected, draw around the area you wish to heal and drag it over to an area that you’d like to replace it with. Then hit +Ctrl/Command + D to Deselect it.

In the image below, the patch tool was used to get rid of the tattoo on the model’s arm. Sometimes a tattoo is unwanted or inappropriate for the desired look. Here the patch tool removed it easily, as the skin was pretty consistent.

The Clone Stamp Tool
The Clone Stamp Tool is one of the most used tools in Photoshop. It is indispensable to fashion photography retouching. It copies and pastes pixels from one part of the image to another and allows you to adjust the opacity of the pixels. I use the Clone Stamp to get rid of stray hairs, clean up the skin and background, and correct any flaws in the clothing.
Select the option for “Current Layer and Below”. Keep the Flow at 100% but adjust the Opacity as needed. A very soft brush and a low opacity work best, but it depends on your image.
To use the Clone Stamp tool, hold down the Alt/Option key and select pixels from the image that you want to copy. Use brushing motions with your mouse to copy the pixels where you want them. Crosshairs will signify the sample area: be sure that it doesn’t veer into any unwanted areas.
In the image below, I used the clone stamp tool to smooth the model’s skin. It removed some file lines and the hairs around her face.
In fashion and beauty retouching, a lot of attention is paid to the skin! For example, you may spend a lot of time smoothing the underarm area.
Before and After skin smoothing
Dodge and Burn
Dodge and Burn is an important technique. It can help you clean up and fix issues where lightening or darkening the pixels will improve them. You can work on the highlights and shadows in your image to add some dimension. You can touch up the catchlights in the eyes and smooth out the lips.
Zoom in to see the areas you may want to retouch using this technique. You might want to do this once you have cleaned up your image with the tools mentioned above.
When using the Dodge or the Burn tool, be sure to use a very low opacity (under 10) to avoid a fake and heavy-handed effect.
Create separate layers for Dodge and Burn so you can see what effect each tool is having on your image. Work zoomed in to retouch your image with precision. Be sure to zoom out to assess how it looks overall and how you might need to adjust it further.
Conclusion
A high-end, polished look distinguishes commercial fashion photography. It requires subtle but skilled retouching.
Over time, every photographer develops their workflow and preferred way of working. These tips will help you refine your commercial fashion retouching skills.