Black and White Vs Color – Which is Best for You in 2026?
There are so many different areas in modern photography it can be overwhelming. Moreover, there is black and white vs color photography. The two techniques are quite different, both in shooting and end result.
So how do you pick one?
This article will help you choose a style that works best for your needs. To do this, we’ll look at the advantages and disadvantages of both black and white vs color photography.
General Tips on Choosing Black and White vs Color Photography
As a photographer, you can use color or the lack of it in a photograph as a tool to reaching your specific goal. In my work, choosing black and white vs color or otherwise is always a conscious decision.
To make this choice you would have to answer two general questions:
- What is your subject matter?
- What is the level of visual complexity of your shoot?
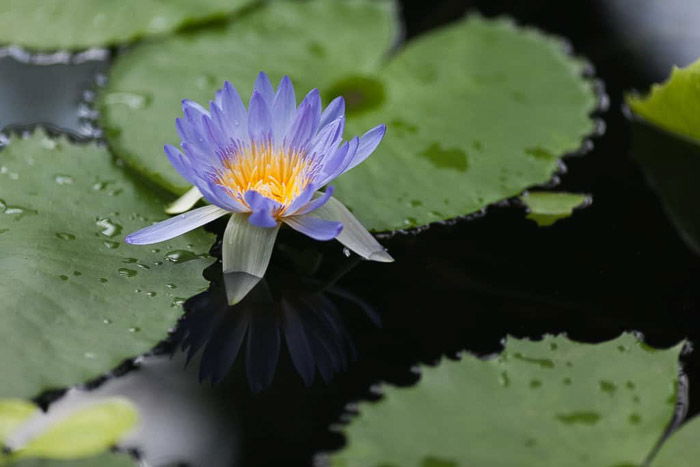
Water Lily. © 2014 Daria Huxley
There are certain subjects that you would more often shoot in color over black and white. For example flowers, city skylines, colorful birds, landscapes in low light and commercial product shoots.
But fine art architecture and minimalist landscapes? These would typically be presented in black and white.
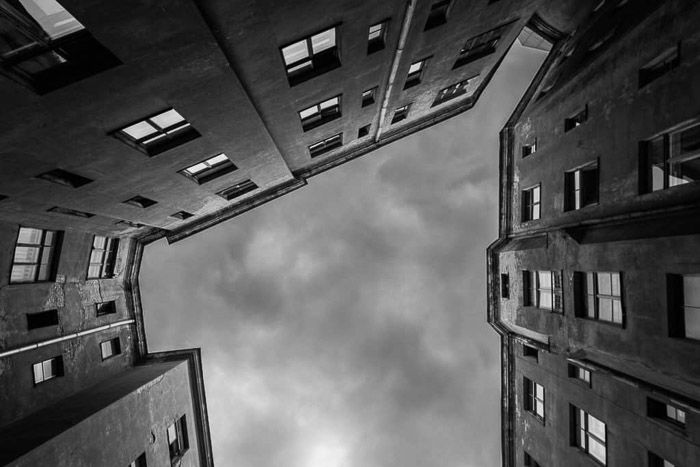
Courtyard. © 2012 Daria Huxley
A myriad of other subjects, including portraits, architecture, street photography, and animals can look stunning in both color and black and white.
Before we go into detail, let's take a very brief look at the roots of photography as a medium.
From Black and White to Color: Evolution of Photography Style
As we know, photography was born in black and white. Early film was only available in black and white limiting all choices to a single process.
Shooting portraits or street scenes in black and white allows you to use the film connotation. You add a dramatic look to your images, creating the feeling of timelessness.
Black and white photos tend to be more straightforward and draw the most attention to textures and shapes.
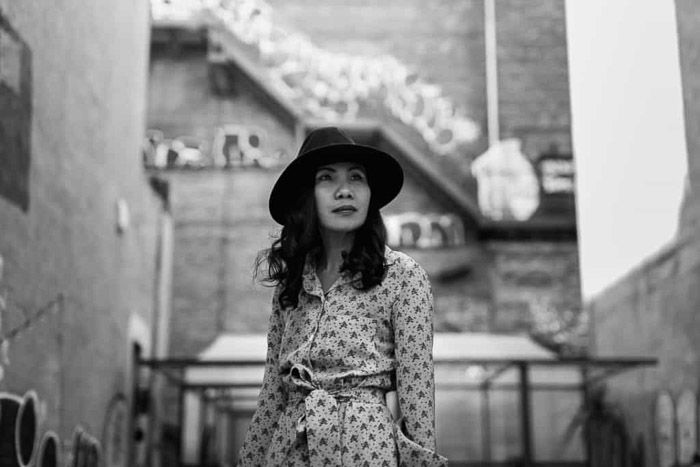
Woman in New York. © 2017 Daria Huxley
It is especially useful to look into black and white medium if you are just beginning to learn about photography. Black and white photos can be considered as a necessary basic. And they are very useful for training your eye for composition and contrast.
There are way less variables and distracting elements in black and white and monochrome pictures compared to color images. This makes it much easier to focus on the composition and shape of your subject.
As you become accustomed to identifying the contrasting areas and strong compositions, it may be a good time to move on to color.

Portrait of a Musician. © 2017 Daria Huxley
With color comes complexity. There is an endless variety of looks you can reach and this toolset takes a lot of practice to master.
For a more experienced eye it can be a very powerful tool, allowing for a lot of flexibility.
Taking the Best From Black and White Photography
Black and white photography operates in the system of only two primary colors: white and black. This makes it quite simple and direct.
All the shades are distributed in-between, so it is a linear two-factor process.
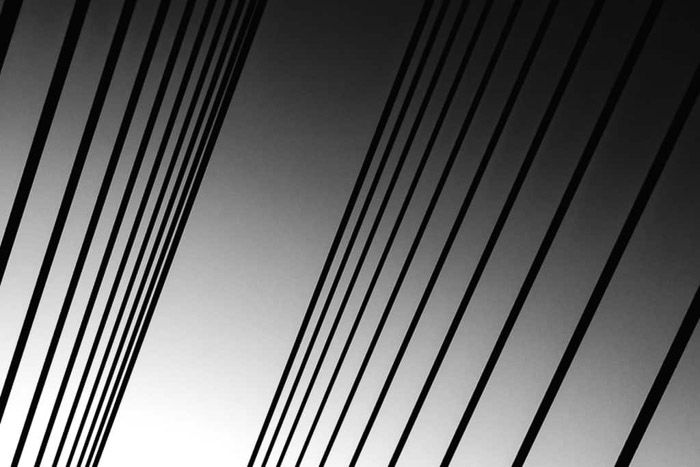
Parallels. © 2012 Daria Huxley
Taking advantage of this comparatively simple visual process, you can put your focus on finding the right composition of your image. That allows you to decide on the overall visual statement you want to make.
Black and white images often explore strong compositions, emphasize textures and shapes with higher contrast. Just like in the example above.
Alternatively, you could add softness to your image. To do this, decrease contrast in certain areas. Black and white style fits best for minimalistic photographs. And for images focused on textures and abstract shapes.
If you are using a digital camera, stick to shooting in color. Then transform your images into black and white manually on your computer. It will give your more flexibly and ensure better quality of the final result.
Using Color to Define Your Unique Visual Style
Adding color to your work means working with a whole lot more of information. The number of potential editing techniques that you can use to set your work apart increases exponentially compared to working solely in black and white.

Symmetric Portrait. © 2014 Daria Huxley
Working with color opens doors for you to achieve a really distinguished look for your pictures in post-production. There are many different techniques you can use, split toning and curves to name a few.
Perhaps, you might have seen some photographers online that have galleries with a very distinct visual style. Their entire bodies of work look consistent. This is achieved by editing all photos in a certain way.
For example, Ryan Berg uses infra-red filters to achieve pink leave effect in his nature series. Marat Safin puts a stake on hyperrealism, making images of his models appear almost alive.
These guys spend a great deal of time on color correction to achieve such effects, but the results do pay off.
Find a photographer whose technique you really like. Try to make your photos look visually similar to their style. Replicating the look will teach you practical editing tweaks. And it will motivate you to look for very specific editing tutorials.
Black and White Vs. Color: Combining the Two
Black and white and color images don't have to always exist separately. Sometimes it makes sense to push the boundaries and experiment further.
For example, try combining black and white and color in one image. This technique drives attention to your subject. You can use Photoshop layers to achieve this effect.
In the example below I separated the leaf from the desaturated brick pavement. I did it to preserve its sophisticated color and focus attention on it.
It’s a double win. The high texture and composition of the brick lines leading us to the upper left corner gain additional strength in black and white.
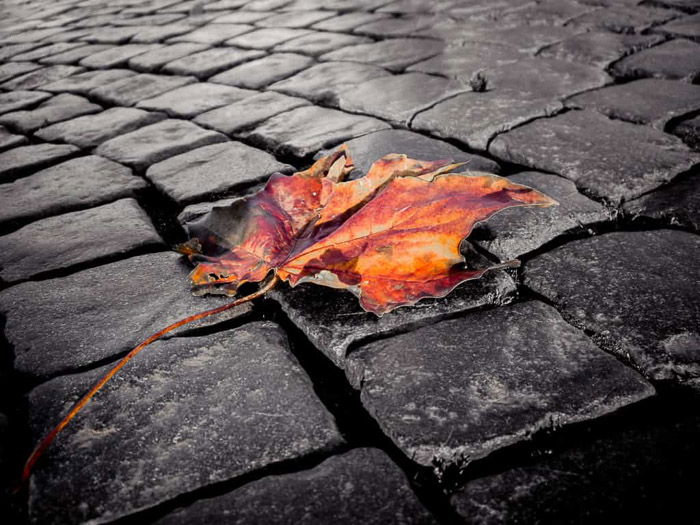
Maple Leaf. © 2008 Daria Huxley
Another way to add color to black and white photographs is to transform them into monochrome.
One of the key colors (or both of them) will be different from black (or white). The image histogram would still be linear and consist of two main colors, and everything in between.
We will discuss the means to achieve such look in the editing tips section below.
Tips for Post-Processing Your Color or Black and White Photographs
Tips for Editing Black and White Images
In black and white, try experimenting with contrast more. Don't be afraid to use selective brushes in Lightroom or masks in Photoshop. This way, you can apply changes only to certain areas of a photo, as opposed to the entire image.
I usually try to highlight the main focus of my photo with the help of dimming radial filters.
It is also often helpful to decrease the clarity of the distracting elements. You can even put them out of focus with the blur tool.
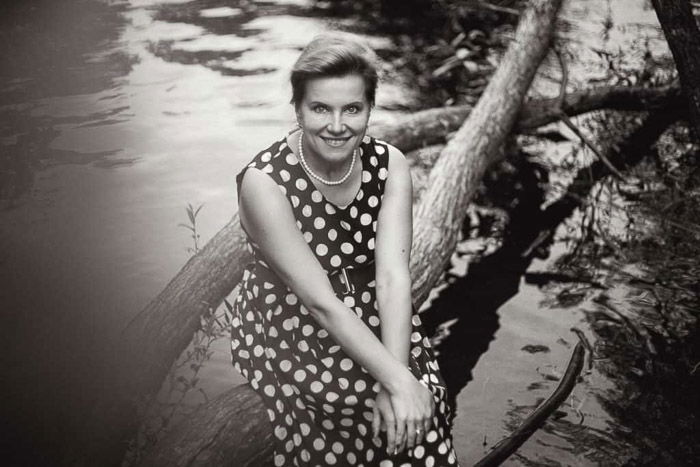
Woman in a Polka Dot Dress. © 2014 Daria Huxley
To achieve monochrome, use the split toning function in Lightroom or Color Balance adjustment filters in Photoshop. Split toning lets you color your highlights, mid-tones and shadows in different colors. This can create a very special look and feel to your image.
In the example above the black is shifted slightly towards red and white is shifted towards yellow.
If you are looking for more precision, try experimenting with Curves and Selective Color adjustments in Photoshop.
These tools give you a lot of flexibility in pulling certain colors of your image (assuming you are editing a converted file from color to black and white) and changing their brightness locally.
Tips for Editing Color Images
For color, editing techniques are similar. But the time you spend to achieve desired results can increase exponentially due to increased complexity. It is especially true for editing color portraits as the skin tone is a very delicate matter.
This is the very reason for existence of such jobs as fashion or portrait retouchers. In the example below most color correction work was done retouching the model’s skin tone.

Portrait Before & After. © 2016 Daria Huxley
In order to achieve a perfect result, editing in Photoshop is recommended. My best friends there are tonal curves, selective color adjustment layers, color balance and levels adjustments.
I use curves to achieve effects similar to split toning that work better for black and white.
Using masks is recommended. You can always disable them and see what the image would look like without them.
Also, when you are making these small tweaks in color you are dealing with a very delicate fabric. Creating a good work environment is of essence.
Physiologically, our eyes are able to see the smallest variations in tone and shade. To ensure the most accurate color perception make sure to get rid of all distracting light sources in your room.
I usually work either in a darkroom or in a room filled with natural light. Remember to calibrate your monitor as well, as it can greatly impact the way colors appear on screen.
Work with layers in Photoshop or create virtual copies in Lightroom to compare what your photo would look like in black and white vs color.
Conclusion
The black and white style goes to the roots of photography itself. It can be very important for developing the strong technique.
Color photography opens endless opportunities for visual expression. But it is harder to manage and takes more time to master. It is just a harder language to learn, but a very useful and descriptive one.
My general advice would be not to choose one over another. Combine both techniques in your work to grow and sharpen your overall skills as a photographer.
Black and white and color photography go hand in hand. The best way to become a better photographer is by experimenting and learning from both.
It takes time to find your unique style and look. Good luck on your journey!

