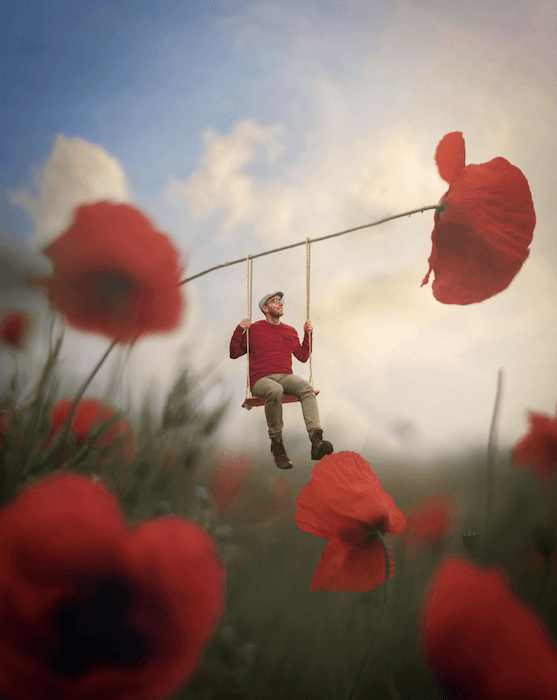
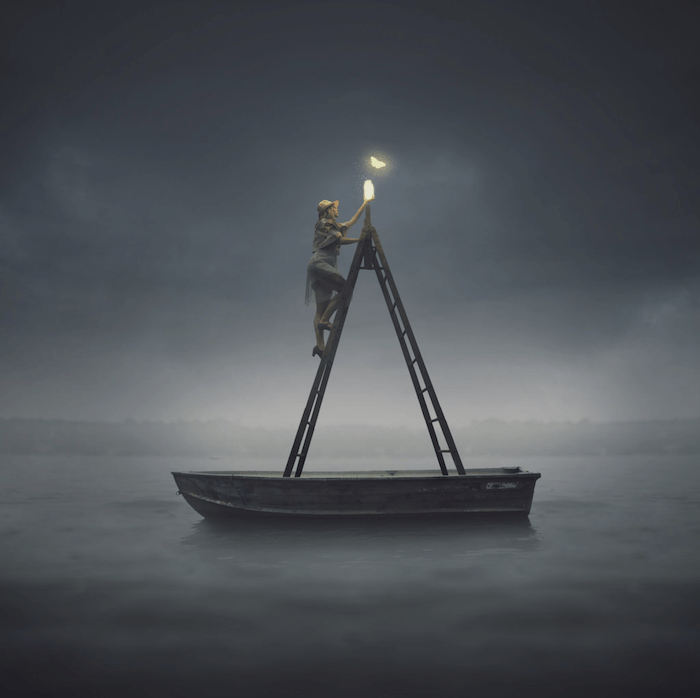
Composite photography is widely used. Almost every single photo advertisement you see is a composite. That’s because it’s easier to create a crazy, fictional scene in post-production.
It can be hard to capture something in real life or build a whole set with every detail you need. And a composite gives you complete control of the environment. You can add or subtract different parts as you wish.
Today, we’ll guide you through composite photography. We’ll describe what it is and what it’s used for. We’ll also discuss the crucial aspects to consider when collecting your imagery for your edits.
Finally, we’ll take you through a quick step-by-step guide to a simple composite that will teach you the basics! By the end of this article, you’ll be able to create amazing composite images.
What Is a Composite Image in Photography?
A composite image is simply a picture made up of multiple images. Composite means an object made up of several parts or elements.
A composite image takes time and meticulous planning for it to be successful. And a composite image is most successful when it looks believable.
It could be anything from adding a missing detail to a photo to creating a picture of a dog riding a rocket into the sun. It is a method of addition or subtraction to create the unreal.
Composite Photography Is Like a Complex Collage
Composite photography is like making a collage. Most of us have cut different images from magazines or photos and stuck them together to make a new picture.
You do the same in Photoshop for composite photography. But you have added control.
You can change the sizes, proportions, and colors of images. And you can seamlessly blend pictures. These Photoshop techniques are advanced collage work.
And these photo composites come in all forms. They can be these images where you think, No way did a photographer capture that!
Or they can be almost undetectable from unedited photographs. The latter examples use techniques such as focus stacking and even HDR photography to create composite images.

Ethics of Composite Photography
A composite photo is photo manipulation. This means we actively change a photograph’s depiction of reality. Images have been around for a long time, and we know that people can edit photos to skew reality.
The internet heavily emphasizes this. I’m sure we have all been fooled by a photograph showing a new movie coming out when it isn’t or one of our friends standing with a car they could never afford.
Know When to Use Composite Photography
Composites are also heavily frowned upon in some photography competitions. It is especially evident in competitions like the Wildlife Photographer of the Year awards.
The rules specify that “entries must not deceive the viewer” or “attempt to disguise or misrepresent the reality of nature.”
So you must be as transparent as possible when using composite photography and know when it’s appropriate. Do not use it for editorial photography, but use it freely with fine art photography.

Planning and Preparing to Create Composites
Step 1: Come Up With an Idea
In composite photography, the concept is everything. And you are only limited by what your mind can think of.
The hardest thing will probably be managing what you have in your head and translating it into set images in a fixed frame. The easiest way to do this is to separate your vision into a few categories:
- Subject
- Background
- Extras
- Atmosphere
The most important details are the subject and the background. Once you have a simple idea, you can include other things that add to this idea.
Maybe the person on the desk is sitting down with person-sized Lego figures. It’s all about creating a narrative through the control you have.
Step 2: Choose Images With the Following Characteristics
Collecting images for a composite is not as simple as choosing the best photographs. There are a few things you need to take into consideration:
Appropriate File Sizes and Resolution
Make sure the background is big enough to zoom into the picture and work on the elements inside without pixelating the image.
This also goes for the subject image you’re choosing. Can it be scaled up to fit in the background without it pixelating?
If it is just going to be used for web purposes, having images as little as 10 cm in length at 72 dpi will work. You probably want around 20 cm in length at 300 dpi for print.
I would recommend the latter option as an excellent go-to size for composite images.
Similar Perspectives
Perspective is arguably the most crucial factor in making a composite image.
Maybe you have a photo of a subject looking up, but the background image is taken level or at a higher perspective. It won’t look right putting them together.
It is best already to have the final background image in your mind. This means you will be able to photograph your subject (or background) with the same perspective and in a believable way.
For instance, if you’re photographing someone as if they have shrunk into the palm of a hand, you will most likely be looking down at them. So get up on a ladder or shoot out of a window to try and mimic this angle.
When sourcing images, you want to ensure all the elements are taken with a similar perspective.
Similar Lighting
Lighting is the most common way that you will be able to spot a composite image.
In advertisements, you can sometimes tell the lighting is too perfect on someone in the middle of the frame. There is no way anyone could get this effect with studio lighting.
In less refined edits, there can be even clearer giveaways. There may be a background that is clearly in a basement with no windows, yet there is harsh directional lighting.
Even if there is a light source in the image, people will sometimes mistakenly put the subject where the light cannot fall onto this person.
Determining the direction of light in all images you use in your composite photography will go a long way.
Of course, you can get away with lighting not being 100% perfect. But every tiny detail you cover will go a long way.
Similar Color Temperatures
The color cast in your photos will also profoundly affect your composite.
Each separate image will most likely have been taken in a different light. And different kinds of light have different color temperatures.
This means cut-out sections will not look like they are under the same light as the background image. But it usually just takes a tiny change to the color temperature to match them.
It is usually a case of making the subject warmer (more yellow) or colder (more blue).
Step-By-Step Guide to Creating Photoshop Composites
We will now go through a short step-by-step approach to a simple Photoshop composite. I will introduce a few quick and easy techniques to apply to various situations.
This edit should take you under five minutes to do!
I will use two stock images for this demonstration. I took both from the stock image site Unsplash. I will also later use a brush I downloaded from Brusheezy.
Step 1. Select Subject and Background Images
First, I make a plan for my final image. I want to composite people doing yoga in an extreme place. So I find a yoga pose first (subject).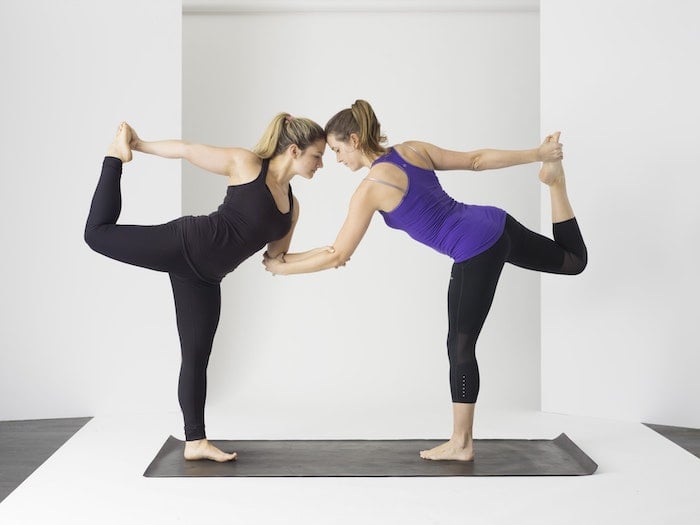 Now I want to find an extreme place like a cliff (background). When looking for the cliff image, I consider the camera’s perspective in the yoga photo.
The yoga picture looks straight at the subject from eye level. This means I pick a location to place the subjects on the same or slightly higher level. This cliff will work great.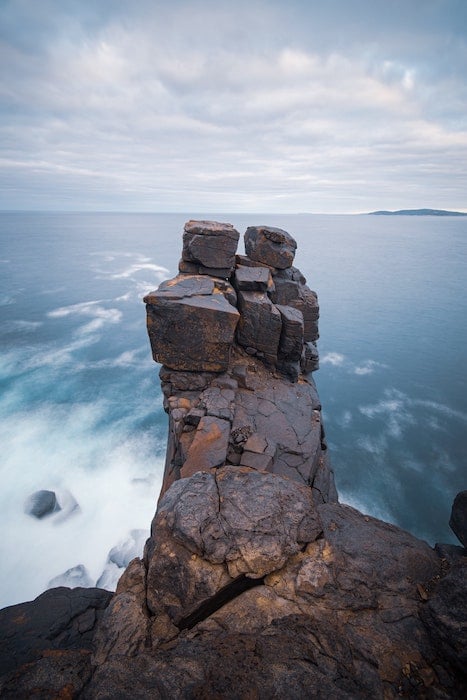
Step 2: Cut Out the Subject
Now we start the editing process. First, open up your subject image in Photoshop.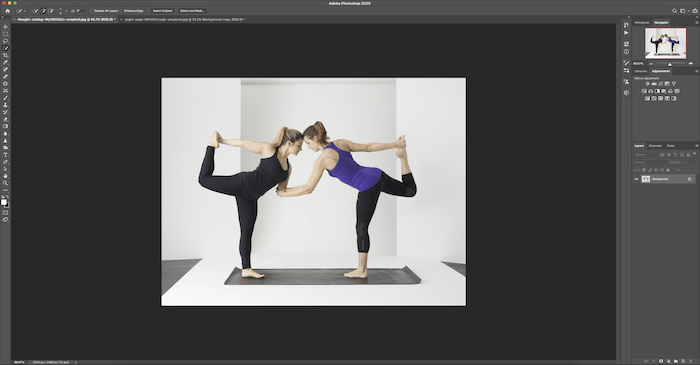 Then duplicate the background. You can right-click the original image (Background layer) in the Layer panel and click Duplicate Layer.
Or you can drag the Background layer over the Create New Layer icon (+ sign) on the bottom.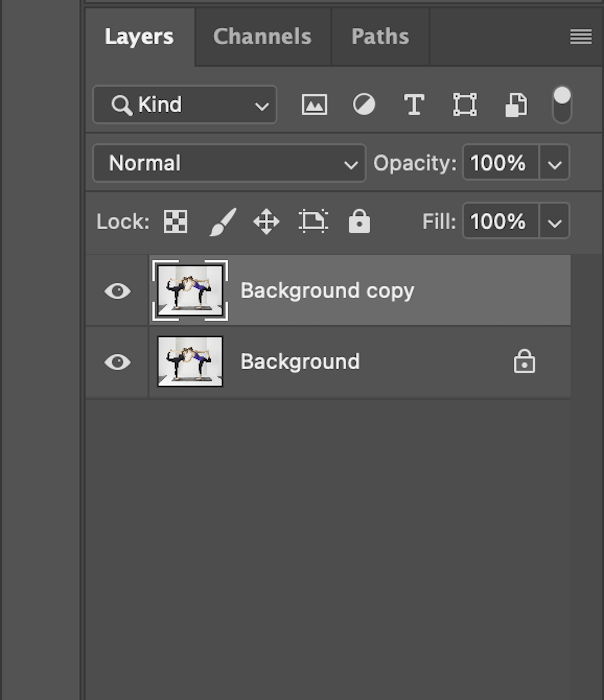 Now we will cut out the two women. There are many ways to do this. As this is a quick guide, I will use the Quick Selection tool in the toolbar (paintbrush icon with a dotted circle).
Start to click on your subject so that the “marching ants” snap to outline your subject.
Do this for both people. Make sure to use the subtractive brush (with a minus sign) to take out the gaps between their bodies.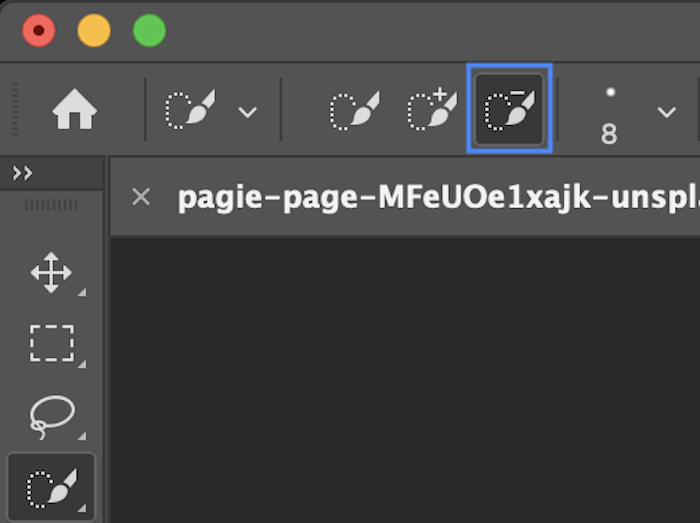 Now you want to inverse the selection. I do this by holding down Command or Ctrl+Shift+I. The “marching ants” should also be around the border of your image.
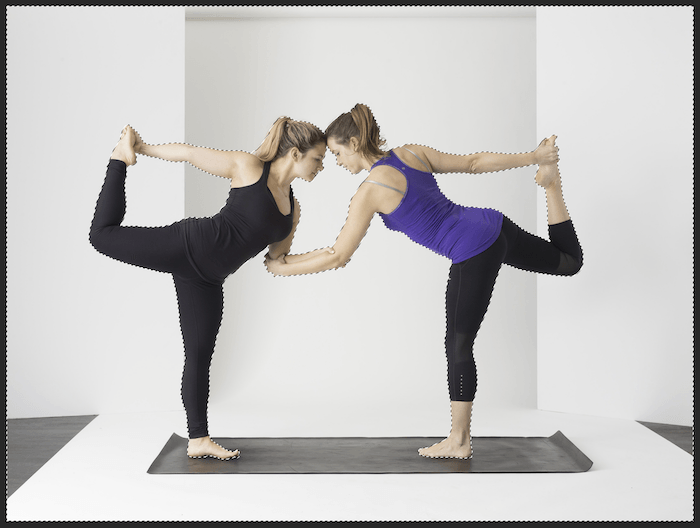 With the duplicate background layer selected, press the Backspace or Delete key to cut out your subject. This is how your duplicate layer should look.
You can “hide” the original image by pressing the Eye icon in the layers panel.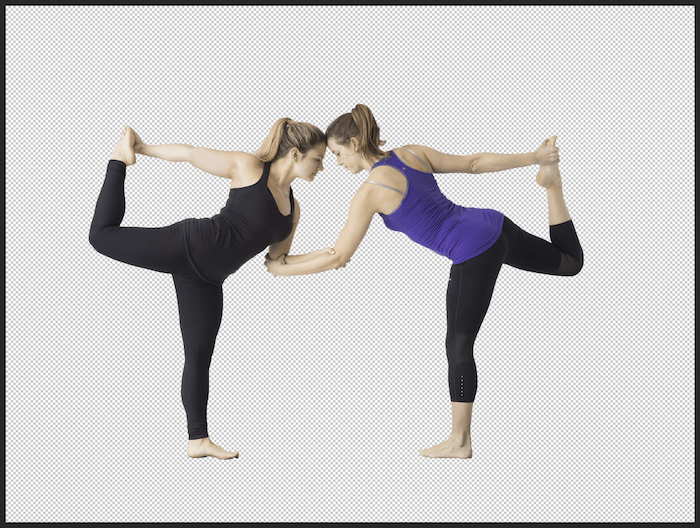
Step 3: Move the Subject Onto the Background
Next, open your background image in Photoshop. You will have separate tabs for the two files you are working on.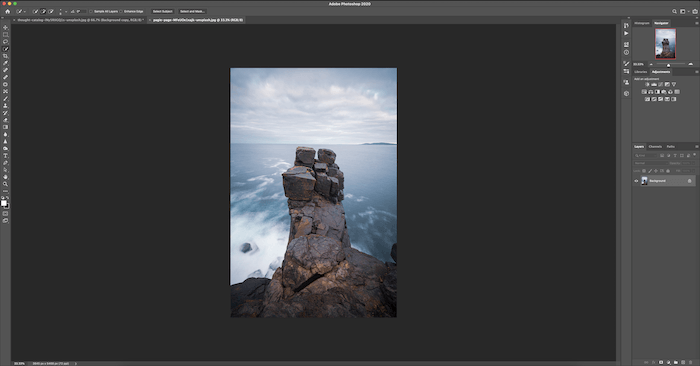 With the subject image selected, double-click on your cut-out layer. Then drag it onto the tab of the new background image, which will open.
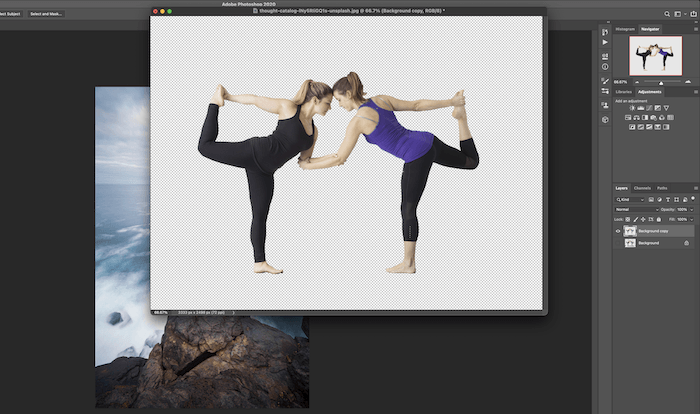
Step 4: Resize and Position the Subject Image
First, you want to resize the subject. Press Command or Ctrl+T to open the Transform box and resize the image.
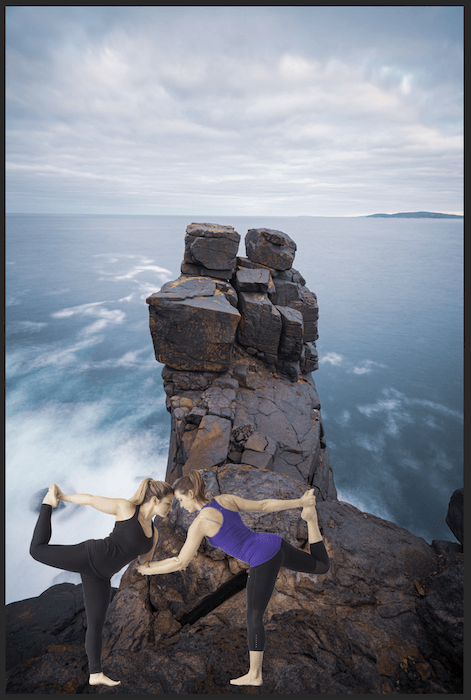
Make sure your subject is a believable size. In my example, I make sure the height of the people is realistic.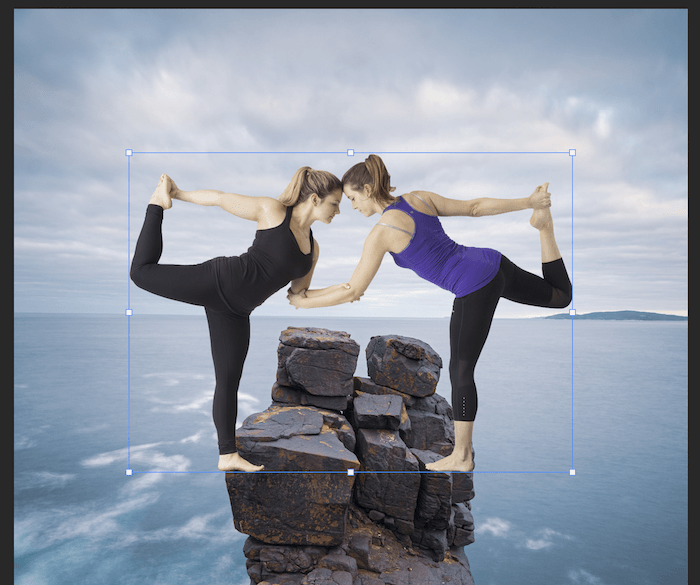 Then use the Move tool (V) to place the subject correctly. Here, I put the women on top of the cliff. This is the base of our simple composite image.
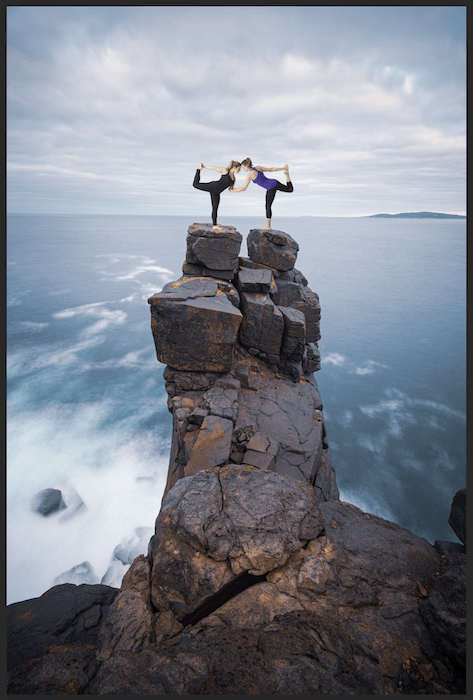
Step 5: Create a Layer Mask to Match Color Tones
Now you want to create a layer mask for your subject. I’ll use it to fine-tune the color of the subject images. But you can adjust many kinds of details using a masking technique.
Grab your subject layer and drag it over the “add a layer mask” button at the bottom of the Layers panel.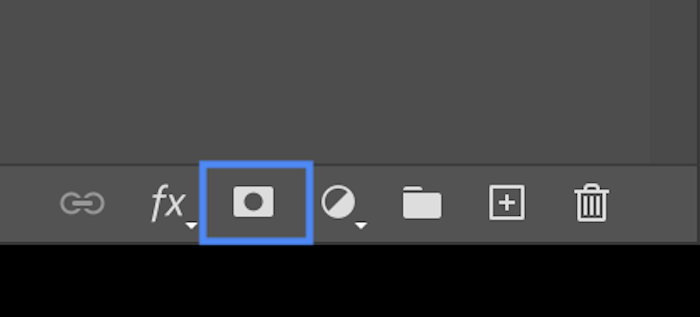
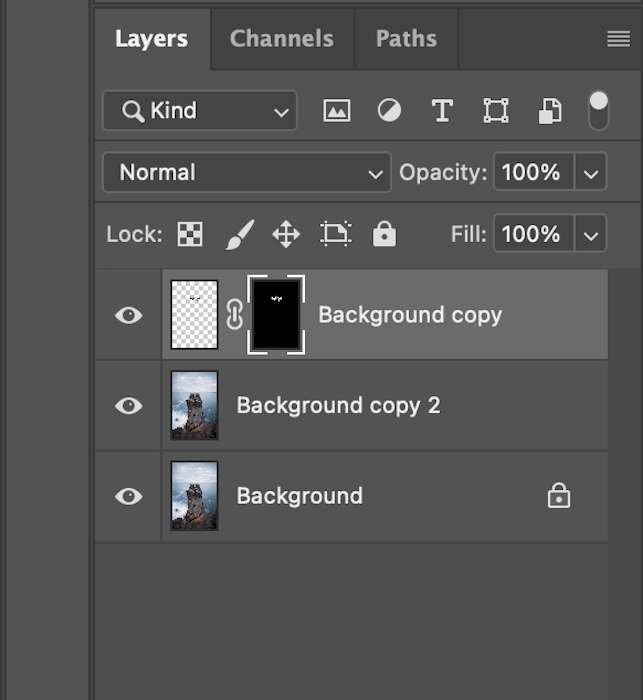 Next, in the Adjustments panel, click the Color Balance icon. This opens an adjustment layer for color balance.
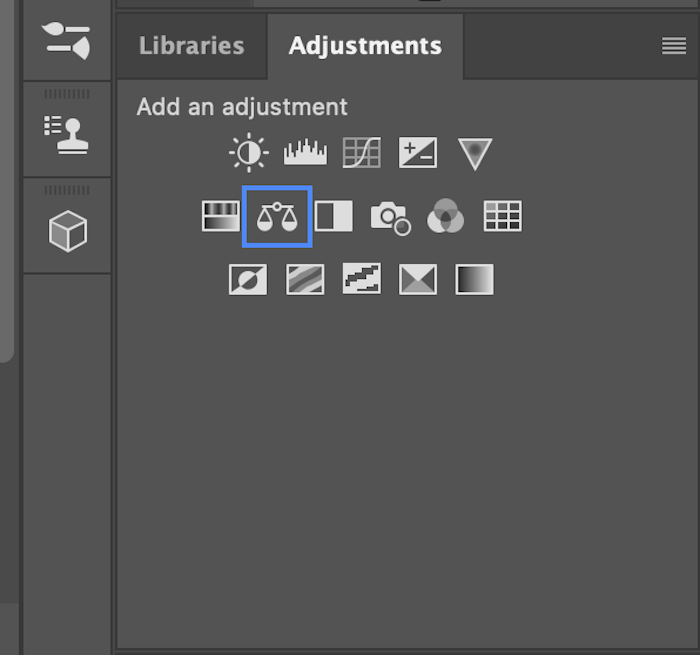 Now you want to drag your layer mask onto this new adjustment layer. If a pop-up box comes up, select “yes” to replace the layer mask.
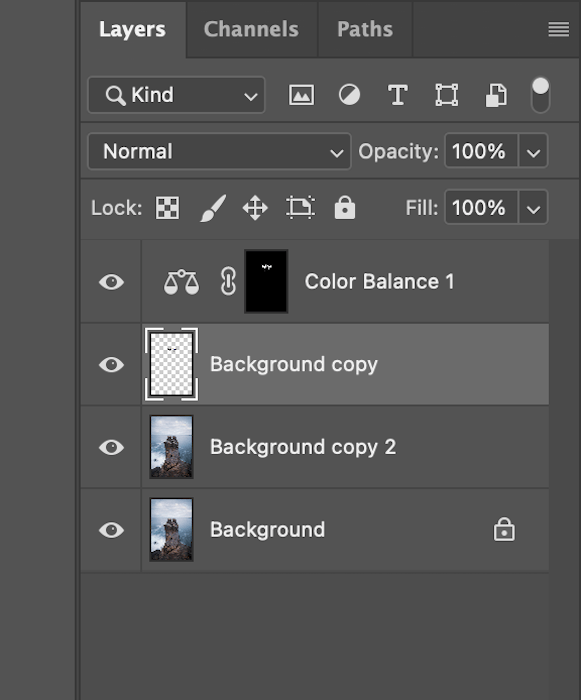 Because the background image has a cold and blue look, I add a blue tone to the subject.
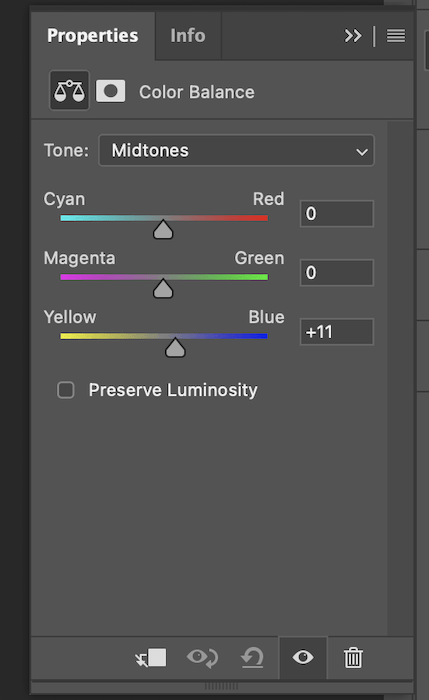 This makes a subtle difference, but that difference goes a long way.
Step 6: Add Extra Effects to Create a Compelling Scene
I want to add some fog for an atmospheric effect. You can choose other effects based on your images.
For this fog effect and others, you can find fog brushes online. Download the tools and import them into Photoshop.
First, you want to create a new layer (Layer 1) for the effect. Click the new layer button (+ sign) at the bottom of the Layers panel.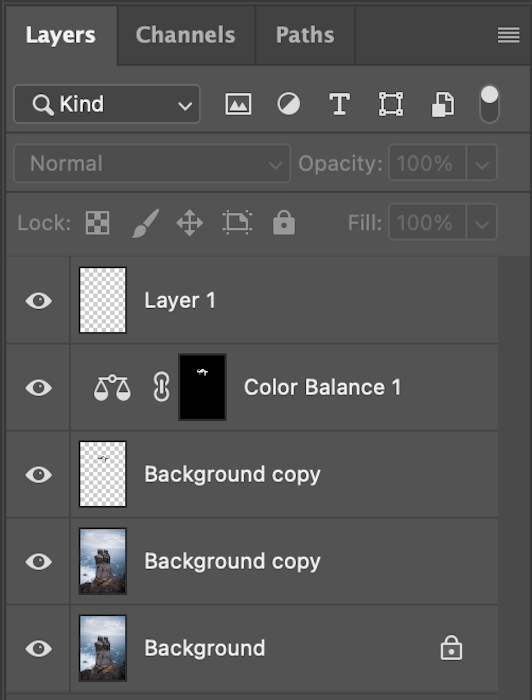
Then choose the Brush tool. And select the type of brush you want to use in the Brush Picker in the top menu bar.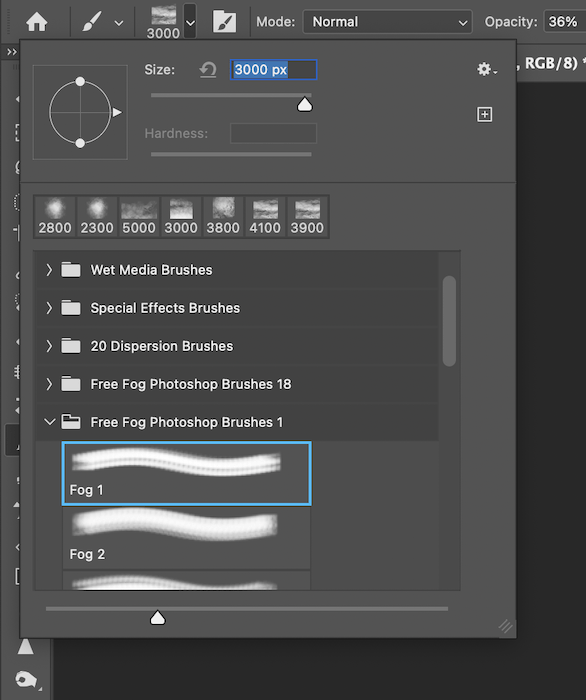 When working with fog brushes, lower the opacity and flow of your brushes. This ensures a light effect and application.
 Gradually, start bringing in the fog by brushing it in. Make it look as natural as possible.
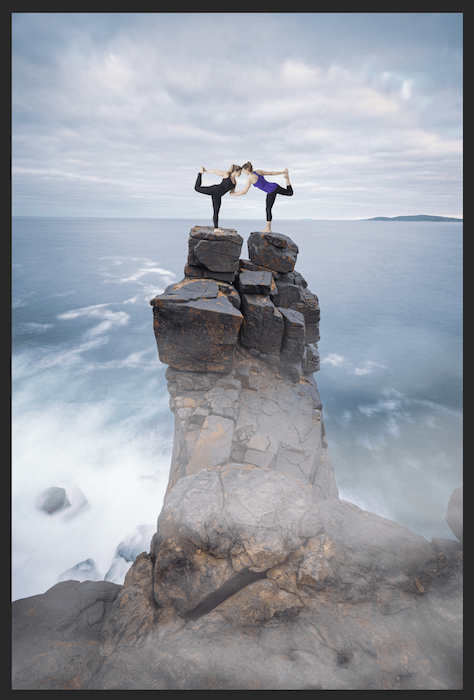 Do this all around the image. Make sure you use different brushes or change the brush direction to add variation.
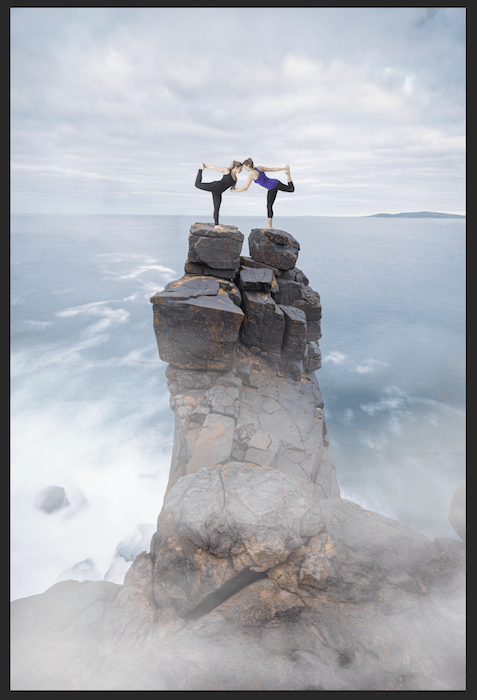 For illustrative purposes, this is what your layer should look like if you applied a black background for the fog. (You don’t have to apply a black background to this layer.)
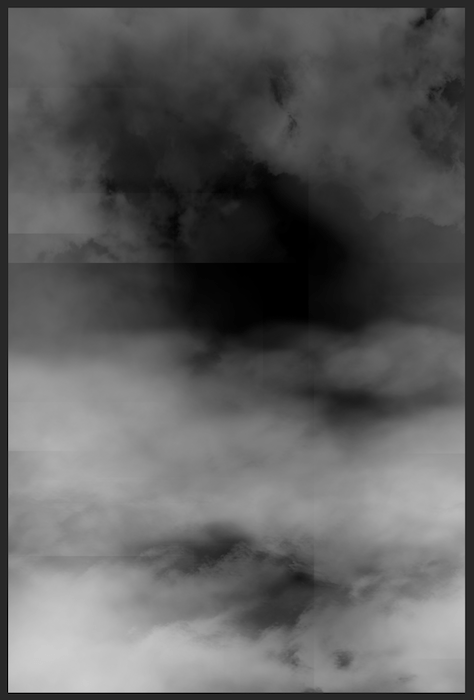
To fine-tune the final image, you will want to erase the fog in the way. Select the Eraser tool from the toolbar.
Again, you will want to make sure the opacity and flow are low, so you can lightly blend the fog out. Now you have a quick and easy Photoshop composite photo!
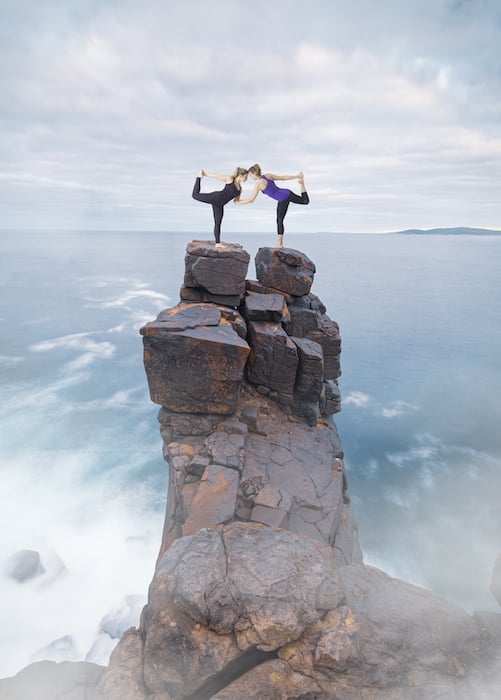
Conclusion: How to Create Awesome Composite Photography in Photoshop
Creating composite images can be a painstaking task. The most important thing to remember is that it’s not always as simple as it seems. When you start to experiment, you will realize the amount of attention this process needs to make the image successful.
Simple composite photographs are a great way to quickly build your skill and familiarity with Photoshop. Start with small projects like the example above. Then you can add more and more elements to your photos. You will be mastering composite photography in no time!
Try out our Fantastic Photo Adventures video course to create unique Photoshop compositions!


