A white balance card is an important tool for photographers to have in their arsenal. It can be used to help achieve accurate colors in photos, regardless of the lighting conditions. In this article, we’ll show you how to use a grey white balance card for perfect color in your photography.
Improve the Exposure and White Balance of Your Images With a Grey White Balance Card
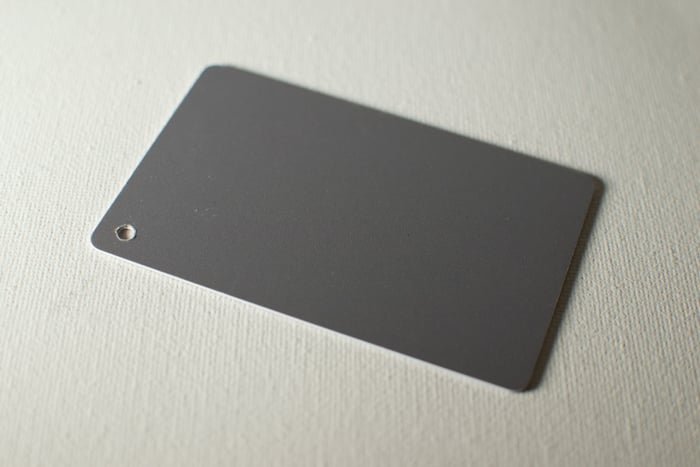
A grey card is 18% grey to be exact. This corresponds to a mid-grey, the middle point between the darkest shadows and the brightest highlights.
The light reflected from an 18% grey is what your camera meter understand as "normal" exposure. That’s why a grey card is a great tool to get a good exposure. You can use it as a reference spot.
Because they are neutral, grey cards can also be a reference point to detect any color cast and correct the white balance in your images.
How to Fix Difficult Exposure Scenes With a Grey Card
Getting the exposure you want in your image is critical for getting great images. Your camera meter evaluates the light reflected in the scene.
According to how cameras are manufactured, it will try to average the light to a mid-grey (18% grey). In most situations it is OK to trust how the camera meter estimates the colors.
The problem appears when you take a dark photo with lots of blacks. Your camera will push it towards the mid-grey. It will overexpose it and your blacks will end up being grey (as your camera wanted).
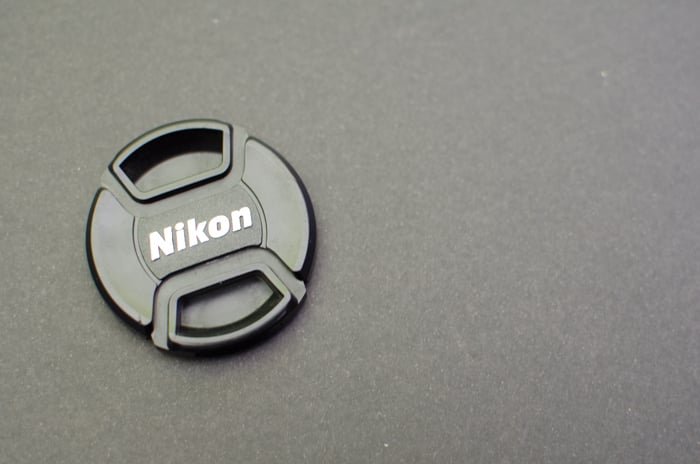
The color in photography is not always so easy to get as in “real” life. When an image has a lot of blacks, your camera will adjust the exposure to get closer to a mid-grey.
In white scenes, your camera will also try to reach mid-grey. As a result, it will underexpose it and the whites will look grey.
In these tricky situations, a grey card can help you get more accurate meter readings.
To use the grey card to set the exposure of your scene you have to follow the following steps:
- Place the grey card in the scene
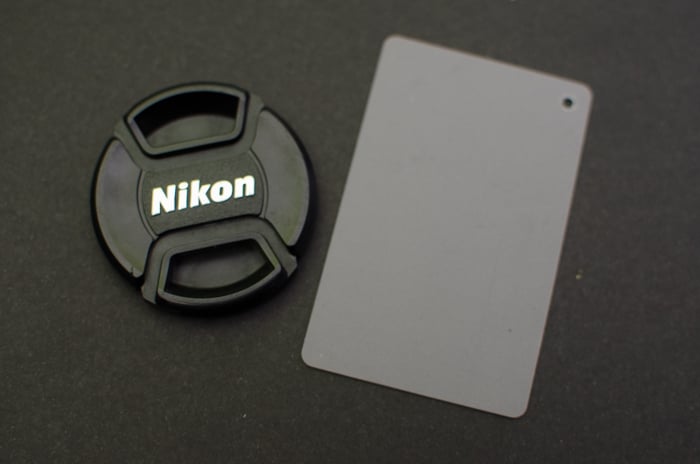
- Set your camera to the spot metering mode
- Point your camera at the grey card
- With your camera in Manual, adjust the exposure your meter shows
- Take away the grey card from the scene and take photos keeping the exposure you set in the previous step
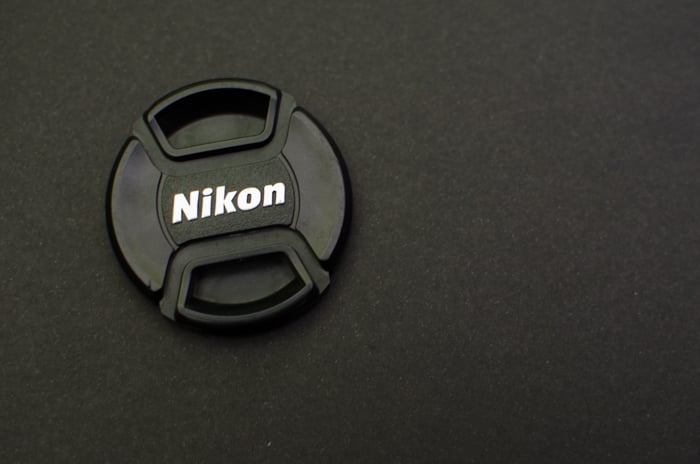
If light conditions change, you need to repeat the process all over. As it is quite fast to do it, it is not a big deal.
The complicated thing here is to remember to do it in each setup!
Why Is White Balance Important
A grey card is a useful tool to set the correct white balance and capture colors accurately, without color cast.
The camera’s white balance settings are doing a good job. In some cases, such as taking photos indoors with mixed sources of light, the white balance can get complicated to achieve.

The colors of this setting were only white and black. The orange-brown that you see is a color overcast cause by the color temperature of light conditions I had in the scene.
The grey card can be used as a reference point. It has a neutral tone. The RGB color proportions (Red Green Blue) are similar between them.
You can use the grey card either to set a custom white balance in your camera or to be a reference point for post-processing in Lightroom or Photoshop (or any other image editing software).
How to Fix WB In-Camera With a Grey Card
The exact way of setting the white balance in camera with a grey card might differ from what I explain here, depending on the manufacturers.
Check your camera manual or search on Google about custom white balance and specify your camera’s model.
For example, these are the steps to follow using a Nikon D7000:
- Place the grey card in the scene;
- Set the camera to manual focus;
- Frame the shot so that the grey card fills the whole frame. Don’t worry about the sharpness of the image. It will work fine even if it’s out of focus;
- Check exposure and adjust if you need to;
- Press the WB button while turning the main dial until you select PRE.
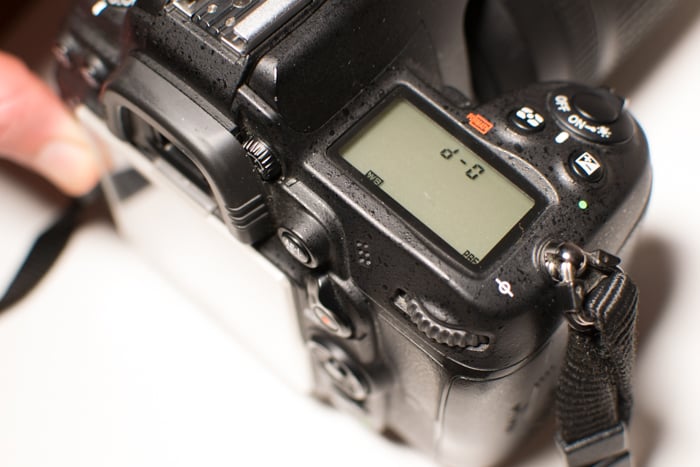
- Release the button. Press and hold it again until the letters PRE start flashing.
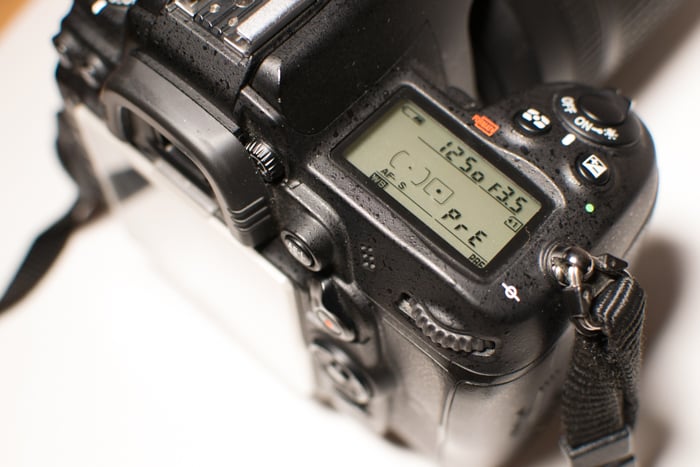
- Take the photo of the grey card before PRE stops flashing.
- That´s all! The camera has just created a WB preset based on the photo you just took.
In other camera models, you might need to take a photo of the grey card and then select it in the Custom White Balance as the reference image.
The problem of setting the white balance in-camera is that you need to repeat all these steps each time there is a change in your light/color situation.
The process requires quite a lot of steps and it can interrupt your workflow. I rarely use this method. Instead, I use the grey card to correct the color balance in post-processing.
How to Correct WB in Post-Processing
If you don’t want to bother with adjusting the white balance in camera or you just realize when you get home that your photos have a color cast, you can fix it in post- processing.
This approach works better if you have your images in RAW format. This file type keeps all the data about colors.
You can correct color in JPEG images too. Because of the compression that characterizes this type of files, their color information is burned into the pixels. Editing might result in strange color shifts.
Almost any editing software will allow you to correct your image’s white balance using a grey card.
During the photo session you need to do the following:
- Place the grey card in the scene or tell your model to hold it.
- Take a photo. This will be your reference image.
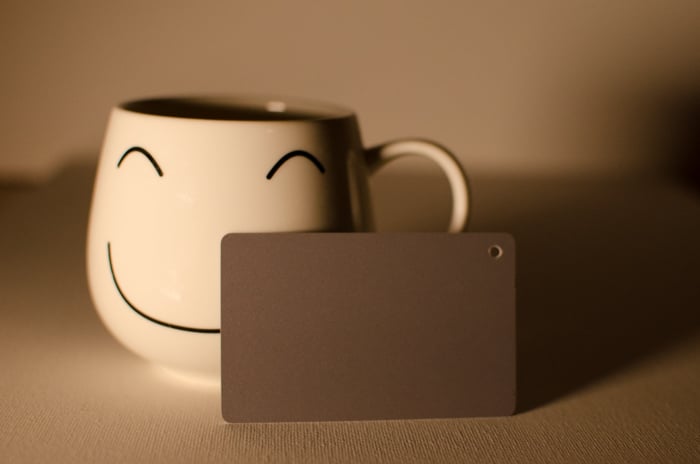
- Take away the grey card from the scene and take photos.
- Each time the settings change, take a new photo with the grey card.
Grey Card Color Correction in Lightroom
Start by correcting the colors in your reference image:
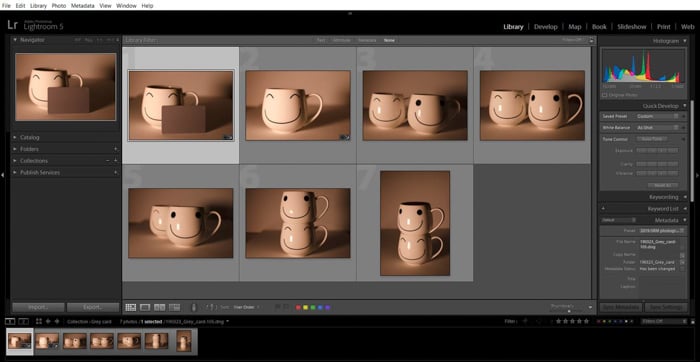
- Select the reference image with the grey card and in the Develop module, look for the eye dropper tool.
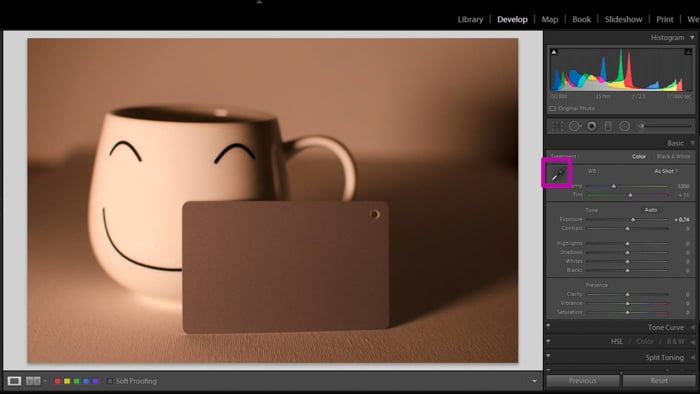
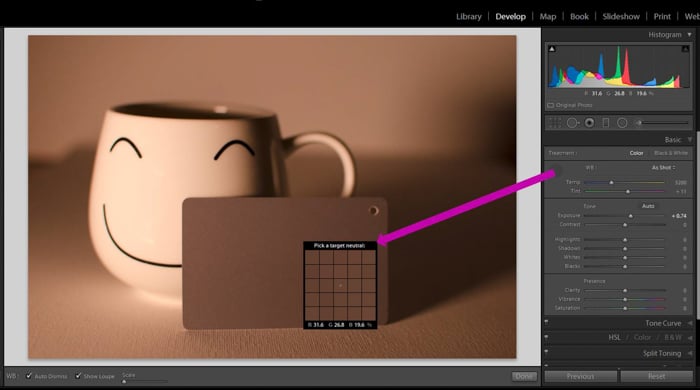
- Use the eyedropper to pick a spot in the grey card (a neutral spot, with the RGB colors similar between them).
- Click on the spot and Lighroom will correct the image in reference to this spot.
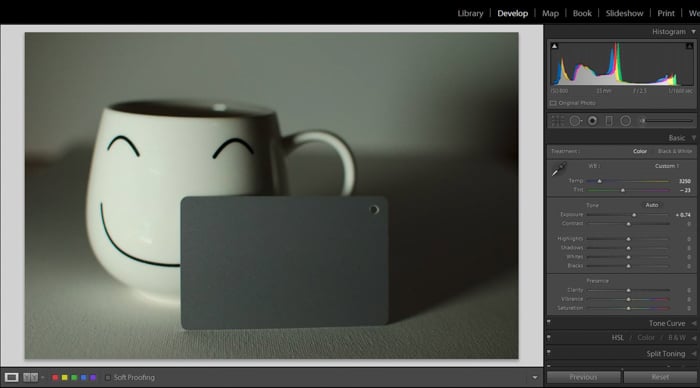
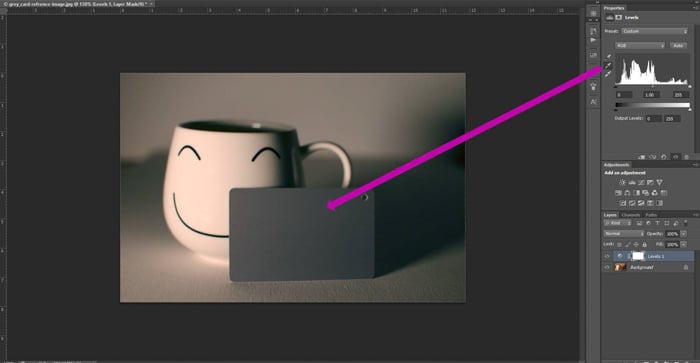
After the adjustments, colors look better. Now the grey card is neutral grey (as it should be!) and the scene doesn’t have a brown color cast.
- Do any final adjustment such as exposure, contrast, shadows.
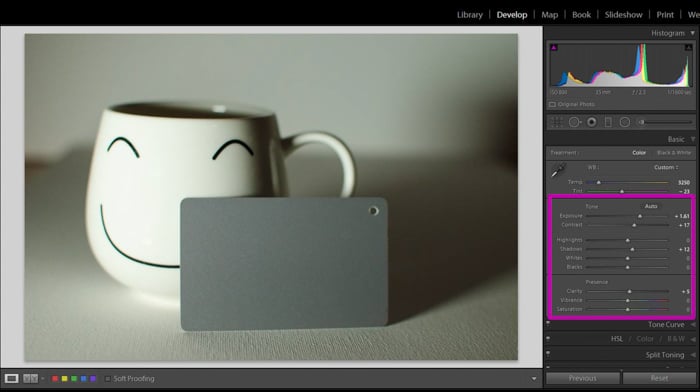
A great thing about Lightroom is that you can do batch editing. This means applying the edits from one photo to a series.
There are different ways to batch edit in Lightroom. In this case I do the following:
- In Grid View (shortcut G when you are in the Library module), select the reference image you just edited.
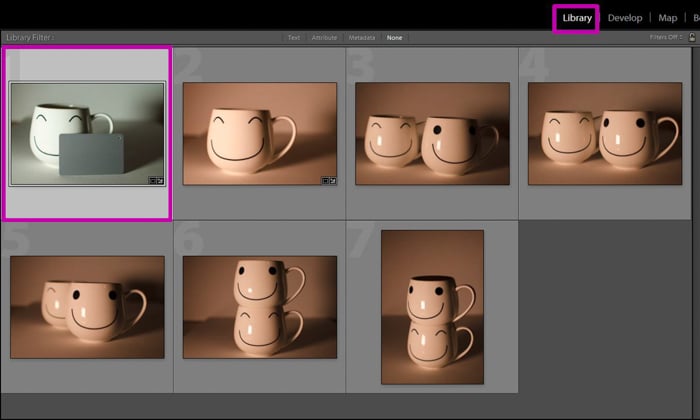
- Select all the photos you want to have the same settings (the ones with the same set-ups). The selection order is important. Lightroom will recognize the first image you’ve selected as the one to copy the settings from.
- A quick way to do it is to select the edited reference image, hold the Shift button in the keyboard and click on the last photo in the series. Press the Sync Settings button.
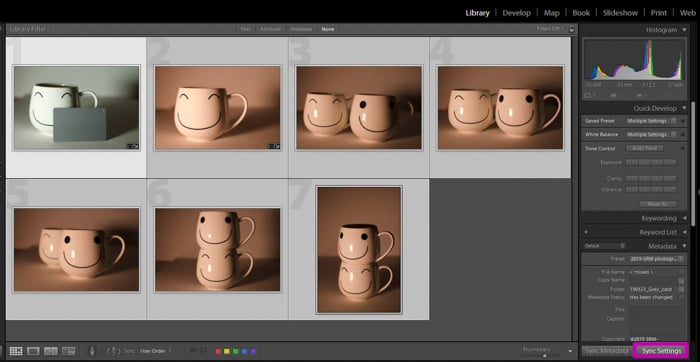
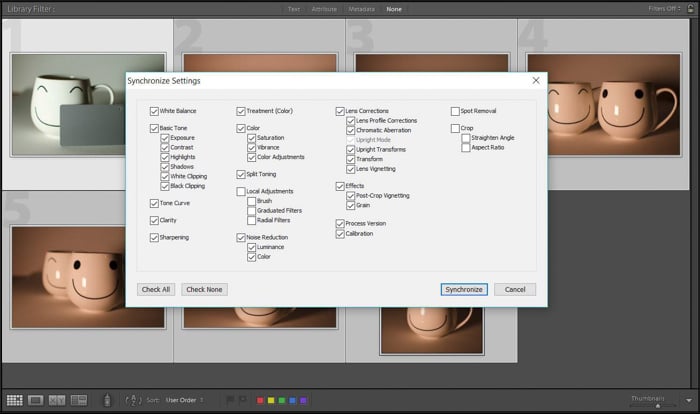
- Select the settings you want to synchronize in the Synchronize Settings Window and press Synchronize.
- Lightroom will add the settings to all the selected images.
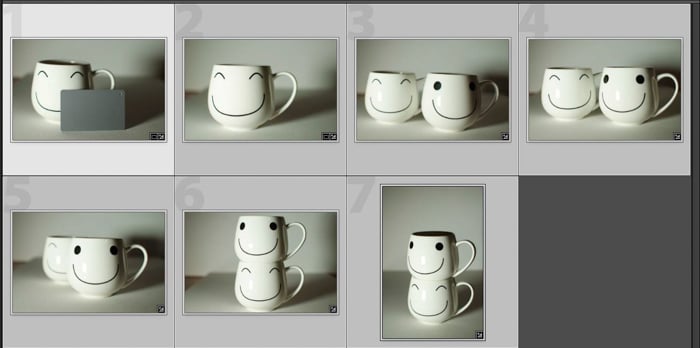
- Repeat for each reference image you took for different light conditions.
Do color correction in Photoshop with a grey card
As before, you need to start by correcting the colors in the reference image with the grey card:
- Open the image with the grey card in Photoshop.
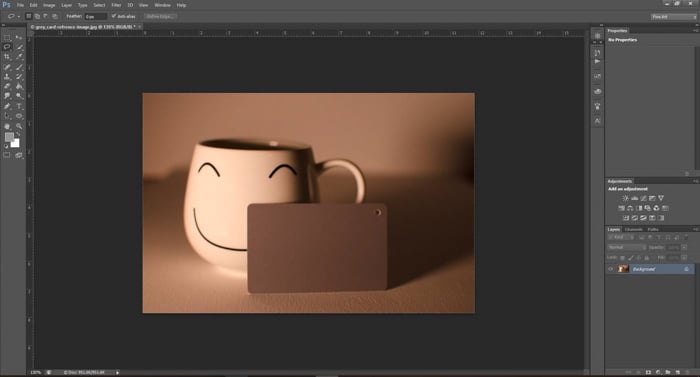
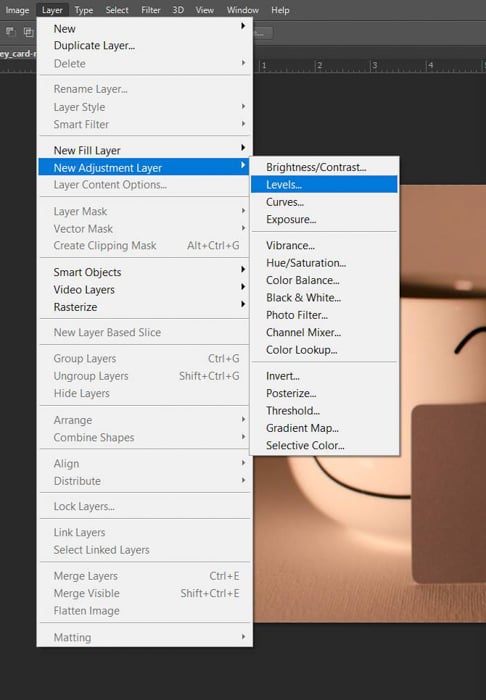
- Create an Adjustment Layer of Levels by selecting in the menus Layer>New Adjustment Layer>Levels.
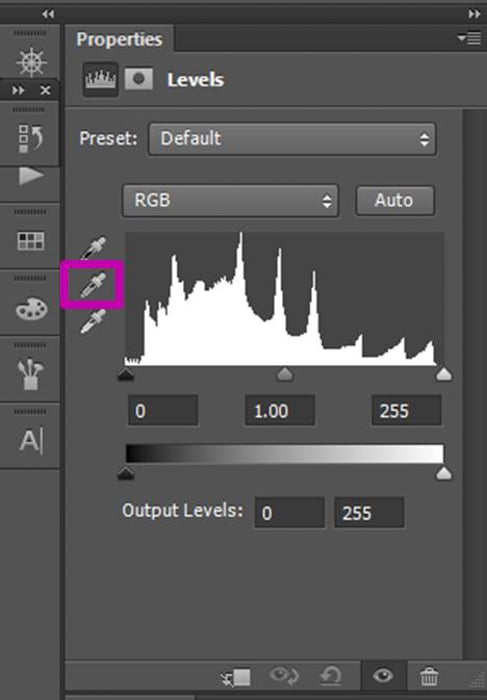
- Select the middle eyedropper next to the Levels Histogram of the Layer panel.
- Click on the grey card. Photoshop will automatically adjust the colors of the image.
- To be able to apply the same adjustment to the other images you took under the same conditions, you need to save the Level Preset you just created.
- Click on the drop-down menu in the top right corner of the Level menu.
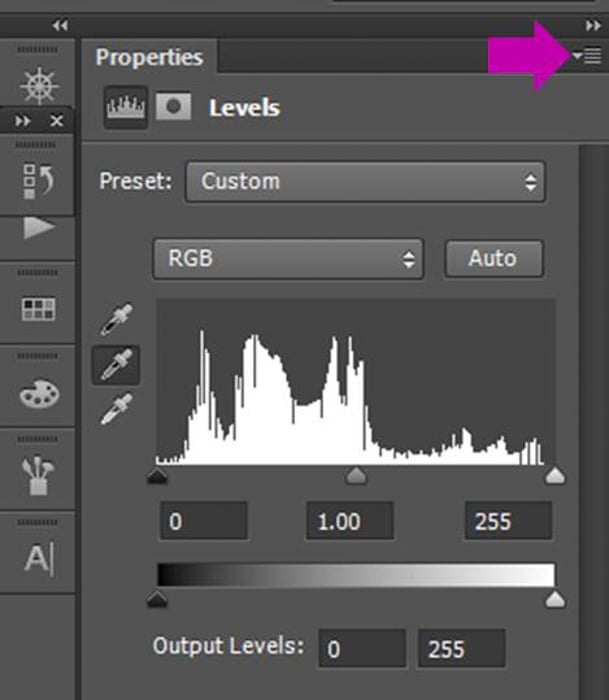
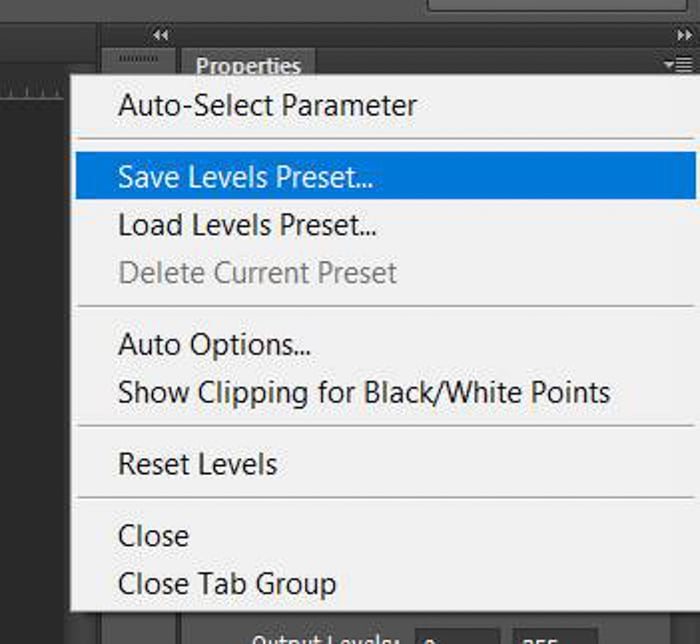
- Select “Save Levels Preset” .
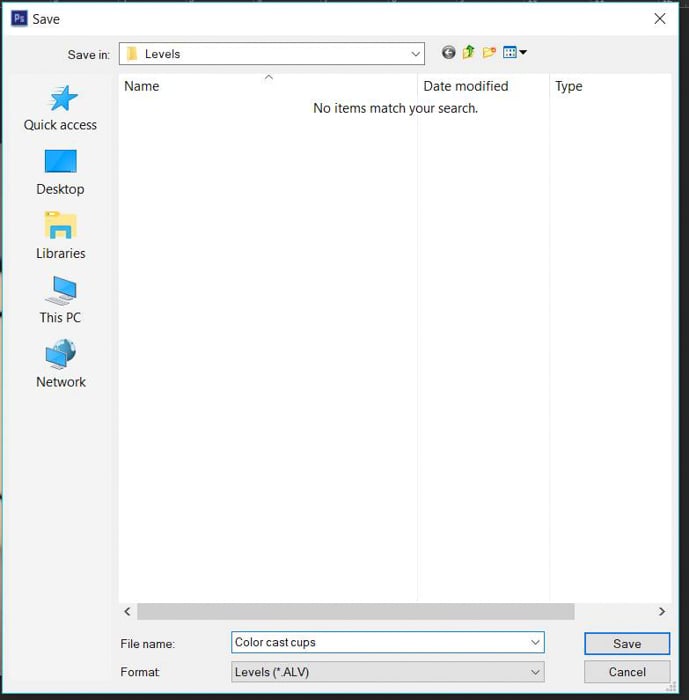
- Save the preset with a recognizable name.
- Open another of the images you want to edit.
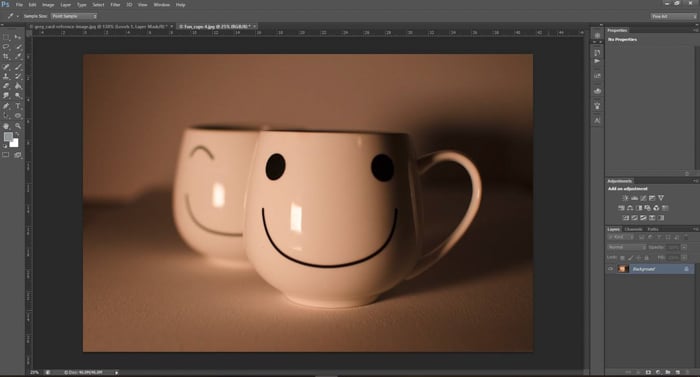
- Create an Adjustment Layer of Levels.
- Click on the drop down menu of the Levels and this time select “Load Levels Preset”.
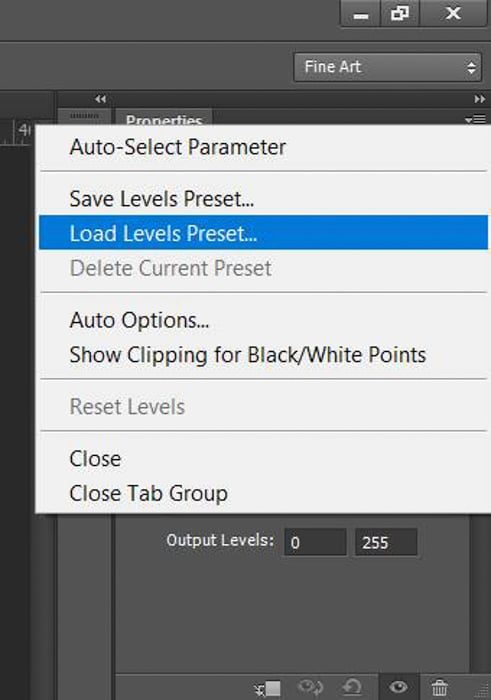
- Select the one you just created to apply it on the new image.
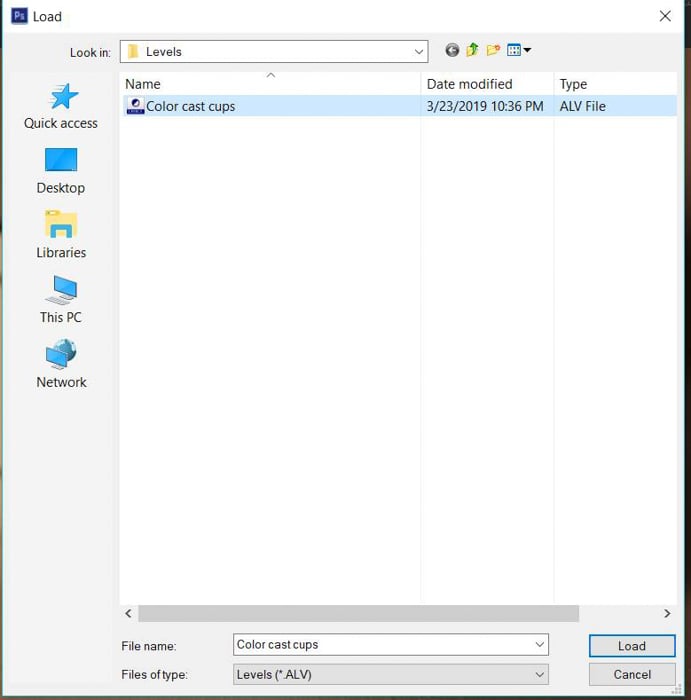
- That’s all! Now repeat with the other images.
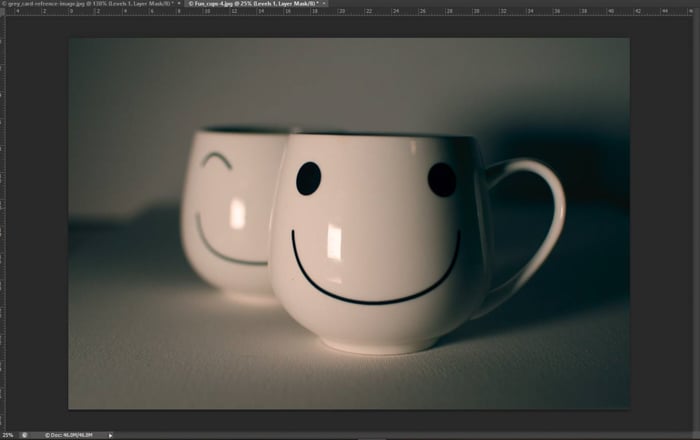
How to Choose the Right Grey Card
You can find grey cards at your local photography store or on websites such as Amazon or eBay.
There is a big variety of them and they are also quite affordable.
The most important thing to consider when buying a grey card is the size. There are small ones that are perfect for carrying in the camera bag.
They are perfect if you are traveling or if you want to be light with your equipment.
Their great advantage is that you can always have them in your bag. You’ll never forget them.
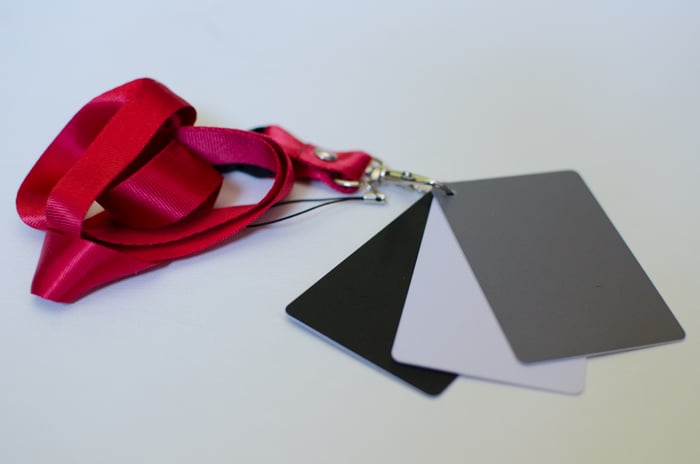
If you need to fill the whole frame with the grey card or the model that needs to hold the grey card for the reference shot is a bit far, using a small grey card can be a challenge.
In that case, you need to get a bigger one. There are foldable ones that are easy to carry around.
If you need to be extra accurate in your photography colors, the most advanced option is to get a color checker.
Conclusion
A grey card is an affordable and easy to carry accessory. It’ll help you to get accurate exposure and color in your photographs.
You might not need it all the time. It’s in handy in certain situations, especially in cases where your camera meter is limited and can’t get it right.
You can use your grey card to correct both white balance and exposure on the spot. In the case of white balance, the most common thing to do is to use the grey card during the photo shoot.
You’ll get a reference image and can correct your colors during post-processing.


