A color card for photography is an essential tool for any photographer who wants to ensure accurate color reproduction in their photos. They are simple to use and can help you achieve the perfect color balance in your images. In this article, we will explain what they are, how they work, and show you how to use them for your own photography projects.
What Is a Color Checker or Color Card For Photography?
The Datacolor SpyderCheckr 24 is the simplest and most compact version of a color checker that you can find on the market. Datacolor offers two color checkers: the spyderCheckr and the spyderCheckr 24. The difference lies in the construction and in the information provided.
The SpyderCheckr 24 is a card in thick cardboard. It takes up little space in your backpack, and it’s very light. I mostly photograph landscapes. Keeping my equipment light and portable is key, and the SpyderCheckr is an accessory I can throw in my backpack with no worries.
The card has 24 squares corresponding to 24 different colors on one of the two sides. On the other side of the card, you’ll find 6 grey squares that go from white to dark grey. This second face acts as a reference for white balance.
The Datacolor SpyderCheckr is a rigid plastic case that opens in two like a book and reveals two color cards. These two cards contain 48 squares with color samples in total. They also come with the necessary squares for a correct white balance.
Datacolor’s main brand rival is the X-rite ColorChecker Passport Photo.
But once you understand the theory behind using a color checker in the field and on your computer, the brand and color arrangement is irrelevant. The same steps will be applied in each case and you will always get excellent results without costly mistakes.
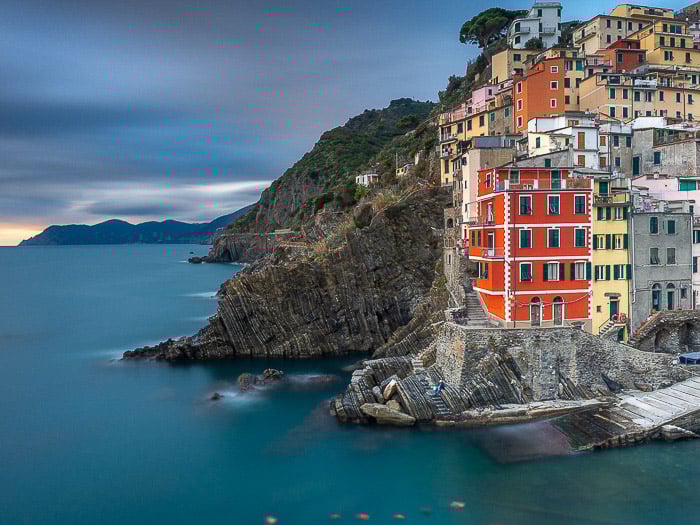
Riomaggiore with a bunch of colors
Software
Each Color Checker is accompanied by software. This software will read the data of your photo and compiles a small file with HSL setting. You will import this file into your photo editor for camera calibration.
Adobe Lightroom will then create a new preset, which will change only the “HSL” tab. This file can then be applied automatically to all photographs that have similar characteristics.
In this way, the color management will be constant throughout the workflow and will provide consistent color in all the photographs of the same series.
How to Use a Color Checker
Every combination of lens, camera (whether it’s a Nikon, Canon, Leica, etc.), and sensor reproduces colors in its own unique way from a wide range of colors. And this combination can then change as the lighting conditions change.
Not to mention that cameras don't record color data the way our eyes perceive it.
This is why we use color checkers, to act as an accurate color reference. And to speed up our image production flows significantly, at least when it comes to color management.
To help you understand how to use a color checker, I’ll show you how I use it for landscape photography. With this step-by-step process, you’ll see exactly what you need to do to include a color checker into your photography workflow.
You can use a color checker for any kind of photography. It’s really useful in portrait photography, for example, when it comes to accurately capturing human skin and skin tones.
What to Do in the Field
Once you’ve found your composition in the field, you must take a picture of it with the color checker first. Make sure the lighting is uniform.
The manufacturers’ instructions will tell you to place the color checker in front of the camera and make sure it’s as stable as possible. You can also search for the ColorChecker passport video for instructions.
Lighting needs to be at a 45-degree angle. It’s also best if the light source is at a considerable distance and it’s not shielded by reflectors.
This is easier to do in a photographic studio, where you control every lighting aspect. In landscape photography, it might be a little harder to get it right.
But natural light is always a great distance away from your subject. Unless you’re photographing under special conditions where the sun manages to cross the clouds, making them act as a diffuser, the light is always quite uniform.
Even the lighting direction is not that tricky to get right. If you’re not shooting with the sun in front of you or behind you it will always be at a certain angle.
How to Set Up Your Color Checker
Once you’ve placed your color checker in front of your camera, you don’t have to frame it so that it fills the whole frame. You can leave plenty of space around the color checker. You can cut this out later on your computer.
A really important thing to check is that the board is perfectly in line with the sensor axis. To do this make sure to align the central axis of the lens with the center of the color checker.
This is important both to get the highest quality for the colors and the sharpest image possible.
You can use any shooting mode that you feel comfortable with, it doesn’t really matter. But it is important to shoot in RAW.
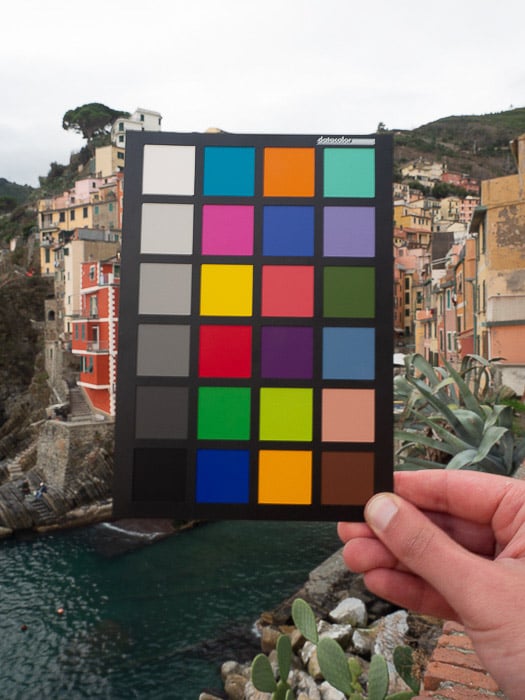
Color Checker in the field
Software Configuration
Before you do any post-processing, you need to install the software that came with your color checker.
Once installed, you can tell your editing software, such as Adobe Lightroom or Photoshop, to use it as a secondary editing software. This step will ensure that the newly installed software will appear under the “Edit In >” menu after a right click.
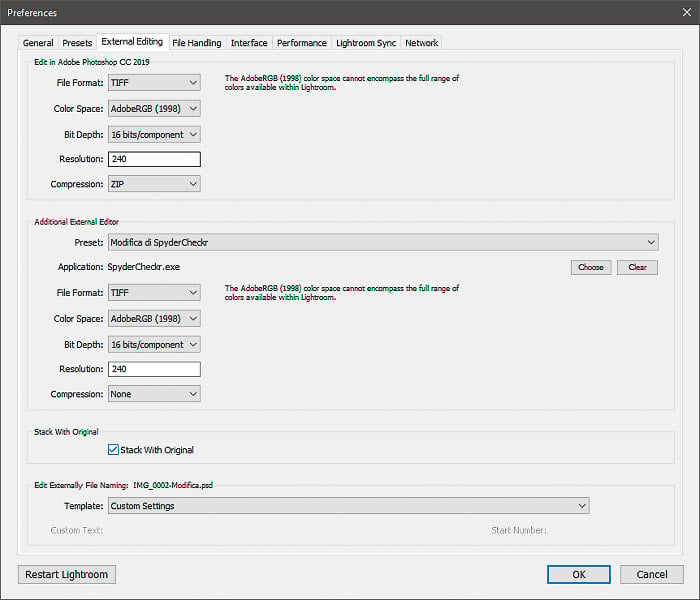
Lightroom Configuration
Editing in Adobe Lightroom
Once you are at the computer, download your photographs of the color checker. Open in your favorite editor. I’m using Adobe Lightroom, but you can follow the same steps in Adobe Camera Raw or Capture One.
First, use the “Angle” function to straighten the photograph. I also used the chromatic aberration reduction and perspective correction options on the photo itself.
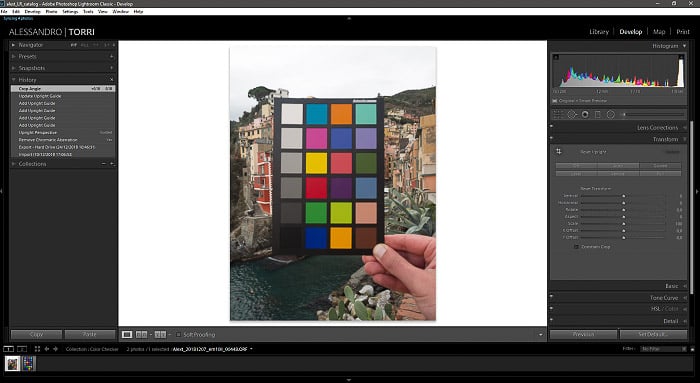
Step 1 – Importing
In theory, these two steps are not necessary if you followed the instructions for taking the color checker photo. But I prefer applying them, just in case.
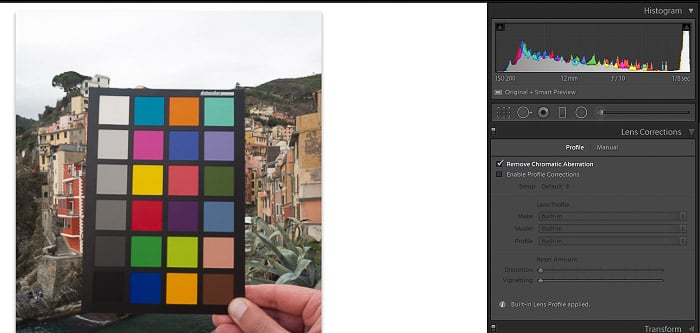
Step 2 – Lens Correction
Now you should use the Crop tool to remove all the extra space in the photograph and have only the color checker tablet in the frame.
You won’t have any background in the photo. I suggest cropping into the black edge of the tablet itself to ensure you get rid of the background completely.
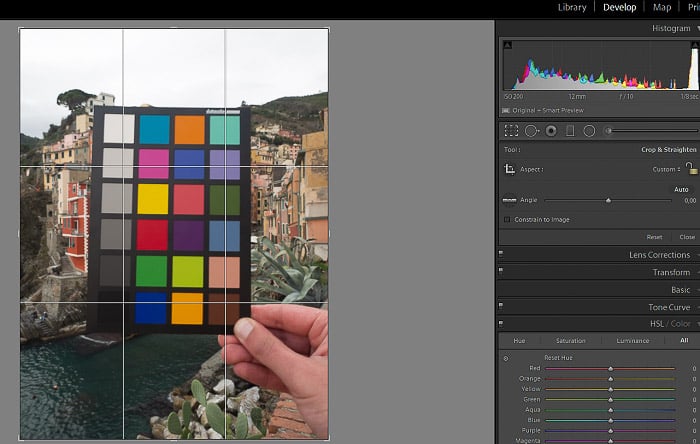
Step 3 – Crop
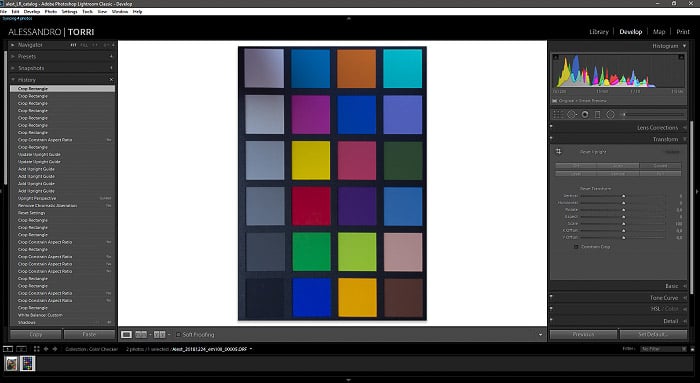
Step 4 – Cropped image
With the appropriate measuring sampler, you can use any of the light-grey or medium-colored samples to perform or check the white and gray balance. It is advisable to use the 20% grey sample, identified by the initials E2.
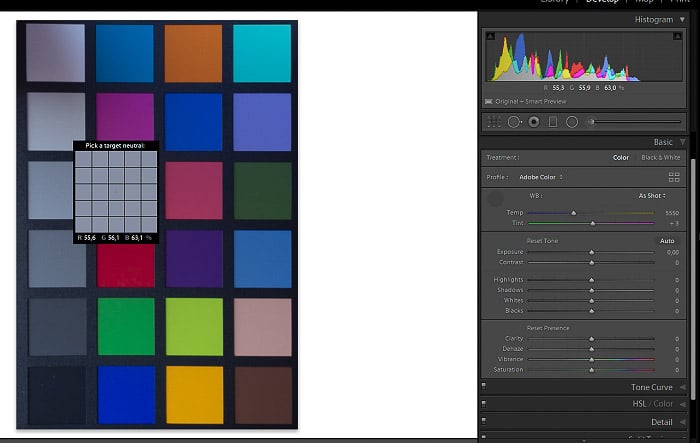
Step 5 – White Balance
RGB Values
Now you have to check the RGB values that Lightroom offers you right under the histogram. You will have to adjust the exposure slider until you get values close to 90% (or for example in ACR of the RGB values very close to 230, 230, 230).
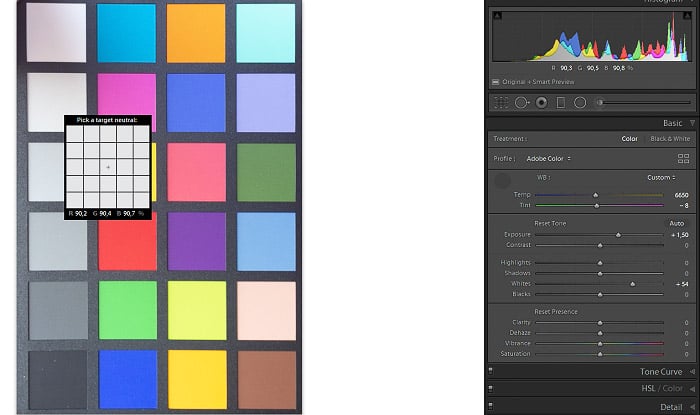
Step 6 – Highlights & Exposure Values
Now adjust the blacks or the adjustment of the shadows. You will have to obtain values close to 4% in Lightroom or RGB 10, 10, 10 in ACR.
It is important to perform this operation before proceeding so as to correctly set the white balance, and consequently the rendering of the entire spectrum of colors that make up the photograph.

Step 7 – Shadows & Darks values
At this point, you are ready to edit your tablet in the proprietary software. Then right click on the photo and then “Edit in” and choose the “SpyderCheckr” application.
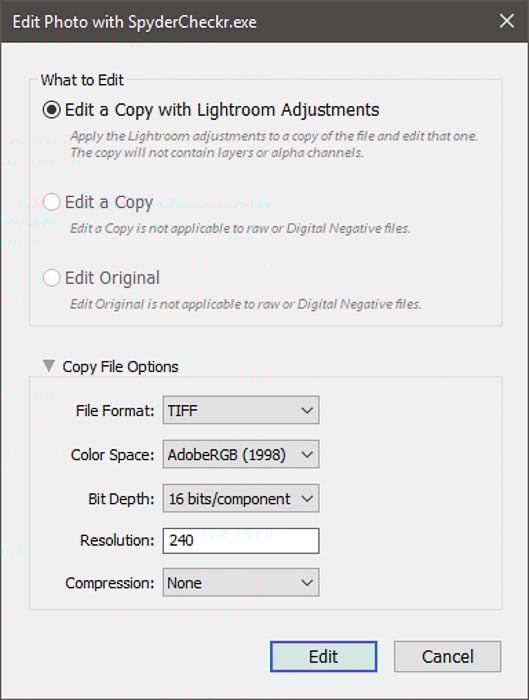
Step 8 – Export from Lightroom
If you use ACR instead, you will need to save the image as a TIFF file with Adobe RGB color profile and then open it with the same “SpyderCheckr” application.
SpyderCheckr Application
At this point, you will have opened your photograph of the chromatic tablet in Color Checker’s proprietary software. You will notice that there will be small squares inside the color samples that make up the photographed table.
These small desaturated squares should position themselves at the exact center of the corresponding saturated colors.
In the event that these small squares are not positioned correctly, you can use the small blue arrows on the sides to position the color samplers more precisely.
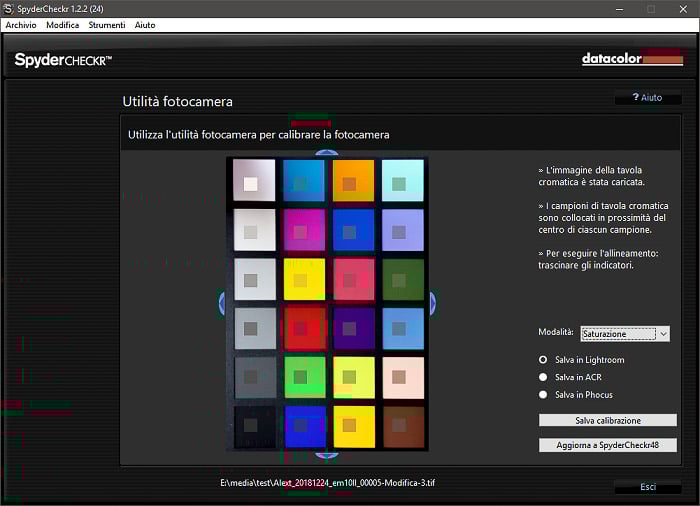
Step 9 – Datacolor SpyderCheckr
As a way of interpreting colors, I suggest you use the ‘Saturation’ value. It is well suited to many types of images, with pleasant colors. ‘Colorimetric’ is applied for color reproduction of products or graphic elements. ‘Portrait’ is self explanatory.
Also, keep in mind that these selections are very moderate and are very often imperceptible.
Once you have verified the orientation of the tablet image and the positioning of the samplers you simply have to save the color calibration.
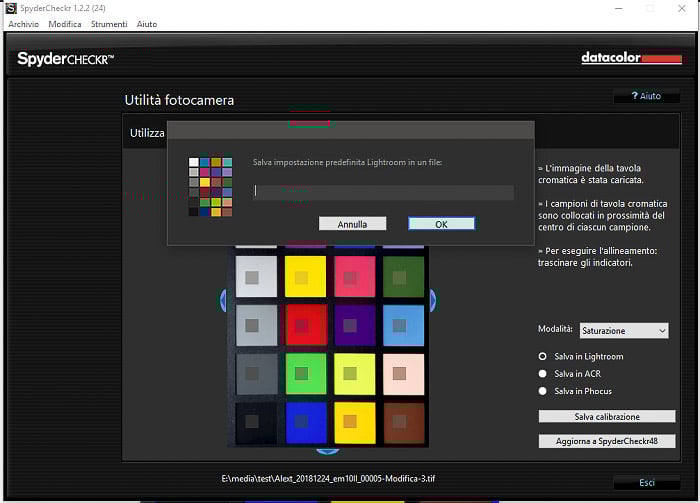
Step 10 – Naming the new profile
Give a recognisable name to your profile. A little advice: it may be useful to use a name with the lens and the camera used and maybe the type of lighting.
Editing in Lightroom
When you have finished and closed the SpyderCheckr application you will end up in Lightroom. It will ask you to restart. This is required in order to use the new color profile you just created.
Now that Lightroom has rebooted, all you have to do is open any image in the series and apply the new color profile. You will find it in the Development Module under the “Presets” section.
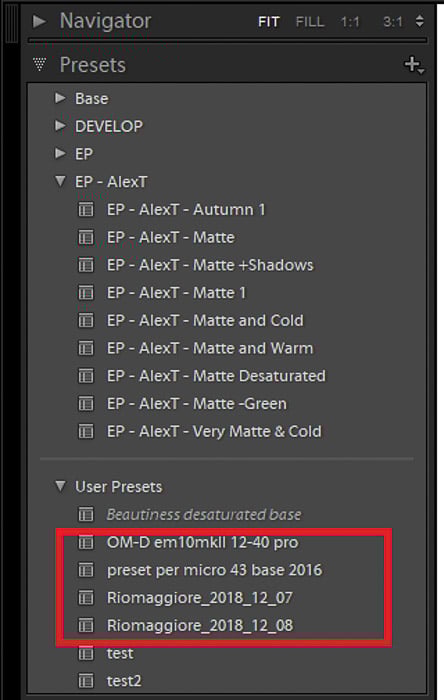
Step 11 – The new preset
Once you apply the profile head into the ‘HSL’ panel. You will see how the color sliders have changed. And this happens for the ‘Hue’, ‘Luminance’ and ‘Saturation’ channels.
Here is the camera calibration with a set of reference colors.
With the small button you can see the before and after, deactivating and reactivating the calibration. You will immediately realise the variation that the colors have undergone.
Obviously, if the result does not satisfy you, you can try the process from the beginning. Perhaps adjusting the white balancing values, exposure and shadow management again.
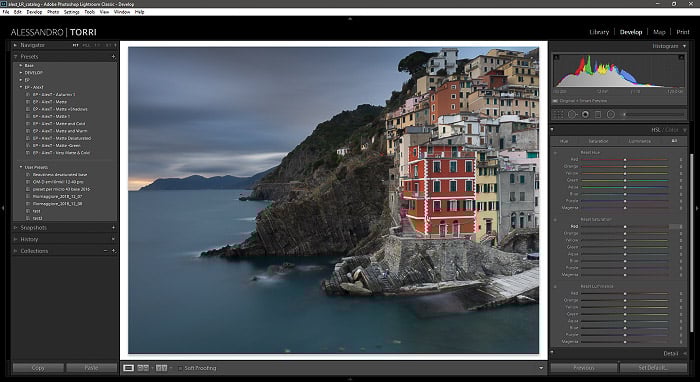
Original image
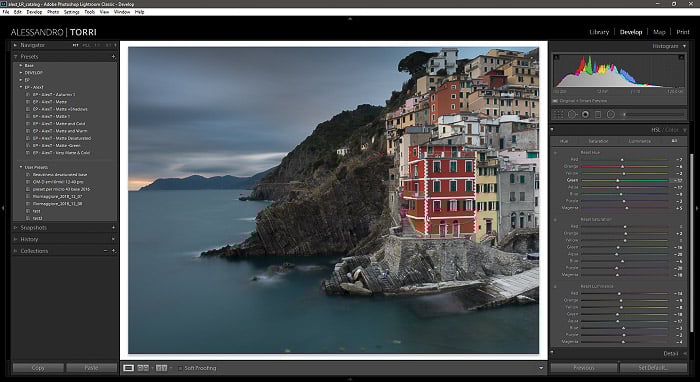
Calibrated image with HSL values
Or you can still manually change the color sliders to make them fit what you want to communicate.
From here on you can proceed with your normal image processing workflow. Keep in mind that you can apply this preset automatically. You can apply it in the import phase.
Or you can synchronize all photographs that match that combination of lighting, camera, and lens.

Before

After
Conclusion
Color is a fundamental element of photography. Whether it’s landscape or portrait photography, it’s important to know how to manage colors in the best possible way.
With digital photography, it is possible to have a reference sample with which to calibrate our images perfectly, and that’s the color checker.
It helps speed up your workflow and prevents you from spending hours and hours post-processing to get the right color correction in that one particular scene.


