In this article, I will show you how you can take portraits in a similar style to those of renowned British portrait photographer Antoniou Platon.
The Platon photography style is best known for its series of highly contrasted black and white portraits of celebrities and politicians. And while you may not be photographing anyone famous anytime soon, we’ll show you how to take some amazing high key portraits you can use in your next photo shoot.
The Platon Photography Style
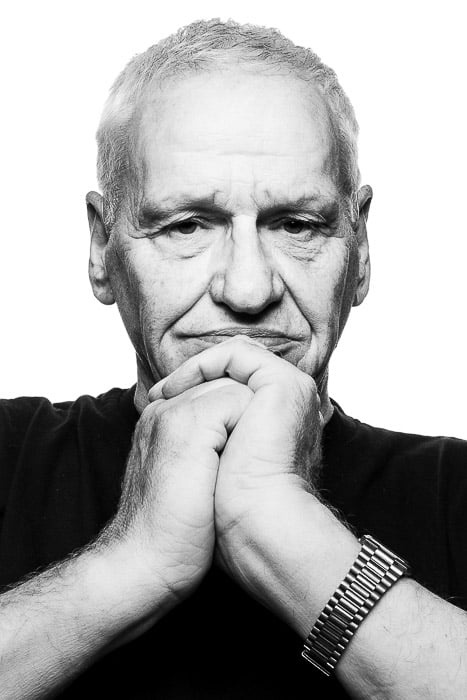
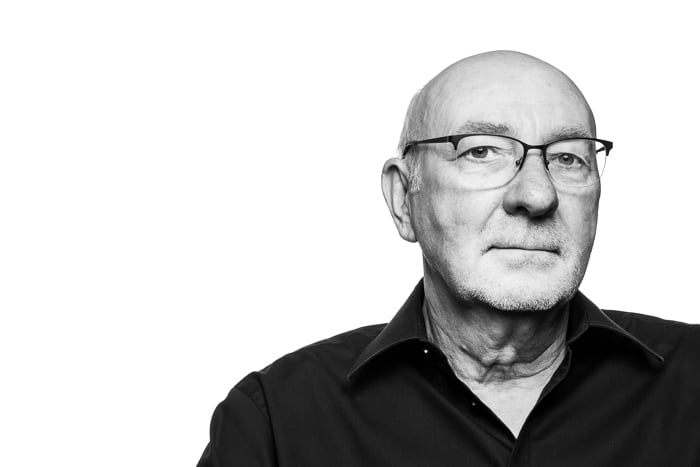
The style we are after is a high key black-and-white headshot. As you can see from the image below, the main characteristics of Platon portraits are the tight frame around the model, the high general contrast, the shadows on the model’s cheeks, and the white background.
If your model has an interesting face, this is the perfect style for them. The clean and simple image you create will let the viewer concentrate on the model.
This style is quite hard and highly contrasted, so it best suits male models.
But photography rules are meant to be broken, so you should try it with female models too. You can portray them in a different, intense, and non-traditional way.
The Gear
If you think you need a lot of expensive studio equipment to do portraiture, well… think again!
In this article, I already discussed how you could take compelling portraits with a minimum amount of gear. And if you are new to portrait photography, we have a useful glossary of terms.
The image below shows you six simple styles you can create using a single off-camera flash without light modifiers.
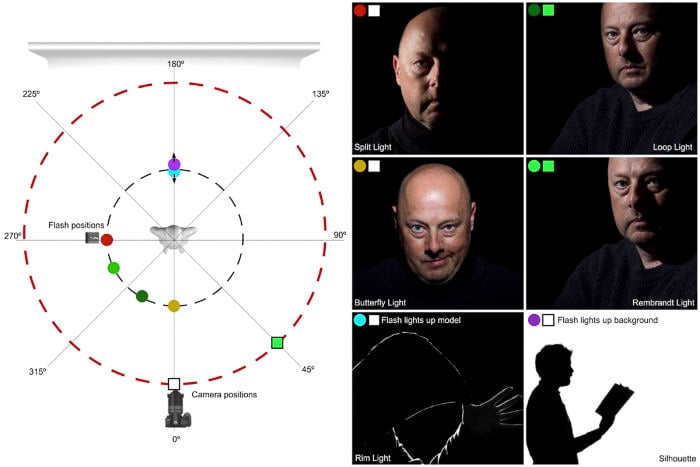
This scheme shows the relative position of the light, camera, and model to create some of the most common lighting setups used in studio portrait photography.
Light Equipment
To recreate the Platon photography style, the amount of studio equipment you need is fairly modest. Ideally, you will need a couple of flash guns, but you can do it with one if you decide to turn the background white digitally.
You will also need one or two light stands to use your flashes off camera and a small umbrella.
Camera and Lenses
Platon uses a medium format film camera with a 135 mm lens, which roughly compares with a 75 mm lens on a full frame camera. But don’t let that stop you.
Just use whatever camera you have. The only constraint is your creativity and the fact that you need to be able to trigger your flash guns off-camera.
Aside from the screenshots depicting Platon’s portraits, all the portraits in this article were taken with my Sony RX10 bridge camera with a 1″ sensor, not your typical portrait camera.
Deconstructing the High Key Portrait Style
Because the background is white and most of the tones are bright, this is a high key setup.
The Background
To get a white background, you can do it digitally in Photoshop or directly with the camera by lighting it with a flash. Since we are in a controlled environment, it is always good to try getting it right in-camera.
Because there are no visible shadows on the background from the key light (the light used for the model), you should put some distance between the background and your subject.
Finally, the edge of the model’s figure is very contrasted, meaning the light reflected from the background is not strong enough to spill over your model. You do this by properly metering your background light and having some distance between the model and the background.
The Light
Two things reveal the positions of the lights used for a portrait:
- The shadows on the model’s face
- The position of the catchlights in the model’s eyes
Usually, the telltale shadow to look for is the one cast by the nose. For Platon photography, that shadow is often directly under the model’s nose. This is the result of the butterfly light, where the main light is frontal and slightly above the model.
Platon’s portraits often have a single catchlight and deep shadows under the model’s face. Because of this, we can conclude that he used only one light source in the setup.
Using set.a.light 3D by Elixxier, I modeled the setup we just guessed by reading Platon’s image. The resulting shadows on the virtual model’s face match those in Platon’s portrait.

This virtual studio setup was created with set.a.light 3D STUDIO software.
In the virtual setup, I used a bare flash gun. The shadows are in the correct position, but the light is quite hard and strong, with the forehead and nose too bright. An umbrella will help to soften the light.
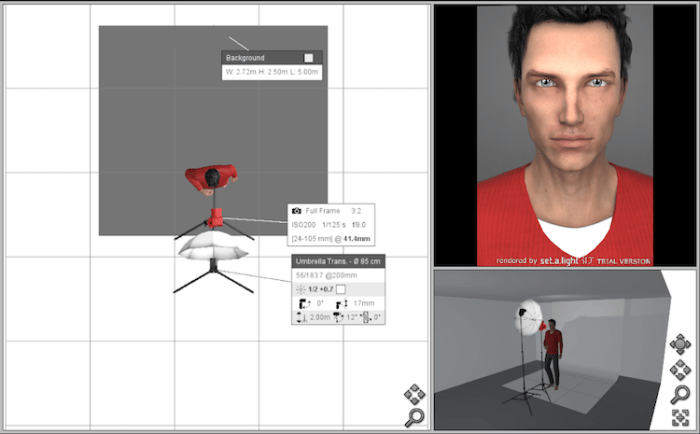
By adding an umbrella, we have softened the light from the flash gun.
Light Fall Off and Flags
The light fall off (how sharply the brightness decreases) is the result of two things:
- The distance of the light from the model (the shorter it is, the bigger the fall off is)
- The size of the light source (the larger it is, the weaker the fall off is)
An 80 cm umbrella, placed very close to the model, will give you a good fall off across their face.
Because the umbrella diffuses the light in every direction, you have little control over it. You can use flags (also known as blockers) to precisely control your light. Flags would absorb some of the light, thus stopping it from reaching your model from particular directions.
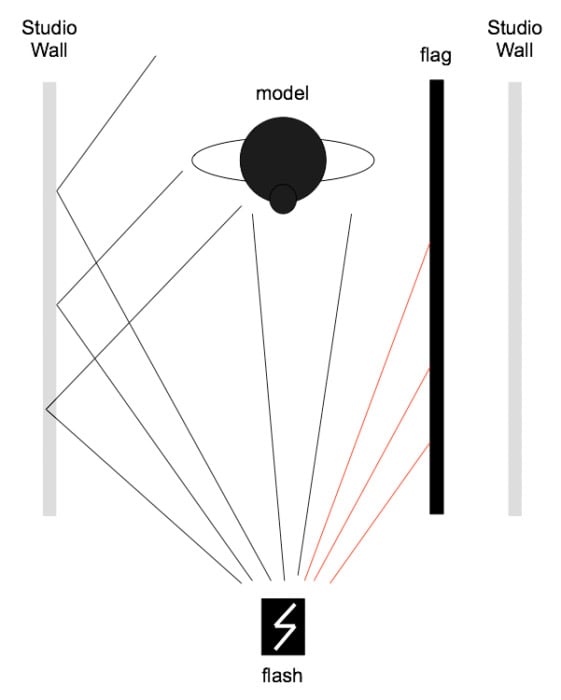
This shows how I controlled light with a flag in the studio. The flag prevents the light from being reflected in the scene after bouncing against the studio’s right wall.
Flags can be made out of anything. They can be anything from DIY solutions such as black fabric and cardboard to commercial 5-in-1 reflectors and black foldable backgrounds.
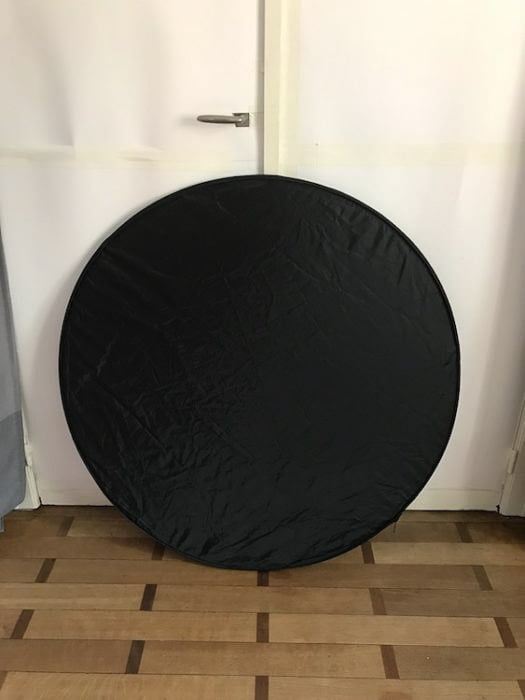
My 1-meter 5-in-1 circular reflector has a black surface, allowing me to use it as a flag.
In the Platon photography setup, flags block stray light coming sideways at your model to darken the cheeks. You can effectively achieve this by sandwiching your model between two flags.
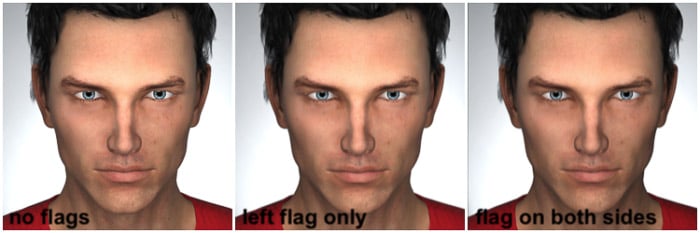
Here is the subtle deepening of shadows on the model’s cheeks when adding flags to a single light setup.
The closer the flags are to the model, the more visible their effect.
Finally, here is the 3D model for the Platon setup. It includes the background light and the flags. Please note that while this software is very useful and realistic, you should use it only as starting point. I found that the shadows shown in the rendered 3D model are often weaker than those you get in reality.
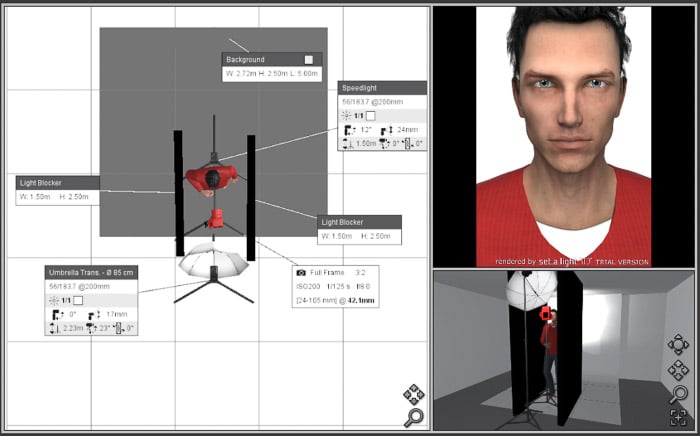
The 3D model for a setup to recreate the Platon style I guessed by reading his images.
The image below shows the real setup I used in a recent workshop.
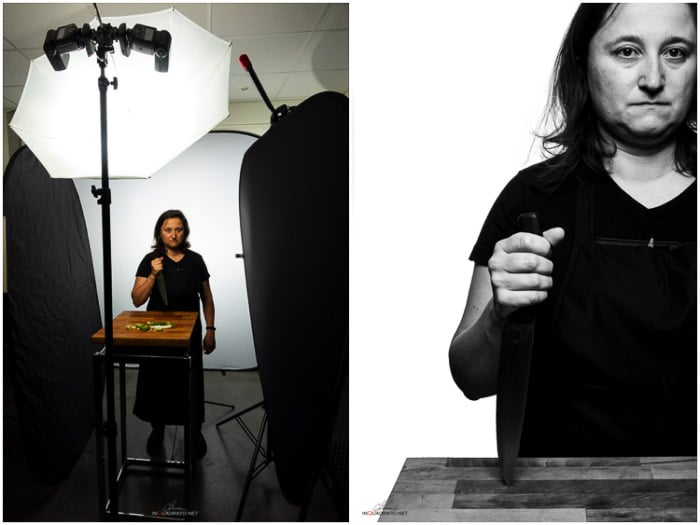
This is the real implementation of the virtual setup and the resulting image.
How to Edit Your Portraits in the Platon Style
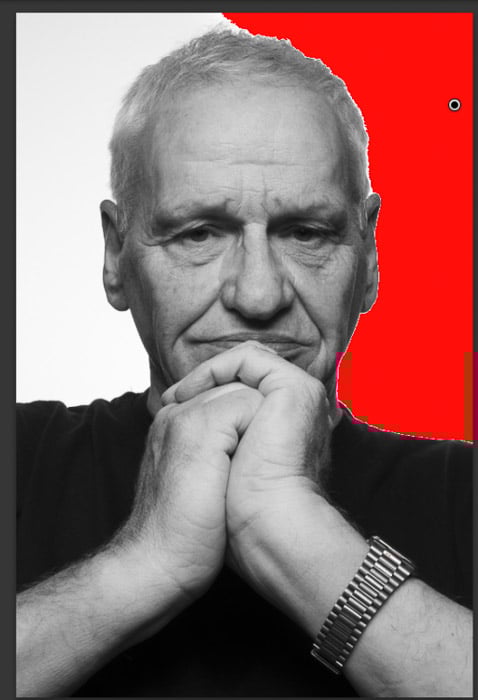
Here is a portrait straight from the camera. While the contrast is not as strong as in the photos we saw earlier, all the important features and basic contrast are there.
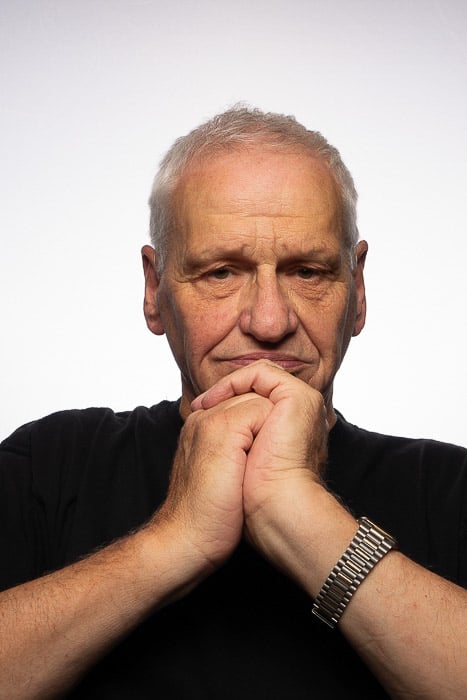
Image converted from unedited raw file.
You can see the darker cheeks, the bright face, a whiteish background with no light spilled over the model’s shoulders and the butterfly shaped shadow under his nose.
Let’s now see how to begin editing this image in Adobe Lightroom.
1. Crop and Convert to Black and White
This image could benefit from a smaller crop to make the model more imposing in the frame. Next, convert it to black and white.
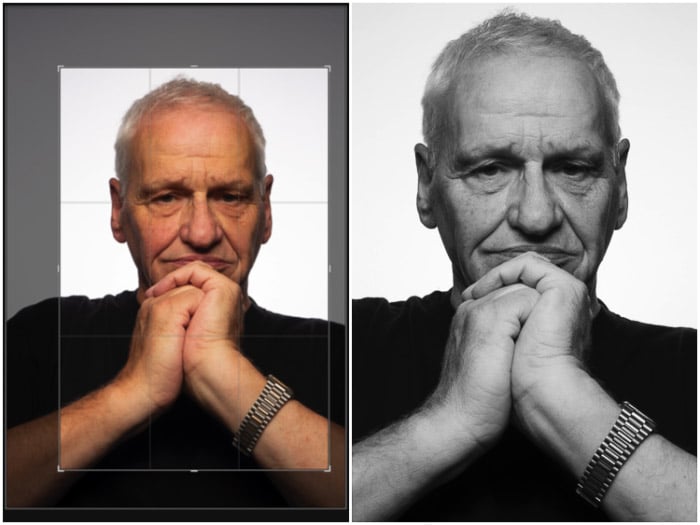
The face will become the focal point by cropping tightly on your model,
2. Whiten Background
Once converted into black and white, the image needs a pure white background. You can do this with an exposure brush in Lightroom. Set your exposure slider all the way to +4 and the white one to +100. Also, by selecting auto-mask, you will not spill over your model, which makes this task a breeze.
Tip: By using the highlights warning, all areas clipped to pure white show red in the image.
3. General Contrast, Brightness and Sharpening
We said one key ingredient in Platon’s portrait was the light fall off (how fast brightness decreases across the image). You can see this by noticing how much brighter my model’s forearms look compared to his face. This is because they are closer to the light source.
However, this is not a flattering effect. We need to even the brightness of the image. We do this by using a brush. We darken the forearms until they match the face.
The image is quite dark now, since we used the face brightness as reference. Since the luminosity gradient across my model is now absent, we can use the general sliders in Lightroom’s Tone panel to brighten the image and boost the contrast. If you are comfortable with Curves adjustments, you can use them instead.
Finally, let’s fix the eyes by dodging and sharpening them.
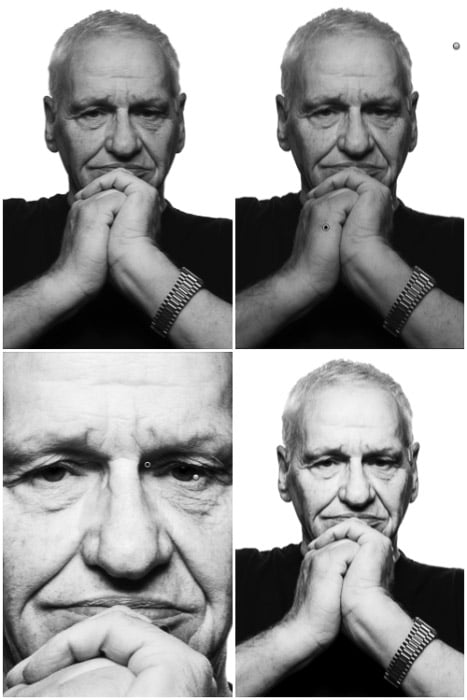
In clockwise order, the results from 1. Whitening the background 2. Darkening the forearms 3. Brightening the image and boosting contrast 4. Dodging and sharpening the eyes
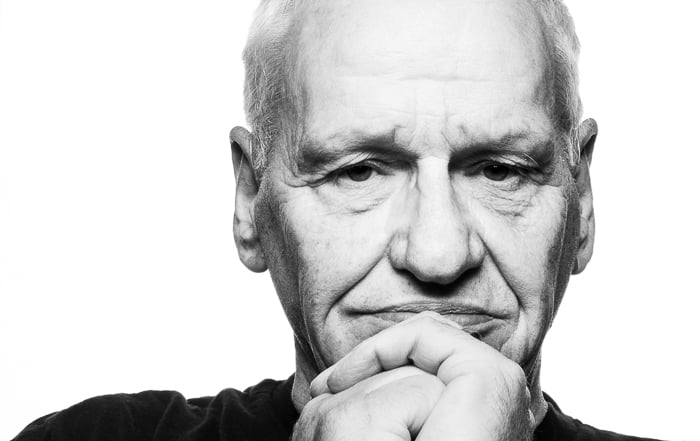
4. The Final Image
Here is the final image. I think it turned out quite alright.
Add Your Own Touches
There is nothing wrong with drawing inspiration from the work of other photographs. Learning new styles will help you improve your skills and knowledge.
But it’s important to add your own touch.
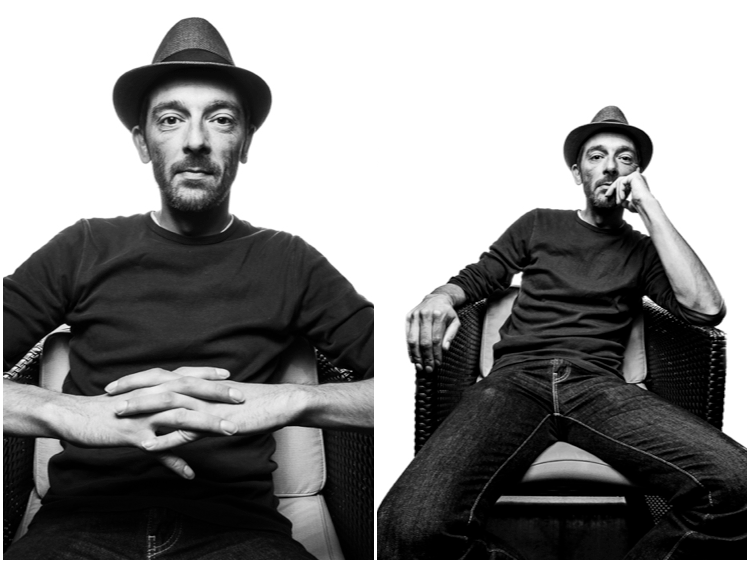
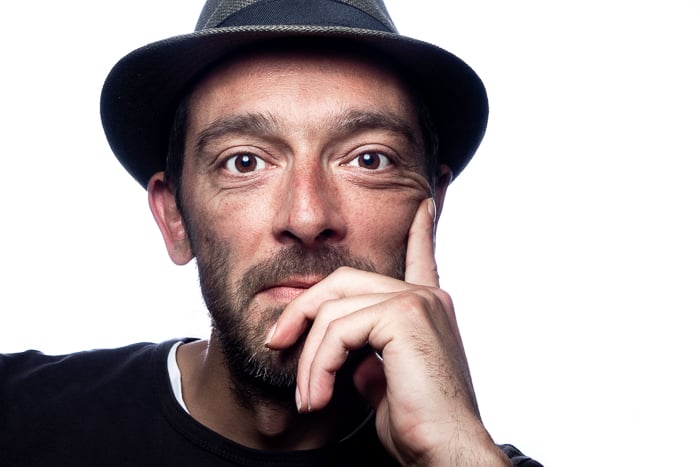
Getting in Close
I am fairly new to this style and am still exploring what does and doesn’t work. I found that the image we just finished editing could be much stronger if framed differently.
This is when having a 20 MP (megapixel) camera pays off. You can crop your original image in many ways and still have an image with a decent resolution.
Once you understand Platon’s photographic style, I suggest experimenting with angles and subjects to find out what you like more.
As I mentioned, I like close ups more than wider headshots. Since not much is happening in these images, you need a strong, imposing character to hold the viewer’s attention and interest.
Consider that the more you close in to your model to have a tight composition, the more you will introduce distortions (big nose, etc.). To avoid this perspective effects, you should shoot from afar and use a telephoto lens (like a 200 mm).
The Middle Ground
To me, a middle ground between the close-up and the wide shot is not great. It loses much of the interest and strength typical of this style.
Don’t get me wrong. The image is still nice, just less strong.
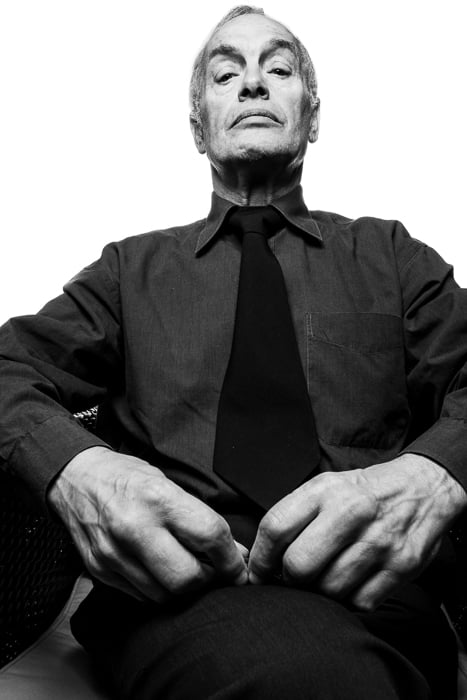
Go Wide
A mezzo busto (half-bust) is an interesting way to photograph your model. The trick is to get up close and personal.
A wide portrait with a low angle is the perfect way to empower your model. You can make the lens distortions work for you, like making your model’s hands more imposing.
Go Wider
If you think you have gone wide enough, try to go wider still. You may be in for quite a surprise.
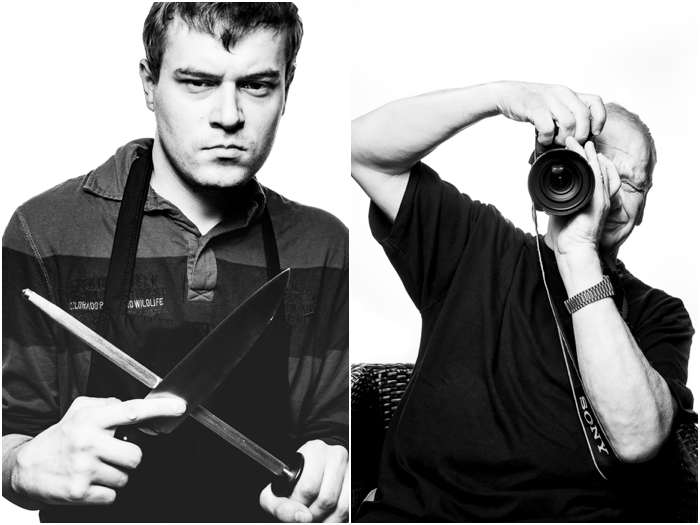
Props
You can also introduce some props to help set the mood and further characterize your model.
Conclusion
I hope this article has inspired you and that you will have a go with this style.
And if you are not a fan of black and white, who said everything must be monochrome? Have fun, and try applying this style to your next color image.
Launch a successful portrait photography business with our Profits from Portraits e-book!