Lifestyle product photography shows real-life scenarios where people can use a product.
It’s intended to be more realistic and interactive than traditional advertising. Seeing the product in context creates more convincing imagery than seeing it against a white background.
The goal is for consumers to feel like they are living vicariously through your images, and make a purchase because they want what you have shown them! Your job as a photographer is to make sure you convey that in your images.
Here are a few tips to help you get started taking perfect lifestyle product shots.
1. Lifestyle Product Photography: Show What the Product Is For
Always think about the product first. What does it do? Who is it for? Those questions will help you figure out what you need to include in your pictures.
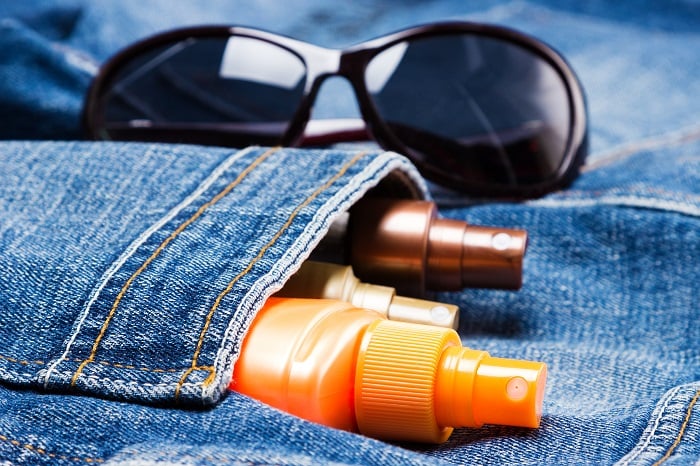
If you're shooting a bottle of sunscreen, show it beside the pool or at the beach. Why? Because those are the most obvious places where people use them.
The most obvious approach is to photograph a model beside a pool rubbing the lotion on their skin.
If that’s too simple for you, create a still life image that will remind your audience of being outdoors. You can try placing the bottle in sand or on top of a colorful towel. Or you can shoot it sticking out of a beach bag.
There are plenty of ways to shoot any product. Use your imagination, and look for new ideas that people haven’t seen before.
2. Where to Shoot Your Product
When it comes to lifestyle product photography, it's important to know the best places to take photos. Choose real locations where possible. That way, you don't have to spend money creating a believable background.
Remember when we mentioned taking photos of the sunscreen bottle beside a pool or at the beach? Well, it's not always necessary to go to those actual locations to get the images you want.
You can always fake a poolside scenario by shooting it in your room. Just take a close-up photo of your product beside some towels or even a pina colada, and that's it!
If you zoom in tight into the item, people won’t even notice you took it indoors.
If you want to get creative, you can even depict the product in a conceptual way. The photo above has brown paper for sand and a cardboard poster for the sky.
The props may be artificial but they still show a believable scene. And the best part is that this shot was taken indoors.
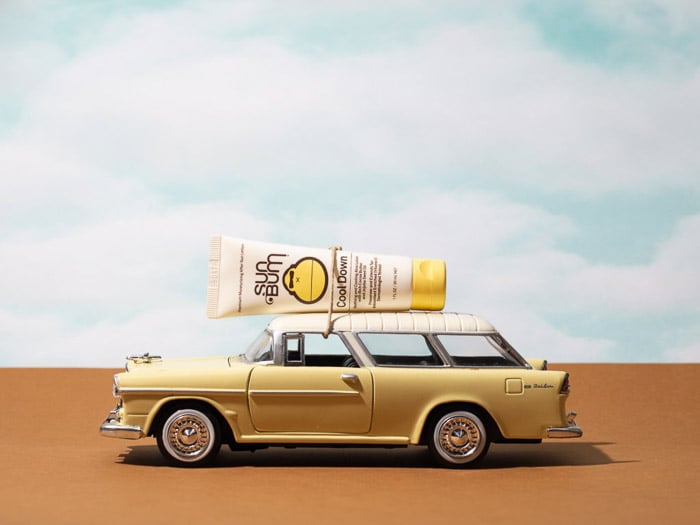
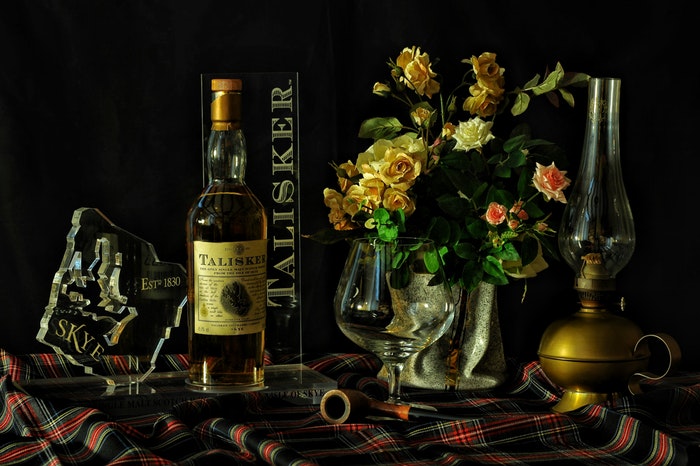
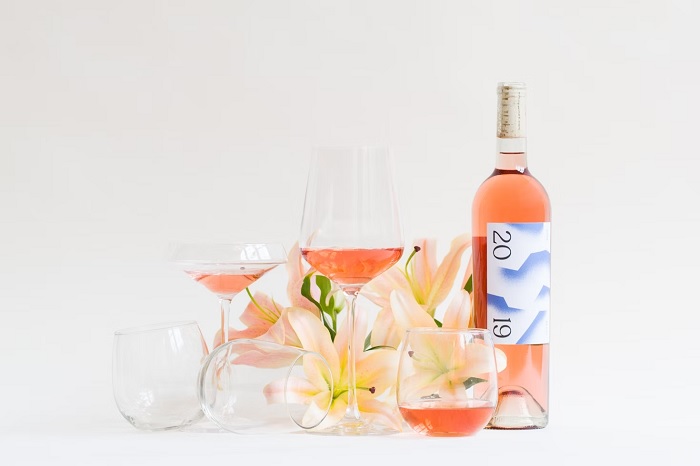
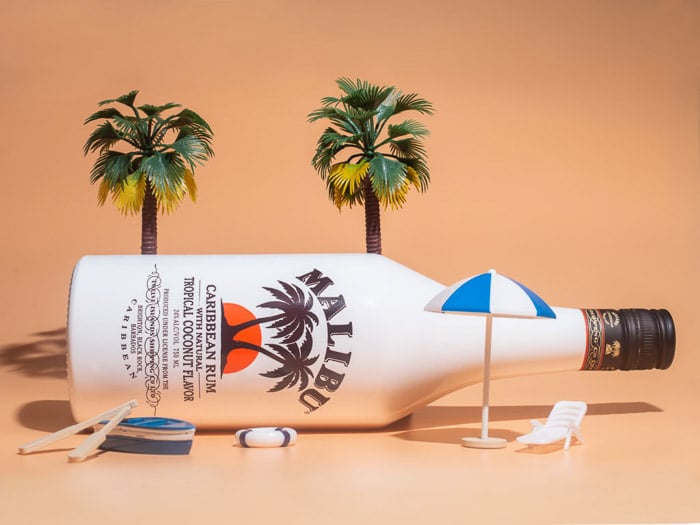
3. What Props to Use
The car above isn’t part of the product. But it helps enhance the sellability of the product. Don't be afraid to add other things to your shot if it helps establish a story in people's heads.
The secret to a great lifestyle product photography setup is using the correct props. In other words, don't use random items that aren't connected to your product at all.
You should refrain from overwhelming your photo with too many objects. Remember that the hero of your shot should always be the product. If there are too many things surrounding it, people may not even see your subject at all.
Keep your props between one to three objects. Any more than that and it's going to be a bit crowded.
Make sure that the main product makes up most of the frame. If not, people will have a hard time finding it.
4. Best Lighting for Lifestyle Product Photography
We all know that lighting plays a crucial role in photography. But it's particularly essential when taking photos of products.
Light behaves differently on various types of objects. That's why you need to be meticulous about your lighting setup to get the best results.
In general, you need to avoid direct light when shooting products. This is true whether you're shooting with natural or artificial sources.
The harshness of direct lighting tends to blow out the details of the object and casts ugly shadows. Try to shoot in the shade instead. Doing so allows you to create soft and even exposure.
The best place to shoot your product is beside a window. This shields you from direct sunlight. A white blanket or a scrim also work well in diffusing light when you're outdoors and away from any shade.
Make sure you don't see any specular highlights that distract the eyes away from the product. In other words, look at where the light hits the object.
For instance, does the light glimmer on the logo or a label? Then you need to look for another angle until you get rid of the glare. The same rule applies if the light blows out the edges and details of the object.
There are plenty of ways to light products, especially bottles and shiny objects. Make sure you study how to illuminate your subject before you begin shooting.
There’s no single lighting set up that works for every product even when you’re shooting similar objects. For instance, amber bottles may reflect light differently from clear bottles.
Don’t be afraid to move around your light source to achieve the best results.

5. Best Angles for Lifestyle Product Photography
As a lifestyle photographer, it may be challenging to figure out where to place objects in the frame.
If this happens to you, then you can always consult the tried and tested Rule of Thirds. First, turn on your camera's gridlines. Then place your main subject where the lines intersect.
The good news is the same principle works even when you have many objects in the frame.
Once you have your composition down, you can start thinking about the angles. The most common ones that product photographers use are eye-level, 45 degrees, and overhead (a.k.a. flat lay).
Eye-level means you keep your camera at the same height as the product. Meanwhile, 45 degrees refers to the angle when shooting above your subject. And finally, overhead is shooting 90 degrees above the object.
Feel free to try other angles as there are many other options out there. But these are the three that you need to do first to cover the best possible perspectives.
6. Use Focus Stacking for Sharper Images
Always check if your product is sharp in every shot. Otherwise, it would end up melding with the background. And you certainly wouldn’t want that when you want your main subject to shine.
Don't open up your aperture to f/1.8 or f/2 like you would when doing portraits. Choose a narrow aperture between f/8 to f/22 to ensure you capture all the details of the object.
When shooting small objects, you'll get a blurry background no matter how small your aperture. Consider focus stacking to ensure the item looks sharp from front to back.
Focus stacking comes in two parts. The first one happens in-camera.
First, set up your camera on your tripod and make sure it doesn't move. Once everything is ready, adjust the lens so the front of the product is in focus.
After you take a photo, refocus so that the next section of the item looks sharp. Keep doing this until you cover the entire surface of the object.
The second part happens in Photoshop. You can follow these steps below to finish the process:
Under File, go to Scripts and click Load Files into Stack
Once a dialogue box opens, click Browse and select the files you want. Check Automatically Align Sources and select Okay.
When the images load in the layers panel, select them all.
Go to Edit and click Auto-blend layers. When the dialogue box appears, select Stack Images and click Okay.
If you do it correctly, the product in the final image should appear sharp from front to back. You may see a few bad spots in some areas, but you can clean them up using a spot healing tool.
7. How to Edit Lifestyle Product Photos
It's easy to learn how to take lifestyle product photos, but editing is another skill that you need to master.
You need to make sure that the objects you shoot look perfect because nobody wants a damaged item.
Even though you can make it look right in-camera, a product truly shines when you retouch it. So let’s do these few simple steps to get you started.
First, check if you see blue or orange hues in your image that make it look unnatural. If so, then you'll need to color correct your images.
When you open your file in Photoshop's Adobe Camera Raw, look for White Balance. In the dropdown menu, try settings from Daylight to Fluorescent until the colors look correct.
Next, adjust basic settings such as exposure and contrast until you have a well-lit image. Just be careful not to tweak everything too much. Otherwise, you might end up with colors that don't reflect what the product looks like in real life.
Another crucial step in editing product photos is removing dust and blemishes. The good news is Photoshop has a few tools to make it easy for you to edit them out of your image.
For getting rid of specks, you can use the Spot Healing Tool. All you have to do is click on the dirt you want to remove, and Photoshop will remove it automatically for you.
For bigger blemishes, try the Patch Tool. Once selected, click and hold as you "cut" around the speckle you want to remove. After you made your selection, drag it to a clean area that you want to use to replace the spot, and that's it!
Conclusion
Lifestyle product photography lets people imagine how they can use an item. So create scenes that invite them to do just that.
Learning technical skills is crucial, but you should also focus on your visual style. That's what will attract people to your photographs.
Learn these important tips for setting up a product photography business next!