Light painting photography can bring a sense of wonder and magic to your images. Light is an integral part of photography. And usually, we struggle to fully harness its power.
But with light painting photography, light becomes the paint you daub on a canvas of darkness. You create shapes, pictures, and even words.
With light painting, you can create stunning and unique photographs. And if light painting photography is something new to you, we’ll show you how it’s done.
What Is Light Painting Photography?
Light painting reminds us of children playing with sparklers on Bonfire Night! How you could use the red glow of the sparkler to write our names in the cold November darkness.
The principle of light painting photography is the same. You’re using a light source to paint a picture on a sheet of blackness.
But unlike the sparklers, the shapes don’t disappear into the darkness. The camera captures the light and holds it still.
When you first see a light painting photo, you might believe it’s a post-processing effect. Light drawing, or light graffiti as it’s sometimes known, is an effect you can achieve in your camera.
You use an artificial light source as your brush. You move it around your frame to create shapes and effects. And your camera is set with a long exposure to capture the entire journey of the light.
The long exposure reduces seconds or minutes of movement into one still photograph.
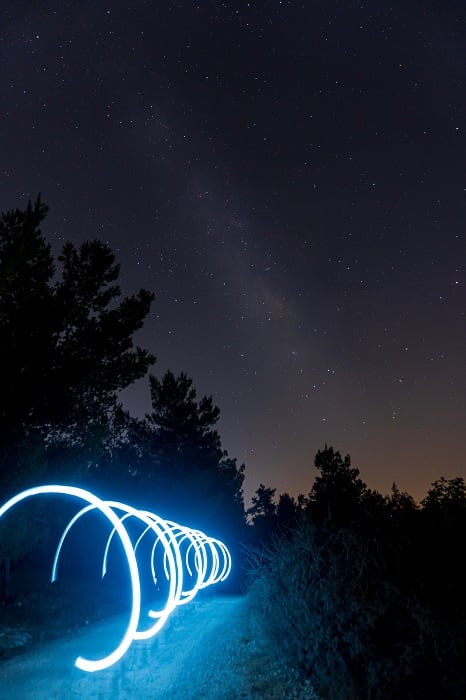
The light painting technique can be used to spice up many types of photography. Many astrological photographers use the technique to light the foreground in their shots.
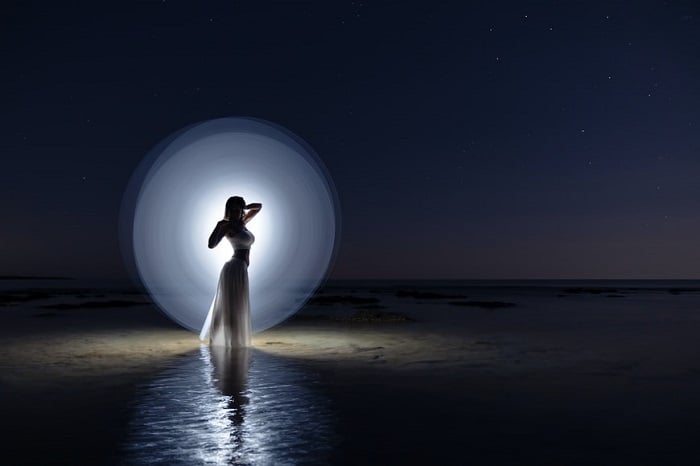
You can add light painting to night landscapes or portraits. It works well with product, fashion, and even urban photography.
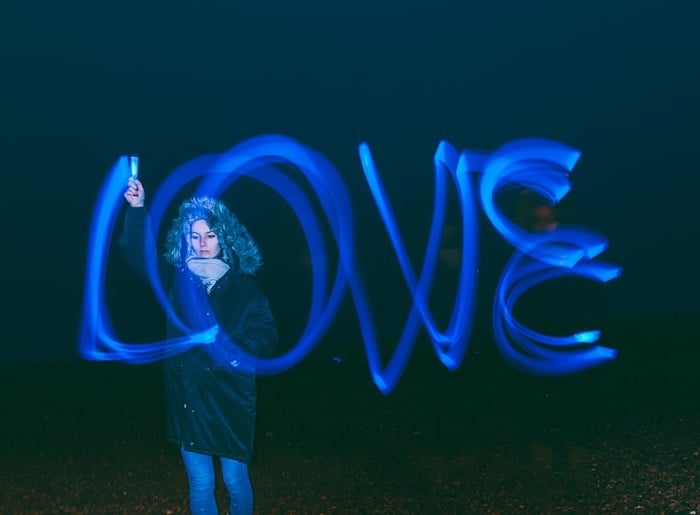
Photo by Joshua Fuller
9 Tips For Light Painting Photography
You will need a few pieces of equipment. And you’ll need to have some knowledge about the exposure triangle.
But even if you’re a beginner photographer, we’ll take you through everything you’ll need to create amazing light painting photographs.
1. Get the Right Camera Equipment
To create the best light painting images, you need to have the right camera equipment. There’s nothing too fancy. But there are some essential times you’ll need for this technique.
Camera
The first thing you need is the right camera. The best option is a good quality DSLR camera with adjustable manual settings. They’ll give you the best settings and functions for light paintings.
Mirrorless cameras are great for light painting too. You need to make sure your mirrorless machine gives you the manual settings for light painting.
Light painting is possible with your smartphone camera. The newer iPhone models have a night mode on the camera, giving you enough creative input for light painting. The older models don’t have this mode. But you can get specific apps for light painting.
The smartphone apps can be great fun, but they don’t give you the flexibility of a DSLR camera. A DSLR gives you complete creative control, giving you the freedom to experiment.
Lens
The type of lens you use depends on the types of images you want to capture. A zoom lens isn’t necessary because you’re in control of your subject’s position. So a telephoto lens is also redundant.
A prime lens will work perfectly. And many light painting photographers like to use a wide-angle lens. They give greater scope for painting options.
A wider shot allows you to use broad, expansive stokes with your light painting brushes. You can use light to paint from one side of the image to the other.
Tripod
A tripod is essential for light painting with photography. You’ll be using a long shutter speed. As with all photography shoots involving long exposures, you need a steady camera.
Using a long exposure time without a tripod will result in blurry images. Your light paint strokes won’t be clear. And everything in the photo will be blurred and non-distinct. This is especially true when you’re working in the dark.
A tripod will make sure your images are free of camera shake. It will keep your images crisp and clear.
Wireless Shutter Release
Many members of the light painting community recommend a wireless shutter release button. They allow you to work away from the camera and still get the shot you need.
If you have an assistant or if you’re shooting a subject, you can press the shutter button yourself. But if you’re working alone, you can’t be in front and behind the camera at the same time.
With a wireless shutter release, you can work in front of the camera. You press the button and start painting with your light brushes. You don’t need to run from behind the camera while the shutter is open.
If your camera has Wi-Fi capabilities, you can use smartphone apps as a remote trigger. But they tend to be less reliable than a specialist device.
© Anton
2. Go Manual With Your Camera Settings
If you have experience with night scenes or long exposure shooting, you might be familiar with some of this. But with light painting, the camera settings might not be as you expect.
Use your camera’s manual mode. You need to be in control so you can make adjustments. The auto-functions won’t understand what you’re trying to do.
Use a Slow Shutter Speed
For light paintings, you need a long exposure time and a slow shutter speed. And we’re talking seconds, if not minutes.
Many cameras have a 30-second shutter. This might be enough for what you want to draw. But if you do need more time, go for the manual bulb mode. It lets you decide when to open an d close the shutter.
Using the bulb mode makes a wireless shutter release all the more useful. It saves you from running from and to the camera. You can open and close the shutter from wherever you are.
Keep Your ISO Low
When shooting in dark situations, you might opt for a higher ISO setting. But with light paintings, you want to keep a low ISO.
You can go as low as ISO 200 or 100. The long exposure time will give enough light. And you want to maintain image quality with a noise-free ISO setting.
Use a Low Aperture
A lower aperture will allow more light into the camera. And the lowest f.stop on your lens is the best place to start.
A lower f.stop will give you a deeper depth of field, making it easier to focus. This is especially handy when shooting in the dark.
Once you’ve done a few test shots, you can adjust the aperture. You might want to reduce the amount of light. Or you might want to narrow your depth of field.
© Xuan Nguyen
3. Get a Sharp Focus in The Dark
Getting a sharp focus can be difficult when you’re working in the dark. If you don’t have enough ambient light, it’s hard to get a fix on your subject, even with a manual focus.
The light source you use for light painting might not have much of an output. And you’re relying on a long exposure to get enough light for the final shot.
To help get the focus pre-shot, you can use a torch. Shine it on your subject while you make the adjustments on your camera.
Another excellent tip is to use a red light over your torchlight. It will still give you enough light so you can get in focus. But it means your eyes won’t have to keep adjusting to light and dark. You can keep your night vision with a red light.
© Andre Riezzo
4. Underexpose Your Test Shots
You’ll need to do test shots without the light painting to get your composition perfect. But when you’re shooting your tests, your instinct is to expose them correctly.
But when it comes to light painting techniques, it’s best to aim for an underexposed shot in your tests.
You need to compensate for the painting light you’re going to use in the final image. If your test is perfectly exposed, your final images will be overexposed due to the added light source.
Getting the exposure right before you shoot means there’s less trial and error. Once you start painting, you can focus on getting the shapes you want. And you don’t want the batteries to run out.
© Prateek Katyal
5. Experiment With Different Lights
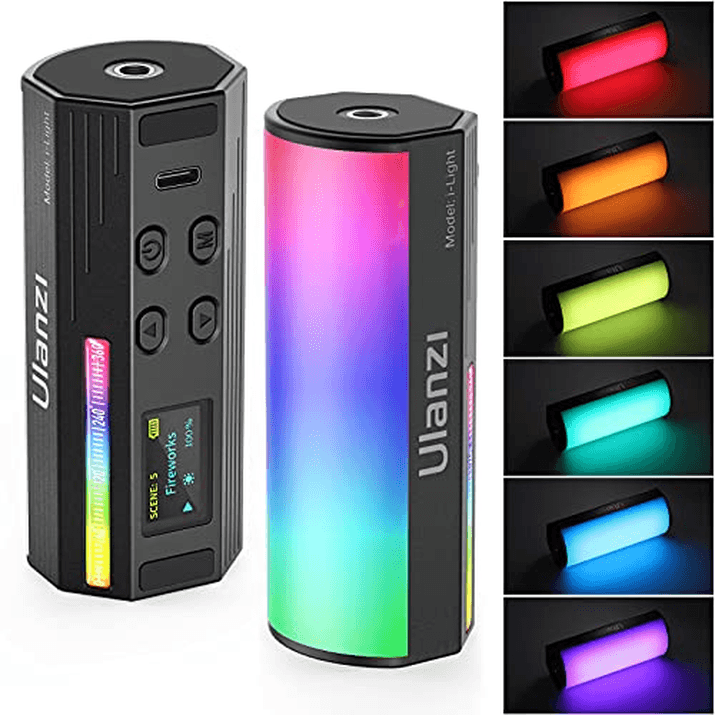
One of the fun parts of light painting is that you can use a wide variety of lights as your brush. You don’t need a special kind of off-camera flash with a radio connection. You can use any light you have.
The type of light you choose is down to the kind of effect you want. You can use a steady off-camera light source for night sky images. You can illuminate an object in the foreground as well as the stars above.
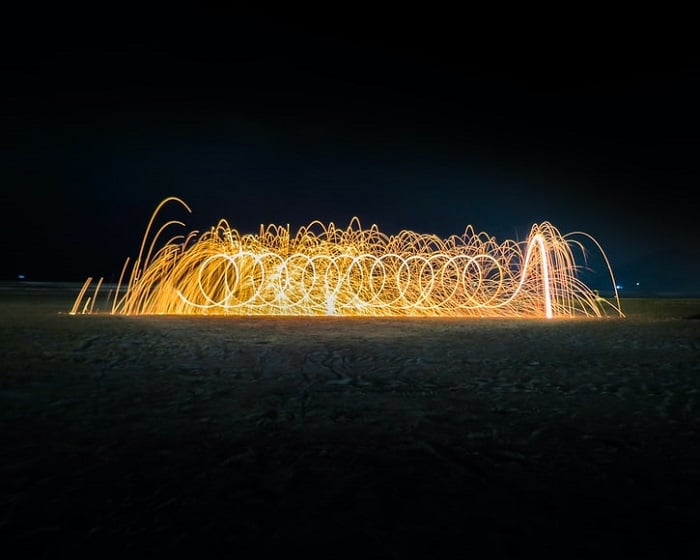
If you’re on location, you’ll need something battery powered. Or you can use a light source that isn’t electric. Candles and sparklers can be excellent fun if you’re careful.
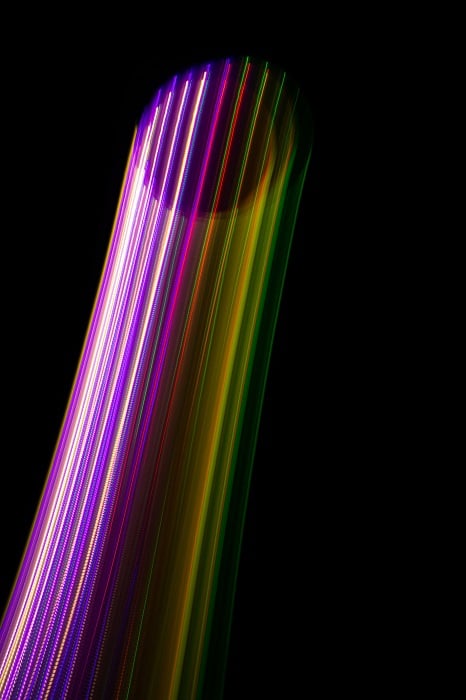
You can use colored lights. Or you can use color gels for your camera. Color gels are a transparent material you put over your camera lens. They are cheap and easy to carry around.
Fairy lights are a favourite with light painters. The multitude of small bulbs gives a soft effect. And when moved, they generate a lot of energy.
Maybe you have some glow sticks left over from the last rave you went to. Their soft colored light acts as a perfect brush on the canvas of night.
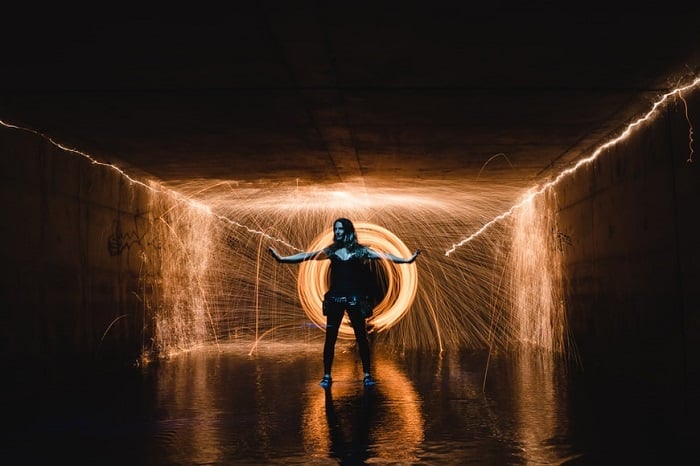
The source of light doesn’t have to be constant. Strobe lights make excellent light painting tools. They can give you a multi-exposure effect. Other flashing lights can also give you different textures and effects on your final image.
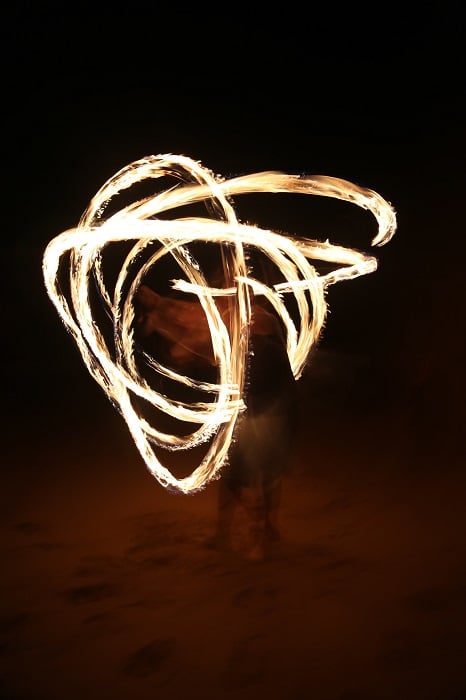
© Berto Macario
6. Experiment With Movement
Once you have your light sources, you can experiment by moving them in the dark. You can see what kind of paintbrush each light will be.
You can start by playing with the light in the dark. You don’t even need the camera. You can move the lights around in front of your eyes. Or if you have a friend, they can make shapes in front of you.
Think about what you want to paint. Is the light painting going to be an effect? Or is it going to be the subject?
If you’re doing portraits, you can place the lights in different locations around your subject. Or you can move the lights around the subject during the exposure.
Your brushes can be used to create images of pure light. They can be real-world objects. Or you can create abstract art pieces.
© Octavio Fossatti
7. Scout Out Different Locations
Your location is an important consideration when you want to create light painting photography.
The location doesn’t have to be somewhere out in the wilderness. You can black out a studio, covering all the windows. You can then work in the comfort of a nice studio.
But if you want to shoot on location, there are some things you should think about.
When you’re scouting locations, think about how it will look at night. Will the features be visible? And how will they react to light?
Bodies of water are excellent locations. They’re scenic, and the water has a reflective quality you can exploit. You can double your shapes. And you can create visual echos.
Mountains can create spectacular backdrops after nightfall; their silhouette cuts across the starry sky.
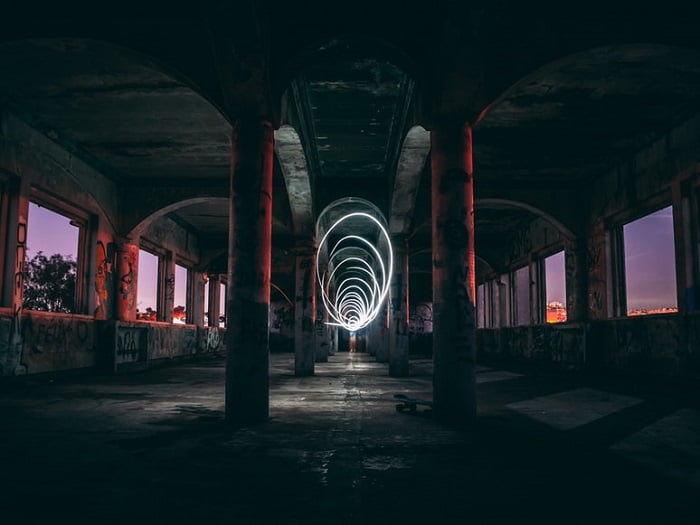
Industrial landscapes provide lots of objects the light can interact with. Or, if you want to create pure light paintings, you can find a remote area with few features.
You also need to think about the levels of ambient light in each location. Cities have lots of artificial light. This isn’t ideal if you want dark pictures. And a full moon produces more light than you might think.
You should always scout your locations during the day. This way you can get a good look at the area. It will help you compose your shots. And it’s safer, especially if you are using remote or abandoned locations.
© Ricardo Rocha
8. Keep Additional Movement to a Minimum
When painting with light, you move your light source during the long exposure. This creates electric brushstrokes that move across the image.
But for the rest of the shot, you want to keep movement to a minimum. When you’re using a slow shutter speed, camera shake is your main concern.
When you’re light painting, your shutter is open for 30 seconds or more. That means even small movements will result in motion blur.
A tripod will keep your camera still, which certainly helps. But you need to be aware of anything else in your image that might move.
Long exposures can be used for night cityscapes. And the car lights paint their picture on the image. So it can create a great visual effect. But you need to make sure you take this into consideration.
This is one of the reasons remote locations are often chosen by light painters. There are no people or vehicles moving around in the background.
If you’re the one painting in the image, you can reduce the impact by wearing black clothes. They also need to be non-reflective.
© Antonino Visalli
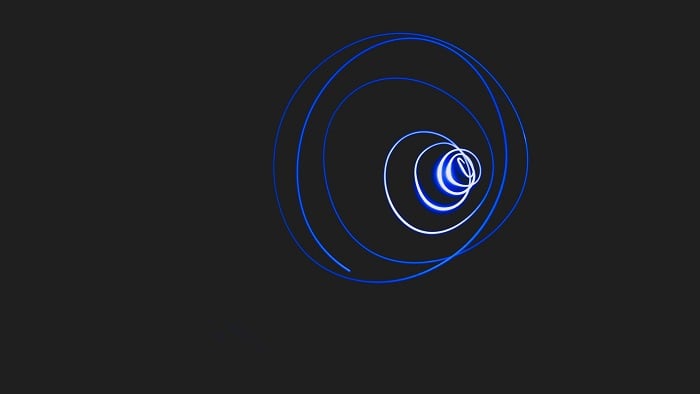
9. Try Kinetic Light Painting Photography
With kinetic light painting, the light source is still. And to create the brush strokes, you move your camera.
You can use dim lamps or candles. Any fixed light will do. You can even have a friend hold a light in position.
Kinetic light painting will give you more abstract results. You can create fabulous shapes and lines. But the background will always be blurred.
When you move your camera, your movements need to be deliberate and considered. You can’t wildly shake the camera around. That will result in one big blur.
Also, consider the distance between the light source and your camera. The closer they are, the more sensitive to movement they will be.
You can try kinetic light painting on location or in the studio. You can even try it at home. You don’t need to worry so much about surroundings or additional movement.
© Solen Feyissa
Conclusion
Light painting photography is an excellent way to experiment with light. You’ll learn about long exposures and night photography. And you’ll create some special images.
A black canvas is the perfect backdrop for light painting. You can enhance a night landscape. Or you can create a unique set of portraits using your light brushes. You can go literal. And you can go abstract.
You don’t need much equipment. And all the hard work is done in the camera. So you can still create stunning light pictures without a degree in Photoshop editing.
I hope this information has been clear and helpful. Now it’s time to get yourself a few glow sticks and head into the night. Let the night be your canvas, and the light be your brush!


