The ocean and its beautiful coast are fantastic subjects. But you need that wow factor to make your ocean photos stand out. And the ocean is so majestic! You want your photos to do it justice.
Here are some essential techniques you must know to get the most out of your ocean photography.

What Sets Ocean Photography Apart?
Ocean photography is different from landscape photography. And it’s somewhat different than classic seascape photography. The reason is the ever-moving body of water.
Long exposure, for instance, has a bigger impact on ocean photography than on regular landscapes. It smooths a more significant part of the picture—the water. And because of this, it affects the complete look and feel of the image. The term seascape photography usually applies to both the sea and the ocean.
The ocean is restless and never quiet. There are always waves and splashes and a lot of action. So when shooting the ocean, you should always be careful to keep yourself (and your gear!) safe.
Ocean Photography Gear
Like other types of photography, ocean photography requires some specialized gear. Apart from the camera and your best , here’s what you’ll need for better ocean photography.
- Tripod: A good steady tripod is a must-have for ocean photography. Always be sure to clean your gear, as sea salt can corrode metal. The type of tripod head is important to ensure it works with your gear setup.
- Water Shoes or Waders: To get the best seascapes, you’ll need to get into the water. It depends on the season and ocean location. For cold climates, you’d better use waders. For warmer places, you can get away with good water shoes.
- Microfiber Cloth: There is a good chance the salty spray will cover the front of your lens. And it won’t come off completely by rubbing it with your sleeve. I usually buy a whole bag of microfiber cloths and carry a bunch with me in the backpack.
- Lens Pen: If your lens gets wet, the microfiber won’t help. You need a lens pen to handle the issue after carefully wiping the water out with a napkin. It’s easy to use and safe for your lens.
- Filters: You’ll need filters for seascapes and ocean photography. ND filters are the most important for seascape and ocean photography. Another useful filter is a circular polarizing filter. It can help you see through the water. It also improves the colors of the sea surface and enhances the clouds.
Staying Safe During Ocean Photography
The ocean is a dangerous environment. Before mastering any ocean photography techniques (such as shooting modes), you need to know how to stay safe.
Here are a few simple rules to follow:
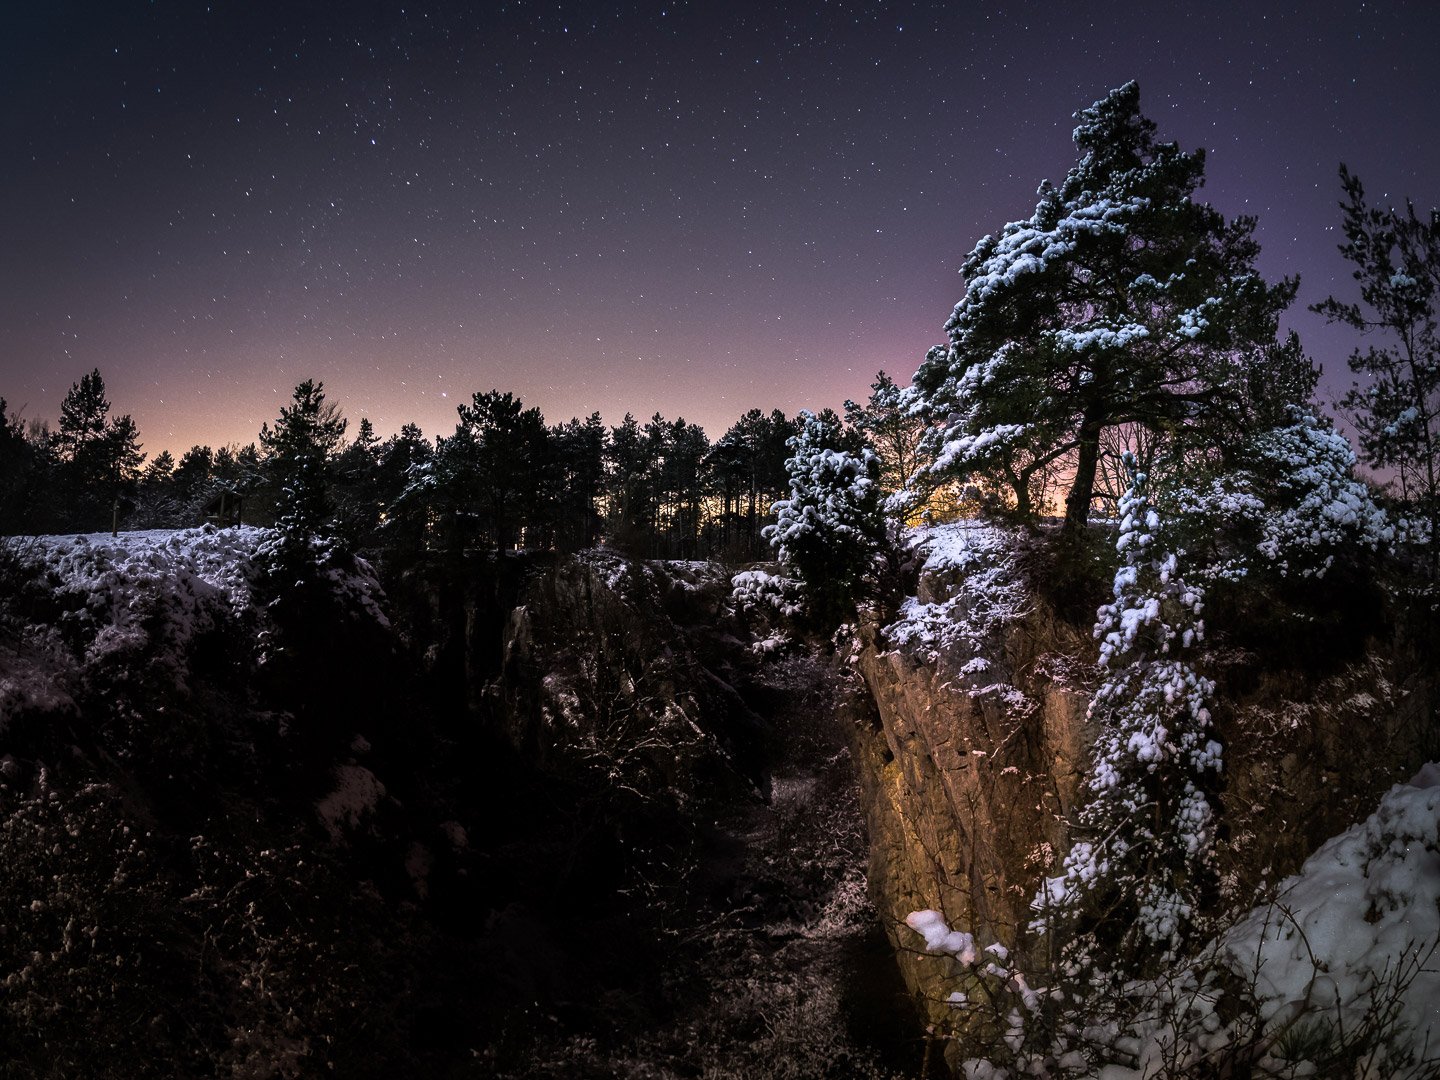
- Always have a headlamp when going out for the sunrise or the sunset. If you trip over a rock in the standard landscape setting, you fall. If you trip over on the cliff edge, you fall down.
- Watch out for the rising tide. Check if the tide is rising before going out. Otherwise, you may find yourself locked out of the shore all of a sudden.
- Always keep an eye on the ocean. Some waves are larger than others, and you need to be careful. An unsuspecting wave can wash you away or ruin your gear. Also, a regular wave can sometimes have a very strong pull. Look out for rip currents and stay away from them.
- Don’t go to the clifftop if there are strong winds blowing towards the sea.
- Watch the rocks. If they are wet, then some waves can hit them from time to time unless it’s raining.
- Some water plants are very slippery.
- Never touch any animals. Here in Australia, for instance, we have deadly poisonous cone snails, blue octopuses, and some jellyfish.
Ocean Photography Techniques
Here are some fundamental techniques I use extensively for ocean photography. Feel free to use them on their own or combine them to get new interesting results.
1. Use Long Exposure to Smooth Motion
Long exposure is a photography technique with a huge punch in the final photo. This is especially true for seascape and ocean photography. In a standard landscape, the only thing that smooths out is the sky. In ocean photography, this also affects the water, one of the main subjects of your shot.
Ultra-long exposures produce fog-like or mirror-like water, depending on the actual activity happening there. The restless sea produces fog. The calm water creates a mirror.
For a shutter speed of 10 seconds or less, we start to see some smooth water structure. Five seconds or less creates a very smooth dynamic shot with some texture. The shutter speed below 2 seconds is my favorite. The picture will be very dynamic and full of texture yet retain its fluidity.
To shoot long exposure images, you often have to use an ND filter to stop down the exposure values.
2. Receding Waves in Ocean Photography
Almost every technique in ocean photography is related to the shutter speed. But they have different approaches, so I separated them into sub-techniques.
Receding wave is by far the most popular ocean photography technique to master. It produces the modern classic look of your seascape photos with white water trails going from the edges towards the sea.
For this technique, you need to be standing in the water. Use a shutter speed of 1/2 to 2 seconds. There are a few things to remember:
- Dip your tripod into the sand so that an incoming wave doesn’t move or shake it.
- Take a series of shots rather than a single one. The pattern changes every split second, so you never know which picture works best.
- Look for free-standing rocks because the water flows around them, forming exciting shapes and curves.
- Pay attention to the direction of the flow. Pre-visualize the composition with them in your frame.

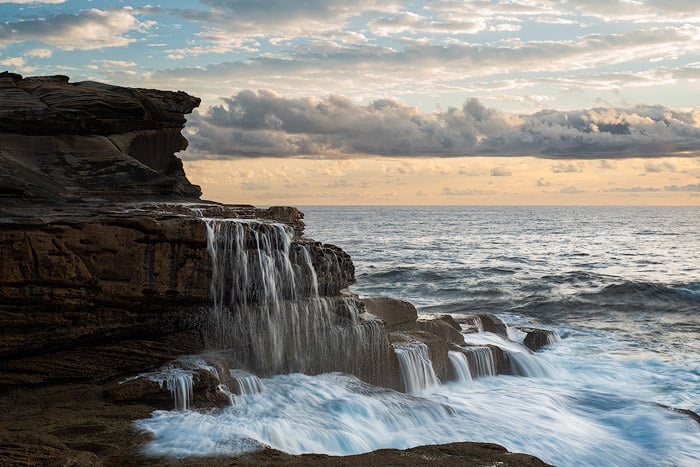
3. Incoming Waves in Ocean Photography
Similar rules apply to incoming waves. But there is a difference. The incoming wave moves two or even three times as fast. So take this into account when calculating your shutter speed. Such waves give you even more opportunities as they can wrap around rocks or cliffs and produce small temporary waterfalls.
The desired shutter speed for this type of ocean photo is also twice or three times as fast. So use 1/4 to 1 second at most.
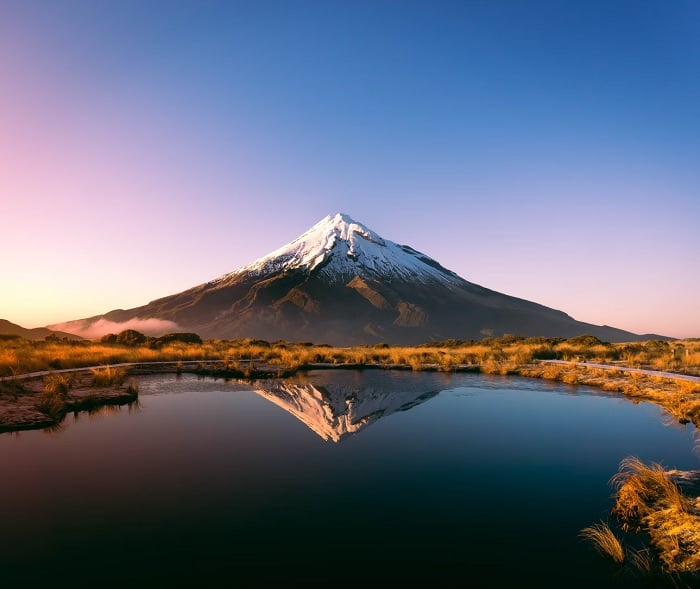
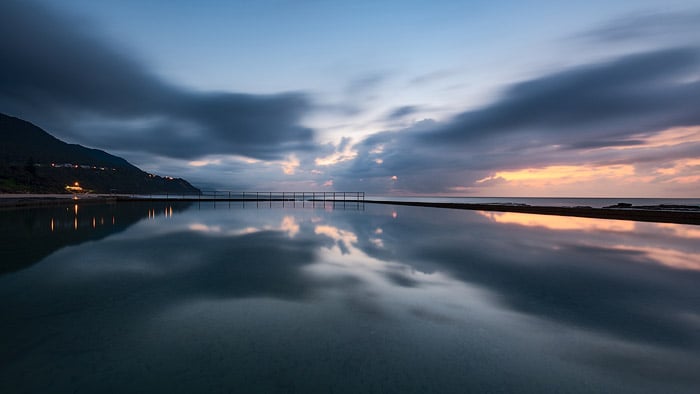
4. Reflections Over the Pool
As I have already mentioned, the ocean is rarely calm. Therefore getting reflections is becoming a sort of pinnacle of ocean photography.
One way to get them is to find a rock pool and shoot over it. The trick is to get really low above the surface to get as many reflections as possible.
Another way is to photograph after it’s rained and look for puddles in the rocks. They sometimes can be quite large. You can easily incorporate them in your composition along with the leading lines produced by the rocks around them.
Of course, this won’t work on a windy day.
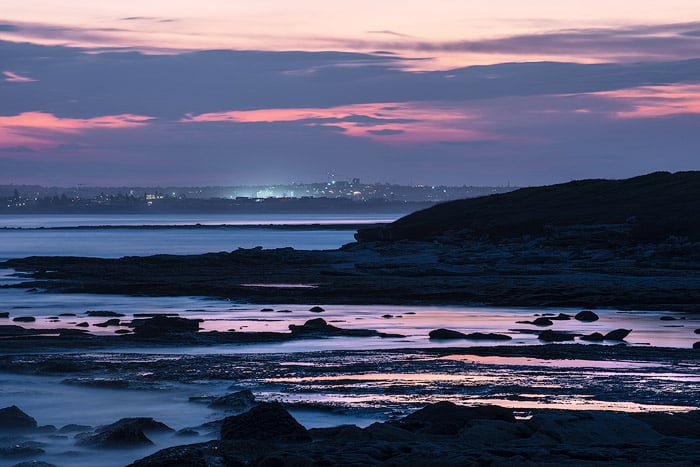
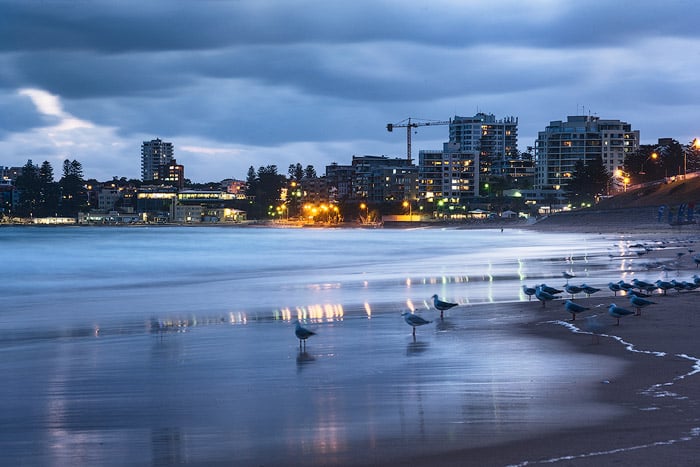
5. Reflections on the Sand
This is a more elusive type of reflection photography. Newbie photographers typically have no idea about it. You need a low tide so that the water recedes, leaving a flatter part of the beach open.
Then, after each wave, the water goes away slower than during the high tide. The sand stays wet for longer, giving you a chance to see the reflections.
You also need to shoot from a reasonably low angle, but not too low. Too low of a point of view kills linear perspective, which you wouldn’t want for your seascapes. Try to find the balance between the perspective and the number of reflections.
With these reflections, you can produce great shots even on windy days.
6. Abstract Seascapes
Abstract seascape photography is becoming more and more popular. Online galleries are full of such prints. But there is a difference between a snapshot and a good photo. And it is much more true for abstract photography.
In general, you need a little longer shutter speed and then zoom in and focus on the waves. They will smooth out nicely and produce various shapes and colors. But you need to avoid chaos and messiness!
Shoot many photos and then choose which composition works best. If you include the sky, then regular composition rules apply. If you don’t, then it becomes more about the lines and shapes.
Another way to create abstract seascapes is an ultra-long exposure. But in this case, the photo should be absolutely clear. Don’t include any distractions like seaweed or rocks. Include only the water and the sand or just the water.
The sky is not that important. If you include it, the picture looks more like a landscape. If you don’t, it looks more abstract.
7. Telephoto Seascapes
You can, in fact, shoot seascapes with your telephoto lens. This lens allows you to balance out the composition without exaggerating the foreground. You can focus on the features or shoot distant clouds, for instance.
Some of my best seascapes were created with a telephoto lens. You should also use this lens for waves and ocean photography.
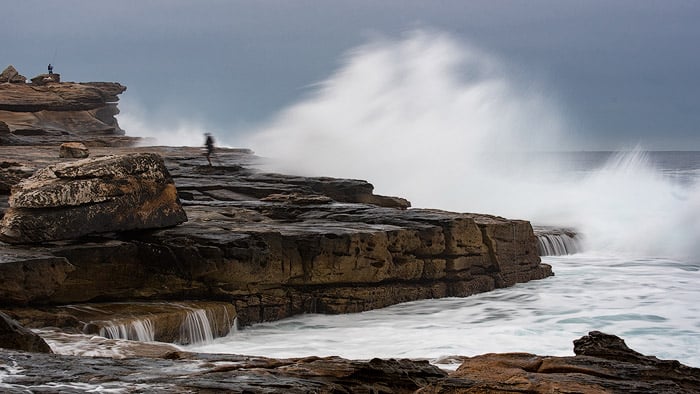
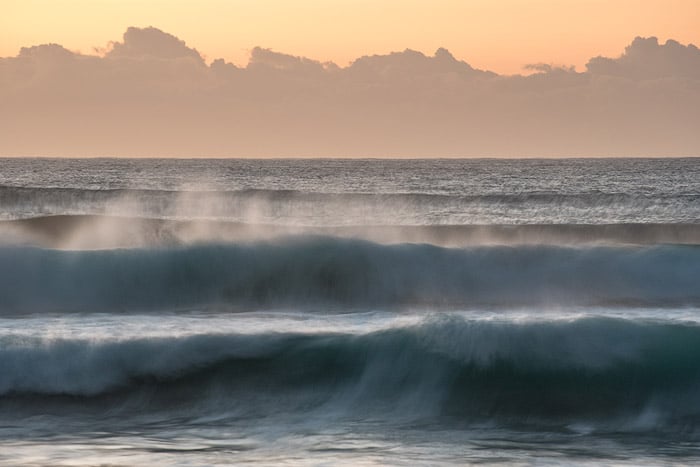
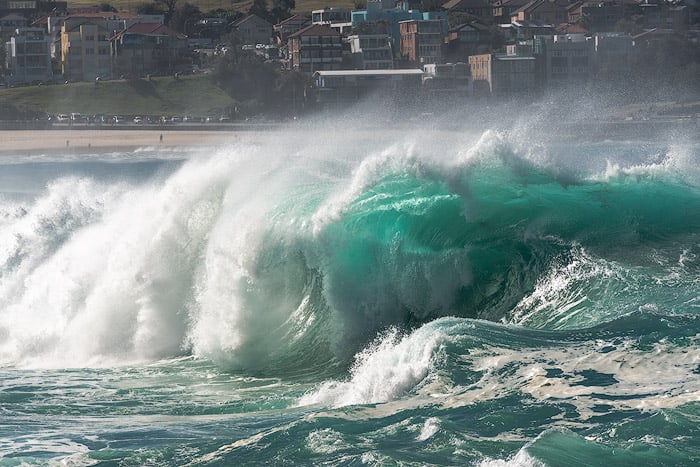
8. Ocean Wave Photography
Wave photography is almost like another genre of photography. It’s about the ocean water, yes, but it works differently.
If you are shooting from the beach, you must have a telephoto lens. The longer, the better. If you want to shoot close-ups, you’ll need a standard zoom or a wide-angle lens and a .
The trick here is to choose the right shutter speed. The more you zoom, the faster the shutter speed should be. The absolute minimum is 1/250 s, but I recommend using 1/800 s or even faster. The speed varies, and the wave could be blurred.
Try to photograph the waves when the sun is behind or above them. Otherwise, the colors become dull and boring, with unnecessary shadows from the rolling crest.
Sometimes blurring is the desired effect, and you want to show how powerful the wave burst is. In this case, the maximum shutter speed you can go is 1/2 s, but that’s only possible with wide apertures.
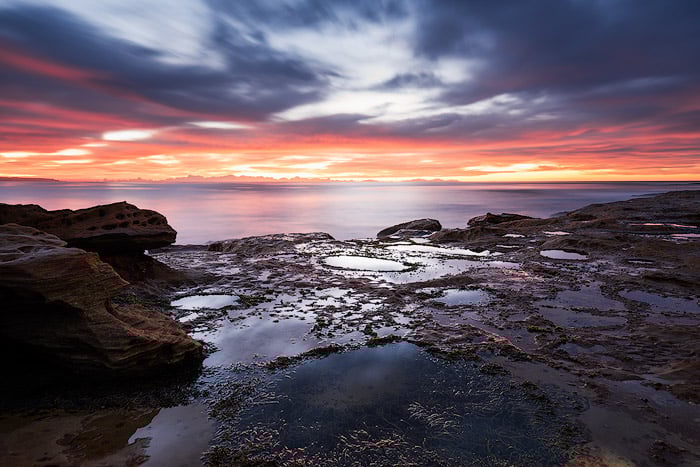
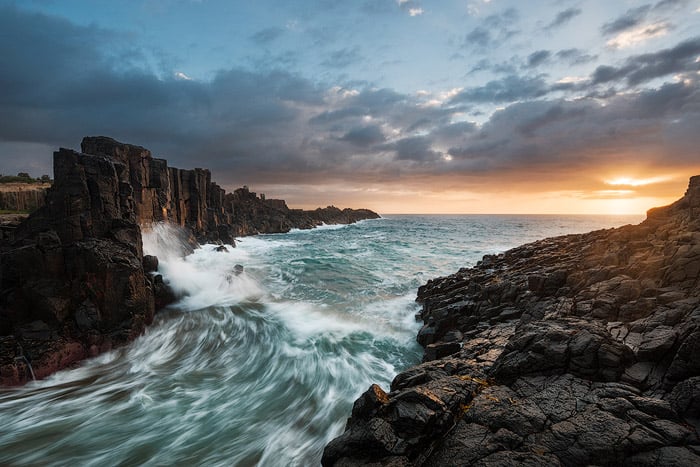
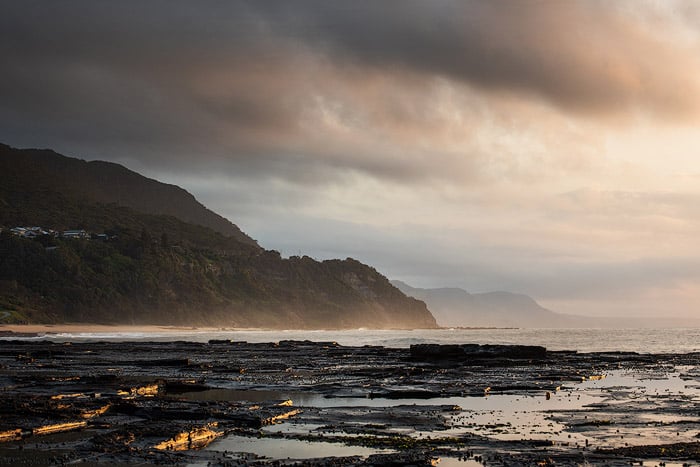
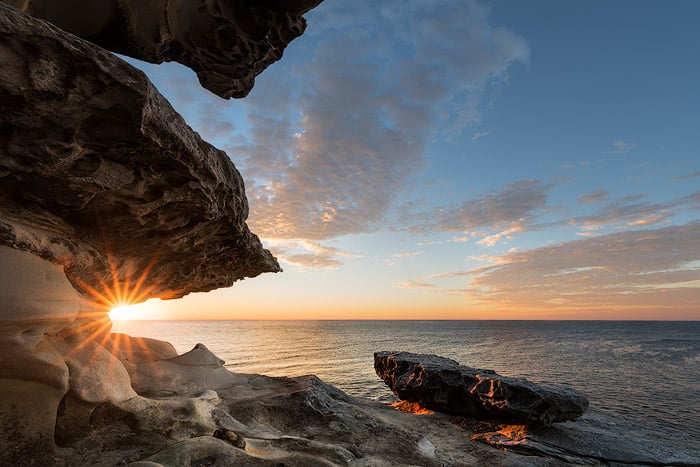
9. Sunburst Technique
Seascapes and ocean photography are very handy for creating sunburst effects. There are always some rocks and cliffs that you can make use of.
But first of all, you need to figure out the exact position of the sunrise or sunset and set up in advance. You can use PhotoPills for this.
The sun moves quickly, and you will have just a few minutes to get your shot. The general idea is to have something much darker next to the sun to make its rays visible and prominent.
The sun is very strong even when it’s low on the horizon. The other important thing is to partially obscure it. This could mean hiding it behind a rock, a cliff, or just a cloud. By shifting your camera very carefully and slowly, you can manipulate the size of the sunburst. You can also set the aperture higher (above f/11) to create spikes around the sun.
Not all lenses are born equal. Some of them cannot cope with direct sunlight and have reduced contrast and faded colors. But there is a way to deal with this issue. First, create a shot with the sun as normal. Second, cover it with your finger and create another shot.
When the sun is hidden behind your finger, the photo becomes free from flares and contrast issues. Later, blend the two shots in Photoshop.
Conclusion
Ocean photography is not an easy one to master. But it is extremely rewarding. Once you learn the key techniques and master your camera, every visit to the ocean becomes a joy, a new story, a whole new world. The same place won’t look the same twice.
Always experiment with the shutter speed to manipulate the amount of action and fluidity. Play with the point of view to shrink or stretch the perspective and always stay safe.