If you’re looking to capture some amazing beach photos, then you need to learn about long exposure photography. This technique can create stunning shots that show off the beauty of the beach in a whole new way.
Check out these eight tips for creating incredible long exposure beach photography.
Exploring Long Exposure Beach Photography: How Long is a Long Exposure?
The shutter speed threshold for “long exposure” differs for each photographer. And there is no hard line you need to cross to make it count as a long exposure shot.
Some photographers say it’s 1 second and above, but I don’t agree with that. It could be right for a general landscape where 1 second doesn’t make a huge difference, but for seascapes, every moment counts.
I typically consider 0.5 of a second and slower a long exposure. For the purposes of this article, that’s what I will consider long exposure.
Everything above 30 seconds is referred to as an ultra-long exposure for the convenience of understanding the basic settings.
1. Why You Should Get a Sturdy Tripod
A tripod is the first thing you need for any sort of long exposure shots and even more so for seascape photography.
People tend to get lightweight tripods for the sake of carrying less during the hike, but make sure it’s sturdy. A lightweight tripod will require weighing down for what we are after. As with any type of photography, I recommend getting a solid and sturdy tripod.
Most of the time, the coast is windy, which causes camera shake on a flimsy tripod. It can even blow it over on a really windy day! Also, if you are shooting on the beach, each wave hitting it could add to the shake. I always use aluminum tripods heavier than 1 kg.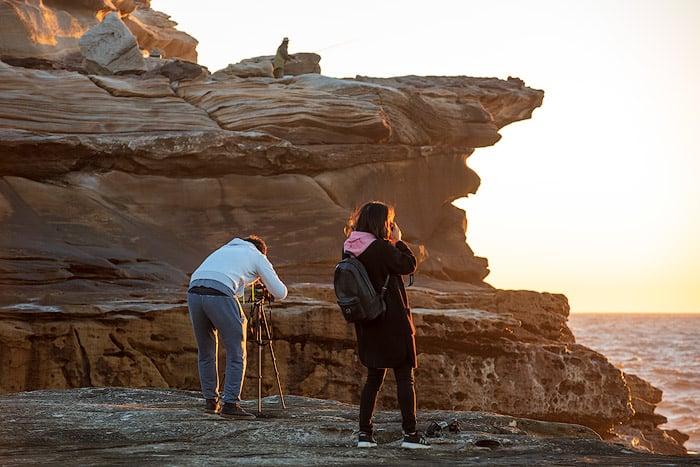
2. How to Use Use Filters
Neutral density (ND) filters are designed for long exposures. Photographers use these filters to cut the amount of light coming in. Some of these filters are so dark you could create long exposures with them during the day.
You can safely skip ND2 and ND4 as their effect is quite weak. And you could easily achieve the same thing using aperture and ISO (or by using a polarizer). Instead, get an ND8, ND400, or even ND1000.
The first one is three stops, the second one is 8 2/3 stops, and the last one is ten stops. ND400 and ND1000 are very dark, and you’ll need to pre-focus to use them.
A really dark filter is a must-have for the ocean photographer. You can also combine filters to achieve a more significant effect.
Therefore, you don’t really need a single ND1000, for instance. Instead, you could get ND8 and ND400 and use them separately or together.
Also, you could combine an ND filter with the polarizer, which should also be present in your bag. The typical polarizer is similar to ND8, in that it cuts three stops of light, and you can use it as a darkening filter too.
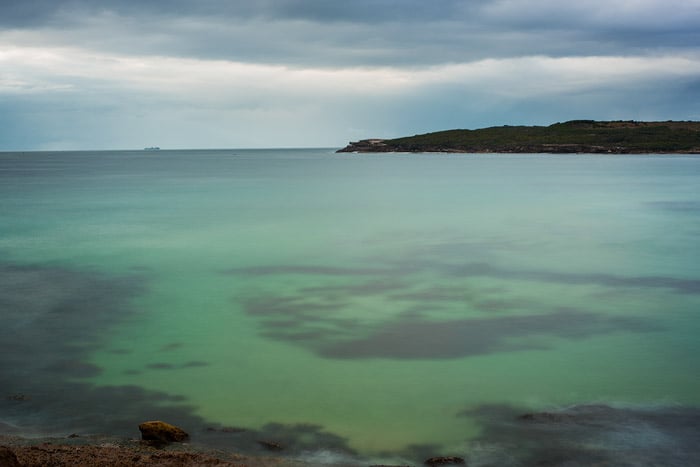
3. Shoot at the Top of a Cliff for Better Images
As we climb higher, the swell becomes visually smaller and plays a more minor role in the photo. Such a view allows us to smooth out all the waves and produce a level sea with soft color transitions.
This type of effect works best when we have something massive and rugged such as cliffs and fast-moving clouds. It allows us to remove all of the busy action from the photo.
The other example would be to smooth out water around something protruding from the sea. Also, the cliff edge is the easiest way to produce a diagonal composition. You just need to shift your camera slightly to the side.
These large-scale shots with something rugged only work when the water is level and smooth. Otherwise, the photo becomes overly busy and distracting.
The wind is always stronger on top of the cliff, so fix your tripod thoroughly or hide behind something. You could also protect it using a spread raincoat or an umbrella if you have one.
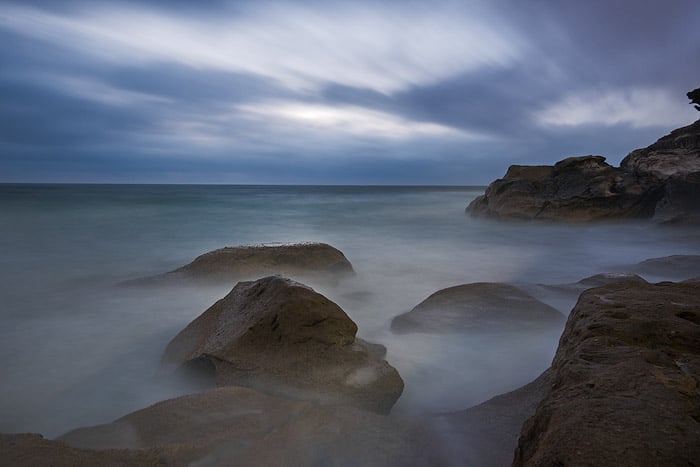
4. How to Create Foggy Water Effect
When we are creating a long exposure shot, the camera averages what it sees over time. And if we are standing at sea level with unrest water, the camera sees the waves.
Each wave has a different shape and form and moves a bit differently. Therefore, the final image has all these waves photographed together and smoothed by other wave’s movement.
In the end, it creates a foggy effect. The water doesn’t look like water anymore. It looks like fog. To emphasize this effect, we could include some solid objects, like rocks so “the fog” goes around these objects.
This type of photo only works when there are waves. If the sea is calm with a small swell, a long exposure will turn it into a level surface.
The shutter speed required for this one is quite long—at least 20 seconds. This effect also looks much better on a zoomed-in lens.
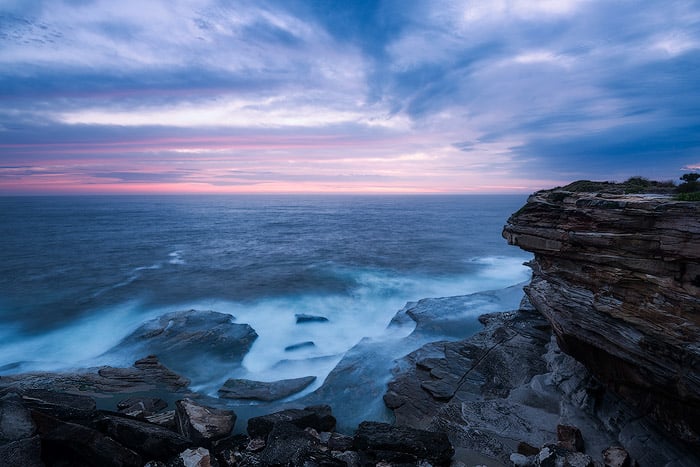
5. How to Create Water Trails
Another type of beach photography is to create white water trails on the sand. First, you need to shoot receding water, not an incoming wave. Second, the water moves at a different speed every time, so there’s no hard and set shutter speed for this type of shot.
A good exposure time to start experimenting at is 1/2 of a second. Sometimes you could use up to 2 seconds for some super slow flow. But I wouldn’t go faster than 1/4 s, which is already a rare case.
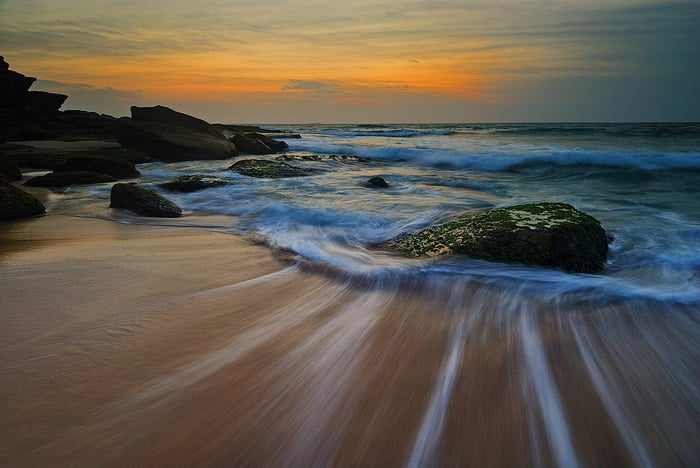
To create this type of shot, you need to stand in the water. So, get your shorts and flip-flops (or the waders) out and go in. Don’t go too deep and always be careful, as it could be dangerous.
Dip your tripod into the sand about three inches for better stability but don’t let go of it. Then wait for the wave and shoot when it recedes.
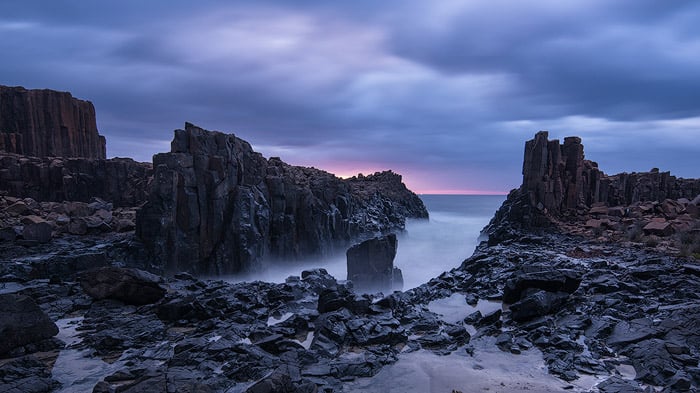
6. How to Use an Ultra-Long Exposure
Ultra-long exposures are anything longer than 30 seconds. It could be 60 or 120 seconds or even longer. Such a shutter speed is used to smooth out the water completely, removing all textures and leaving the colors intact.
Also, such exposure smoothes out the clouds, as well. This creates a somewhat surreal effect. I recommend including something solid as a visual anchor—a cliff, a rock, or a lighthouse—anything standing tall against the flow of time.
You need to shoot either well before sunrise (after sunset) or use some dark ND filters, as I have mentioned in this article. Another way to do this type of shot is a fake long exposure, which I will mention later.
7. How to Shoot Abstract Long Exposure Ocean Photography
Abstract ocean photography is becoming more and more popular. Many galleries showcase such pictures. But if you examine these works, most of them look more like snapshots. Let’s avoid this trap and create something more meaningful.
The general idea is to have an average length exposure time combined with some zoom. Pick a day with ordinary-sized waves and focus on them.
We need to capture the movement in a way that blurs the waves without making it a total mess. We’ll be focusing on the various shapes and colors.
Look for movement, lines, and colors. Try to avoid anything solid like the coast.
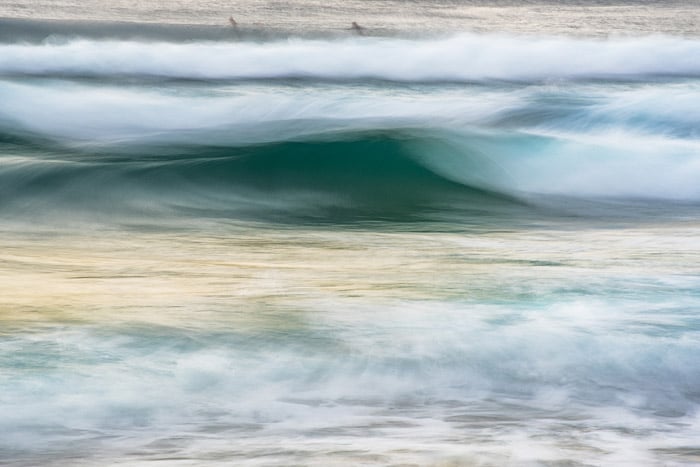
It’s up to you whether or not to include the sky. Also, you may need to experiment with the shutter speed. It depends on the focal range, water speed, and direction of movement. So this is purely a trial and error experiment. Start with 1/2 s shutter speed and adjust as necessary.
8. How to Fake Long Exposures in Post-Processing
Sometimes we just can’t do a proper long exposure.
But there is a way to simulate a long exposure while editing. You need to have your camera on a stable tripod and set it to either interval shooting or shoot many photos manually.
Try to minimize the gap between the pictures. We are not shooting a time-lapse in this instance.
Here is how to do it:
- Make as many photos as you wish to combine later.
- Edit them in the same manner as a batch.
- Upload all photos as layers in Photoshop.
- Select all photos, go to the Layer > Smart Objects > Convert to Smart Object.
- Now the actual magic. Layer > Smart Objects > Stack Mode > Mean.
Now you’ve got a great long exposure, and no one can tell you merged it in Photoshop.
The added benefit is that you can create a time-lapse if you have created enough shots for it. Or vice versa, you can create many long exposures from a time-lapse series.
Conclusion
Long exposure photography is a great tool that lifts our art to the next level. But I also have to warn you there is a whole world of different shutter speeds producing various effects in the final photo.
Do not run mad after just this one long exposure ocean photography technique. You must use it as a tool and know how and when to use it properly without limiting your creative juices.
Next time you’re shooting, try a long exposure and more traditional ocean photography.