17 Surf Photography Tips to Inspire Great Photos
Are you eager to capture the thrill and beauty of surfing through your lens? Mastering surf photography can be a rewarding challenge. It tests your technical photo skills and creativity.
We’ve all seen those picture-perfect shots of a surfer in a barrel or riding a wave. They look fantastic, even before adding a setting sun or a dramatic background. But how do you take good surf pictures? We provide everything you need to know to get started with surf photography!
- Master manual mode to capture moments you’re proud of.
- Overcome the frustration of missed shots with quick exposure settings.
- Benefit from visuals with hundreds of images and illustrations.
What Is Surf Photography?
Surf photography is a specialized genre of sports photography. It captures stunning images of surfers riding waves, often in dynamic, challenging environments. But it also involves other types of photography, capturing the culture and natural surroundings.
Coastlines and beaches inspire and are perfect for dynamic, dramatic shots. There are also opportunities for water photography and underwater photography.
Taking surfing images requires technical photography expertise and an understanding of creative composition. You need to know about lighting, the direction to shoot in, and shot composition.
It’s also best to understand surf conditions. Physical considerations include shooting close to or in the water. But don’t worry—you don’t need to be a surfer to take great surf photos. While surfing knowledge helps, it’s not a barrier to success.
Despite the challenges, surf photography is a subject full of opportunities for taking epic action shots. The results are breathtaking shots that showcase the thrill and beauty of this exhilarating sport.
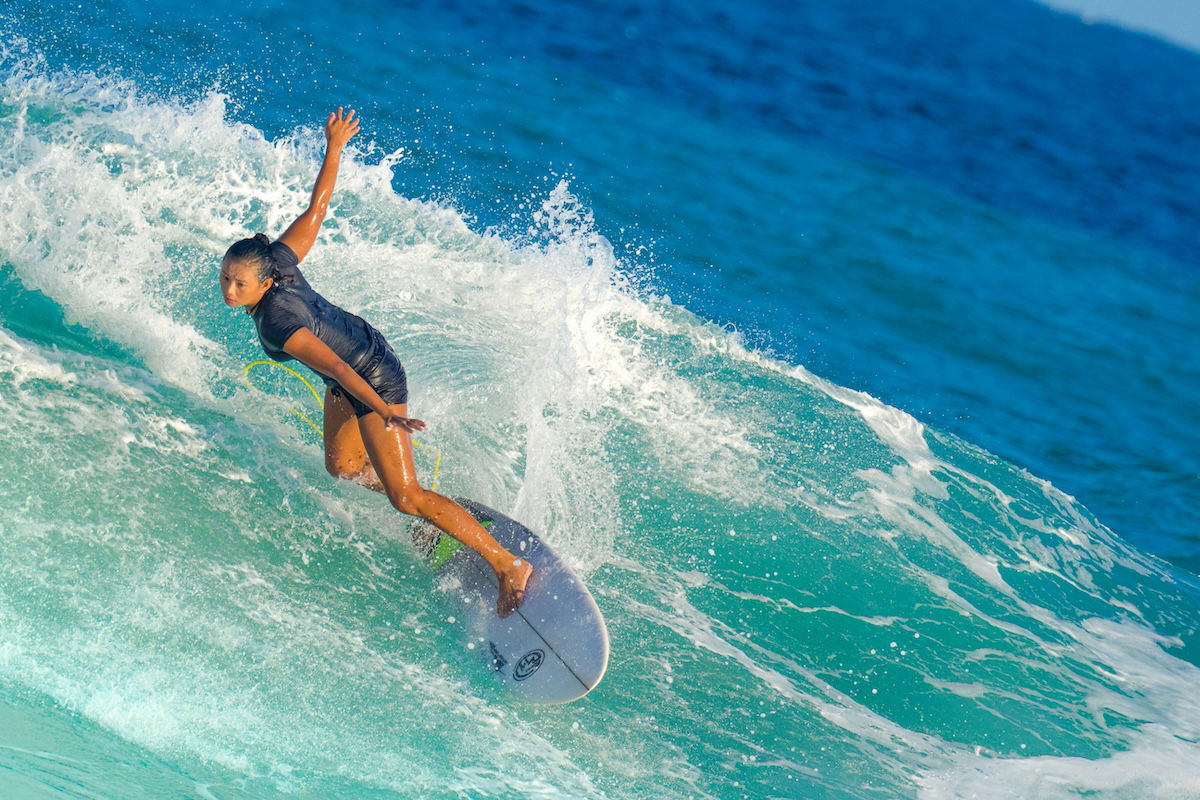
Shot with an OM System OM-D E-M1. 420mm, f/5.6, 1/2,500 s, ISO 200. Ting Tse Wang (Unsplash)
17 Tips for Taking Great Surf Photography
If you want to become a surf photographer, here are some tips to help you begin shooting incredible surf photography.
1. Use Fast Shutter Speeds for Dynamic Surf Shots
Surfing is a dynamic sport, which can result in blurred photos and a lack of clarity. You want to stick with a fast shutter speed to help keep your images sharp. This helps you snap great action shots with water spray and fine detail.
Shooting with a shutter speed of 1/700 s (seconds) and above lets you capture emotion, movement, and reactions with perfect sharpness.
It would help keep your ISO low to minimize noise in your shots. This is where your tripod is essential. Low ISO helps you maximize image quality.
But with higher shutter speeds, don’t be afraid to crank up the ISO as needed for the best exposure. Most modern digital cameras have high native ISO settings. Editing software, like Adobe Lightroom, also has excellent noise-reduction tools.
Shutter priority mode, also known as TV mode, is perfect for dynamic surf shots if you don’t want to use manual mode. You can adjust the shutter speed while your camera handles exposure in this mode. Most surf photographers use shutter priority mode or go fully manual if in the water.
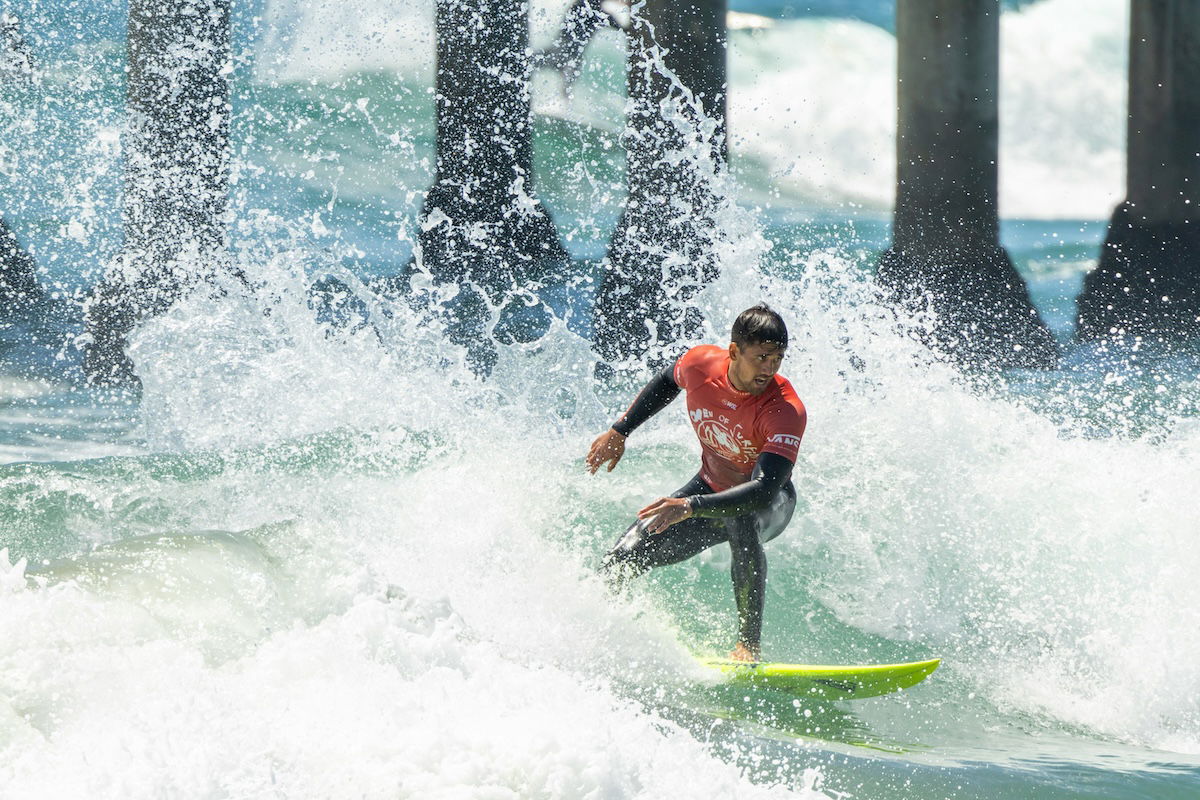
Shot with a Canon EOS R3. 856mm, f/13, 1/1,250 s, ISO 1,000. Leo Visions (Unsplash)
2. Experiment With Composition to Best Balance Images
Balancing action with a stunning background in your surfing images is best. Consider how the surfer draws the viewer’s eye. Is there a pier or rocky outcrop you can frame them against? Can you play with perspective using sea cliffs, ships, or giant waves?
For example, if you’re shooting big wave surfing, you can emphasize the wave size compared to the surfer. Consider the angle of your shot. This can create drama and scale in your composition. The natural movement of breaking waves can create dynamic photos.
Try to avoid unnecessary distractions in your image. Objects directly behind your subject should not detract from the composition. For example, masts, buoys, or other surfers should no
3. Use Composition to Tell a Good Story
Surf action can create a great story. There’s plenty of natural movement when working with water. But you can get boring-looking images if you don’t position your subject correctly.
Avoid centering a surfer in your shot. This can create a flat image and leave the viewer wanting more. The same goes for shooting one or several subjects. Good surf photographers create a sense of direction by positioning subjects on the left or right of the frame.
You create a dynamic sense of movement by positioning them off-center, leaving lead space in the direction they’re headed. These images capture where their subjects have been and where they are heading well.
Also, consider what else you include in your shot. What is the context? Shooting from within a barreling wave or angling your shot to reflect the crest creates a great story.
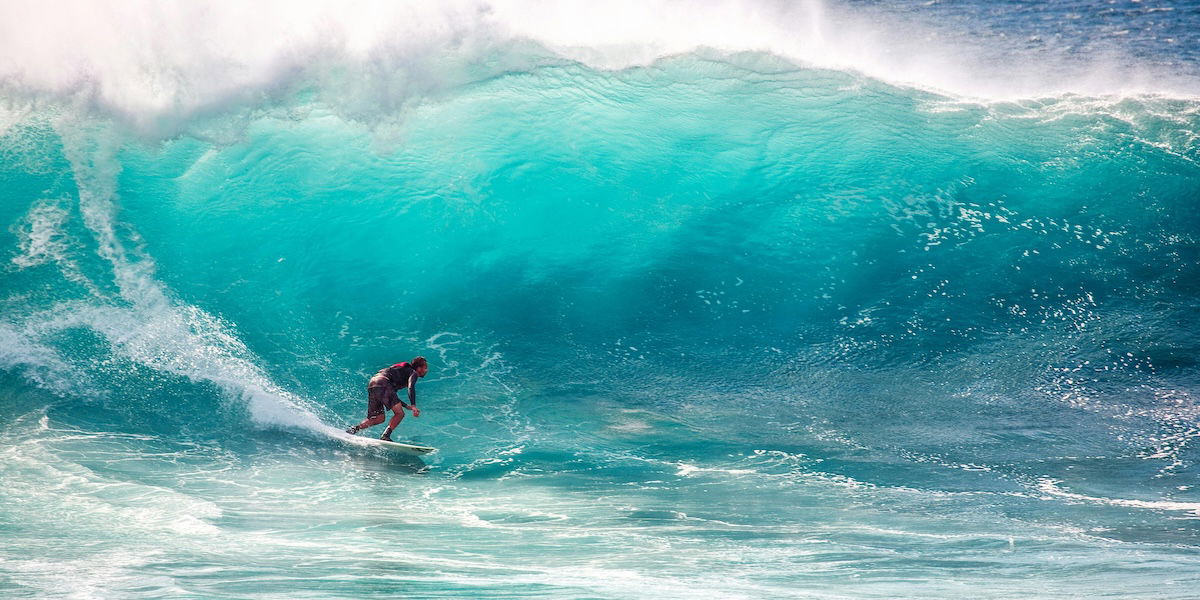
Shot with a Canon EOS 5D. 400mm, f/6.3, 1/640 s, ISO 100. Kanenori (Pexels)
4. Keep the Horizon Level or Skew Images for Effect
Keeping a level horizon is a rule of photography not limited to surfing photography. Unless you’re in the water and skewing the horizon purposefully, you should try to keep it steady and level in your shots.
Images with a skewed horizon can look strange because they stand out to viewers. The human brain unconsciously processes what we see and can sense when something is off.
A horizon that isn’t level in an image looks strange unless you’re planning a creative edit or surreal shot. A skewed shot is an aesthetic choice and can completely change the composition of your image.
Ultimately, it’s your choice, as your photography should be a way for you to express yourself. But bear in mind the effects it may have. A skewed shot can emphasize the movement of surfers and waves in the ocean for a great effect!
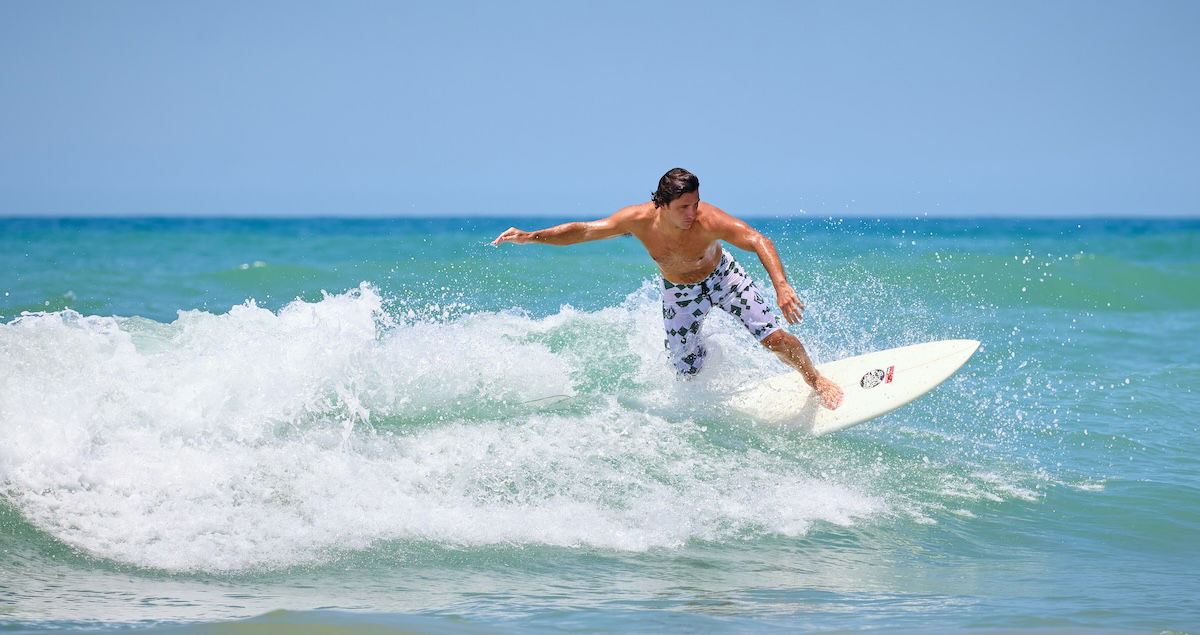
Shot with a Canon EOS 5D Mark II. 200mm, f/5.0, 1/1,000 s, ISO 100. Vidar Nordli-Mathisen (Unsplash)
5. Use a Tripod or Monopod for Optimal Shooting
If shooting from land, it’s best to use a tripod or monopod. This improves your ability to quickly change manual settings. It also makes shooting with longer lenses easier and can help you get sharp, well-composed images.
Using a tripod also makes it easy to track surfers and the direction of the waves. This helps with your shot composition and creating movement in your images. You can also align your tripod with the horizon, which is key for getting great surf photos.
Lightweight tripods and monopods are an excellent choice for the beach or rocky terrain. You want to remain mobile, so being able to pack up and move without fuss should be considered. Don’t just stay in one spot!
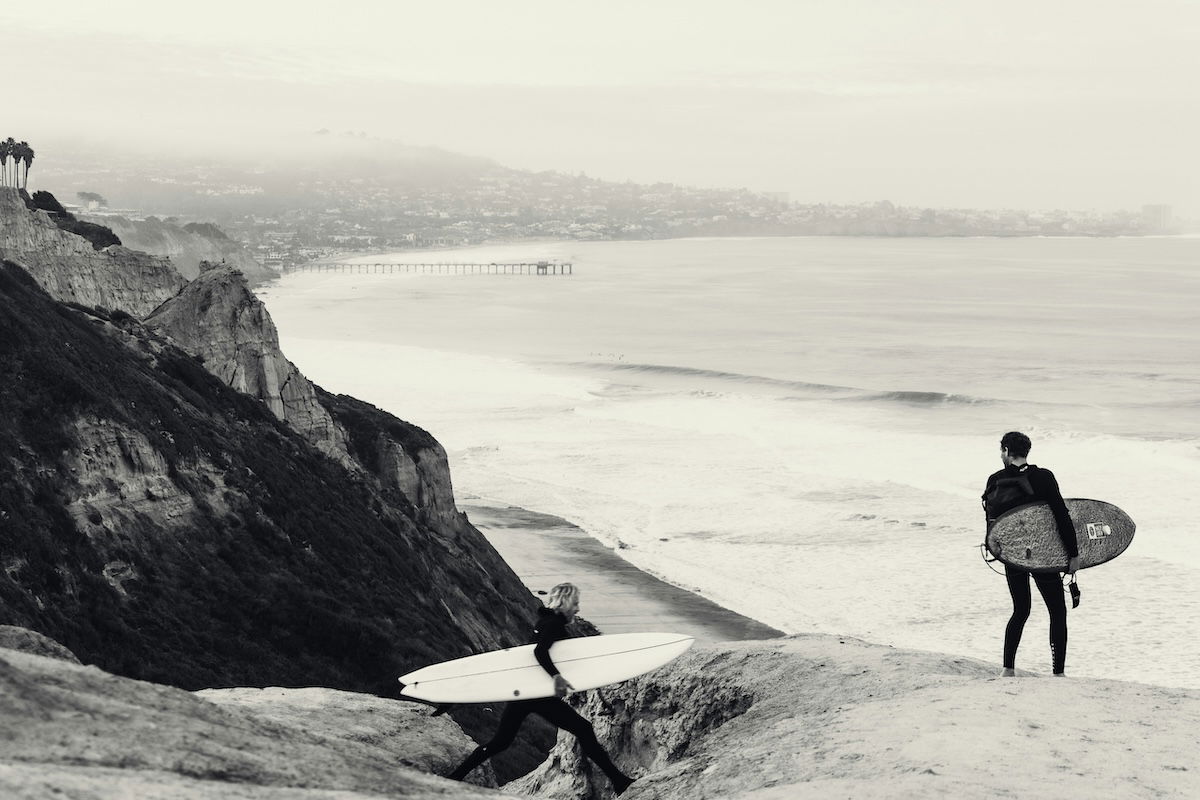
Shot with a Canon EOS R6. 61mm, f/4.0, 1/125 s, ISO 250. Reed Naliboff (Unsplash)
6. Use Foreground Details to Elevate Shots
Sometimes, the action isn’t as dramatic as you may want. To give your shots depth and perspective, don’t neglect the foreground. Having interesting or striking objects in the foreground, like an exciting background, is vital.
Remember that shooting straight-on can be tedious. You can include extra details by shooting along a beach or at an angle from rocks. Using an interesting foreground can breathe life into your surf photos.
Experiment with trees, beachgoers, or surfers heading out into the water. You might even be lucky if wildlife enters the frame.
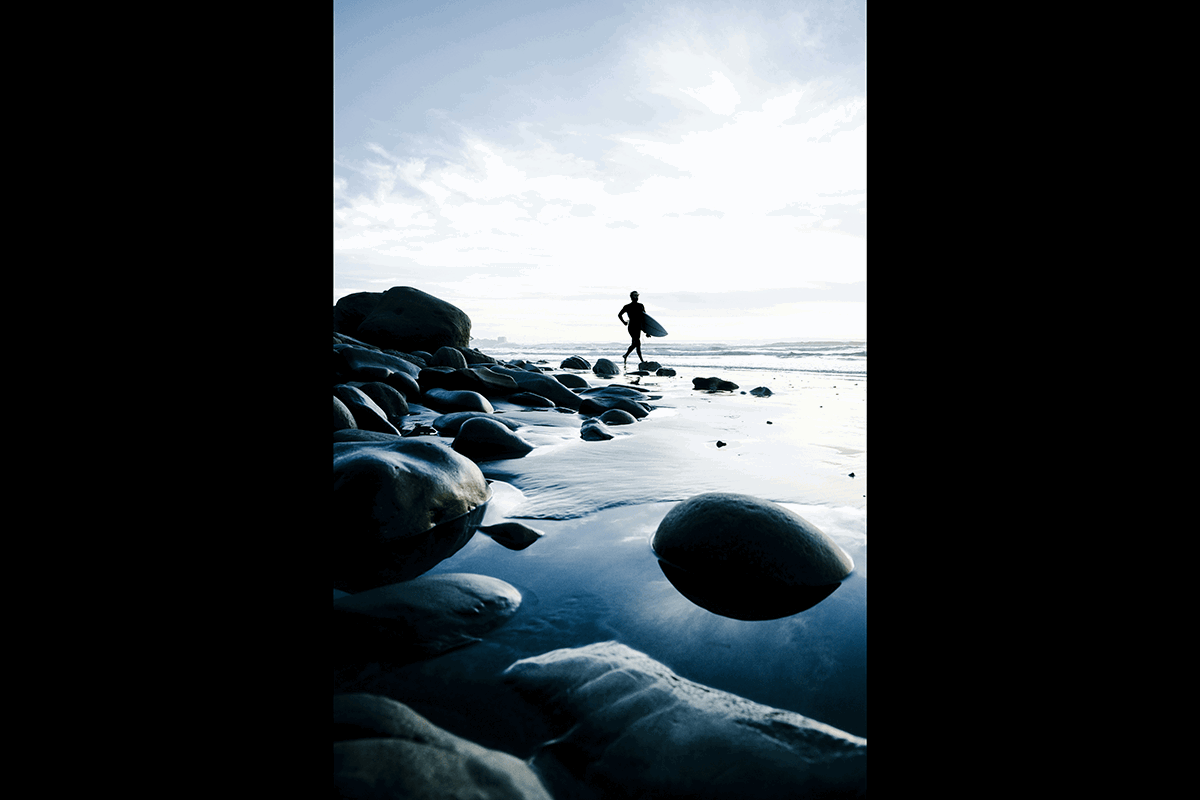
Shot with a Canon EOS R6. 26mm, f/7.1, 1/200 s, ISO 100. Reed Naliboff (Unsplash)
7. Take Surf Shots in the Water
While shooting from the shore can yield fantastic results, other options exist. With the right equipment, you can shoot from the water itself. Everyone loves the classic shot of a surfer riding inside the barrel of a wave.
To head into the water, buy reliable waterproof camera housing or an underwater camera. It’s also best to familiarize yourself with the basics of surfing. You should know where to position yourself and when to shoot.
Shooting from the water offers many opportunities for creativity. You can position water to the edges of your photo, and half-submerged subjects also create exciting dynamics. Shooting detailed images of the waves and water is easier when you’re right up close!
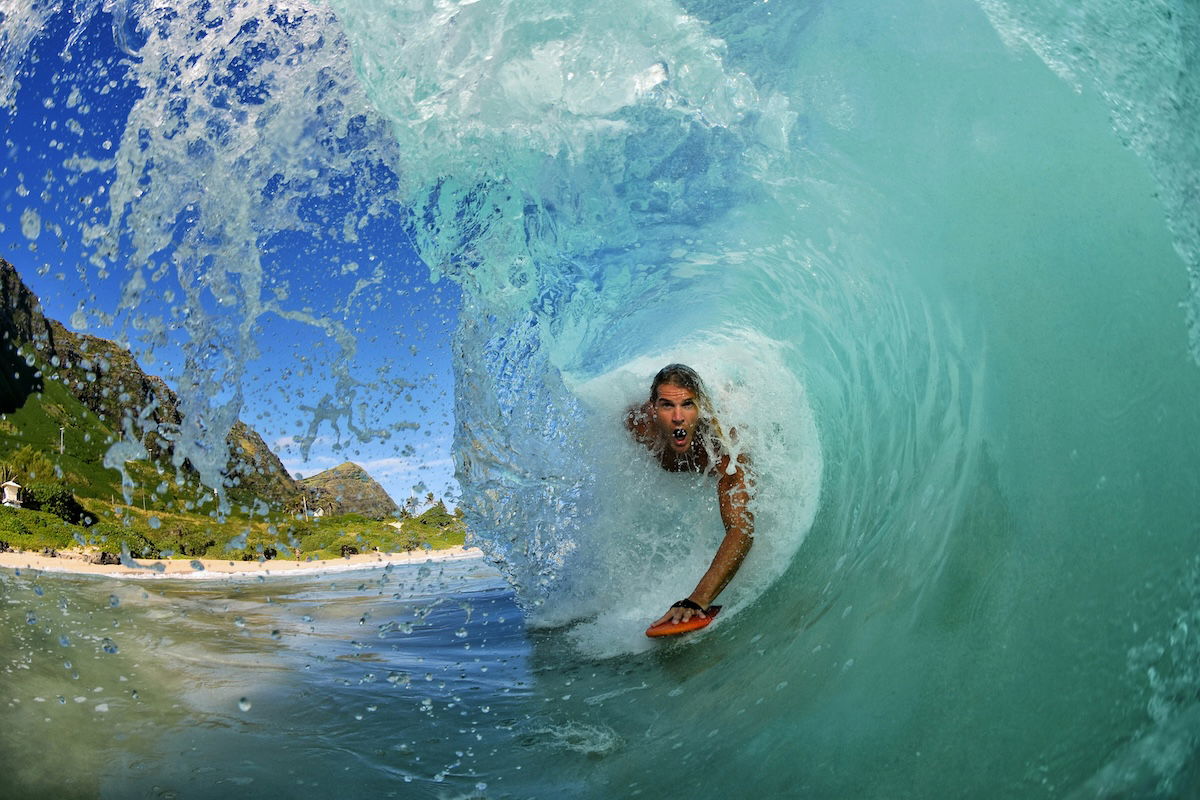
Shot with a Nikon D7200. 10.5mm, f/6.3 , 1/1,600 s, ISO 200. Drew Farwell (Unsplash)
8. Aim to Capture Epic Surf Action Shots
Catching a surfer getting airtime against the surf looks excellent. If you’re going for action shots, make them as dramatic as possible. Consider your composition to boost angles, heights, and impacts.
Remember to include the human element! People’s reactions and expressions can make your photo seem even more intense. Fast shutter speed and correct exposure are vital for capturing drama.
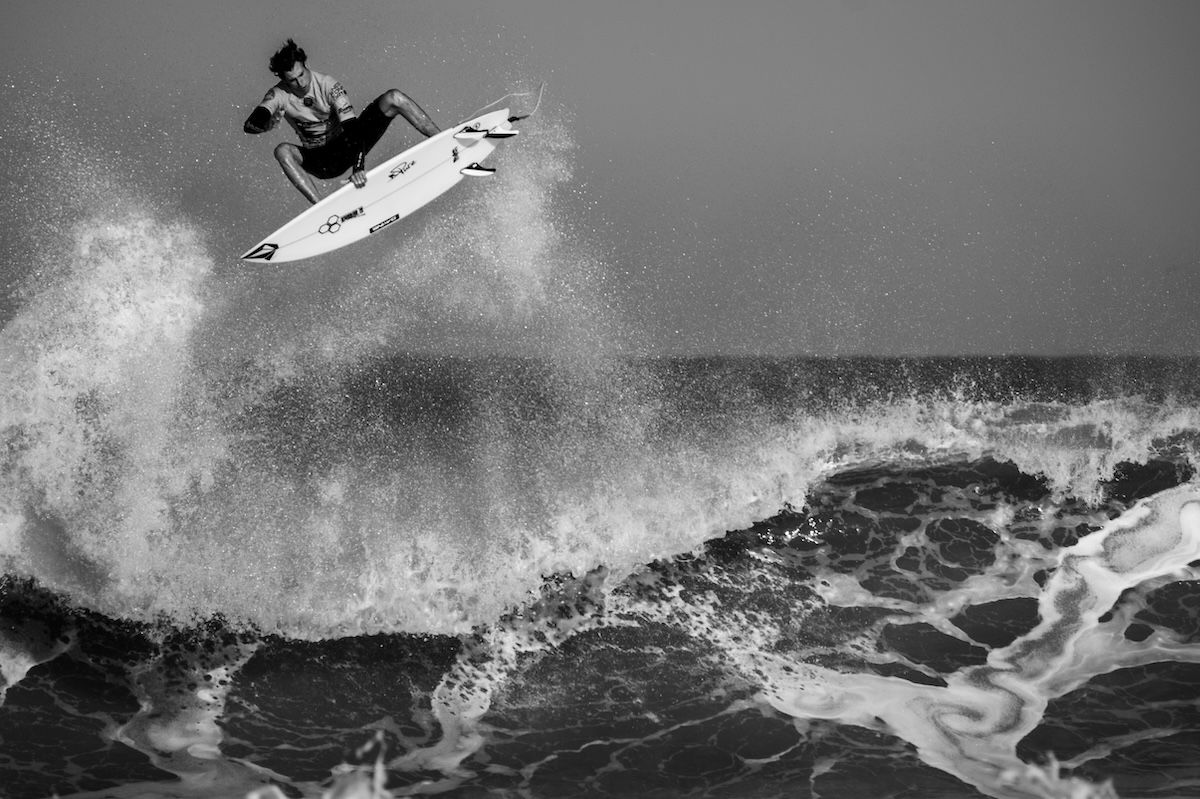
Shot with a Fujifilm X-T1. 400mm, f/7.1, 1/1,600 s, ISO 640. Mathieu Chirico (Unsplash)
9. Adapt Your Approach to the Natural Light Available
Consider the effects of natural light on surfing photos. Like many other types of photography, natural light is one of the best tools in surf photography. It can affect the mood, energy, and tone of your images. And you must adapt to the available light.
If you’re shooting around dusk, go for dramatic, striking compositions. Consider incorporating a storm into your angles and composition if it is on the horizon.
If you have intense, bright light, shooting back up through the water can be great. A breaking wave can look amazing if it’s captured with light behind it. Using a shutter speed that is fast enough, you can capture textures beautifully.
Low sun angles mean you can play with silhouettes and shadows if you shoot later in the day. You can take snapshots full of emotion, depth, and meaning. They can also look great with a soft reflection! Be sure to keep an eye on your exposure settings.
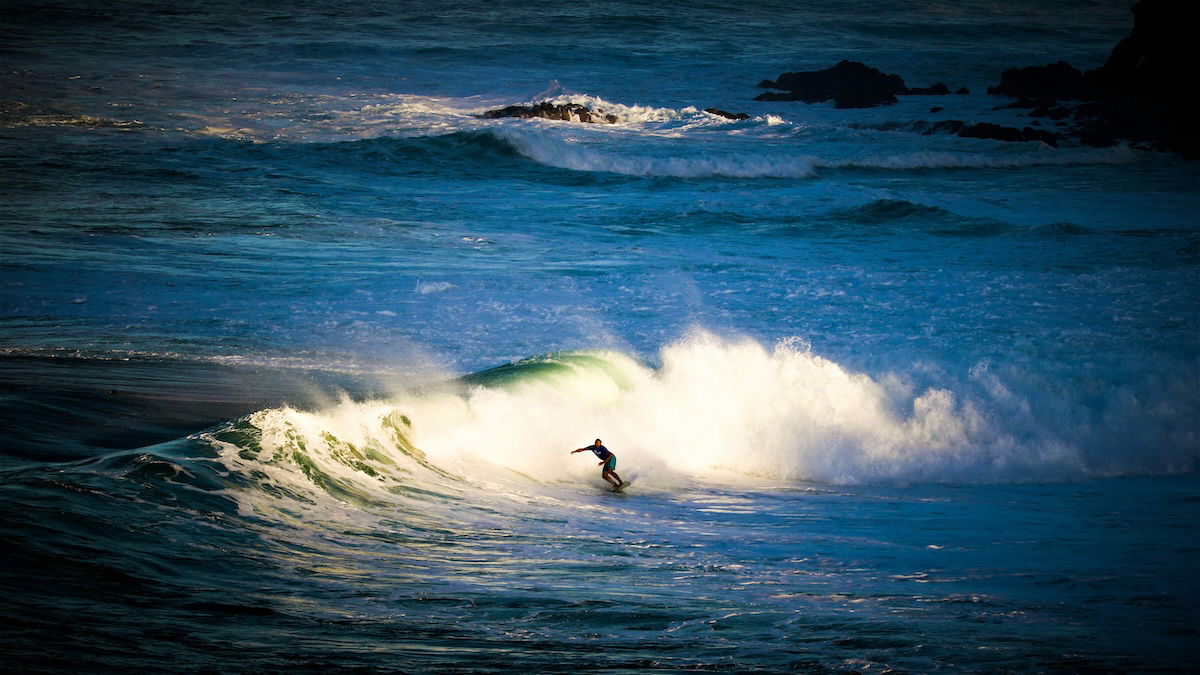
Shot with a Canon EOS Rebel T6i. 250mm, f/7.1, 1/400 s, ISO 100. Mark Vihtelic (Unsplash)
10. Plan Photoshoot Times and Angles to Avoid Reflections
Before you shoot, study the water. You get reflections depending on the time of day and the strength of the light. If you want a photo full of detail and contrast, try to find an angle that minimizes reflections.
Shooting in the evening or morning can increase or decrease reflections on the water. If you take the time to position yourself properly, you can get incredible detail and color in the water!
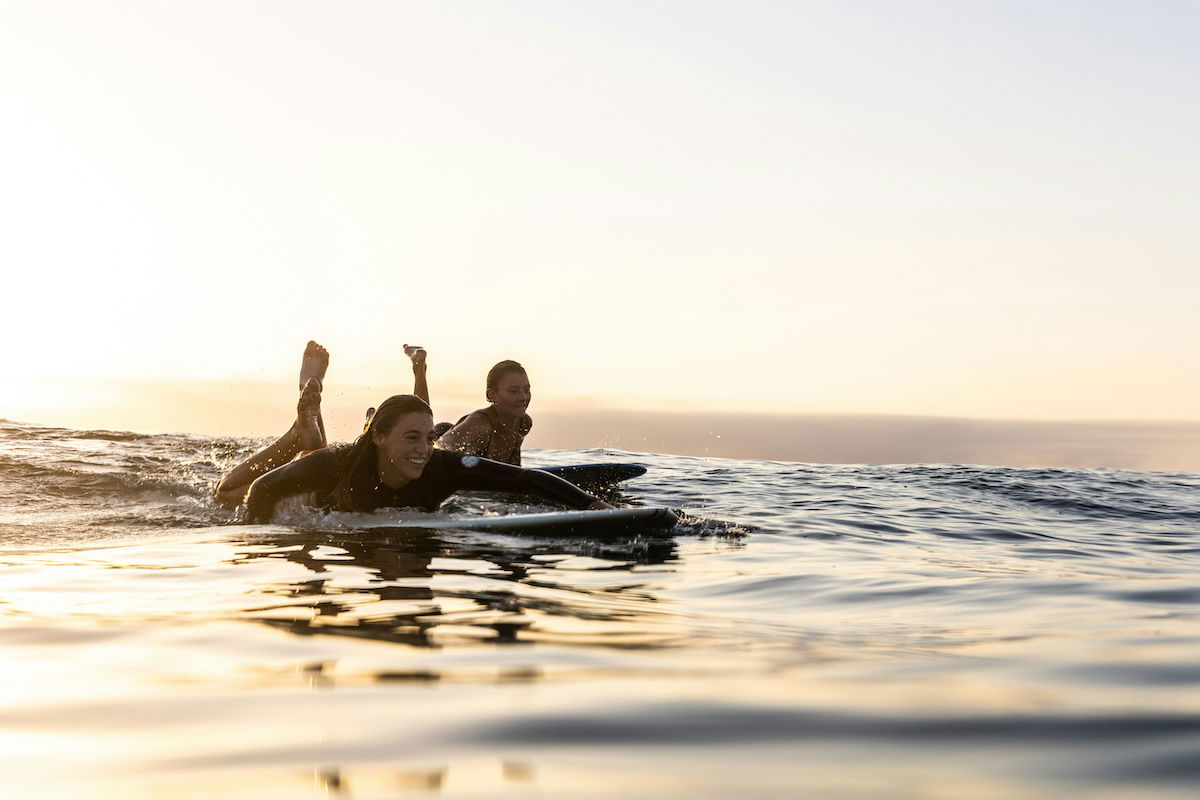
Shot with a Canon EOS R6. 61mm, f/7.1, 1/400 s, ISO 100. Reed Naliboff (Unsplash)
11. Use a Polarizing Filter to Minimize Reflections
Reflections are common when shooting surf photography on a bright, sunny day. As the bright sun hits the water, reflections appear on the surface and in the spray.
You can minimize this in your shots by using a polarizing filter. These filters manage the balance of light entering your lens. Just be sure to use the correct size filter for your lens.
With polarizers, you get great results with deep color and sharp, intense spray. Without a polarizing filter, your shots may look overly bright, and water loses clarity.
A polarizing filter is a valuable tool for many other situations in photography, so keep one in your bag! We recommend the
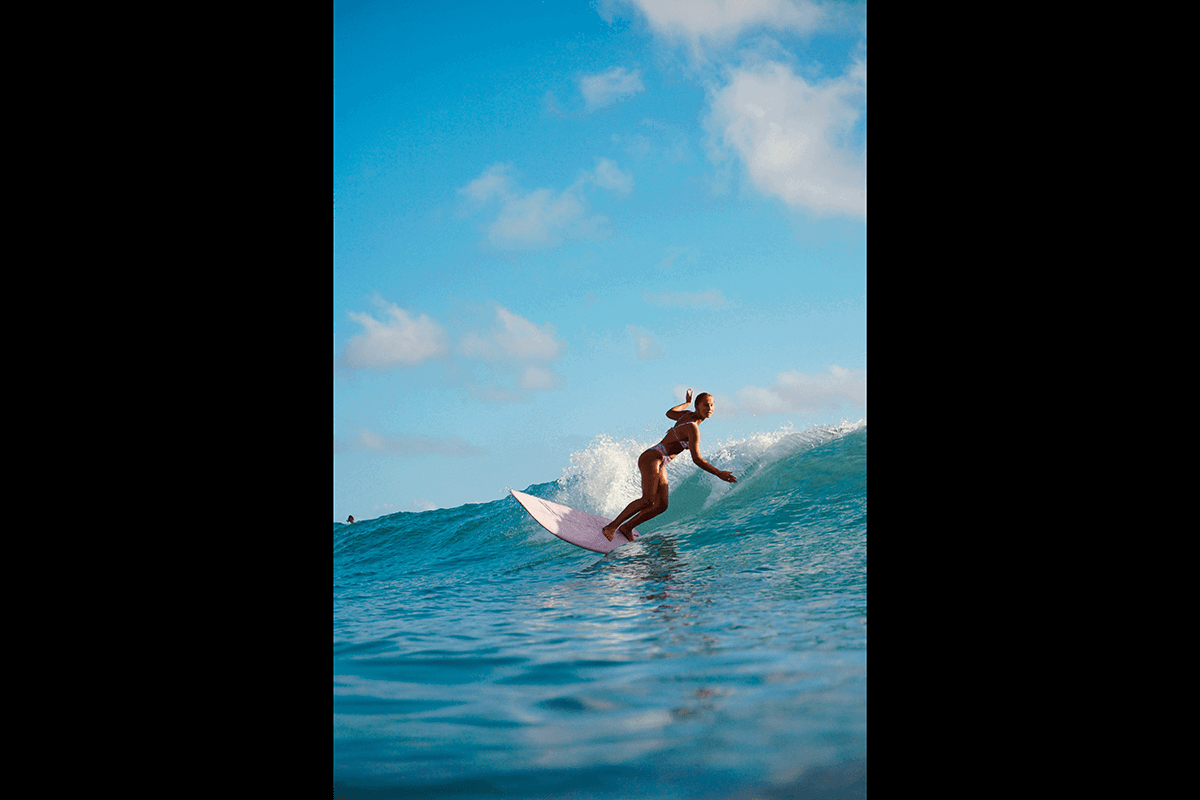
Shot with a Sony a6000. 50mm, f/5.6, 1/1,600 s, ISO 250. Knut Robinson (Unsplash)
12. Shoot at Dawn and Dusk for Best Color and Light
Shooting at dawn and dusk is perfect for getting dramatic, color-drenched photos. As the light changes, you get fantastic color palettes and patterns in the sky.
This can be a great time to experiment with silhouettes and shadows. You also get great backgrounds with clouds and the open ocean.
Great light effects are present in surf spray, and the water has beautiful golden and orange tints. If you’re shooting from the water, you can snap perfect shots of the light through a breaking wave. Shooting manually here can help you gather light and focus best.
There’s something magical about being on a beach at sunset or sunrise. Use the shifting colors and changing light to tell a story. Experiment with the hours before and after sunrise and sunset. You can get shots full of emotion and magic.
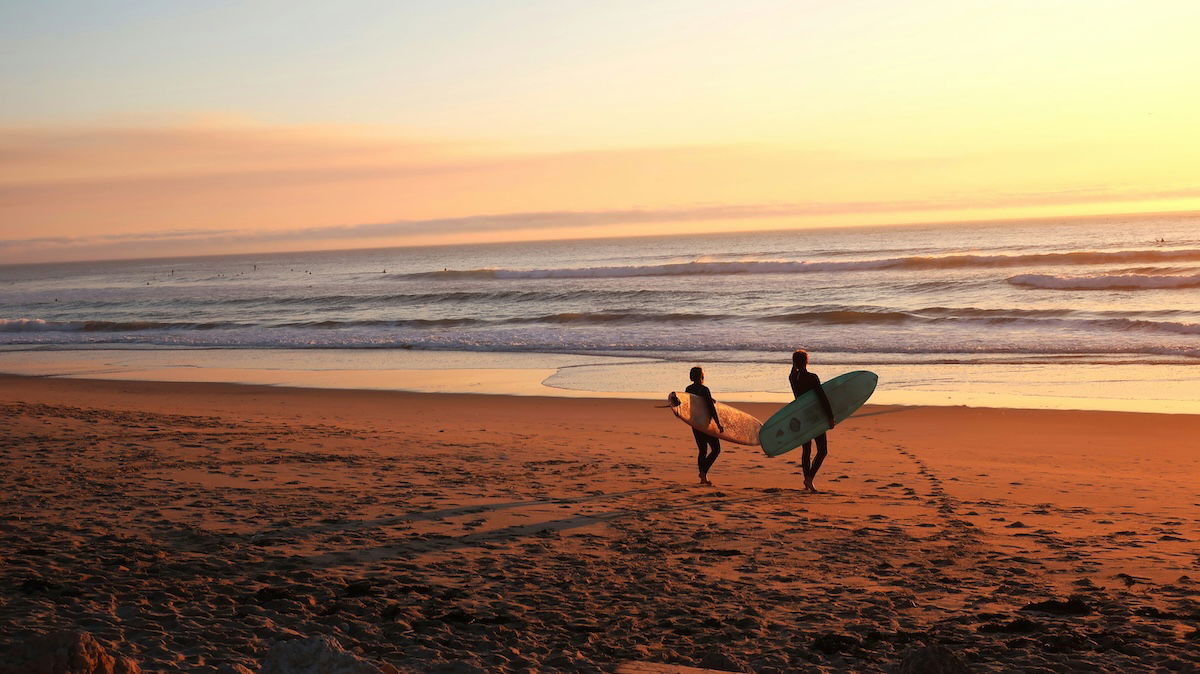
Shot with a Canon PowerShot G9 X Mark II. 18.4mm, f/5.6, 1/400 s, ISO 125. Sacha Verheij
13. Capture Surf Photos Beyond the Action
While the main draw is the classic shot of a rider catching a wave, there’s more out there with surf photography. The locations alone offer the opportunity for excellent seascape shots. You also get fantastic color and dramatic skies if you’re shooting at dawn or dusk.
Surfing is also more than a sport—it’s a lifestyle. Expand your shot list to include life out of the water to add personality to your visual stories. Snap people relaxing or preparing to head out into the surf. You can even snap portraits of surfers.
A good surf photographer captures a surfer’s journey from the beach to the wave. Tell a surfer’s story, from preparation to paddling their surfboard and catching a wave.
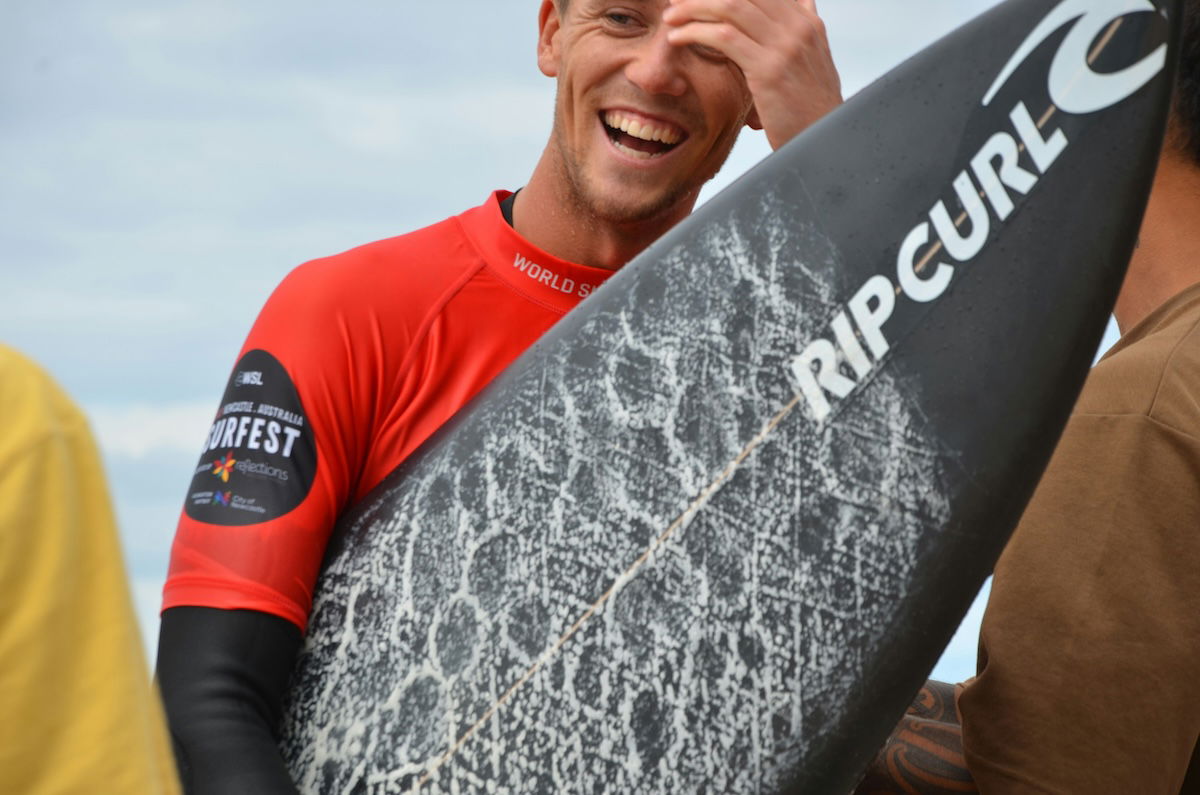
Shot with a Nikon D7000. 105mm, f/8.0, 1/250 s, ISO 100. Kiros Amin (Unsplash)
14. Expand Your Surf Knowledge for Best Shots and Opportunities
While it’s not paramount, knowing a little about surfing helps you plan your surf photography. Different styles of surfing offer various opportunities.
With prior knowledge, you’ll find it easier to anticipate surf action and the direction of surfers. You’ll know what, when, and how to shoot. Surfing culture is also different around the world, so different approaches apply!
It also often pays to connect with your subjects to capture images of surf life on the beach. Opportunities open up when you show an interest and passion for surfing and photography.
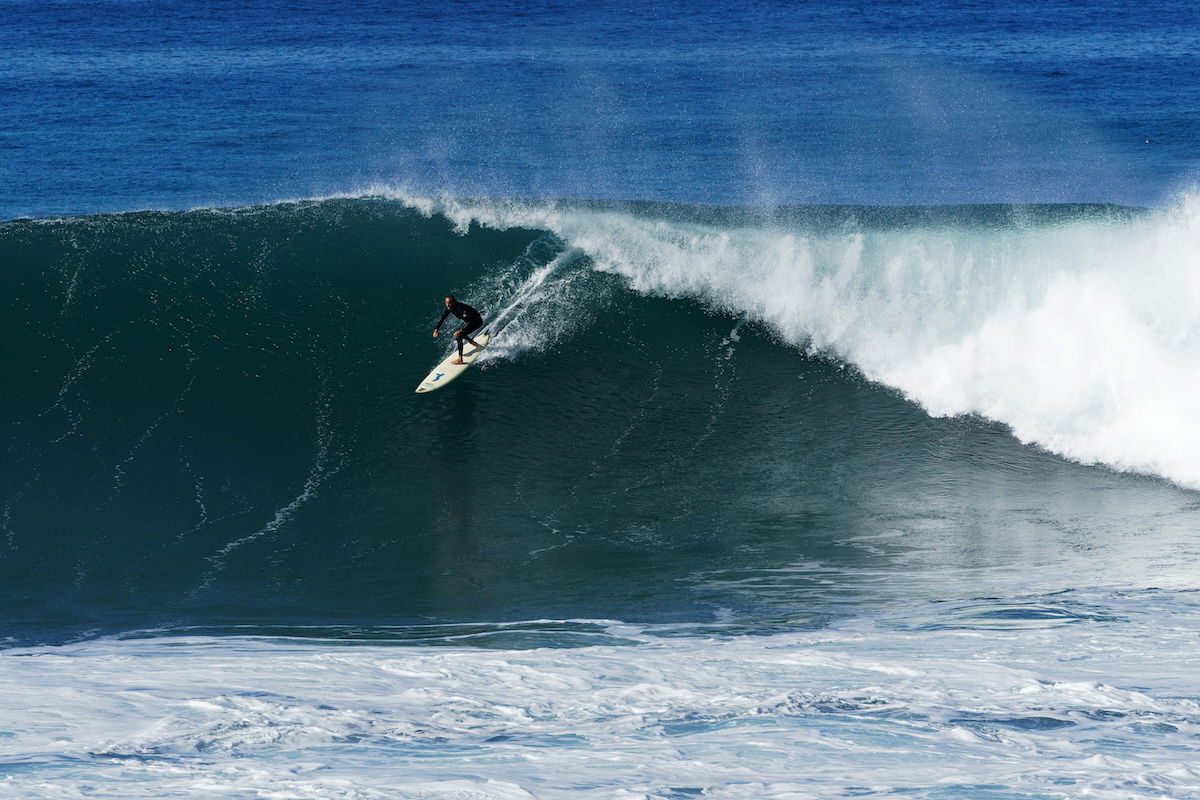
Sony a7R II, 198mm, f/6.3, 1/1,600 s, ISO 200. Colin Watts (Unsplash)
15. Choose the Right Lens for Shot Types
You may be unsure what camera lens you should use for surf photography. It depends on your approach and the type of shot you want.
If you want close-up shots and intense action photos, super-telephoto lenses of 400mm and up are best. A long lens produces detail-heavy, sharp images, even from a distance.
Telephoto lenses like 70-200mm are perfect if you want pulled-back, less intimate shots. They can incorporate foreground and background and also capture more surrounding life.
More creative lenses like fisheye or wide-angle lenses work well if you shoot in the water.
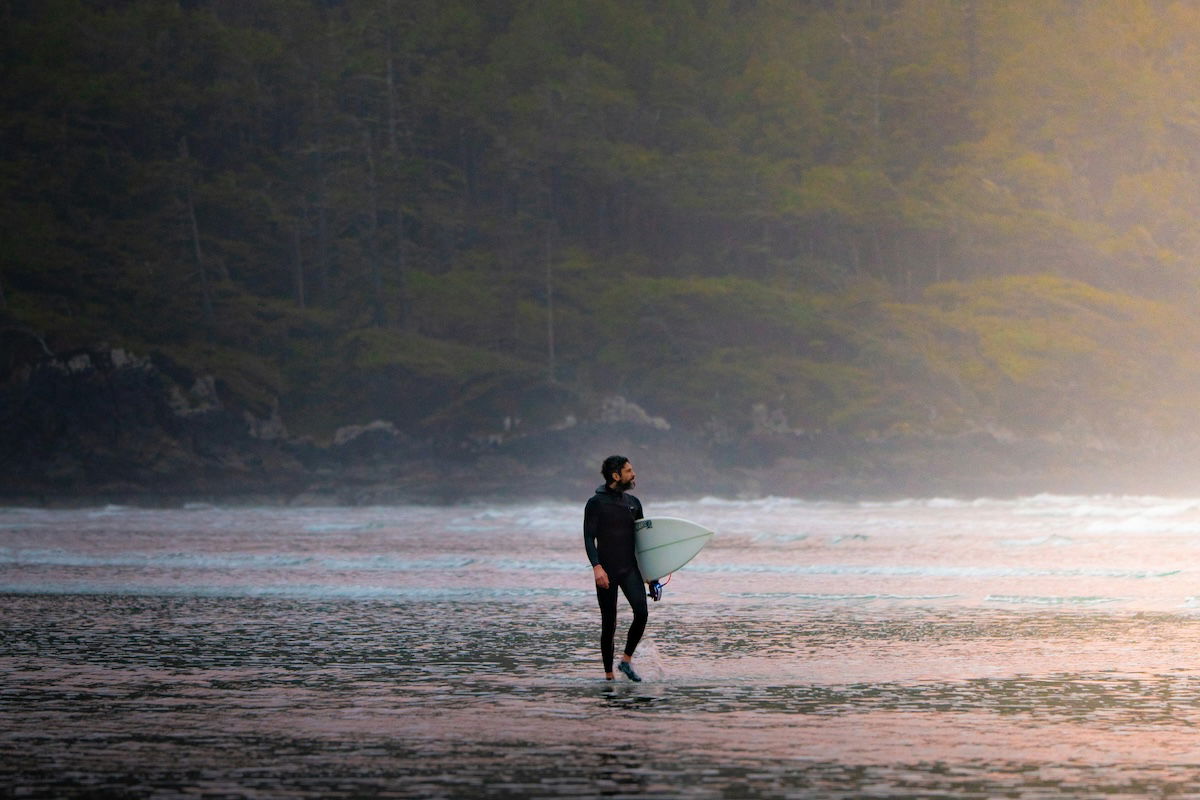
Shot with a Sony a7 IV. 200mm, f/4.0, 1/60 s, ISO 400. Luke Miller (Unsplash)
16. Combine Techniques and Find the Best Surf Spots for Stand0ut Photos
Don’t limit yourself to the commonly seen surf shots. While these look great, your photos will stand out more if they’re unique.
Find a unique angle or combine techniques to get creative. Shooting from the water can yield impressive results. And the unpredictable nature of the sea offers fantastic opportunities.
While you can experiment with color, black-and-white surf photography looks fantastic. Also, don’t be afraid to travel to different surf locations. The best surf spots may not be within easy distance, but the best shots are likely there.
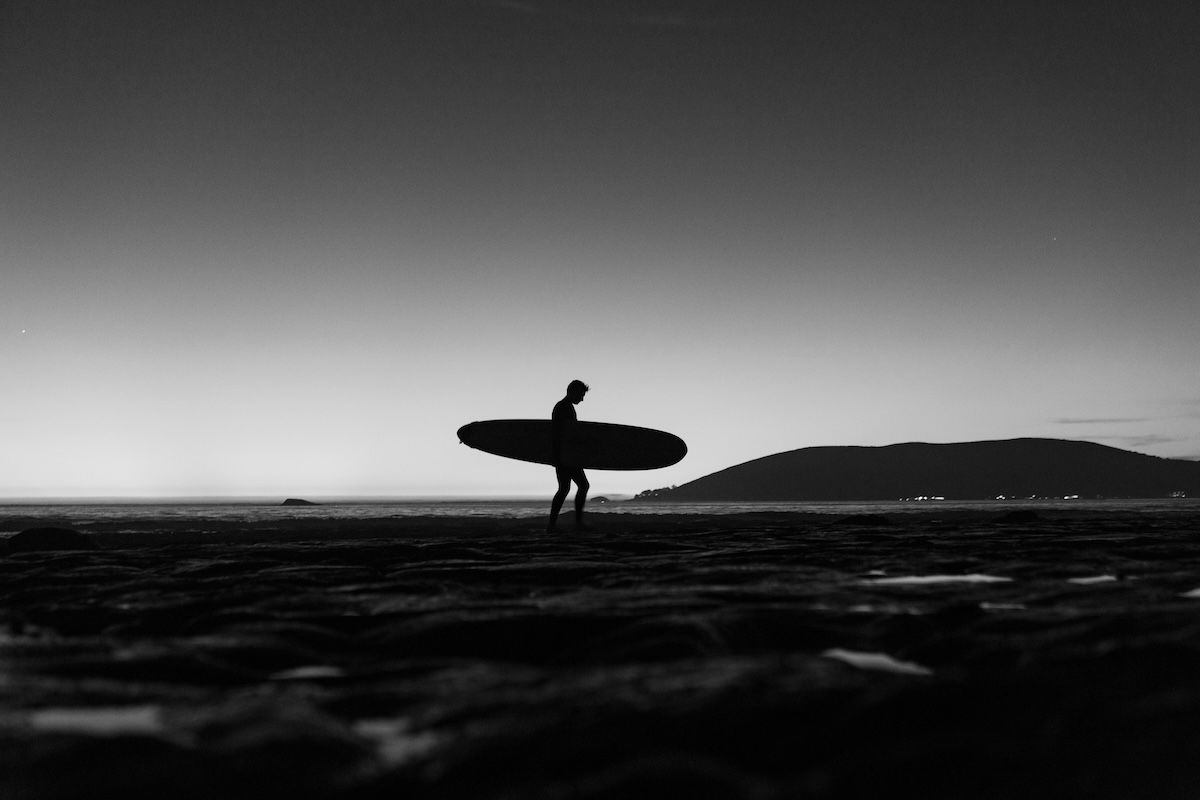
Shot with a Sony a7R III. 51mm, f/2.8, 1/30 s, ISO. 1,000 Jeremy Bishop (Unsplash)
17. Take Safety Precautions When Shooting Surf Photos
Last but not least, think of safety first! Don’t take risks, even if you’re on dry land. Rocks and coastlines can have slippery surfaces, and being in the water can expose you to currents and collisions.
Respecting the power of the waves and currents in the ocean environment is crucial for surf photography. Surf knowledge and situational awareness are crucial for taking epic in-the-water shots.
Proper protective gear is also important. Consider a safety helmet to protect your head and a wetsuit to stay warm in cold water.
Familiarize yourself with the basics of surfing. Know where to position yourself in the water and when it’s safe to shoot.
Also, stay aware of your surroundings. Currents, waves, and surfers around you pose potential hazards when in the ocean.
You could be harmed if you’re unaware of surfing’s dynamics and basic water safety. In this situation, a little knowledge is a must. Make sure you know how to photograph safely before you shoot the water!
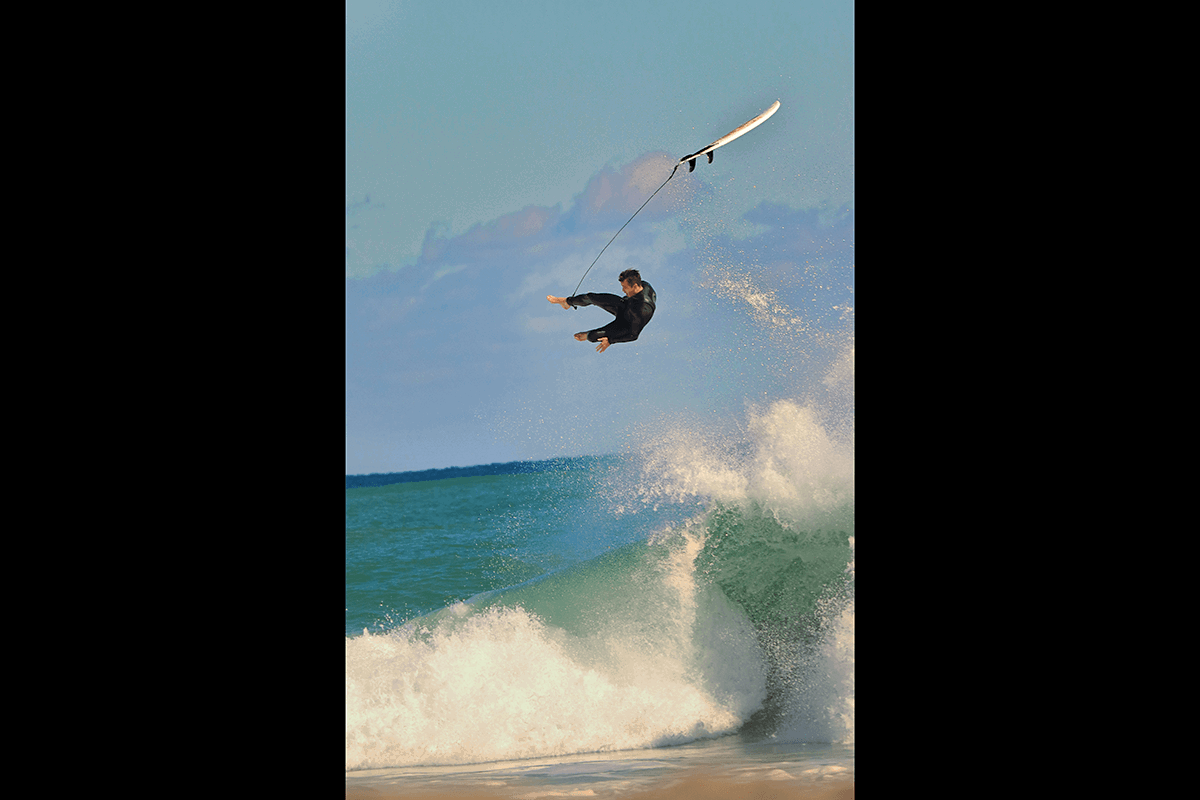
Shot with a Canon EOS Rebel T8i. 250mm, f/5.6, 1/2,500 s, ISO 400. Live Kaiah (Unsplash)
Conclusion: Surf Photography
So, ultimately, how do you take good surf pictures? The answer is all the above, plus practice! As with all other types of sports photography, surf photography isn’t always easy.
You ease into it as you get more familiar with surfing, the lifestyle, and the action. Surf photography is all about telling stories. The beauty of this is that you control telling that story.
Try some of our tips and experiment with new techniques and locations. You’ll ride the waves of success in no time and become a better surf photographer!
If you’re looking for a camera for surf photography, read our articles on the best sports cameras, action ones, GoPros, or GoPro alternatives.
- Master manual mode to capture moments you’re proud of.
- Overcome the frustration of missed shots with quick exposure settings.
- Benefit from visuals with hundreds of images and illustrations.


