TTL flash photography is daunting for beginners. But the list of technical specifications on each flash can feel even more intimidating. For instance, what are TTL and Manual, anyways?
Let’s find out what these two flash modes are and how you can use them with this quick beginner’s guide.
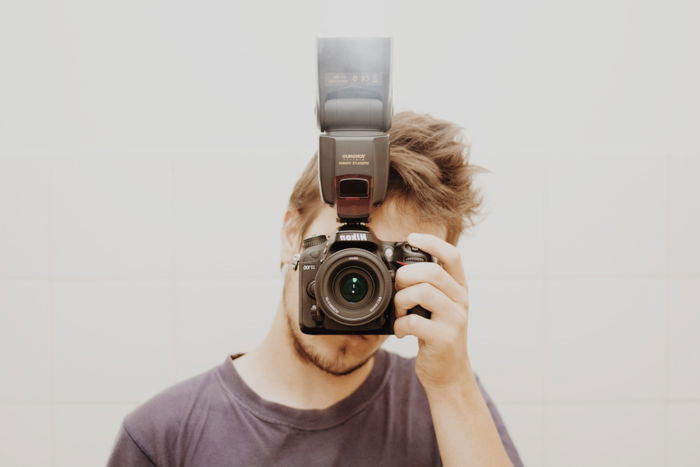
Most people think of flash as the attachment they see on top of cameras. But that’s not the only type of flash out there.
To help you better understand TTL, let’s find out more about the different kinds of flashes that are available to you.
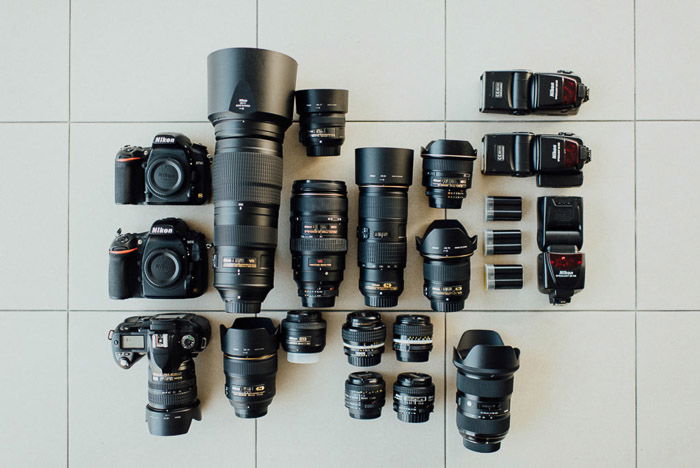
Although these devices look different, they’re all under the category of flash or strobe.
In other words, you can’t call a monolight a Speedlite or vice versa. But you can call either a monolight or Speedlite a flash.
Many Speedlites and monolights feature TTL. So this article applies to both.
It’s most likely that you own a Speedlite. But if you also happen to own a moonlight, feel free to check if it has a TTL feature. That way, you can take advantage of the functionality of your photoshoots.
As you first navigate flash photography, you’ll hear TTL a lot. But what is flash TTL, anyway?
TTL stands for “through the lens.” Consider this flash mode the equivalent of that automatic mode on your mirrorless or digital camera.
In contrast, a strobe without TTL can’t make automatic adjustments. Instead, it relies entirely on input from the photographer.
For TTL to work, it reads the exposure that’s going through the camera’s lens. Hence the term “through the lens.”
TTL automatically uses the camera’s built-in metering system and the distance to the subject. This is sometimes called TTL metering or TTL flash metering.
For companies selling flashes, TTL would often be their top-selling point. TTLs tend to be pricier than manual-only flashes. But many flash options have this feature these days anyway.
The difference between an inexpensive TTL flash and an expensive TTL flash is often light output and features like high-speed sync.

Using flashgun TTL is easier to use than you think. Remember that TTL is an automatic setting. It’s easy to work with because it doesn’t need as much input from you at all.
To use it, simply press your flashgun’s menu button and select TTL. That’s it!
When you press the shutter, your Speedlite puts out the amount of light according to the camera’s exposure reading.
If the scene is dark, the flash output would be intense. If the scene is bright, you can expect a dimmer burst from your Speedlite.
So is TTL flash necessary? The simple answer is yes.
If you’re running and gunning all the time, you don’t want to be fidgeting with your Speedlite. TTL changes the flash output for you. So it lets you confidently take pictures without having to worry about under or overexposing your shots.
Like auto mode on your camera, TTL is easy to use. But it’s difficult to customize. Because your device chooses the settings for you, it’s challenging to adjust the lighting from one shot to another.

TTL isn’t wholly impossible to adjust. Just like you can use exposure compensation on a semi-automated mode on your camera, TTL flashes have what’s called flash compensation too.
Flash compensation takes that automatic level set by the strobe. Then it can add more or less depending on how you set it. Just like exposure compensation, this feature is measured in fractions of a stop.
A -3 flash compensation turns the flash down just a bit. A +1 adds a full stop of light to the image.
Flash compensation is an excellent tool for photographers that are new to flash. It’s also perfect for shots where the distance to the subject changes quickly. The downside is that it’s not as customizable as a fully manual flash mode.
Yes, it does. However, its effectiveness depends on the situation.
Exposure readings for TTL happen through the camera’s lens.
So what would happen if you place your Speedlite in an area that has different lighting from what the camera sees? Then you end up with either an under or overexposed image.
To make sure you get the correct exposure, place your flash close to the camera. That way you can make sure the output from your flash closely matches that of your camera’s exposure reading.
If you want a more precise output, then perhaps it’s better to use manual flash instead. Let’s scroll down to learn more about how to use it.

Some TTL flashes have several TTL modes. For example, Canon flashguns feature A-TTL and E-TTL, among other features.
E-TTL means “evaluative through the lens.” It uses a quick pre-burst of light before the actual flash. It does this to drown out the ambient light that may interfere with the exposure. This pre-burst fires quickly and close enough to the main burst that many don’t even notice it.
E-TTL is useful in scenes where other bright light sources are competing with your strobe. So it’s perfect for concerts, weddings, and other events.
Like the manual mode on your camera, manual flash offers the most control over your images. With manual mode, the photographer chooses the amount of light to expose a shot. Regardless of what the camera settings are.
Manual flash power is measured in fractions. A 1/1 setting is the brightest light that flash can send out. A 1/2 is half that, a 1/4 is a quarter, and so on.
Different flash models will have different flash ranges. Some will power down to 1/64, some to 1/128, and others to 1/250.
By controlling the strobe’s power, you can customize the look of the light and shadows in the image.
Mastering manual flash takes practice and patience. Unlike auto mode, your Speedlite won’t give you any suggestions on what settings to use at all. It’s all up to you to adjust everything.

You can learn manual mode through practice and experimentation. Many photographers have a go-to setting for each type of image. They can then raise or lower the flash from there as needed.
Another option is to use a handheld light meter to read the light in the scene. You can use that data to determine your correct exposure and flash settings.
Typically, handheld meters allow for more accurate readings than that of handheld flash.
Some photographers find it just as easy to start with a specific power such as 1/32 (this is an arbitrary number, you can choose any setting you want) and take a picture. They then adjust the flash settings higher or lower based on that first image.
Manual mode isn’t the only way to control the flash. The camera’s exposure settings also impact the flash system.
Narrowing the aperture will create an effect similar to lowering the flash output. The light on the subject will appear dimmer.
If the flash power remains the same, adjusting the aperture will impact the brightness of the flash.
To balance the flash with ambient light, the shutter speed needs to be correct. If your subject is well-lit but your background is dark, you need to decrease your shutter speed.
However, it’s worth noting that shutter speed has a limit when it comes to flash.
In most cameras, the shutter speed limit is either 1/200 or 1/250. If you go beyond those values, you’ll see black bands on your image.
So why does this happen? If you go beyond 1/200 or more, the shutter will not be in sync with the flash anymore. That’s why you see those black bands.
If you want to get rid of this issue, you can try high-speed sync.

Let’s start with ISO.
ISO’s impact on flash is easy to remember because it’s the same as using ISO without flash. Adjusting the ISO makes the photo brighter or darker. It impacts the ambient light in the background just as much as the light from the flash.
In manual mode, you can move the flash or the subject farther away if the flash is too bright. And if it’s too dim, you can quickly move it closer to your subject.
You can further control your flash using flash modifiers, like softboxes, and diffusers.
Shooting with an unmodified flash creates hard light with harsh shadows. Using a diffuser or a softbox together with a lower flash power will create a softer, more flattering light. (I use and recommend the MagMod diffuser).
If you don’t have a diffuser, you can also bounce your light off a neutral-colored wall or ceiling to soften the light. Bouncing the flash off a wall will create dimensional lighting. It’s almost as if you had placed the flash where that wall was instead of on the camera.
So if TTL is like the auto mode on your camera, you should always shoot in manual mode, right? Not so fast. Each flash mode has a unique set of pros and cons. You might use TTL for one scenario and manual for another.
TTL flash is excellent in scenarios where the distance between the flash and the subject changes fast. If you are photographing a bride walking down the aisle in manual flash mode, the lighting will change as your subjects get closer to you. As a result, you’ll end up with wildly inaccurate exposures.
Using TTL automatically adjusts the flash output for you as the distance between you and the camera changes.
Manual flash is best in scenarios where you want the most control over the light source. It’s also useful if the distance between the subject and the flash doesn’t change rapidly.

In TTL mode, it’s difficult to recreate the same lighting pattern twice, because you don’t know what settings the TTL mode decides to use for you.
In most cases, photographers who understand manual mode stay in that mode a majority of the time. They switch to TTL only when they can’t change the flash settings fast enough for the way the subject is moving.
If you’re annoyed that your flash is making dark shadows behind your subjects, a manual flash and a diffuser will make a dramatic difference in your images.
But, TTL still has a place for beginners and moving subjects mainly when used with flash compensation and a flash modifier. TTL is good for getting your feet wet with flash and sticking with a simple flash compensation to adjust the flash up or down.

TTL’s automatic flash adjustments have a place with moving subjects and photographers new to flash. But more often than not, the manual flash mode will produce better results.
However, understanding manual flash is only one piece of the puzzle. You should also understand how to use a diffuser, how exposure settings impact your flash, and for the most versatility, how to use an off-camera flash.
In the end, choosing between TTL and manual isn’t a matter of preference. Instead, it’s all about your lighting scenario.
Do you want to get better at flash photography? Then you need to master both these modes to get perfect results every time.
If you’re eager to learn more about basic photography techniques, check out our ebook Photography Unlocked.