Zooming photography is a great way to add impact and excitement to your photos. By moving the camera closer or farther away from the subject while you take the picture, you can create a sense of depth and drama that will make your images stand out from the crowd. Here are four easy steps to help you get started.
Zooming Photography: What is a Burst Photo?
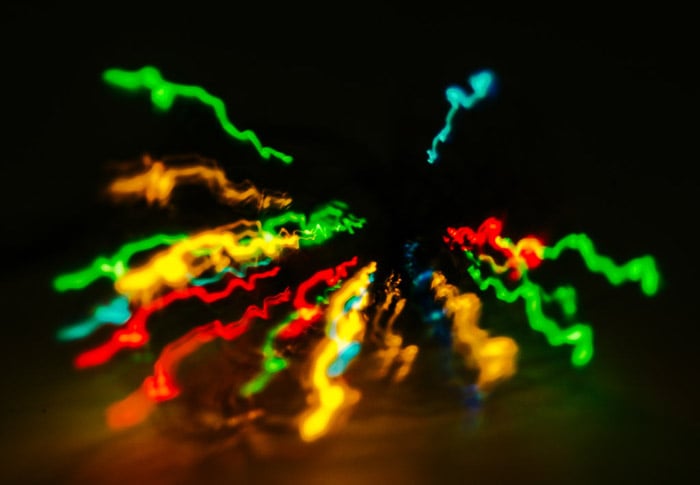
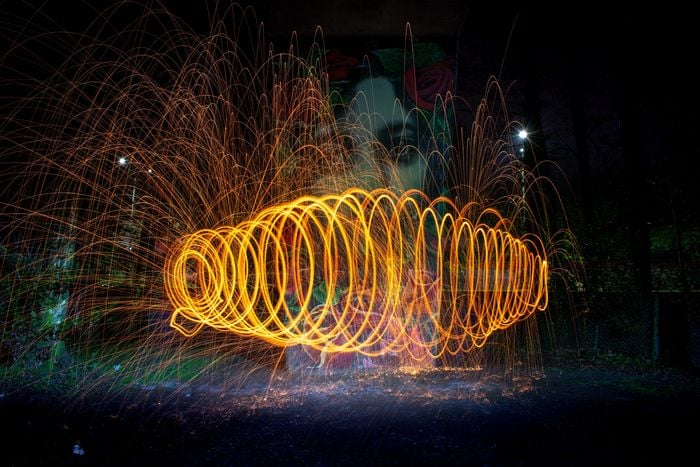
Simply put, a zoom burst is looking through a tunnel where everything in your peripheral is blurry.
You can use it to produce creative blur or exaggerate movement in your images. The burst refers to the exploding effect that your lens creates while it's moving.
Zoom burst image are an effective way to direct the viewer’s eye since the center is sharper than the corners.
Zoom burst photography involves you zooming in or out while the shutter is still open.
Here’s everything you need to know, step-by-step.
What Lens Should You Use for Zoom Bursts

The first step in creating zoom burst photos is using the right lens. Sadly, you can't produce the effect with prime lenses since they have a fixed focal length. In other words, they don't allow you to zoom in at all.
The good news is you already have the perfect lens to use in the form of your kit lens. It’s perfect for zoom bursts since it allows you to zoom in and out.
A typical kit lens has variable focal lengths from 17mm-50mm or 55mm. They’re not too long, but enough to create short streaks.
If you want the blur to look more prominent, consider using a larger zoom lens as well.
Why? Since it takes longer for light to travel through its elongated barrel, you'll have more time to produce the streaks you need. You’ll have longer streaks as compared to a regular kit lens.
Most people start with 70mm-300mm since it's often the cheapest telephoto available. But you can also use options like 18-200mm or 100-400mm.
Any focal length works as long as it lets you zoom in or out.
Shoot in Manual Mode to Control Every Aspect of Your Zoom Burst Photos
This may sound intimidating especially if you never tried it before. But in reality, this setting simply lets you select your aperture and shutter speed instead of the camera doing it for you.
But how will you know which setting to use? If it's bright outside, start with f/22 for aperture and 1 second for shutter speed. If it's dark, go down to the next option f/20 and 2 seconds.
Keep lowering the values if the lighting still seems off. Once you feel that you have the proper exposure, then you’re ready to start shooting.
Remember that every camera has a particular method of letting you change the camera settings in Manual Mode. So consult your manual before using your camera.
Use a Slow Shutter Speed to Create the Blur Effect
Twisting the zoom lens alone is not enough to create beautiful zoom burst photos. The real secret in producing the effect is using slow shutter speed.
When you’re using long shutter speeds, your camera records movement as a blur since the aperture stays open longer. So when you zoom in with your lens, the light would register as bursts in the image.
Setting your shutter speed between 1 to 5 seconds should be enough to produce the zoom burst photographic technique. Especially since your sensor needs about that much time to capture the moment you twist the lens.
Knowing the right shutter speed is a matter of trial and error. If you're shooting in daylight, try about 2 or 1 second to avoid the danger of overexposure.
When shooting at night, feel free to select 3 seconds or longer.
The length of your zoom lens is also going to be a factor in choosing your shutter speed. Remember how long it takes you to zoom in to your subject all the way.
If it takes more than 1 second, then start with 2 or 3 seconds as your shutter speed.
Stick to Small Apertures to Avoid Overexposed Photos
Since your exposure time lasts a second or more, you'll need to limit the light coming in. Otherwise, you'll end up with overexposed photos especially if you're shooting in the daytime.
To solve this problem, you should use smaller apertures between f/16-f/22. They should be small enough to let you use slow shutter speeds without blowing out your exposure.
In most cases, a lot of photographers avoid narrow apertures such as f/22 due to lens diffraction.
This phenomenon causes images to be blurry because the lens opening is too small. But it's not going to be an issue with zoom burst since you're intentionally blurring your photo anyway.
Of course, you don't have to use small apertures for your zoom blur photos all the time. When you're shooting at night, and there's not enough light, feel free to open up your aperture. You can even use f/2 or f/1.8 if you want.
The value you choose doesn’t matter as long as you don’t end up overexposing your image.
Add an ND Filter If Your Images Are Still Overexposed
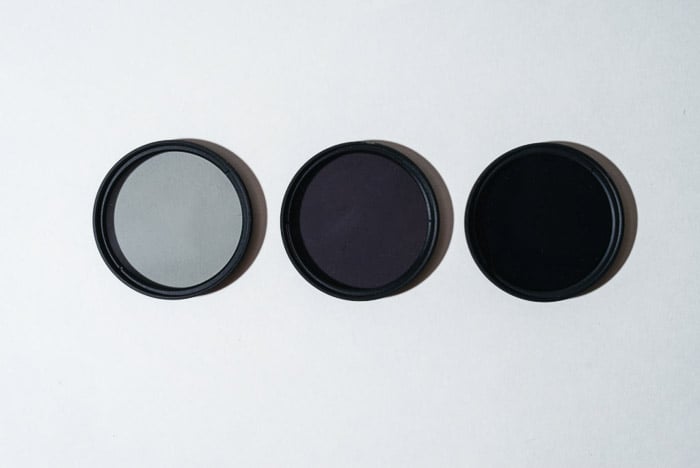
Sometimes, you could overexpose your photos even when you’re using a small aperture. To solve this issue, try attaching a neutral density filter to your lens. Think of it as a pair of sunglasses that blocks extra light, so it's not too bright.
There are expensive filter sets out there, but you can get one for as low as 20 dollars. So think about investing in them if you’re thinking of doing plenty of zoom burst photos.
There are two main types of ND filters you can buy. The first one is a kit with several glasses with different gradations. The second one is the variable ND filter.
It’s a single piece of optics that you twist to make your photos darker or brighter. Both of them work more or less the same, so it's a matter of which option you prefer.
Most kits include an ND2, ND4, and ND8 filter. ND2 is equal to narrowing your aperture to one stop. So if you're using f/22, an ND2 would make everything appear like the aperture you used was f/23.
ND4 can reduce your exposure to two stops, and ND8 three stops.
You can buy even more options if the ones you have aren’t enough. You can even get up to ND64 which reduces light by six stops.
If it's too bright, use an ND8. And if it's getting dark out, consider snapping on an ND2, instead.
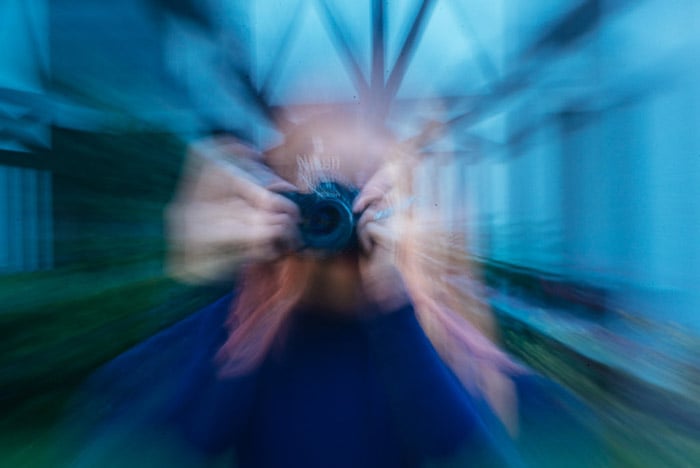
Keep Your Subject in the Center for a Sharp Focus
When you do zoom burst photos, only the center is going to be in focus. That's why it makes sense that you place your main subject in that same position as well.
If you're taking photos of a static subject, feel free to take test shots to make sure you're in the right spot.
To ensure your subject is sharp, turn off autofocus and zoom in all the way. Next, focus your lens and zoom out.
Don't worry if everything looks blurry in your viewfinder. The scene will look normal again as soon as you twist your lens.
For moving objects, set your focus to infinity. It won't be that hard to keep everything sharp since you're using a narrow aperture, anyway.
Once your subject is in the frame, zoom in and take a picture.
Get Creative By Zooming In or Zooming Out
Learning how to zoom with burst shots can be tricky. It takes a while to get used to the twisting motion with the lens. Since you have to do it fast, it can throw off your focus if you're not careful. So practice before you take a photo.
Start with static objects first. That way, you can take photos while standing still. Once you're comfortable twisting your lens, you can start shooting moving subjects.
It will help a lot if you use a tripod in both situations to avoid camera shake. Consider also using a shutter remote release.
You can either zoom in or out when you're doing burst shots. The result is going to be more or less the same. The only difference is the appearance of your zoom burst.
When you zoom in, the burst looks like they're headed towards the subject. When you zoom out, the streaks appear to be moving away from it.
Feel free to use either photography technique to achieve the zoom burst effect you want.
Conclusion
Zoom burst is a useful technique you can try no matter what type of photography you do. You can use it to add an abstract feel to your cityscapes or add some action to your sports photos.
What makes it remarkable is that you can create zoom burst photos without any special equipment.
Next time you encounter photos that look boring, all you need is to twist that zoom ring to make everything more interesting.
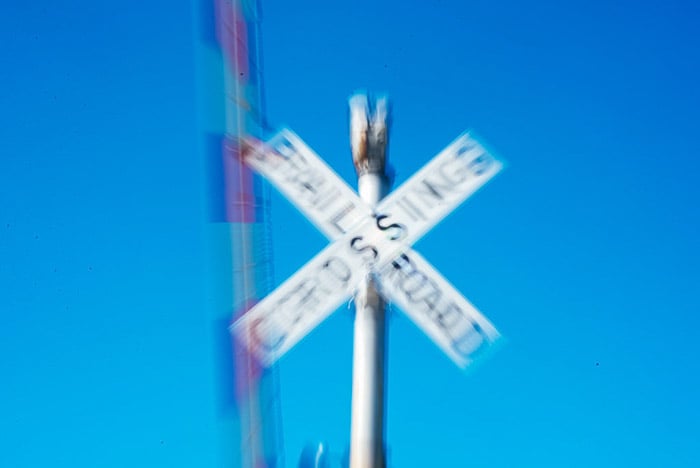
Some ideas to try with this zoom blur technique are neon signs or stained glass windows.
If you’ve already tried zoom burst photography, show us your results in the comments section!