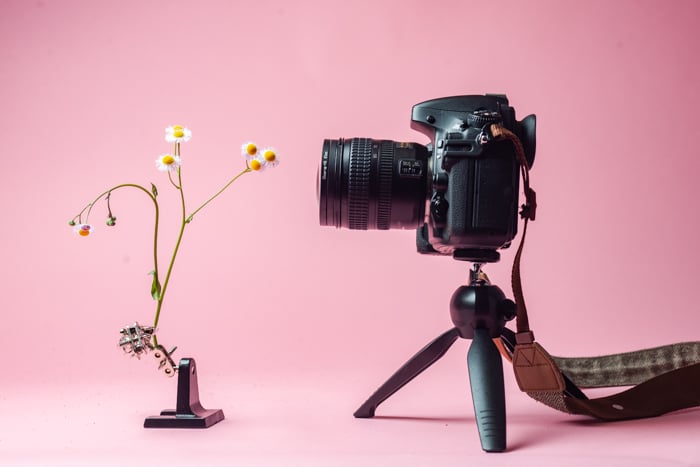
Macro photography is a genre that can transport us to another world. It gives photographers a unique ability to capture elements that aren’t otherwise visible to the naked eye. Macro photography gives us a new perspective on the world and allows us to see interesting objects or animals in incredible detail.
Today, we will give you all the knowledge you need to get started with macro photography. We will discuss everything from equipment to camera settings. By the end of this article, you will be confident in taking your own incredible macro photographs.
What Is Macro Photography?
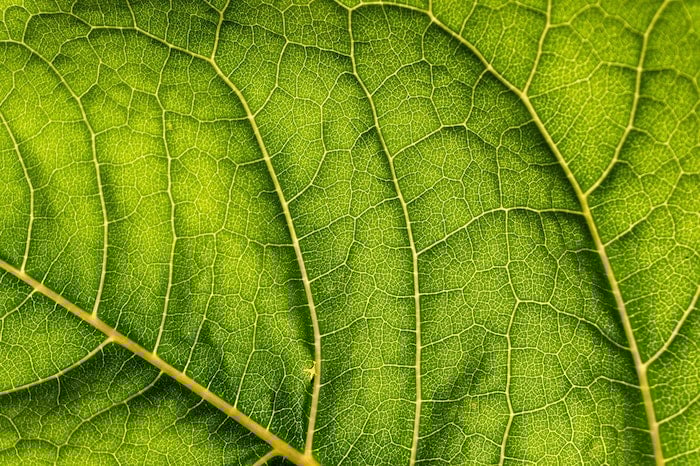
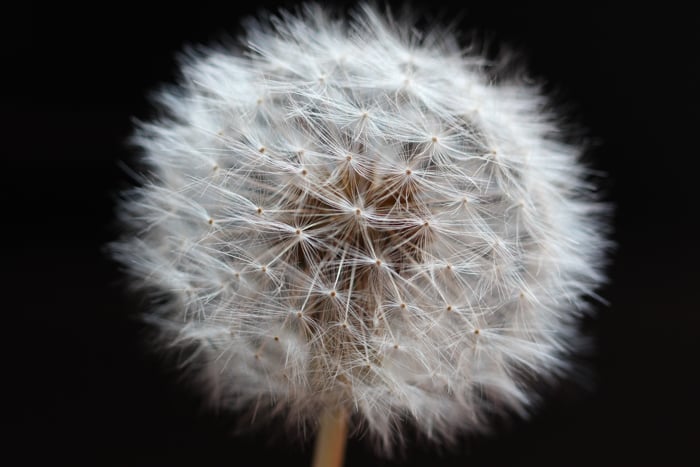
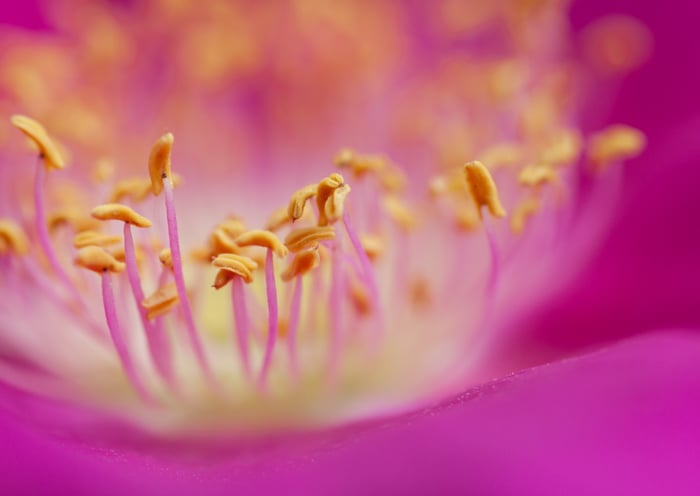
Macro photography involves taking pictures of your subject very close up at a life-size 1:1 ratio. This can highlight specific details of an object or capture a subject that is too small for our eyes to appreciate.
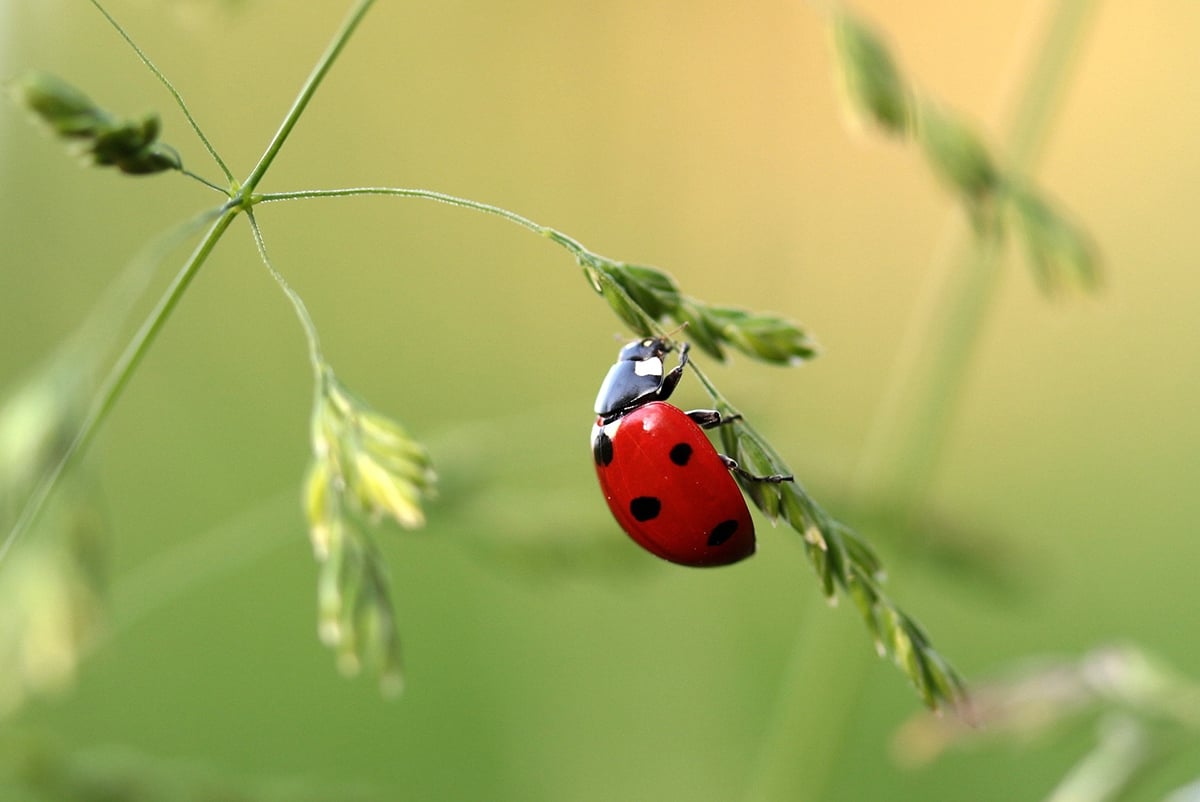
Flowers or small insects make perfect subjects for macro photography. This is because we often don’t notice intricate details with our naked eye.
Let’s now dive into the best ways to get started in macro photography. We will discuss cheap options to help you decide whether you like the genre before spending money on specialist gear. We will also teach you how to make the most of your light and environment.
Getting Started With Macro Photography
Macro photography is a fascinating genre that doesn’t have to be expensive. You can start with creative macro photography using affordable accessories like screw-on diopter lenses, extension tubes, and macro bellows. These attach to your existing lenses and allow you to focus closer, magnifying your subjects.
Another budget-friendly option is reversing your lens using an adapter that converts the filter thread into a lens mount. Wide-angle prime lenses with fast apertures work best for this technique. Crop sensor cameras also provide an advantage in macro photography by bringing subjects closer due to their crop factor.
Lighting is just as important as magnification in macro photography. Ring lights and flashes with softboxes provide soft, consistent illumination for your tiny subjects. By using these creative macro photography techniques and accessories, you can explore the fascinating world of close-up photography without breaking the bank.
Understanding Macro Photography
There are certain macro photography techniques that allow you to accentuate your subject. These range from choosing the right camera settings to the background you use. Knowing the right techniques will dramatically improve your macro results.
This next section will guide you through different points to consider. We will look at focusing, the difference between macro and micro photography, and how to pick a good background.
Camera Settings and Exposure
Choosing the right camera settings is key for stunning macro photos. Use Manual mode to control the exposure triangle, which consists of aperture, shutter speed, and ISO. A small aperture like f/11 gives a deep depth of field to keep the whole subject sharp.
Use a fast shutter speed of at least 1/100 s to avoid blur from camera shake or subject movement. Keep the ISO low to avoid noise, but don’t be afraid to raise it if you need to. And because the depth of field is so shallow, manual focus is best for precise control.
If you want to learn more about settings for macro photography, we have a detailed guide that covers everything you need to know.
Macro vs Micro
Close-up photography, macro photography, and micro photography all involve capturing subjects up close, but they have distinct differences. Close-up photography is a general term for taking photos at a short distance from the subject, and this can be done with most lenses.
Macro photography involves taking extremely close-up photos of small subjects at a 1:1 ratio, where the image on the camera sensor is the same size as the subject in real life. This requires specialized lenses or attachments to achieve the necessary magnification.
Micro photography goes even further, capturing subjects at a microscopic level that cannot be seen with the naked eye. This requires the use of a microscope with magnifications typically ranging from 7 to 100x or more. To learn more about the differences between macro vs micro photography, check out this in-depth article.
Focusing
Getting sharp macro photos can be tricky. The depth of field is very shallow when shooting close-ups, so it’s important to understand how to adjust your focus. Use manual focus for the most accuracy, as autofocus sometimes struggles with macro shots.
To get more of your subject in focus, use a smaller aperture (higher f-number) to increase the depth of field. You may also need to adjust your angle to change the plane of focus. Using a tripod will help you avoid camera shake and get sharp photos at slower shutter speeds.
Mastering macro focus takes practice, but these tips will help you capture stunning close-up shots.
Considering the Background
Backgrounds are key when capturing stunning macro photography. A good background will take your macro photos to the next level, while a bad background will make them fall flat.
The best macro backgrounds tend to have no distracting elements. Find spots of consistent color behind your subject, like a deep green tree or a patch of golden wheat. Position your subject in front of these areas for a nice, blurred background that doesn’t distract from the main subject.
Use a wide aperture like f/2.8 to achieve a beautiful background blur. You can also increase the distance between your subject and the background for an even better blur effect and better background separation.
For more tips on interesting macro photography backgrounds, check out our in-depth guide.
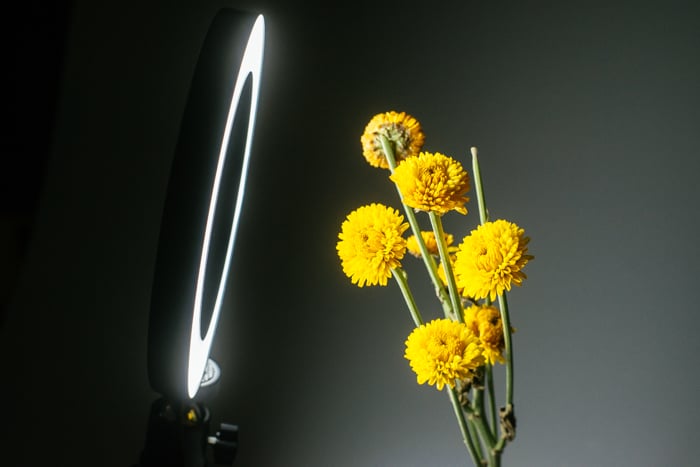
Lighting Your Macro Photography Shoot
Lighting is a key component in macro photography. As we shoot subjects our naked eye struggles to see, we need as much light and detail as possible. You can use both natural and artificial light with macro photography, and each has its advantages.
As we will shoot close-ups of our subjects, we want to ensure our body or camera isn’t blocking the light source. Let’s explore the different ways that lighting can affect our images. We even have a guide on diffusing your flash for even and soft lighting on your subject.
Use Light to Your Advantage
Lighting is one of the main challenges in macro photography. Getting the light just right without blocking your subject can be tricky. But with the right techniques and accessories, you can get perfect macro shots every time.
When shooting outdoors, aim to take photos in the morning when the sun is about 45 degrees overhead. If you see ugly shadows, wait a few hours or find a shaded area. You can also use a reflector to bounce light and fill in unwanted shadows.
If you are indoors, try shooting by a window for soft, even lighting. If it’s dark, a simple desk lamp with an adjustable neck works well. Experiment with different light bulbs to get the color temperature you want.
For an even brighter light source, incorporate flash, which can allow you to shoot at faster shutter speeds. To learn more about macro photography lighting, check out our in-depth guide.
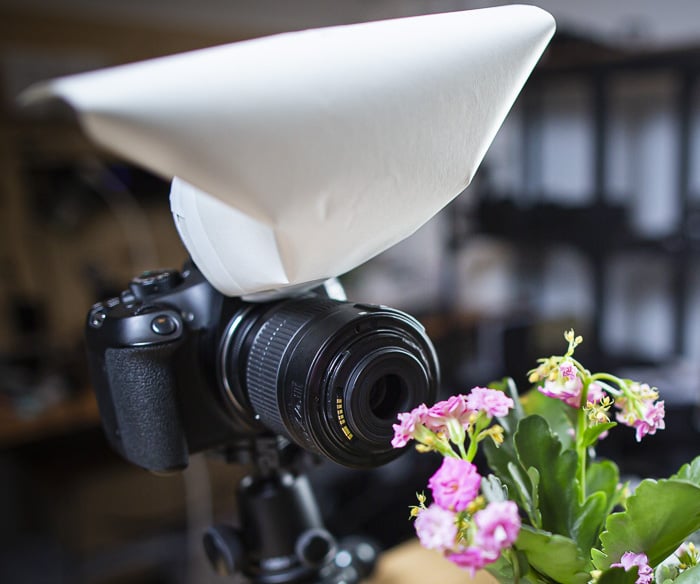
Make Your Own Flash Diffuser
A DIY flash diffuser is a simple yet effective tool for macro photography. It softens harsh light from your camera’s flash, resulting in more even and flattering lighting on your subject.
To make one, you’ll need white paper, tape, scissors, and a hollow tube like an empty Pringles can. Cut the tube to match the length of your lens barrel, leaving one side slightly longer to direct light downwards. Fold a piece of white paper and tape it to the tube, then attach the diffuser securely to your camera’s pop-up flash.
This cheap and easy DIY diffuser can significantly improve your macro lighting. It’s a fun photography project that boosts creativity and leads to better macro photos. For more information, read our full article on DIY flash diffusers.
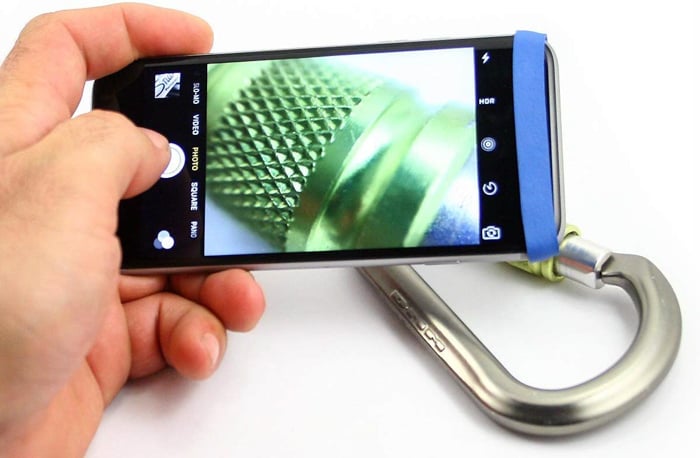
Macro Phone Photography Tips
Smartphones now have the ability to take great macro pictures. Even if this feature isn’t built-in, we can use accessories to get incredible macro photographs. Phone macro photography is great because we get a big screen to see our images. It is also cheap as we don’t have to buy a lot of specialist equipment.
Another benefit of phone macro photography is that you can shoot and edit from the same device! Whether using a built-in editing software or a professional one like Adobe Lightroom, you can tweak your images to get the most detail possible. You’re also able to share the images online or on social media in an instant!
Macro on Your Phone
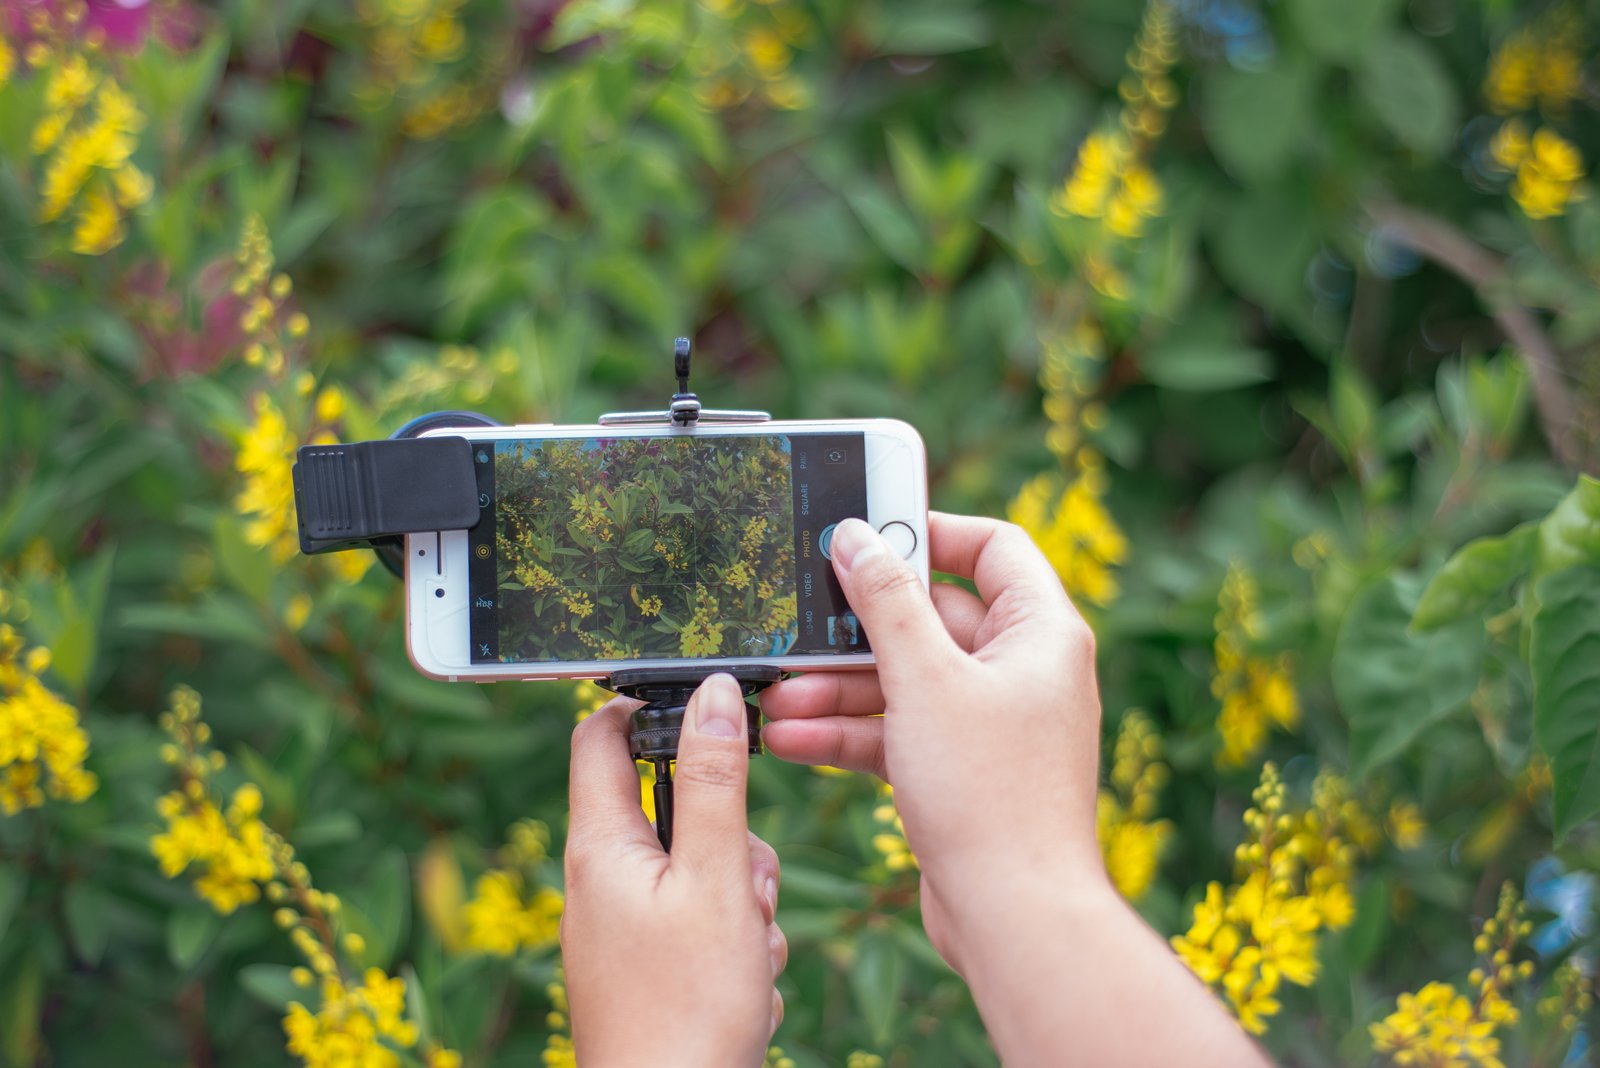
iPhone macro photography can be challenging without the right knowledge. But with a few simple modifications, you can turn your iPhone into a great macro photography tool. iPhone macro photography can produce beautiful pictures that rival those taken with a modern camera.
Get a clip-on macro lens to take extreme close-ups. Attach it properly to avoid vignetting and get close to your subject for sharp focus.
Use a tripod and remote shutter to minimize movement and shoot several photos to capture the right moment. iPhone macro photography is super convenient because you can edit your shots right on your phone with a photo editing app.
Phone Accessories
When looking for the best macro lens for iPhones, you have many choices. Most modern smartphones have built-in wide-angle and telephoto lenses but lack a macro lens. The APEXEL 2-in-1 Cell Phone Lens is an excellent macro lens attachment for taking close-up photos with your iPhone.
Whether you’re photographing insects, flowers, or food, a macro lens attachment allows you to capture stunning details you’ve never seen before on a smartphone. To learn more about macro lenses for iPhone photography, check out our in-depth guide.
Macro Photography Ideas
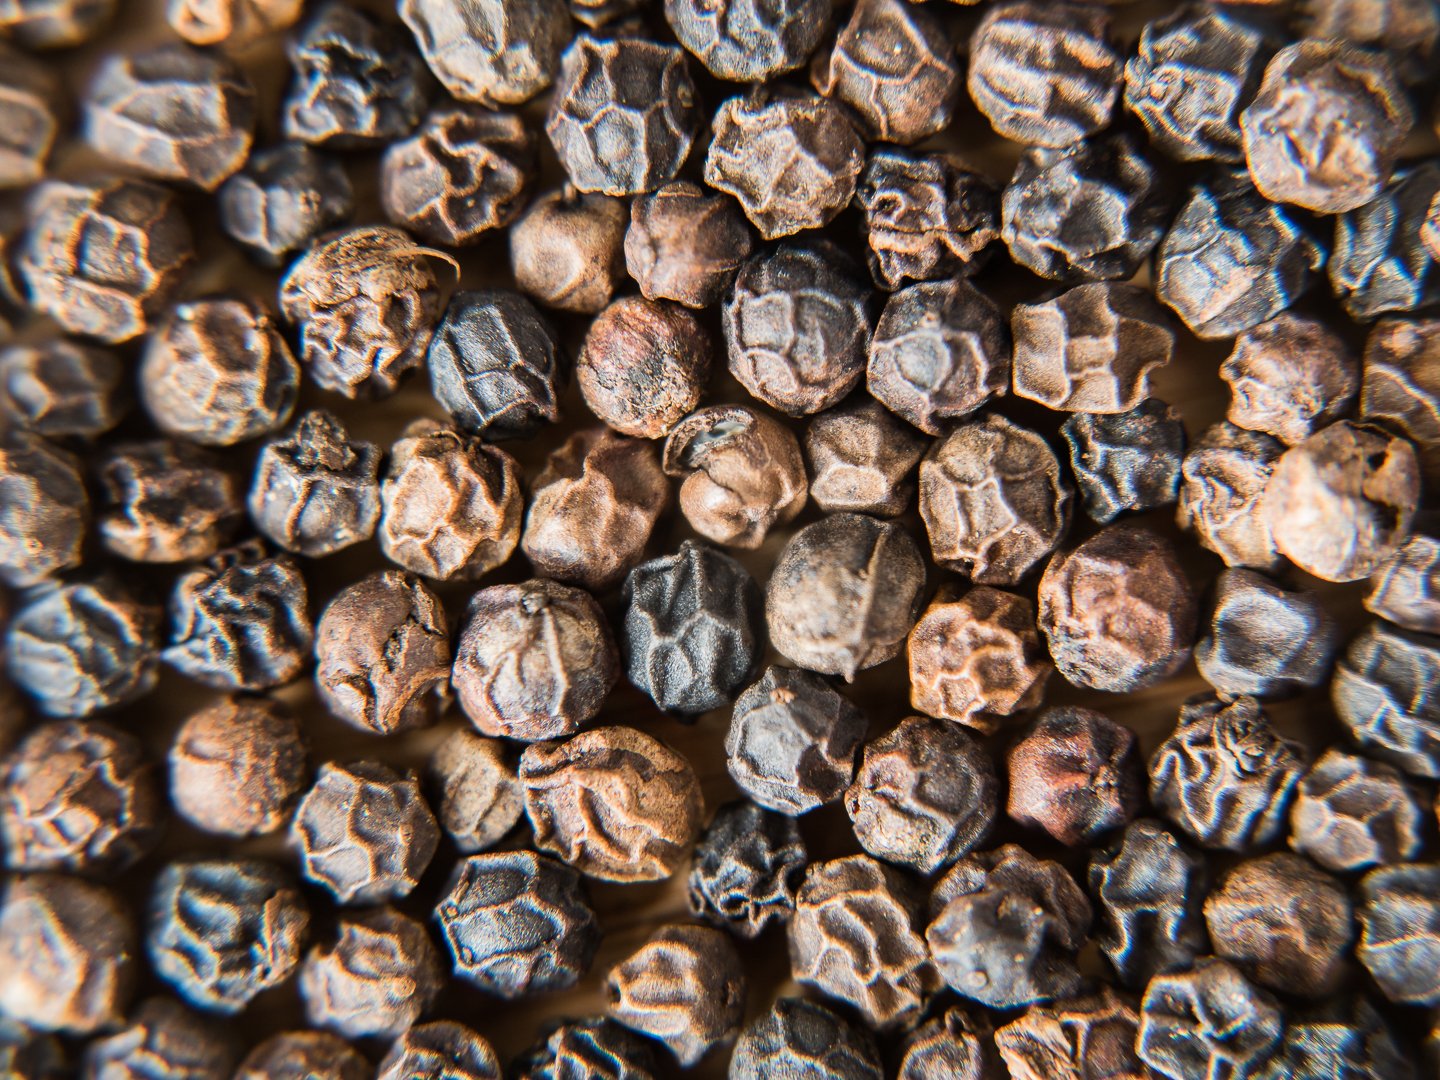
In this next section, we will look at awesome macro photography ideas you can try today items. Take a look around for inspiration! It’s fun and easy to capture the details of everyday items like makeup, stones, and minerals.
Fruits and vegetables offer rich colors, shapes, and textures. Rust and peeling paint show the passing of time. And the intricate patterns of feathers and textiles are perfect for abstract shots.
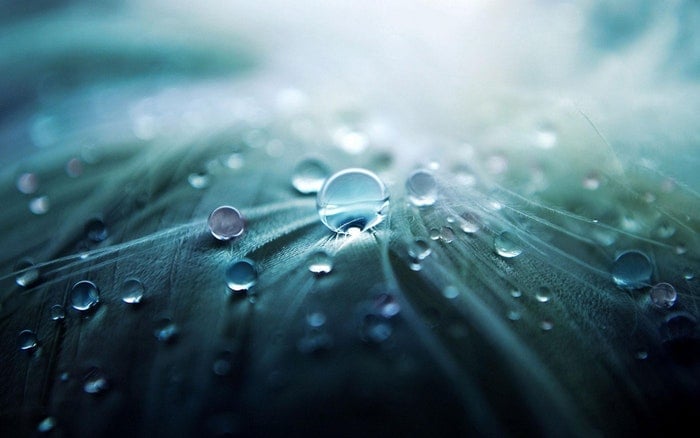
You can find plenty of subjects around your home, like leaves, food, water droplets, and jewelry. Get creative with abstract images and interesting patterns. Capture the fine details of textures, toys, insects, flowers, and even eyes. Macro photography ideas are all around you!
Black and White
Black-and-white macro photography is all about contrast. Look for scenes with strong backlighting during the golden hours or harsh midday sun. Shoot dark subjects against light backgrounds or vice versa to make your subject stand out.
Keep your compositions simple with uncluttered backgrounds and a single point of focus. Zoom in on small, isolated details like a flower petal or water droplet. Interesting textures like wrinkles or ripples can add visual appeal to black-and-white shots.
Surround your subject with negative space to draw the viewer’s eye. Finally, improve the contrast in post-processing by setting true black and white points. Black-and-white macro photography is a great way to create stunning, moody images.
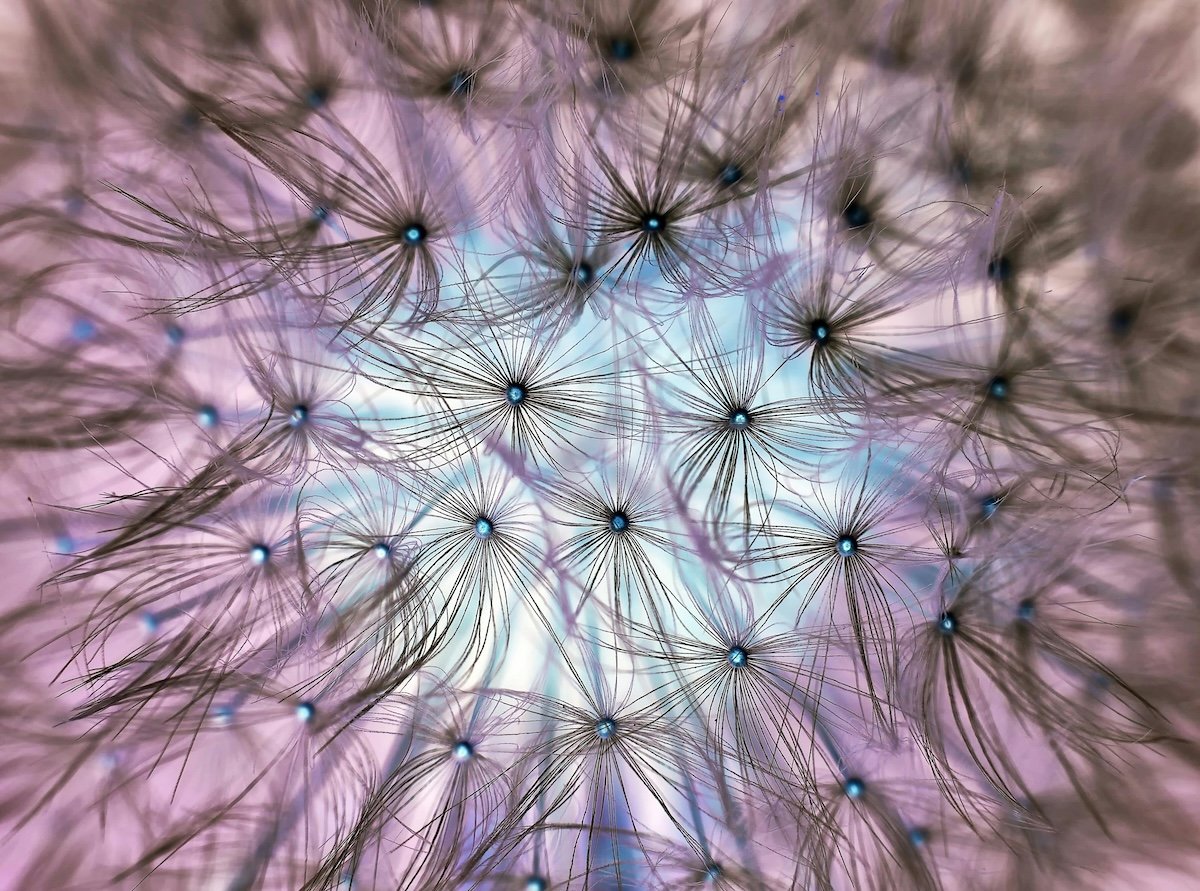
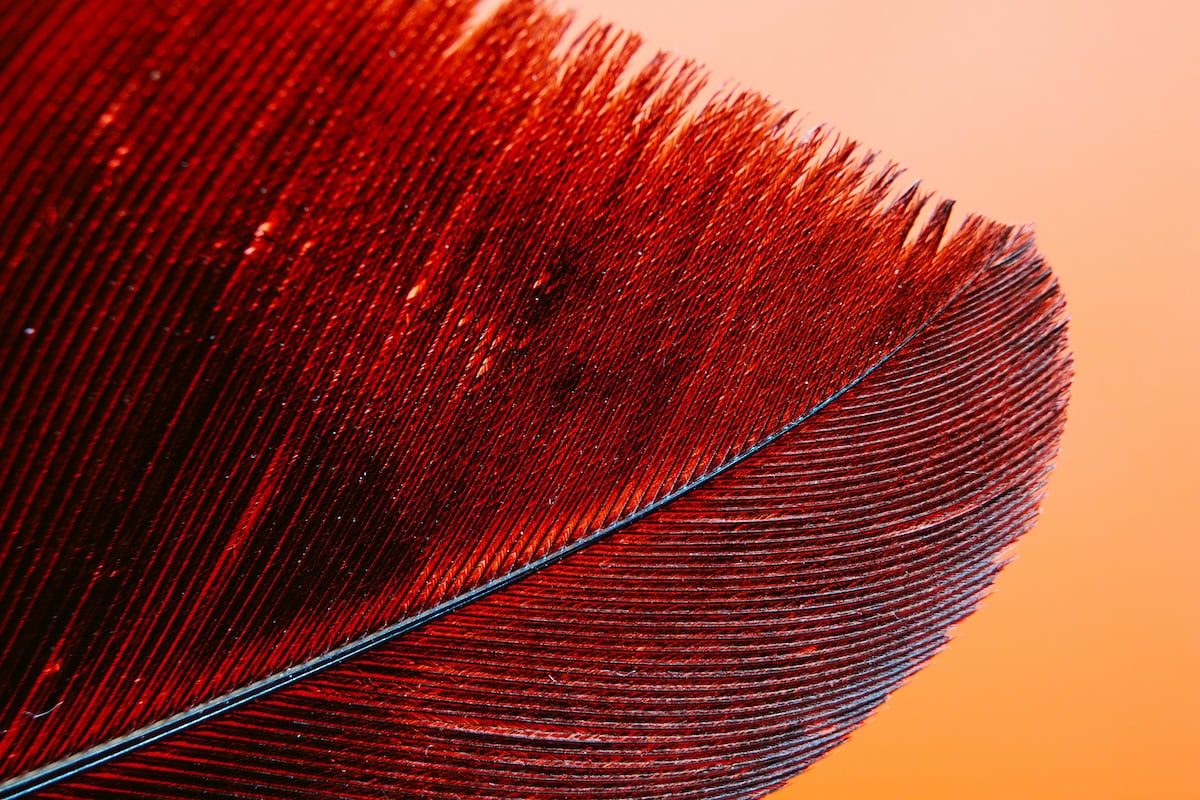
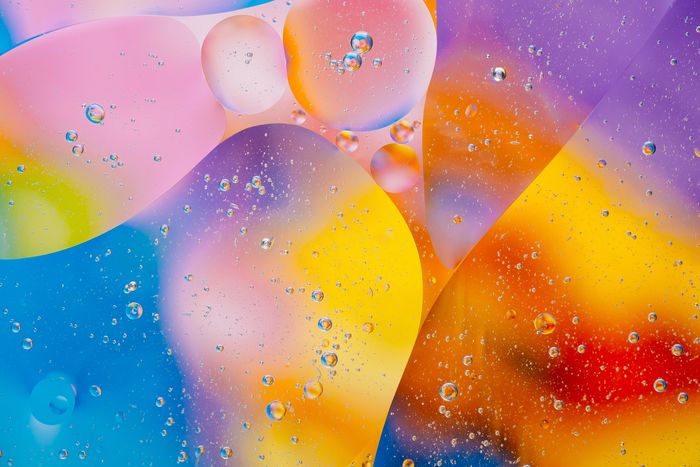
Abstract
Abstract macro photography is a creative way to capture everyday objects in a unique and eye-catching manner. By focusing on patterns, colors, and textures, you can create visually striking and thought-provoking images. Experiment with different angles, lighting, and compositions to transform ordinary subjects into abstract works of art.
Some ideas to get you started include capturing the intricate details of a feather, the swirling patterns in a drop of oil, or the vibrant colors of a piece of candy. You can also play with depth of field to create a dreamy, ethereal look or use reflections to add an extra layer of interest to your images.
With a little creativity and experimentation, you can produce stunning abstract macro photographs that will captivate your viewers. To dive deeper into abstract macro photography and learn more techniques and ideas, explore our comprehensive guide.
Fine Art
Capturing stunning fine art macro photos is all about creativity. Look for interesting lines and curves to engage the viewer. Fill the frame with your subject for maximum impact.
Simplicity is key in fine art macro photography. Use a single subject and non-distracting background. Limit your color palette to two or three colors to avoid a chaotic look.
The sun-shade technique creates beautiful bokeh backgrounds. Position your subject in the shade with a sunlit background for a golden blur effect. Intentional camera movement along your subject’s natural lines produces unique, artistic results. Experiment with different shutter speeds and movements to find what works best.
Fine art macro photography is a great way to get creative with your images. If you’d like to learn more, check out our in-depth article on fine art macro photography.
Ideas For Subjects
Now, let’s look at some inspiration for your macro photo shoot. We will present a few different subjects and recommend ways to get the most out of each subject.
Different subjects have different requirements. You might not have time to set up a light when photographing an insect, so you must take advantage of natural light. You’ll also want to avoid pointing a flash directly into someone’s eyes if you try iris photography.
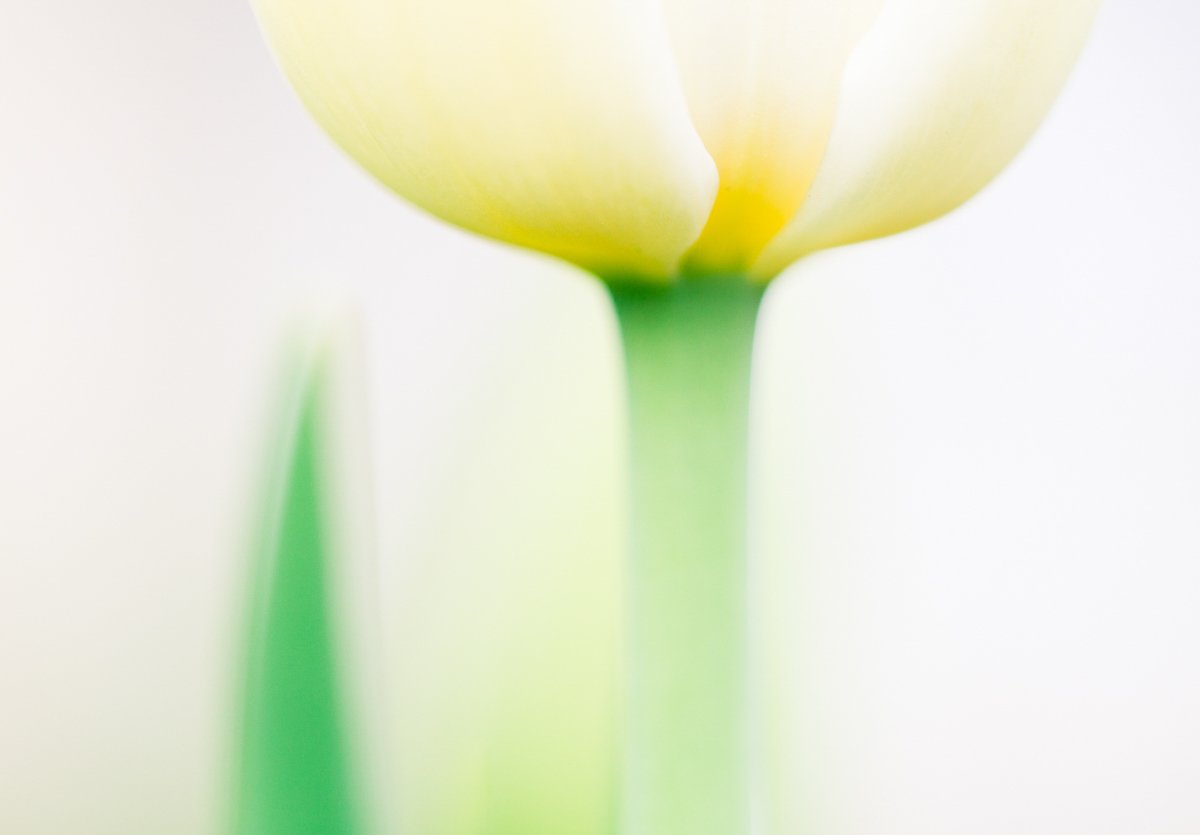
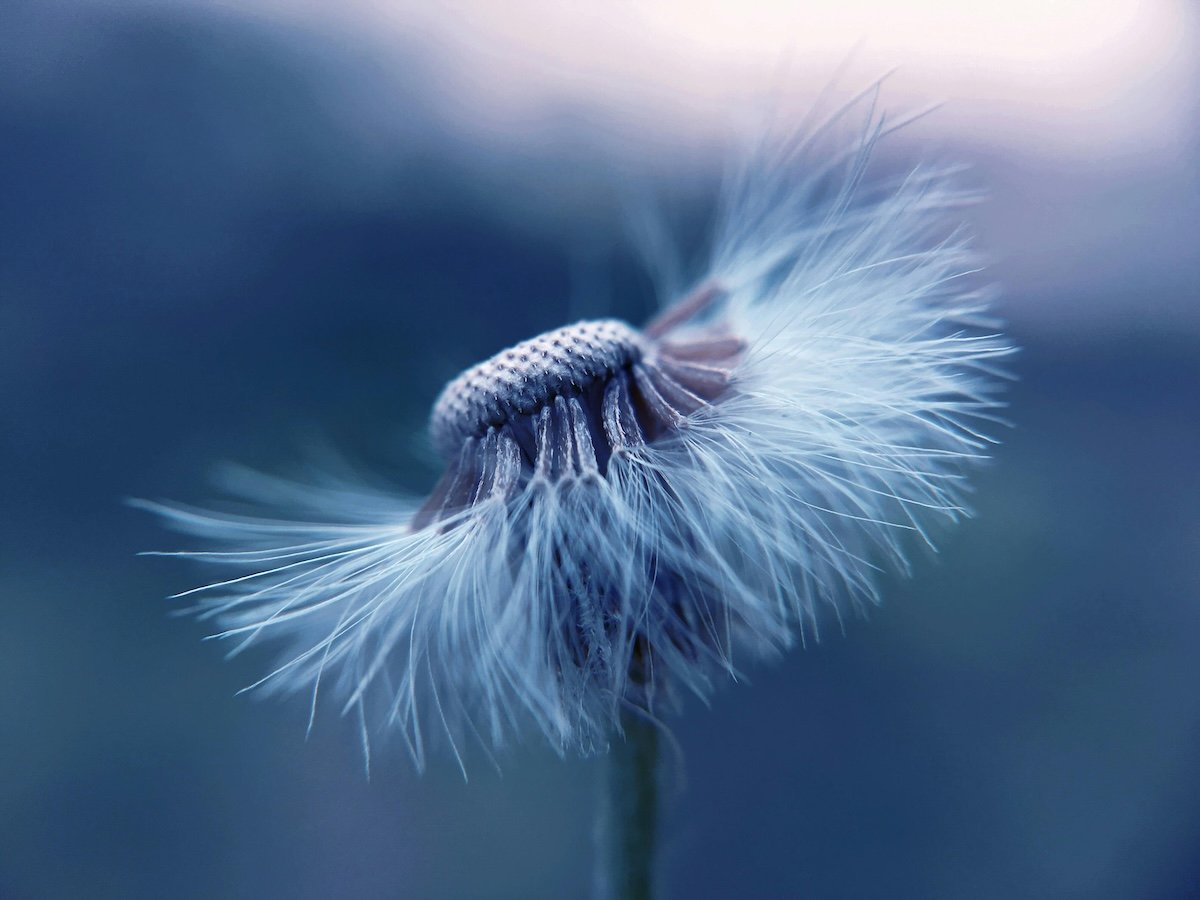
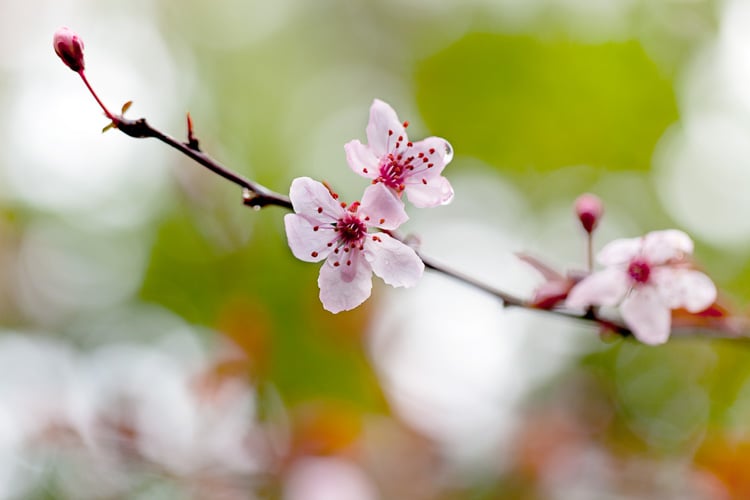
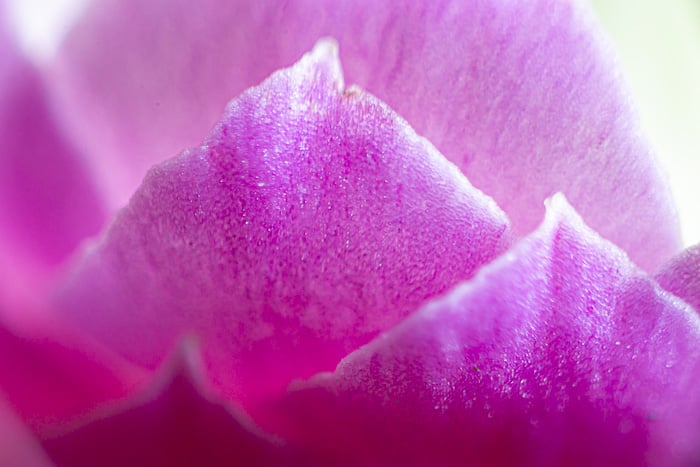
Flowers
Macro flower photography is a great way to capture the beauty of flowers in a unique way. Get up close to reveal intricate details and patterns that aren’t visible from a distance. Experiment with different angles and compositions to create stunning abstract images.
Lighting is key in macro photography. Use natural light or a diffuser to soften harsh shadows and bring out the colors and textures of the flower. A shallow depth of field can also be used creatively to blur the background and make the flower stand out.
With the right techniques and a bit of creativity, you can take your macro flower photography to the next level. To learn more about macro flower photography, check out this in-depth guide.
Food
Macro food photography is a fun and creative way to capture the beauty and detail of your food. To get started, find interesting subjects like vegetables, fruits, sweets, beans, and grains. These are cheap, easy to work with, and come in a variety of colors, shapes, and textures.
When composing your shots, make the food the star of the image. A minimalist approach with clever use of negative space often works best. Avoid overcomplicating the scene with too many elements that can distract from the main subject.
Experiment with different techniques to showcase your food in unique ways. Try capturing close-up portraits that highlight interesting features or textures. You can slice fruits and vegetables open to reveal their intricate inner structures.
Get creative by adding unexpected elements or playing with lighting to create moody or abstract images. To dive deeper into the world of macro food photography, explore more tips and techniques from the experts.
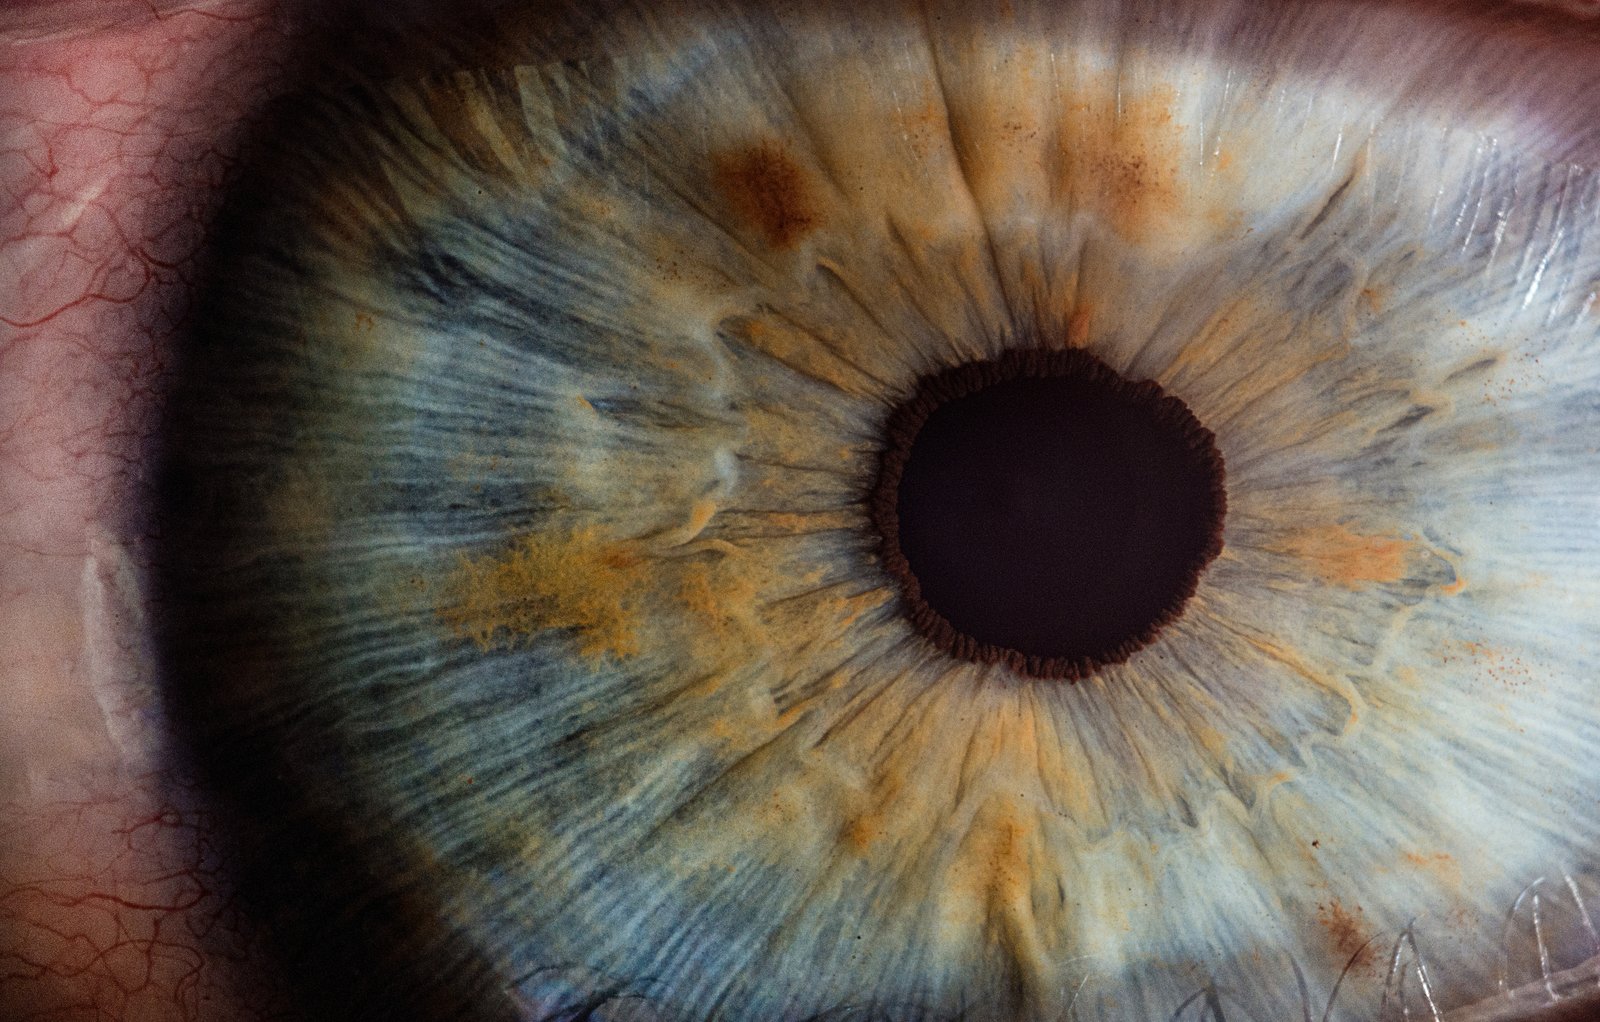
Eyes
To capture macro shots of eyes, you will want to use a macro lens with a focal length of at least 100mm. If you don’t have a macro lens, you can also use macro attachments like extension tubes. Set your ISO between 100 and 800 to minimize noise and use a smaller aperture.
Make sure your subject is comfortable and still to avoid losing focus. Use a tripod to keep your camera stable. Natural light from a large window works well for lighting the eye. You can also use continuous artificial lights, but avoid flash which can cause blinking.
In post-processing, adjust the white balance, exposure, contrast, highlights, and shadows to bring out the details and depth of the iris. If needed, crop out the sclera to zoom in closer. Eye photography takes practice but can produce stunning results.
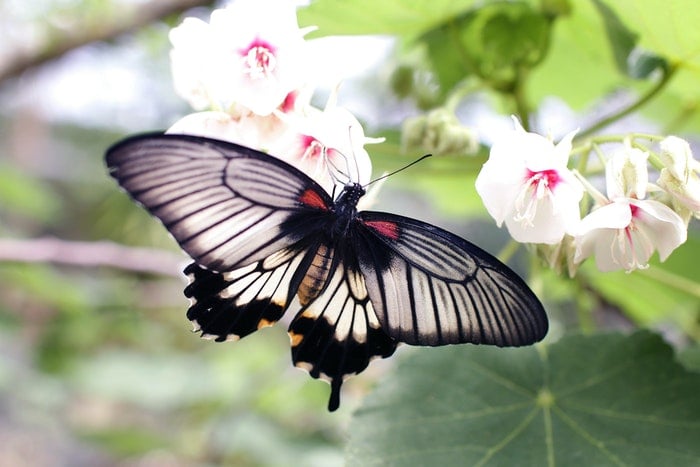
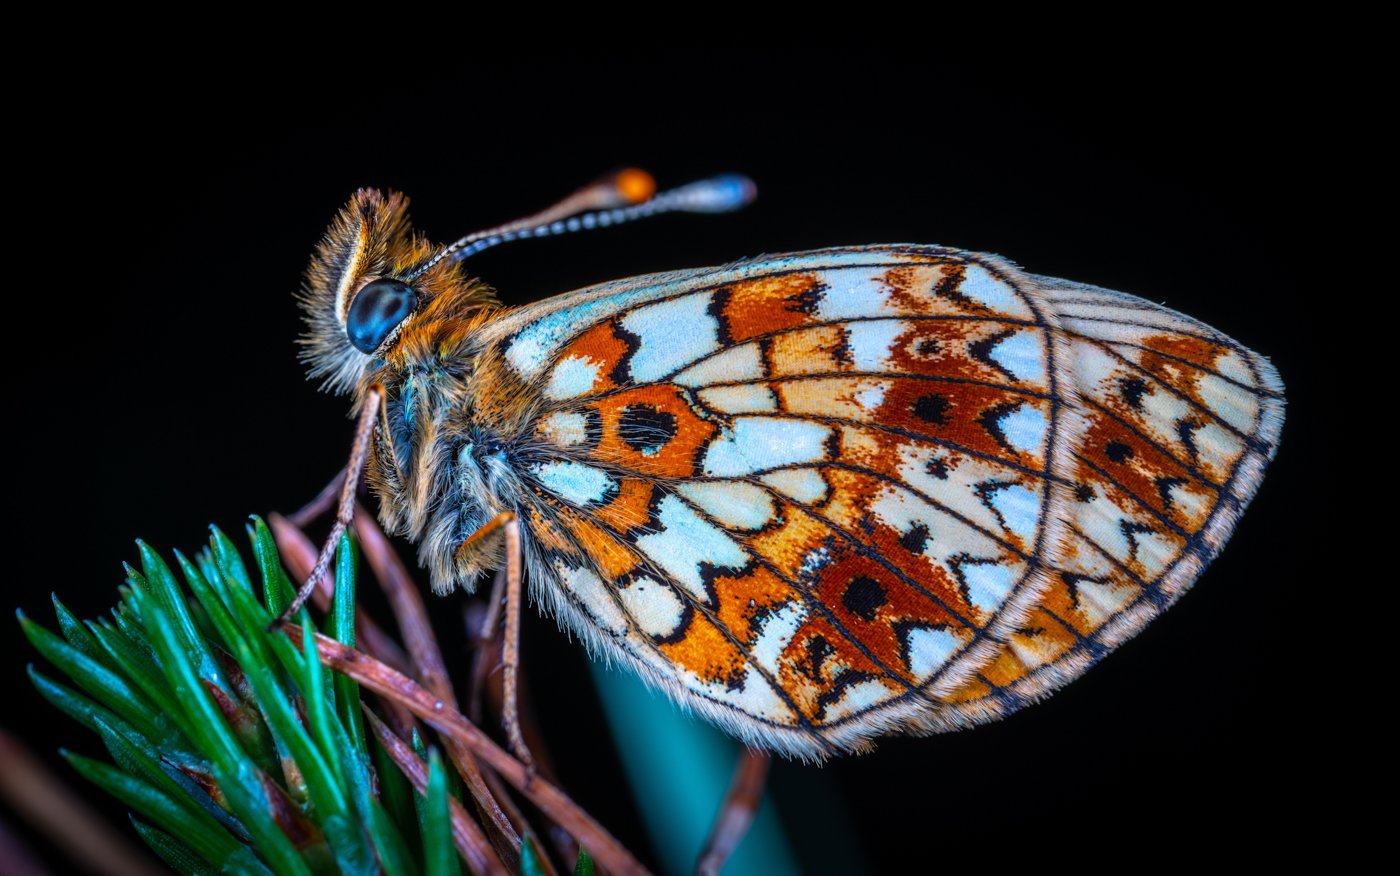
Butterflies
Butterfly photography captures the beauty and grace of these colorful insects. To find butterflies, look for plants that caterpillars feed on during spring and summer.
Using a macro lens between 100 and 200mm helps you get sharp, detailed shots without disturbing the butterflies. Set your camera to a low ISO and use a fast shutter speed of 1/180 s or quicker to freeze motion.
Focus manually or use continuous autofocus to track the butterfly’s movements. A tripod keeps your camera steady for the sharpest results. Move slowly and be patient so you don’t scare the butterflies away.
Butterfly photography captures stunning images of these delicate creatures, and it is a rewarding challenge.
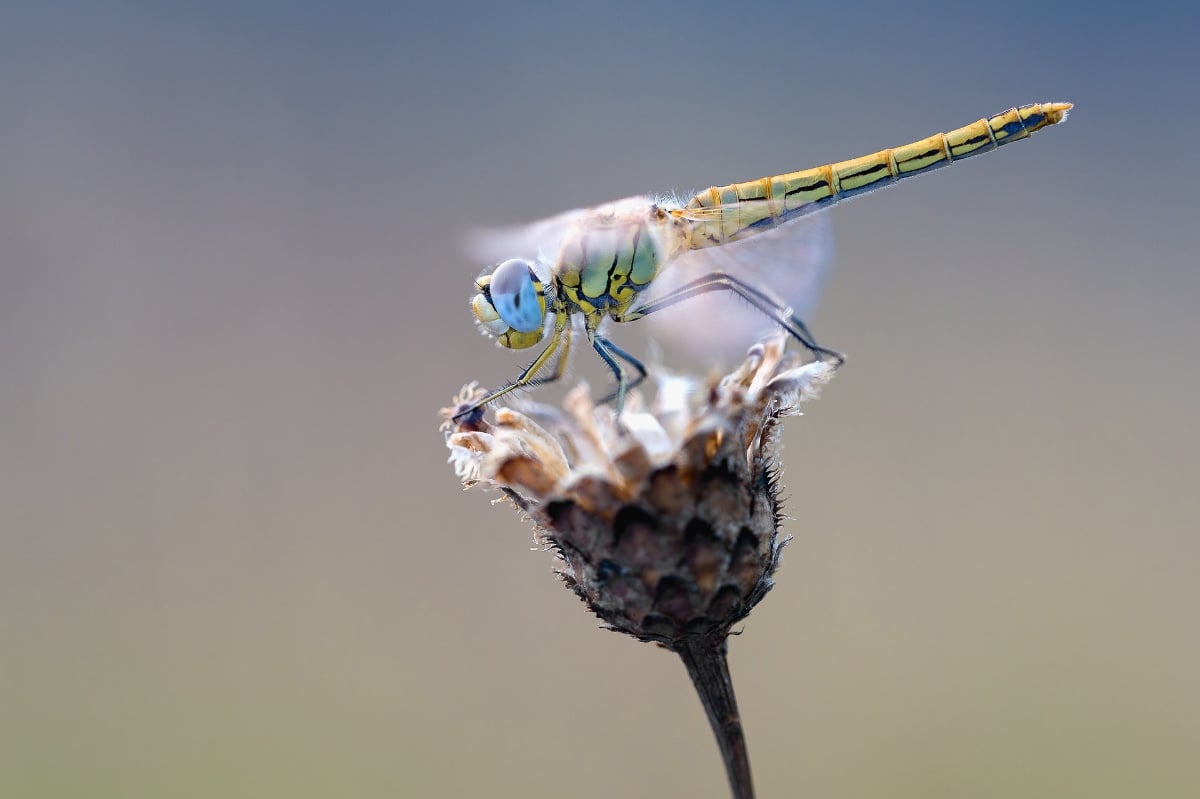
Dragonflies
Dragonflies are beautiful and interesting insects that make great subjects for macro photography. You don’t need fancy gear to capture stunning dragonfly pictures. A tele-macro lens around 100-150mm is ideal, but you can also use a zoom lens with an extension tube.
Dragonflies are most active near water in the summer. Approach them carefully and study their behavior to increase your chances of getting a great shot. Keep the background simple to avoid distracting from the intricate details and colors of the insect.
Be patient, experiment with different compositions, and appreciate being out in nature. With practice, you’ll be capturing beautiful dragonfly photography in no time.
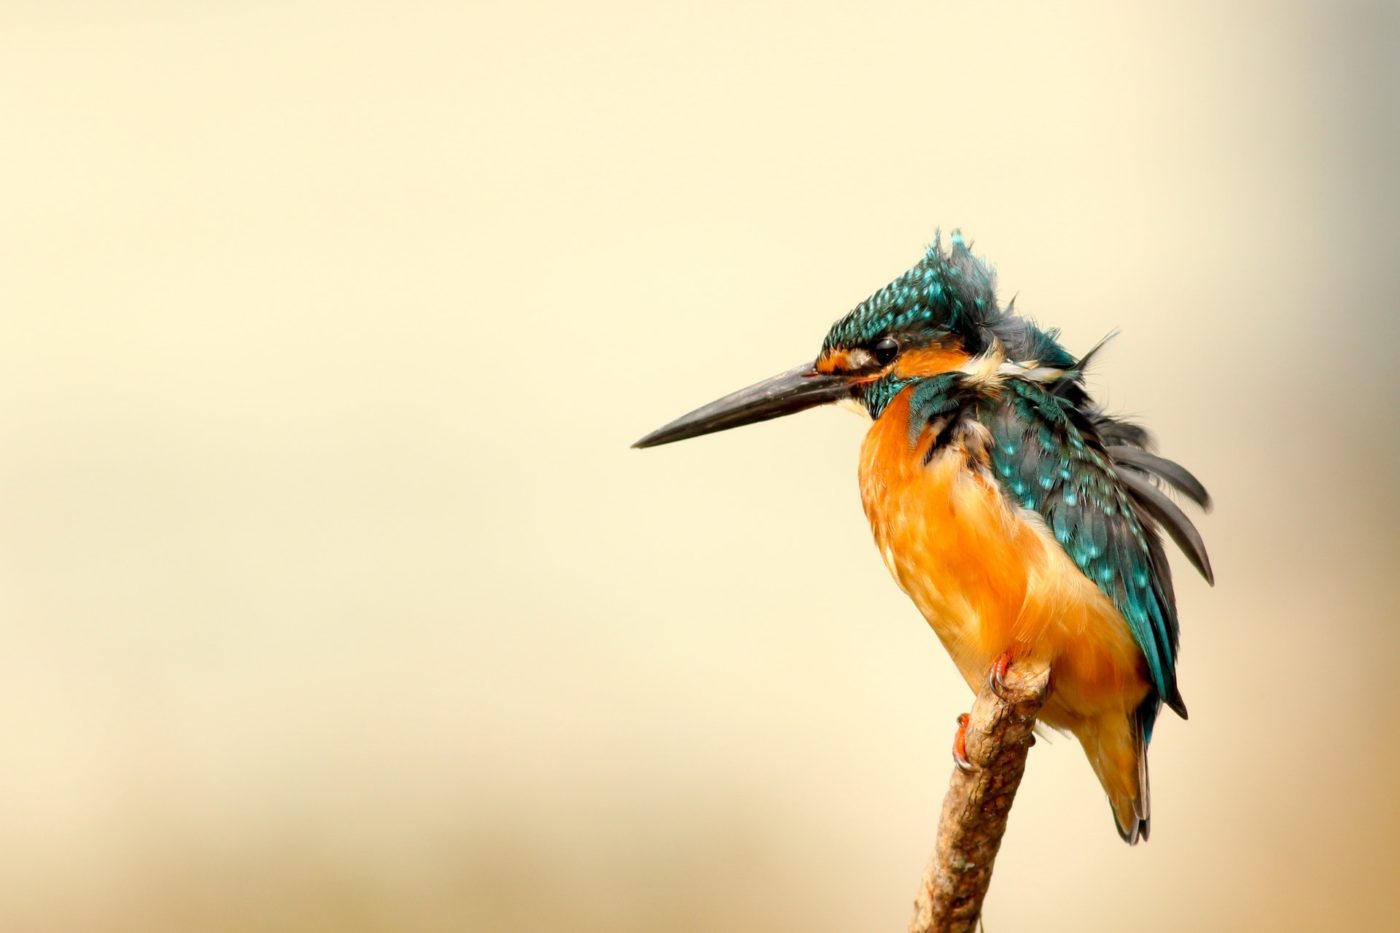
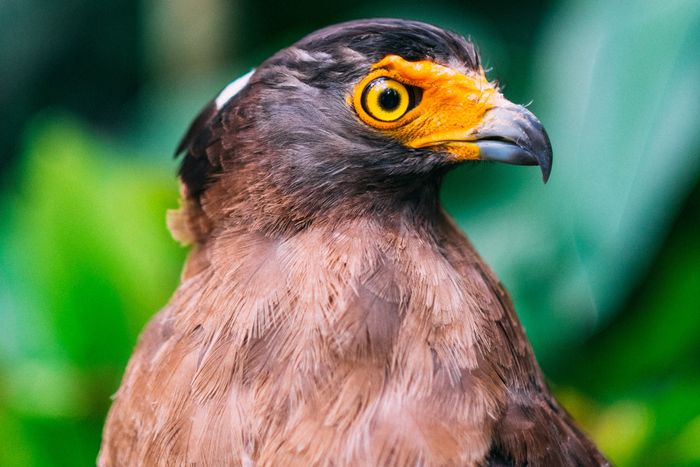
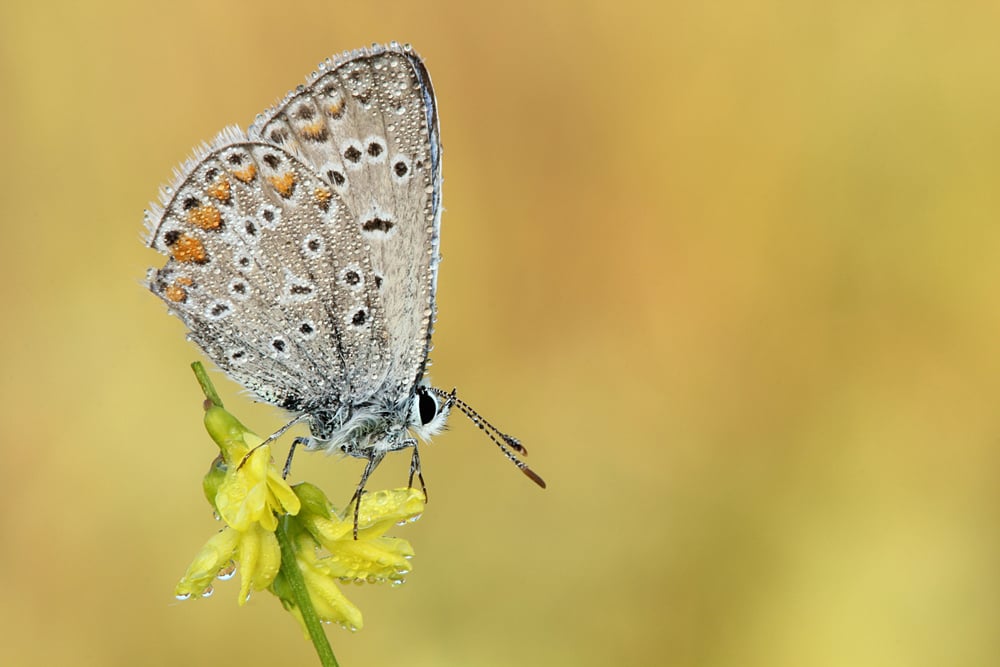
Insects
Insect photography opens up a fascinating world of tiny creatures. The best time to shoot is in the morning when insects are less active and covered in dew drops. Evenings are also good as insects rest, allowing you to capture them from different angles.
Dragonflies, butterflies, and bees make great subjects. Look for them near water, in flower fields, or set up a bee hotel to attract them. Use a macro lens with a focal length of at least 90mm to avoid scaring insects away.
Keep your ISO low and use the fastest shutter speed possible for sharp images. An aperture between f/5.6 and f/11 will give you the best depth of field. But even with a deep depth of field at such close range, you may still need to focus manually.
To learn more about insect photography, check out our detailed guide.
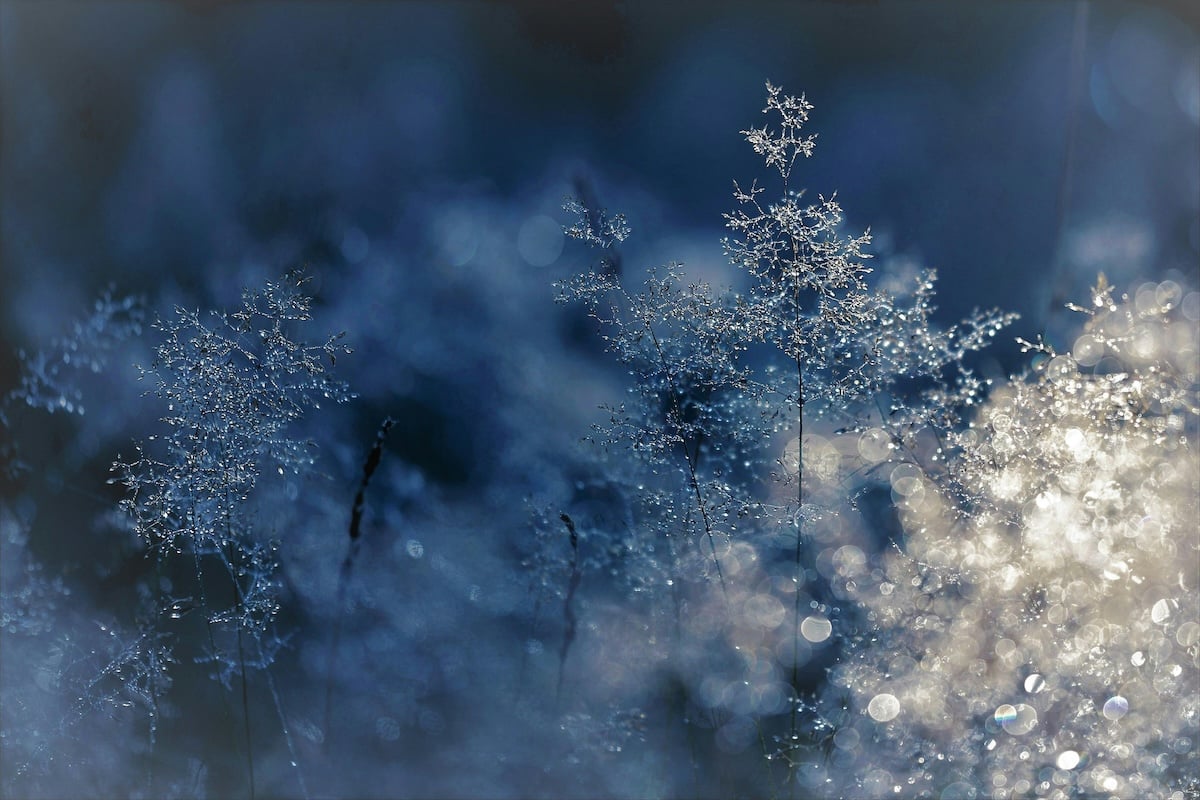
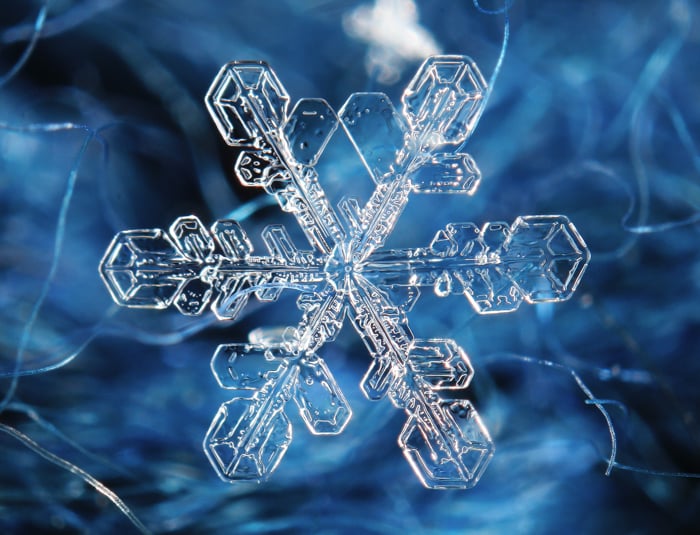
Snowflakes
Snowflake photography captures the tiny, unique beauties that create winter landscapes. Macro photography is the perfect way to capture the intricate details of snowflakes.
To photograph snowflakes, you need a camera capable of capturing images at higher than 1:1 magnification. A mirrorless or DSLR camera with a macro lens, reversing ring, extension tubes, or macro filter works best.
Use manual focus and a shallow depth of field to separate the snowflake from the background. Keep your ISO low to avoid noise and grain and start with a shutter speed of 1/100 s and adjust from there.
Dark backgrounds like gloves, scarves, or coats create contrast and make snowflakes stand out. Snowflake photography is a beautiful way to capture the magic of winter.
Macro Photography Techniques
You can use a few photographic techniques to achieve different effects or make macro photography easier to shoot. These range from editing techniques to specialist equipment that makes macro photography easier and more accessible.
Read this next section to familiarize yourself with more advanced equipment and techniques.
Focus Stacking
Macro focus stacking is a technique that lets you take multiple photos of the same subject, each with a different focal point. When you stack these photos together, you get a final image with much greater sharpness and clarity than any single photo could provide.
To do macro focus stacking, you’ll need to take a series of photos, adjusting the focus slightly each time to capture the entire subject in sharp focus. Even when using a small aperture, the depth of field in macro photography can be very shallow, so focus stacking is often necessary to get the whole subject in focus.
Once you have your series of images, you can blend them together using software like Photoshop.
If you’d like to learn more about macro focus stacking, check out our how-to article.
Macro Bellows
A macro bellows is a flexible extension mechanism that sits between the camera and lens, allowing for extreme close-up magnification. It works similarly to extension tubes but offers more flexibility and precision.
One advantage of a macro bellows is its adjustable focal length, which can be smoothly controlled by turning a knob. This allows for precise focusing, unlike extension tubes with fixed lengths. Bellows also typically offer longer extension distances compared with a single extension tube.
However, most bellows do not transmit electronic signals, meaning you can’t use autofocus, and you lose control of the aperture. It’s recommended to use fully manual lenses with a bellows.
Additionally, bellows are best suited for lighter gear setups to avoid stability issues. If you’d like to learn more about macro bellows, we have a detailed guide that covers everything you need to know.
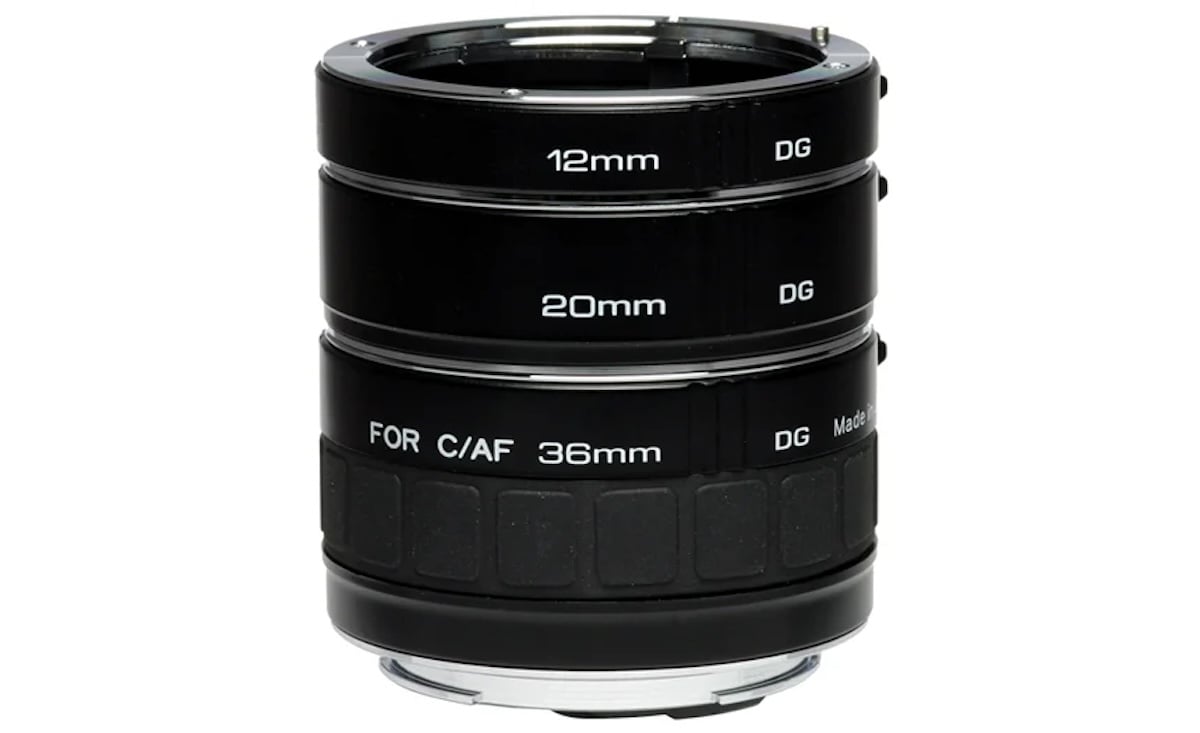
Extension Tubes
Extension tubes are a cheap way to turn your existing lens into a macro lens. They fit between your camera and lens, moving the lens further from the sensor. This lets you focus closer and magnify your subject.
There are two types of extension tubes: ones with electrical contacts and ones without. Tubes with contacts let you use autofocus and control aperture. Tubes without contacts are cheaper but limit control.
The magnification boost from extension tubes depends on the lens. Shorter lenses get a bigger boost than telephotos. But extension tubes also reduce the light hitting your sensor. You may need to use a wider aperture, higher ISO, or add a flash.
Extension tubes take some practice but open up a world of macro possibilities.
Macro Filters
Macro filters are an affordable way to turn any lens into a macro lens. They screw onto the front of your lens, reducing the minimum focusing distance. This allows you to get closer to your subject and capture more detail.
Macro filters come in different strengths—typically +1, +2, +4, and +10 diopters. The higher the number, the closer you can focus. You can also stack filters to increase the magnification.
To use a macro filter, simply screw it onto your lens and start shooting. Experiment with different apertures and focusing distances to find the perfect focus. A macro filter lets you capture stunning close-up photos without breaking the bank.
Focusing Rail
A macro focusing rail is a tool that lets you move your camera forward, backward, left, or right in small increments. This is important for macro photography because the depth of field is very shallow when shooting close-up subjects. A focusing rail gives you precise control over the focus point.
To use a macro focusing rail, attach your camera or lens to the rail using the tripod thread. Choose your starting focus point, then twist the knob to move the camera and adjust the focus. You may need to take multiple shots at different focus points to capture the entire subject in focus.
The number of images needed depends on your depth of field, which is determined by aperture and distance from the subject. A macro focusing rail is the best way to use the focus stacking technique to create completely in-focus macro images. If you want to learn more about macro focusing rails, check out our in-depth guide.
Editing Macro Photographs
Macro photography benefits from post-processing as much as any other photographic genre. It is particularly useful to boost the colors or add more detail to your subject. These actions can be done using a few post-production techniques found in most digital editing software.
Editing in Lightroom
Editing macro photography in Lightroom can take your photos to the next level. Start by cropping in tight to your subject or placing it off-center for more impact. Use the sharpening tools to ensure crisp, sharp focus on your subject.
Vignetting can add drama by darkening the edges of your photo. Adjust colors using the Vibrancy slider to make your subject pop without losing detail.
Finally, separate your subject from the background using brushes to adjust sharpness, clarity, and contrast. By editing your macro photos tips, you can give your tiny subjects the spotlight they deserve.
Best Gear for Macro Photography
The best macro photography gear helps you capture stunning close-up shots. A good macro lens is key, offering a 1:1 magnification ratio for life-size images. The Canon RF 100mm f/2.8L Macro IS USM is an excellent choice, delivering sharp details and beautiful bokeh.
Other important accessories include a sturdy tripod like the Vanguard Alta Pro 263AB 100 for stability and a macro ring flash such as the Godox MF-R76 for even lighting. Extension tubes and focusing rails provide added flexibility and precision.
Reflectors are also useful for bouncing light and reducing shadows. The Photo Trust 5-in-1 Pocket Reflector is a compact option with multiple surfaces. The right macro photography equipment will take your close-up shots to the next level.
Our Top 3 Choices for the Best Macro Photography Equipment

What Is a Macro Lens?
A macro lens is a lens that lets you capture “true macro” photos. It has a 1:1 magnification, which means the image projected onto the camera sensor is the same size as the subject in real life. This is different from regular lenses, which make the image smaller than the actual subject.
Macro lenses have a very short focusing distance, often just a few inches. They also create a shallow depth of field, blurring the background to make the subject stand out. This effect is called bokeh.
Using a macro lens can be tricky. The short distance between the lens and the subject can cause shadows or scare away small animals. Autofocus may also struggle, so manual focus is often better.
To learn more about macro lenses, check out our full guide.
Cameras
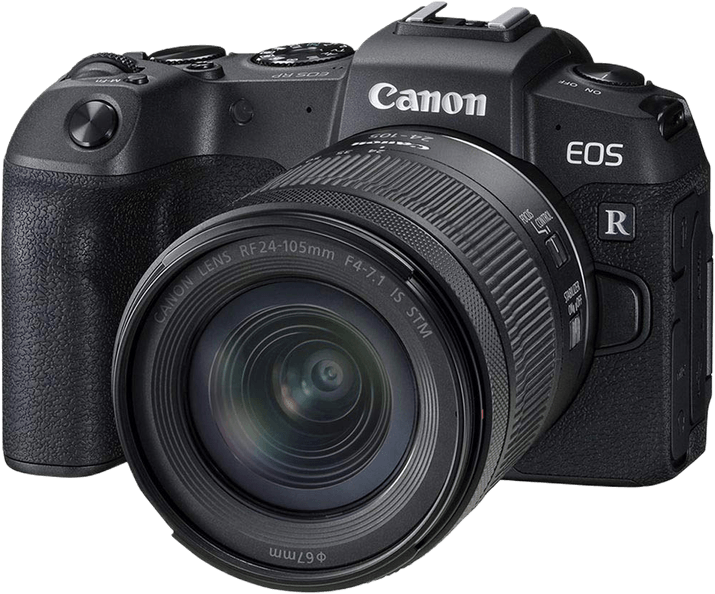
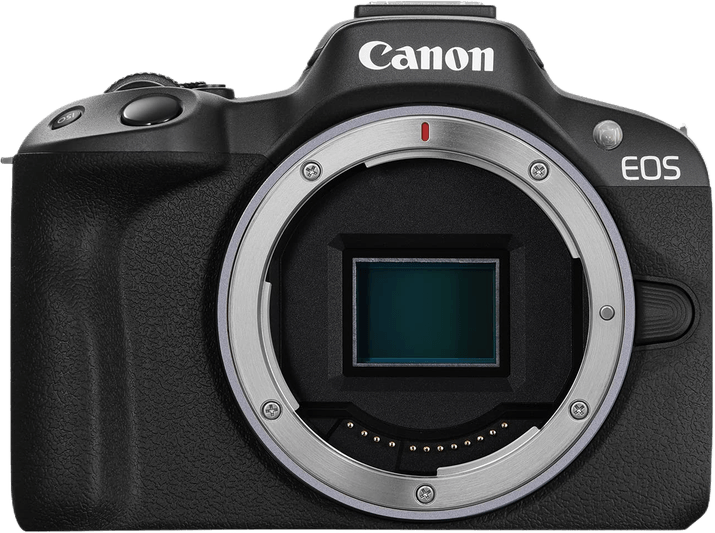
The best camera for macro photography delivers stunning image quality and makes capturing incredible close-ups easy. Our top pick is the Canon EOS RP. This full-frame mirrorless camera produces images with excellent detail, vibrant colors, and a wide dynamic range.
The EOS RP’s reliable autofocus system and practical features like focus stacking make it a pleasure to use. It’s also compatible with Canon’s best macro lenses, giving you plenty of options.
If you want to learn more about the best camera for macro photography, check out our full article. You’ll find great options for beginners, intermediates, and professionals, plus unique cameras with specialist macro features.
Our Top 3 Choices for the Best Camera for Macro Photography

Lenses
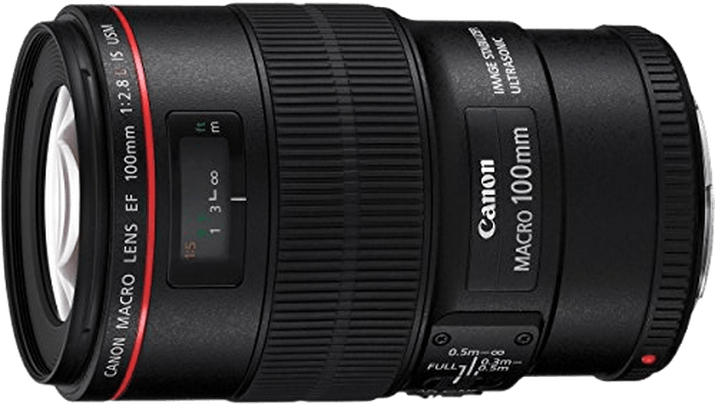
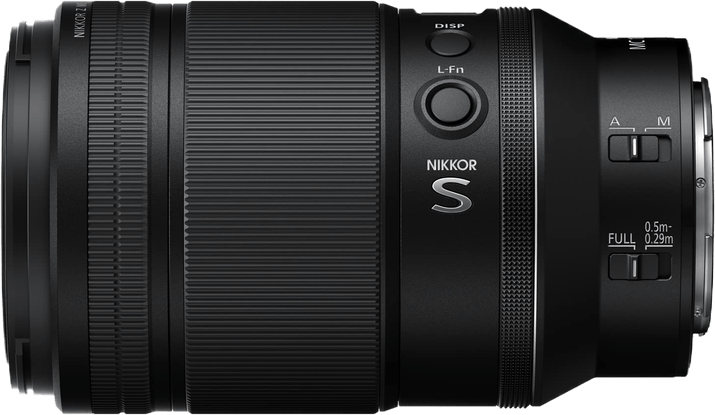
The Canon EF 100mm f/2.8L Macro IS USM delivers incredible sharpness, beautiful bokeh, and in-lens image stabilization. It’s a top choice for Canon users. The Nikon NIKKOR Z MC 105mm f/2.8 VR S offers 1.0x magnification, precise autofocus, and up to 4.5 stops of image stabilization.
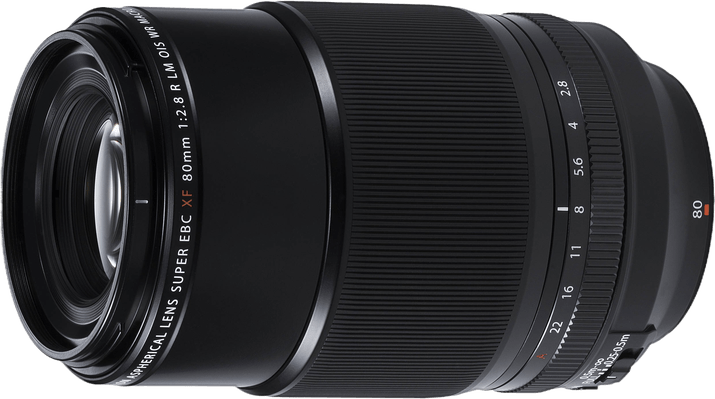
For Fujifilm X-mount cameras, the FUJINON XF 80mm f/2.8 R LM OIS WR Macro provides exceptional image quality with 1.0x magnification and 5-stop image stabilization in a weather-resistant lens.
If you want to learn more about choosing the best macro lens for your needs, check out our detailed guide.
Our Top 3 Choices for The Best Macro Lens
Lenses for Canon
When looking for the best macro lens for Canon cameras, there are many excellent options to choose from. The Canon EF 100mm f/2.8L Macro IS USM is a top choice, offering superb image quality, quick autofocus, and effective image stabilization. It performs well in low light and produces beautiful bokeh.
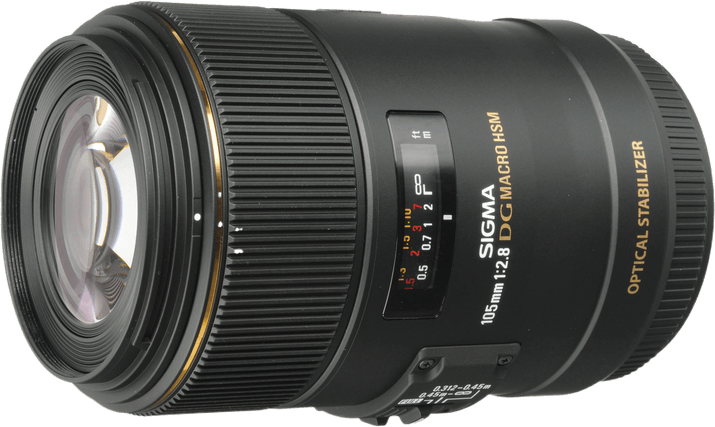
Another great option is the Sigma 105mm f/2.8 EX DG OS HSM Macro Lens. It provides professional-level image quality at a more affordable price compared to the Canon L lens. The Sigma also features fast, silent autofocus and optical stabilization for sharp handheld shots.
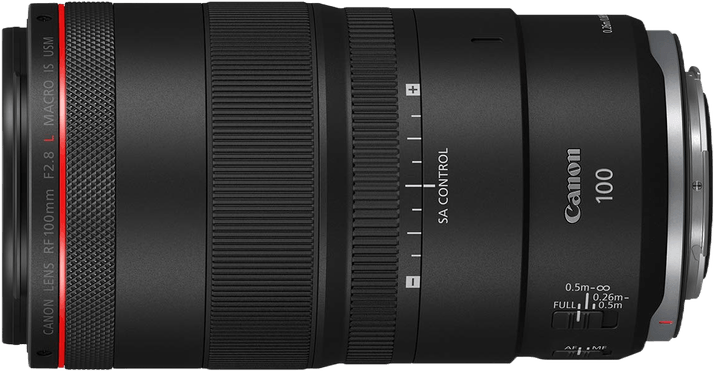
For Canon mirrorless users, the Canon RF 100mm f/2.8L Macro IS USM is a standout lens. It delivers high-quality images with a maximum magnification of 1.4x, allowing for larger-than-life macro photography. The lens also offers precise bokeh control and an advanced optical stabilizer. Macro lenses for Canon cameras open up a world of creative possibilities, allowing you to capture stunning close-up details in your photography.
Our Top 3 Choices for The Best Macro Lens For Canon

Lenses for Nikon
When choosing a macro lens for your Nikon camera, consider factors like image quality, magnification, working distance, maximum aperture, and autofocus. The Sigma 105mm f/2.8 is an excellent all-rounder, offering great image stabilization and durability. It also doubles as a short telephoto lens for portraiture and wildlife photography.
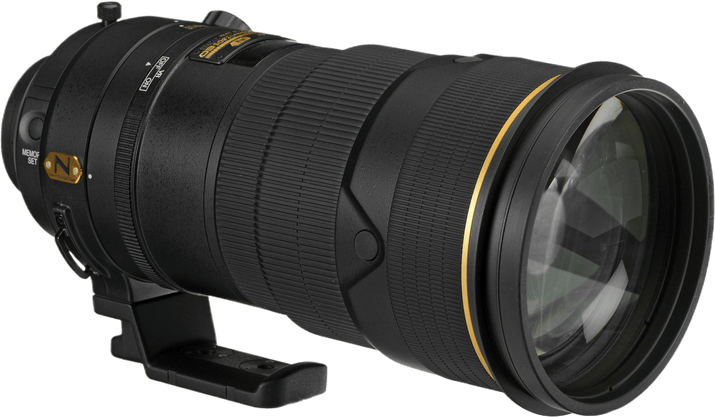
For Nikon’s own lenses, the AF-S Nikkor 300mm f/2.8G ED-IF VR provides fast autofocus and high optical performance. If you have a Nikon mirrorless camera, the Nikkor Z MC 105mm f/2.8 VR S is the top choice with its superb sharpness from close-up to infinity.
Ultimately, the best macro lens for you depends on your specific needs and preferences. Macro lenses for Nikon come in a variety of focal lengths and features, so consider what matters most to you before making a decision.
Our Top 3 Choices for The Best Macro Lens For Nikon
Lenses for Sony
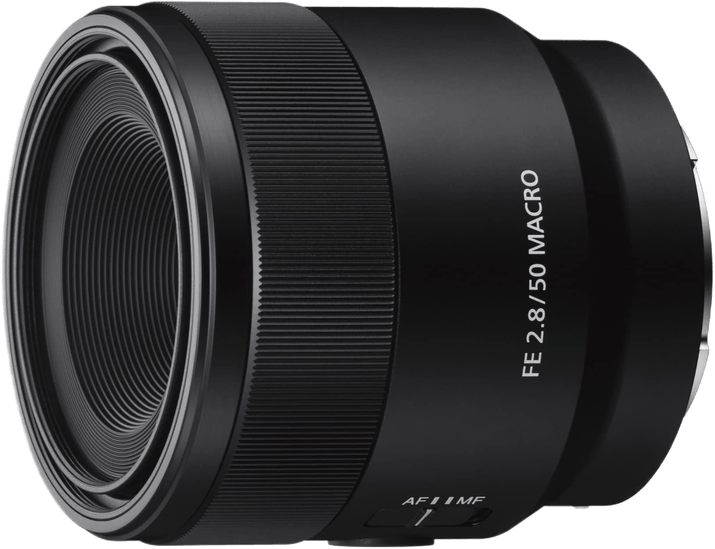
The Sony FE 50mm f/2.8 Macro Lens is our top pick. It has a 1:1 magnification ratio for detailed close-ups. The lens is compact, lightweight, and weather sealed. It delivers excellent sharpness with minimal aberrations and smooth bokeh.
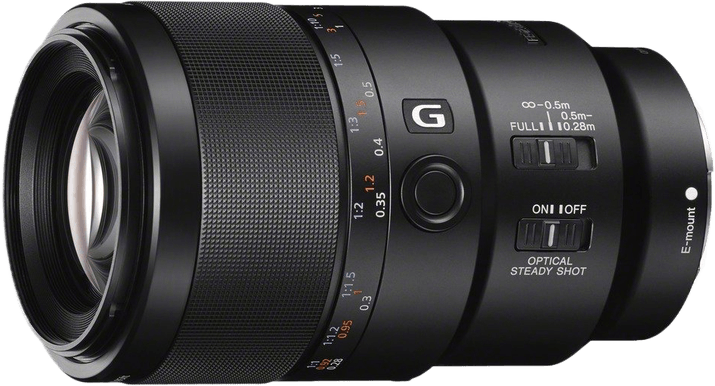
The Sony FE 90mm f/2.8 Macro G OSS is another fantastic macro lens. It has incredible optics, fast autofocus, and built-in image stabilization. The lens is ideal for both macro and portrait photography.
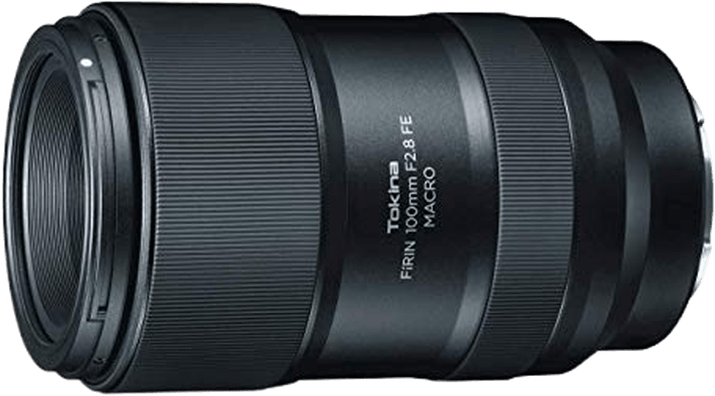
For those on a budget, the Tokina FiRIN 100mm f/2.8 FE Macro offers exceptional sharpness and true macro capability at an affordable price. Sony lenses for macro photography come with a range of focal lengths and features to suit different needs and preferences.
Our Top 3 Sony Lenses for Macro Photography
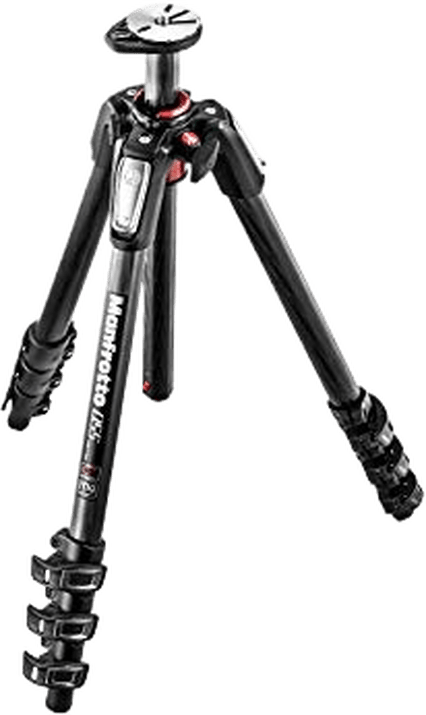
Tripods
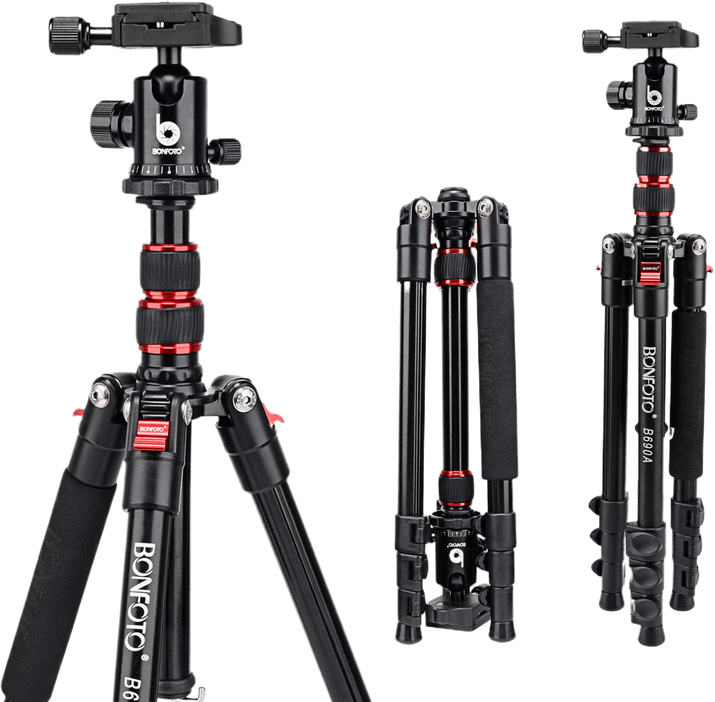
The best tripod for macro photography is strong, stable, and flexible. The Vanguard Alta Pro 263AB 100 is our top pick. It’s durable, reliable, and has a maximum capacity capable of holding cameras of all kinds. And it offers excellent mounting options.
The Alta Pro 263AB 100 has a multi-angle central column system. This lets you shoot at angles that are usually impossible. You can mount the central column horizontally, getting as low as 10 inches (25 cm) from the ground.
It’s made of aluminum, so it’s not the lightest tripod at 4.4 lbs (2 kg). But it supports camera setups weighing up to 15.4 lbs (7 kg). The Alta Pro 263AB 100 also has a top-quality ball head. This makes it even more flexible, letting you mount the camera at virtually any angle.
The Vanguard Alta Pro 263AB 100 has everything a macro photographer needs in a tripod for macro photography. It’s a bargain for such a strong and versatile tripod. The price makes it perfect for amateur and professional macro shooters.
Our Top 3 Choices for the Best Tripod for Macro Photography
Lighting Equipment
Macro photography requires a specific type of flash to capture small details. A ring flash is perfect for macro lighting because it fits around the lens and spreads light evenly. This creates a soft, diffused look that works well for many macro scenarios.
The lighting position is also important in macro photography. Front lighting from a camera-mounted flash can look flat and unflattering. Side or back lighting often produces better results by emphasizing texture and depth.
Using the right light modifier, like a softbox, can further improve your macro flash photography. Natural-looking lighting is usually best. To learn more about flash for macro photography, check out our in-depth guide.
Macro Accessories
The best macro photography accessories can make capturing tiny worlds much easier. Extension tubes are a great way to get closer to your subject without buying a dedicated macro lens. They fit between your camera and lens, reducing the minimum focusing distance.
Macro bellows offer even more magnification than extension tubes. They’re adjustable, allowing you to fine-tune the magnification for the perfect shot.
Macro photography accessories can open up a whole new world of creative possibilities.
Macro Photographers
Macro photography reveals a world invisible to the naked eye. These influential photographers capture stunning close-ups of insects, flowers, waterdrops, and more. Their images are sharp, colorful, and full of surprising details.
Following these artists is a great way to find inspiration for your own macro photography. Some use professional cameras and lenses, while others rely on their smartphones. But they all have a passion for the tiny creatures and objects around us.
Explore the galleries of these macro photographers to see the beauty in the details. From butterflies to snowflakes, their subjects will leave you in awe. If you want to see the work of incredible macro photographers, check out our inspirational list.