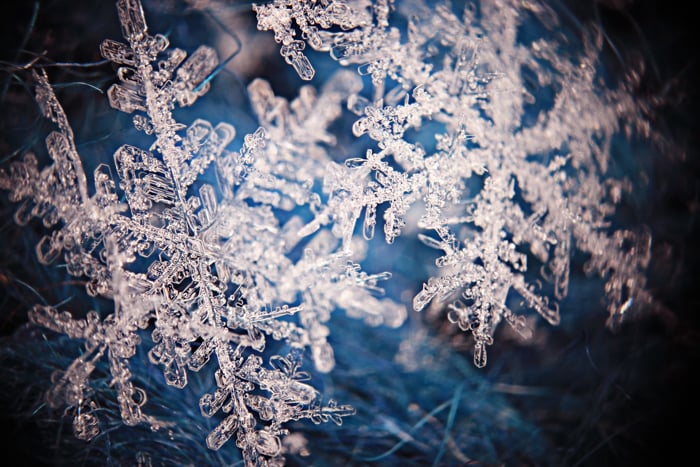
When we think about snow, we imagine white landscapes and completely transformed cities. But snowflake photography captures the tiny beauties that create these scenes.
No two snowflakes are alike, and they’re all unique and beautiful in their own shape. And macro photography offers the perfect way to capture the details invisible to the naked eye. Continue reading for everything you need to know about how to shoot amazing macro snowflake photography.

- Learn to take stunning photos without stepping outside.
- Discover affordable ways to convert any lens for macro shots.
- Explore unique techniques for lighting and composing your subjects.
How to Shoot Snowflake Photography
Because snowflakes are so tiny, snowflake photography is a type of macro photography. And this brings its own set of challenges. And below, we’ll let you know how to navigate them.
What Equipment Do You Need
To photograph snowflakes, you need a gear setup capable of capturing images higher than 1:1 magnification. This 1:1 ratio is considered “true macro.” This means that your subject appears the same size on the camera sensor as it does in real life, allowing you to take breathtaking photos of tiny subjects.
There are some point-and-shoot and bridge cameras you can use for macro photography. Even some smartphones have a macro mode, but they’re not usually powerful enough for capturing snowflakes.
Your best option for shooting macro snowflakes is a mirrorless or DSLR camera with the right lens. However, you don’t necessarily need to buy a dedicated macro lens right away. There are macro accessories that allow you to shoot macro images without a macro lens.
One option is using a reversing ring. These allow you to attach the lens you already own to the camera backward. This effectively reverses the lens’s optics, creating magnification strong enough for macro photography.
Extension tubes are another good option for getting into macro photography. These tubes sit between your lens and the camera body to extend the magnification of your lens.
Your other option is to use a macro filter. These allow you to focus closer than you otherwise could. They sometimes cause distortion, but you can crop the edges or fix it in post-processing.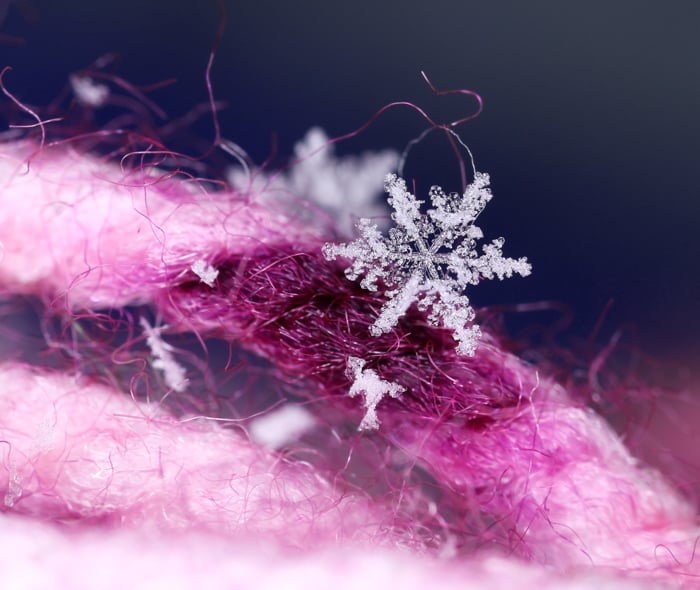
What Settings Do You Need for Snowflake Photos?
I strongly recommend using Manual mode on your camera. It gives you full creative control over your exposure.
Because every snowflake scene is different, there’s no one-size-fits-all camera setting for snowflake photography. We’ll tell you how to adjust and compensate for each of the three settings that create the exposure triangle below.
How to Set Your Aperture
As snowflakes are extremely small, using a shallow depth of field to separate them from the background is a good idea.
Starting between f/5.6 and f/11 is a good starting point for choosing your aperture. If you use too wide of an aperture when shooting macro, your depth of field can be too narrow. So don’t immediately turn to your f/2.8 setting.
You want the whole snowflake in focus. An aperture between f/5.6 and f/11 is a good compromise that creates an in-focus subject with a separated, out-of-focus background.
How to Set Your ISO
It’s best to keep your ISO as low as possible in macro photography. This helps avoid noise and grain, which result in a loss of image quality. Start with your camera’s smallest ISO value, which is probably 100 or 200.
If you need a fast shutter speed or a small aperture, increase your ISO to compensate for your exposure. Most modern cameras can shoot up to around 1600 ISO before seeing noticeable grain. Of course, you can go even higher if you need to.
If you do need to use a high ISO, you can always reduce image noise in Photoshop.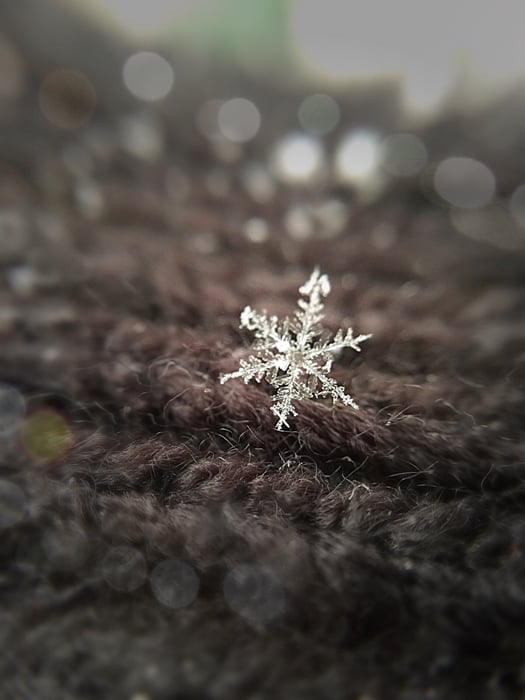
How to Set Your Shutter Speed
The shutter speed depends on the available light, the aperture, and the ISO. But it also depends on your scene and if you’re using a tripod or not. It’s unlikely you’re going to get motion blur from fast-moving snowflakes. But sometimes, you need to be fast to capture the snowflake before it melts!
A shutter speed of 1/100 s is a good starting point. But you can go even faster if there’s a lot of light, which is often the case in bright white snow scenes.
You can use even slower shutter speeds if you use a tripod and a remote shutter. This setup allows you to use slow shutter speeds while avoiding camera shake.
Use Manual Focus for Snowflake Photography
Macro photographers usually work with manual focus. It’s hard for most cameras to autofocus on subjects as tiny as snowflakes.
Also, macro filters can interfere with the autofocus and they make focusing even harder. So stick with manual focus and place the focus wherever you wish. You can and should move the camera to find the perfect focus point.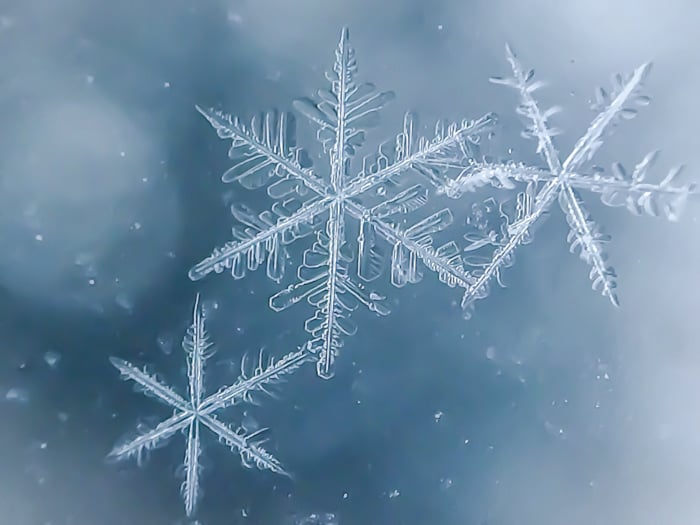
Why You Should Try Focus Stacking
Focus stacking allows you to take multiple photos with a shallow depth of field and stack them to create one image with the entire subject in focus.
This technique combines several pictures of the same subject but with different parts of it in focus. Because you’re stacking the same photo onto itself, you need to use a tripod and shoot from the exact same angle.
Once you have all of your images in focus, you combine them in Adobe Photoshop.
Lighting for Macro Snowflake Photography
When photographing snowflakes outside, you can take advantage of the natural light. Because snow scenes tend to be very bright, you probably won’t need anything but the ambient light you already have.
But if you want more light, you can use a flash ring. Ring flashes light all parts of the snowflake evenly and make it sparkly and clear. And because the flash sits on the front of the camera lens, it won’t create shadows.
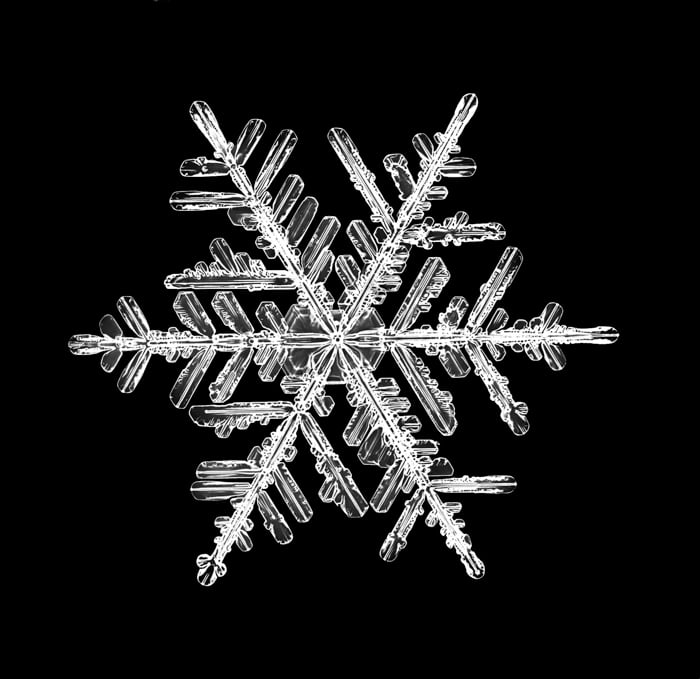
This is also the perfect setup for creating a translucent macro snowflake contrasted against a dark background.
How to Choose the Background
Choosing your location isn’t hard. If there’s snow, you can shoot macro images of snowflakes. But you should be more deliberate when choosing your background. Dark backgrounds are great because they create contrast with snowflakes, making them stand out more.
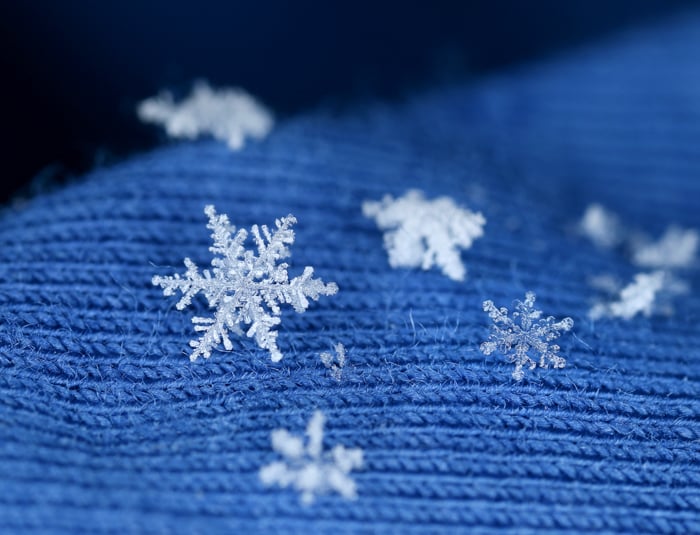
It’s difficult to physically move snowflakes against the background you want. So photographers use their gloves, scarves, or coats to capture the ice crystals that fall on them. But make sure whatever they fall on is also cold. You obviously can’t take photos of snowflakes if they immediately melt into water droplets.
If you find a snowflake that’s fallen on a window, shoot the snowflake through it. The winter wonderland outside will provide a nice winter backdrop for your snowflake photos.
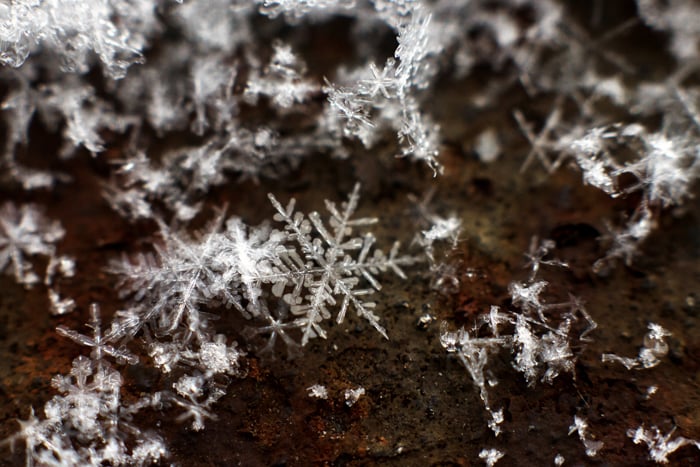
When the ground isn’t completely covered in snow, it can also serve as a dark background. But you can also use a white, snow-covered part of the scene if the crystal in focus stands out from it.
Other Considerations for Photographing Snowflakes
There are a few other things to consider when shooting macro snowflakes. Because snowflakes either melt quickly or freeze in contact with other snowflakes, it’s best to shoot them as the snow falls. Setting up your tripod with a remote shutter allows you to frame your shot and snap photos as snow falls.
The other thing to consider is the temperature. Obviously, shooting outdoors in the winter means you’ll need to dress warm. And needing to operate your camera presents a different set of challenges while wearing warm clothing. Here are our top recommendations for the best photography gloves, including good choices for winter temperatures.
The temperature also affects your gear. The most noticeable thing is that your battery won’t last as long in cold weather. It’s always a good idea to ensure your batteries are fully charged before you leave the house. But it’s an even better idea to always carry an extra battery.
Conclusion—How to Shoot Snowflake Photography
Snowflake photographs are beautiful pieces of art. And macro photography gives you the ability to capture magical images.
With the right gear, techniques, and cold-weather considerations, you can capture snowflake images that are sure to wow your viewers!
- Learn to take stunning photos without stepping outside.
- Discover affordable ways to convert any lens for macro shots.
- Explore unique techniques for lighting and composing your subjects.