If you’re just starting out as a professional photographer, or if you’re thinking about starting your own photography business, one of the most important things you’ll need to do is prepare for your first client photo shoot. This involves more than just showing up with your camera and tripod! Here are some tips to help you get ready for your first photo shoot.
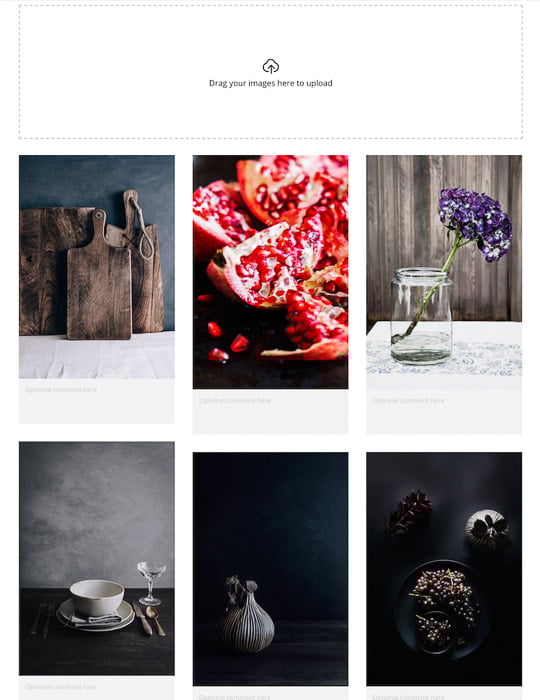
Create a Mood Board for a Photo Shoot to Share Ideas With Your Client
This is to make sure that you and your client are speaking the same language. It’s crucial to have visual information that communicates the required end result.
A mood board is one of the best ways to do so. You can ask your client for one or come up with one yourself.
Simply put, a mood board is a collection of images gathered together in collage form. They are used extensively in design and photography to communicate the direction of a project.
Asking your clients for a mood board or images that represent the desired aesthetic will ensure that everyone involved in the photoshoot is on the same page.
Miscommunication occurs when people have different ideas about what different terms mean. You may have one idea about what constitutes a “dark and moody” shot while your client may have another. Your perception of the color teal maybe someone else’s green.
Having a mood board can help you and your client define the lighting style, color treatment, composition, or any other important elements that are desired for the final images.
Note that 4-6 images are all that you really need. Too many images may dilute what is meant to be conveyed.
Ultimately, a mood board can go a long way in preventing any client dissatisfaction and the need for a costly re-shoot.
Do a Tech Scout of the Location
A tech scout (or technical scout) is when you visit your shooting location ahead of time to get “the lay of the land”. It’s a term used widely in the film industry but it’s important to photography as well.
Location can make or break a photograph. It’s important to know exactly what you’ll be dealing with before you do a professional shoot.
As a commercial photographer, I try to do a tech scout for every shoot I do for a client.
If I’m shooting in a new studio, I make sure I have enough space to work in and that the studio has a kitchen. This is necessary for me as a food photographer working with stylists.
If I’m shooting at a restaurant, I visit beforehand to see if there are enough windows for me to shoot in natural light. Or if I will need to bring in lighting equipment.
When shooting outdoors, there can be a variety of factors that can influence your shoot. These include the light you’ll be photographing in, how public the space is, and what the actual terrain looks like.
There is always some thinking on your feet involved in photography. But anticipating any problems before the actual shoot will ease your stress and help you make sure that you have everything you need to be successful.
Are there enough large trees in that park that you can move your subjects too if the sun is too harsh? Is the area where you want to take family portraits actually too crowded?
Or maybe the tide will not be out far enough at the time you intend to take engagement photographs at the beach.
Timing your shoot with the position of the sun can be crucial for most outdoor shoots. You can use an app like Sun Seeker to help you determine where the sun will be for your shoot.
Make sure that you bring your camera to the tech scout and the lenses that you plan on using. Not only can some test shots be used to determine possible camera settings for your shoot day, you may need to send them to a client.
Professional photographers often scout 2-3 locations for a potential shoot. Then they let the client choose where the shoot will ultimately take place.
Keep in mind that putting a tripod down in some public places can require a permit.
If you’re shooting a portrait, you might be able to move along if you encounter this scenario. But with a commercial production, it can potentially be disastrous.
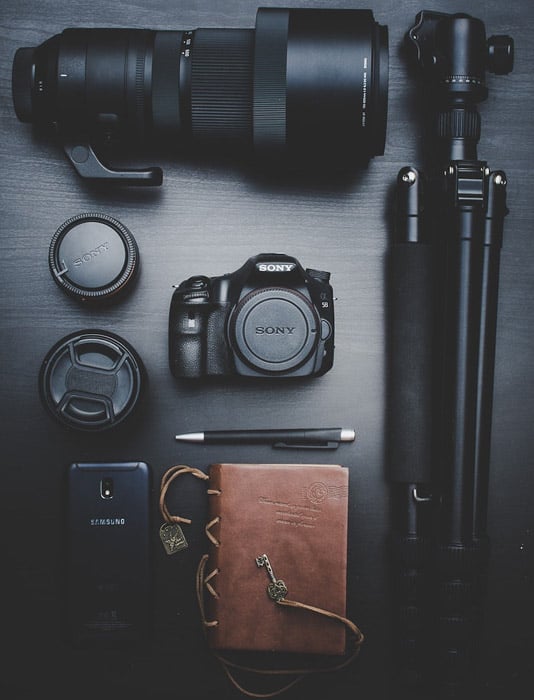
Rent or Borrow Extra Gear You Might Need
A big part of photography is problem-solving. Unfortunately, this often means gear issues or technical difficulties.
First of all, make sure that you have all the gear you need to pull off the photo shoot.
This may mean renting items that are not part of your regular setup or purchasing extra SD cards, etc.
You should also bring at least two of everything.

This doesn’t mean just two batteries and SD cards. It also means two cameras, a variety of lenses, and extra extension or tethering cables.
A backup camera may be the last thing you can afford financially. But you also cannot afford to have your equipment die on you on an important photo shoot.
Digital cameras get error messages and stop functioning for a host of seemingly inexplicable reasons. You need to be prepared for this.
It might mean borrowing a camera from a photographer friend. Or buying a used one that might not be top-level but will help you get the job done in the event your camera craps out.
The same goes for lighting equipment if you use it. Not only do I bring an extra strobe light to my commercial shoots, I also bring a couple of extra speedlights and remote triggers in case something goes wrong with my strobes.
Make a list of every single item you will need to complete the shoot. Then make sure that you have it or can buy it or rent it.
Hire an Assistant to Speed Up Your Workflow
There are certain types of shoots that require assistance. Wedding shooters often have backup photographers that shoot alongside them. This ensure they get images that they may have missed.
Other photographers have assistants to hold reflectors, help with small things like changing batteries and lenses as well as transporting gear.
The role your assistant should take is up to you, as is figuring out when you actually need one.
I have an assistant on almost every shoot that I do, even if the job is seemingly small.
In fact, I worked with an assistant on my very first food photography job. That was a two-day restaurant shoot where I was required to photograph fifty dishes!
My assistant helped me swap out background, change my lenses and adjust my tripod. He also acted as the liaison between me and the kitchen.
His assistance helped my workflow go much faster and ensured that I would be done on time.
On shoots where I have needed to use artificial lighting in studio, my assistant has managed my lighting and gear in addition to making sure everything I need is at my fingertips.
There is only so much you can do with one pair of hands. Having an assistant is not necessarily expensive and the cost is worth tacking onto a quote or even paying out of pocket for if need be.
What to Do the Day Before the Shoot
Here are the things you need to do the day before your photo shoot.
- Finalize what equipment you’ll need to bring. My suggestion is to have a checklist of the gear and accessories you need to bring to shoots and refer to it whenever you are packing your photo shoots. If you are working on a commercial shoot, you will need to determine any gear rentals ahead of time. Pack any reflectors, extension cords and your laptop if you use it for tethering.
- Clean your equipment. Wipe your camera and lenses and laptop keyboard and screen.
- Charge your batteries. Have several on hand to change out before you run out.
- Look up directions to the venue. Don’t rely on your GPS on the day of. I have been taken to the wrong address by relying on apps more than once.
- Check your camera settings. Make sure they are at a neutral starting point or that any settings that you don’t want are switched off and vice versa, such as back button focusing or exposure compensation.
What to Do the Day of the Shoot
Always be early for your shoots. How early you need to be will be determined by the type of shoot you are doing.
If you are shooting in a studio, you may need at least an hour to set up and test your lighting.
On the other hand, if you’re doing family portraits, fifteen minutes should be sufficient to set up your gear depending on the light source at the location.
Hopefully, you have done a tech scout and are familiar with the location. But give yourself extra time if you need to find parking or if you need to walk a stretch.
Any model releases and contracts should be signed up front. Bring a copy of these with you in case you need to refer to them.
Conclusion: Photo Shoot
There is that old saying that an ounce of prevention is worth a pound of cure. That is definitely true when it comes to pulling off your first professional photo shoot.
The last thing you want is to discover a dead battery with no backups, or that you have forgotten to pack your favourite lens.
Knowing you have everything under control will help you focus on your photo shoot and allow your creativity to flow.
Check out our post on whether shooting mini sessions are a valuable extra for your business, or a waste of time!