Every digital photo has data about it included in the image file. This is what we call EXIF data.
This information can show you the camera settings you used to take a specific photo. Knowing how to find it can help you see how these settings influenced the picture and improve your skills.
EXIF stands for Exchangeable Image File Format. This data is in every image file a camera records.
Some of this information will be more helpful to you than others.
It includes settings such as:
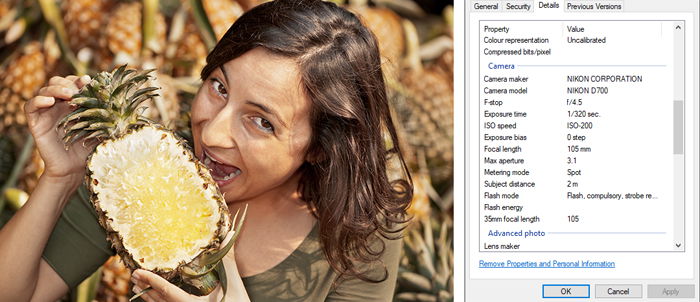
© Kevin Landwer-Johan
If you have taken a photograph and it's blurry, knowing how to view EXIF data might help you understand why. The EXIF data includes camera settings like the aperture and shutter speed.
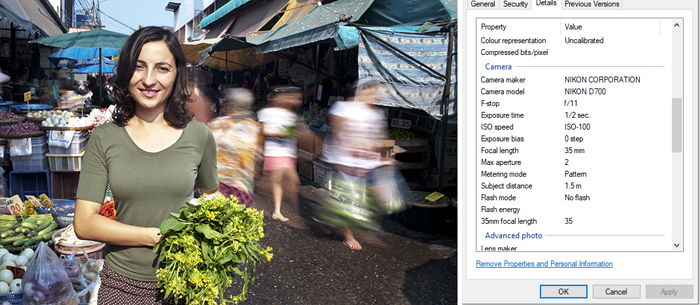
© Kevin Landwer-Johan
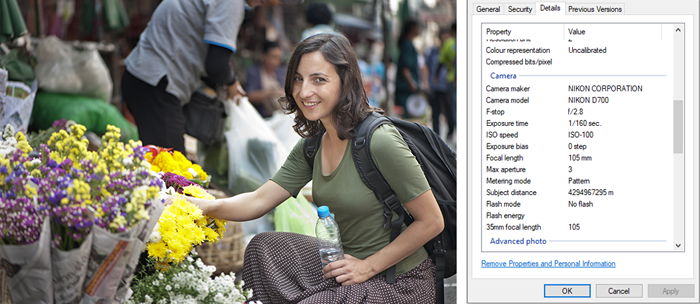
© Kevin Landwer-Johan
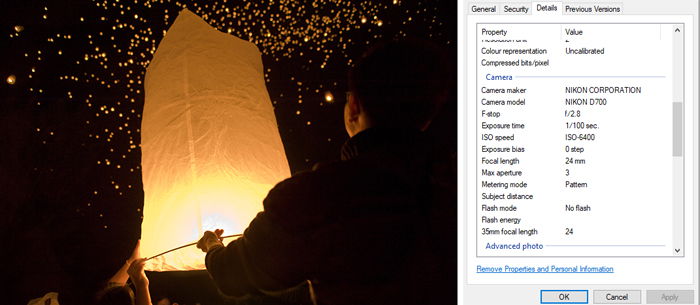
© Kevin Landwer-Johan
You can view EXIF data in several ways. It is possible to see the EXIF data for a photo immediately after taking it. The information can be seen on your camera's monitor. On most cameras, it’s easy to see by scrolling through the Information settings until you find it.
Consult your camera manual or do an online search to discover how to view EXIF data on your camera model.
There are dedicated EXIF data viewer software programs available. Imaging software always includes the capacity to view EXIF data. You can also see the EXIF data directly from within your computer's file system.
On a Windows PC using File Explorer right-click on the file you want to see the data for. You will see a window pop up with various options. Click on Properties and then on Details. This will bring up the EXIF data for that photo.
On a Mac computer open the image with Preview. Now click on Tools> Show Inspector and then click on the EXIF tab.
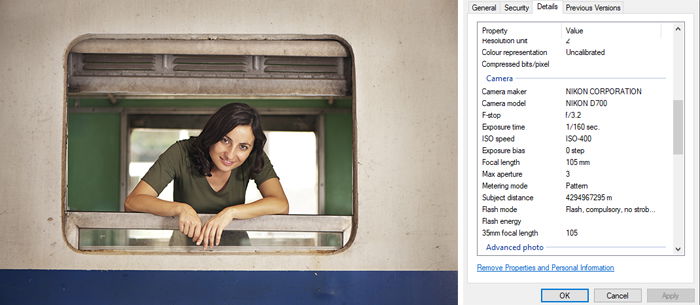
© Kevin Landwer-Johan
You can gain insight when making comparisons between photos you’ve taken. Looking at the EXIF data about the lens used for a picture can help you know when it’s good to use the same focal length.
Compare aperture settings and how they look on two different lenses. This will help you understand the depth of field and the way bokeh appears.
Comparing how the same setting looks with two different focal lengths is interesting. You can experiment by taking a series of photos at various focal lengths and study the results. This will give you an understanding of how each photo looks depending on what focal length you used to make it.
I often encourage photographers with new cameras to set up a test to figure out how high they can set their ISO. Making a series of photos of the same subject at different ISO settings will help you see when there's too much digital noise in your pictures.
Viewing the EXIF data for each photo will show you the ISO setting used. This way, you can set a limit to the highest ISO setting you are comfortable to use. Without knowing how to view the EXIF data, this exercise would be more difficult.
Many cameras and devices will allow you to alter the settings not to record any EXIF data, or to restrict what gets recorded. You can also remove EXIF data from images once you load them to your computer.
Most image processing software allows you to alter or remove EXIF data when you save a photo or export it. This option will often show up in the Save or Export dialogue box.
Search for specific information online to show you how to do this on the software you use.
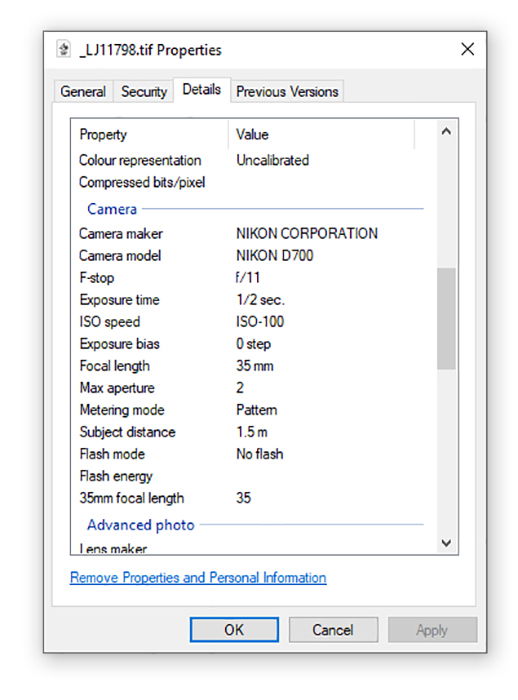
To remove the EXIF data from a photo on a PC you can right-click the picture and choose Properties>Details. At the bottom of the box, you will see an option to Remove Properties and Personal Information.
You can make a copy of the photo with the information removed. Another option is to remove the data from the original. Click “OK” to confirm which option you decide to use.
Using a Mac open the photo you want to remove the EXIF data from using Preview. Go to Tools and select Show Inspector. Select the ‘i’ tab and click the EXIF option and delete the data.
Knowing how to view EXIF data can help you learn a lot about the photos you take. As you practice reading and using the data, you will learn which aspects are most useful.