12 Wedding Photography Lighting Tips (Natural Light & Flash)
When it comes to wedding photography, lighting is key. You want to make sure that your photos are properly lit so that the bride and groom look their best. Here are 12 tips for the best wedding photography lighting.
Wedding Photography Lighting: Natural or Artificial?
One of the first questions wedding photographers face as they visualize the shot is the type of light natural, or artificial? Both natural light and flash have a unique look and a distinctive set of advantages and disadvantages.
First, however, photographers should understand that there's seldom a "correct" way to light a photograph. Sometimes, using a flash is the only way to get a technically correct, sharp image in the available light. Most of the time, the lighting gear that you use or choose not to use is a matter of style, not right or wrong.
So when do you use natural light, and when do you use artificial light?
First, rule out the obvious sometimes, photographers aren't permitted to use a flash. Check with the officiant before the ceremony, since many ceremonies do not allow flash. Remember to be considerate and avoid ruining a quiet moment with several invasive pops of light.
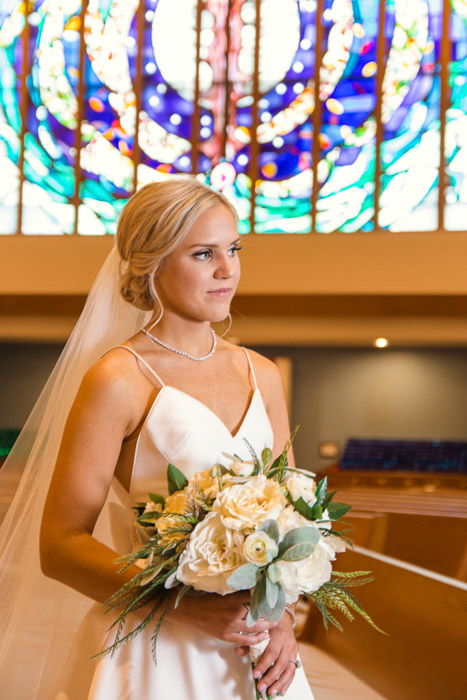
The next consideration is what light already exists within the space. When the light in the room is already beautiful, leave the flash off. For example, in a bridal preparation room with a nice large window, I'll ask the bride to move so that the window light hits her in a certain way while she is getting ready. No flash required.
If the existing light is boring, a flash can add interest to the scene. Flash also tends to add more contrast to a photo. The burst of light also helps freeze action, allowing for shooting at slower shutter speeds. Flash will also allow you to create dimensional lighting even on a cloudy day.
And flash is also a fix for many different problems that may pop up in wedding photography, like an underexposed couple, or an overexposed sky.
Sometimes, the existing light is already beautiful, but instead of ruining the light, a flash or reflector can add just the right details to the shot. Balancing ambient light with flash is tricky, but often well worth the effort. For example, I will add a flash turned on the lowest power just to add catchlights to the eyes in a beautiful backlit scene.
As you learn wedding light, learn to look for scenes that already have gorgeous existing light, and when to add that beauty with a flash.
Find Your Wedding Photography Lighting Style
While some shots aren't possible without a flash, sometimes the decision on how to light the shot is simply a matter of style.
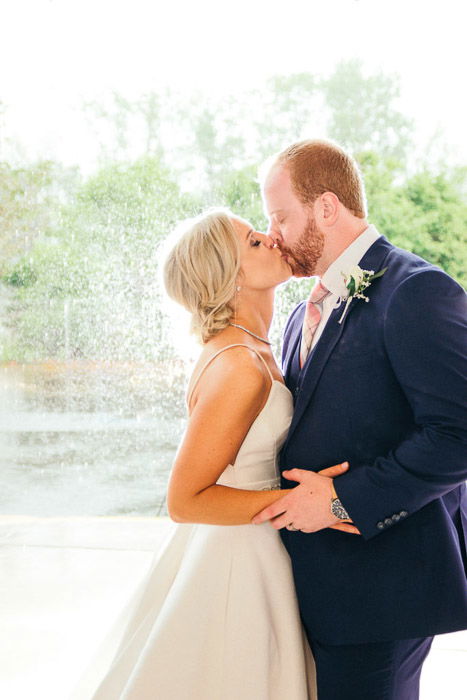
Let's look at a scenario that is technically correct with or without the use of a flash a portrait of the newlyweds, backlit by the sun. Myself, I would use a low powered flash or a reflector as a fill light to retain both the details in the couple as well as the details in the surroundings.
Without a flash, a backlit sky will be overexposed to white instead of blue. (And I'm also a stickler for catchlights, which requires some form of light in front of the couple as well).
Another photographer could shoot that same scene without a flash and wouldn't be incorrect either. Photographers with a light and airy style, rather than a style with more dramatic colors and contrast, would shoot that backlit couple without a flash. They’d expose for the couple's faces and intentionally overexpose the sky.
The result of both choices is a technically correct photograph, but with very different styles. Defining your wedding style plays a big role in the decision on how to light a photograph. Some styles will use flash more often than others.
While styles differ, don't opt for natural light photography just because you don't understand flash. Photographers need to be ready when a wedding presents a scenario that's impossible to shoot without a flash.
Understanding flash will also support your understanding of light in general. Once you've learned photography lighting equipment, even your natural light photos will benefit.
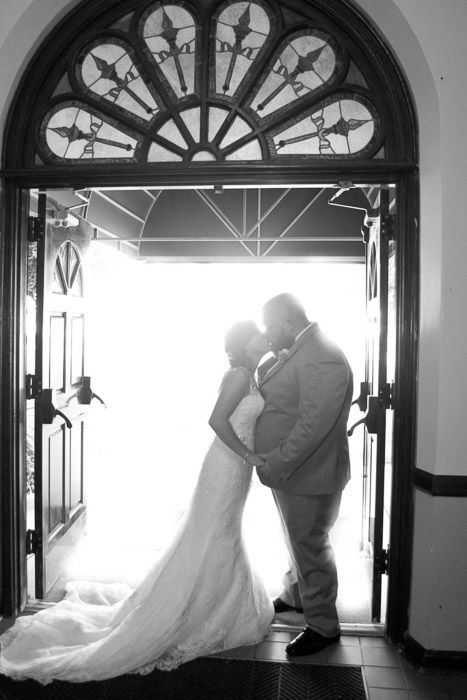
Use Backlighting
The direction the light is coming from plays a big role in the final image. When it comes to weddings, backlighting is often a favourite because of the way traditional wedding attire looks when backlit, not to mention the halo-like glow that backlighting creates in any portrait.
The bride's veil will appear to glow when backlit and the skirt of many wedding gowns will also pop in backlighting.
Backlighting with the sun, the couple will be underexposed without the right settings. One option is to use a fill flash, which creates more contrast and allows both the couple and the sky to be properly photographed.
Another option is to meter for the couple's faces, so that the bride and groom are properly exposed. In this scenario, placing the couple against a darker background maintains that contrast. Placing the couple against an intentionally overexposed sky creates more of that light and airy look.
An off-camera flash can also create backlighting. The flash behind the couple can mimic that golden hour backlighting on a cloudy day. A flash from behind can also freeze raindrops or create an interesting silhouette for a nighttime portrait of the couple.
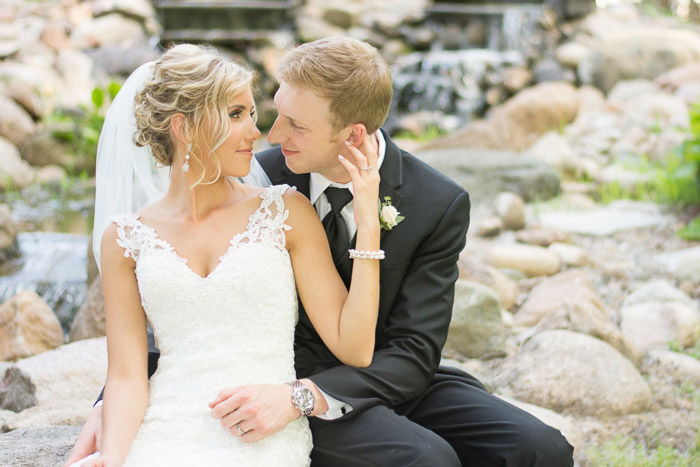
Use Sidelighting – But Watch Out for Shadows
Positioning the couple so that the light is coming in from the side is another way to use light effectively for weddings. Unlike shooting with the flash or light source in front of the couple, side lighting will create more interesting shadows and is less boring than front lighting.
Like backlighting, side light can be created from a low sun or a flash. The key to using side lighting is to watch the way the light falls across both of the couple's faces. Look for light that flatters both the bride and the groom.
Make adjustments to the light to achieve the right amount of shadows, or have the bride or groom tilt their face towards (or away from) the light to get light that adds depth while highlighting the bride and groom's best features. For example, avoid large shadows on the nose, or the nose will look larger.
If you're not sure where to start with side light, start with the light at a 45-degree angle towards the front or back of the couple and adjust from there.
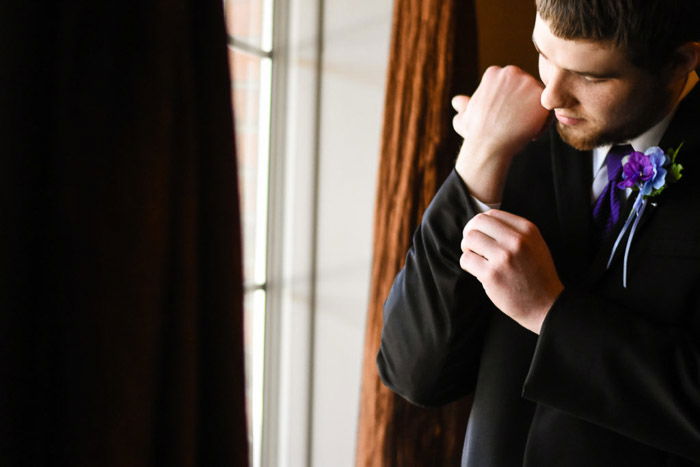
Windows Can Be Great – Or Terrible
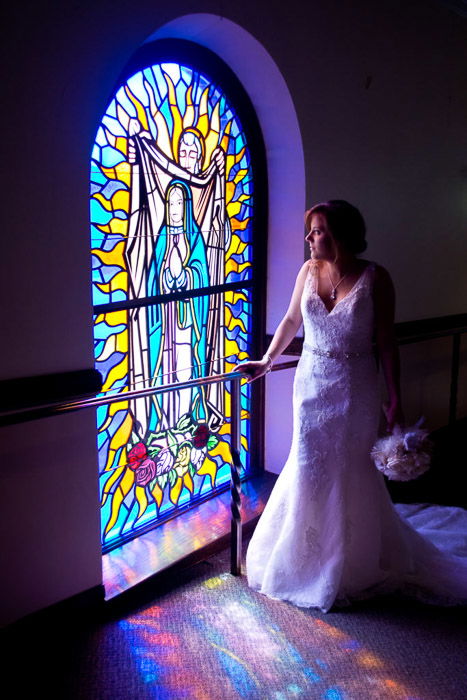
Windows often create soft, flattering light that's easy to work with. Just like working with flash or the sun, windows can be used to shoot with backlighting and side lighting.
Placing the bride, groom or both at an angle to the window creates soft, flattering light. And placing them in front of a window is a good opportunity for a silhouette or intentionally blowing out the highlights of the window. I would always rather shoot in a room with windows than a room without any windows at all.
So why the frenemies? Windows are great for photographers, not so great for photo editors. I recently shot at a church that had windows at the very back of the sanctuary. That allowed me to shoot without using such a high ISO. The problem? Wide angle shots had two different white balances, for both the window and the overhead lights.
I used the gradient tool in Lightroom to adjust the white balance in only one portion of the room in order to balance the light in the image.
Overall, windows are better than no windows. If you can't use window light to light up the entire shot, however, you'll need to do some white balance adjustments later. You may need to make a note of what the colors in the room should be in order to create an accurate adjustment later.
Use a Reflector
Reflectors are both a stepping stone to learning how to work with artificial light and a tool that many photographers continue to use even after mastering lighting with flash. A reflector is easy to use because it bounces back the light that's already in the scene. There's no guesswork to determine just how much light to add to the scene.
Reflectors work great as wedding photography lighting equipment on sunny days. With the sun behind the couple, bounce back some of that light with a reflector in the front. The reflector will fill in the couple, allowing for a more even exposure between both the subject and the background.
While reflectors come in many different shapes and sizes, my favourite for wedding light is a shoot-through reflector. The shoot through reflectors are easier to use without an assistant and work well for backlighting. The ring of light from a shoot through reflector is also flattering and works excellent for portraits.
Never Shoot With a Bare Flash
Many new photographers are afraid to use flash because the first time they popped on that flash, it simply looked awful. Flash looks awful because it's a small, powerful light that creates harsh, unflattering shadows. But that awful hard light? You can turn it into a softer, more flattering light.
The first step to create more flattering light with a flash is to stop shooting with a bare flash. Naked flash is bright and harsh. To fix that, photographers have two main options diffuse it, or bounce it. Diffusing the flash spreads the light out for a softer, more flattering look.
Flash diffusers come in many shapes and forms. The key is to look for something larger than your flash head, not the little plastic caps that are the same size. I use the MagMod diffuser. Inexpensive flash softboxes also create nice, soft light, but they don't stay put on the flash quite as well.
The other option is to bounce the flash. Indoors, you can bounce the flash off a ceiling or wall, but sometimes, that ceiling is 100 feet up or you're outside and, well, there's no ceiling. Bendable flash panels will help bounce the flash when nothing else is handy.
The Rogue FlashBender is popular among wedding photographers as a flash accessory that can be bent to get that perfect bounce angle.
Stick to Manual Flash
Diffusing or bouncing that flash is one half of the equation. Using manual flash is the other half. TTL or Through the Lens automatically adjusts the flash based on the light in the room. But TTL is like auto mode on your camera.It doesn't get the settings right near often enough.
Manual flash allows you to control the amount of light to eliminate the rest of those harsh shadows that modifiers can't take care of.
Manual flash is adjusted in fractions. 1/1 is full power, 1/4 is quarter power and so on. Learning manual flash is a bit more experimentation than manual. There's no tool like the built in meter on the camera.
Since most of the time, TTL is too powerful, start with a low number like 1/8 power and adjust up or down from there. Look for hotspots on the skin and dark shadows behind the subject. If you see those, then the flash is too high.
Flash power will depend on what you are lighting, how you are lighting it and the existing light. To add a bit of catchlights in the sun without ruining the ambient light, I use the flash with a diffuser at the lowest possible setting. For portraits with an off camera flash, the light is a bit higher, about 1/8. My flash is seldom on 1/1 power.
Balance Flash and Ambient Light
Wedding light with a flash is about both understanding the flash and how the camera settings work with the flash. The shutter speed will determine how much of the ambient light pops up in the background of the photo. If the shutter speed is high, you'll get a bright subject and a black background.
If the shutter speed is low, both the flash and the ambient light will appear in the image, preventing that black background. A fast shutter speed with flash, then, can help if the background is distracting. If the background contains important details of the day, a slower shutter speed will help keep both subject and background well lit.
You can change the brightness of the flash using those manual settings. But aperture will also play a role in the brightness of the part of the image lit by the flash only, leaving the background alone. Lowering the f-stop will create a look similar to raising the power of the flash. The lower the f-stop is, the brighter the flash will appear.
That's one of the reasons I tend to shoot on the lower end of the manual flash settings. Most of the time, I'm using a wide aperture. If the flash isn't bright enough using the settings on the flash itself, use a wider aperture. The same goes for when the flash is too bright even with manual settings and a diffuser. Try using a narrower aperture.
Finally, ISO will also effect the look of the flash too but ISO affects the image as a whole, just like when you aren't using a flash. Shutter speed determines how much of that background comes through, aperture affects the brightness of the flash.
If the background and the flash are perfectly balanced but the image as a whole is too bright or too dark, leave the shutter speed and aperture alone and adjust the ISO instead.
Bring Your Flash Off-Camera
Lighting a subject from the front is technically correct. But while soft front lighting is flattering, the shadows from a wide or backlit subject are often more interesting. On camera flash doesn't create the interesting shadows and depth of an off-camera light.
Once you've mastered balancing the flash with the existing light, explore off-camera flash. A flash transmitter and receiver will allow the flash to continue talking with the camera while off the actual camera. And there's a wireless system for most camera bodies.
An inexpensive adapter will allow a tripod to hold the flash for you, or you can purchase a light stand or pay an assistant to keep the flash in place.
Using manual flash and a diffuser works the same with off camera flash. But now you have the flexibility to create your own light using different angles. Using an off-camera flash, my go-to angles are a 45-degree angle towards the front or back, or completely behind the couple for backlighting.
But with off-camera flash, the possibilities are almost as endless as your imagination. Off camera flash adds depth and dimension, where on-camera flash creates a flatter image because all the light is coming from the front.
Off camera flash is more time consuming and less mobile. When you don't need complete mobility, taking the flash off camera makes a dramatic difference in the wedding light.
Make the Most of Existing Light
Learning flash not only helps you know how to light any scene, but also how to recognise amazing light that already exists in the scene. Lights in the scene can be used just like side and backlighting with a flash.
A DJ's colored lights, for example, can serve as backlighting during the reception dances. A window is just a flash with a giant softbox.
The more you work with wedding lighting, the more you'll be able to quickly assess a scene's light and capture creative, well-lit shots using what's available on the scene and the gear in your bag.
Conclusion
Learning wedding photography lighting isn't a ten-minute process. You can't read the entirety of this article and shoot a wedding five minutes later using all these tricks. Instead, take one tip at a time and practice with a friend. Then, add the remaining wedding photography tips one at a time until you have a firm grasp on light, from ambient light, to flash and balancing it all.
Avoid trying something for the first time at a wedding. If you've never taken the flash off-camera, for example, try shooting portraits with a friend first. A wedding isn't the time to learn how to use new photography lighting equipment or techniques.
Understanding light helps wedding photographers both capture technically correct shots and get creative with the resulting images. But wedding lighting is more than adding a bare flash to the top of the camera.
It's about understanding the mix of natural and artificial light, how light plays a role in style, when flash makes a shot great and when a flash ruins the shot. Start by working with windows, reflectors and the sun, then learn how to make a flash look good.
With some practice and wedding photography lighting tips, you'll be able to create a relationship between the natural light and the flash that's almost as good as the couple's.
For more great lighting tips, check out our article on low key lighting for more dramatic images.