When it comes to photo editing software, there are a lot of choices out there. Luminar vs Affinity Photo are two of the most popular options, but which one is right for you? In this article, we’ll compare the two programs and help you decide which is the best fit for your needs.
Luminar vs Affinity: What is Luminar Neo?
In this article, we compare Luminar NEO with Affinity Photo. Luminar NEO is the newest image editor from the Ukrainian-based company Skylum. Luminar NEO joins the older Luminar AI program. Both are available, but Luminar NEO is the flagship offering.
The company prioritizes intuitive user interfaces and AI tools. Artificial intelligence tools help you achieve your best images. Luminar NEO is a stand-alone program. But you can use it as a plug-in with Adobe Photoshop and Lightroom.
In a separate article, we looked closer at the Luminar Neo editing software. The head-to-head comparison of Luminar vs. Lightroom is very close.
Luminar Neo has powerful AI tools not available in Lightroom or even Photoshop. You can replace skies and add sun rays. The Portrait AI helps edit portraits by softening skin and suggesting changes to facial features. It is similar to the Liquify tool in Photoshop. You can also automatically remove power lines and dust spots from your images. One of the newest AI tools in Luminar NEO is the ability to relight a scene.
<img class=”wp-image-787456″ src=”https://expertphotography.com/img/2022/06/Luminar-vs-affinity-neo-workspace-relight-1200px.jpg” alt=”Screenshot Luminar NEO relight tool woman Florance duomo” width=”700″ height=”428″ /> Luminar NEO workspace showing relight AI tool
What is Affinity Photo?
Affinity Photo joins other programs by Serif like Affinity Designer and Affinity Publisher. This image editor is more like Photoshop than Lightroom. We took a closer look at Photoshop vs. Affinity in a separate review. Like Photoshop, Affinity has more than image editing tools. You can also create graphic designs.
Serif markets this as the fastest, smoothest, and most precise professional creative software. The program certainly looks professional and runs smoothly.
<img class=”aligncenter wp-image-787459 size-full” src=”https://expertphotography.com/img/2022/06/luminar-vs-affinity-workspace-feather-1.jpg” alt=”Screenshot Affinity Photo workspace” width=”700″ height=”438″ />
Photo Editing Comparison of Luminar vs. Affinity Photo
First, let's look at what both image editors do. The programs work on an IOS and PC operating systems. They both have a mobile app. They offer RAW file editing as well as handling other popular image formats. Also, both use layers. This makes them more like Photoshop than Lightroom. The programs work non-destructively, so you can always return to your original image. The history menu of both programs keeps track of each edit. You can easily go back and make a change.
Now, let’s explore the features of Luminar vs. Affinity and what makes each image editor unique.
Workspace
Photoshop users will find the Affinity user interface familiar. There are tools down the left-hand side of the workspace and panels on the right. But the workspace is certainly more colorful and inviting!
Affinity Photo workspace is called Photo “persona"
Affinity Photo has a few different workspaces, called personas. There is a Photo persona, Liquify, Develop, Tone Mapping, and Export. Photo persona looks like a cross between Photoshop and Adobe Camera Raw. The adjustments for basic photo post-processing are laid out in a panel.
Many of the tools on the left will be familiar to Photoshop users. The Develop persona is for working with RAW files, and Export lets you save the image in different formats. The Liquify tool is like the Liquify filter in Photoshop. You can change facial features and body shape, tools useful to portrait photographers. The Tone Mapping persona creates an HDR image.
In contrast, Luminar NEO feels like Adobe Lightroom. The workspace divides into Catalog, Edit, and Presets. Clicking the Edit tab takes you to the editing tools. Add layers in the left-hand column. The edit tools are grouped into Essential, Creative, Portrait, and Professional panels. Some overlap with Lightroom and Affinity. But others, like Landscape and Atmosphere, are unique to Luminar.
Affinity Photo also has handy assistants. When a new layer is needed, your assistant creates it for you. The results are quick and make your image look amazing.
In most of the tools, both programs start with simple options and reveal more detailed choices when you want them. For instance, Affinity gives a few choices with previews so you can see what your image will look like when you apply each option. When you select a choice, more options appear, letting you manually adjust the settings.
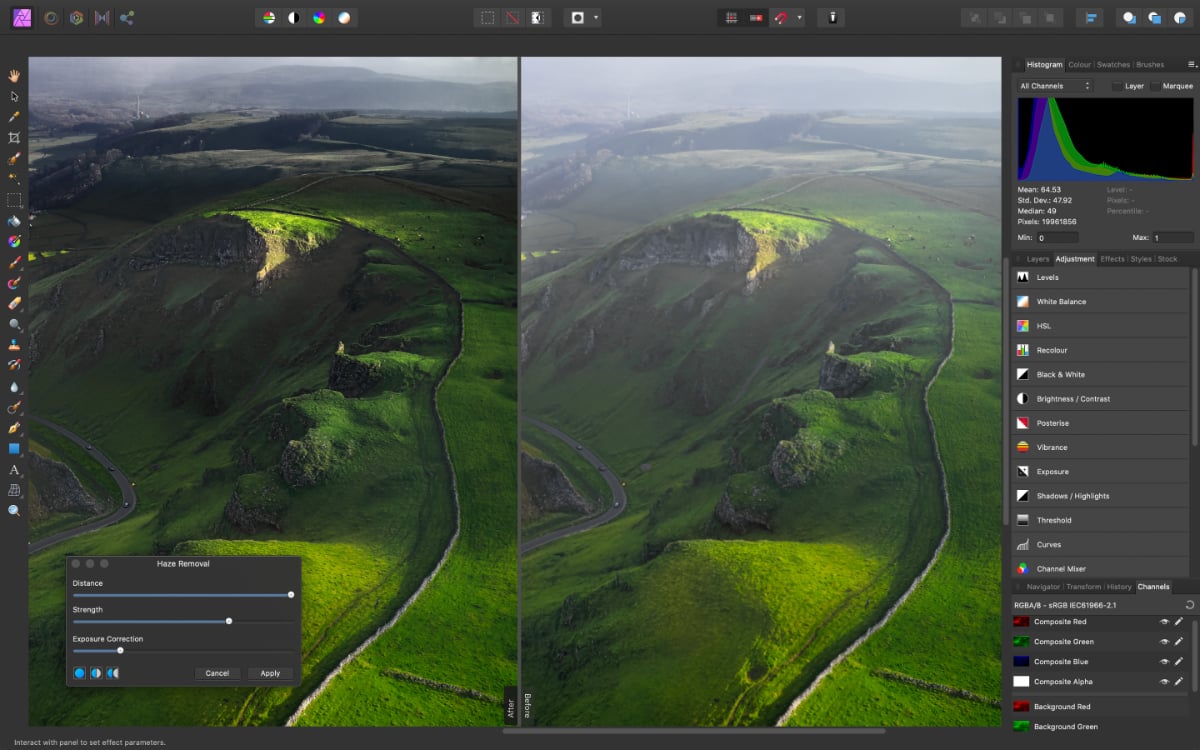
<img class=”wp-image-787468 size-full” src=”https://expertphotography.com/img/2022/06/luminar-vs-affinity-tool-previews.jpg” alt=”Brightness Contrast tool Affinity Photo screenshot” width=”700″ height=”286″ /> The Brightness/Contrast tool in Affinity gives you five choices including Lighter and Increase Contrast. Click an option to reveal manual controls.
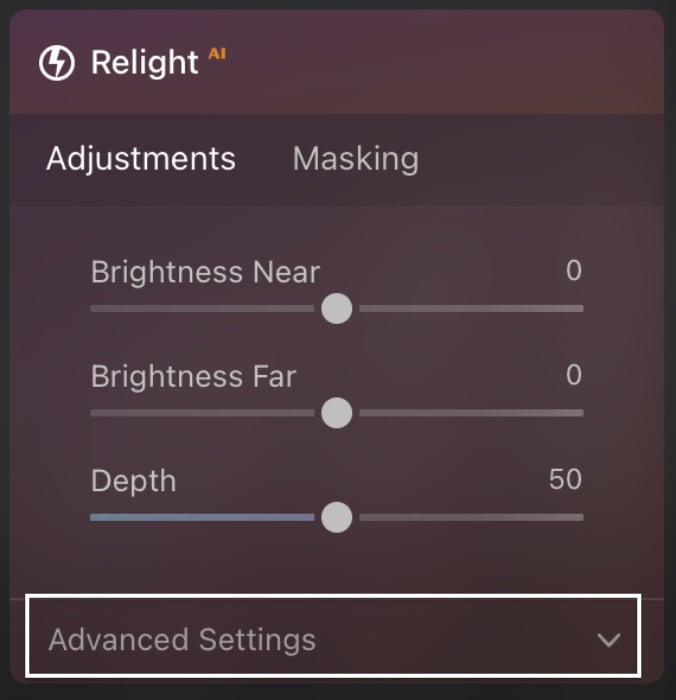
In Luminar Neo, opening a panel reveals the basic set of choices. Click the Advanced Settings button, and you get more options.
Importing & Exporting Photos
Like Photoshop, Affinity Photo works with one photo at a time. You can batch process, but you are limited in the tools you can use, and the process is not intuitive.
You do not have to import files into Luminar Neo. Simply point the program towards an image or a folder and start editing. Super simple!
Both programs have export options. Luminar NEO is more bare-bones compared to Affinity. But it does let you export to popular sites like Smugmug and 500px. The export options in Luminar NEO will cover the needs of most photographers.
<img class=”wp-image-787477 size-full” src=”https://expertphotography.com/img/2022/06/luminar-vs-affinity-export.jpg” alt=”screenshot Affinity Photo export window” width=”700″ height=”450″ /> Affinity Photo export window
Cataloging & Metadata
Like Photoshop, Affinity Photo is not set up for cataloging. But Luminar NEO will keep track of your photos. Luminar NEO has digital asset management tools. You can pick or like your images and put them into albums. But this is much simpler than Lightroom’s cataloging system.
Missing from Luminar NEO is the ability to see or change metadata. In this respect, the program has taken a step backward from its predecessor Luminar 4. Skylum releases updates frequently. Let's hope that rating options and viewing metadata will be back.
In Affinity Photo, you can access metadata and add IPTC data to your image. Affinity Photo will show your photo on a map if your camera collects location information. Also, there is a handy Focus menu that gives your hyperfocal distance. I am not yet sure how I can use this information, but I like that the program is finding my focus point.
<img class=”wp-image-787480 size-full” src=”https://expertphotography.com/img/2022/06/luminar-vs-affinity-metadata.jpg” alt=”Screenshot Affinity Photo metadata and focus panels” width=”700″ height=”373″ /> Metadata and focus panels in Affinity Photo
The Basic Editing Tools
Both Luminar NEO and Affinity Photo have common photo adjustment tools. Both make it easy to tweak the colors and exposure of your image. The tools are easy to use in both programs.
Like Photoshop, Affinity Photo creates adjustment layers when you make changes. But unlike Photoshop, this process works in the background. The user interface looks more like Lightroom or Adobe Camera Raw. Only when you open the Layers panel do you see that each edit is on its own layer.
Affinity Photo is a bit light on presets, overlays, and LUTs. Luminar NEO overflows with these one-click post-processing solutions. Plus, you can mark the tools that you often use as favorites.
The programs organize the tools differently. But everything you need for basic photo adjustments is there.
<img class=”wp-image-787483 size-full” src=”https://expertphotography.com/img/2022/06/Luminar-vs-Affinity-basic-photo-editing-tools-1.jpg” alt=”Comparison screenshots Luminar NEO and Affinity Photo adjustment tools” width=”700″ height=”489″ /> Both Luminar NEO (left) and Affinity Photo (right) have easy-to-use basic editing tools
AI Tools and Advanced Photo Editing Process
The programs begin to diverge when you go beyond basic editing and into advanced tools.
Luminar Neo uses artificial intelligence to help you achieve the best image. The program suggests a crop and ways to enhance your image. You can automatically add structure or a bit of atmosphere.
New to Neo is the ability to relight a scene. AI will help you edit portraits by softening skin and suggesting changes to facial features. The program will automatically remove dust spots and power lines. Luminar NEO has an AI sky replacement tool. It allows you to control the focus of the sky and even reflect your new sky in the water.
Like Photoshop, Affinity Photo goes beyond photography and lets you do graphic design and digital painting. But here let’s look only at the advanced tools in photography. A major difference is in the ability to merge photos. You can stitch together panoramas or do bracketed HDR merging. You can do focus stacking or make an astrophotography stack. There is no need for separate programs.
In many ways, stacking in Affinity Photo is easier than in Photoshop. It is easy to overlook Affinity Photo's swish resize tool. It is surprisingly fast, putting it up against Topaz Gigapixel, Photoshop, and ON1 Resize.
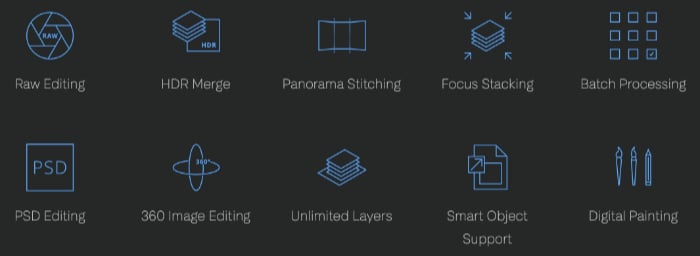
List of advanced editing tools and features in Affinity Photo
Affinity Photo is the only photo editor to offer a full end-to-end 32-bit workflow. This is for working on HDR images, renders, textures, or exports from 3D software. I will admit that I do not need this type of power yet. But it is nice to know my photography has somewhere to grow.
One glaring omission from Affinity Photo is an AI sky replacement tool. If you want to go beyond photo editing into painting or graphic design, Affinity Photo is for you.
Are They Easy to Use?
Like Photoshop, Affinity Photo has a lot of tools that let you do a lot of things. But there is a learning curve as you figure out each tool and its options. For instance, it was not immediately clear how to change the color of a brush stroke. I could change the size, opacity, flow, hardness, and a bunch of other factors. I could even make a cool mirrored spiral. But I could not change the color. I figured it out eventually.
The point is that Affinity Photo is not always an intuitive user interface. The unique terminology used in Affinity Photo also obscures the meaning. For instance, the Inpainting tool removes objects.

Affinity Inpainting tool removes objects
Luminar Neo has an easy-to-use, friendly interface. You should be able to open the program and start making changes right away. Click the button to remove power lines, and the program gets to work.


If you are not yet ready to lose the cataloging features of Lightroom, Luminar NEO works as a plug-in for both Lightroom and Photoshop. Affinity Photo works with Photoshop files.
What Are the Prices?
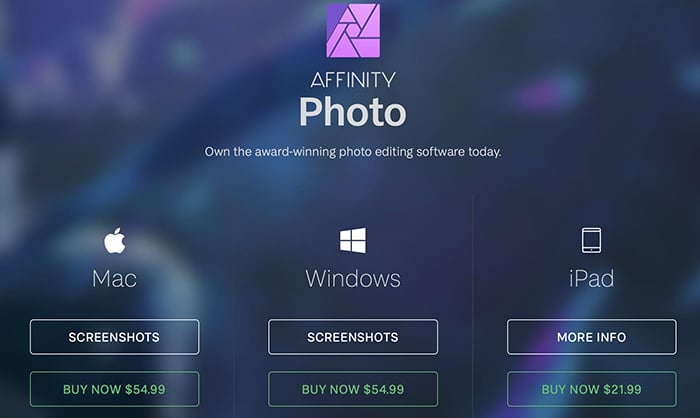
Luminar Neo and Affinity Photo are attractive to photographers who want to own the software. You buy the programs outright and use them for as long as you want. There is no annual subscription.
Combined, the price of both programs is the same as a one-year Adobe subscription. If you buy one program, it is about half of what it costs you for a year of Adobe. Use either program for more than a year, and you have saved some cash!
Affinity Photo offers a 10-day trial of Affinity Photo. Skylum does not have a trial version of Luminar Neo, but they offer a 30-day money-back guarantee. With Luminar Neo, you can buy the software for up to two computers. With Affinity, you have to buy a separate license for each computer.
Verdict: Luminar vs. Affinity Photo, Which is Better?
It is hard to compare Luminar vs. Affinity Photo. They have very different strengths. If you are wondering if Luminar NEO is better than Affinity Photo, the answer is no. But…
The programs are for different types of photographers. Luminar NEO focuses on creatively editing photos. It is immediately accessible to a beginning photographer. But it will be attractive to all photographers who want to be creative with their images.
Affinity Photo edits photos and much more. This program will do graphic design, HDR merging, panorama stitching, and focus stacking. Affinity Photo is the more powerful program. But it is not necessarily the most useful editing program for all photographers. Like Photoshop, it will take time to learn and is probably not for the beginner.
What the programs have in common is that they are both forward-thinking. The designers have a fresh take on what photo post-processing will look like tomorrow. Both make Adobe look a little stuck in the past.
If you want a photo editor that helps you quickly achieve results, Luminar NEO is for you. Affinity Photo is the program you are looking for if you want to go beyond editing a single image and merge images and add text.


