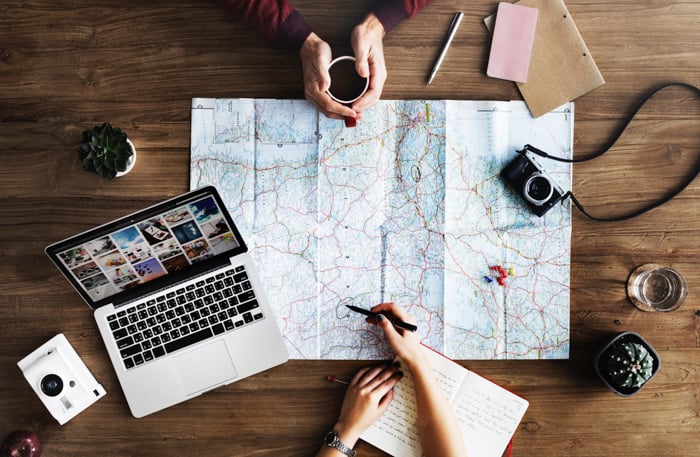
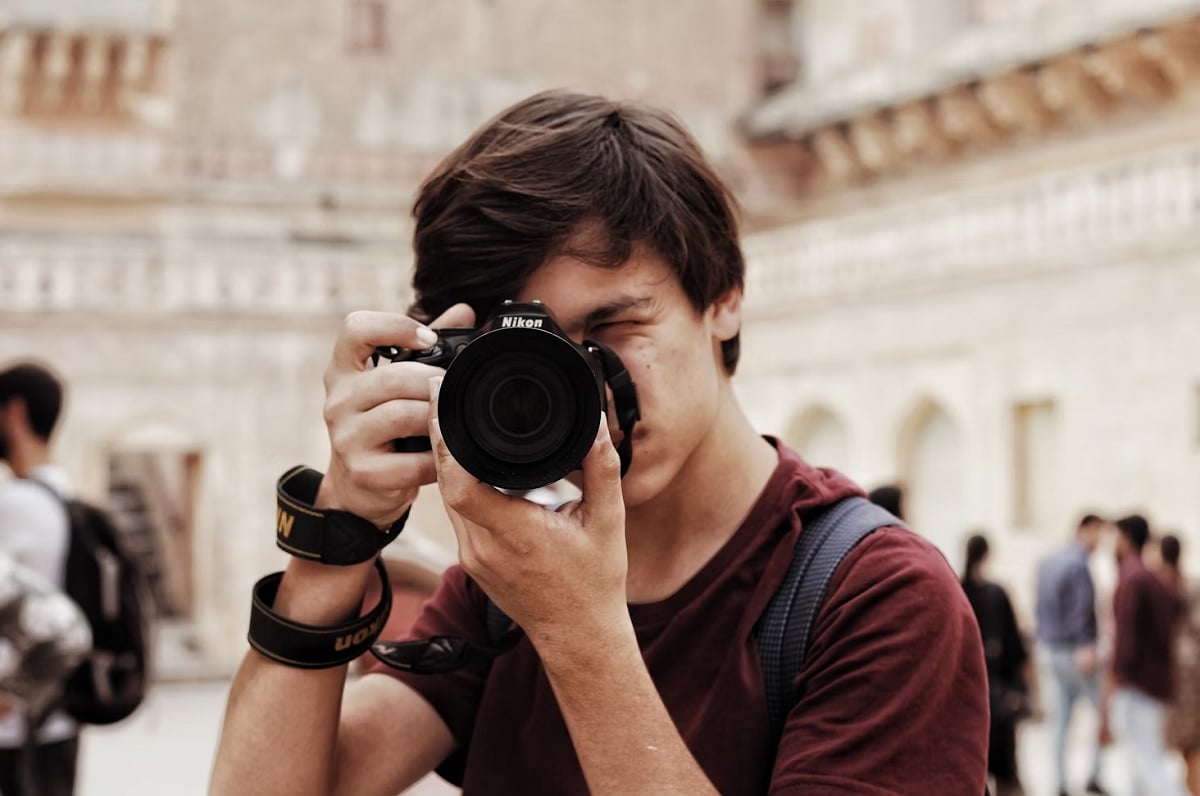
Travel photography is one of the most exciting types of photography you can pursue. Combining two of life’s great pleasures—exploring new lands and taking photographs—is a thrill any photographer would enjoy.
While travel photography is open to anyone with the drive to get up and hit the road, there are a few things you need to learn. That’s why we’ve compiled this in-depth article containing everything you need to know about travel photography. We cover everything from camera settings to the best travel gear, so keep reading to find out more.
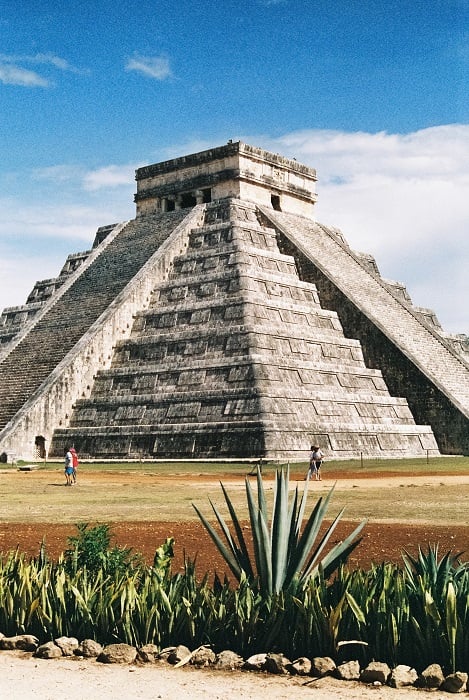
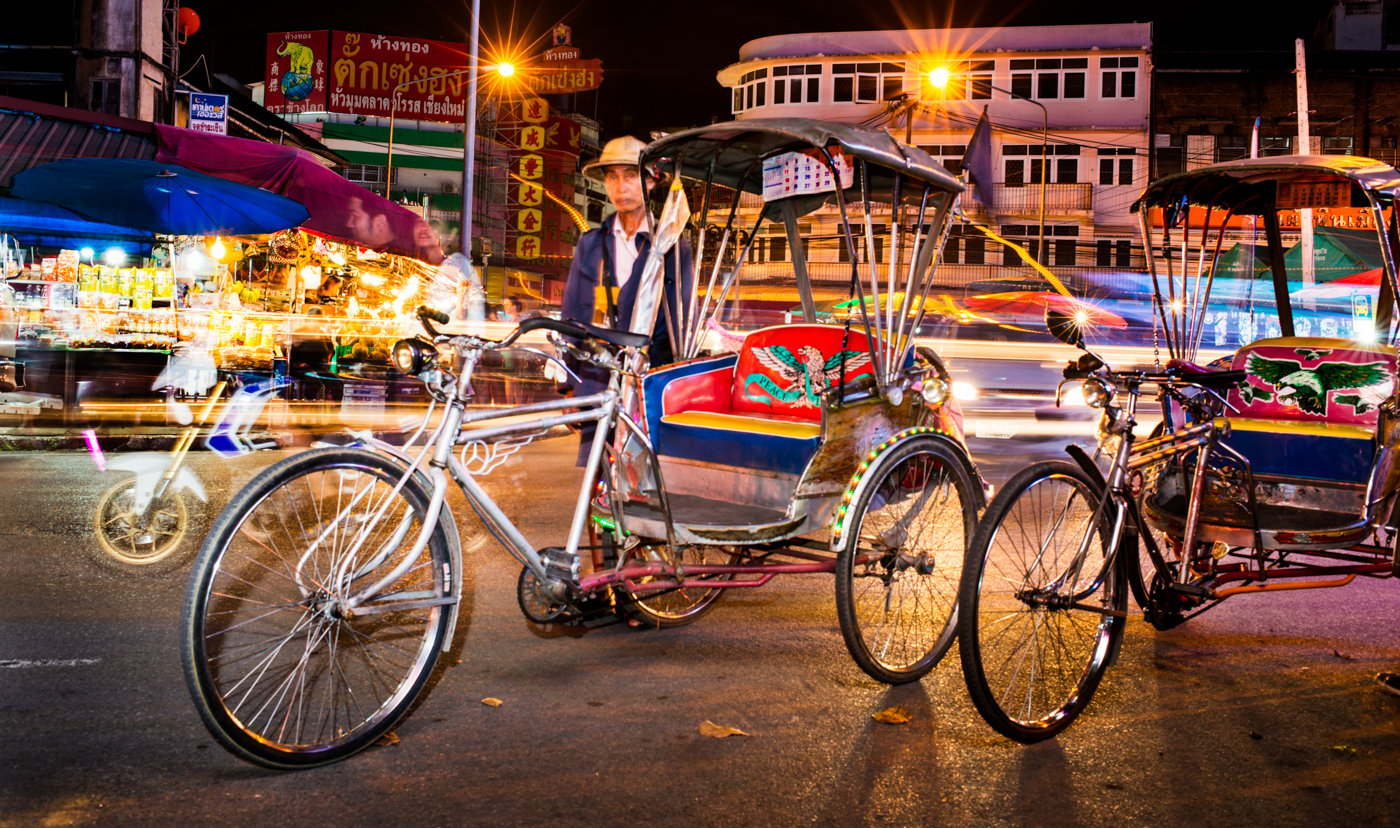
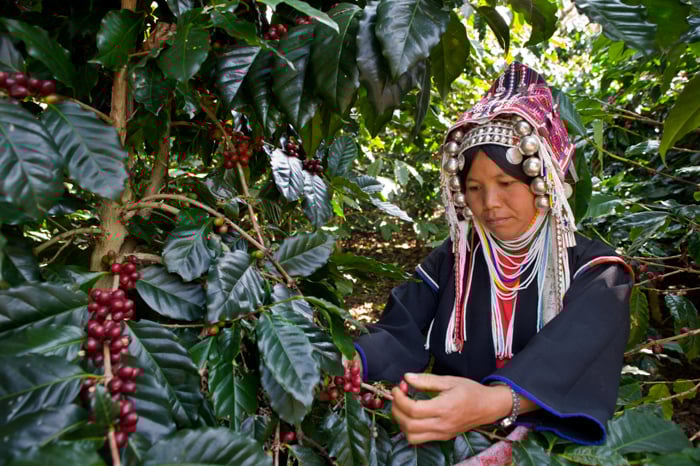
Chichen Itza, Yucatan, Mexico © Christopher Bryan-Smith
What Is Travel Photography
Travel photography is simply taking pictures of different places around the world. But good travel photos are not mere holiday snaps. Travel images should show a location in a new light so they’re interesting even for people who have already been there.
Travel photography involves many different styles and techniques. You can incorporate landscapes and portraits into your travel photography. You can even use more advanced techniques like time-lapse and long exposures.
A travel photographer needs to show more than the obvious. They need to explore each location at a deeper level and look for elements that make that place unique and interesting. It isn’t enough to take pictures of the famous landmarks. A travel photographer needs to look deeper and go beyond.
Far-flung exotic locations often hold the most romance for travelers, but you don’t have to go far to practice travel photography. Venturing to new locations is always exciting, but you can also photograph places you’re familiar with. Using your familiarity to your advantage, you can give viewers a deeper view of these locations.
Anyone can shoot travel photography. The first thing you need is a desire to explore the world, which is something you probably already have. But continue reading for everything else you need to know about travel photography, from techniques to gear.
Mastering Travel Photography
While travel photography is open to anyone with an adventurous spirit, mastering the art does require practice, knowledge, and skill.
Firstly, you need to understand your camera and its settings. You might be tempted to take the easy road and shoot in Auto mode. But you’ll get far better results and more interesting and unique images when shooting with semi or fully manual settings.
You should also experiment with composition, and you can try both color and black-and-white photography. These are stylistic choices that’ll give your travel photography a personal touch. You also have to consider specific types of travel photography so you’re ready for anything when you’re on the move.
The following sections cover mastering the art of travel photography. Click the links in the text for more information on each topic.
Camera Settings
When it comes to camera settings for travel photography, there are a few key things to keep in mind. First, make sure your camera is set to the right aperture and shutter speed for the type of photo you want to take. You’ll also need to adjust your white balance and ISO as you move through different locations.
To learn more about camera settings for travel photography, check out camera settings for travel photography.
Shot List
A travel photography shot list helps you plan and capture the best photos on your trip. Research the location thoroughly, including famous sights, experiences, geography, and lighting conditions. Look at existing travel photos for inspiration, but aim to create something unique.
Use a spreadsheet to organize your shots by day and time, considering factors like sunrise, sunset, and harsh midday light. Include a mix of portraits, environmental portraits, cityscapes, daily life moments, religious sites, festivals, food, transportation, landscapes, close-ups, architecture, night scenes, and wildlife.
Remember to be adaptable and respectful of local customs. With careful planning and a detailed shot list, you’ll be well-prepared to capture stunning travel photos that transport viewers to your destination. To learn more about creating a travel photography shot list, check out this in-depth guide.
Composition
Good travel photography composition captures the beauty and essence of a destination. Use the rule of thirds by placing important parts of your photo on the intersecting points of the grid. Or take advantage of symmetry by centering the axis of symmetry in one direction.
Direct attention with leading lines, using elements like paths or fences to guide the viewer’s eye to your subject. Frame spectacular views with windows or arches to provide context. You can also use bold colors to lead the eyes or balance the composition.
Change your perspective by moving around, kneeling, or shooting from a rooftop. Get close to fill the frame with your subject or step back to include surrounding context. Play with scale by including familiar elements like people to convey the impressive size of large spaces.
To learn more about travel photography composition, check out this in-depth guide.

Black & White
Black-and-white travel photography can be a powerful way to capture the essence of a place. By removing color, you can focus on the light, shapes, and textures that make a scene unique.
Pay attention to contrast and tone in your black-and-white photos. Look for strong shadows and highlights that create depth and drama. Texture is also important in black-and-white photography, so seek out interesting surfaces like rough stone or smooth water.
Most importantly, use black-and-white photography to connect with your subject and tell a story. Whether it’s a portrait of a local person or a landscape that captures the mood of a place, aim to convey emotion in your images.
By developing your own style and vision, you can create compelling black-and-white travel photos that stand out. To learn more about black-and-white travel photography, check out this in-depth guide.
Unique Perspectives
Taking unique photos of famous places can be challenging, but with some creativity and planning, you can capture stunning images. Start by researching the location and scouting out potential spots for your shots. Arrive early to avoid crowds and take advantage of the soft, golden light.
Look for elevated views or unusual angles to create a different perspective. Use composition techniques like the rule of thirds to emphasize the landmark in an interesting way. Including people in your shots can add a sense of atmosphere and tell a story.
Don’t be afraid to experiment with different techniques like light trails or time-lapse photography. If you encounter photography restrictions, think outside the box and find creative solutions. To learn more about capturing unique photos of famous places, check out this in-depth guide.
Documentary Photography
Documentary photography captures real-life events as they happen. It’s a form of visual storytelling that depicts the world around us. Documentary photographers often work on long-term projects to tell new stories through their images.
You don’t need to travel far to find good documentary photography ideas. Look for interesting subjects in your family or community. Focus on the people involved to help viewers connect with the story. You can also tackle big topics by photographing small, local stories related to them.
Visit and scout your locations before the shoot. Get comfortable with the basics of photography, like camera settings and composition. Keep your story personal and critique your work as you go.
If you want to learn more about documentary photography ideas, we have a detailed guide to help you get started.
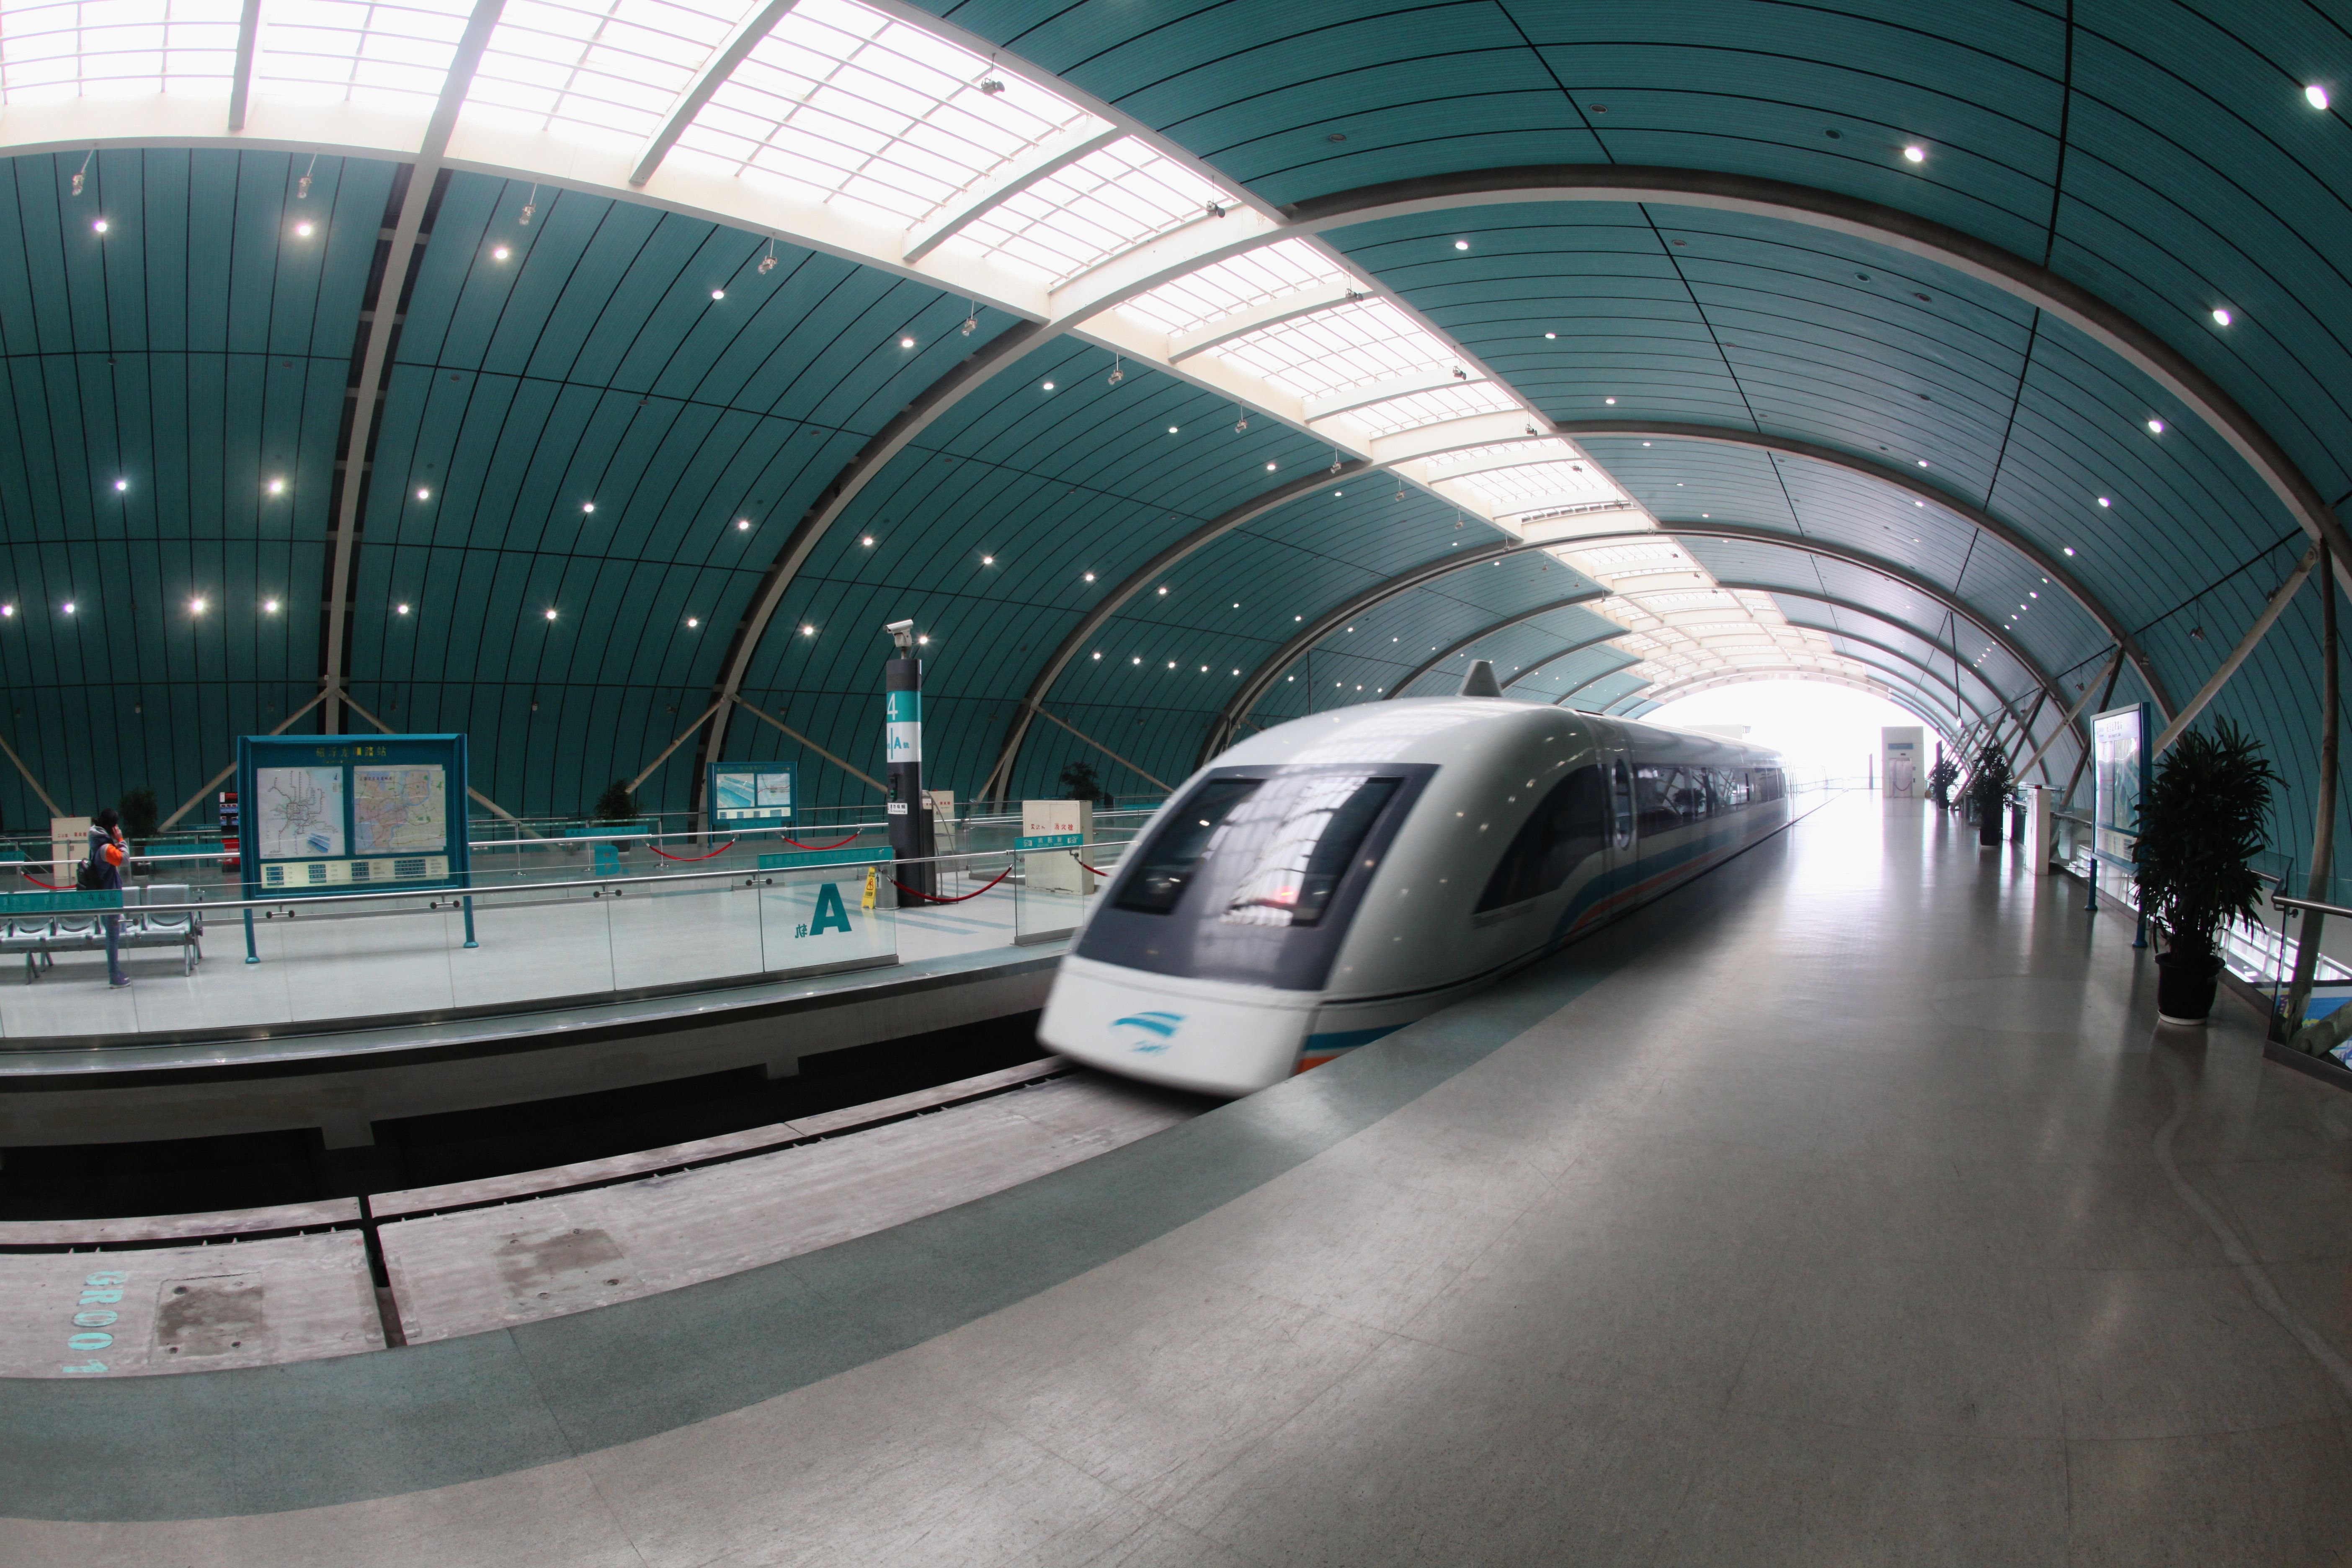
Train Photography
Train photography offers a diverse range of subjects, from historic steam engines to modern bullet trains. To capture excellent locomotive photos, research train routes and schedules to find the best locations and times. Use natural light to your advantage, with side or backlighting to highlight steam and texture.
Longer focal lengths can compress the scene and show the train in its surroundings. At stations, photograph details like wheels and logos to create atmosphere. Adjust shutter speed for sharp images or creative motion blur, and slightly overexpose for more detail.
For more insights on capturing stunning train photography, check out our full-length article.
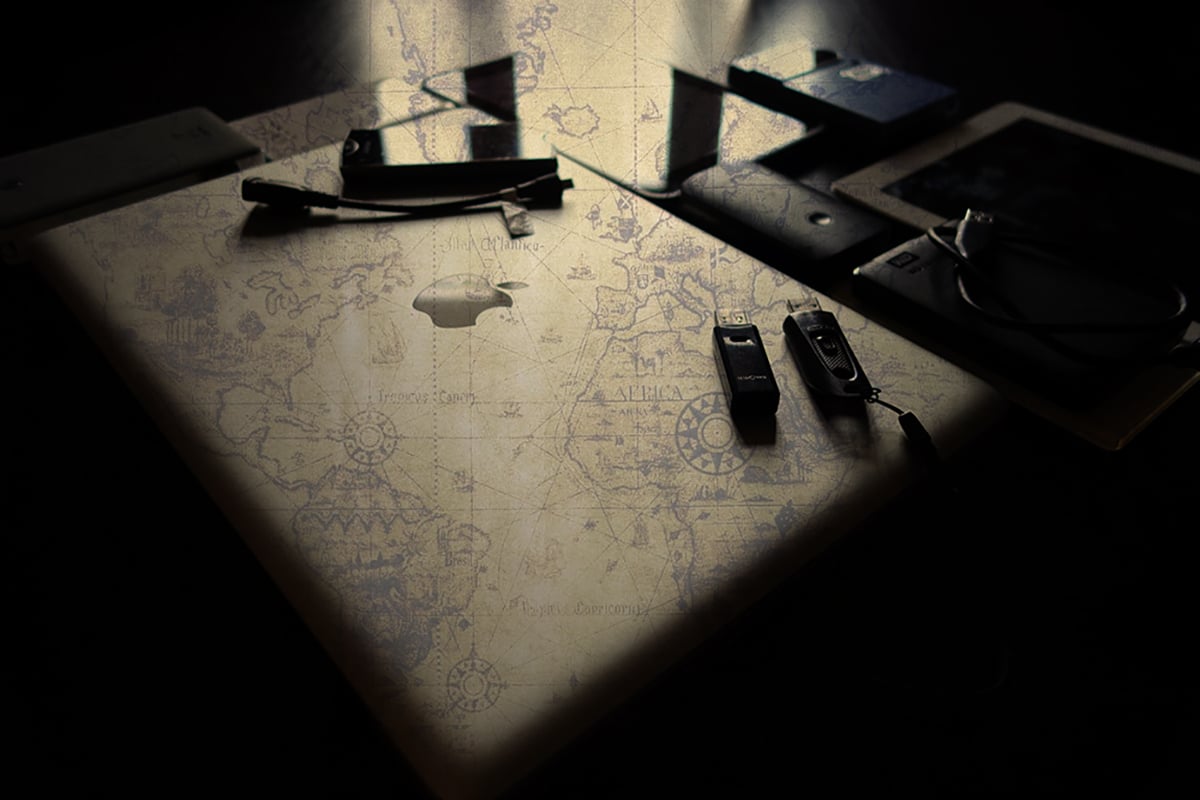
Backing Up Photos
It is important to back up photos while traveling, and an external hard drive is a great option. They are compact, durable, and have large storage capacities.
Smartphones and tablets can also be used to manage photos on the go. With the right accessories, they can connect to external storage devices. This allows you to back up and edit your photos without a laptop.
For the best results, use multiple backup methods. This could include an external hard drive, a USB thumb drive, and cloud storage. By having multiple copies of your photos, you reduce the risk of losing them. If you want to learn how to back up photos, check out our in-depth article.
Making Money from Travel Photography
Becoming a travel photographer takes hard work and dedication. You need to learn a wide range of photography skills for shooting everything from landscapes to portraits. Building a strong portfolio of your best travel images is key to attracting clients.
To get your name out there, create a travel website or blog to showcase your work. You can also sell your images on digital platforms like stock photography websites. Selling physical prints of your photos is another great option.
As you travel, look for photography work with local businesses, such as hostels or tourism boards. Capture great travel content and consider offering tours or workshops for extra income.
To learn more about how to become a travel photographer, check out this in-depth guide.
Travel Photography Jobs
Travel photography jobs can be an exciting and rewarding career path for those with a passion for photography and adventure. However, it’s important to understand the challenges that come with the job. You’ll need to have exceptional photography skills, business savvy, and the ability to handle tough physical conditions.
To succeed, you’ll need a strong online presence, including a professional website and active social media accounts. You’ll also need reliable gear that can withstand the demands of travel.
There are many ways to make money as a travel photographer, such as selling prints, licensing stock photos, writing for publications, and teaching. The key is diversifying your income streams and constantly looking for new opportunities. With hard work and creativity, finding paid travel photography jobs can be both fulfilling and profitable.
Get Paid to Travel
Getting paid to travel and take photos is a dream for many photographers. There are several ways to make this a reality. Selling prints of your travel photos through print-on-demand websites is one option. You can also upload your best images to stock photography agencies and earn passive income from sales.
Entering travel photography competitions is another way to earn money and gain prestige. Winning contests can help you promote your work and attract potential clients.
Building relationships with travel magazine editors can lead to regular paid assignments. Learn what they want and deliver high-quality photos to make their jobs easier. To further your success, get paid to travel and take photos by marketing your photography services to people who have the budget to hire you.
Sell Travel Photos
Selling your travel photos can be a great way to make money with your photography. To get started, ensure you have high-quality, well-lit, and properly composed images. They should also be free of technical errors like chromatic aberration and noise.
There are many ways to sell your travel photos. You can sell them through stock photography agencies, directly to clients, or as prints. Each option has its own requirements and markets, so consider your goals before deciding which path to take.
Actively promoting your work is key to maximizing sales. Use social media, email lists, and other marketing strategies to reach potential buyers. If you’re working with a stock agency, ask them what types of images are in demand so you can plan your shoots accordingly.
Learning how to sell travel photos takes time and effort, but with persistence and a willingness to adapt, you can turn your passion into a profitable venture.
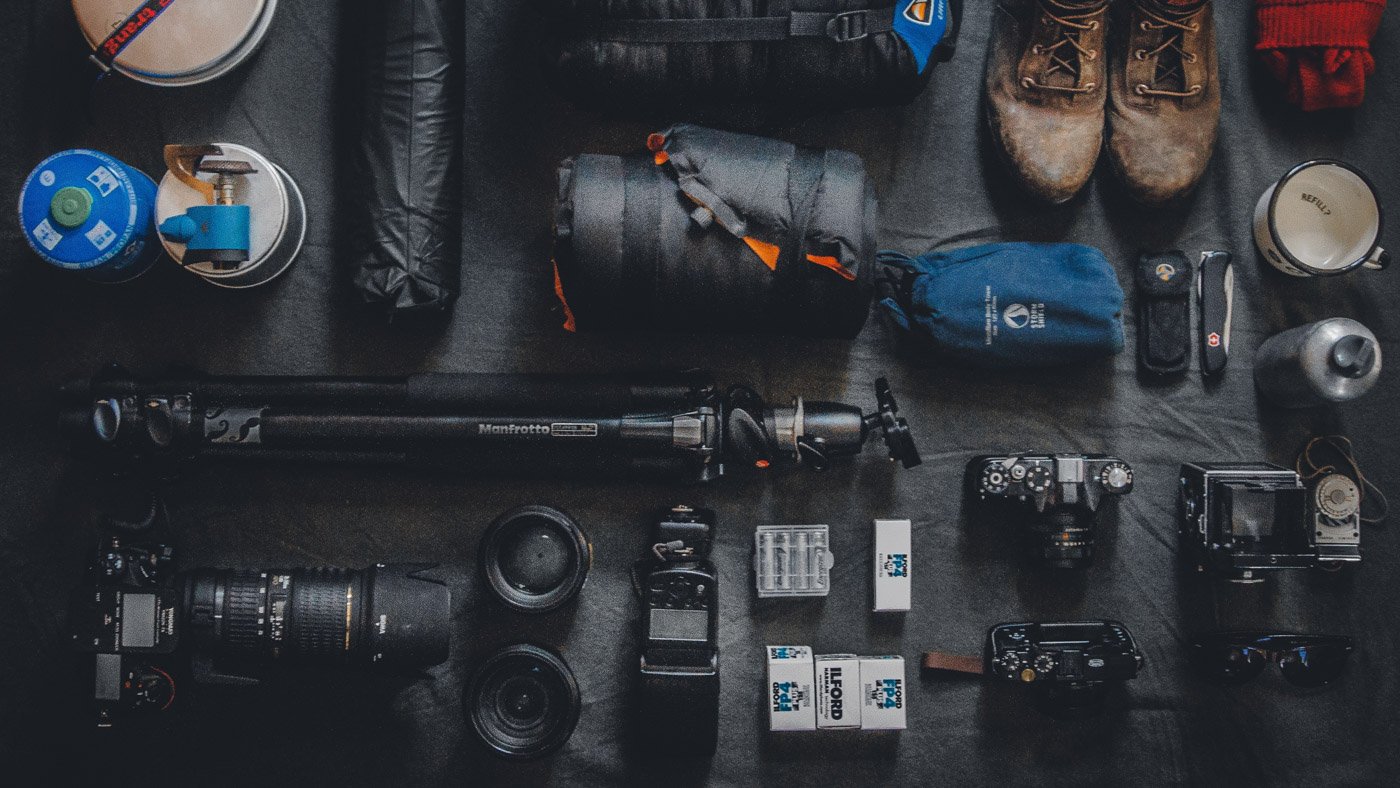
Gear for Travel Photography
When packing for a travel photography trip, it’s important to bring the right gear. A lightweight and compact camera body is essential, along with one or two versatile lenses like a wide-angle and a medium telephoto lens.
Don’t forget a sturdy tripod that fits in your luggage for sharp shots in low light. Filters like a circular polarizer and strong ND filter are small but open up creative options when traveling.
Cleaning supplies, extra batteries, memory cards, and rain protection round out the must-haves. With the right travel photography gear, you’ll be ready to capture amazing images anywhere your adventures take you.
Traveling with Camera Gear
Traveling with camera gear can be challenging, but there are ways to make it easier and safer. Use padded cases to protect your equipment from bumps and knocks. A shoulder bag is a good option for keeping your camera close and secure while walking through busy areas.
Always carry your gear in your hand luggage when flying. Most airlines understand the importance of this and are lenient about the weight of your carry-on bag. To deter thieves, hide or remove any camera branding using black duct tape.
Insuring your gear is crucial in case of theft or damage. Take down all the serial numbers and make sure your equipment is fully covered. By following these tips for traveling with camera gear, you can have peace of mind and focus on capturing great photos during your travels.
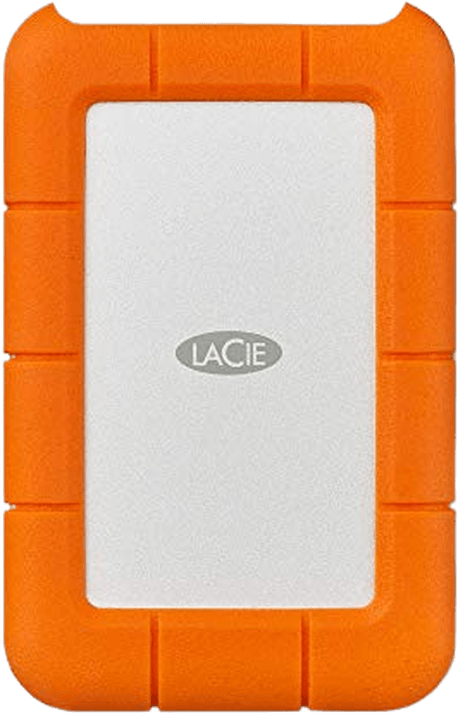
External Hard Drives
An external hard drive is an essential accessory for travel photographers. Memory cards fill up fast when you’re traveling, and you don’t want to carry a bunch of them around with you. It’s best to take an external hard drive to keep all your photo files in one place.
You’ll need something durable yet compact, which is why we recommend the LaCie Rugged Mini for travelers. It’s an easy fit for any travel camera bag. You have storage options up to 5 TB, and it’s the most durable external hard drive on the market.
See more of the best external hard drives in our full-length article.
Cameras for Travel Photography
The Canon EOS RP is a great mirrorless camera for travel photography. It’s lightweight, easy to handle, and has a 26 MP full-frame sensor that captures high-quality images in any situation.
The camera’s autofocus system is fast and accurate, even in low light. It also offers eye-detection AF for portraits. The EOS RP can shoot 4K video and has convenient Wi-Fi and Bluetooth connectivity.
This camera is ideal for most travel photography needs. If you want to learn more about the , check out our detailed guide.
Mirrorless Cameras
The best mirrorless cameras for travel are compact and lightweight, but still capture stunning photos and videos. Our top pick is the Nikon Z50. It has a compact body that fits easily in any camera bag. The 20.9 MP sensor produces bright, vibrant images with excellent low-light performance.
The Z50 is also great for travel vlogging. It records 4K video at 30 fps and has an articulating screen for easy self-recording. Built-in Wi-Fi and Bluetooth make it simple to share your adventures with friends and family back home.
If you want to learn more about the , check out our in-depth guide. We cover a range of cameras for every type of traveler, from beginners to professionals.
Compact Cameras
The Sony ZV-1 II is a pocket-sized camera packed with features for modern travelers. It has a high-resolution 20 MP sensor and a versatile 18-50mm zoom lens. The f/1.8-4 aperture provides solid low-light performance.
Vloggers love the ZV-1 II’s 4K video at 30 fps and the special Cinematic Vlog Setting. A built-in mic and wind muffler make capturing audio easy. Real-time AF with face and eye detection keeps subjects sharp.
The Sony ZV-1 II is the ideal vlogging. It’s a worthwhile investment for creating exciting content abroad. But we have more options in the link above.
Lenses for Travel Photography
The best travel lenses give you a wide focal range in a compact size. Zoom lenses like the Nikon AF-S DX 18-105mm f/3.5-5.6 are very popular. It has vibration reduction to reduce camera shake and improve low-light performance.
Prime lenses are another good option. They are usually smaller and lighter than zooms. The Canon EF-S 24mm f/2.8 STM is a great example. This pancake lens is ultra-compact but still gives you a versatile focal length.
When choosing , think about the size, weight, and focal length. You want a lens that is easy to carry but still gives you plenty of options. The lenses on this list are all fantastic choices for your next adventure.
Canon Lenses
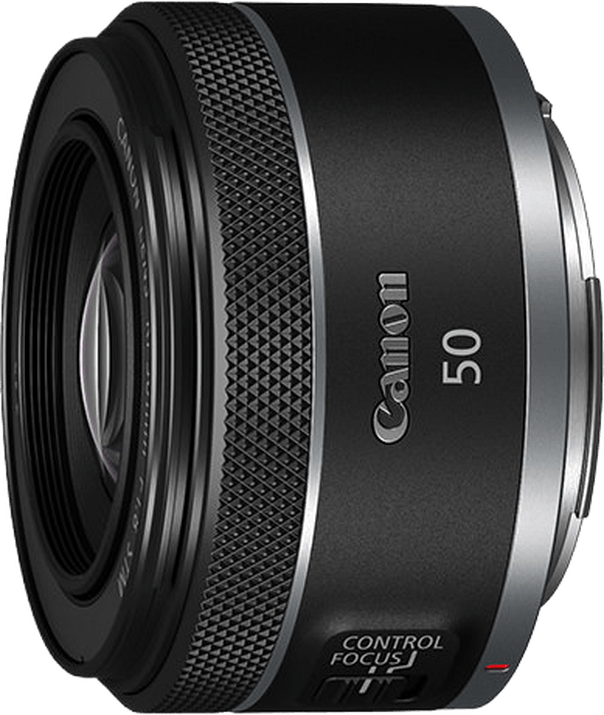
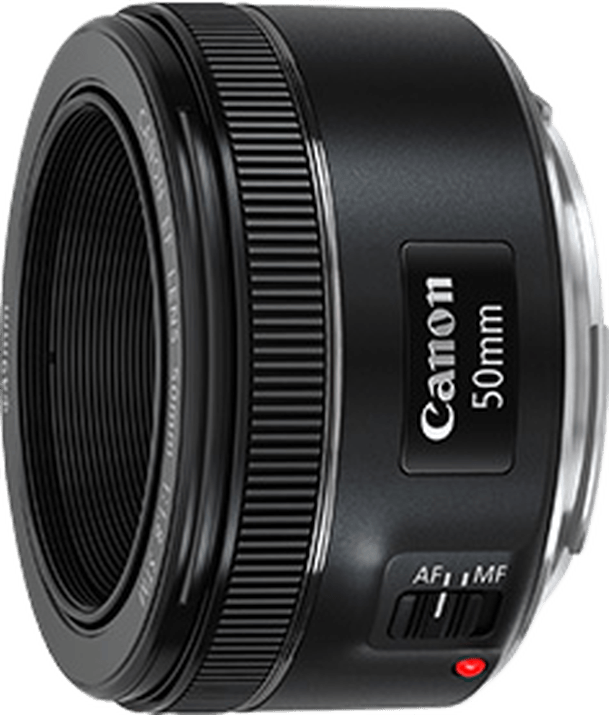
The best Canon lenses for travel photography are lightweight, versatile, and capture stunning images. Our top picks are the Canon RF 50mm f/1.8 STM and Canon EF 50mm f/1.8 STM. These nifty-fifty lenses are compact, affordable, and great in low light.
Other top choices include the Canon RF 24-105mm f/4-7.1 IS STM for its wide zoom range and the Canon RF 16mm f/2.8 STM for landscapes. The Canon EF 24-105mm f/4L IS USM is a popular all-in-one zoom for DSLR users. It has a constant f/4 aperture and weather sealing.
No matter your camera type, there’s a perfect travel lens for you. Look for a lens that’s light, has a useful focal range, and fits your budget. help you capture amazing images around the world.
Our Top 2 Canon Lenses for Travel Photography
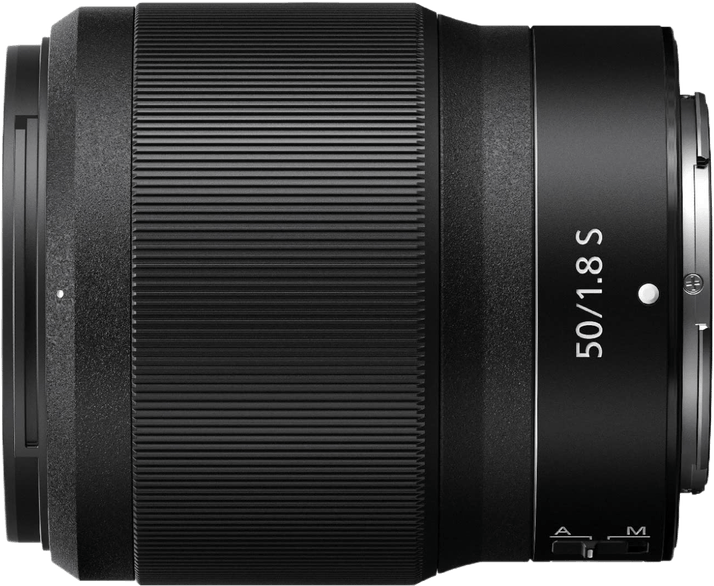
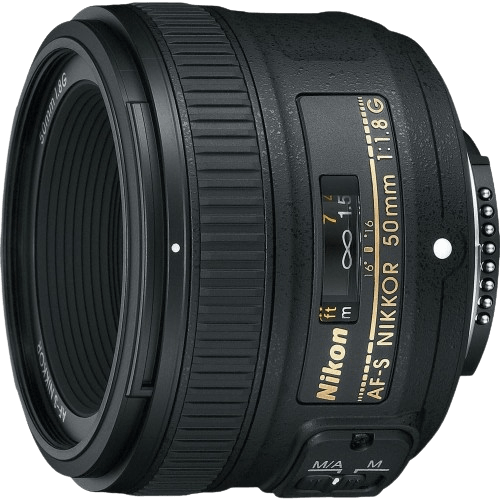
Nikon Lenses
The Nikon Z 50mm f/1.8 S and Nikon AF-S 50mm f/1.8G are the best Nikon lenses for travel photography. The Z 50mm f/1.8 S offers sharp images and a durable build. It’s great for low light with its f/1.8 aperture.
The AF-S 50mm f/1.8G is compact and lightweight. It also performs well in low light. The 50mm focal length is perfect for street scenes and portraits.
Both lenses are very popular with travel photographers. If you want to learn more about , we have a detailed guide that covers the best options for Nikon mirrorless and DSLR cameras.
Our Top 2 Nikon Lenses for Travel Photography
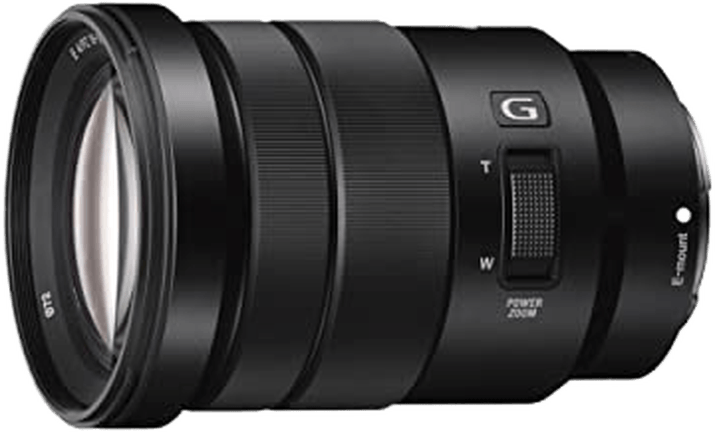
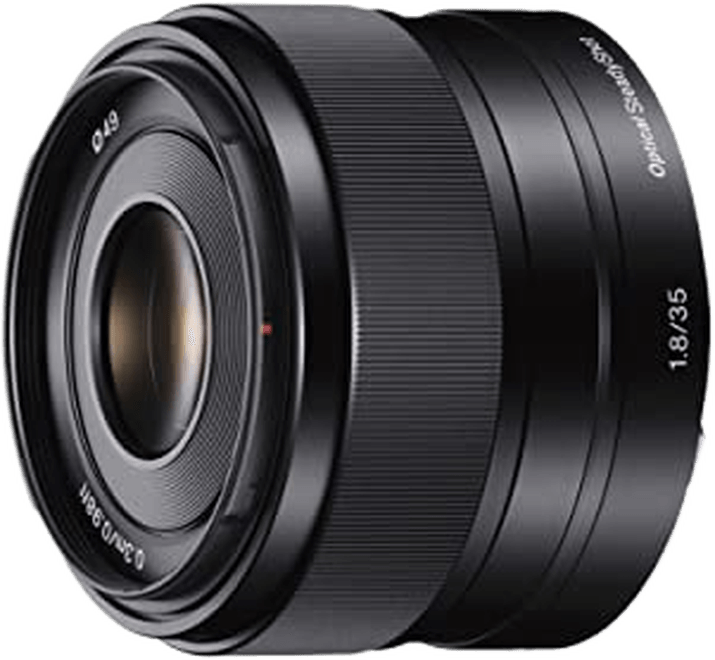
Sony Lenses
When choosing the best Sony lenses for travel photography, consider weight, versatility, and image quality. Our top pick is the Sony E 18-105mm f/4 G OSS PZ, offering a wide zoom range, constant f/4 aperture, and effective optical stabilization in a compact design.
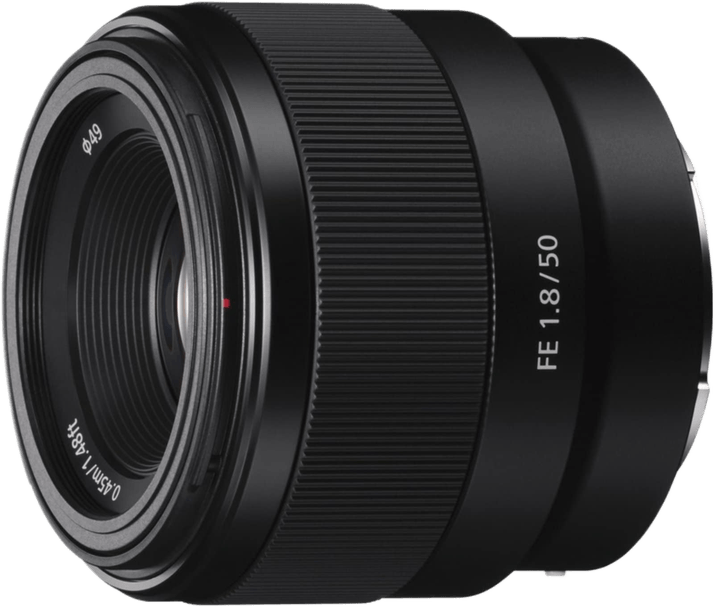
For APS-C cameras, the Sony E 35mm f/1.8 OSS is a great low-light prime lens. Its wide f/1.8 aperture and built-in stabilization help capture sharp images in dim settings. The Sony FE 50mm f/1.8 is an affordable and versatile prime for full-frame cameras, ideal for portraits and everyday shots.
Other notable lenses include the Sony FE 24-105mm f/4 G OSS for its all-in-one zoom capabilities and the Sigma 18-50mm f/2.8 DC DN | C for its fast aperture and compact size. To learn more about the , check out our in-depth guide.
Our Top 3 Sony Lenses for Travel Photography
Travel Tripods
A travel tripod is a must-have for any photographer on the go. The best travel tripods are lightweight, compact, and easy to set up. They also need to be sturdy enough to support your camera gear.
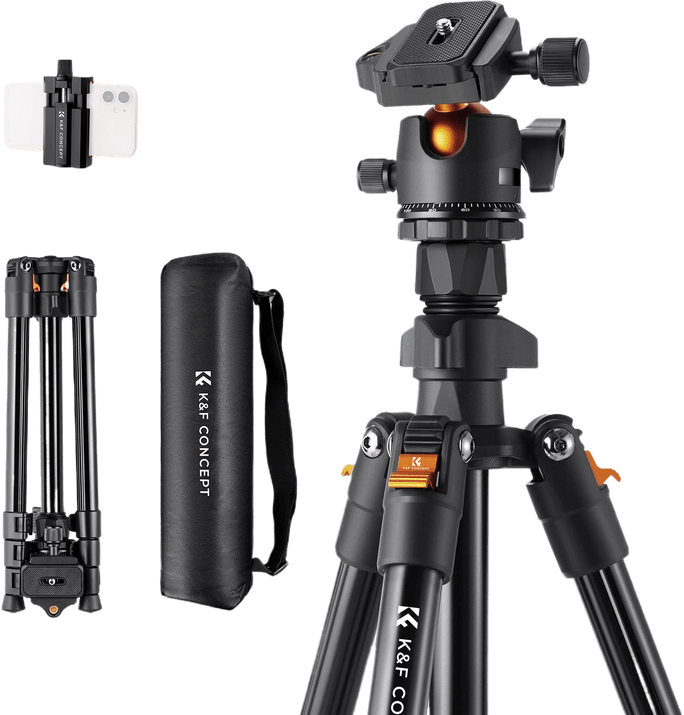
Our top pick is the K&F Concept Lightweight Travel Tripod. It weighs only 2.4 lb but can hold up to 17.6 lb of gear. The aluminum ball head gives you great flexibility for positioning your camera. And the included carry case makes it easy to take with you anywhere.
If you want to learn more about choosing the right travel tripod, check out our detailed guide. It covers everything from key features to look for to our top recommendations in different price ranges.
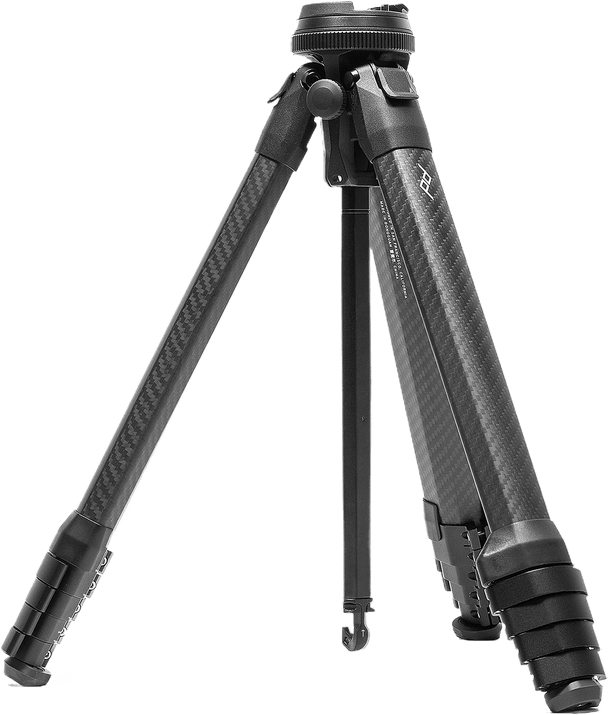
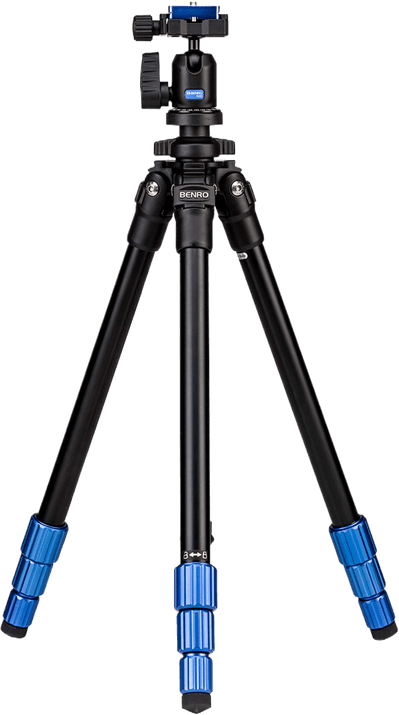
Our Top 3 Choices for The Best Travel Tripod
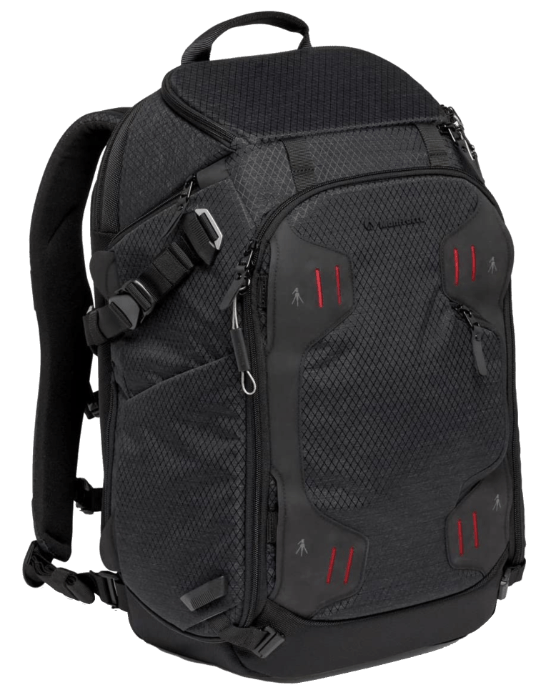
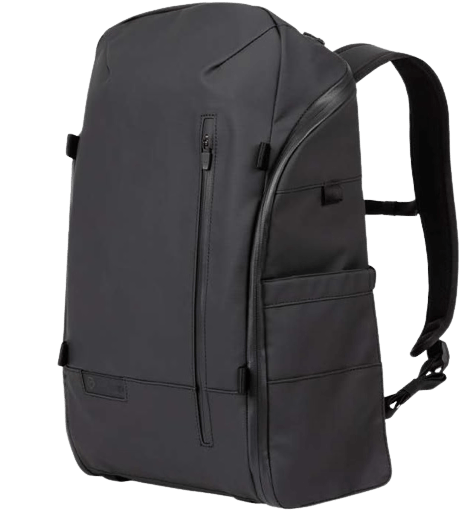
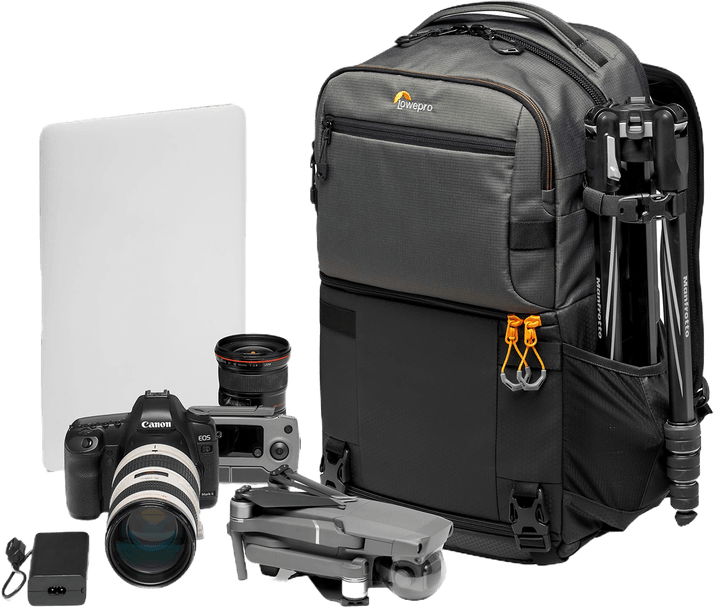
Travel Camera Backpacks
When choosing a camera backpack for travel, protection and comfort are key. The best bags are well-designed, roomy, and easy to carry.
Our top pick is the Manfrotto PRO Light Multiloader. It’s sturdy, spacious, and versatile. You can use it as a backpack, duffel, or sling. And it has access from the front and both sides.
The Wandrd Duo Daypack is another great option. It’s made from quality materials that protect your gear from the weather. It has ample storage and the main zipper allows quick access to your camera.
If you want to learn more about the best camera backpack for travel, check out our detailed reviews. We’ll help you find the perfect bag for your next adventure.
Our Top 3 Choices for The Best Camera Backpack For Travel
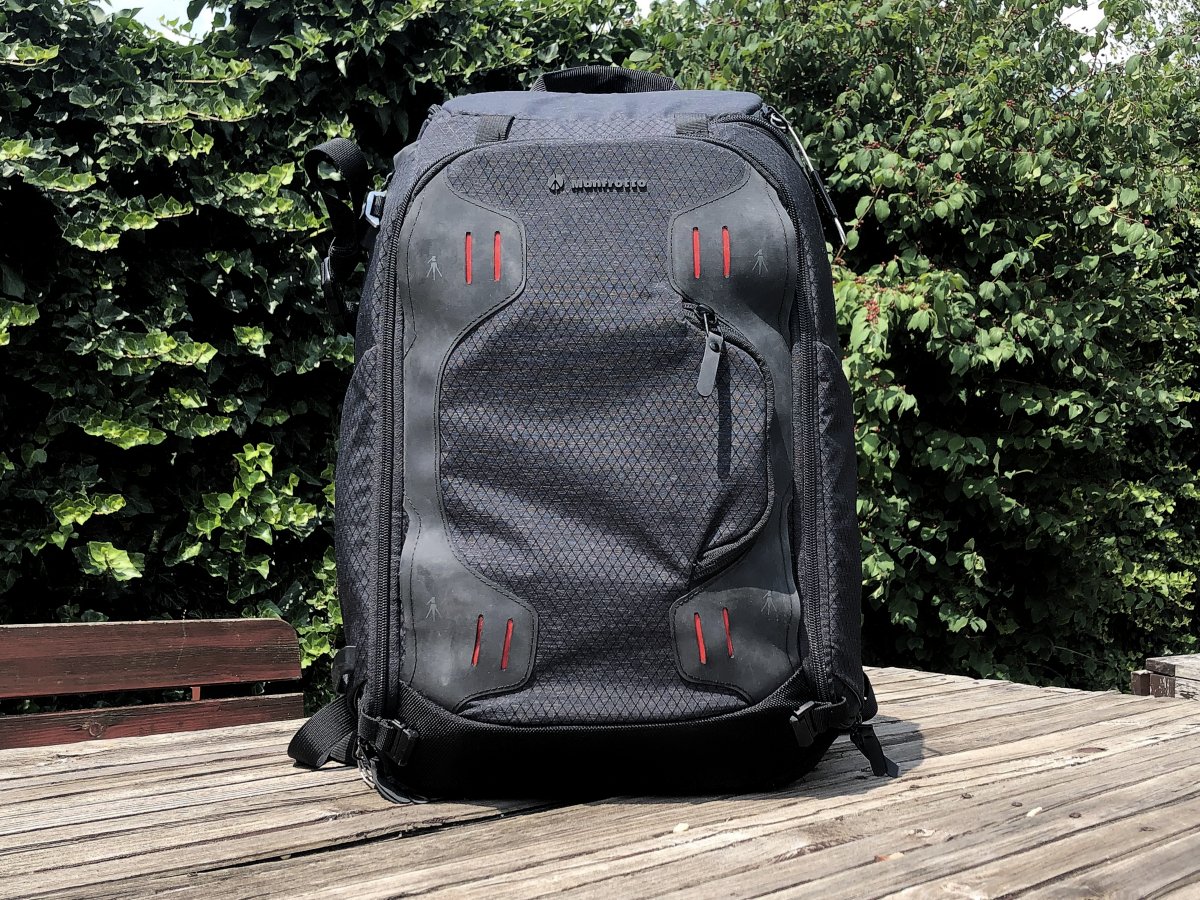
Manfrotto PRO Light Multiloader
The Manfrotto PRO Light Multiloader Camera Backpack is a top choice for photographers. It has a sturdy design and plenty of space for your gear.
The backpack is comfortable to wear, even when fully loaded. You can easily adjust it to fit your body.
This bag is perfect for any photography adventure. It’s a worthwhile investment for serious photographers looking for a reliable way to carry their equipment. To learn more about the Manfrotto Pro Light Multiloader, check out our full review.
Think Tank Airport Essentials
The Think Tank Airport Essentials is a camera backpack specifically designed for air travel. It has a smart design, useful features, and fits as carry-on luggage.
This backpack offers secure storage with an efficient use of space and a special lock. The lifetime warranty makes it a one-time investment for years of use.
While it lacks some versatility found in other bags, the Airport Essentials excels at storage capacity, protection, and style. Photographers who want a Think Tank Airport Essentials for their travels will find this bag a great choice.

Weatherproof Backpacks
Protecting your camera gear from the elements is essential. Weatherproof camera bags offer peace of mind when shooting in unpredictable conditions. They feature robust materials and coatings that keep water out, even in sudden downpours.
Our top picks, the Wandrd Prvke, Wandrd Duo, and Lowepro Freeline, have impressive exterior materials that don’t need a separate rain cover. The Prvke’s roll-top design is commonly used in waterproof bags, while the Duo and Freeline include waterproof zippers to secure even the weakest points.
When choosing a weatherproof camera bag, consider not only its water-resistant abilities but also its functionality for your photography style. Look for features like easy access points, ample storage, and comfortable carrying options that suit your needs.
Our Top 3 Choices for The Best Weatherproof Camera Bag


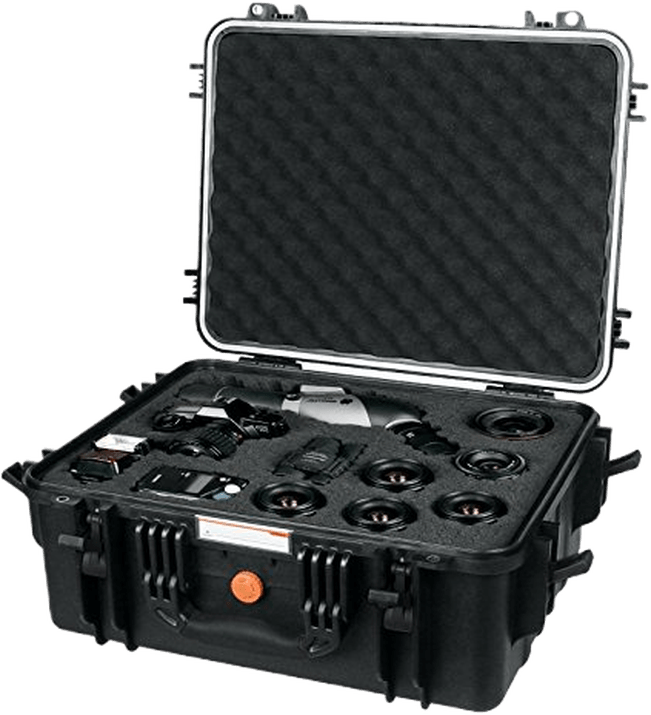
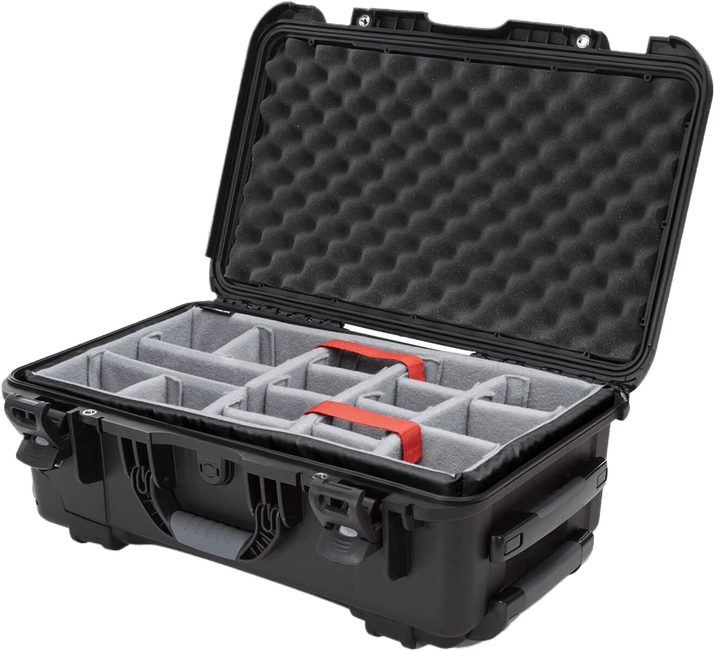
Hard Cases
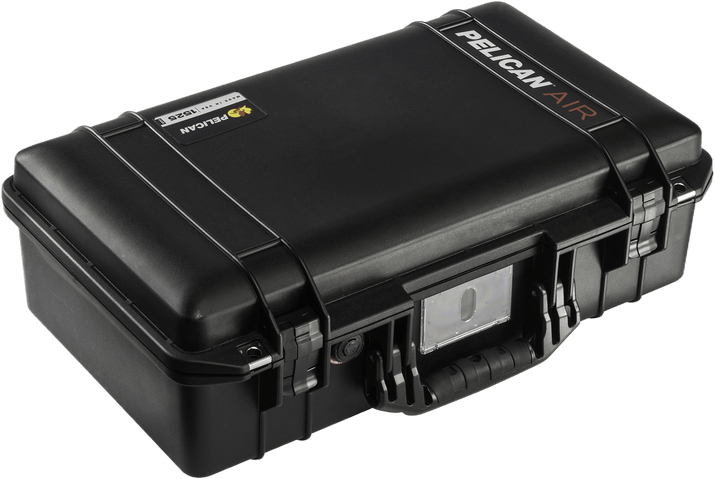
A camera hard case is the best way to protect your photography gear while traveling. The Pelican Air 1525 is our top choice, with its tough exterior and foam-padded interior that keeps your equipment safe and secure. It’s spacious enough for your camera and accessories without being too bulky.
The Vanguard Supreme 46F is another excellent option, especially for adventure travel. It’s waterproof down to 16.5 ft (5 m) and can withstand temperatures as low as -40 C. The customizable Pick ‘n’ Pluck foam interior ensures a snug fit for each item.
For convenience, the Nanuk 935 is hard to beat. Its retractable handle and wheels make transportation a breeze, while the padded dividers keep your gear organized and protected. If you’re looking for a camera hard case that combines durability and ease of use, the Nanuk 935 is a great choice.
Our Top 3 Choices for The Best Camera Hard Case
Travel Apps
Travel apps can make your photography adventures easier and more enjoyable. Snapseed is a powerful photo editor with a wide range of tools, from basic adjustments to creative effects. It’s free and available on both iOS and Android.
VSCO is another popular editing app that offers a simple, streamlined experience. Its presets are based on real film stocks, giving your photos an authentic vintage look. You can also use sliders to fine-tune the exposure and add fade or grain effects.
When you’re ready to share your travel photos, consider using Spot. This app helps you find picturesque locations and share your own discoveries with other photographers. With detailed maps and tips, it’s one of the best apps for travel photography.
Editing Travel Photos
Editing your travel photos can take them to the next level. There are many techniques you can use to improve your images, from simple adjustments to more advanced processes.
Cropping is a quick way to remove unwanted elements or zoom in on important parts of the photo. Sharpening will make details pop, while noise reduction can clean up high ISO shots. Straightening the horizon line is also important for a polished look.
Other useful techniques include adding a vignette to draw the eye, adjusting saturation and contrast, balancing highlights and shadows, and using digital blending for challenging lighting. For an extra level of refinement, you can even remove unwanted objects.
With practice, you’ll learn which editing steps work best for your travel images. Check out our in-depth guide if you’d like to dive deeper into editing travel photos.
Location Guides
Whenever you’re heading off somewhere new, it’s always best to do some research before you go. Your preparations will be more thorough and more specialized when you have a better idea of what to expect. That means you can hit the ground running when you arrive, and you’ll get better results.
We have a collection of location guides for some travel photography hot spots. These posts give you a head start when taking pictures in these locations, helping you get unique shots in popular places.
Let’s drop in on a few of the hottest locations in Europe, Asia, and the US.
European Cities
Europe is a photographer’s dream, with its stunning architecture, charming villages, and beautiful countryside. From the centuries-old buildings to the cobblestone streets, there’s no shortage of photo opportunities.
Some of the best European cities for photography include Amalfi, Italy, with its medieval stories and dainty houses; Venice, Italy, known for its canals and seafood; and Dubrovnik, Croatia, a seaside location with picturesque houses and Game of Thrones filming locations.
Other notable cities include Prague, Czech Republic, with its historic buildings and Gothic churches; Oia, Greece, with its stunning white buildings and sunsets; and Amsterdam, Netherlands, full of incredible art and historical monuments.
Whether you’re interested in architecture, landscapes, or street photography, these European cities offer endless inspiration. To learn more about the European cities for photography, check out this in-depth guide.
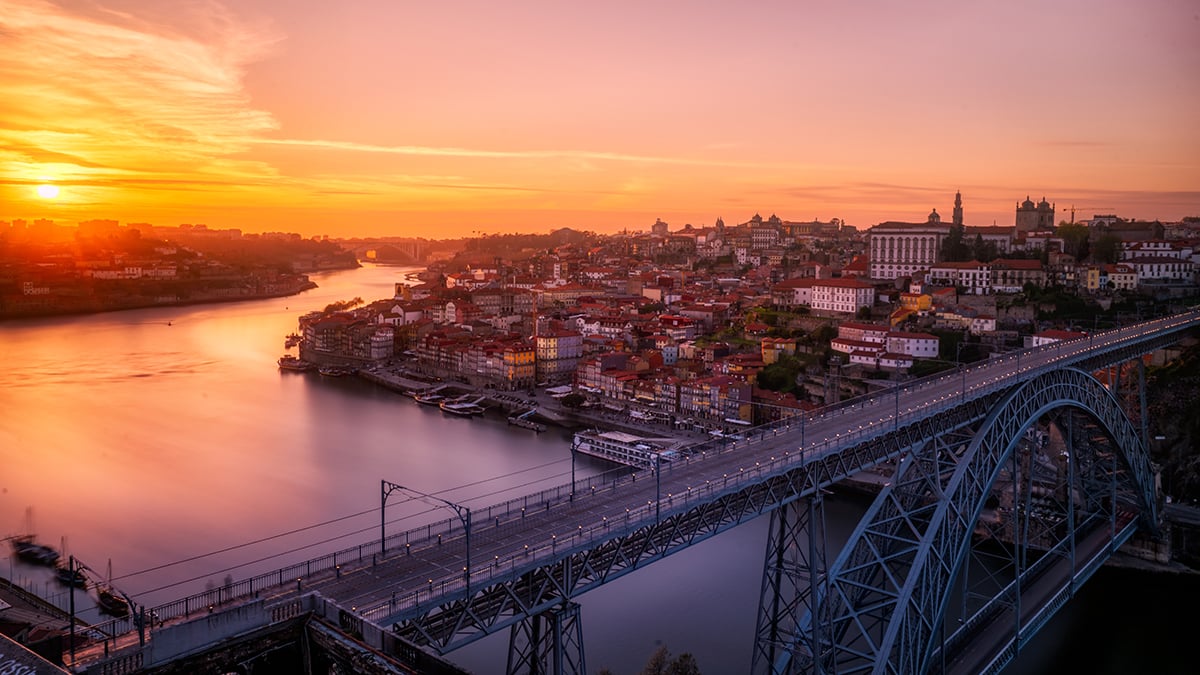
Paris
Paris is a photographer’s dream, offering countless opportunities to capture stunning images. From the iconic Eiffel Tower to the charming streets of Montmartre, there’s no shortage of beautiful subjects to photograph.
One of the best spots for photography in Paris is the Trocadero, which offers a perfect view of the Eiffel Tower. The Champs Elysee and Arc de Triomphe are also must-see locations, with the latter providing a great vantage point for capturing the city’s skyline.
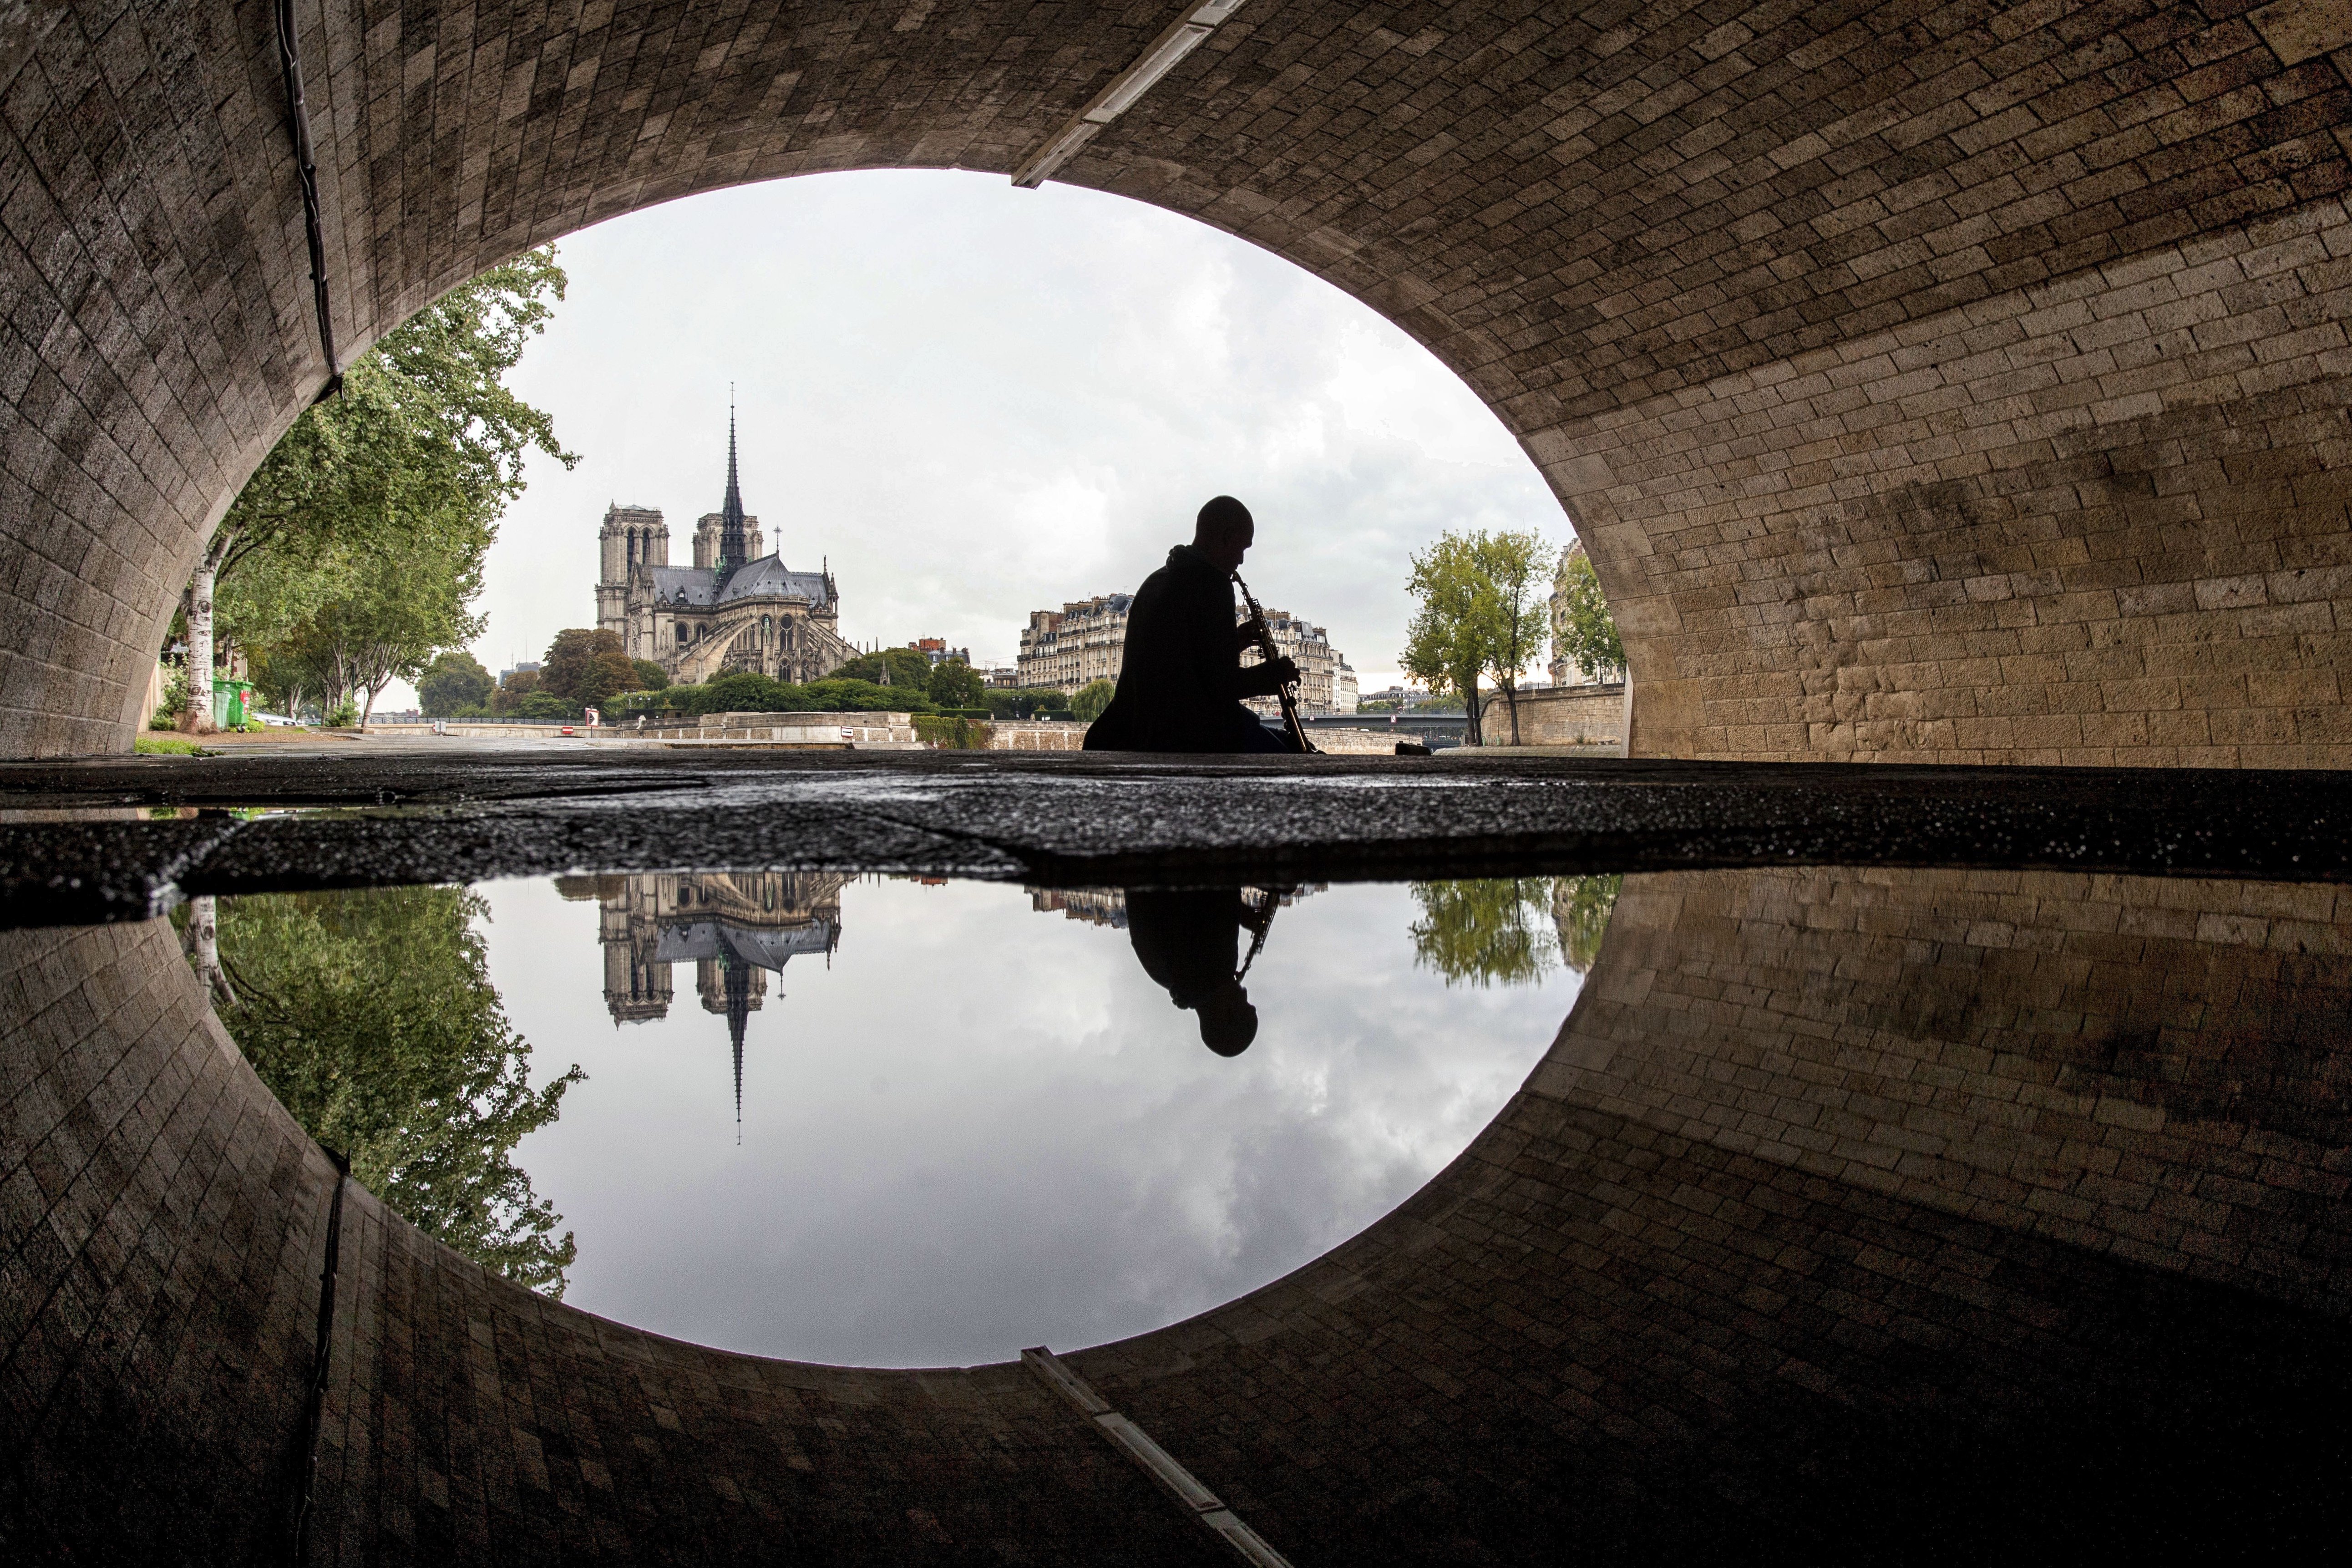
Other notable photo locations include the Louvre, with its striking glass pyramid, and Notre Dame Cathedral, which offers both interior and exterior photo opportunities. It’s still striking even after the fire damage.
For a taste of modern Paris, head to La Defense, the city’s business district filled with skyscrapers and unique architecture.
To learn more about Paris photography, check out this in-depth guide that covers the best locations, tips, and techniques for capturing the city’s beauty.
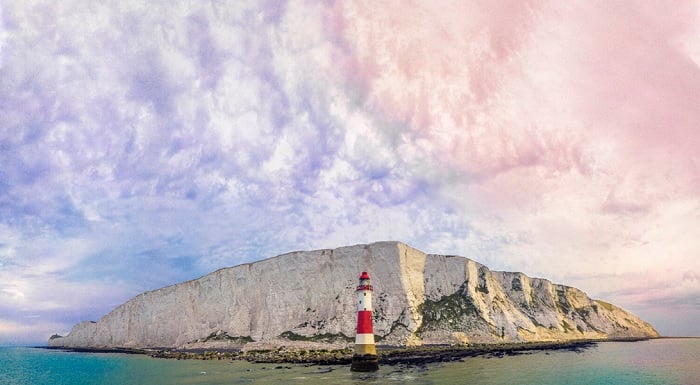
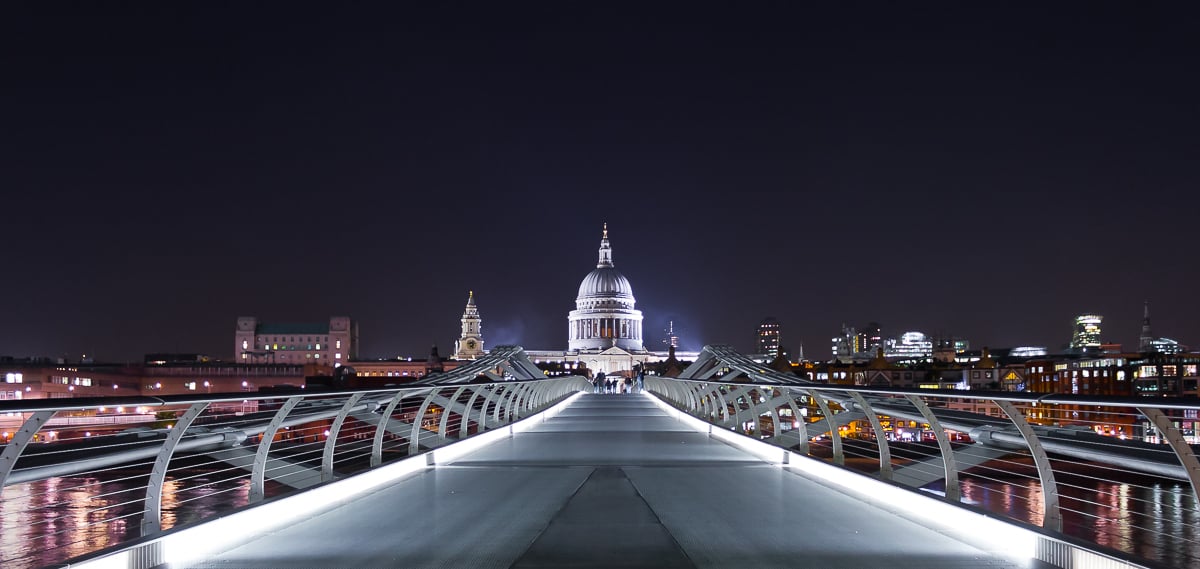
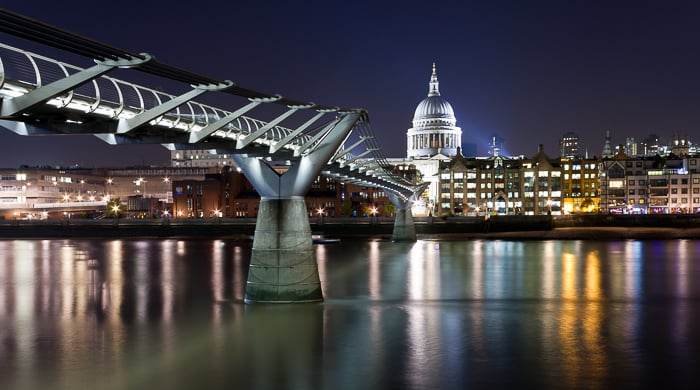
London
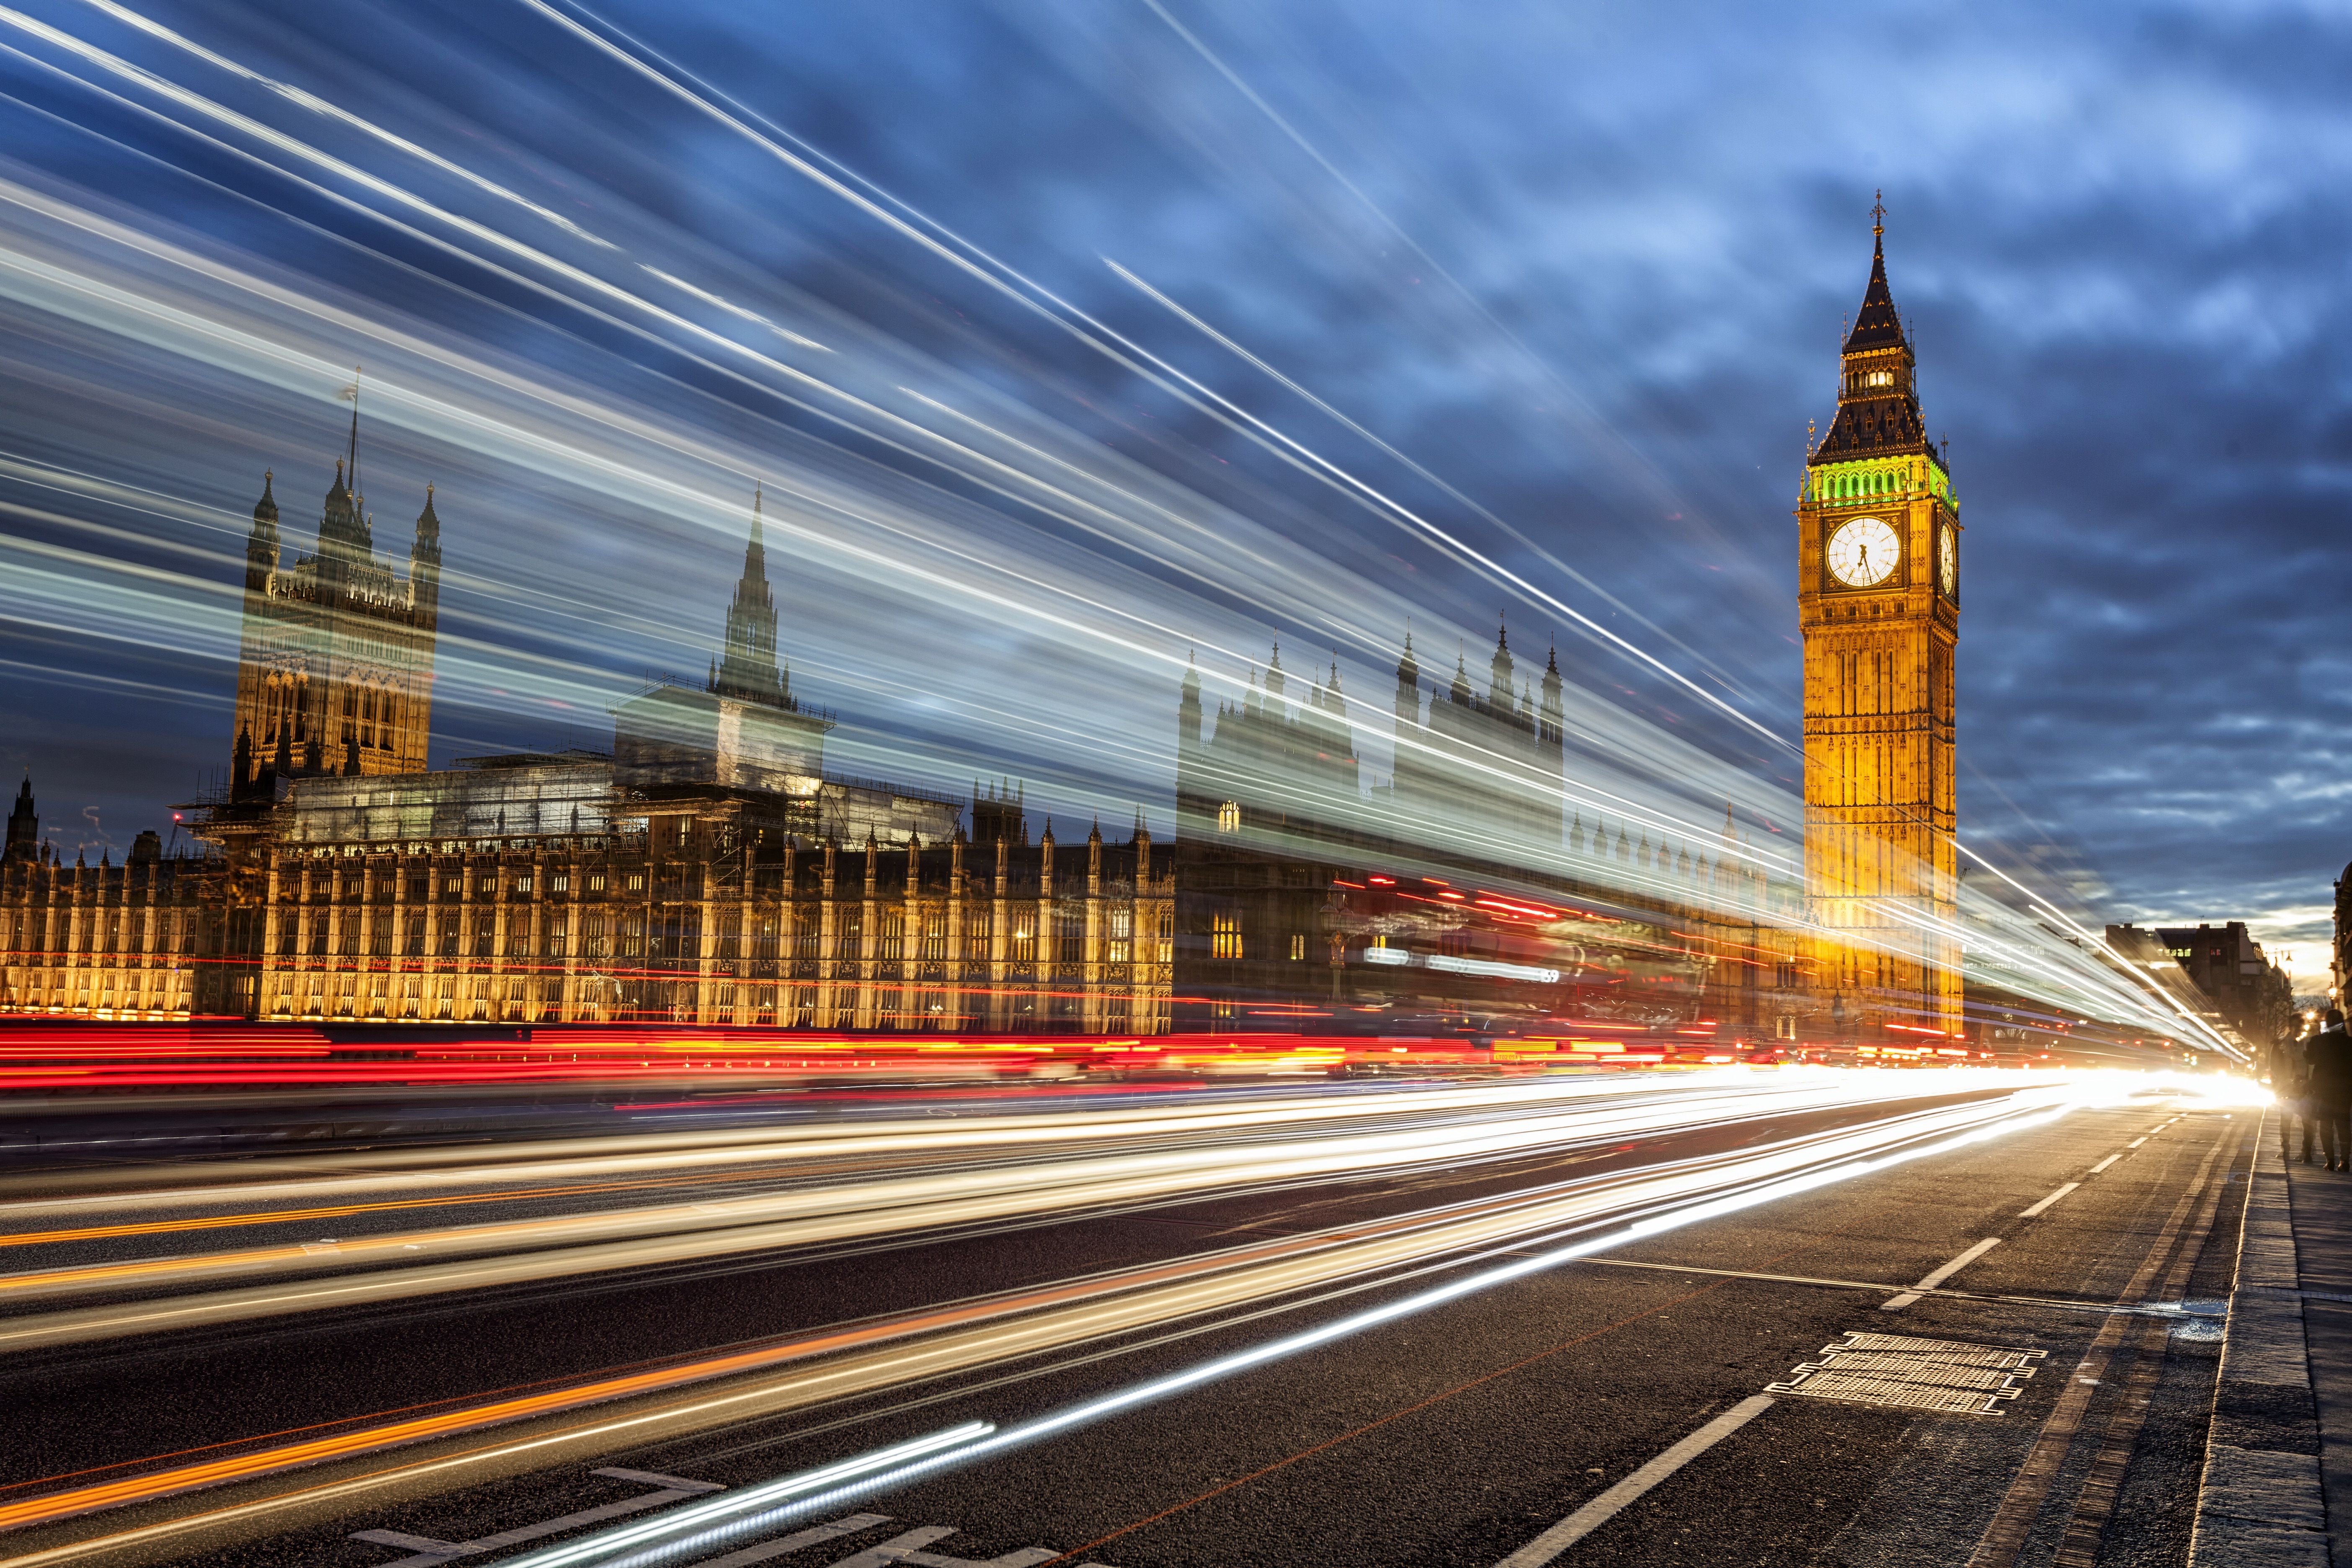
London offers plenty of photography opportunities, from cityscapes to street photography and architecture. Some of the best locations include the Palace of Westminster, where you can capture iconic photos from Westminster Bridge or the south bank of the Thames. Tower Bridge is another well-known site, offering great angles for traffic light trails and sunrise photos.
The London Eye is a newer addition to the skyline, perfect for creative shots like zoom bursts or portraits inside the capsules. Don’t miss the photogenic wrought iron roof at Borough Market or the beautiful exterior of St Paul’s Cathedral.
For stunning views, head to The Shard, the highest skyscraper in the European Union. Buckingham Palace is a must-see, especially during the Changing of the Guard ceremony. If you’re interested in photography in London, these locations are sure to inspire you.
Rome
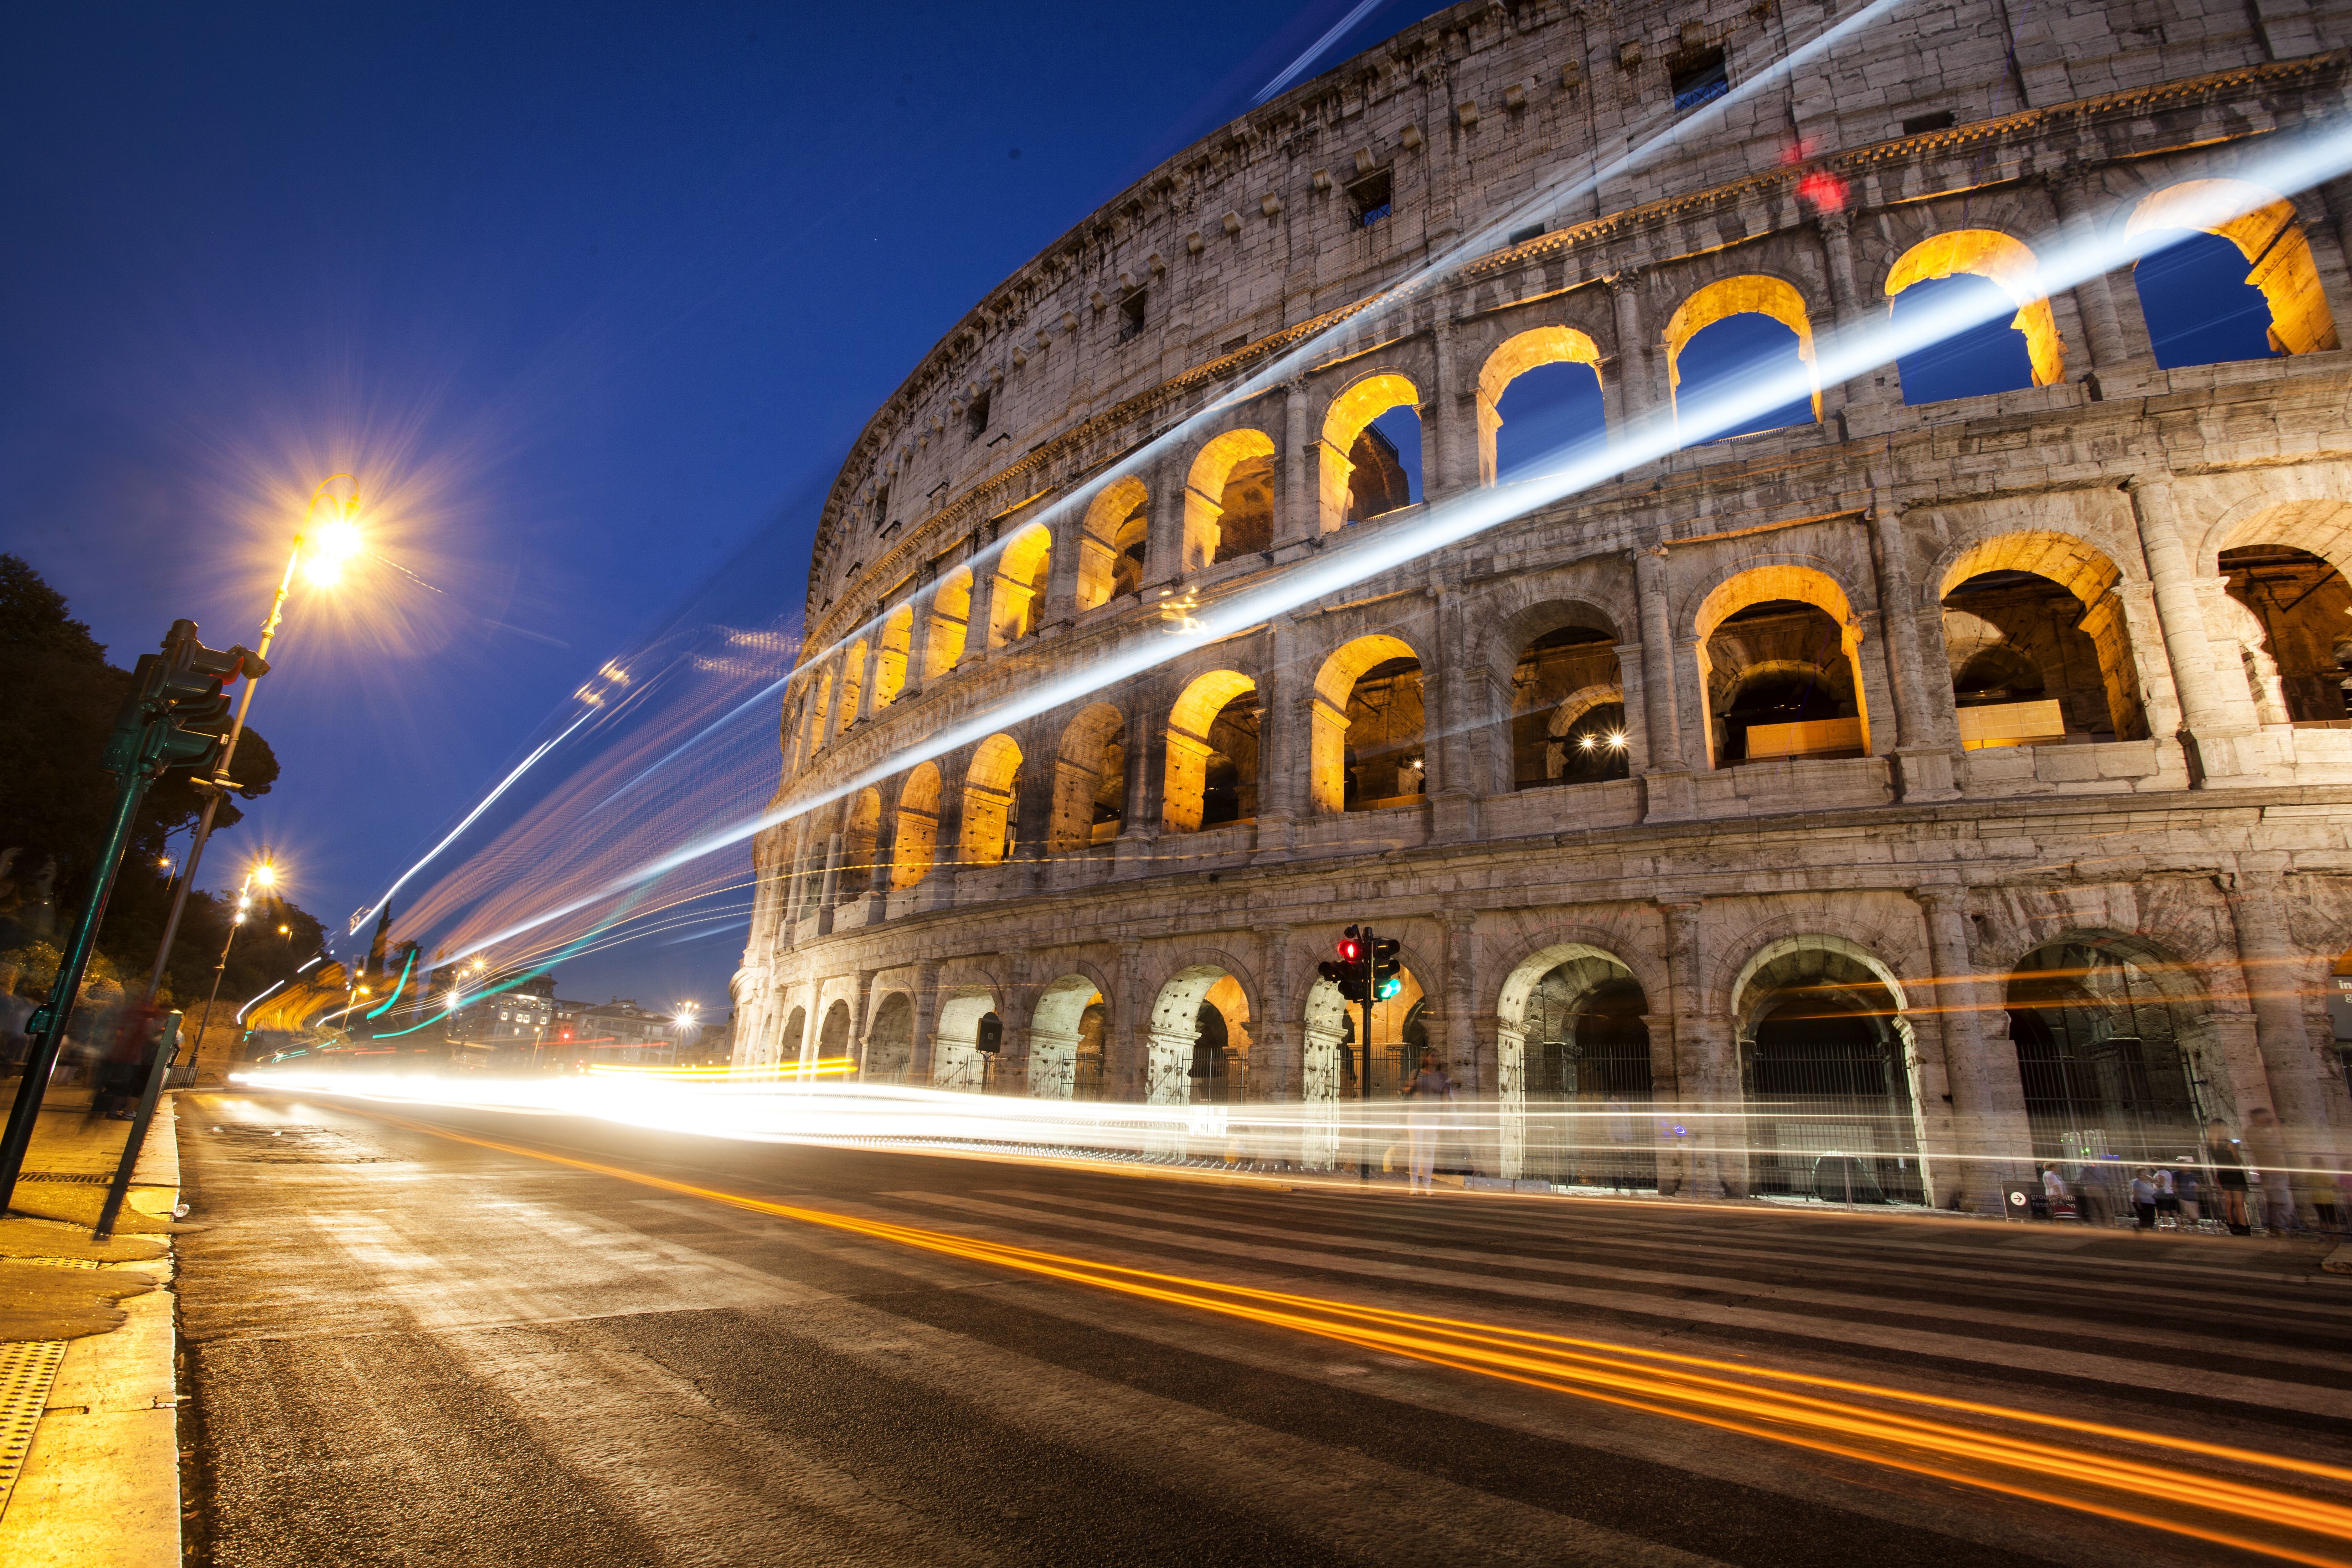
Rome is a photographer’s dream, with stunning architecture, rich history, and vibrant culture around every corner. From the iconic Colosseum to the beautiful Trevi Fountain, there are countless opportunities to capture breathtaking images.
Don’t miss the Vatican Museum, where you can photograph the famous spiral staircase. The Pantheon’s exterior and interior are equally impressive, especially during the blue hour. St. Peter’s Basilica offers great views of the city and a chance to capture the Pope if you’re lucky.
The Tiber River provides picturesque views, particularly from Ponte Sant’Angelo towards St. Peter’s Basilica. Piazza Navona and Piazza del Popolo are perfect for street photography and capturing traditional Roman scenes. To learn more about the best spots for Rome photography, check out this in-depth guide.
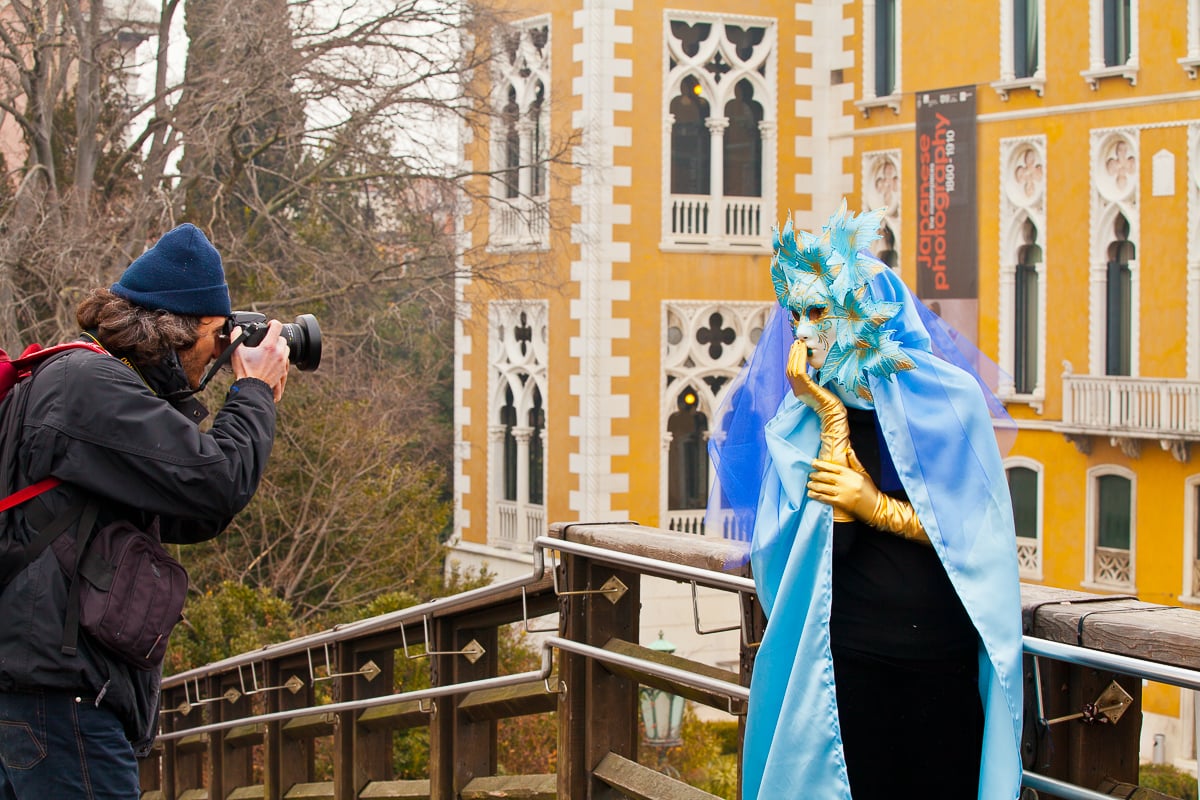
Venice
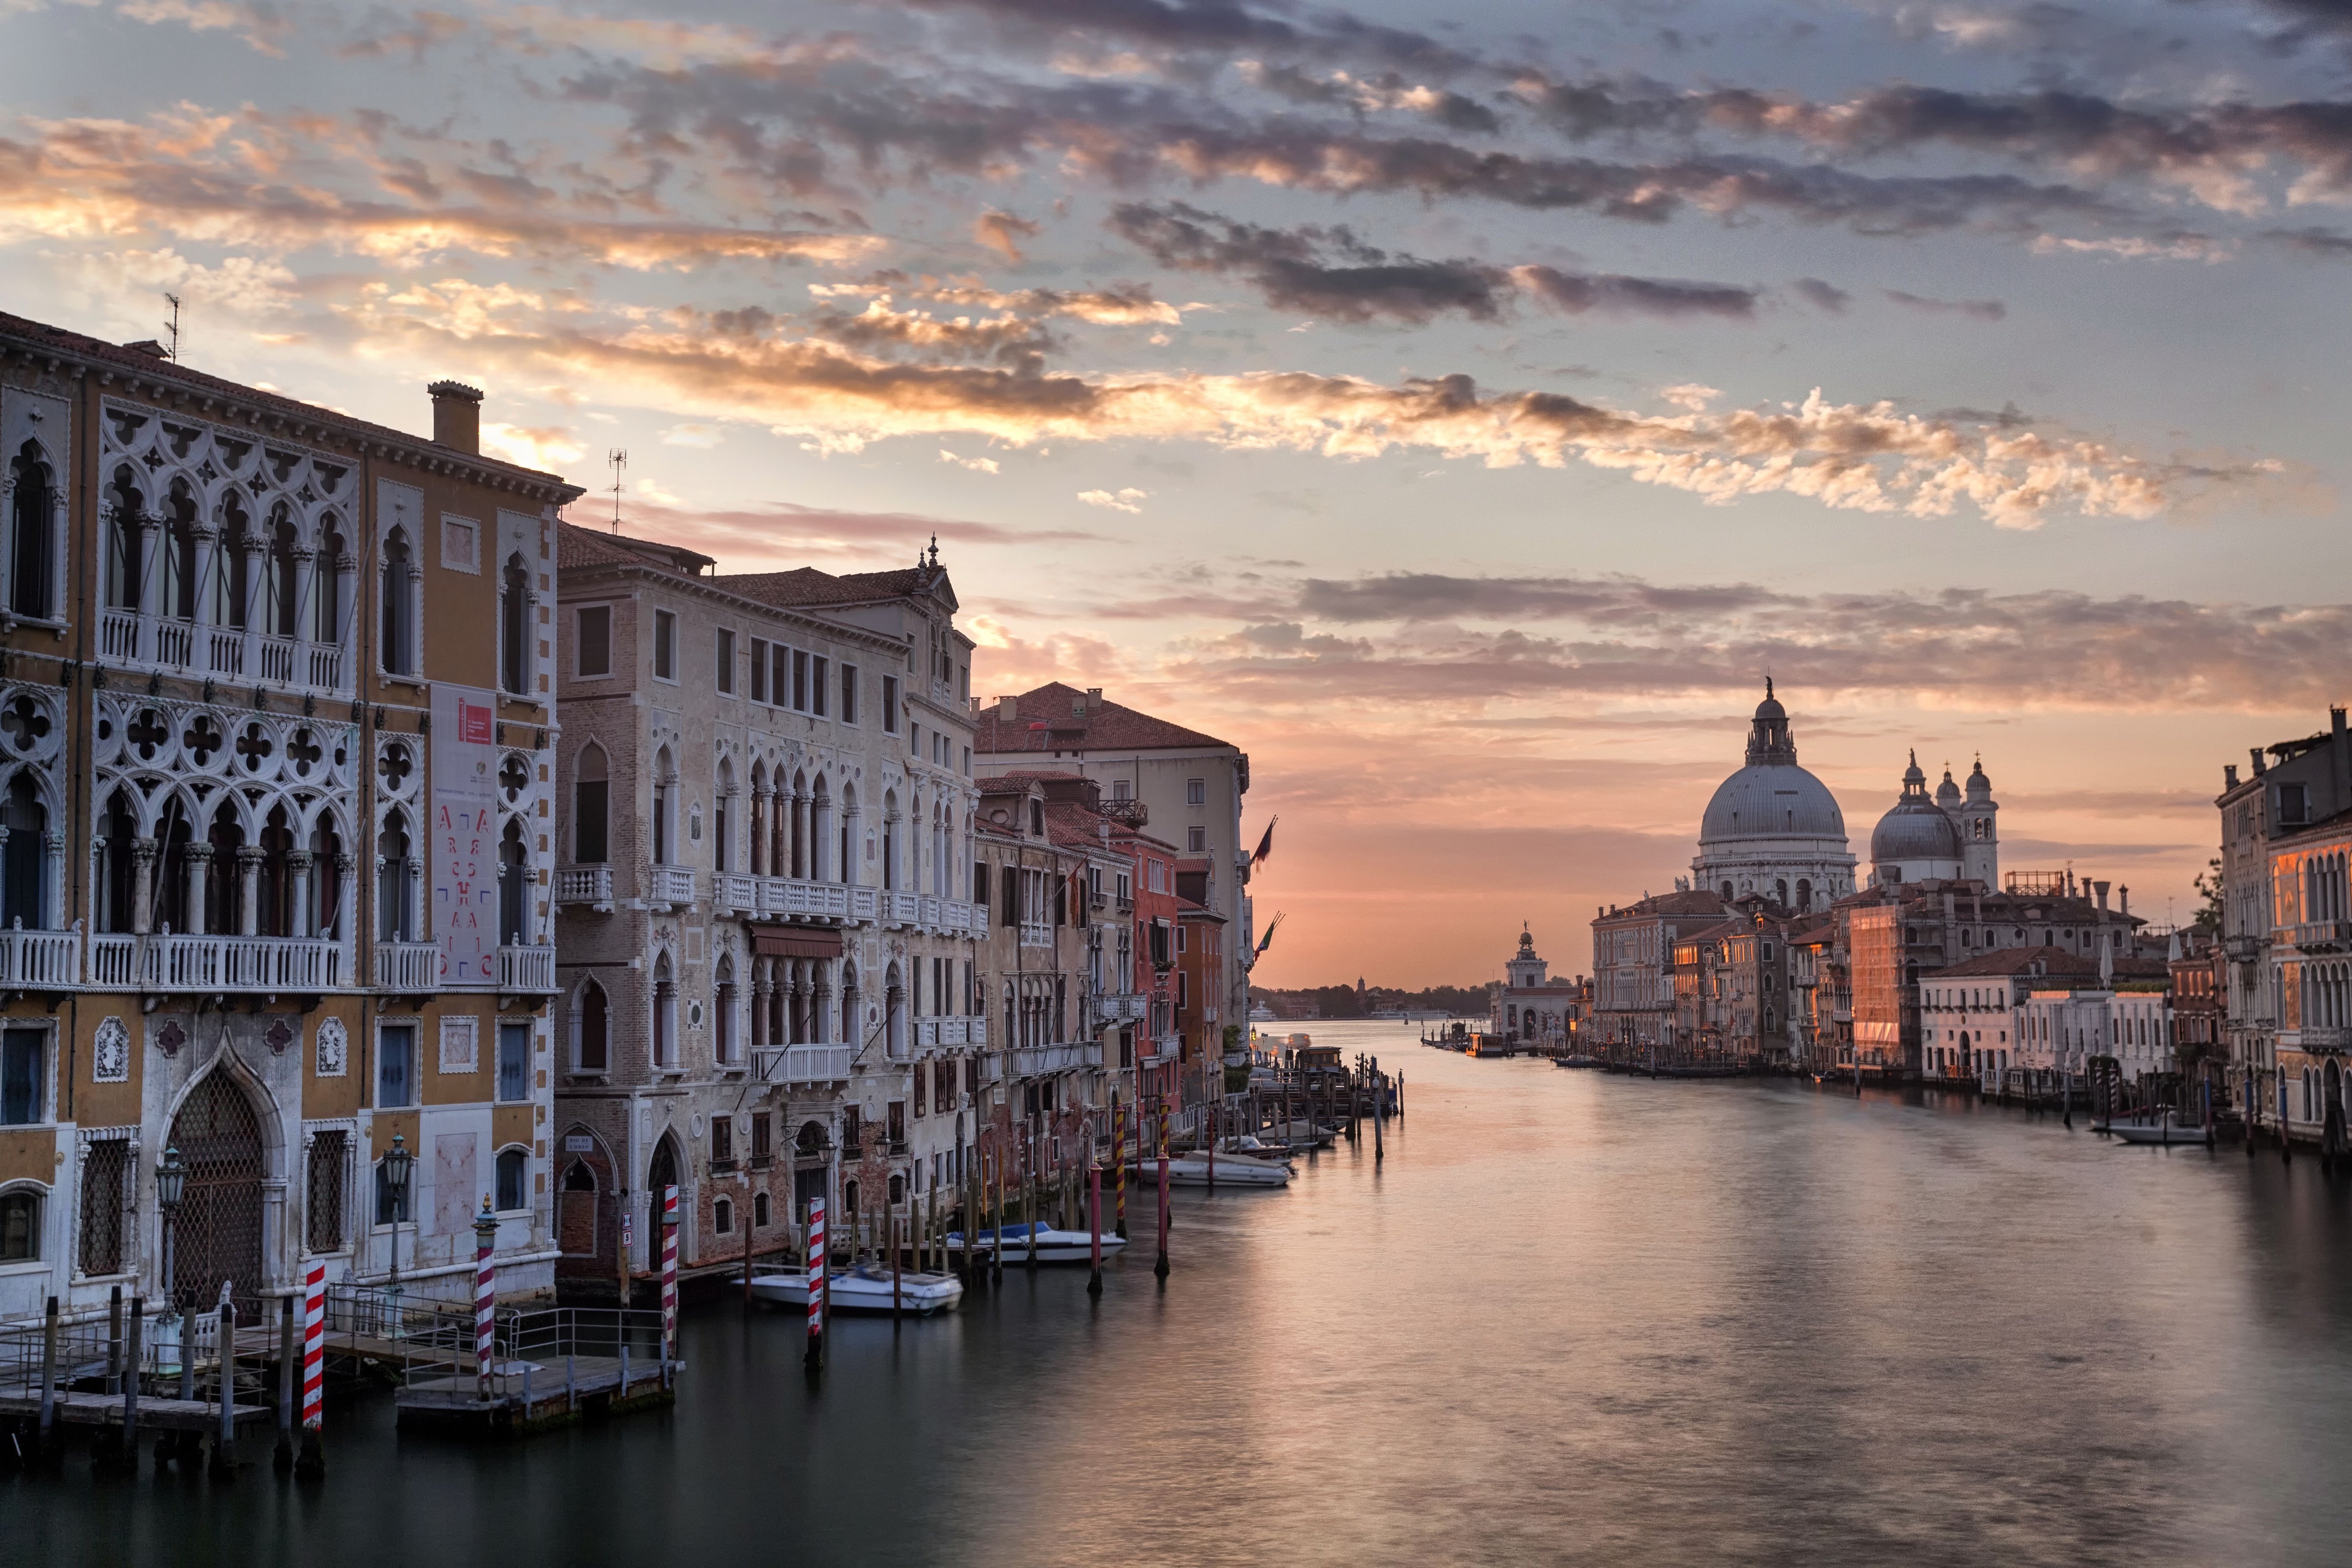
Venice is a photographer’s dream, offering endless opportunities to capture its unique beauty. The best time to avoid crowds and oppressive heat is during the low season or early morning. Sunrise at Academia Bridge provides a stunning view of the Grand Canal, while Piazza San Marco is best photographed before tourists arrive.
Don’t miss the iconic gondolas along the waterfront near Piazza San Marco, especially during sunset and blue hour. For a different perspective, head to San Giorgio Maggiore island to photograph the church and Venice’s skyline at golden hour.
Explore the backstreets of San Polo and Dorsoduro districts for charming piazzas, decaying architecture, and canal scenes. Murano and Burano islands offer colorful buildings and glassmaking demonstrations perfect for photography. To learn more about Venice photography, check out this in-depth guide.
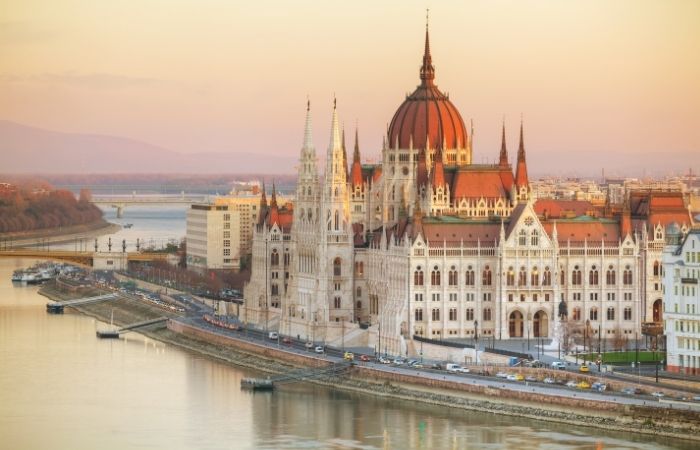
Budapest
Budapest is another fantastic city for photographers, offering endless opportunities to capture stunning images. From the grand architecture of the Hungarian Parliament Building to the thermal baths of Széchenyi, there’s no shortage of photogenic spots in this beautiful city.
One of the best places to start is the Fisherman’s Bastion, a neo-Gothic terrace with breathtaking views of the Danube River and the Pest side of the city. Nearby, you’ll find Matthias Church, a stunning example of neo-Gothic architecture that’s perfect for capturing intricate details and beautiful stained glass windows.
For panoramic views of the city, head to Gellért Hill, where you can capture the entire skyline from the Citadella fortress. And don’t miss the iconic Chain Bridge, which looks particularly stunning at night when it’s lit up against the dark sky. To learn more about the best spots for Budapest photography, check out this in-depth guide.
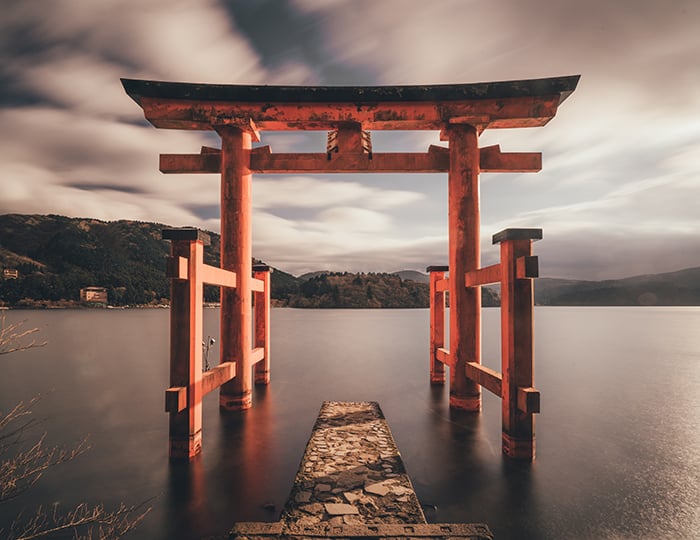
Japan
Japan is a brilliant destination for a photography trip. From stunning landscapes to interesting architecture and fascinating culture, there’s no shortage of inspiration for your travel photography.
Capture the vibrant cityscape of Minato, one of Tokyo’s special wards. Improve your food photography skills at Japan’s many cafés and restaurants, where every dish looks like a work of art. Take adorable photos of tame deer in Nara Park or sharpen your landscape photography in Hakone, with its hot springs, views of Mount Fuji, and gorgeous lake.
Don’t miss the breathtaking cherry blossoms in Japan’s parks during the Sakura season, usually from January to April. Visit the magical Blue Pond in Biei, go on an adventure in Kyoto’s Bamboo Grove, or document the commercial side of Japan in Shinjuku. For more inspiration on Japan photography, check out our in-depth guide.
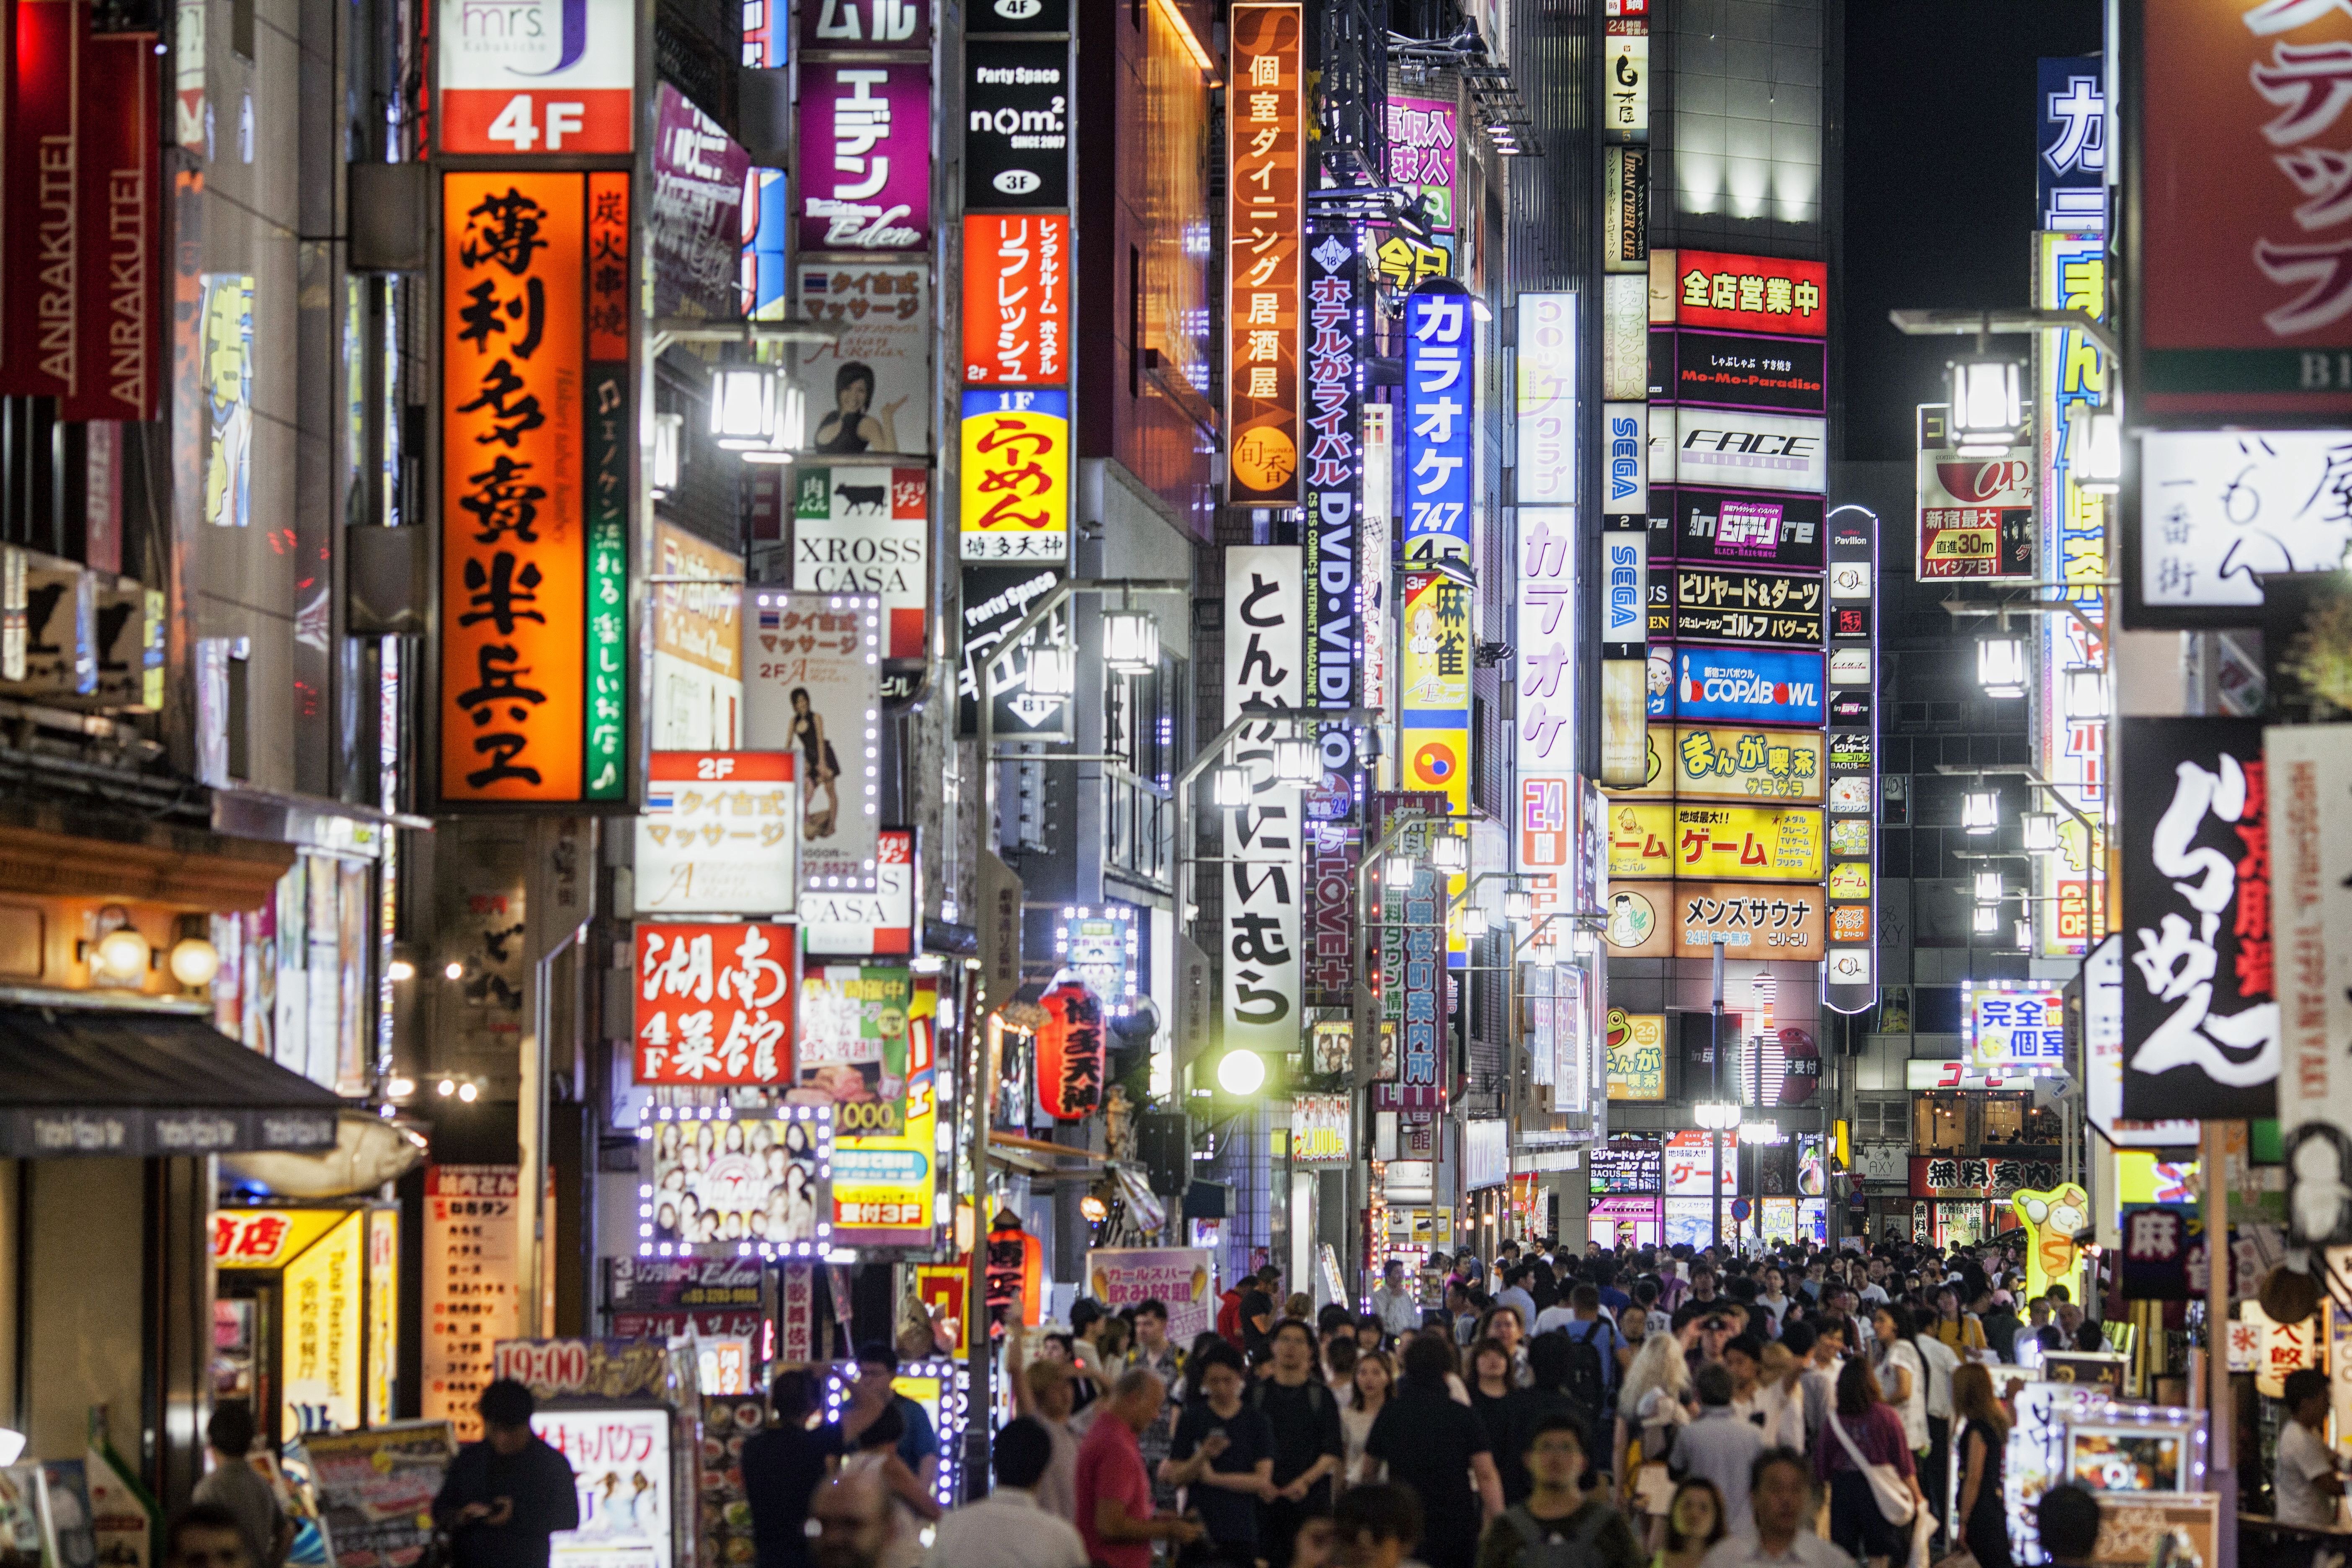
Tokyo
Tokyo is one of the world’s most vibrant locations, offering a diverse range of subjects to capture. From the bustling streets of Shinjuku and Shibuya to the traditional temples of Asakusa, there’s no shortage of incredible hot spots to explore.
For those seeking modern architecture and vibrant city life, the Tokyo Skytree and Roppongi Hills Mori Tower provide stunning views of the skyline. Harajuku, the heart of Tokyo’s youth culture, is perfect for street photography and capturing unique fashion trends.
If you’re interested in learning more about Tokyo photography, check out our in-depth article to help you plan your trip and find the best spots to shoot. With its mix of old and new, Tokyo is a city that will inspire and challenge you as a photographer.
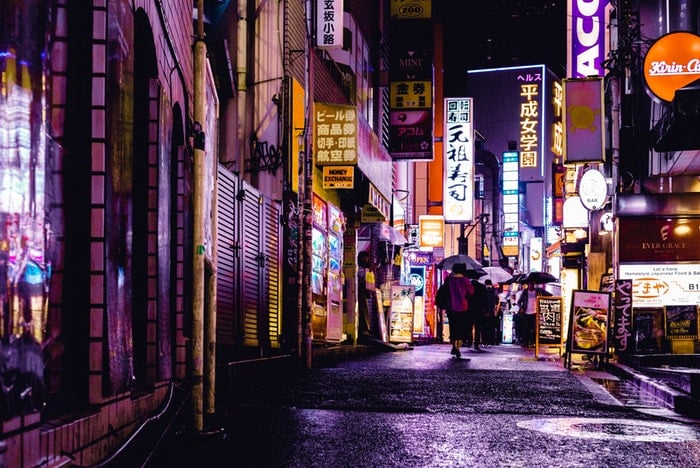
Etiquette in Japan
When taking photos in Japan, it’s important to be respectful and follow proper etiquette. Always ask for permission before taking someone’s photo, especially if you plan to share it publicly. If you can’t get permission, blur the person’s face to protect their privacy.
Be prepared to show your photos to the police if asked, and avoid using selfie sticks in crowded areas to prevent injuries. In cafés and restaurants, ask the staff for permission before taking photos of your meal.
At night, skip the flash and use a higher ISO and tripod to capture vibrant neon lights. Avoid taking photos in no-photo areas, of children without parental consent, geishas, people on public transport, and those in the middle of prayer. For more tips on photography in Japan, check out this in-depth guide.
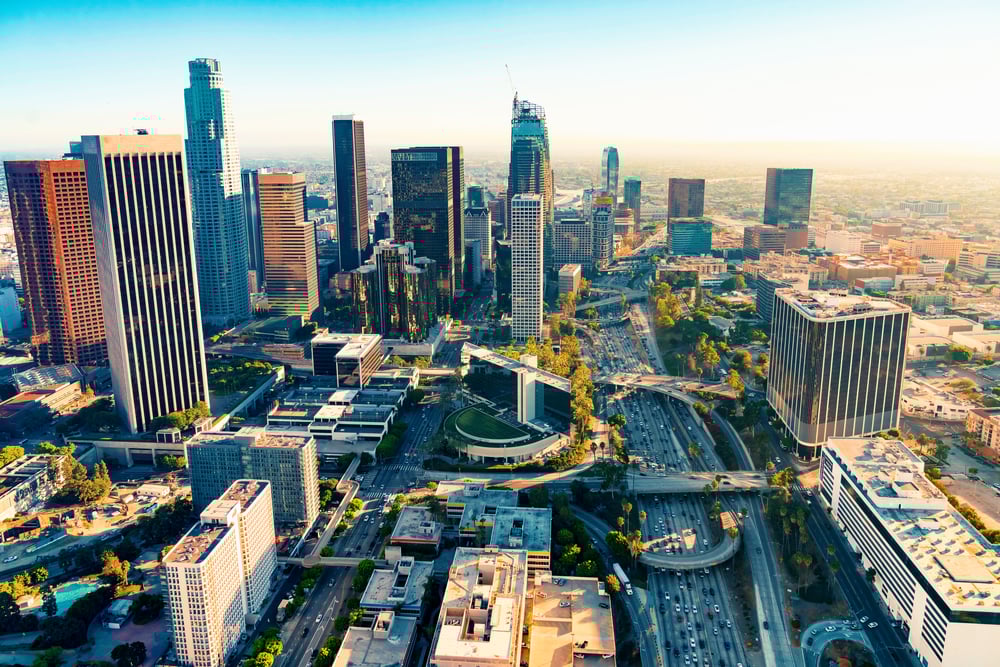
Los Angeles
Los Angeles is a street photographer’s paradise. From the colorful Venice Beach boardwalk to the iconic Griffith Observatory, there are endless opportunities to capture the city’s unique character.
The Santa Monica Pier is a must-visit spot, especially in the evening when the lights come on. Echo Park offers stunning views of the skyline, particularly at sunrise or sunset.
Downtown LA is full of hidden gems like the Bradbury Building with its intricate architecture and the bustling Grand Central Market. For a taste of old Hollywood glamor, head to Union Station or the Hollywood Bowl Overlook. Places for street photography in Los Angeles are as diverse as the city itself, so grab your camera and start exploring.
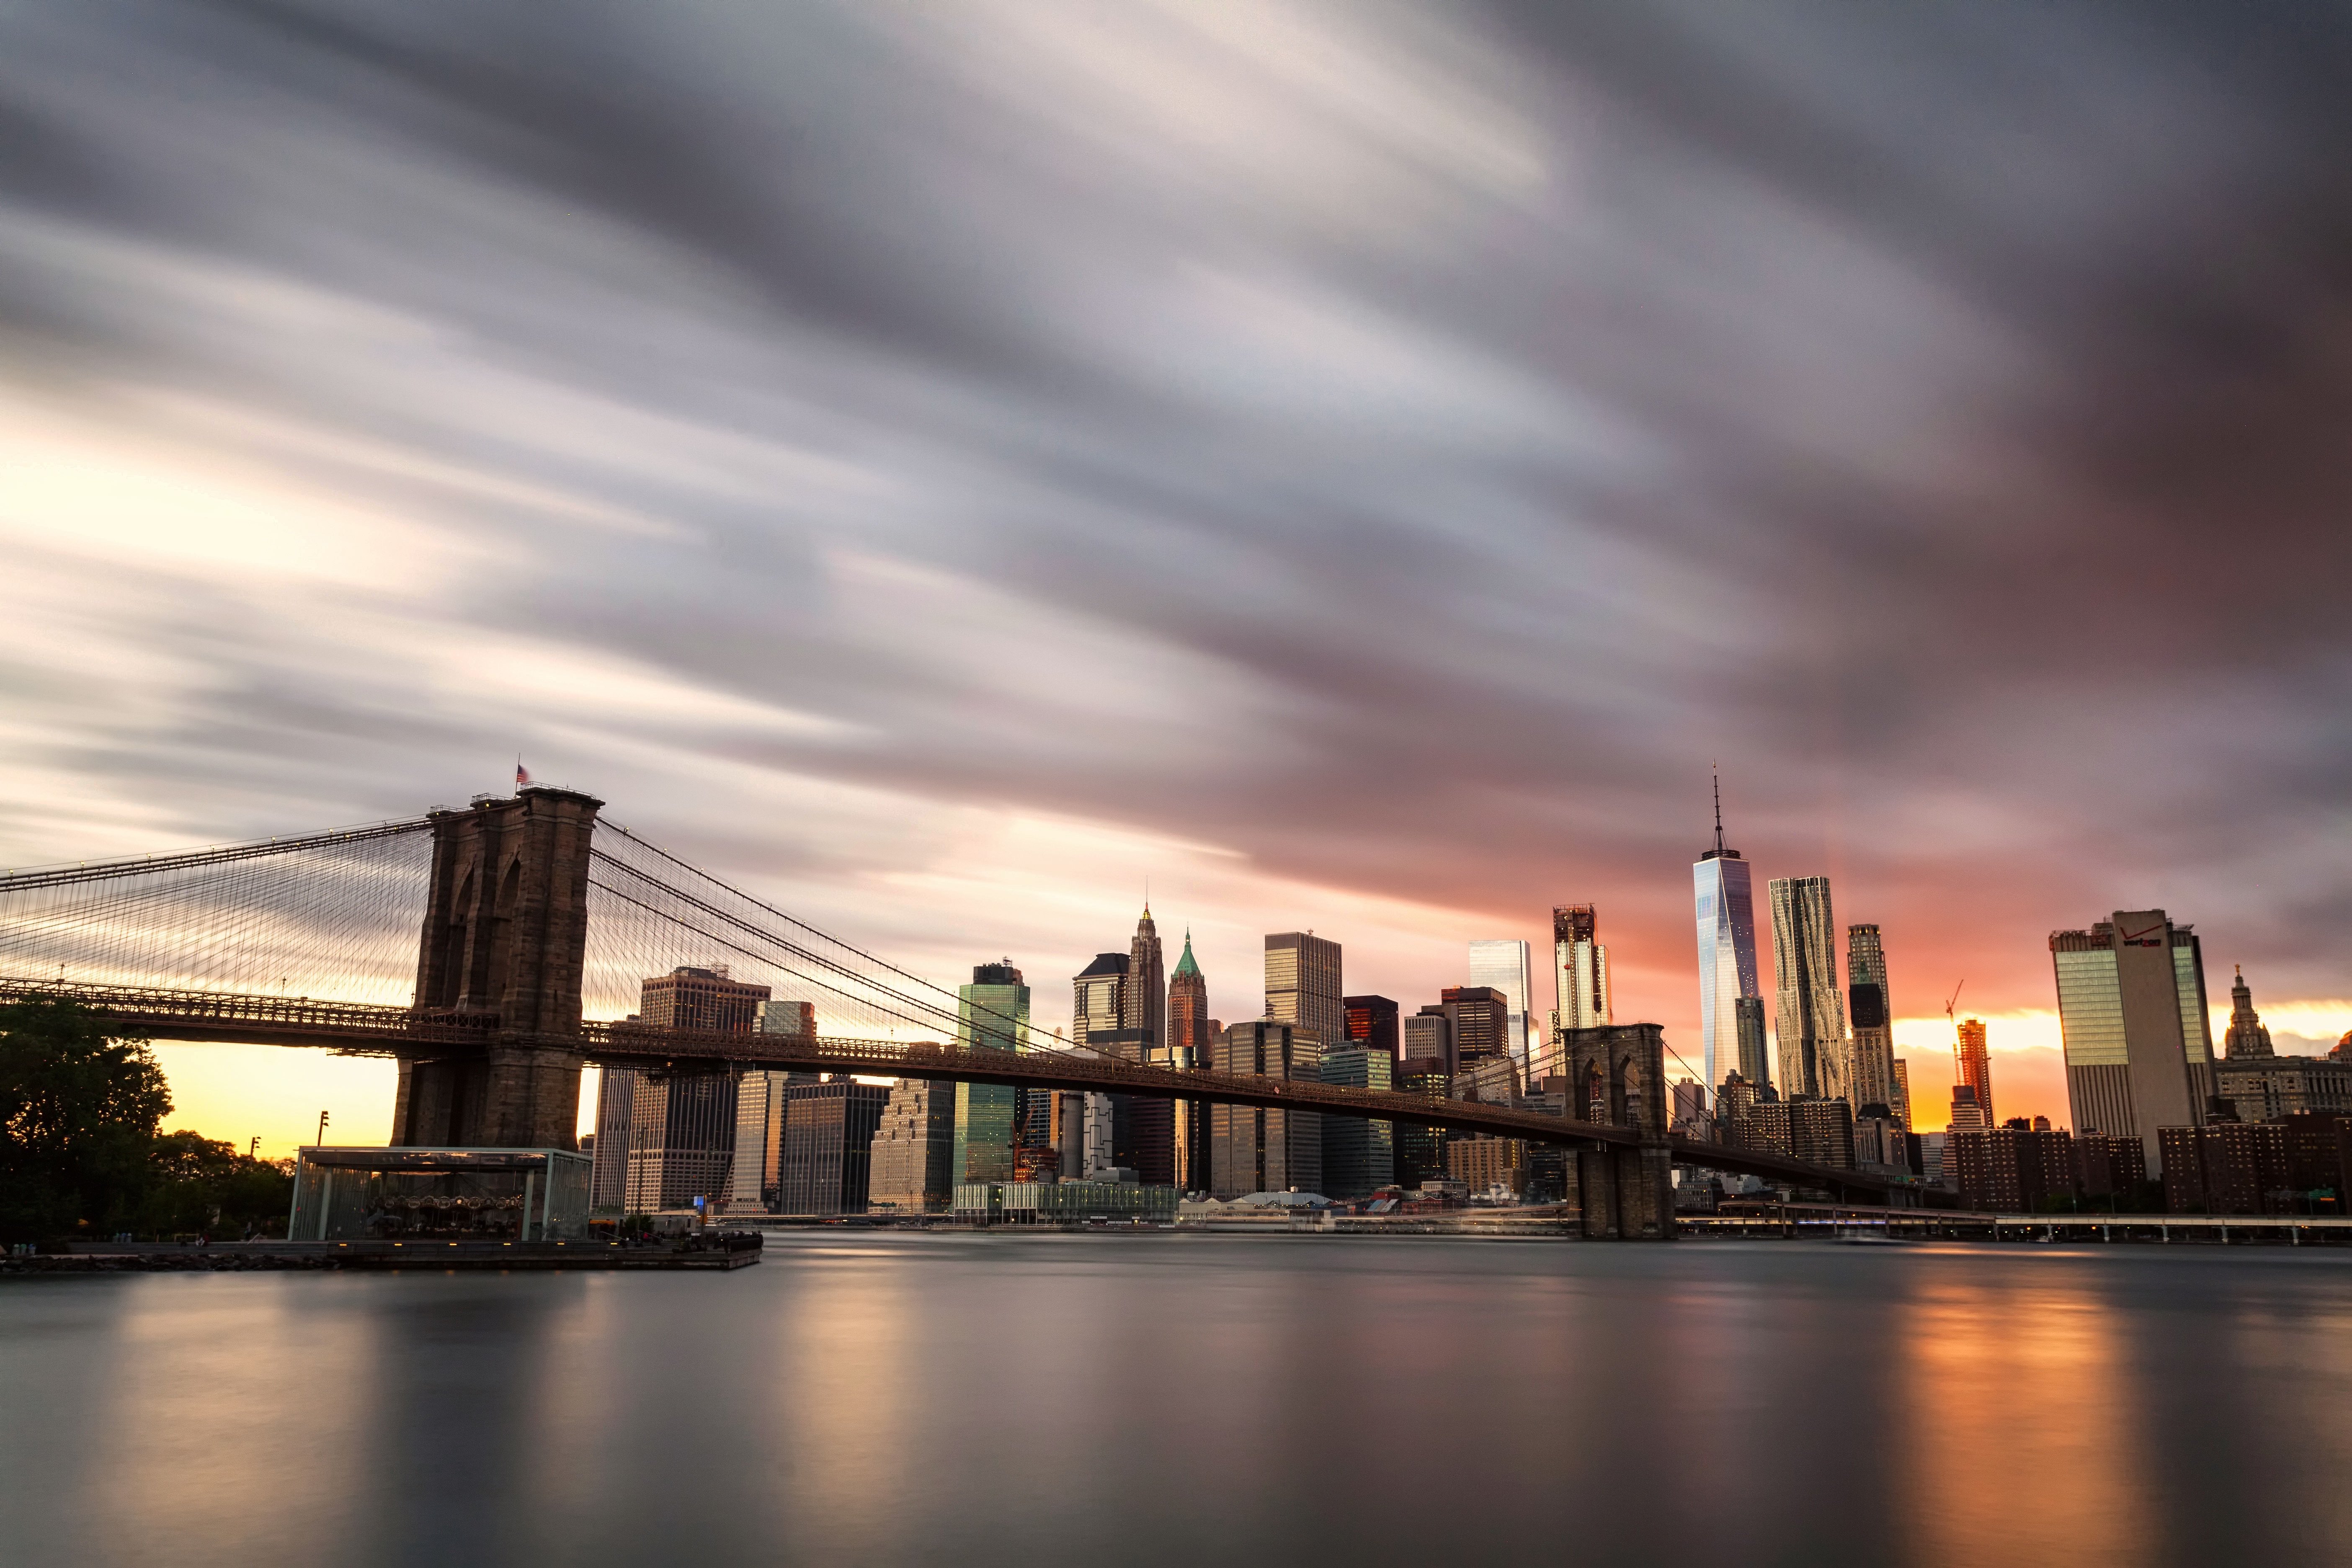
New York
New York City remains one of the most popular locations for photographers, with countless iconic locations to capture. Central Park offers a variety of scenes, from the Bethesda Terrace and Fountain to the Alice in Wonderland statue. The Brooklyn Bridge is another must-see, with its stunning suspension cables and brick towers.
Grand Central Station and the Chelsea Market are great for street photography and architectural details. Rockefeller Center provides both street-level interest and panoramic views from its observation deck.
Of course, no trip to New York would be complete without photographing the Empire State Building and the Statue of Liberty. For breathtaking cityscapes, head to Brooklyn Bridge Park or find a unique vantage point to capture the Manhattan skyline. Don’t miss the Flatiron Building and the vibrant energy of Times Square.
To learn more about the best spots for New York photography, check out our in-depth guide.
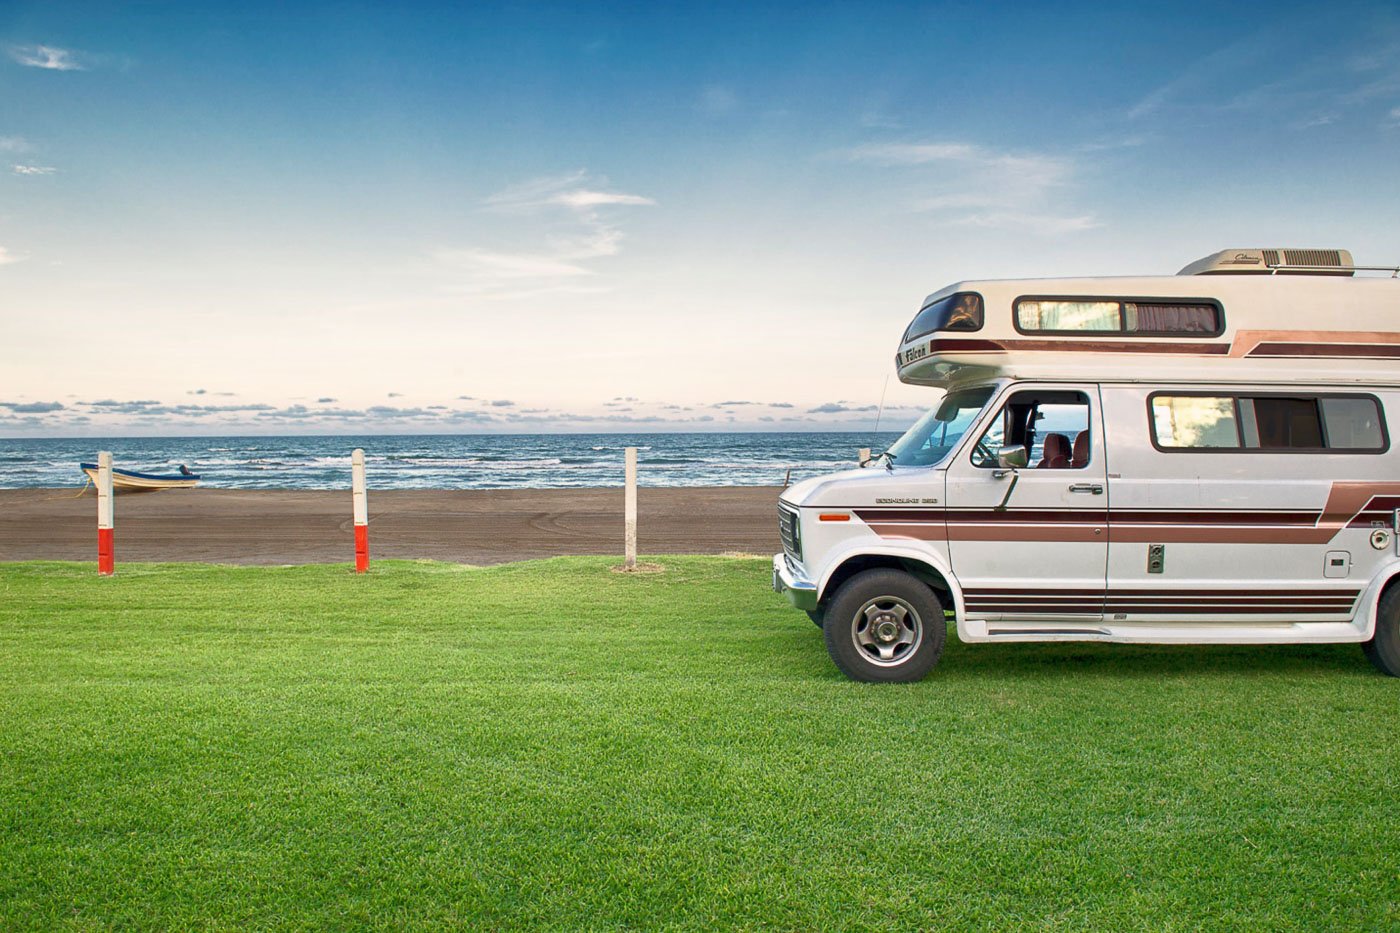
Photography Road Trip
Planning a road trip for photography involves choosing the right vehicle, deciding on accommodation, and mapping out your route. Your vehicle should be safe, comfortable, and suitable for the terrain you’ll encounter. Living out of your vehicle, like an RV or camper van, allows you to stay closer to photo locations and immerse yourself in nature.
When planning your route, prioritize the locations you want to photograph. Research potential spots using apps and websites like Pinterest, 500px, Flickr, and Google’s My Maps. Plot your route, campgrounds, points of interest, and photo locations to make the most of your trip.
Electricity is essential for photographers on the road. Ensure you have reliable power sources, such as a dual battery system, solar panels, or a 12v inverter. Always carry a power bank as a backup. To stay connected, use local SIM cards with data or take advantage of Wi-Fi at cafes and fast food outlets.
By planning your shots in advance and considering factors like lighting, crowds, and unique perspectives, you can capture stunning images that tell the story of your road trip photography adventure.
Inspiration from the Best Travel Photographers
Travel photography captures the adventures and locations you visit during your journeys. It involves many genres like landscape, architecture, street, and environmental photography. Travel photographers often tell stories through their images, focusing on special moments and atmospheres.
There are many approaches to travel photography. You can focus on people, take self-portraits, emphasize landscapes, or try aerial photography. Mixing these approaches can result in a unique style and help you gain recognition as a travel photographer.
If you’d like to learn more about travel photographers, we have an article that goes into greater depth on the topic.
Travel Blogs
Travel photography blogs are a great source of inspiration for your next adventure. They feature stunning images from around the world and provide useful tips for capturing your own travel photos.
Some of the best travel photography blogs cover a wide range of topics, from destination guides to photography tutorials. They showcase the work of talented photographers who have explored every corner of the globe.
Whether you’re planning your next trip or simply looking for some armchair travel, these blogs are sure to inspire you. To discover some of the best travel photography blogs to follow in 2026, check out this list of top picks.