Armed with the best street photography gear, you’re ready to hit the pavement and snap some shots. We know street photographers like to pack light and use minimal equipment. But some gear is worth the extra weight in your backpack.
The Wandrd Duo Daypack is our top piece of street photography gear. It’s a high-quality camera backpack that’s ideal for street photographers. But this isn’t a backpack article. We also have camera straps, tripods, and other useful gadgets. Keep reading to find out more.
Our Top 3 Choices for The Best Street Photography Gear
What Is the Best Street Photography Gear?
The best street photography gear helps you capture incredible shots without weighing you down or attracting attention. Street photographers need to be light on their feet, moving unnoticed through urban areas. That’s why they don’t want to carry lots of heavy equipment.
But even so, there are a few bits and pieces that can improve your street photography experience. We’re not talking about the best cameras and lenses for photography. Although, we do look at those briefly in the FAQ section.
In this article, we’re looking at street photography accessories. Some are must-have items for street shooters. But others are optional pieces some photographers might find useful.
Every street photographer needs a street photography bag, which is why we start the list with a beautiful camera backpack. We also look at camera straps, another essential item. Not all street photographers use tripods or monopods. But they broaden the creative possibilities.
We also have digital gadgets that have become essential to digital street photography. But whether you choose all these accessories or just a few, you’ll be better prepared for life on the streets.
Here’s a quick rundown of the best street photography gear. We look at each item and why we’ve picked it in the following section. Then we have a buyer’s guide at the end looking at cameras, lenses, and other aspects of street photography.
- Incredible build quality with durable materials
- Completely waterproof with rubber-protected zippers
- Side access with infinity zip design
- Excellent padding for camera and accessories
- Quick-connecting and quick-adjusting for ease
- Ultra-durable and inspired by high-end climbing gear
- Works with any DSLR and most ARCA-type tripods
- Low-profile design, unobtrusive and sleek
- Strong aluminum build
- Folds down to 15.3 inches / 39 cm
- Impressive strength with a 17.6 lb / 8 kg load capacity
- Ball head with built-in bubble level
- Lightweight and compact, easily portable for on-the-go shots
- Universal thread fits all DSLR and mirrorless cameras
- Foam grip and wrist strap for comfortable, secure use
- Non-skid rubber foot, perfect for indoor and outdoor terrain
- Ensures safety from shock and moisture
- Durable exterior protects against water and dust
- Snap-on lock for secure storage
- Molded eyelet for easy attachment
- Superior performance with multi-card compatibility
- Premium aluminum enclosure for cool, speedy transfers
- High-speed data transfer with USB-C 5 Gbps port
- Write-protect lock switch for data protection
- High-capacity power bank with 20,000 mAh limit
- Trickle-charging mode for low-power devices
- Charge with micro USB or USB Type-C cables
- Multiple ports for simultaneous charging
Best Street Photography Gear
Now we look at all the best street photography accessories in detail. We have also included links to more in-depth reviews and longer lists with more options for specific accessories. But this is the best place to start to get set up with the best street photography gear.
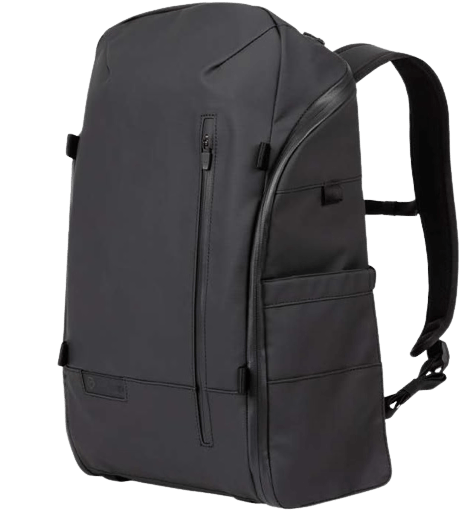
1. Wandrd Duo Daypack
| Brand |
Brand
Wandrd
|
| Product Type |
Product Type
Camera backpack
|
| Material |
Material
840D Jr ballistic nylon
|
| Capacity |
Capacity
20 L
|
| Water-Resistant |
Water-Resistant
Yes
|
| Other Key Features |
Other Key Features
Waterproof zippers, side access, pop camera cube, chest strap, laptop sleeve
|
| Best For |
Best For
Street photographers looking for a stylish, durable camera backpack
|
The Wandrd Duo Daypack is a street photographer’s dream camera bag. It’s stylish without being garish, so you can maintain a low profile. And it has packed pockets for storing your camera, lenses, and extra gear.
We recently reviewed all the best camera backpacks, testing and scoring each one. And the Wandrd Duo Daypack is very close to the top of the list.
We’ve already mentioned how it looks. But the quality isn’t only skin deep. The closer you look, the more you appreciate this backpack.
The materials are of the highest order. The main outer material is thick, water-repellent 840D Jr ballistic nylon. You’d need a sharp knife to rip this open, so you don’t have to worry about snags and tears in the street.
The nylon is water-repellent and has a coating for extra protection. And the gear inside is completely protected thanks to the rubber padding on the zippers that keeps water from seeping through. It’s a fully waterproof backpack, so you don’t have to worry about your gear if you get caught in the rain.
You also get excellent storage space inside. You can keep the main compartment open if you’re using it as a normal backpack. But erect the “pop camera cube,” and it becomes a camera backpack. The camera cube is well padded, so your camera is secure.
Don’t worry about all your other gear. The bag has plenty of pockets for lenses and gadgets. And the larger pockets are well-padded and have elasticated rims, so everything is secure and protected.
Street photographers will appreciate the infinity zipper design. This allows you to open the bag fully, which makes packing and unpacking much easier. It also gives you side access on both sides of the bag. That means you can grab your camera without taking the bag off.
We have much more to say about this camera backpack. You can read our full, in-depth review of the Wandrd Duo Daypack to learn more.
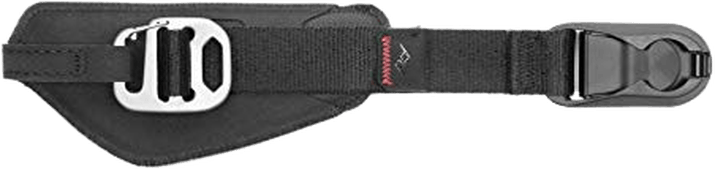
2. Peak Design CL-3 Clutch Camera Handstrap
| Brand |
Brand
Peak Design
|
| Product Type |
Product Type
Camera hand strap
|
| Materials |
Materials
Nylon, aluminum
|
| Other Key Features |
Other Key Features
Microfiber pad, clip anchors
|
| Best For |
Best For
Street photographers who like to keep their camera firmly secured in their hand
|
Many photographers prefer a classic camera neck strap. But a camera hand strap is ideal for street photography. When roaming the streets with your camera, you need to be ready at all times. At any moment, a shot could present itself. With a hand strap, your camera is always where you need it: in your hand.
The Peak Design CL-3 Clutch Camera Handstrap is the best option for street shooters. It’s strong, reliable, and comfortable. It’s a fairly no-thrills accessory. But it will never let you down.
The main strap is made of thick, robust nylon. It is rather coarse, but you have padded microfiber that protects your hand, making it comfortable. You can wear it for hours without chaffing or discomfort. You also have the aluminum buckle to tighten it for a better fit.
With super-strong anchors, the camera’s weight will never be an issue. They can hold anything up to 200 lbs / 90 kg, so your street photography camera won’t even come close to bothering it.
The Peak Design CL-3 Clutch Camera Handstrap is compatible with DSLR and mirrorless cameras. They can be APS-C or full-frame models. And rangefinders and compact cameras are no problem either. You can also use it when using a tripod, thanks to the bottom screw connection.
You can see our list of all the best camera hand straps if you want more options. Or you can check out our post on the best camera neck straps if that’s what you prefer.
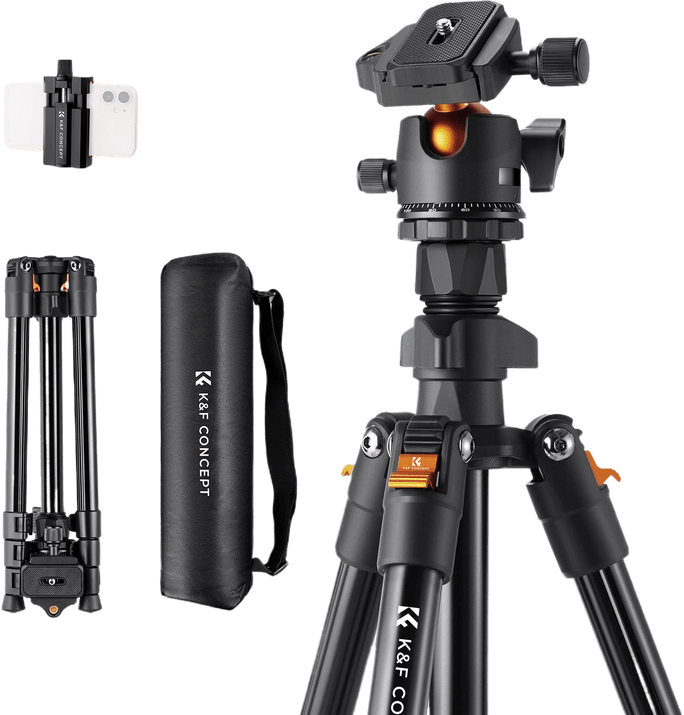
3. K&F Concept Lightweight Outdoor Tripod
| Brand |
Brand
K&F Concept
|
| Product Type |
Product Type
Tripod
|
| Material |
Material
Aluminum
|
| Folded Height |
Folded Height
15.3 inches / 39 cm
|
| Maximum Height |
Maximum Height
64 inches / 163 cm
|
| Tripod Weight |
Tripod Weight
2.4 lbs / 1.1 kg
|
| Max Load Capacity |
Max Load Capacity
17.6 lbs / 8 kg
|
| Other Key Features |
Other Key Features
Ball head, flip locks, bubble level
|
| Best For |
Best For
Photographers looking for a lightweight, portable tripod
|
Not all street photographers use tripods in their daily practice. They don’t always help when a street photographer is in anonymous mode. And they can be slow to set up and pack up. But a tripod can also be a useful tool for street photographers.
They give you more options with your exposure settings. You can shoot with slower shutter speeds without motion blur. Or you can use them to capture motion blur using long-exposure photography in a busy street. They also allow you to work in the early morning or late evening, when there’s less light.
If you want to try using a tripod for your street photography, we recommend the K&F Concept Lightweight Outdoor Tripod. It’s lightweight at just 2.4 lbs / 1.1 kg. And it folds down to a convenient size of 15.3 inches / 39 cm, making it easy to strap to your camera backpack.
With strong materials and excellent build quality, it’s surprisingly durable. It can support anything weighing up to 17.6 lbs / 8 kg. That is far more than you need for most street photography cameras. Even full-frame DSLRs are a breeze for this tripod.
Thanks to the quick-release flip-locks, it’s easy to set up, adjust, and pack away. And it has a decent height range, allowing you to get low-angle shots or anything up to 64 inches / 163 cm.
The ball head gives you fantastic flexibility. It sits on a panning base, which is great for panoramas. And the ball joint gives you an excellent range of motion. The built-in bubble level is another handy feature, helping you achieve a perfectly level mount in any environment.
If this isn’t the tripod for you, check out all of our best tripod articles:
- Best Tripods for Photographers
- Best Heavy-duty Tripods
- Best Time-lapse Tripods
- Best Tripods for Landscape Photography
- Best Mini Tripods
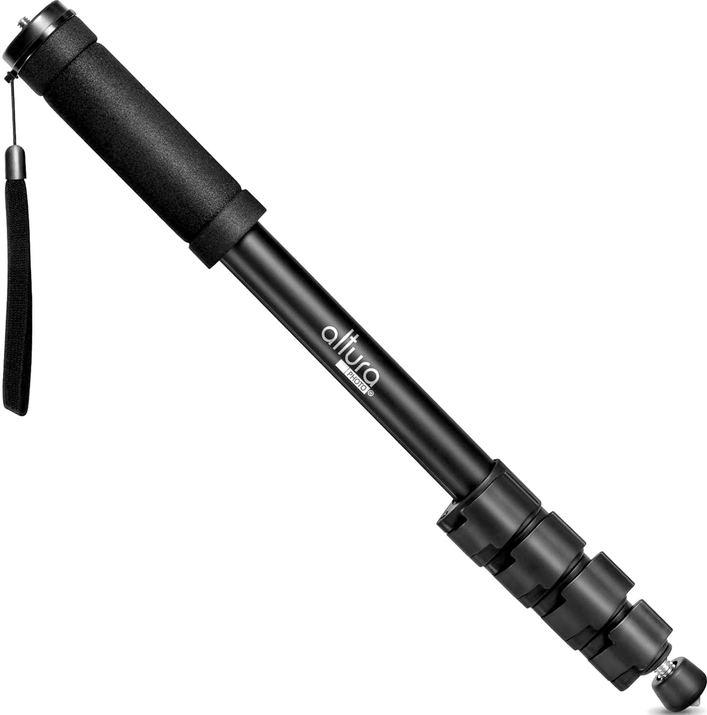
4. Altura Photo Camera Monopod
| Brand |
Brand
Altura Photo
|
| Product Type |
Product Type
Monopod
|
| Material |
Material
Aluminum
|
| Item Weight |
Item Weight
0.6 lb / 272 g
|
| Folded Height |
Folded Height
16.7 inches / 42.4 cm
|
| Maximum Height |
Maximum Height
62 inches / 157.5 cm
|
| Max Load Capacity |
Max Load Capacity
5 lbs / 2.2 kg
|
| Other Key Features |
Other Key Features
Flip locks, universal thread, rubber foot with retractable spike
|
| Best For |
Best For
Photographers who want extra stability and freedom of movement
|
If you don’t want the hassle of a tripod, a monopod is a fantastic alternative. They are more compact than tripods. And they give you more mobility. But they still give you extra stability, allowing you to use more exposure settings.
They also help you keep a low profile. Erecting and mounting a tripod can make a bit of a scene on a busy street. Everyone will be alerted to the presence of the photographer. But that’s not the case with a monopod. It doesn’t expand your physical profile.
Monopods are popular with event and sports photographers. But they make an excellent addition to a street photographers toolkit.
The Altura Photo Camera Monopod is a great choice for street photographers. It’s portable and lightweight. And it’s simple yet reliable. It’s also an affordable accessory for street photography.
It weighs only o.6 lb / 272 g, which is feather-light. And it folds down to 16.7 inches / 42.4 cm. That means you’ll have no problem storing it in your camera backpack. It’ll even fit in most camera messenger bags.
With five leg sections, the monopod has a large height range. The max height is 62 inches / 157.5 cm, but you can find a comfortable position anywhere between the maximum and minimum height.
It’s easily adjustable thanks to the quick-release flip locks on each leg section. And a padded grip at the top makes it easier to control when your camera is mounted. The rubber foot and retractable spike also give you more grip on any surface.
It isn’t the strongest monopod. But with a max capacity of 5 lbs / 2.2 kg, it is strong enough for most street photography cameras. Most mirrorless models will be okay. But you will have to be careful with full-frame DSLR cameras.
If you do need something more secure, check out our full article on the best monopods for photographers.
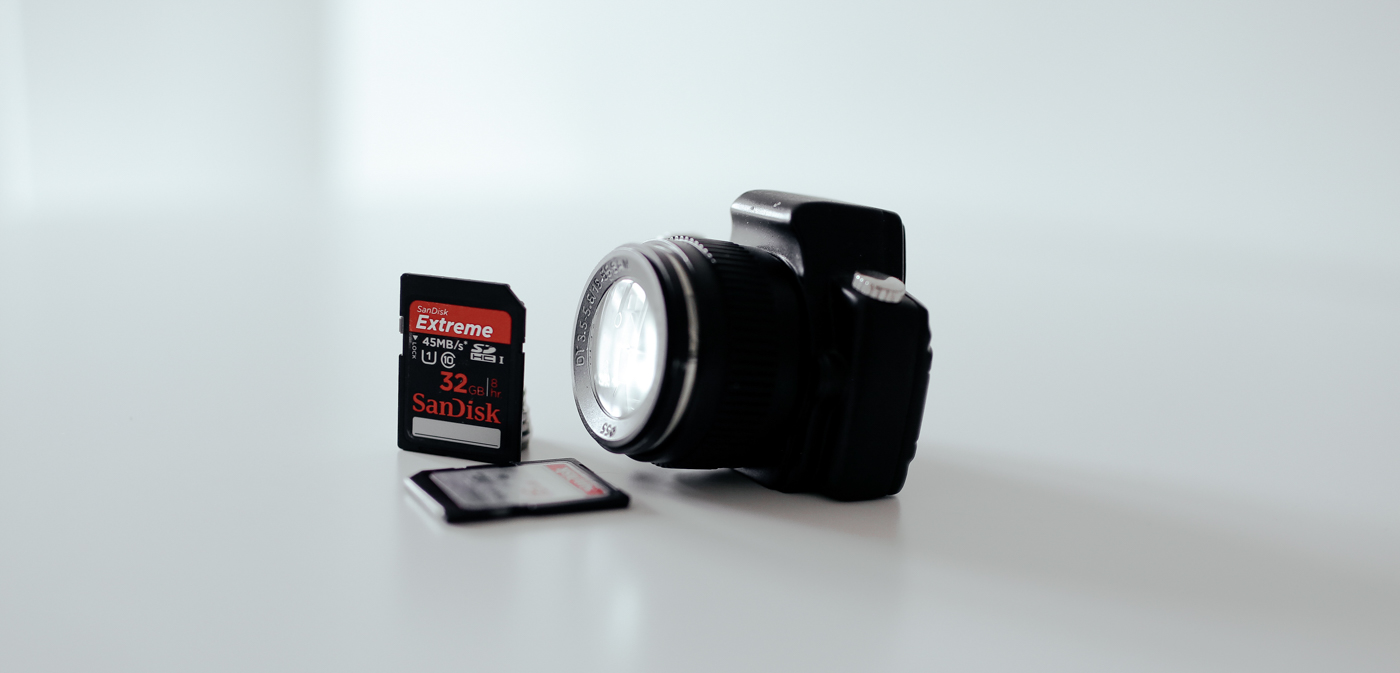
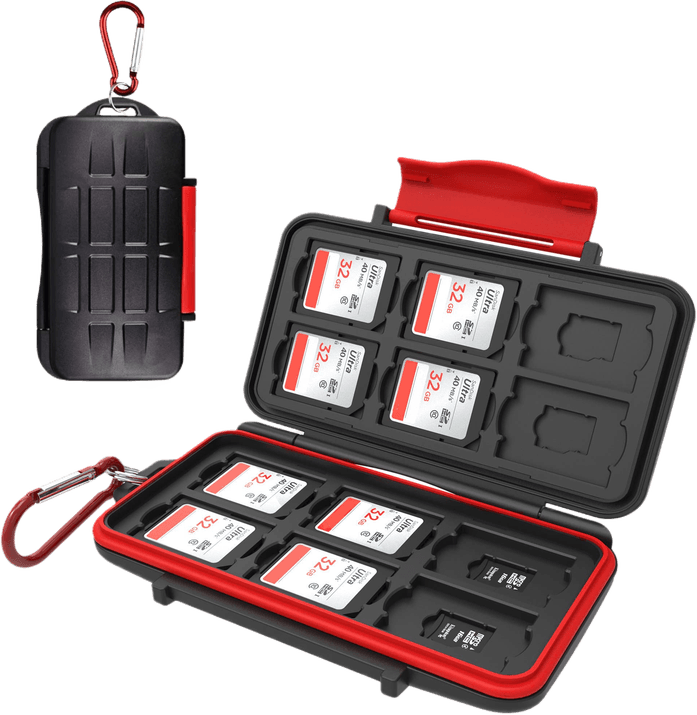
5. Kiorafoto Professional Memory Card Case
| Brand |
Brand
Kiorafoto
|
| Product Type |
Product Type
Memory card case
|
| Dimensions |
Dimensions
5.6 x 3.2 x 1.1 inches / 14.3 x 8.2 x 2.8 cm
|
| Other Key Features |
Other Key Features
Waterproof seal, carabiner buckle
|
| Best For |
Best For
Street photographers using digital cameras
|
A durable memory card case is an essential accessory for street photographers. Filling up your camera mid-shoot is annoying, so you always need spare SD cards. And there’s nothing more heartbreaking than losing an SD card full of your best street shots. That’s why card cases are so important.
The Kiorafoto Professional Memory Card Case is a great option for street photographers. It’s durable, spacious, and reliable. It’s a purchase you won’t regret.
It’s a spacious card case, allowing you to store up to 12 SD cards and 12 microSD cards at the same time. It’s also compatible with TF memory cards.
Memory card cases don’t come much more durable than the Kiorafoto. It’s crush-proof. And it’s waterproof when properly closed, thanks to the rubber seal around the opening. Once shut, your SD cards are safe inside.
It’s small enough for any camera backpack. And it comes with a metal carabiner buckle, so you can attach it to the outside of your camera bag or belt.
You can see all the best SD card cases in our full article. And if you need more memory cards, you can see our articles on the best memory cards and the best microSD cards.
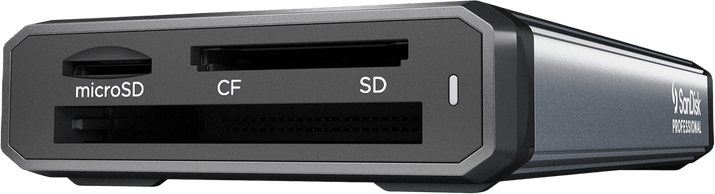
6. SanDisk Professional Multi-Card PRO-READER
| Brand |
Brand
SanDisk Professional
|
| Product Type |
Product Type
Memory card reader
|
| Dimensions |
Dimensions
4.5 x 2.3 x 0.7 inches/ 11.5 x 6 x 1.9 cm
|
| Connection |
Connection
USB-C
|
| Supported Cards |
Supported Cards
UHS-I, UHS-II SD, CompactFlash, SDHC, SDXC, microSDHC, microSDXC, microSD, and SD
|
| Compatible Operating Systems |
Compatible Operating Systems
Windows, macOS, iOS (iPad Pro), and G-Raid devices
|
| Best For |
Best For
Transferring data from memory cards to other devices
|
Even with a tough and durable memory card case, data is vulnerable when stored on an SD card. They are easily lost or broken. That’s why it’s best to transfer the images to another device as soon as you can. And a memory card reader allows you to do that any time, any place.
Many street photographers take their laptops with them when shooting. Thankfully, most quality camera backpacks like the Wandrd Duo Daypack have dedicated laptop pouches. But you still need to bridge your camera and laptop, which is why you also need a card reader.
The SanDisk Professional Multi-Card PRO-READER is one of the very best. It can read a wide range of cards. It has fast reading and transfer speeds. And it’s portable, so you can take it anywhere.
It connects to your laptop with a USB-C cable, which is included. And it has ports for SD and microSD memory cards. It can read pretty much any memory card used for digital cameras.
And with read and write speeds of up to 10 Gbps, you can transfer data in no time. It also reaches top speed when transferring data from multiple cards at once.
With an aluminum outer casing, it doesn’t break easily. And the aluminum pulls heat from the inside, stopping it from overheating.
See our full list of the best SD card readers for photographers if you want more options.
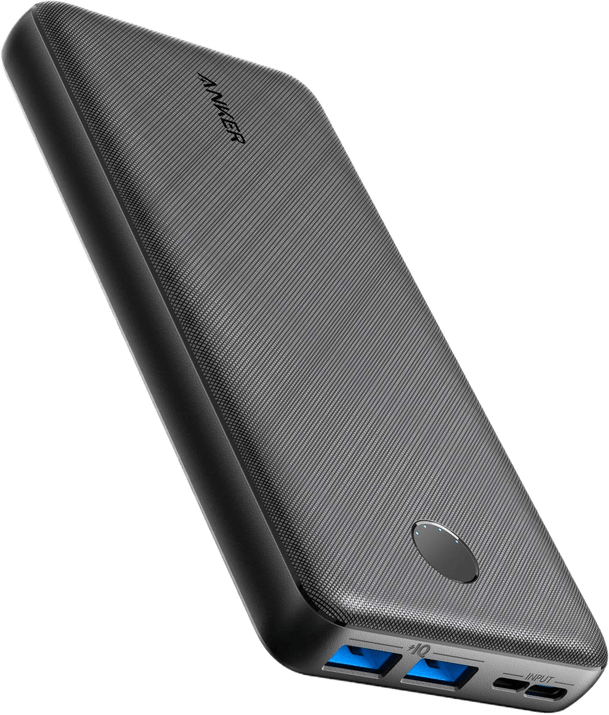
7. Anker Portable Charger
| Brand |
Brand
Anker
|
| Product Type |
Product Type
Portable power bank
|
| Dimensions |
Dimensions
6.2 x 3 x 0.7 inch / 15.7 x 7.2 x 1.7 cm
|
| Battery Capacity |
Battery Capacity
20,000 mAh
|
| Connection Type |
Connection Type
Micro USB, USB-C
|
| Other Key Features |
Other Key Features
Trickle-charging mode
|
| Best For |
Best For
Recharging cameras and other devices on the go
|
Running out of battery when you’re out shooting is frustrating. But if you have a portable power bank, that isn’t something you have to worry about. If your camera has USB charging, you can charge your camera anywhere. Then you can keep shooting for hours on end.
Street photographers can’t go wrong with the Anker Portable Charger. It’s compact and portable, so you can slip it into your camera bag. And it holds plenty of charge, so you don’t run out when you’re shooting.
It does take six hours to fully charge up. But once charged, it gives you 20,000 mAh of power. That means you can charge smartphones and cameras several times over.
You can connect to devices with either a micro USB or a USB-C cable. That gives you excellent flexibility, allowing you to connect different types of devices. You can also charge two devices at the same time, which is another handy time-saver.
It also has a trickle-charging mode for low-power devices, like earphones and wireless speakers.
USB-C and micro USB cables are not included. They will be included with your devices, or you can buy them from the links here.
FAQs on the Best Street Photography Gear
So far, we’ve looked at the best street photography accessories. We haven’t looked at street photography cameras or lenses. And we haven’t talked about the art of street photography. We hope to give you more insight into those areas by answering some FAQs on the subject.
What Is the Best Camera for Street Photography?
Before recommending our top street photography cameras, we need to consider what street photographers look for in a camera.
Street photographers like cameras with compact bodies. When you’re shooting in the street, you’ll be holding your camera for long periods. That’s why a lightweight and compact body is so important.
Also, you’re often shooting in crowded, narrow spaces. A big, bulky camera isn’t ideal in that kind of environment. And a big camera draws more attention. When people are aware of your presence, you can’t get candid shots.
Image quality is always important with cameras. But street photography is about composition, movement, and dynamism. Of course, you want good picture quality. But street photography doesn’t require super-high-resolution images. Anything from 20 to 32 MP is perfectly fine.
Burst mode can be handy with street photography, especially in a busy environment. But you’re not shooting sports photography, so a modest burst speed is okay. You don’t need 30 fps for street photography.
Cameras with a retro design are definitely popular within the street photography community. Some of the cameras we mention below have that style. And while it isn’t essential, looking stylish doesn’t do a photographer any harm.
The Fujifilm X100V is one of the most popular street photography cameras right now. So much so, in fact, it’s hard to find a brand new model online. And that means the price for second-hand models is inflated.
But it is a fantastic camera for street photography. It looks fantastic in black or chrome. It has a fixed 32mm f/2 lens. And it gives you 26.1 MP images. It has an electronic viewfinder and a tilting LCD screen. And you can use it to record 4K video footage.
Leica cameras have always been popular with street photographers. At least with street photographers with a big budget. And if you are one such photographer, you might like the Leica M11.
It’s a superb camera with Leica’s classic rangefinder design. And it gives you resolution options. You can shoot with 60, 36, or 18 MP. It also has a wide 64-50,000 ISO range. And the controls are similar to that of an analog camera.
If you don’t have a Leica-friendly budget, the Olympus OM System OM-5 is another fantastic option. It’s a compact Micro Four Thirds camera. And despite its size, it’s packed with excellent features. It also has a traditional, retro-looking design.
Check out all the best street photography cameras in this article.
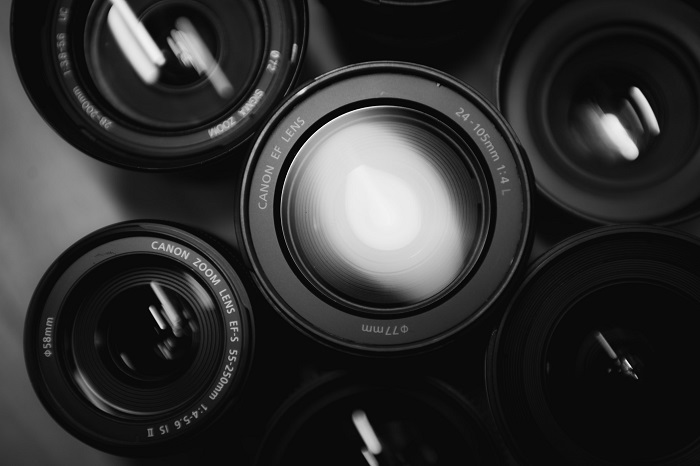
What Is the Best Lens for Street Photography?
There are two important specifications to consider when looking for a street photography lens. These are focal length and whether you want a prime or zoom lens.
When it comes to zoom vs prime, it’s a matter of personal opinion. The classic case for both is that zooms give you more versatility, but primes give you better image quality. There is some truth in that. But when looking for a lens for street photography, it’s just about finding what suits your style.
Zoom lenses do give you better shot versatility. But you don’t need much magnification. You only need a zoom to help you get better close-ups or tighter compositions. You don’t need a super-telephoto zoom lens.
For focal length, street photographers tend to go for standard-angle lenses. The 50mm lens is a staple of the genre. But many prefer something slightly wide, often going to 35mm lenses.
A 24-70mm lens is ideal for street photography if you want a zoom lens. You get a lovely wide angle when shooting at the 24mm end. But you also have the power to zoom to 70mm. That’s excellent versatility when you’re in a busy urban environment.
For more information and recommendations, see our full list of the best lenses for street photography. You can also see our article on the best standard-angle zoom lenses.
What Are the Best Settings for Street Photography?
Beginners are often tempted to head out into the street relying on Auto mode. But for the best results, you need to shoot with manual settings. Firstly, you’ll learn much quicker shooting in manual mode. And the results will be much more pleasing.
We have to start with the three main exposure settings: aperture, ISO, and shutter speed. See our article on the exposure triangle to learn the basics.
Many street photographers like to use medium to narrow apertures. While that does restrict light, it gives you a deeper depth of field. That means your plane of focus is much deeper, and more of your scene will be in focus.
Something around f/8 is ideal for sharp street photography. You can open it to f/5.6 if you are low on light. But anything lower will make the depth of field too shallow.
Of course, if you’re doing close-ups or environmental portraits, a shallow depth of field can give you a nice bokeh effect. But generally, a narrower aperture is more beneficial to street photographers.
Due to the narrow aperture, you might need to push the ISO up a little. It doesn’t need to be a drastic increase, especially if you’re working in daylight. But you might need to go a few stops up from the lowest setting. You’ll still get good image quality from 400 or 800 ISO.
For sharp images, you need a fast or fast-ish shutter speed. There’s a lot of movement in street environments. And if your shutter speed is too slow, you can experience a lot of motion blur. A shutter speed of 1/1000th of a second is great. But you can drop to 1/500 or 1/250 s if you need to.
Also, you can use a slow shutter for creative reasons. If you want an image that transmits the energy of a busy street, you can use a slow shutter speed so all the people and cars have motion blur. You will need a tripod for this. But that’s why we included a tripod in our list of street photography gear.
Burst mode is a handy tool for street photography. You don’t need a rapid shooting speed. But something like 7 to 12 fps allows you to capture hectic moments without missing the perfect shot.
When it comes to focusing, try zone focusing. It’s a form of manual focusing where the focus range is limited to a certain distance. This means you don’t have to search the whole focus range before your subject is sharp. It saves you time, so you’re quicker on the draw.
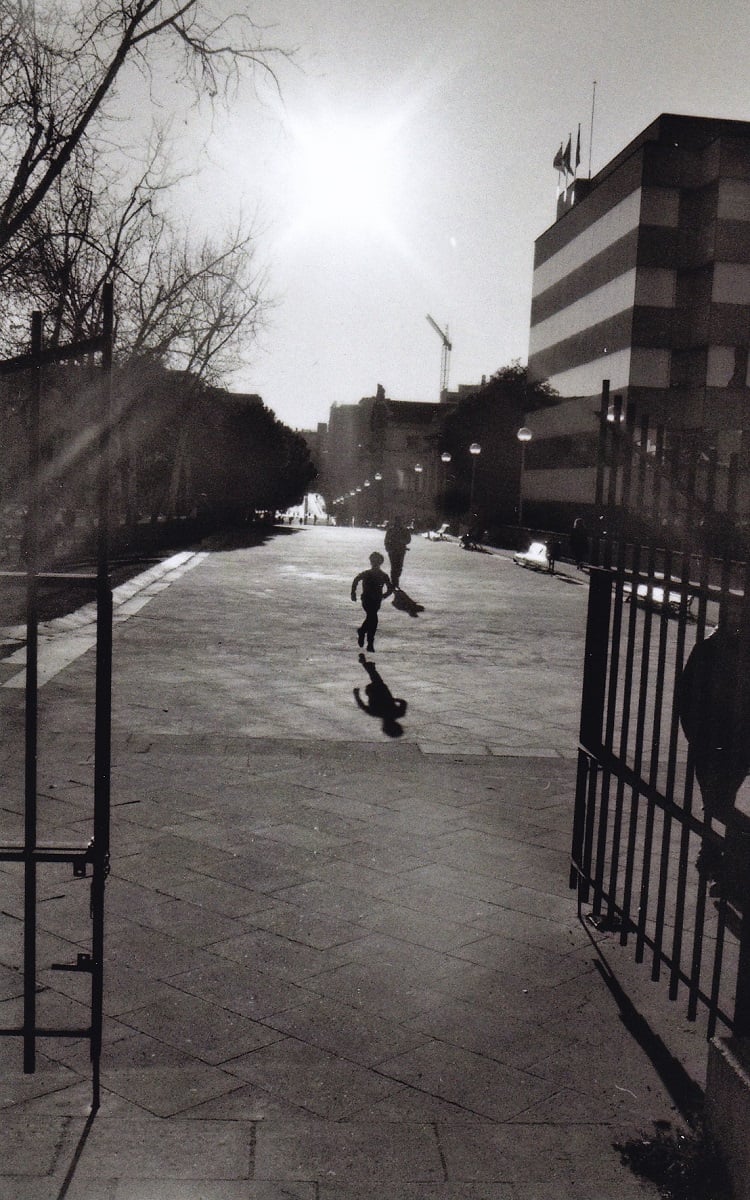
© Zhouxing Lu
Where Can I Find Inspiration for Street Photography?
The first place to start is our article on the most influential street photographers. It’s a comprehensive list of some of the most exciting street photographers working right now. You can see a glimpse of their work. And you can click through to their websites and social media pages.
You should also see Faizal Westcott’s YouTube channel. He’s a fantastic street photographer who loves sharing his tips and educating others on the art of street photography. He has a grounded, relatable teaching style that’s great for beginners.
James Maher is another street photography educator. He lives and works in New York. And his work gives you an intimate street’s-eye-view into that iconic city. His website is great for finding inspiration and learning the skills and techniques to improve your street photography.
What Are My Rights as a Street Photographer?
The rights and laws surrounding street photography depend on the country you’re shooting in. Some countries are far more strict than others. That’s why it’s always good to check the laws before you start shooting, especially if you’re traveling abroad.
You can see more information in our full article on street photography rights.
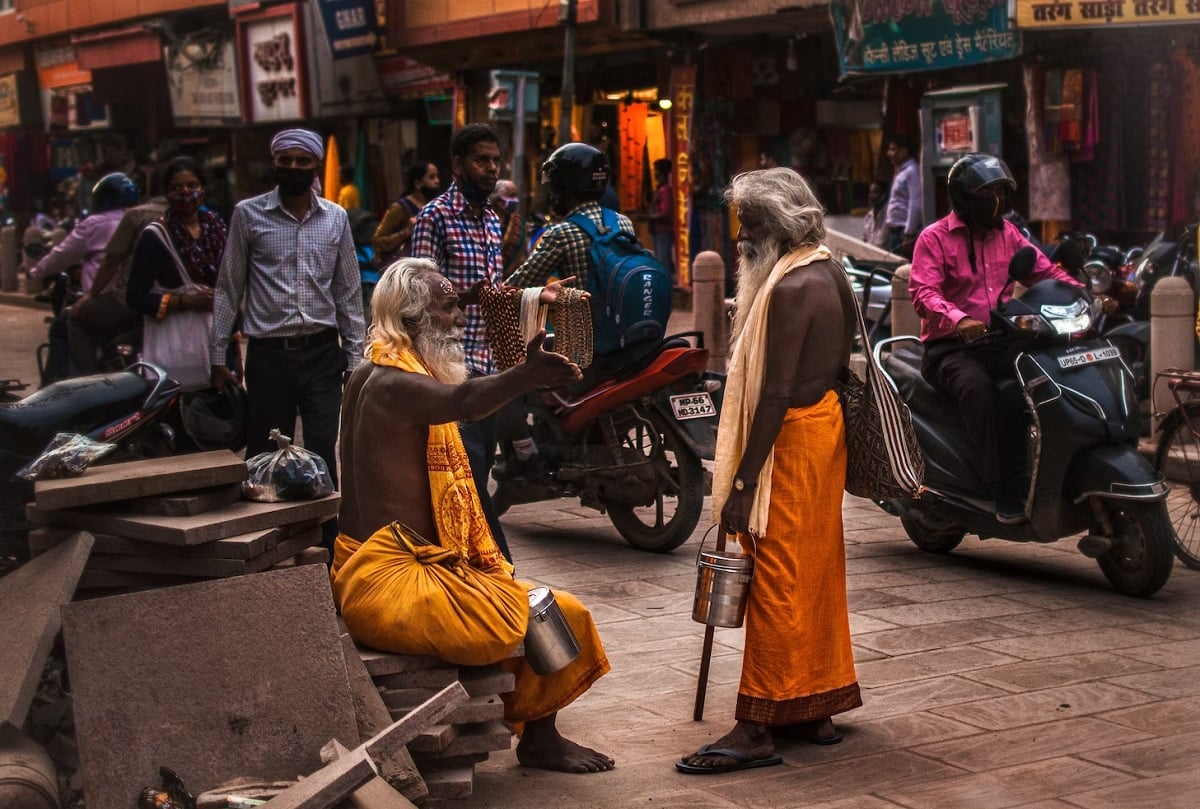
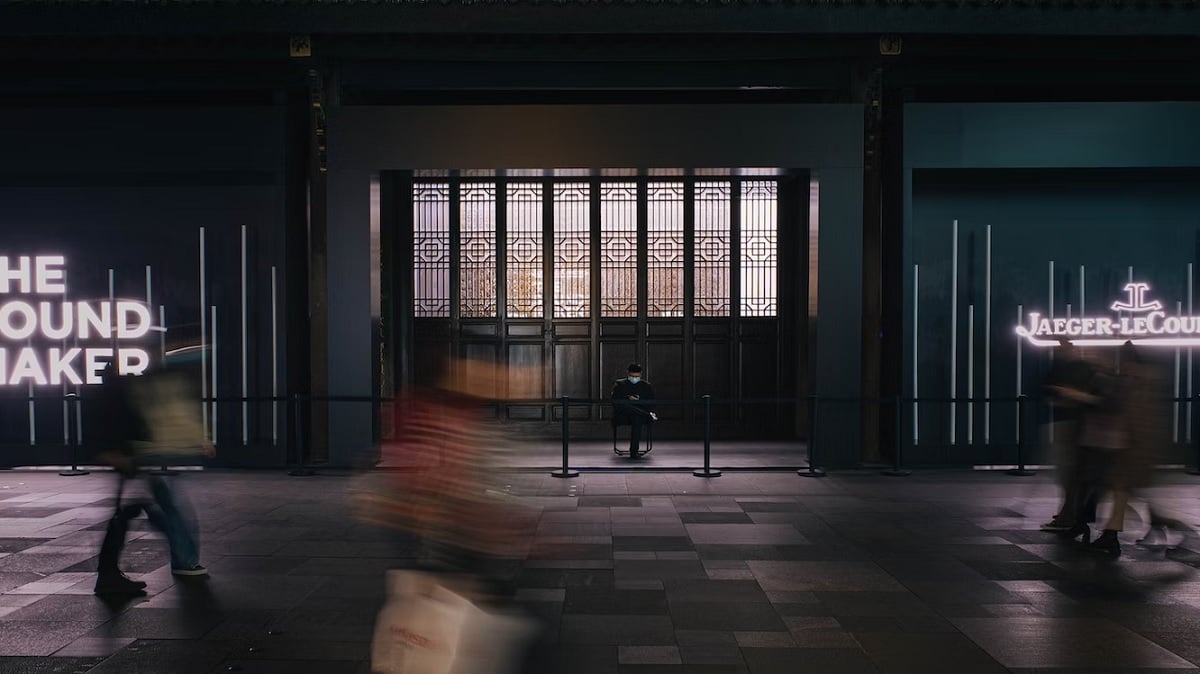
© Shubhangee Vyas
Conclusion: The Best Street Photography Gear
While street photographers tend to travel light, there is some street photography gear that shooters can’t live without. They help you capture the images you want. And they allow for more creativity. Sometimes they help you shoot for longer periods.
The Wandrd Duo Daypack is our top item. Every street photographer needs a good camera backpack, and the Duo Daypack is the best of the best. The Peak Design Clutch Handstrap was number two because you need your camera in your hands. Then we also included tripods, monopods, and digital gadgets. But all of these accessories will help take your street photography to the next level.