Good wedding photography lighting starts with the light on the couple's faces. Use a window or open shade when it gives you the look you want. Add a reflector or flash when faces need more light, and balance that extra light with the surroundings.
These 12 tips cover natural light, flash, dark ceremonies and reception lighting. For the rest of the wedding day, see our complete wedding photography guide.

1. Choose Natural Light or Flash for the Scene
One of the first decisions is whether to work with the existing light or add your own. Both natural light and flash can produce beautiful wedding photographs. Look at the light's direction, the shadows on faces and whether your exposure will keep moving people sharp.
First, check the rules. Ask the officiant about flash and permitted shooting positions before the ceremony. A quiet moment is not the time to discover a restriction.
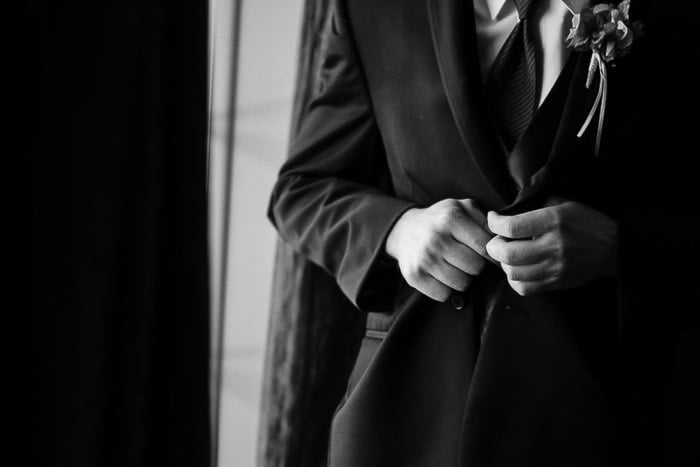
When the light in the room is already beautiful, work with natural light and leave the flash off. For example, in a bridal preparation room with a nice large window, I'll ask the bride to move so that the window light hits her in a certain way while she is getting ready. No flash required.
When faces are too dark against a bright background, flash can fill the shadows while you expose for the surroundings. When the light lacks direction, an off-camera flash can create it. Flash does not always increase contrast: fill flash can reduce the difference between bright and dark areas.
A short flash burst can also help freeze movement. But slower shutter speeds can still record movement from ambient light. Do not assume that switching on a flash makes every frame sharp.
2. Match the Lighting to Your Wedding Style
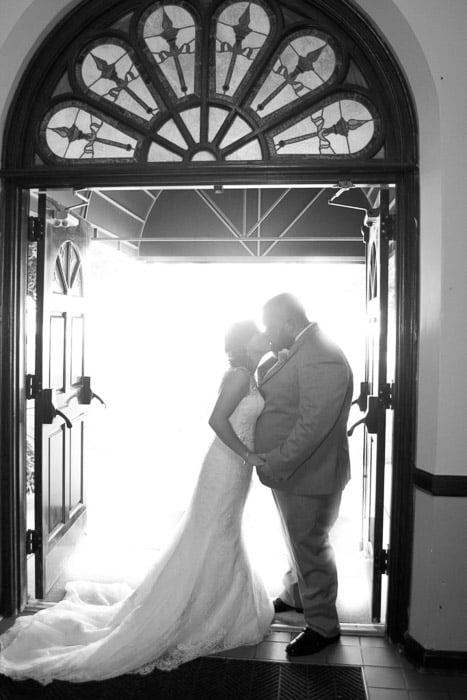
Consider a portrait of the newlyweds with the sun behind them. I would use a low-powered flash or a reflector as a fill light to retain detail in both the couple and their surroundings.
Another photographer might expose for the faces and let a bright sky turn white for a light and airy look. A blown-out sky is a possible trade-off, not an inevitable result of backlighting. It depends on the brightness difference between the faces and the background.
Both choices can work. Decide which details matter, then check the faces and the wedding dress for lost highlights. Our natural light portrait tips cover more ways to use available light. Keep your photography style consistent, but learn enough flash to handle a reception where the available light does not meet your needs.
3. Use Backlighting for Veils and Separation
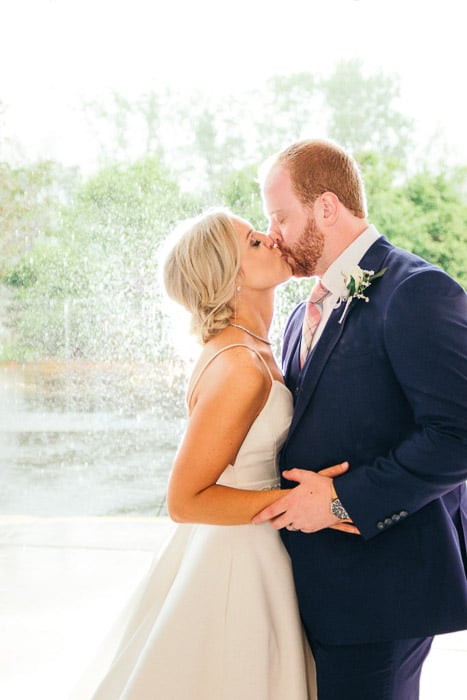
Backlighting can create a bright edge around the couple and make a translucent veil glow. Place the sun behind them, then check how much light reaches their faces.
Use fill flash or a reflector if you want to retain a bright background while lifting the faces. Alternatively, expose for the faces and choose a darker background. This can make the backlit outline stand out without filling the frame with bright sky.
An off-camera flash behind the couple can create a similar rim of light after sunset. It can also light raindrops or help create a silhouette. Sunlight and flash need not produce the same color, so treat golden hour as inspiration rather than a look that one flash setting will reproduce.
4. Use Side Light and Check Both Faces
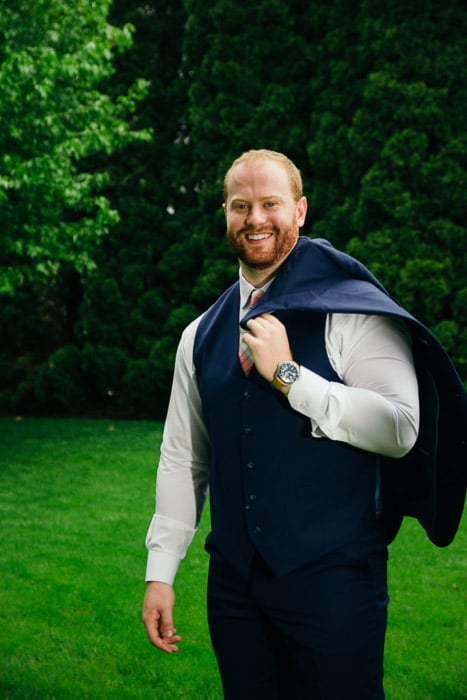
Side lighting adds shape through shadows. Start with the light roughly 45 degrees to one side of the couple, then adjust their position and the angle of their faces.
Look at both people. Light that works well on one face can leave the other in shadow. A small turn toward the light may be enough; a reflector or gentle fill can lift the darker side when needed.
Front light is also useful when you want an even, low-shadow portrait. Choose the direction for the photograph rather than treating one lighting pattern as correct for every couple.
5. Use Window Light and Watch for Mixed Color
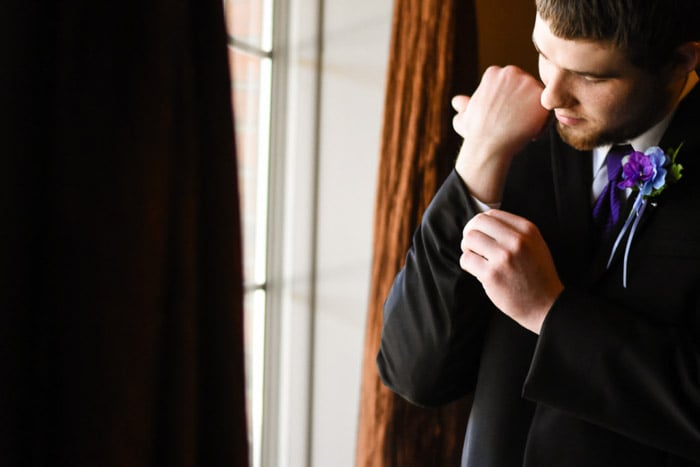
Window light can be soft and flattering, particularly when the window is large relative to the subject and direct sun is not falling on their face. Start with the couple at an angle to the window. Move them or change their angle until both faces look good.
A window with direct sunlight can produce hard shadows. Try a different window, a sheer curtain or a position out of the direct beam. For a silhouette, expose for the brighter window instead of the faces.
I once shot at a church that had windows at the very back of the sanctuary. That allowed me to shoot without using such a high ISO. The problem? Wide-angle shots contained a mix of daylight and overhead lighting, which needed different white balance corrections.
I used a local gradient adjustment in Lightroom to balance the color in one part of the room. In Lightroom Classic, a Linear Gradient mask lets you make local Temperature and Tint adjustments. Adobe's masking guide explains those controls.
When possible, reduce the color conflict at capture: place the couple where one source dominates, or ask whether nearby room lights can be turned off during portraits. One global white balance may not correct two different light sources falling on separate parts of a scene.
6. Use a Reflector for Gentle Fill
A reflector redirects existing light, so you can see its effect before you take the photograph. With the sun behind the couple, position the reflector in front or slightly to one side to lift the shadows on their faces.
Adjust the angle and distance while watching the result. Avoid shining an uncomfortable amount of light into their eyes. A reflector does not create light of its own, so it is less useful when there is little light to redirect.
My favourite for wedding light is a shoot-through reflector. Here, that means a reflector with an opening to photograph through, not a translucent diffusion panel placed between the sun and the subject. The surrounding reflective surface can provide fill for portraits; the effect depends on its position and the available light.
7. Soften Flash When the Portrait Needs It
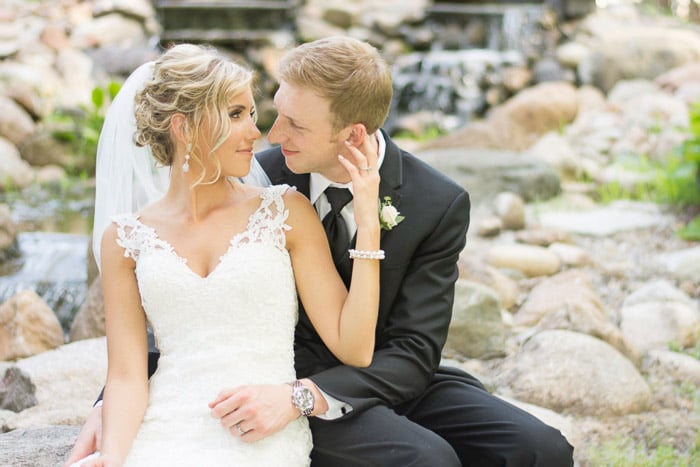
A bare flash is a small light source and usually gives hard-edged shadows. That can be a deliberate look, especially at a reception. For softer portraits, make the effective light source larger by bouncing the flash or using a suitable modifier.
Indoors, try a nearby white wall or ceiling. Check where the bounced light lands and watch for color casts from painted surfaces. A very high or dark ceiling may return too little light.
I use the MagMod diffuser. However, a small diffuser does not turn a flash into a large softbox at a distance. The size of the illuminated surface as seen from the subject matters more than the label on the accessory.
A bendable panel such as the Rogue FlashBender 3 lets you shape and direct reflected flash light. Test the result in the actual room; a small panel and a large white wall will not give identical light.
8. Choose TTL or Manual Flash for the Job
TTL (through-the-lens) flash metering adjusts flash output automatically. It is useful when you or the couple are moving and the flash-to-subject distance changes. Use flash exposure compensation to ask for more or less flash, then check the faces. Nikon's flash guide shows how TTL and bounce flash can work together.
Manual flash is useful for a set portrait position because its output stays fixed until you change it. Power is expressed in fractions: 1/1 is full power, 1/2 is half power and 1/8 is one-eighth power. A change in subject distance, aperture or ISO can still change the flash exposure.
In my off-camera portraits, around 1/8 power has often been a starting point. Treat that as an example, not a wedding preset. The flash, modifier, distance and camera settings determine how much power you need. Take a test frame and adjust.
If faces are too bright, reduce manual power or TTL flash exposure compensation. If shadows have hard edges, change the light's size or direction; reducing power alone will not make those edges soft.
9. Prepare for a Dark Ceremony Without Flash
When flash is not allowed, choose your position and test an exposure before the ceremony begins. Look for areas where the existing light reaches faces, and follow the venue's movement rules.
Choose a fast enough shutter speed to keep the people sharp. A walking entrance needs more allowance for movement than a still reading. Open the aperture as far as your required depth of field allows, then raise ISO to reach the exposure you need. A little more noise is often a better trade-off than an important moment lost to blur.
Do not assume the widest aperture is suitable for every frame. If the couple stand at different distances from you, check that both are in focus. Image stabilization helps with camera shake, but it cannot stop a person moving.
10. Balance Flash and Ambient Exposure
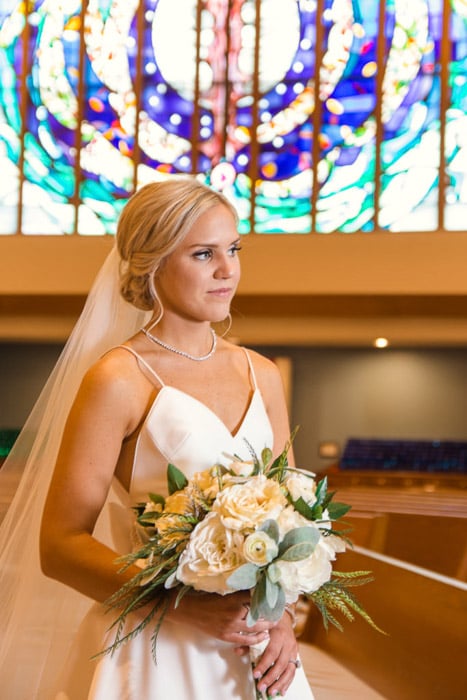
Think of a flash photograph as a combination of ambient light and flash light. For manual camera exposure, fixed ISO and a normal single flash burst at or below the camera's sync speed:
- Shutter speed changes ambient exposure. A slower shutter records more of the room light. It also increases the risk of movement blur.
- Aperture affects both ambient and flash exposure. A wider aperture admits more of both, while reducing depth of field.
- ISO affects the brightness of both contributions. Raising ISO can help retain the room's atmosphere, but also changes noise and highlight headroom.
- Manual flash power changes the flash contribution. Adjust it when the room looks right but the flash-lit faces need more or less light.
These relationships are explained in Strobist's flash and ambient balance lesson. With TTL, the flash can compensate automatically for some setting changes, so the fixed-power example does not apply in the same way.
For a reception, first take a frame without flash to set your camera settings. Choose an aperture for the people you need in focus, a shutter speed that suits their movement and enough ISO to retain the room lighting you want. Then add flash and adjust its output for the faces.
For example, changing from 1/200 to 1/100 second admits one stop more ambient light with aperture and ISO fixed. At normal sync, it leaves the same manual flash burst largely unchanged. This slow-sync flash approach can brighten a dark room, but it can also produce a blurred ambient image around a sharp flash-lit subject. Check moving hands and faces.
Stay within your camera and trigger's normal sync limit unless you deliberately use compatible high-speed sync. High-speed sync changes how the flash fires and reduces its available reach. Check your equipment's manual rather than assuming one sync speed works for every setup.
11. Take the Flash Off-Camera for More Control
An off-camera flash gives you more freedom to choose the direction of the light. A compatible trigger and receiver, sometimes built into the flash, let you fire it away from the camera.
My go-to positions are roughly 45 degrees to the front or back of the couple, or directly behind them for backlighting. Begin with one light and adjust its position before adding another.
Use a suitable, stable stand or an assistant. Keep equipment clear of guests and walkways, and secure it against knocks or wind. Test the trigger and exposure before the moment starts.
Off-camera lighting takes more setup and can limit mobility. Bounced on-camera flash remains useful for fast-moving coverage, and its direction comes from the bounce surface rather than simply from the camera position.
12. Keep the Reception's Existing Light in the Picture
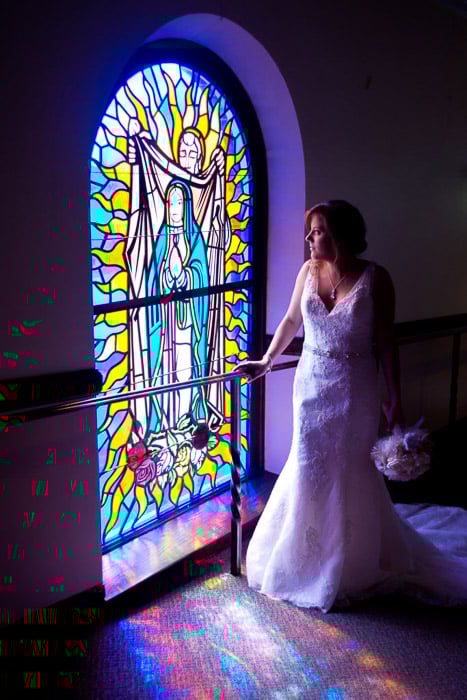
The lights the couple chose are part of the reception's atmosphere. A dark background can suit a dramatic portrait, but need not be the default for the whole reception. A DJ's colored lights can become a background or backlight while your flash lights the faces.
Watch for strong color spilling onto skin. A change in your position may keep the colored light behind the couple. Then use the flash and ambient controls above to decide how much of the room appears in the photograph.
For an important moment such as the first dance, make a test exposure before it begins and check it as the couple move. A setup that looks good in the center of the floor may change when they approach your flash or move under a different light.
Conclusion
Practice one lighting choice at a time before using it at a wedding. Start with windows, reflectors and the sun, then learn bounce flash and a simple off-camera setup.
The aim is to recognize useful light quickly and know what to change when it falls short. Keep faces and important dress detail in view, check movement as well as brightness, and use the mix of flash and ambient light that fits the scene.
For more practice, read our wedding flash photography guide and our guide to low-key lighting for dramatic images.