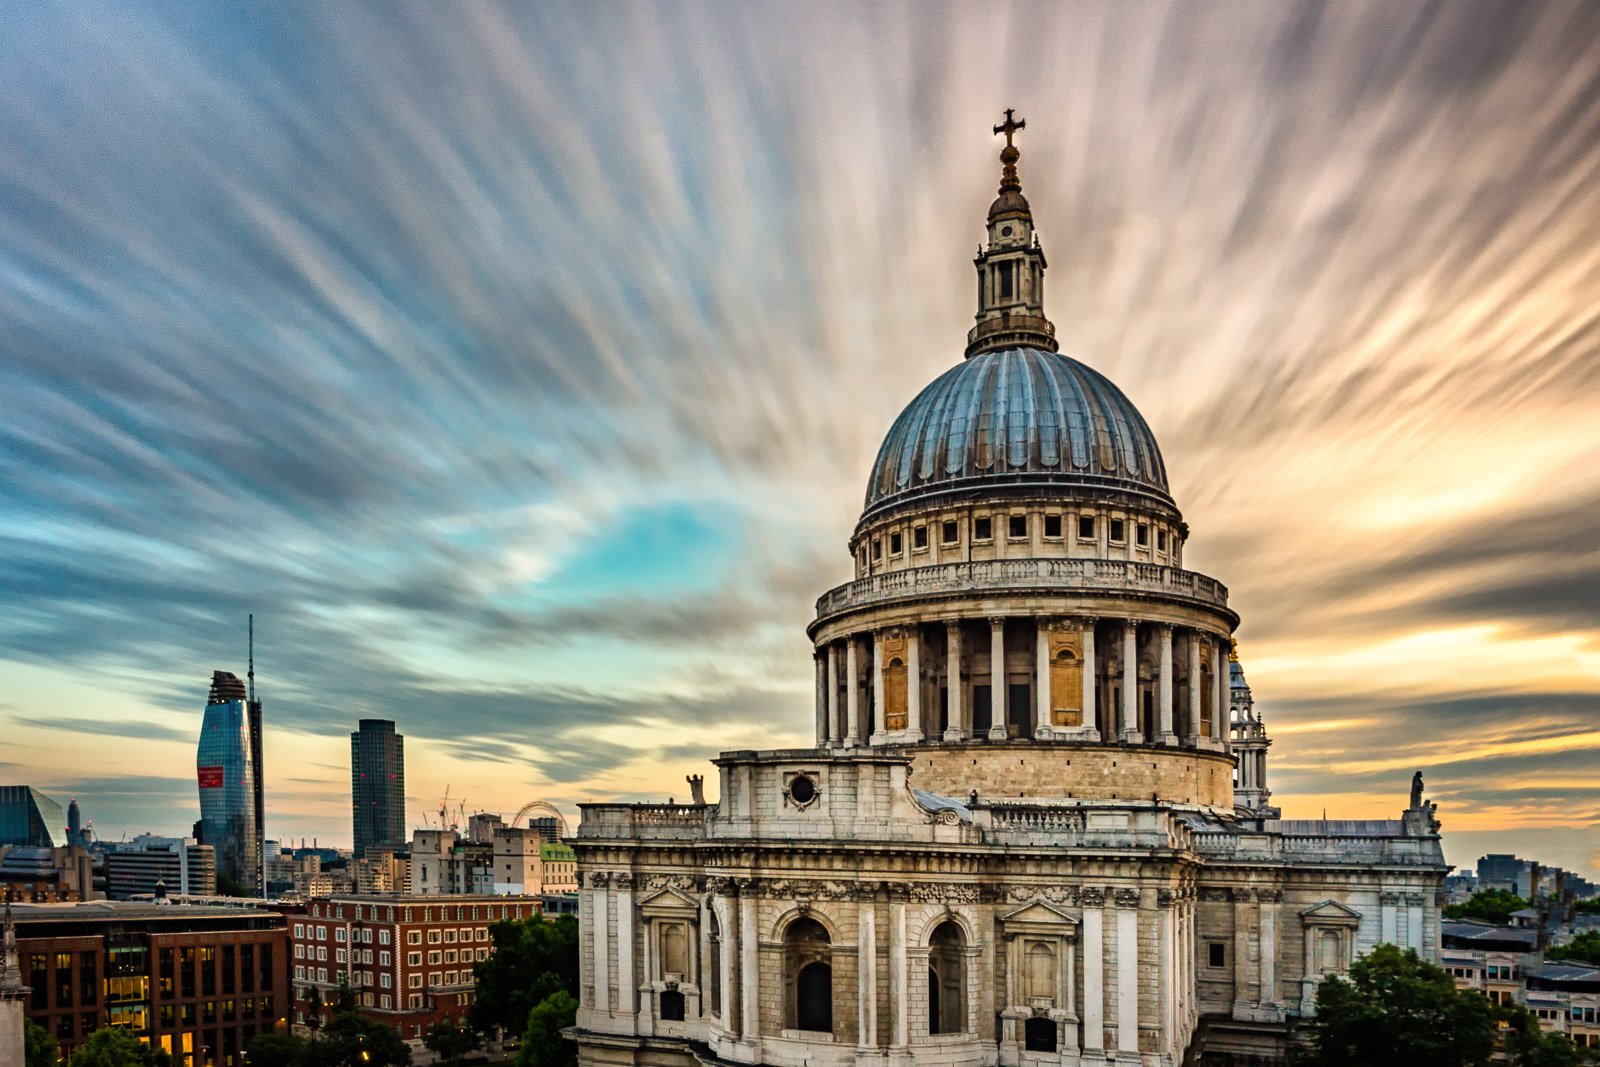
Long-exposure photography captures movements and light trails. The result is artistic and dreamy images that seem to defy the laws of physics. It’s common for photographers to take long exposures of streams, waterfalls, cityscapes, and even the night sky.
Keeping the camera’s shutter open for an extended period can create stunning visual effects. So, we explain everything you need to know to take long exposures effectively. Click the links in each section to delve into each subject more deeply.

- Learn to photograph waterfalls, waves, sunsets, and stars effortlessly
- Discover how to balance movement and stillness in your shots
- Master exposure settings easily, with or without a filter
What Is Long-Exposure Photography?
Long exposure photography generally refers to a certain shutter speed. It is longer than the normally very small fraction of a second used, and the exact length of that exposure can vary.
Motion blur can occur with fast-moving subjects, such as 1/60 s (seconds), at relatively fast shutter speeds. The key to mastering long-exposure photography is knowing the effects of shutter speed selection and using them to your advantage. Use these jump links to go where needed:
- Long-exposure photography techniques
- With natural phenomenon
- With artificial light
- Other photography niches
- Long exposure using a smartphone
- Recommended photography gear
- Learning resource
Long-Exposure Techniques
It might involve playing with the ISO settings for a slow shutter speed, choosing a high f-stop, or using a neutral density (ND) filter. Whatever it takes, we have compiled a wide range of articles with advice on mastering the rather mesmerizing world of long-exposure photography.
It can be counterintuitive at first. We work hard to prevent blurry photos, but now we want to do it deliberately!
Ideas and Examples
Long-exposure photography is a fun way to capture movement in your images. The key is to use a slow shutter speed to blur moving elements like water, clouds, or people.
You can take long exposure photos almost anywhere. Try shooting busy roads at night to capture colorful light trails from passing cars. Or head to the coast and use a slow shutter to smooth out crashing waves for a silky, ethereal effect.
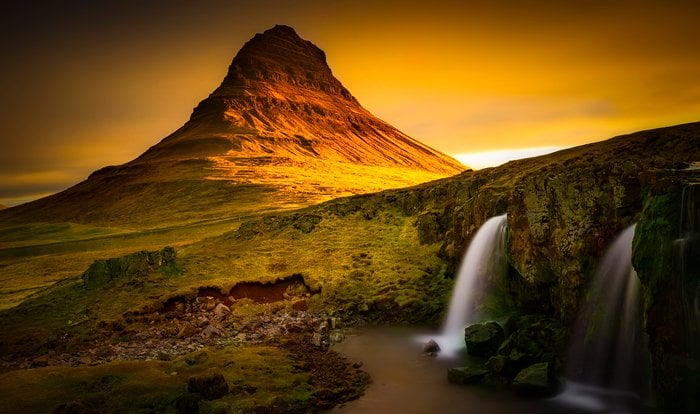
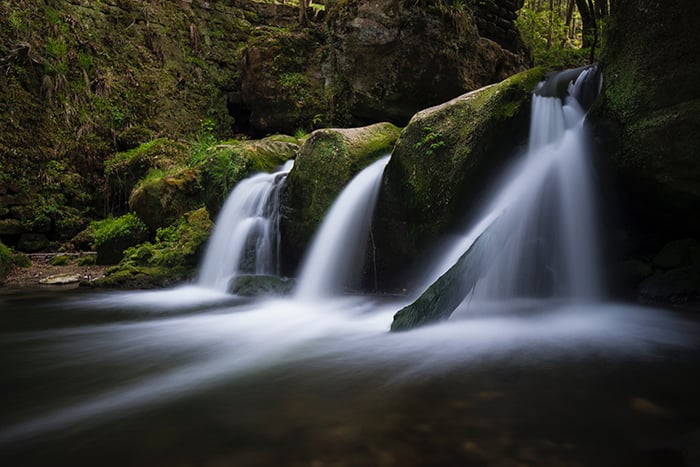
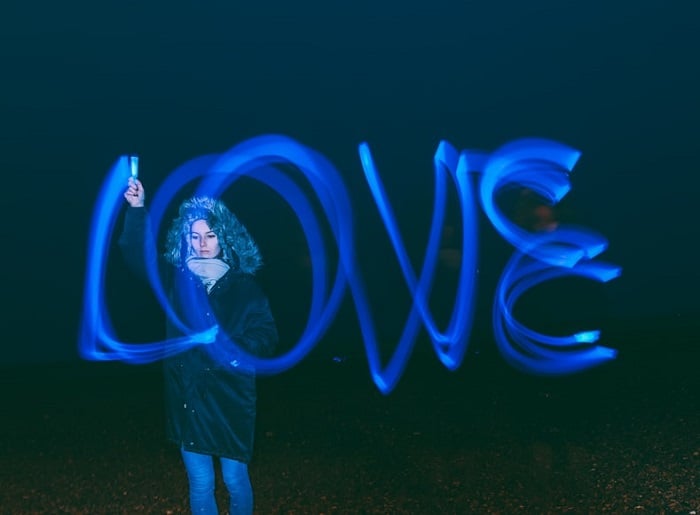
Waterfalls are classic long-exposure subjects, often with blurred, soft water tumbling over rocks. They look stunning! You can also get creative with light painting—use flashlights or sparklers to “draw” words or shapes while your shutter is open.
The possibilities are endless! These are just some long-exposure photography ideas you can try to create unique, artistic images.
Bulb Mode
Bulb mode lets you keep the shutter open for as long as you press the shutter button. This setting is ideal for capturing better long exposures.
Remember, we don’t want everything to be blurred. So, to avoid any camera shake, use a remote shutter release when shooting in bulb mode. A tripod is also important for sharper long-exposure photos.
You may need a neutral density filter to extend the shutter speed when using bulb mode. A polarizing filter can also help remove reflections and saturate colors. Graduated neutral density filters are useful for controlling the exposure.
Take time to learn to love your camera’s histogram. It can help you understand the exposure. And you see errors that are not noticeable on the camera’s screen.
One issue with bulb mode is that light can change during the exposure, especially at dawn or dusk. To avoid this, take test shots to check the exposure and histogram. Then, use an app like PhotoPills to calculate the final exposure time with your ND filter.
Bulb mode can also make bad compositions more evident. So, when framing your shot, be mindful of moving elements like clouds, water, and light trails. To learn more about bulb mode, check out our in-depth guide.
Long-Exposure Calculator
Long-exposure photography captures motion in a scene. Shutter speed controls the blur in moving elements like water and clouds. The longer the shutter is open, the more motion you capture.
ND filters reduce the light reaching the sensor (or film). They let you use slower shutter speeds in bright conditions.
A long exposure calculator helps determine the right shutter speed based on the ND filter you use. Enter your base shutter speed without the filter. The calculator then shows the adjusted shutter speed for each filter density.
Long-exposure calculators are available as smartphone apps and printable charts. They make finding the perfect shutter speed easy for creating stunning long-exposure images. We put together an easy guide to using a long-exposure calculator so you can try it yourself.
Creative Slow Shutter Speeds
A slow shutter speed is a powerful tool for creating dynamic and interesting photos. Motion blur captures moving elements while the camera stays still, giving the image a sense of movement. Panning follows a moving object, keeping it sharp while blurring the background.
Kinetic movements, like zoom bursts and camera rotations, create blur through camera motion rather than subject motion. Daytime long exposures use ND filters to capture dramatic effects in bright light.
Photographing clouds and water with slow shutter speeds can add texture and mood to your images. Light painting involves moving a light source in front of a camera or illuminating specific objects during a long exposure.
To learn more about the creative possibilities of slow shutter speed photography, check out our in-depth guide.
Motion Blur
Motion blur is when moving objects appear blurred because they move during the exposure. It can add a sense of speed and dynamism to your photos. To capture motion blur, you need a camera that allows manual settings and a tripod to keep the camera steady.
Use a slow shutter speed to keep the shutter open long enough to record the movement. The exact setting depends on the subject’s speed and how much blur you want.
You can also use panning to capture motion blur. Follow the moving subject with your camera using a slow shutter speed. The subject will be sharp while the background blurs.
Capturing moving clouds, water, and lights is another great way to use motion blur creatively. Motion blur is a simple way to add interest to your photos.
Advanced Motion Blur
If that has whetted your appetite for motion blur photography, we have 50 more ideas! Photographers can blur moving subjects like people, cars, and water using a slow shutter speed. This technique adds a sense of energy and life to photos.
To create motion blur, you need a camera with manual settings. It’s also best to use a tripod.
Set a slow shutter speed, usually 1/60 s or slower. Then, as you press the shutter button, move your camera in the same direction as your subject. This panning technique keeps your subject in focus while blurring the background.
You can find great motion blur subjects in busy cities, sports events, and even nature. Waterfalls and clouds make excellent subjects. With practice, you can capture dynamic and artistic images. Our full article on motion blur photography has all 50 tips.
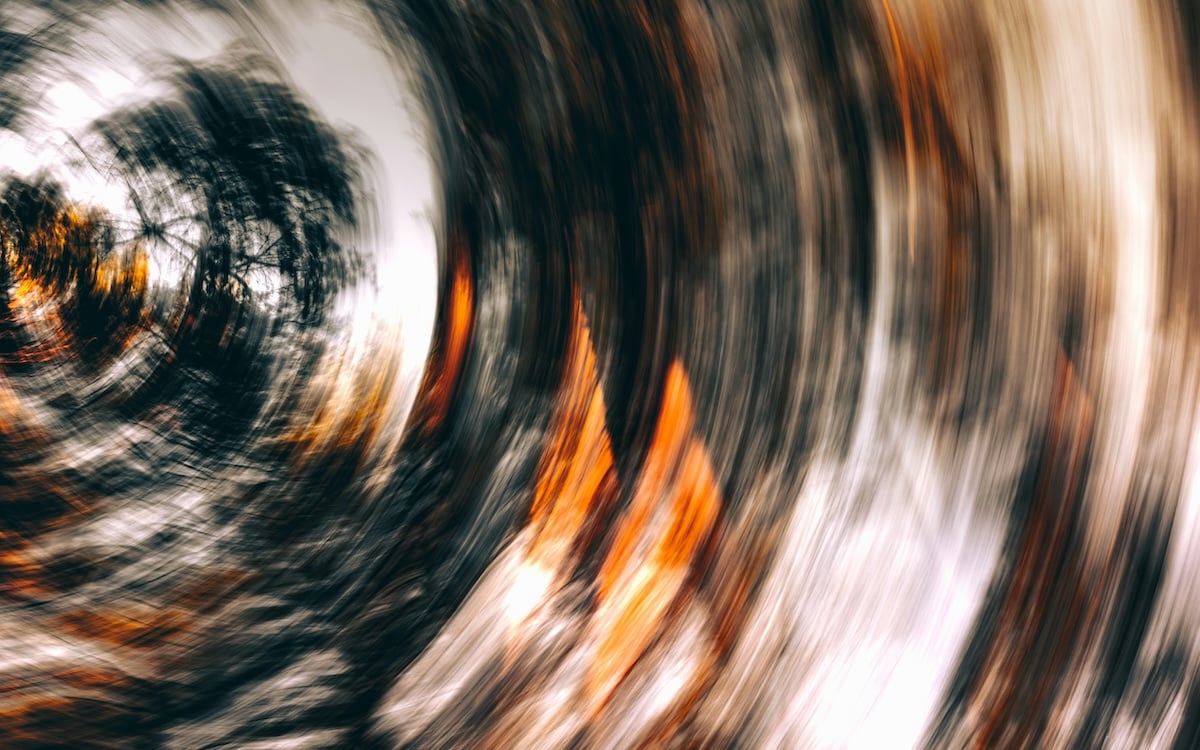
Camera Movement
Intentional camera movement (ICM) is a creative photography technique in which you move your camera during a long exposure. This technique adds motion blur and abstract effects to your images.
You can achieve great results by slowing down your shutter speed and moving your camera in different ways.
To start with ICM, you need a camera that lets you change the shutter speed. A tripod can help you control your movements better. And a wide-angle zoom lens makes the effects more obvious. ND filters are also useful for slowing your shutter speed in bright conditions.
There are many ways to create ICM effects. You can pan your camera to follow a moving subject, move it in a straight line, or rotate it around an imaginary axis.
Zooming your lens during the exposure or randomly moving your camera can also give interesting results. The key is to experiment and find what works best for your subject.
Intentional camera movement is a fun way to add creativity to your photography. You can create unique, eye-catching images that stand out with some practice.
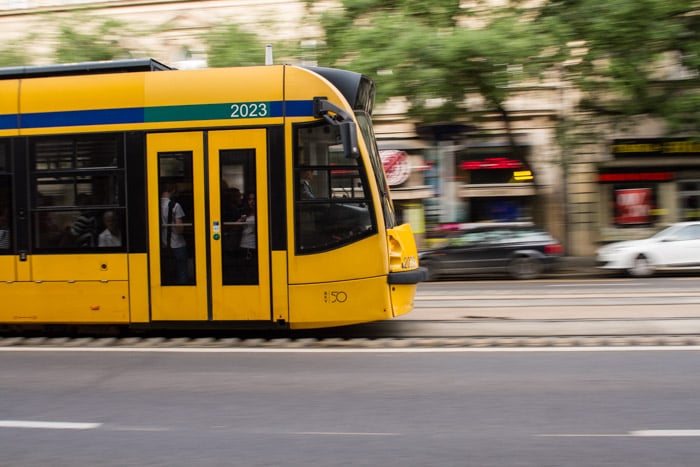
Panning
Panning is a photography technique that captures moving subjects while blurring the background. This camera technique creates a sense of motion in the image. To achieve this effect, use a slow shutter speed between 1/15 and 1/200 s, depending on the speed of your subject.
Next, move your camera along with the subject, matching its speed to keep it sharp while the background blurs. A camera strap can help stabilize your movement for a smooth panning shot.
Adjust your shutter speed based on the subject’s distance and speed, using a faster shutter for closer subjects. Experiment with different settings to find the right amount of motion blur.
Panning takes practice, so don’t get discouraged if your first attempts aren’t perfect. Stand further back from your subject to make tracking easier. Use a wide-angle lens for the best results.
With some trial and error, you’ll soon capture dynamic, eye-catching images that convey a strong sense of movement. Explore our comprehensive guide to dive deeper into the art of panning.
Exposure Stacking
Exposure stacking is a technique that combines multiple exposures into a single image. It’s especially useful for daytime long-exposure photography when there’s too much light, even with ND filters.
To exposure stack, set up your camera on a tripod and take a series of shorter exposures that add up to the total exposure time you want. For instance, you can use eight 30-second exposures to simulate a single four-minute exposure.
In Photoshop, load the images as layers into a single file. Align the layers and convert them to Smart Objects. Then, go to Layer > Smart Objects > Stack Mode > Mean to blend the exposures into a smooth, long exposure look.
Further exposure stacking can help you create stunning daytime long exposures.
180-Degree Shutter Rule
The 180-degree shutter rule is a simple way to create cinematic motion blur in your photos. It states that you should keep your shutter open twice as long as the frame rate of your video. So, if you shoot at 24 fps (frames per second), you should keep your shutter open for 1/48 s.
This rule helps capture motion blur that looks natural to the human eye. Too little motion blur can make a video look odd, while too much can make moving objects blurry and unusable. The 180-degree shutter angle provides a good balance.
Consider the interval between each frame when applying this rule to time-lapse photography. The shutter speed should be half the interval time to follow the 180-degree rule.
For example, a two-second interval needs a one-second shutter speed. Our in-depth article explains the 180-degree shutter rule in more detail.
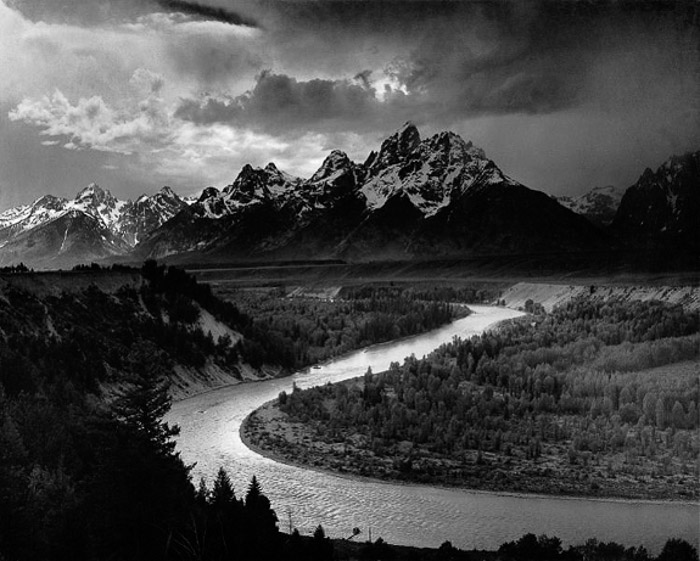
Long Exposure in Nature
Long exposures can reveal new and hidden beauty in natural phenomena. Rivers, waterfalls, seas, and lakes take on a surprising look. Lightning and meteors amaze us when captured with a long exposure.
Landscape
Long-exposure landscape photography can take your images to the next level. Look for overcast weather to add more interest to your photos, and track the sun’s position to avoid overexposed areas. Scout the location beforehand to get a preview of your composition.
Use a tripod and focus a third of the way into the scene for sharp results. Lower your ISO to minimize digital noise and learn to read the histogram for better exposure.
An ND filter can enhance your long-exposure photography. Plus, experimenting with Bulb mode can produce exciting results.
Be prepared to act fast before a scene changes, and set aside enough time to ensure you get the shot you want. Finally, you can use post-processing to stack your images for a long exposure effect without filters.
We have many more ideas in our full article if you want to learn about long-exposure landscape photography.
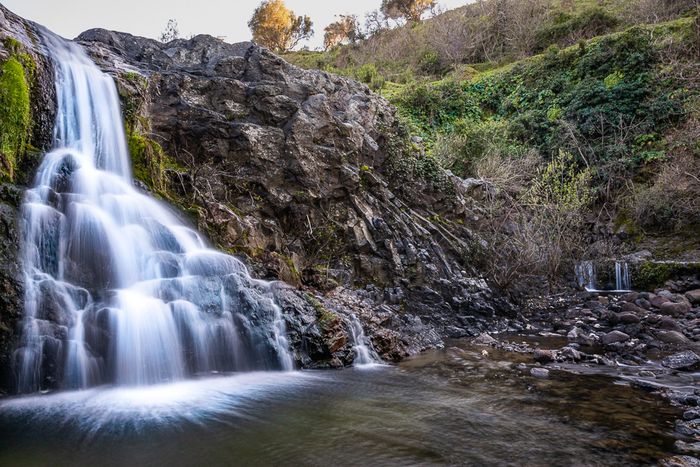
Water Tips
To capture that soft, misty water effect in your photos, you need to master long-exposure photography. Start by finding a safe location with plenty of room to shoot from different angles.
Use a slow shutter speed to create a silky look. Experiment with various speeds to find what works best for you.
A neutral density filter is essential in bright light to prevent overexposure in your water photos. Always use a tripod and remote to avoid unwanted motion blur. Try photographing water from unusual angles to make your images stand out.
Want to learn more about water photography? Our in-depth guide covers everything from the best settings to creative techniques for capturing stunning water shots.
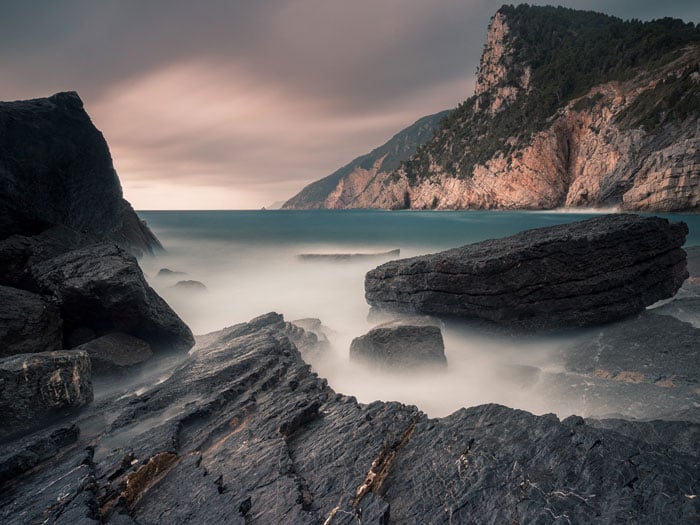
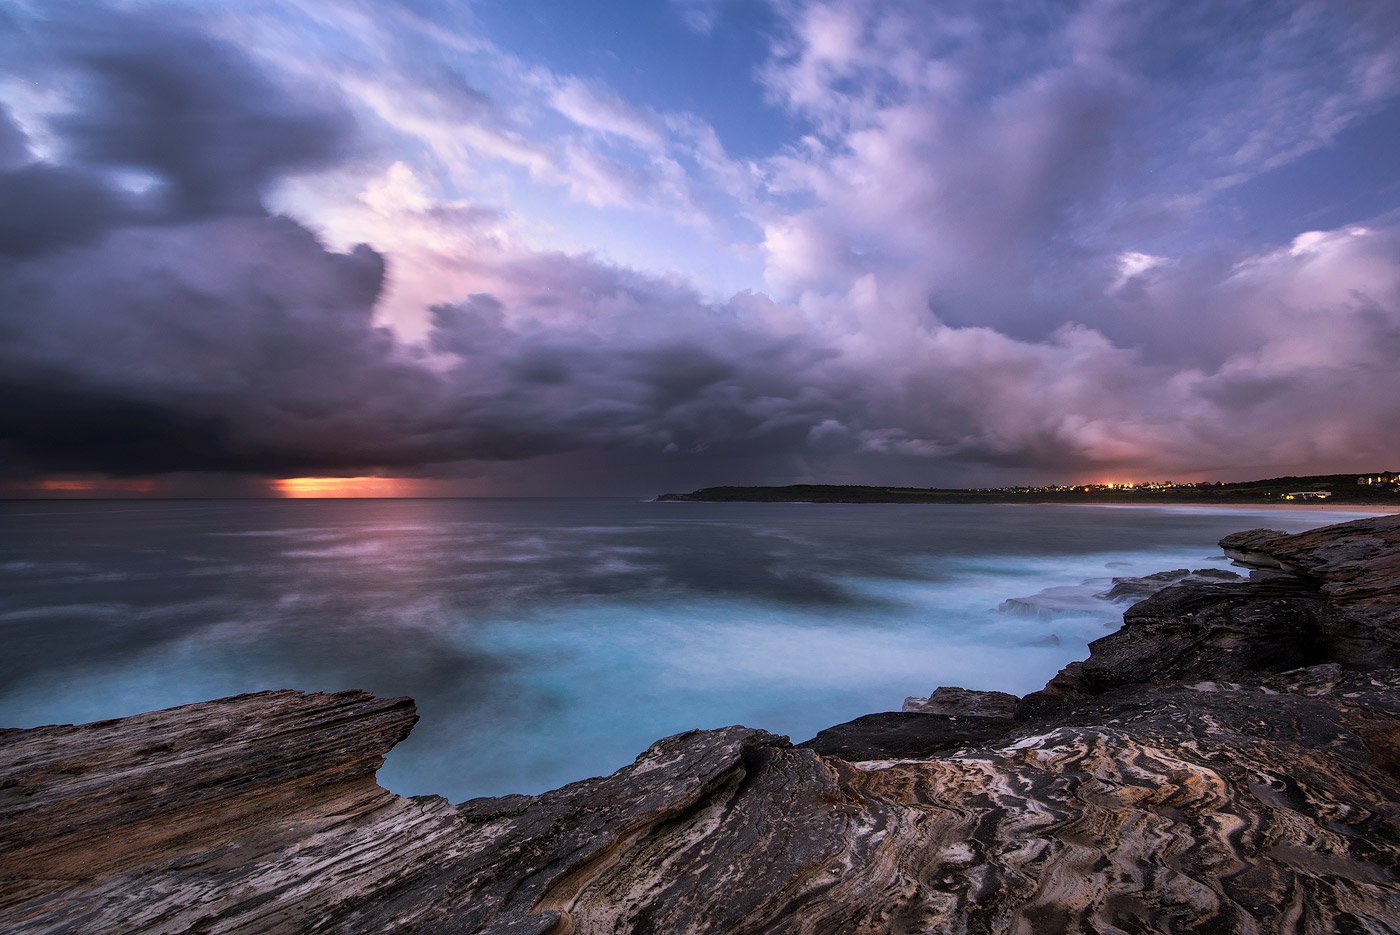
On the Beach
Long-exposure beach photography can create stunning shots uniquely showcasing the beach’s beauty. A sturdy tripod is essential to avoid camera shake caused by wind or waves hitting the tripod.
ND filters are also important tools for long exposures. They reduce the amount of light entering the camera.
Shooting from the top of a cliff can help smooth out the waves and create a level sea with soft color transitions. This composition works best with rugged elements like cliffs and fast-moving clouds.
Another technique is to create a foggy water effect by using a long exposure of at least 20 seconds. This setting averages the movement of the waves.
You can capture water trails by shooting receding water with an exposure time of 1/2 s to two seconds. Ultra-long exposures of 30 seconds or more can completely smooth out the water and clouds, creating a surreal effect.
To learn more about long-exposure beach photography, check out our in-depth article.
Lightning
Photographing lightning takes practice, but there are strategies to improve your shots. Check the weather to predict when lightning will strike, and choose a suitable location with a clear view of the storm. Use a sturdy tripod to keep your camera steady in strong winds.
An intervalometer can help you take sharp photos without touching the camera. Protect your gear from water damage with a lens filter, rain sleeve, or even a plastic bag. Two main approaches to capturing lightning are long exposure and a specialized trigger.
You keep the shutter open with long exposure, hoping to capture a strike. A trigger detects changes in light levels and automatically takes the photo at the right moment.
Whichever method you choose, stay safe and be patient. We have an in-depth guide that explains how to photograph lightning.

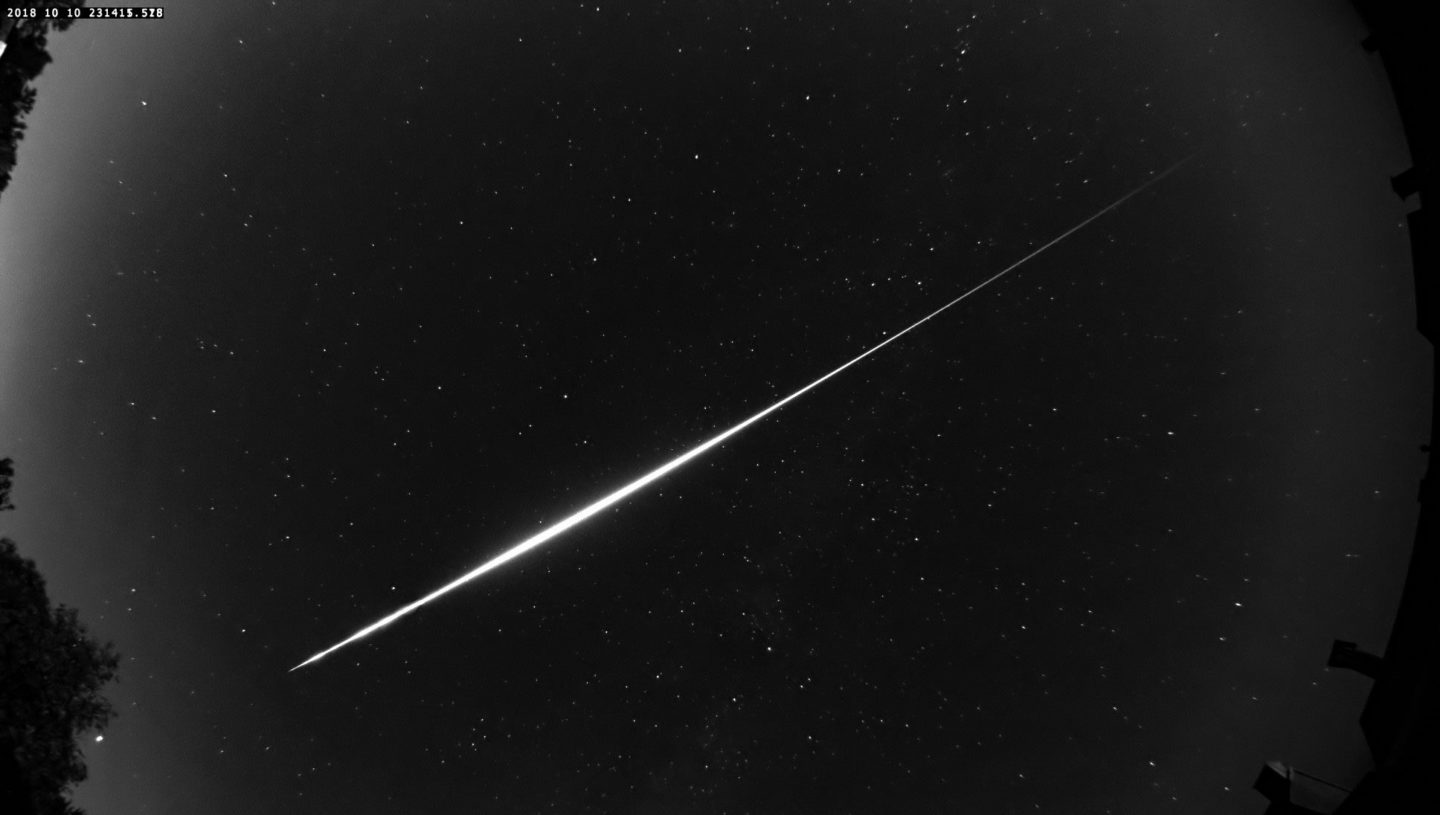
Meteor Showers
To photograph meteor showers, use a wide-angle lens or fisheye on a tripod. Set your camera to manual mode with a wide aperture, high ISO, and a 30-second exposure time. Then, turn off image stabilization and autofocus.
Choose a dark location away from light pollution. To complement the sky, include an interesting foreground like a building or tree. For the best results, frame the area where the meteor shower originates.
Be patient and take many shots, as meteors can be rare, even during a shower. You can stack your images together in post-processing to capture more meteors in a single frame.
To photograph meteor showers successfully, dedicate a few hours to the process and enjoy the experience!
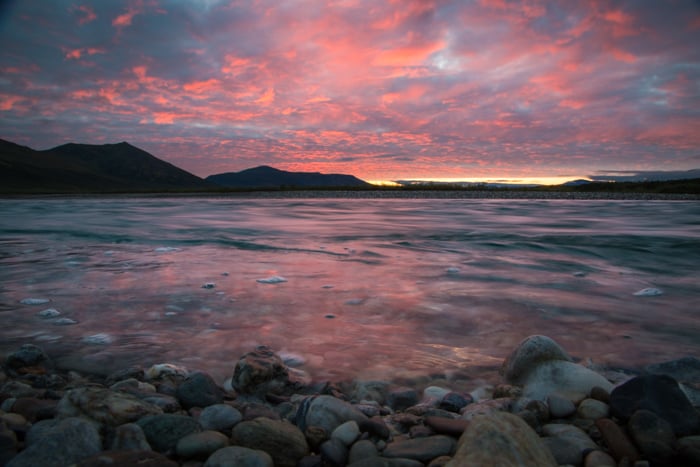
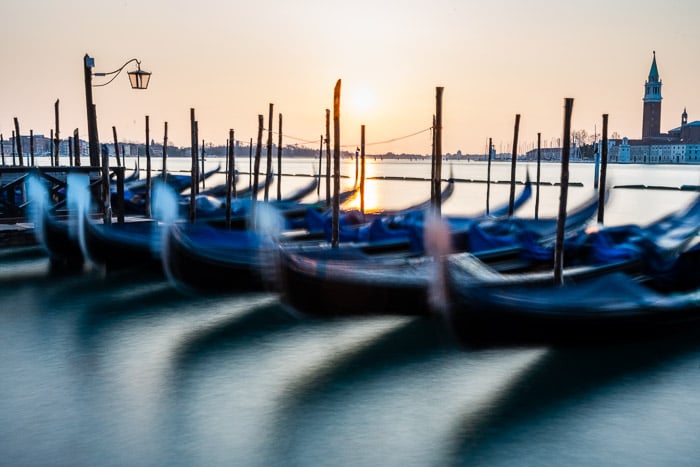
Sunsets
Capturing stunning long-exposure sunsets requires the right tools and techniques. A sturdy tripod is essential to avoid camera shake during longer exposures.
Use a wide or mid-range lens and a small aperture like f/11 or higher to create a deep depth of field. This setting keeps both the foreground and background in focus.
To create motion effects, use shutter speeds of several seconds or more. This setting blurs moving elements like water, grass, and clouds. ND filters can help reduce light entering the lens, allowing for longer exposures even in brighter conditions.
Watch out for blown-out highlights when using long exposures. Use a remote shutter release or your camera’s timer to minimize vibration.
With practice and experimentation, you can create beautiful long-exposure sunset photos. They showcase the beauty and motion of the natural world.
There is much to learn about the best techniques for capturing long-exposure sunsets, so look at our detailed guide. It covers everything you need to know.
Long Exposure With Artificial Light
It isn’t just nature that can provide you with the right light for stunning long-exposure photos. You can use all sorts of artificial light sources. Flashlights, phones, fireworks, and sparklers are tools you can use.
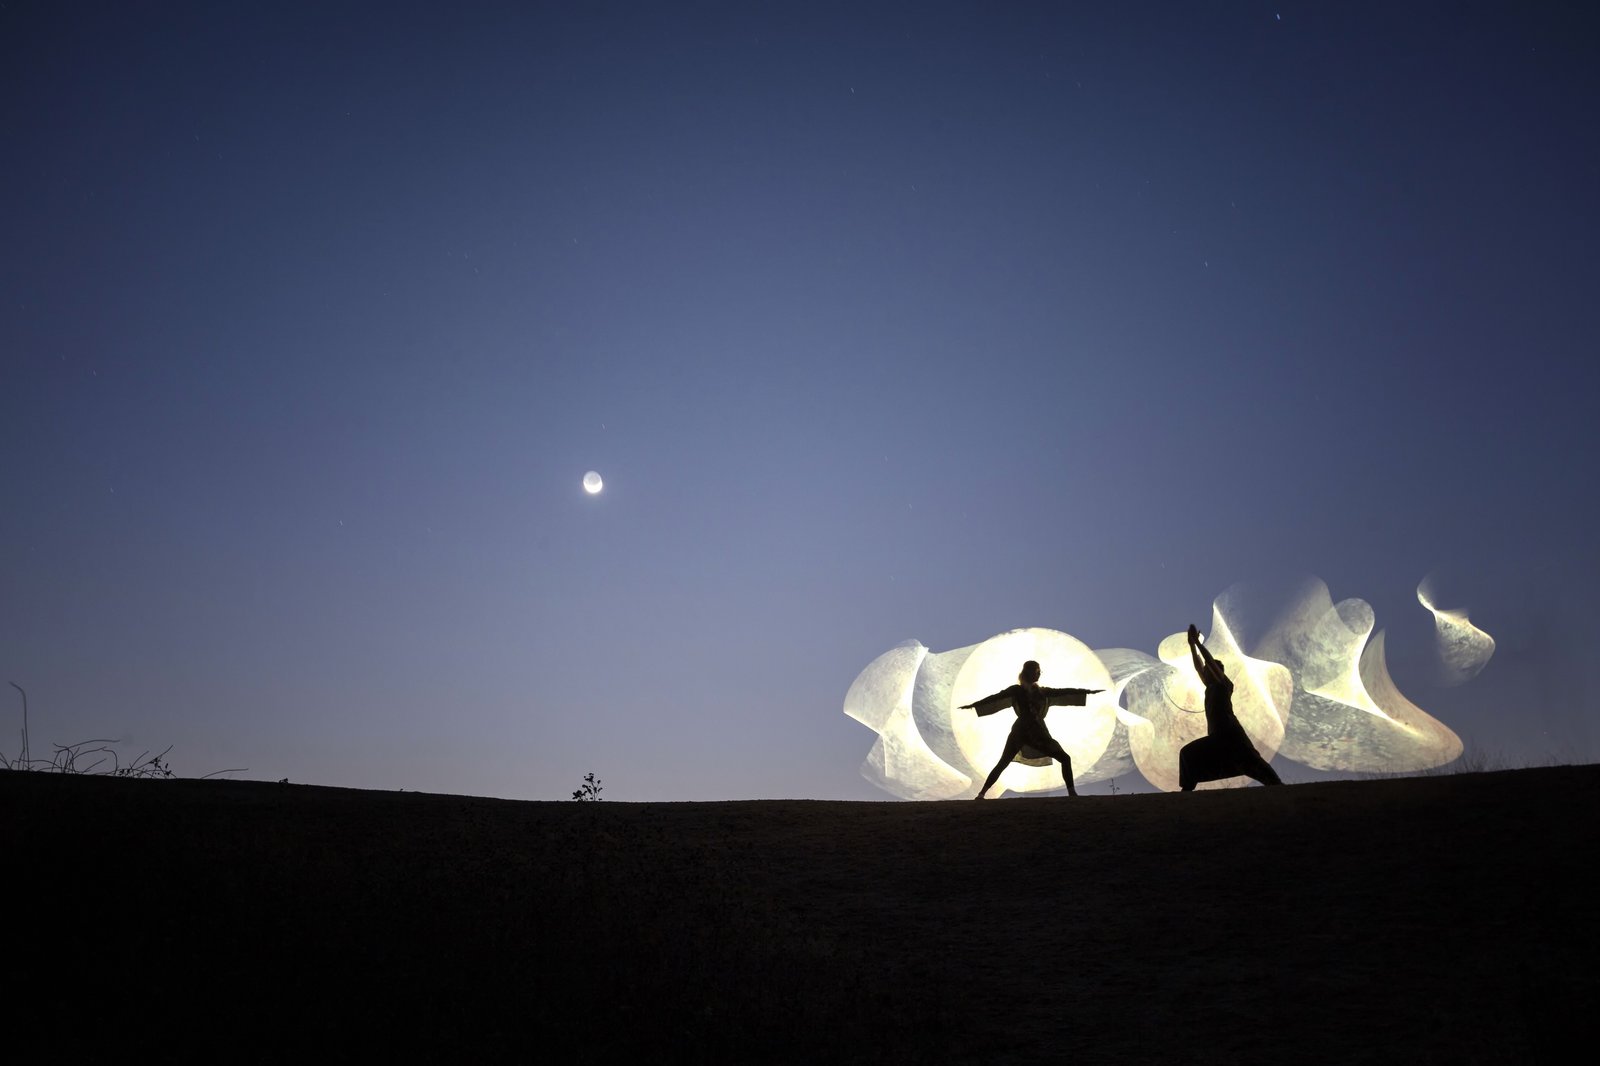
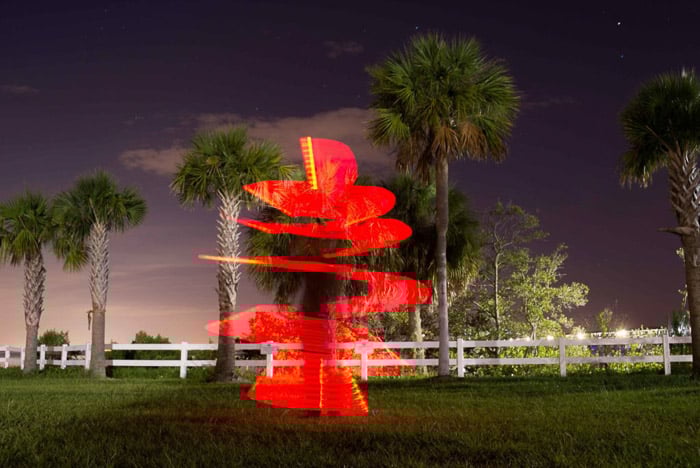
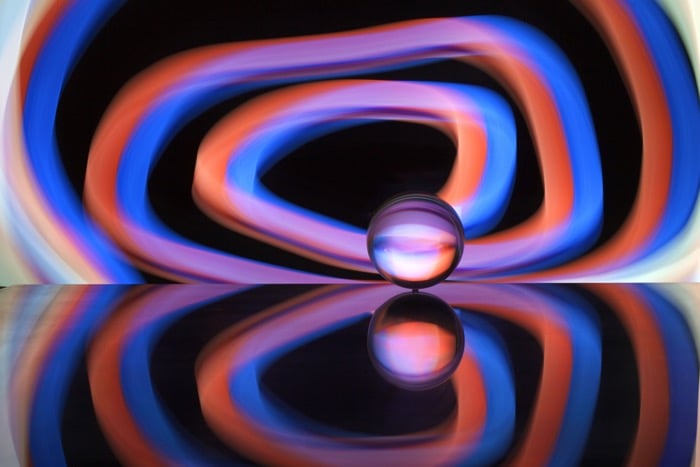
Light Painting
Spiral light painting is a fun and creative photography technique. It involves using a long exposure and moving a light source in a spiral pattern. This technique creates beautiful, colorful swirls of light in your image.
To create spiral light paintings, use a toy lightsaber or a light source with a long shaft. Start with your back to the camera, then turn on your light and point it down as the shutter opens. Slowly turn while lifting the light above your head, staying in one spot to keep the spiral neat.
With some practice, you can create stunning spiral light photography images. Experiment with different light sources and interact with your background for unique results. If you want to learn more about spiral light photography, we think you’ll want to read our guide.
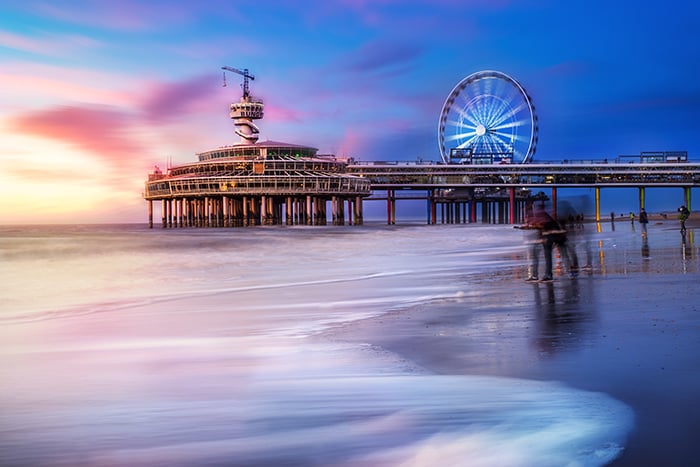
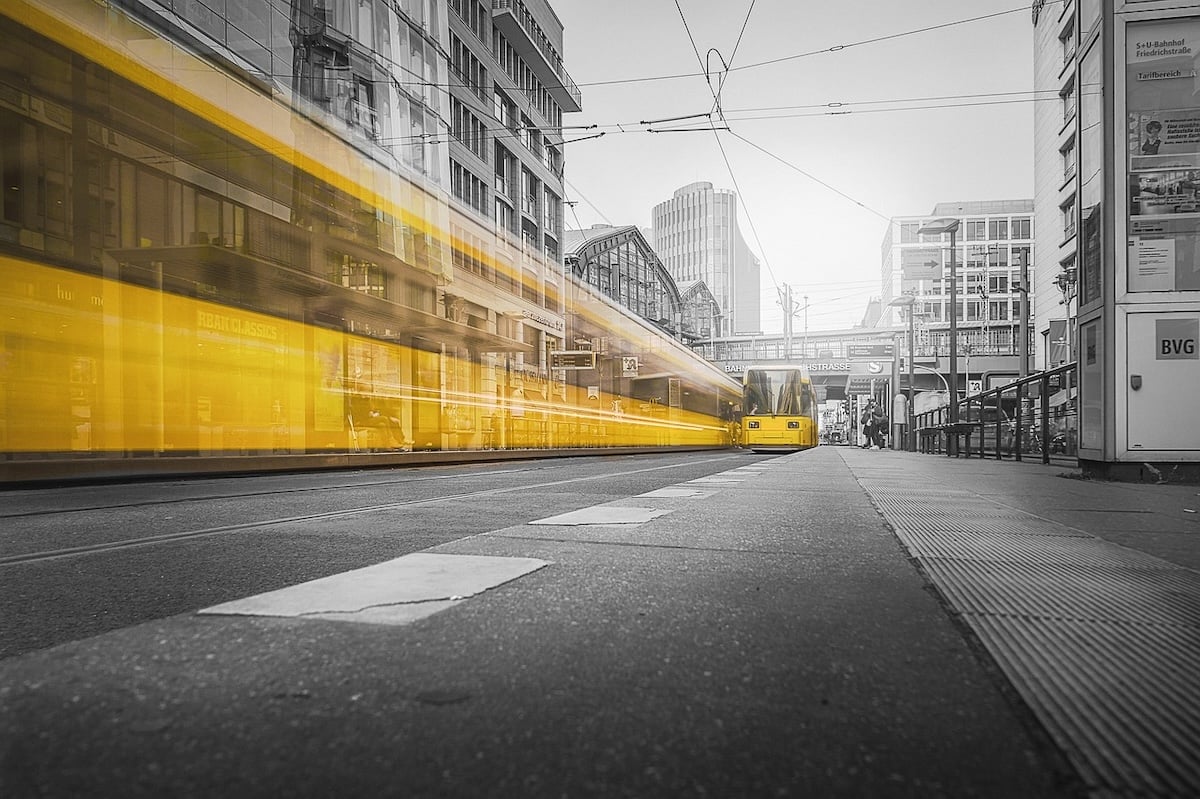
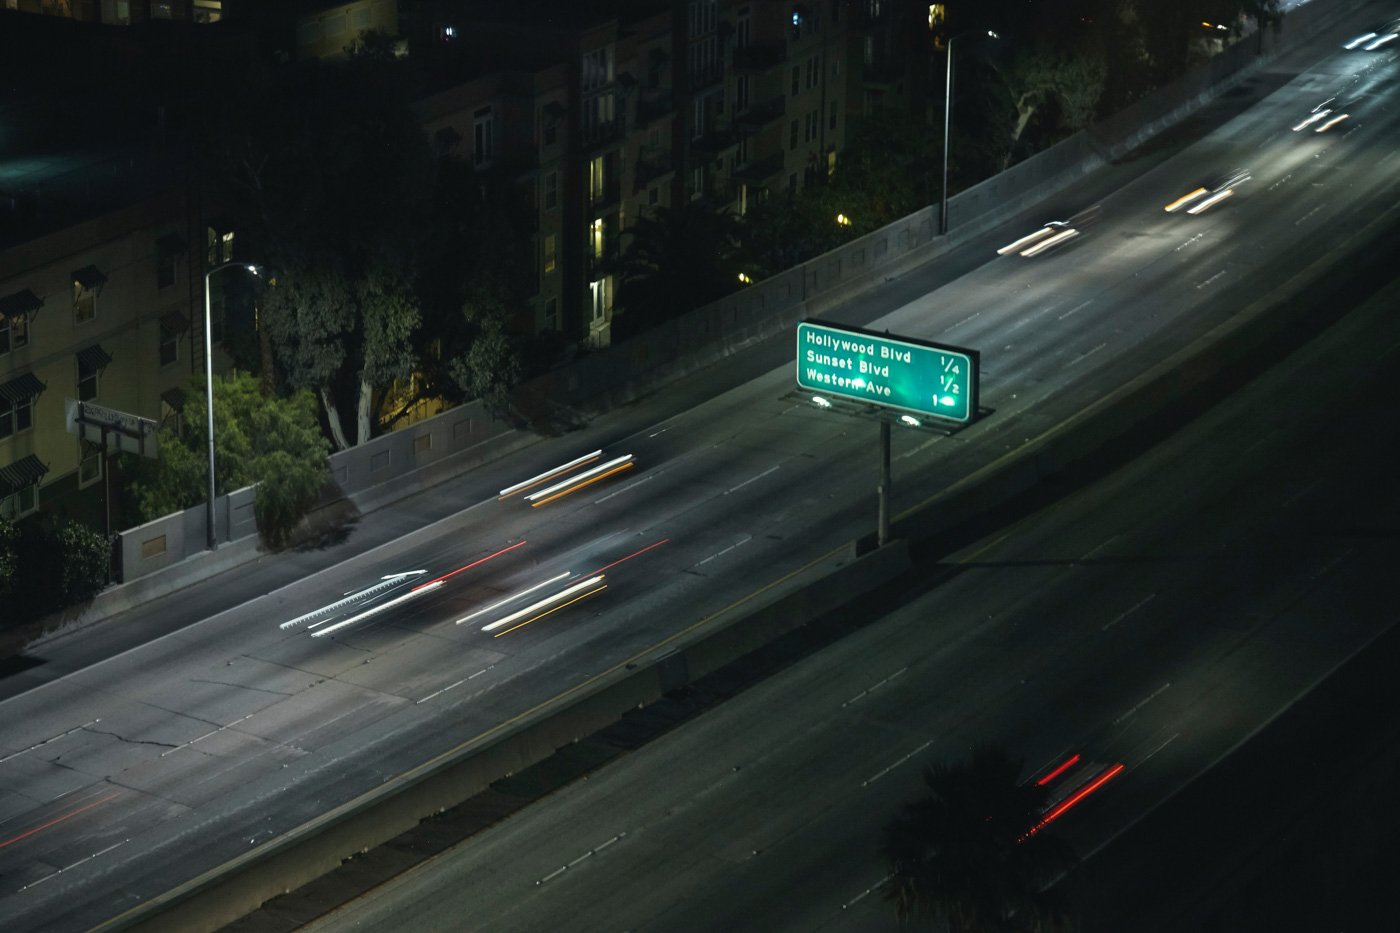
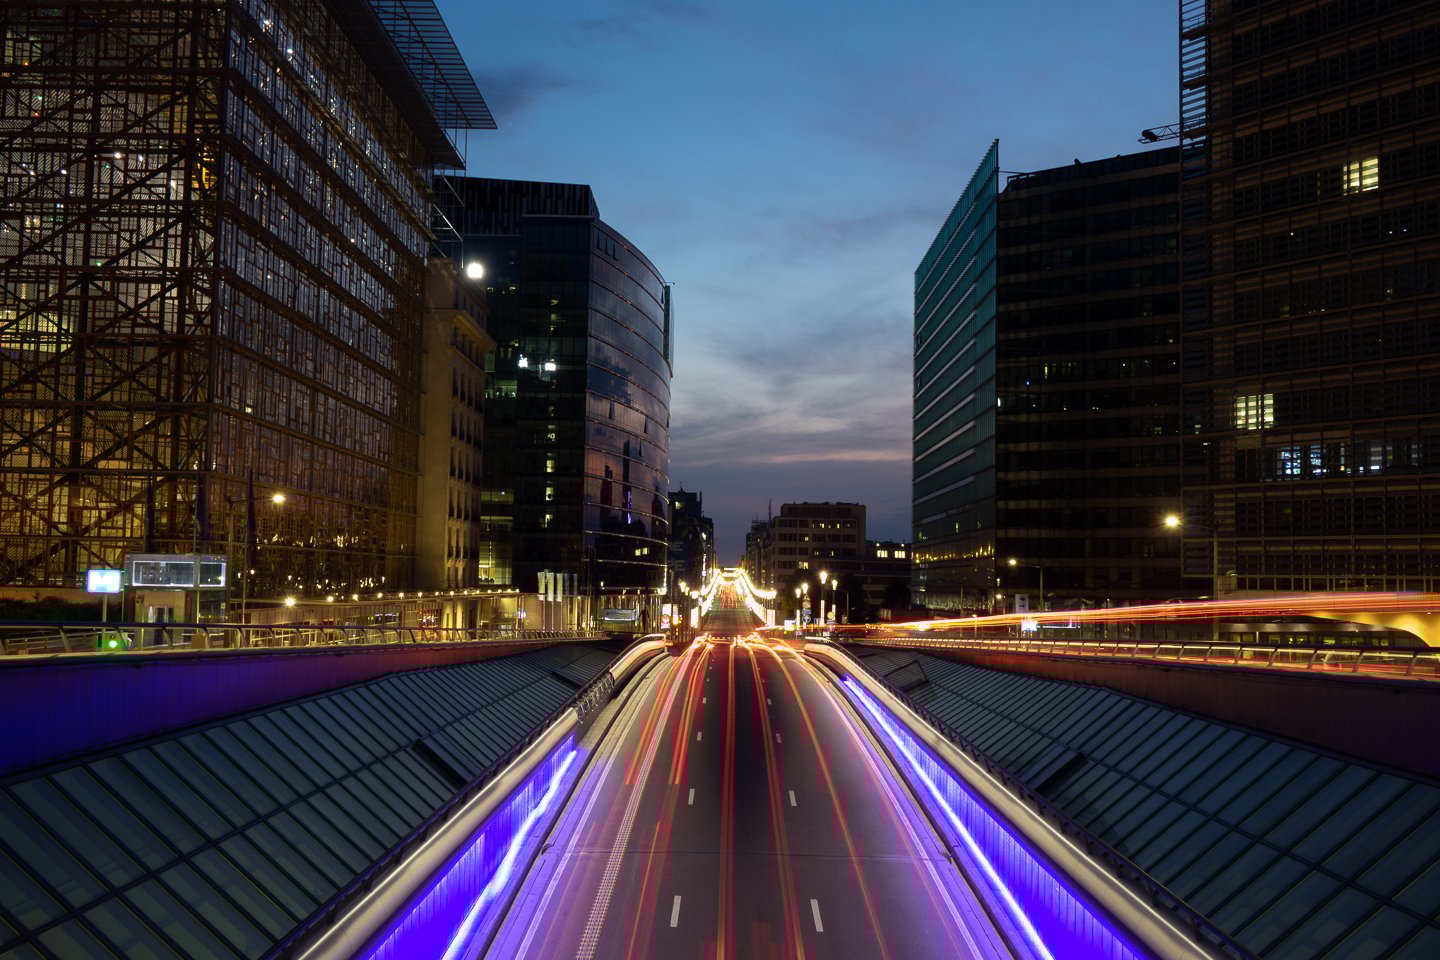
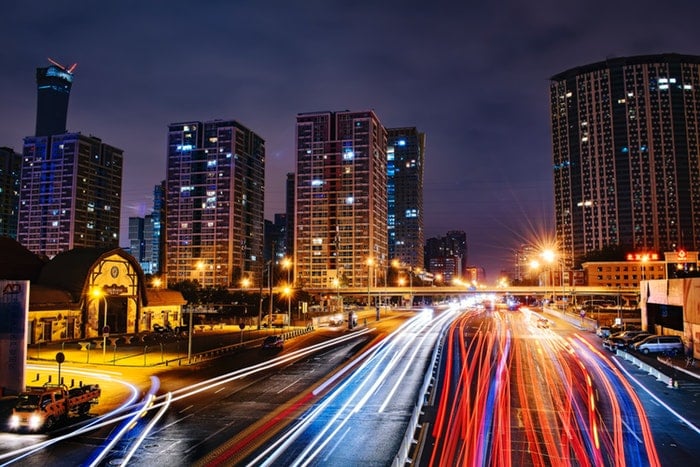
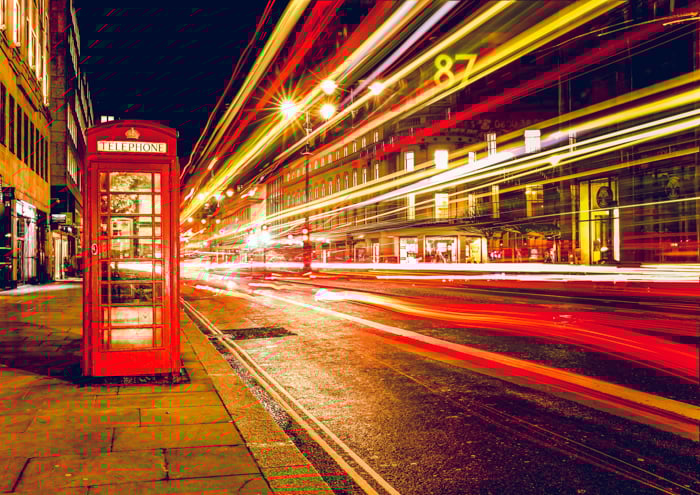
Light Trails
Light-trail photography is a fantastic way to capture the energy and motion of a city at night. To create stunning light trail images, you need a camera with manual settings, a sturdy tripod, and a remote shutter release.
Set your camera to a low ISO, an aperture between f/4 and f/11, and a shutter speed of 10 to 30 seconds.
Choose busy locations like long avenues, roundabouts, or bridges to photograph the flowing traffic. Including famous landmarks or buildings in your composition can add interest and context to your light trail photos.
Experiment with different focal lengths to achieve various effects. Try wide-angle shots showcasing the surrounding environment and telephoto images that compress the trails into the distance. Light-trail photography is a creative and exciting way to capture the pulse of a city after dark.
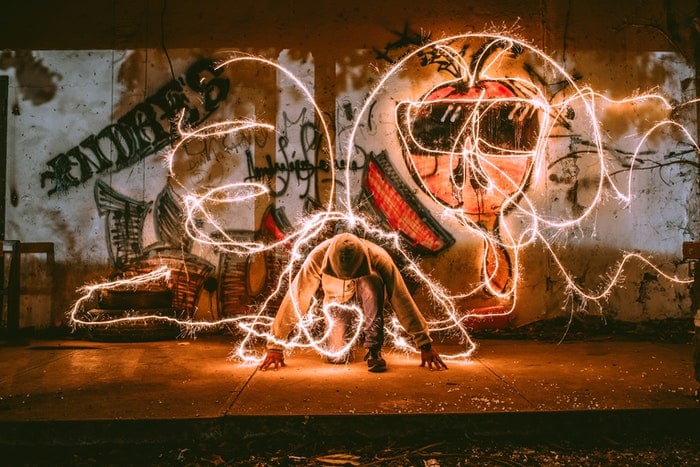
Light Graffiti
Light graffiti is a fun and creative way to experiment with long-exposure photography. Set your camera to Manual mode and use a slow shutter speed.
This setting lets you paint or draw with light sources. You can use flashlights, sparklers, or even your phone while the camera’s shutter is open.
Depth of field is important for creating sharp, focused, light graffiti images. Use manual focus or shine a light on your subject to focus, then switch to manual to prevent the camera from refocusing.
A narrow aperture (f/8 or higher) provides a deeper depth of field. But this setting requires longer exposures and higher ISO.
Experiment with different light sources and have fun with them! You can even play light graffiti games with friends, like drawing pictures for others to guess. Light graffiti is a great way to explore light painting and add a unique twist to your night photography.
More Light Painting
As we’ve seen, light painting photography is a fun and creative way to capture unique images. Again, you need a camera with manual settings, a tripod, and a light source like a flashlight or sparkler.
Set your camera to a slow shutter speed and low ISO. Then, focus in the dark using a flashlight. When you’re ready, press the shutter button. Next, move your light source to “paint” shapes, words, or designs while the shutter is open.
Experiment with different lights and movements to create interesting effects. You can even try kinetic light painting by moving your camera instead of the light source.
Light painting works well in dark studios or outdoors at night. You can create stunning photographs that blend reality with abstract designs with a little practice.
Read our article to learn more about light painting photography. It has plenty of tips and ideas to boost your creativity.
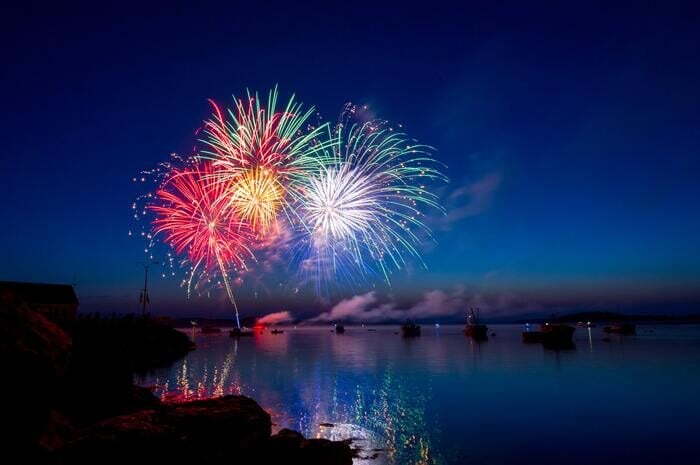
Fireworks
Photographing fireworks can be challenging. But with the right gear and techniques, you can capture impressive shots. Use a tripod to keep your camera steady during long exposures. Set your camera to manual mode and shoot in RAW format for the best results.
Start with an aperture of f/11 and adjust as needed. Use a slow shutter speed of at least 1/20 s or try Bulb Mode to control the exposure time. Keep your ISO low, around 100 to 200, to avoid noise in the dark sky.
Focus manually on the area where the fireworks will explode. Vary your composition by changing your angle, zooming in or out, and including foreground elements like silhouettes or landmarks.
When editing, adjust clarity, contrast, highlights, shadows, saturation, and vibrance to bring out the details and colors of the fireworks. To learn more about photographing fireworks, check out our in-depth guide.
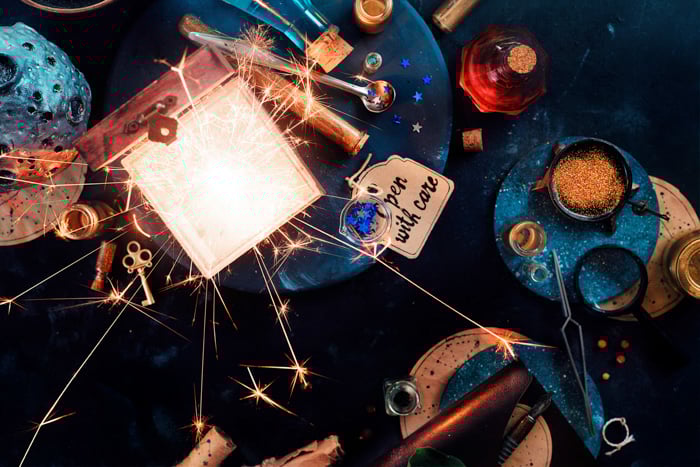
Sparklers
Sparkler photography is a fun and creative way to add magic to still-life images. To get started, gather props like sparklers, matches, and other items for your scene. Then, choose a light source, whether natural light or studio lights.
Build your set one object at a time, starting with larger items and moving to smaller details. Use two lights to illuminate your scene or one light and a reflector. Stick the sparkler in a cork or bend the end to keep it steady to prevent motion blur.
Adjust your camera settings for well-exposed shots. Use a shutter speed between 1/100 and 1/10 s and high-speed continuous shooting mode. You can also photograph sparklers inside jars or make glowing figures with tracing paper.
In post-processing, choose the best shot and make minor adjustments to tone and contrast. Sparkler photography offers endless possibilities for creative still-life images.
Other Long-Exposure Niches
Human creativity has almost no limits. So, you will find photographers who have used long exposures in various photography styles. Slow shutter speeds are deployed almost everywhere, not just in landscapes and waterscapes.
Time-Lapse
Long-exposure time-lapse photography combines the techniques of long exposure and time-lapse. It creates surreal and captivating videos! You need a camera, lens, intervalometer, tripod, and ND filter to shoot a long-exposure time-lapse.
Choose a busy location to capture more movement and create eye-catching light trails. Shoot in manual mode to maintain consistent camera settings throughout the time-lapse. Use a slow shutter speed of three to ten seconds to create the smooth, long-exposure effect.
Manually focus your camera to avoid inconsistencies, and use an ND filter to prevent overexposure in bright daylight. For the best results time-lapse, set your intervalometer to the desired interval and number of photos using a long exposure time-lapse calculator.
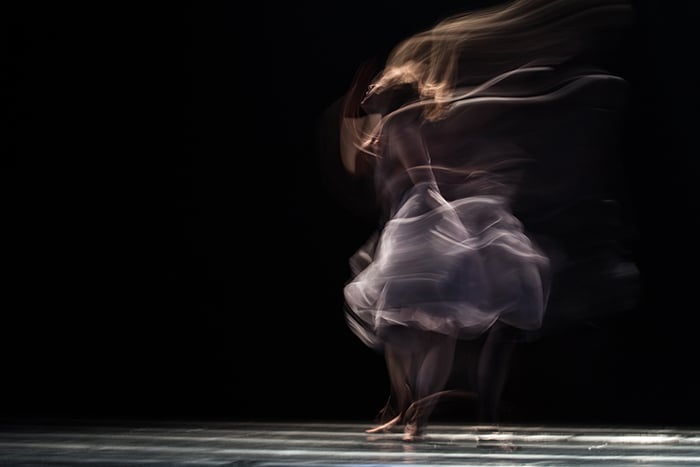
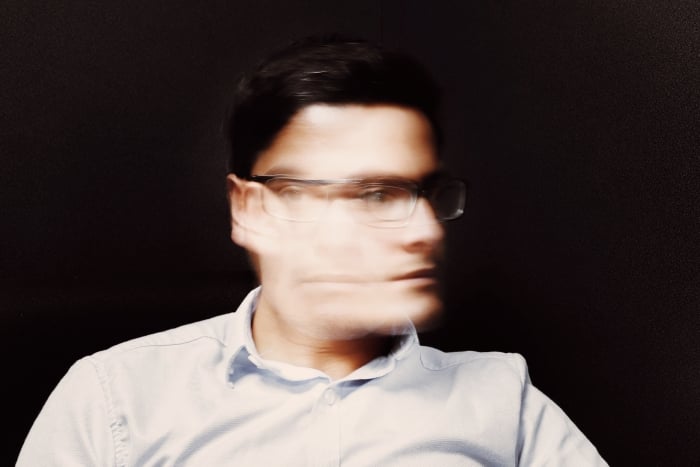
Portraits
Long-exposure portraits create dream-like effects by keeping the camera shutter open for several seconds or even minutes. This records movement as blurry streaks, perfect for surrealistic portraits.
To best shoot long-exposure portraits, use a tripod, remote shutter release, and a light source like continuous lights, strobes, or even a phone screen. Find a dark location to avoid overexposure and unwanted light streaks.
Experiment with light painting by moving a portable light source to draw patterns or words that appear as light streaks. You can also move the camera or ask your subject to move for creative effects.
Long-exposure portraits require patience and many test shots to find the best settings and techniques. But the magical results are worth it!
Daytime
Daytime, long-exposure photography captures the beauty of motion in well-lit scenes. You need a camera with manual settings, a sturdy tripod, and neutral density (ND) filters to create this effect.
ND filters reduce the amount of light entering your lens. This filter lets you use slower shutter speeds without overexposing the image. When composing your shot, look for moving elements like water, clouds, or crowds of people.
Set your camera to Manual or Shutter Priority mode. Start with a low ISO and small aperture (like f/16) to limit the light hitting your sensor. The shutter speed depends on the day’s brightness, the strength of the ND filter, and the speed of motion in your scene.
Experiment with different shutter speeds to find the perfect balance of motion blur and texture. We have an excellent article to help you master daytime long exposure.
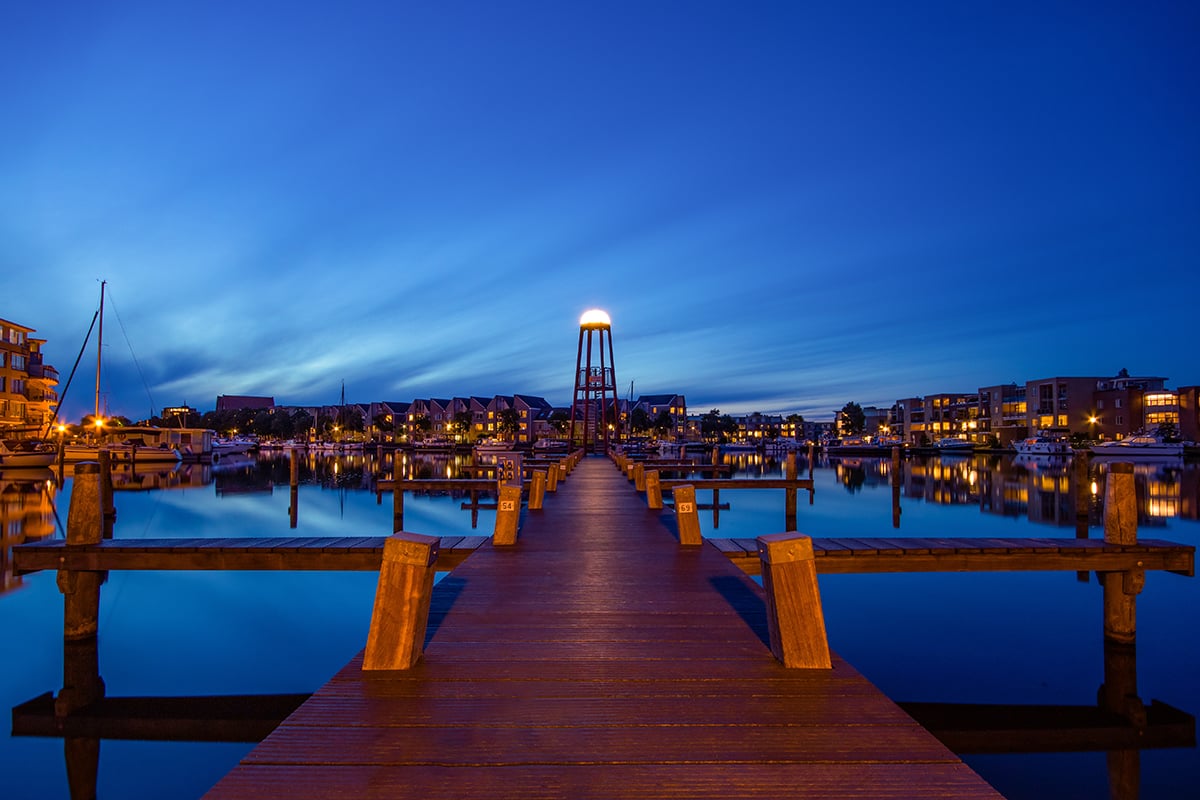
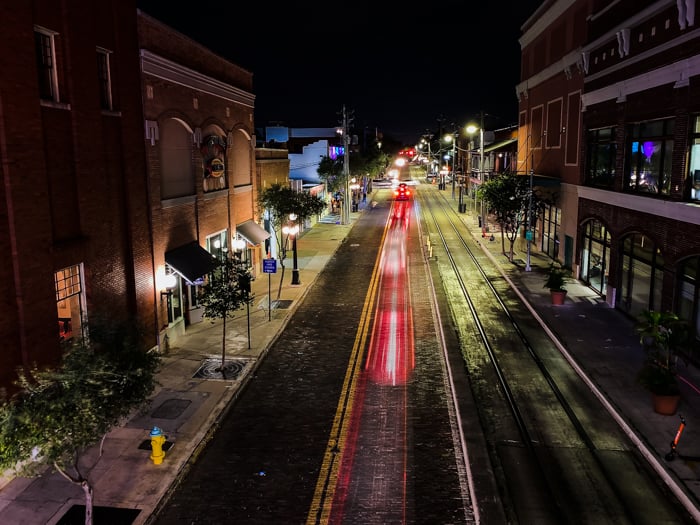
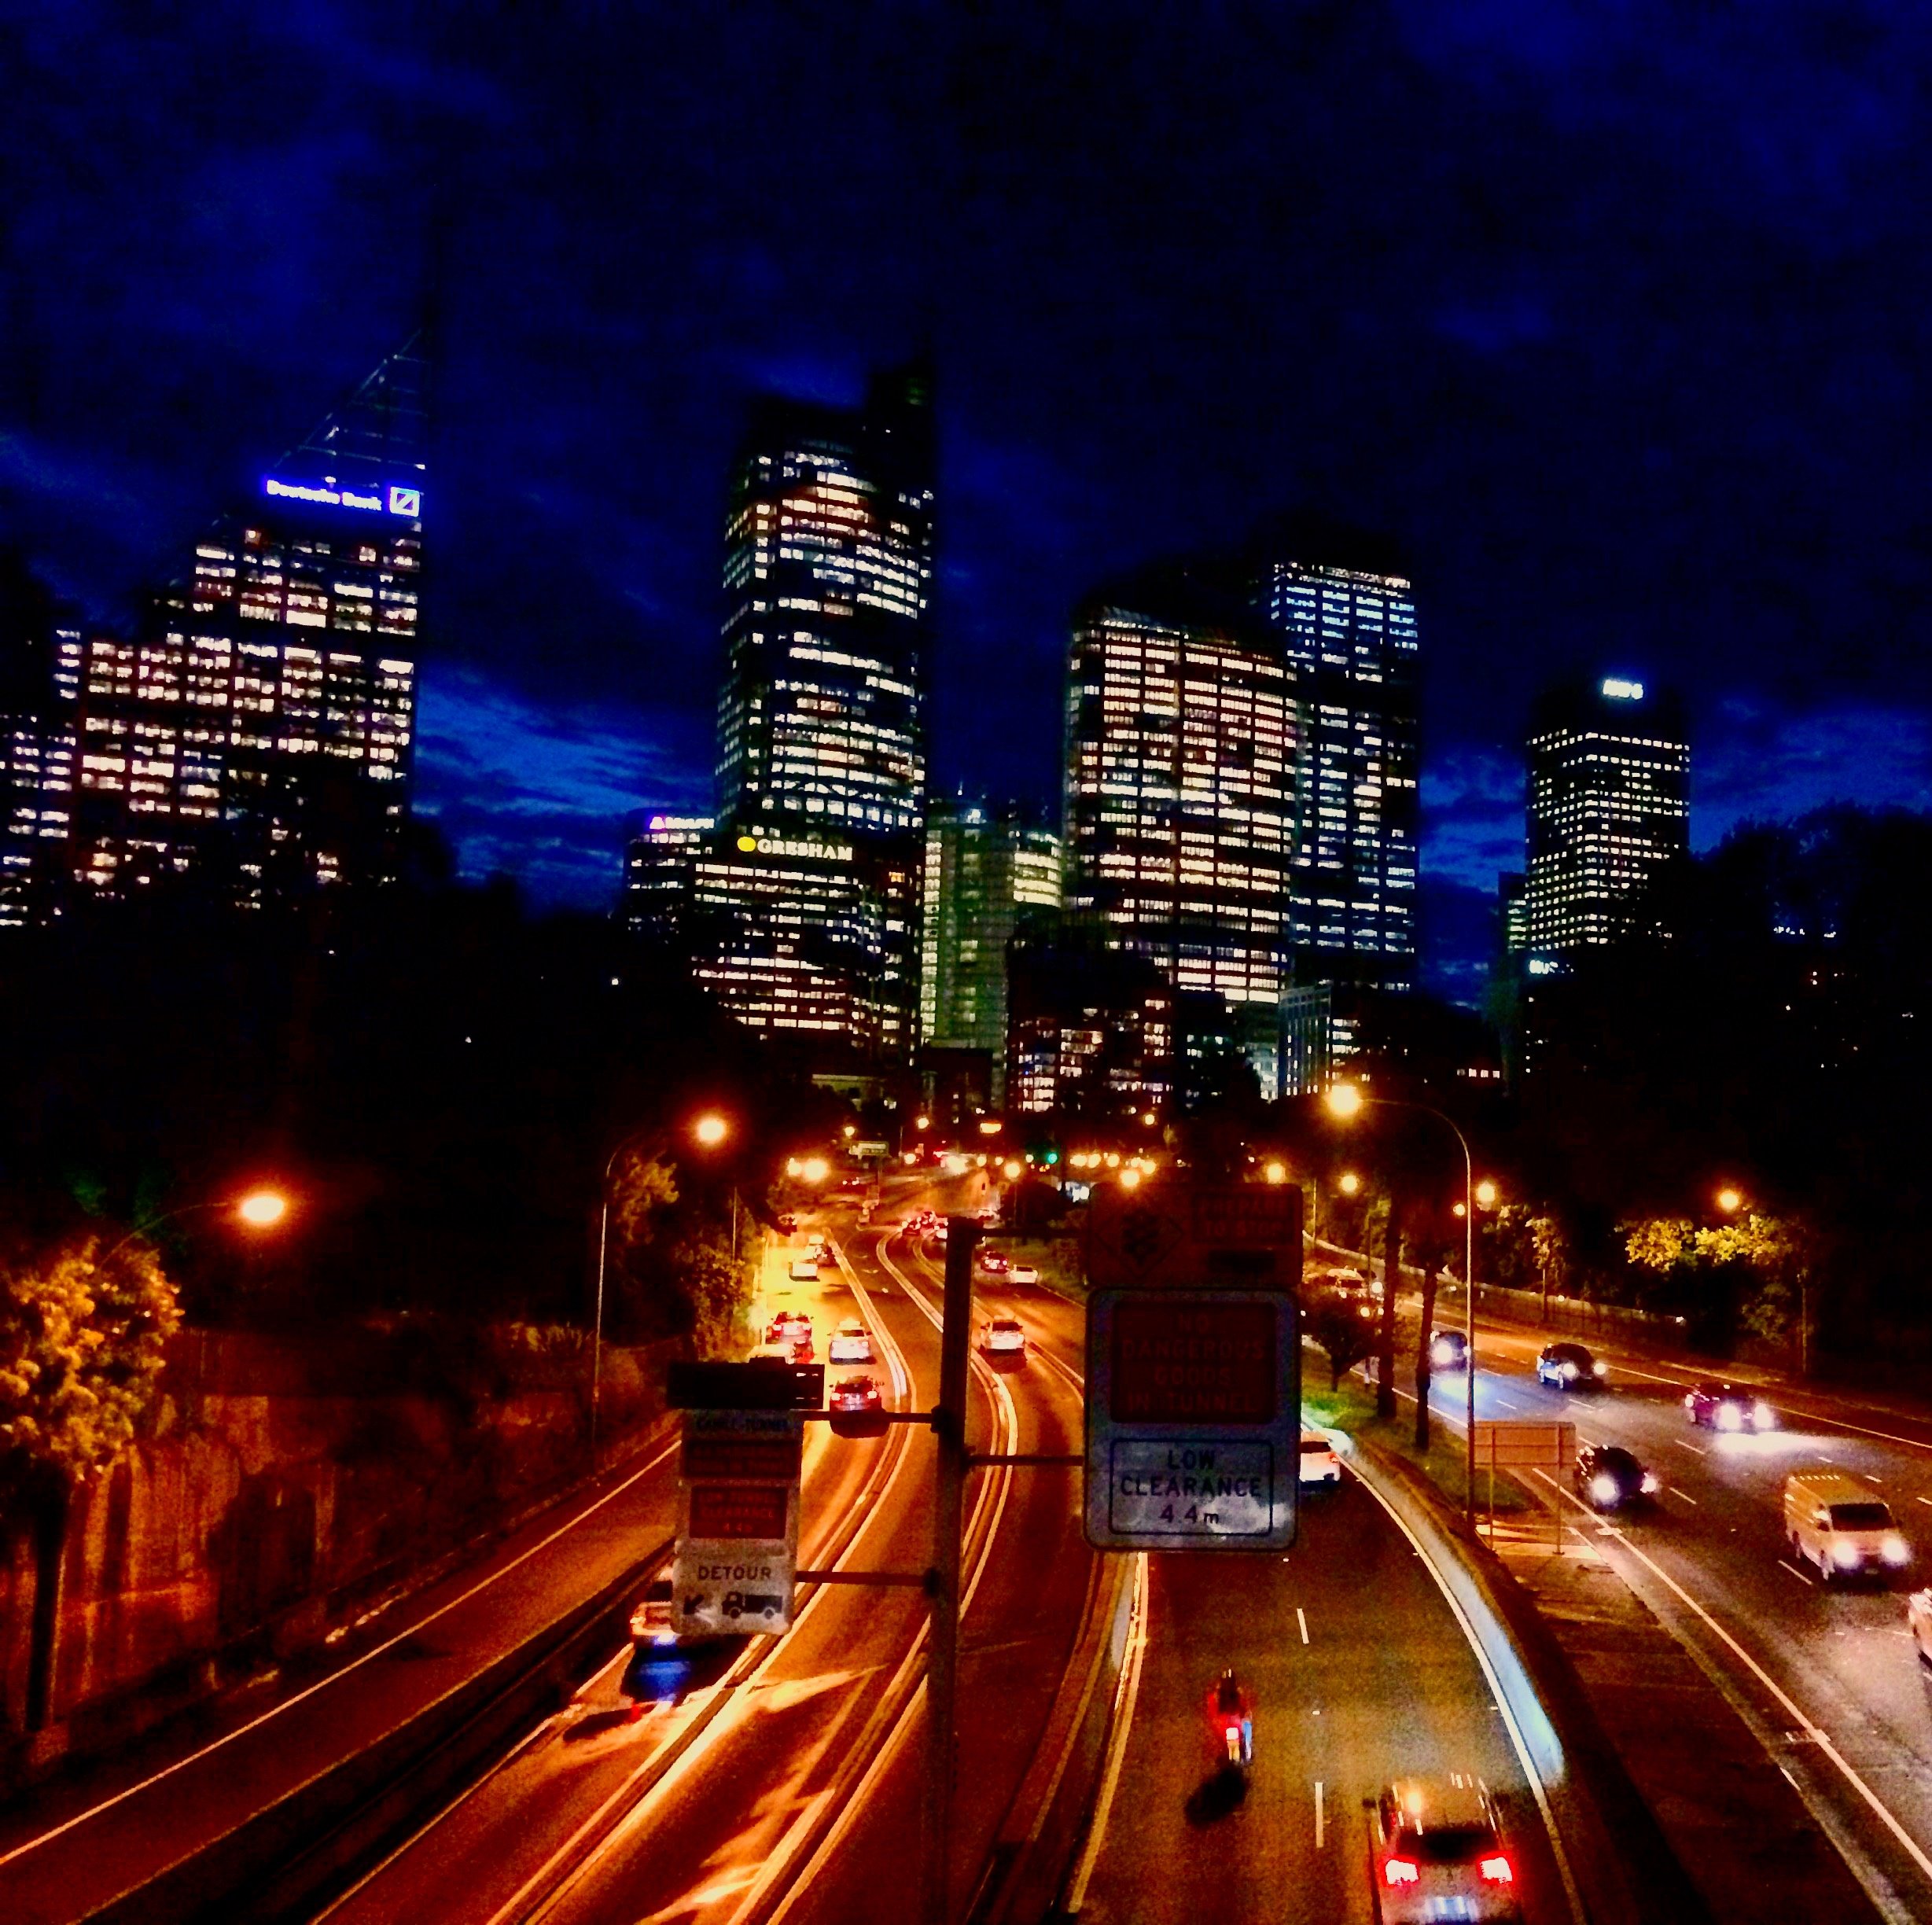
Night Cityscapes
Capturing stunning cityscapes at night requires the right gear and techniques. A fast lens with a wide aperture like f/1.2 or f/1.8 is essential for letting in more light. Use a tripod and remote trigger to avoid camera shake and ensure sharp images.
Timing is key when shooting night cityscapes. Arrive 45 minutes before sunrise or sunset to capture the best light. Wait an hour or two after the sun completely sets for pitch-black skies.
Use a high ISO between 80 and 3,200 for optimal low-light performance without excessive noise. Compose your shot using the rule of thirds grid and focus manually using Live View.
Set your camera to Aperture Priority mode with the widest aperture setting, or use the 300 or 500 rule in Manual mode. Bracket your shots and consider applying HDR when editing to bring more details out.
Our in-depth guide offers many ideas for learning more about long-exposure night photography.
Long Exposure With a Smartphone
We are increasingly taking our photos with our smartphones. Even professionals often have smartphones with them more often than their fancy pro cameras. Part of the reason is that we can take increasingly sophisticated pictures with them, including long-exposure photography!
iPhone Long Exposure
Shooting long-exposure photos with an iPhone is easier than you think. Use a tripod to keep your phone stable and prevent blurry images. The native Camera app has a Live Photos feature that lets you apply a long-exposure effect to your shots.
For more control, use third-party apps like Camera+ 2, Slow Shutter Cam, or Procam 7. These apps let you adjust shutter speed and brightness to create light trails. ND filters can help you shoot long exposures in daylight by reducing the amount of light entering the lens.
You can also get creative with light painting by using a flashlight to draw shapes in the air. Don’t be afraid to experiment with different techniques, like swiping the camera or shooting while walking.
Editing your long-exposure shots with apps like VSCO or Lightroom Mobile can help improve contrast and color. To learn more about long-exposure iPhone photography, we have a detailed guide covering everything you need.
Long-Exposure Apps
There are other ways of taking long-exposure photos with your phone, whether you have an iPhone or an Android. Several excellent long-exposure apps are available for both operating systems.
These apps give you manual control over the camera settings, like shutter speed and ISO. This control lets you take long exposures, even in daylight. Some apps also have built-in presets for specific scenarios, like light trails or low light.
Using a long-exposure app, you can capture smooth, silky water or light trails at night. You can also get creative by blurring motion in street scenes or sports.
Are you interested (who wouldn’t be?) in learning more about the best long-exposure apps? If so, take a look at our detailed guide.
Light Painting With a Smartphone
Light painting is a fun and creative photography technique that captures the movement of light in a scene. You don’t need expensive equipment to do it. A decent smartphone with manual settings or a long-exposure camera app does the trick.
You need a tripod or a stable surface to rest your phone on to get started. To avoid any camera shake, use a camera remote or self-timer. You can also use an LED light, flashlight, or even another smartphone as the light source.
Experiment with different exposure times and light sources to create unique effects. You can capture traffic light trails or “paint” letters and shapes in the air.
With some practice, you can create stunning, ethereal images using your smartphone. Our guide to light painting with a phone offers these and many other inspiring ideas.
iPhone Night Photography
Capturing stunning night photos with your iPhone is easier than you think. Start by using a third-party app like Camera+ 2 that lets you adjust exposure settings manually. These apps let you use a low shutter speed or wide aperture to capture dark scenes.
When shooting handheld, keep your shutter speed between 1/120 and 1/60 s. Set your ISO between 400 and 800 to minimize noise.
For longer exposures, stabilize your phone on a tripod and use the camera timer to avoid shaking. Activate HDR mode to capture a wider range of highlights and shadows.
Timing is key. Start shooting during the blue hour just before sunrise or after sunset for vivid skies and ample ambient light. Find bright areas with artificial lighting to create beautiful contrasts without raising your ISO.
Try long exposures to capture light streaks from moving cars for creative effects. With some practice and our iPhone night photography tips, you’ll capture stunning low-light images in no time!
Long-Exposure Photography Gear
As we have seen, you don’t need a fancy camera to get great results. But some things like a tripod make the task so much easier.
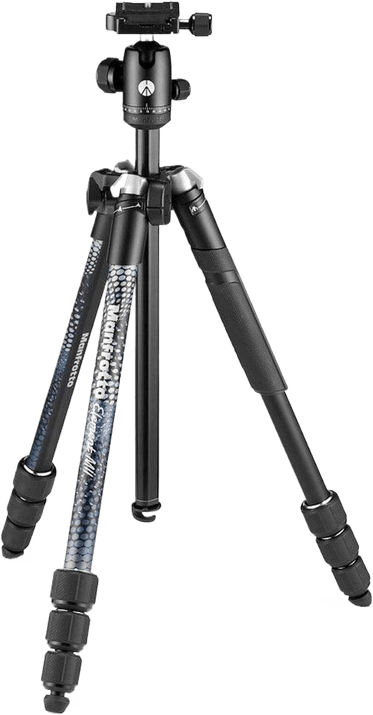
Tripods
A sturdy tripod is essential for long-exposure photography. It provides stability and support to capture sharp images in any environment.
The best tripods are lightweight yet durable. They’re easy to carry on long hikes or expeditions. Look for aluminum or carbon fiber tripods, as these materials are strong and resistant to the elements.
Adjustable legs and a versatile head are also important features. They let you set up your camera on uneven terrain and at different angles. Ball heads and pan-tilt heads are popular choices that provide flexibility and precision.
With the right tripod, you can focus on composing stunning long-exposure shots. It will hold your camera steady, even in low light or windy conditions. A tripod is a worthwhile investment that improves your images.
If you’d like to learn more about tripods, our article on tripods for landscape photography provides additional information and recommendations.
Our Top 3 Long-Exposure Photography Tripods
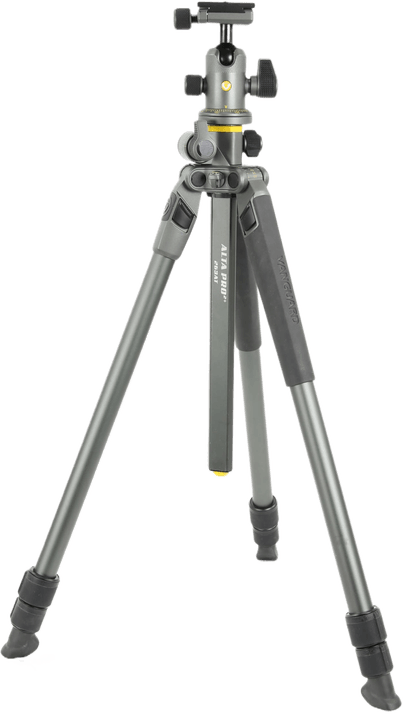
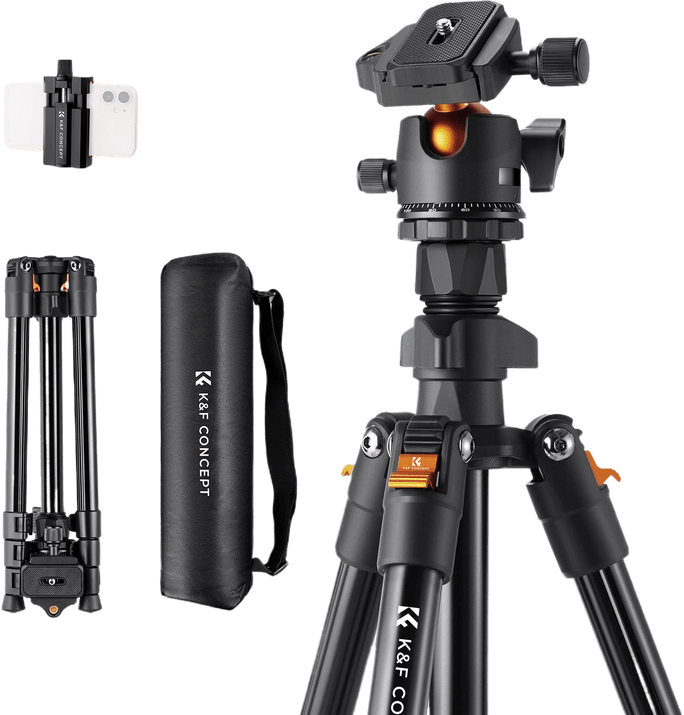
Lenses
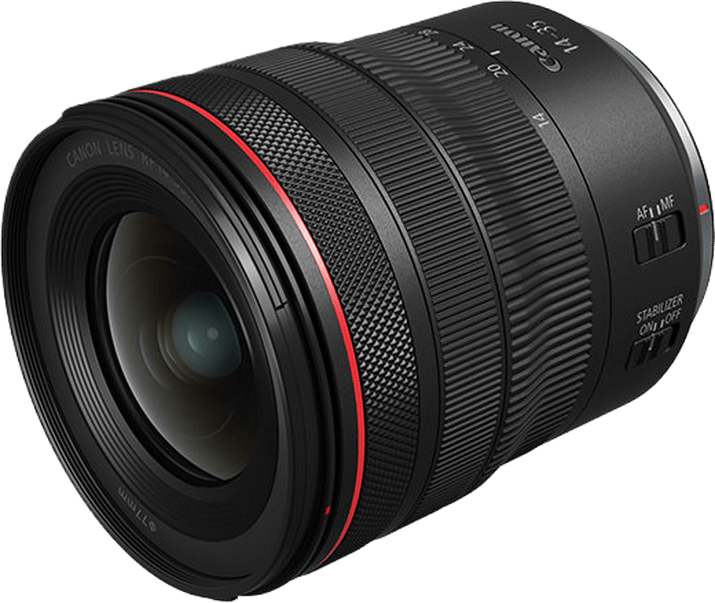
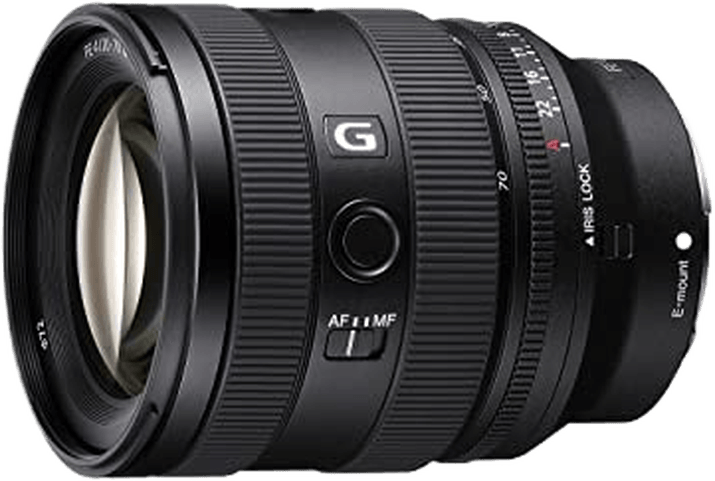
The best lens for long-exposure photography needs sharp optics and a wide focal length. The Canon RF 14-35mm f/4L IS USM is our top pick. This beautiful zoom lens has an ultra-wide field of view and superior optical quality.
It has a Sub-Wavelength Structure and Air Sphere coatings on the glass to improve clarity. The f/4 to f/22 aperture range is ideal for long exposures. And it’s weather-resistant for outdoor use.
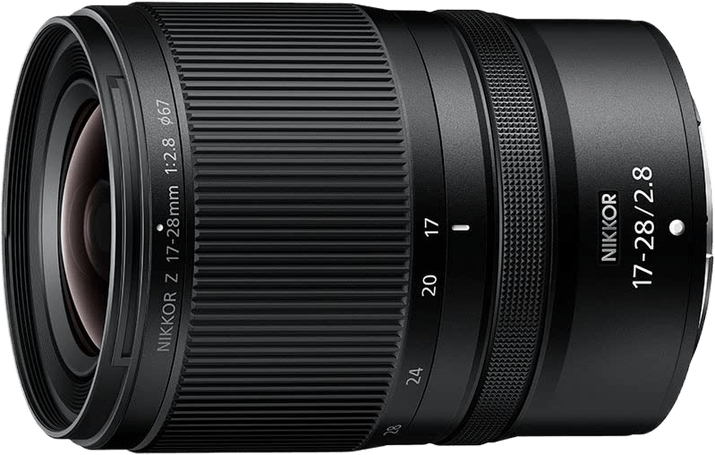
The Nikon NIKKOR Z 17-28mm f/2.8 and Sony FE 20-70mm f/4 G are great options. These lenses provide the wide angle needed for long-exposure photography and have the optical quality to match.
Our Top 3 Long-Exposure Photography Lenses
ND Filters
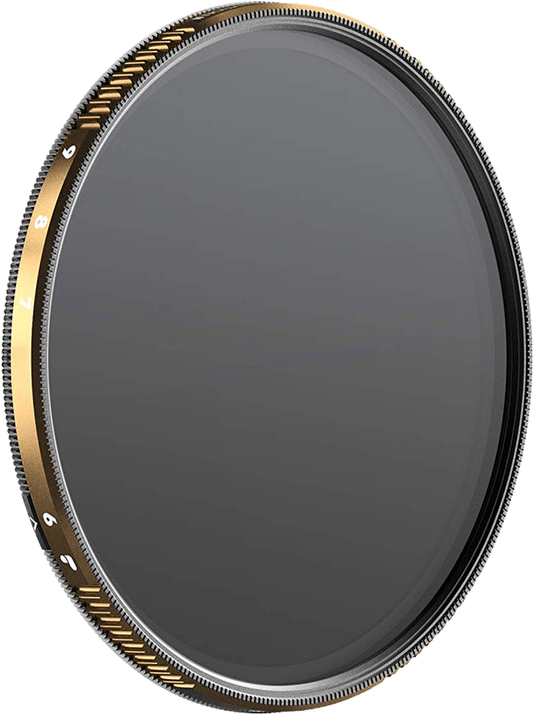
An ND filter is handy for long exposures and a great way to remove people from your photos. It limits the light entering your camera, letting you use longer shutter speeds. This filter helps blur out moving objects, like people walking through the scene.
ND filters come in different strengths, from ND2 to ND100,000. A higher number means less light and longer exposure times. You’ll need to experiment to find the right strength for your shot.
For the best results, shoot in low light and avoid crowds. Place your camera on a tripod, set a long shutter speed, and attach your ND filter. Take a few test shots and adjust your settings until you get a well-exposed image with blurred-out people.
It takes practice, but an ND filter makes removing people from photos much easier.
Our Top 3 Long-Exposure Photography ND Filters


Long-Exposure Resource
We think there’s plenty here to get you started on a long exposure journey. We’ve reviewed a popular eBook if you’ve got the bug and want to know more.
Photzy Guide
Photzy’s Complete Guide to Long Exposure Photography is a good place to start for those interested in this technique. It covers the basic skills needed to analyze a composition while shooting and post-processing.
The eBook provides practical advice on setting up your shot, including potential problems you may encounter. The author, Kent DuFault, is cautious and precise in his instructions.
But the guide has some shortcomings. The graphics are confusing and lack professional design. Plus, many example photos look amateurish and don’t effectively illustrate the concepts.
You can learn more about Photzy through our review and decide if this eBook suits you.