Light can make or break a portrait. But the good news is that you don’t need to buy a lot of fancy and expensive lighting equipment. You can create amazing portrait lighting patterns with one single light!
What You Need for Minimalist Portrait Lighting
Besides the camera, you need:
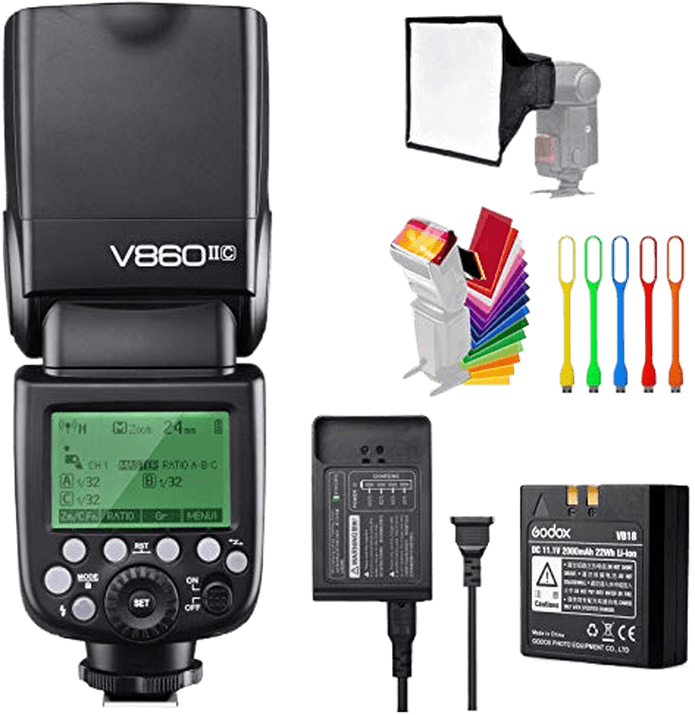
- A speedlight (a strobe or video light works too);
- Off-camera radio transmitter;
- A tripod or light stand with a flash bracket to hold the light;
- A diffuser to soften the light;
- A reflector.
It’s easy to spend a fortune on lighting gear. But the portrait lighting gear we used only cost a few hundred dollars (excluding the camera and lens).
You can even get away with less by buying a used flash and budget brand gear.
One Light Portrait Lighting Patterns
1. Diffused On-Camera Flash
The Look
A simple diffused on-camera flash works as a fill light. It eliminates under-eye shadows and adds a sparkle to the eye.
The light is coming from the same direction as the camera. This means that there are few shadows. If you soften the light, these can flatter imperfections like bumps and wrinkles in the skin.
This lighting pattern is the least interesting of the bunch. But when the lighting in the scene is already interesting, you can perfect the portrait with a slight fill using this technique.
The Setup
Leave the flash on your camera, but add a diffuser. Turn the flash to manual mode and dial it down. I often use this technique on the lowest possible flash setting.
When to Use It
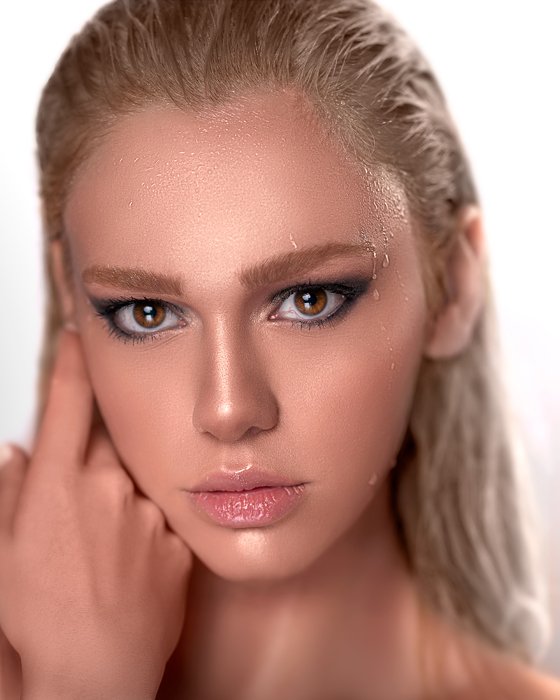
If the sun is already creating excellent lighting for portraits, a diffused on-camera flash can add one important detail: catchlights.
Catchlight is the light source reflected in the subject’s eye. If you were to zoom into the model’s eye, you would be able to spot the shape of the light source. Catchlight adds dimension to the picture and draws the viewer’s attention to the eyes. Without the catchlight, the subject’s eye seems boring and lacks the sparkle that makes it look alive.
On-camera flash doesn’t add much dimension. This is because the light is coming from the same angle as the camera.
Use it when the sunlight or a window is already adding that dimension. If you only need a catchlight, there’s nothing wrong with popping in a little on-camera flash.

2. Bounced On-Camera Flash
The Look
Soft portrait light that hits the subject from an angle.
The Setup
Leave the flash on your camera. Place a reflector, so it bounces the light back to your subject. Then turn the flash head until it points into the reflector.
With this setup, you can adjust the reflector to get different looks. Try bouncing into a reflector that’s angled 45 degrees in front of the subject.
Or, point the flash head up and have someone angle the reflector over your head. This creates a look similar to butterfly lighting with an off-camera flash.
You don’t have to use a reflector either. You can bounce your light off a neutral colored wall or ceiling.
When to Use It
You might not have a radio transmitter to get your flash off the camera. This method will allow you to get soft, angled light in your portraits without one.
The downside is that holding the reflector in the right position is difficult on your own.
You can get a mount to hold the reflector on a tripod. But these are difficult to angle right and tend to tip over in the wind.
Still, the light is flattering. And it’s an excellent stepping stone into off-camera lighting.

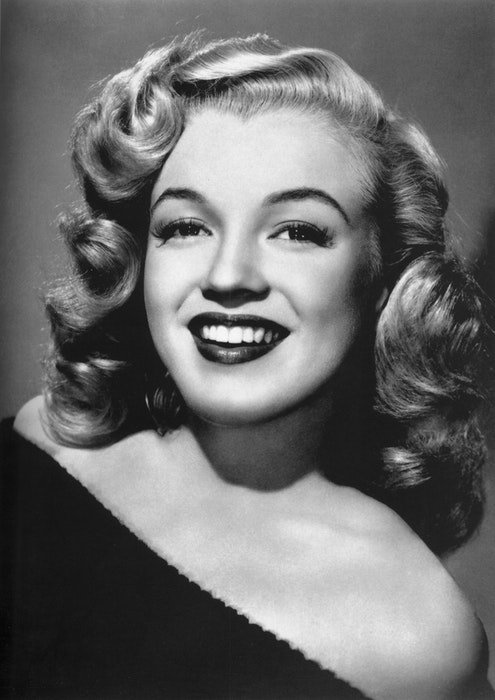
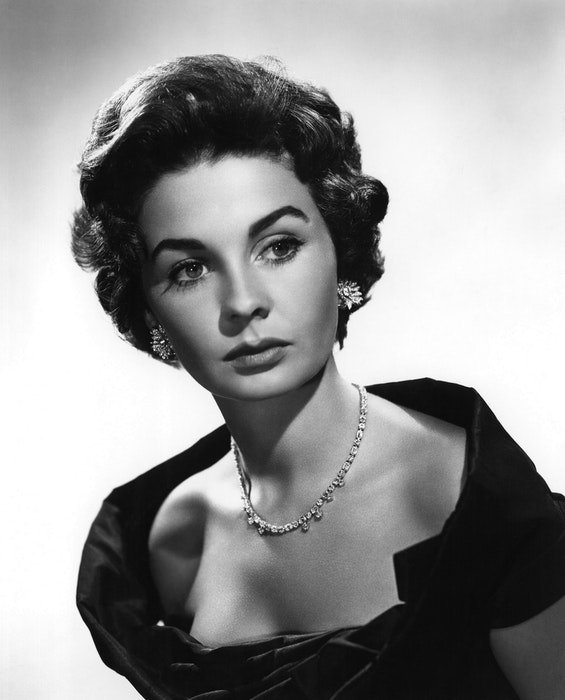
3. Butterfly Lighting
The Look
A soft light that hits the subject from above. It creates a small shadow underneath the nose and chin. These shadows help to make the subject’s face slimmer. The shape of the shadow under the nose resembles a butterfly, hence the name. This lighting brightens up both eyes and both sides of the face equally.
The Setup
Place an off-camera light directly behind the camera. But, unlike an on-camera flash, rise the light stand, so the light source is above the subject’s head.
Then, angle the light down towards the subjects face at about a 45-degree angle.
When to Use It
Butterfly lighting is a popular but simple lighting technique. This portrait lighting setup can emphasize the jawline and the cheekbones.
Try adjusting the modifiers from soft to hard. This allows for more variations from simple and flattering to dramatic.
The light is flattering to different skin types. It’s common for beauty photography as well as mimicking a 1950s style glamour shot. It’s also a flattering lighting setup for elderly subjects as it doesn’t emphasize the wrinkles that much.
4. Clamshell Lighting
The Look
This lighting pattern uses light that hits the subject from above. But it fills in the shadows for an even softer light.
The look is characterized by two catchlights and a soft shadow below the chin. This lighting pattern also exaggerates the cheekbones and jawline.
The Setup
Set up a butterfly light with the flash above and behind the camera, but angled down about 45 degrees.
Add a reflector placed in the subject’s lap. Ask them to hold it in place. The reflector will bounce some of that light back up as a fill light.
When to Use It
This soft, flattering light is common in beauty shots and portraits of women. The shadows on the cheekbones can slim the face and define the jawline.
While it’s a beauty light, that doesn’t mean this can’t be used with men. Portrait photographers using clamshell light on men tend to add harsher shadows by moving the light farther from the face.
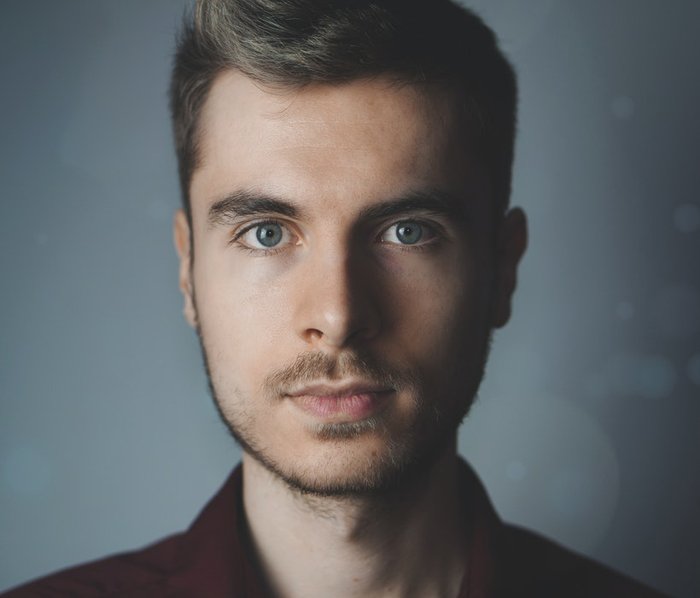
5. Loop Lighting
The Look
A majority of the face is still well lit. But you’re working with a key light that’s off to the side of the camera. This adds shadows to one side of the face.
The light is easily identifiable by a short shadow that’s on one corner of the nose. It’s not under, but not exactly to the side either.
The Setup
A loop light is a butterfly light but moved to one side of the subject. Place an off-camera light next to the camera and off to the side, up to a 45-degree angle from the subject.
The light should also be taller than the subject but angled down at them.
The light should be far enough from the camera to create shadows on one side of the face. But keep it close enough to the camera that both sides of the face are well lit.
When to Use It
If you want the flattering light of a butterfly, but with more interest and dimension, try loop lighting.
This pattern is a happy medium between super soft beauty lighting and dark and dramatic.
Bonus Variation
Use a reflector opposite of the light source to lighten the shadows.
6. One Light Rembrandt
The Look
You can identify Rembrandt light by a triangle of light under one eye. The triangle-shaped light is on the cheek farthest from the light source. The lighting setup got its name after the famous Dutch painter, Rembrandt. His paintings often showcase this kind of lighting.
The Rembrandt lighting pattern also creates catchlights in both eyes.
The Setup
Move that loop lighting to a more extreme angle. Rembrandt lighting is typically a 45-degree angle.
But you’ll need to move the light until the opposite side of the face only has a small triangle of light on the cheek just below the eye. The height of the light is a foot or two above eye level.
Rembrandt lighting is often a two-light setup. To achieve the style with a single light, use a reflector.
Like the main light, place the reflector at about a 45-degree angle from the subject, but on the opposite side. Make sure to angle the reflector so that it’s bouncing some of that main light back.
When to Use It
Rembrandt lighting is a traditional yet dramatic lighting style. This type of light is best for creating a more serious portrait, not a soft smiling beauty shot. It’s often used when shooting male or masculine-looking models.
The more extreme side angle is also less forgiving on skin textures. Acne and wrinkles can be more noticeable in this style.
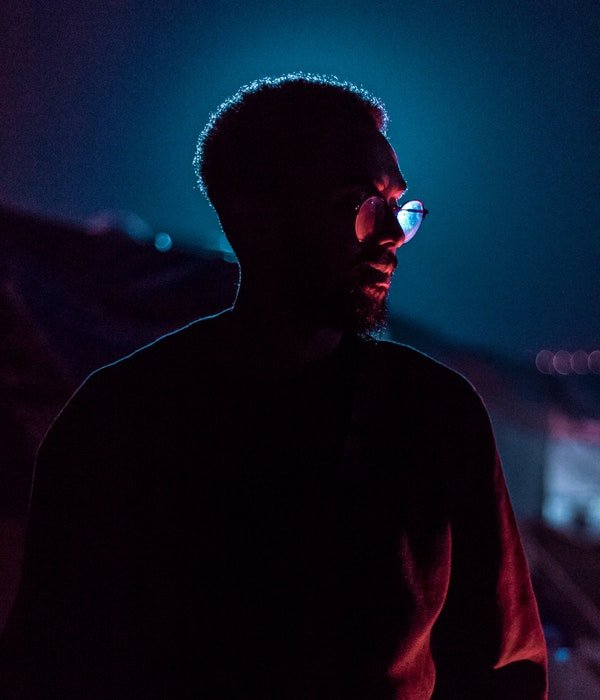
7. Rim Lighting
The Look
Rim lighting is more known for the highlights it creates instead of the shadows. This lighting pattern creates a narrow rim of light on one side of the subject.
Rim lighting is often used with a dark exposure to light the outline of the subject, but not always.
The Setup
Rim lighting also uses a light that’s about 45 degrees from the subject. But rim light is 45 degrees behind the subject.
Instead of placing the light next to the camera, place the light a few feet behind the subject and to the side. You can adjust the width and placement of that rim by changing the height.
If you want a dark image with only the subject’s outline, use manual exposure to get that dark look. If you want the subject’s face lit, expose for the face and use a reflector towards the front of the subject.
When to Use It
Rim lighting is dramatic light that emphasizes the subject’s shape. That makes it excellent for photographing athletes, exaggerating curves, or capturing a profile.
The rim of light can be unforgiving, making it less flattering for skin problems. Without a fill light, it’s also difficult to light the subject’s face as well as that rim outline.
Bonus Tip
Add a colored gel for a more dramatic, fun rim light.
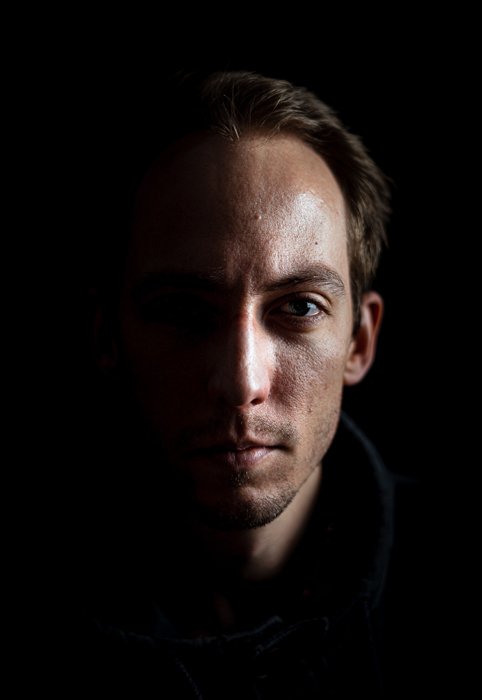
8. Split Lighting
The Look
A light that splits the face exactly in half, with half the face well lit and half the face in shadow.
The second eye may or may not have a catch light.
The Setup
Place the light at the subject’s side, about at face height. The light should only reach one side of the face, leaving the other side dark.
Since this lighting pattern is more dramatic, the light can be farther away, with or without a diffuser.
When to Use It
Split lighting is excellent for creating dramatic, moody images.
The light is less forgiving to skin imperfections. And the more dramatic look tends to work better with a serious expression than a grin.
9. Split Lighting With a Reflector Fill
The Look
Lighting that’s more prominent on one side than the other, but with both halves of the face visible.
The Setup
Like the typical split, place the key light directly to the side of the subject, about at face level.
On the opposite side, use a reflector to direct some of that light back to the other side. A white reflector will create darker shadows than a silver reflector.
When to Use It
Use this setup if you love the drama of the split light, but want to see the details in both sides of the subject’s face.
The lighting is still dramatic, and one side is darker than the other. But the reflector leaves more details intact.
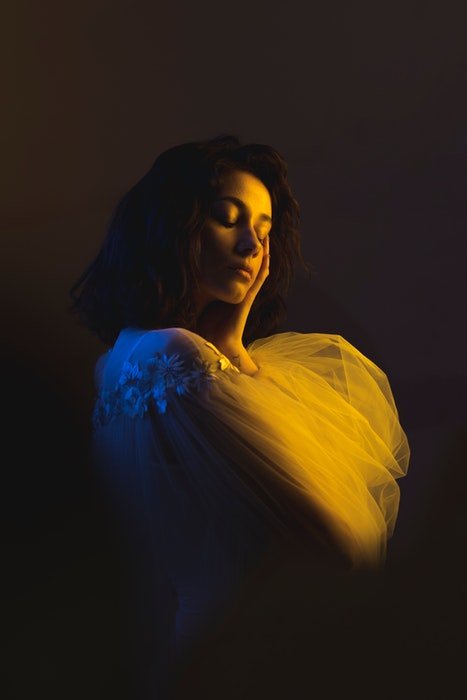
10. Backlight With a Reflector Fill
The Look
A halo-like light from behind the subject with soft light for the face.
The Setup
Place the light directly behind the subject. Lower the height of the light so that the camera can’t capture the light. Leave the light tucked behind the head, or behind the shoulders and pointed a bit up.
Use a reflector at the front of the subject to bounce light back to the face. A shoot-through reflector is easier to hold for this look.
When to Use It
Backlight gives your subject a sort of halo. And the reflector means that the light on the face is soft and flattering.
This lighting pattern also gives the subject and background more separation.
Avoid using on a subject with lots of flyaway hair. This lighting can exaggerate the loose hair and create more retouching work.

Things to Keep in Mind For One Light Portraits
So we’ve got ten portrait lighting patterns here. And there are a few concepts that apply to every (or almost every) setup.
One light portrait lighting uses a single key light or main light. This is often a speedlight or strobe. It’s only one light. But you can supplement with a reflector, a window, or the sunlight.
Each lighting pattern talks about where to place the light in relation to the subject. Don’t forget that distance is part of where you place the light as well.
Closer light sources will create a softer light. And moving the light farther from the subject will spread the light out over a wider area.
Height is also important when placing the light source. These one light portraits use a light that’s at eye level to the subject or higher.
Lighting diffusers are also important for stunning portraits. They help to smoothen out the skin and to expand the range of light reaching the subjects.
Why? Face lighting from below is unnatural. It looks like holding a flashlight under your chin while sitting around a campfire to tell scary stories. It looks creepy.
There are always exceptions to the rules. But most portrait lighting techniques use an eye-level or higher light source. This is because this tends to be both flattering and natural.
You can also add more variety by adjusting the lighting modifier. Most portrait photographers use a diffuser for soft light. But an unmodified hard light can have its place too.
A grid will reduce the spread of the light. It’ll make it so the light only falls on part of the image. And flash gels can change the color of the light in the shot.
One lighting pattern will work better on one subject than another. Lighting can emphasize the cheekbones, add catchlights to the eyes and soften skin imperfections, to name a few.
Keep this in mind as you decide which lighting pattern to use.
Conclusion
Lighting can create a more flattering portrait, add drama and help the subject’s best features to pop. But you don’t need lots of gear to create a variety of lighting effects.
With a single speedlight, strobe or video light, you can create different looks. Add in a reflector, and those possibilities expand even further.
Take your portrait photography business to the next level with Profit from Portraits!