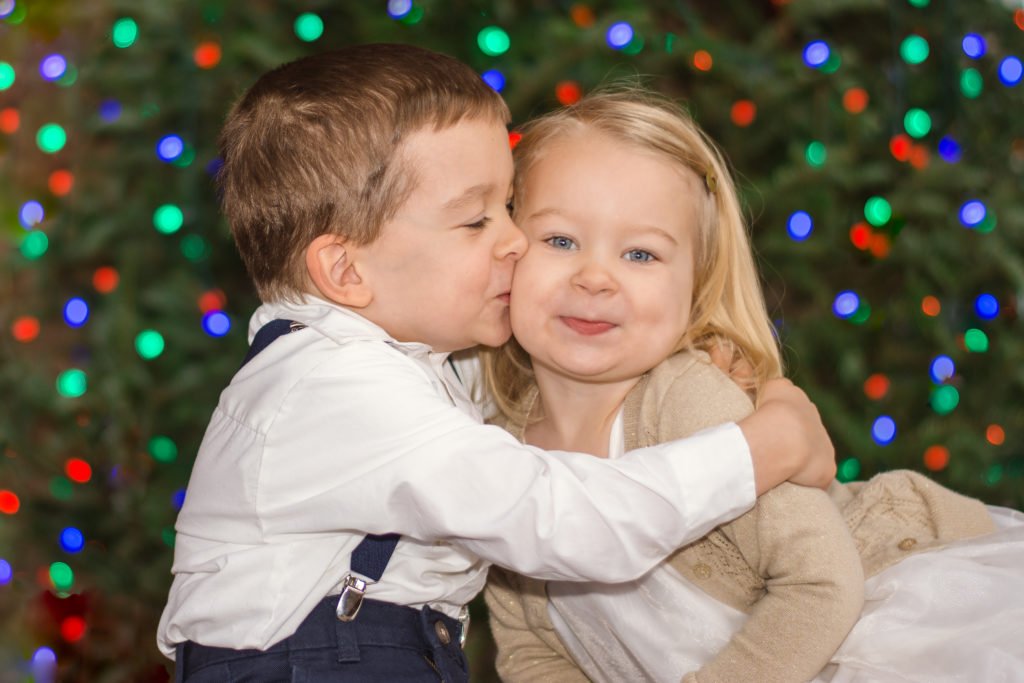
Urban portraits are different from street photography or simple portraiture. There’s more staging involved, but it’s done in a dynamic urban environment.
Interested?
Here’s how to take the perfect urban portrait!
Essential Gear for an Urban Photoshoot
The equipment you’ll use for an urban photoshoot will affect your images. These urban portraits are staged. This gives you more flexibility when it comes to choosing equipment.
Don’t pack too much, unless you have a team with you to share the load. The following are guidelines on what equipment you should bring with you.
A Prime Lens With a Large Aperture
This is the only essential piece of gear you’ll need, in addition to your camera body. There is still flexibility in your approach.
There are a wide variety prime lenses with large apertures. The typical street photographer’s lens is the 50mm lens. That’s a solid choice for urban portraits as well.
In an urban environment using a wider lens is also a great idea. Look at your options for prime lenses wider than 50mm.
You can use that high aperture to blur out backgrounds. And to focus the eye more on your model. It will allow you to photograph in lower light, without the need for a tripod.
You can also try urban environments during blue hour, with background lights on.
Lighting Equipment
With a little more space in your bag, bringing your own lighting equipment works very well.
The following would be an ideal setup:
- Strobe – One or more strobes will add a lot to your portrait work. Working off your hot-shoe will work OK, but better to use off-camera flash.
- Radio trigger and receiver – You’ll need these to use off-camera flash. You’ll need one receiver per strobe unit.
- Light stand – You’ll need this to position your strobe. It’s a good idea to have someone hold the stand. Or you can bring a sand bag to weigh the stand down. They can blow over, especially with a large light modifier attached.
- Light modifier – The best equipment here is the soft-box. This will soften the light and produce a better portrait. Alternatives include shoot through umbrellas, snoots, and the rogue flashbender.
Experimental Equipment
Should you decide to get even more creative with your urban portraits, take the following equipment.
- Tripod – This can double as a more sturdy light stand. The main reason you’ll want this is for long exposures. In some city centres tripod photography can be restricted. As long as you’re not blocking other people you should be OK.
- Light painting equipment – LED light sticks are an incredible creative tool. They work well in an urban environment. Glow sticks and torches are other light painting tools you could use.
- Smoke bombs – Smoke bombs or grenades are great for adding mood for your portrait. Be sure to use them in a safe way.
- Crystal ball – Creative portraits with a crystal ball can work very well in an urban setting.
Location Scouting for Urban Photoshoot
As with all photography, getting the right location is key. The urban area offers lots of opportunities for creative photoshoots. Some opportunities are better than others.
What sort of places should you be looking for?
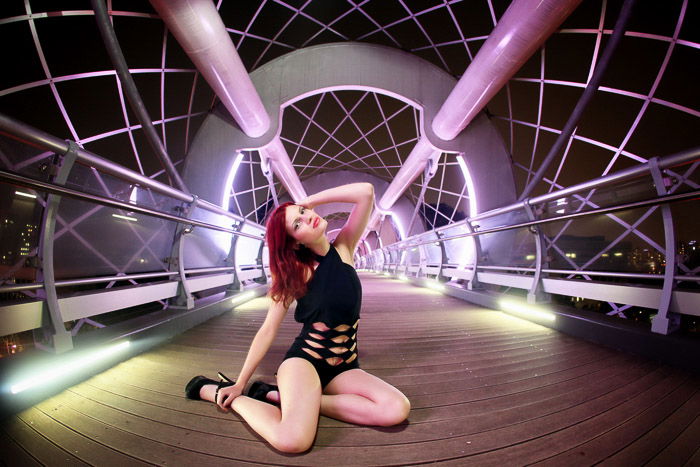
- Tunnels – The leading lines you get with tunnels are perfect for urban portraits. Look for these in places like subway systems, underground road crossings, or sometimes bridges.
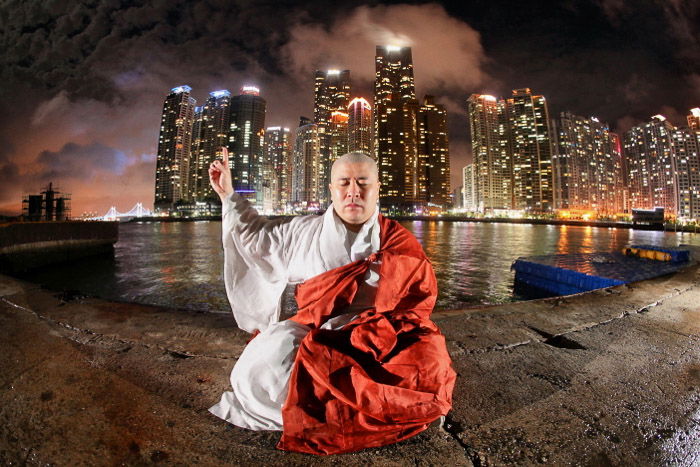
- Iconic architecture – Whether the architecture is old, or an ultra modern building, these are excellent places to find great backgrounds. You can also use abandoned buildings near you.
- Street art – Whether this is graffiti or other forms of street art, these often have great potential for portrait work.
- Riversides – Rivers offer the chance for a more minimalist portrait. You’ll be able to include urban elements from the other side of river.
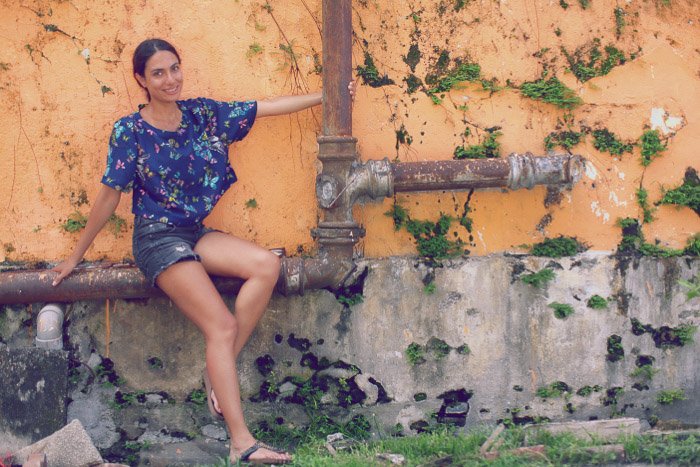
- Textures – The urban area is full of great textured backgrounds. Brick walls, the metal shutters of closed shops, or glass panels can all work very well.
- Industrial – Always ask permission to photograph in sensitive settings. That said if you’re able to photograph around an industrial facility, things like lines of metal pipes work very well.
Design Elements
It’s a good idea to incorporate design elements into your photography in general. These are things like contrast, patterns and leading lines.
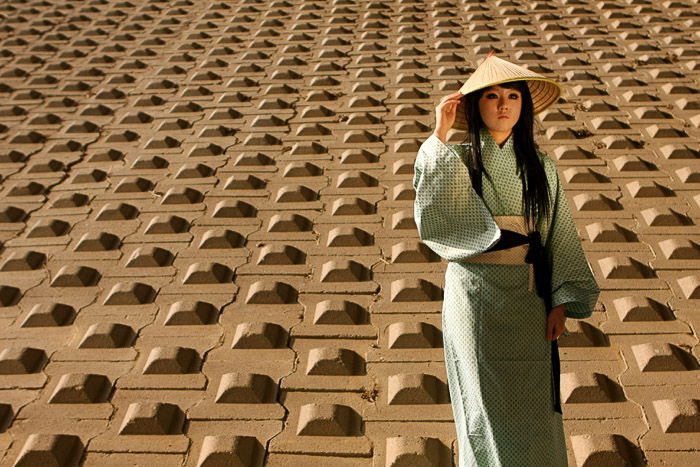
- Textures – There are lots of textures you can work with in an urban setting. Look for tiled walls, shutters, bricks, or worn down concrete.
- Contrast – The use of shadows created by an urban setting can lead to some amazing contrast photos. This is not restricted to whites and blacks though. Colors like red and blue play well off each other as well.
- Harmony – You can combine colors that are close to each other. All warm colors, or all cold colors. Look to match up the clothes your model is wearing with their environment.
- Leading lines – You’ll find lots of natural lines in a city. Roads, tunnels, zebra crossings, lines of buildings.
The Model
The next step after researching your location is to find a good model to work with. This can be seen as a sort of sliding scale.
On one end you have something more approaching street photography. On the other end you have a model you have recruited for your portraits.
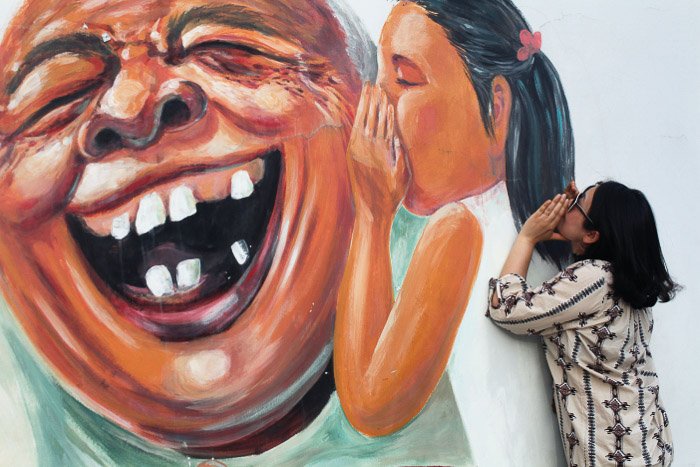
- Street portrait – The bridge from pure street photography, to an urban portrait. This is when you approach someone you don’t know on the street, and ask to take their photo. This will be a staged photo in an urban setting.
- Event portrait – There are occasions where people dress up in an urban setting. Think of the carnival in Venice, or a cosplay event. In both case you’ll be photographing a model wearing stylized clothes.
- Model portrait – The final type of model you’ll photograph is a professional model. In this case you’ll discuss with the model ahead of photographing them. You’ll plan the shoot from start to finish.
The Pose
The way your model interacts with the urban environment is the next part of an urban photoshoot.
Much of what we’ll describe here relates to the background you’ll choose. It’s still important for your model to fill and dominate the frame though.
You want your photo to be an urban portrait after all, with the emphasis on portrait.
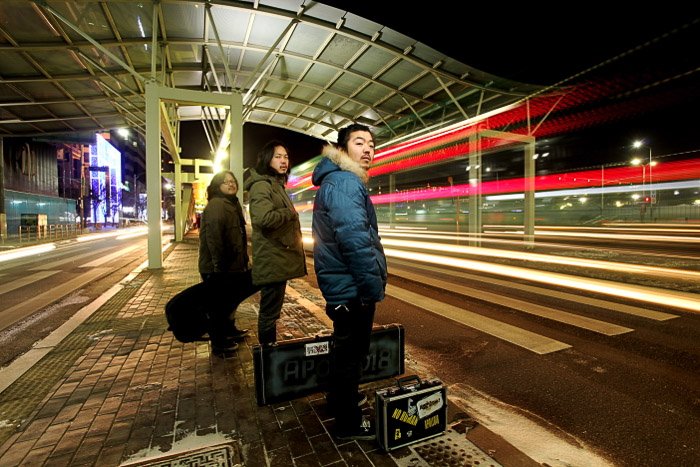
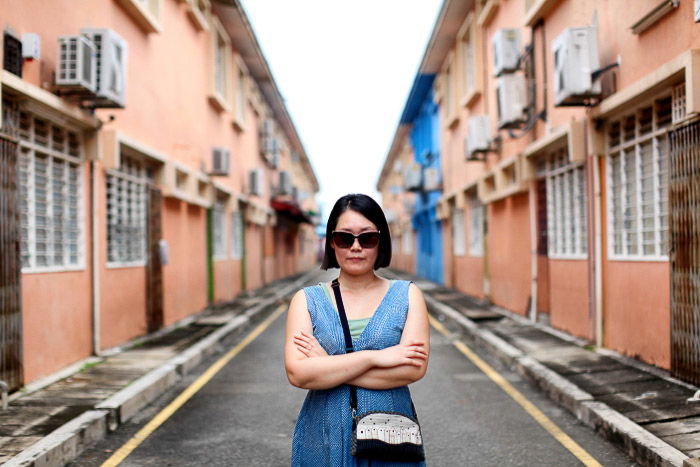
- Urban lines – Placing your model in the center of a leading line such as a road allows them to dominate the frame. You can also have the model standing by the edge of the road, with traffic passing them. Perhaps your model is waiting to cross the road, or to catch a bus or train?
- Architecture texture – Is the architecture harsh or smooth? Does it frame them, and give the photo a claustrophobic feel? Look to see how your models pose can compliment the characteristics of their background.
- The cityscape – Try showing a wider scene. Use a longer focal length to compress the cityscape behind the model. You might look to photograph this from a rooftop. Or a location some distance from the city center that includes the cityscape in the background.
Lighting for Urban Portrait Photography
You can use available light sources, or bring your own off-camera flash.
Let’s look at the two types of lighting mentioned, and how you might choose to use them for your urban portrait.
Available Light
There are plenty of available light sources in an urban center. During the day you’ll have sunlight to work with. In the evening you’ll have street lights and shop window lights to use.
How you use that light will depend on what you want to do with your urban portrait. In most cases you’ll want the sun behind you, lighting the model. You’ll also want the urban feature you include to be well lit.
Having a reflective disc to direct sunlight onto your model can be helpful. Photographing against the sunlight is yet another option. The aim is to produce a silhouette.
At night-time, look to use the available light sources to light up the person’s face. Background street lights will produce a dreamy bokeh background.
Off-Camera Flash
Using an off-camera flash can transform your work. You’re almost turning your outdoor setting into a studio.
This will mean bringing extra equipment with you. An assistant can help you set up the lighting gear.
Light stands and lighting can be as disruptive as a tripod in a busy urban center. Use common sense to decide if off-camera flash is a viable option.
Using off-camera flash can compliment the light you have during daytime. And you can use it to light your model in the evening when available light is too low.
Take care to make your lighting appear natural. Lighting that’s too bright can make the model stand out too much. They’ll overpower the rest of the frame.
This is even truer at night. To avoid this look, use more side lighting with your light source.
Best Time of Day for Urban Portraits
The time of day you choose to make your urban portrait is important. It’s best to avoid the middle of the day. That’s when you’ll have to deal with hard light.
What time of day should you photograph? It will come as no surprise that the golden hour and blue hour present the best options.
- Golden hour – You have a morning and an evening golden hour to use. Which one you use will depend on your background. It’s also a good idea to find streets that run east to west. That way sunlight will shine along them. This type of light will give your model and the background behind them a nice glow.
- Blue hour – This is another great time to take an urban portrait, especially with the city lights coming on. You’ll still have enough light to take the portrait, but with attractive city lights turning on in the background. You may well need to position your model so they’re lit up by available light, or introduce external flash.
- Night time – If you choose to light paint, this will be the time you do so. Similar to photographing during blue hour, but more challenging. You’ll have harder contrast between areas of light and dark. You’ll need to get the correct exposure level on your model’s face. Look to use light more to the side, and don’t make the light too strong when using flash.

Creative Techniques for Urban Photographpy
Portrait photography is a lot of fun, with lots of potential for creativity. This could be about the model’s pose, or their interaction with the background.
If you want to produce something even more creative, here are some ideas that will work well in an urban setting.
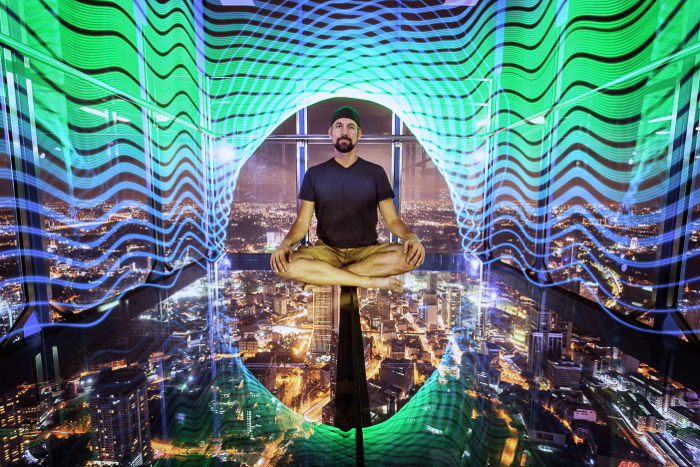
- Light painting – Using light painting is a great way to create additional narrative to your urban portrait work. You’ll need to photograph when it’s dark enough.
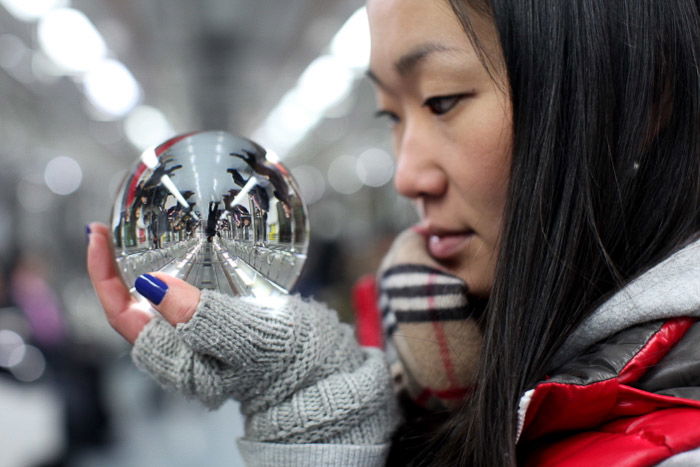
- Refraction photography – The use of prisms and crystal balls for portrait photography can create an interesting urban portrait. Have your model look into the crystal ball, with the urban scene showing inside the ball.
- Silhouettes – Silhouettes create a different portrait photo. You’ll find places with reflective surfaces, such as cobblestone streets, work well. If you choose to light paint, you may decide to silhouette your model against the light painting.
Conclusion
Urban portraiture has lots of potential. With so many people living in cities, you can find many models to work with as well.
You have more control than you would with street photography. And, as a photographer, it’s always great to explore your outdoor urban setting.
Having read this article you’ll know which equipment you’ll need, and how best to use it, so you can get the best urban portraits!
We’d love to see your urban photoshoot results, so please share them in the comments section. And any thoughts you have on taking urban portraits.