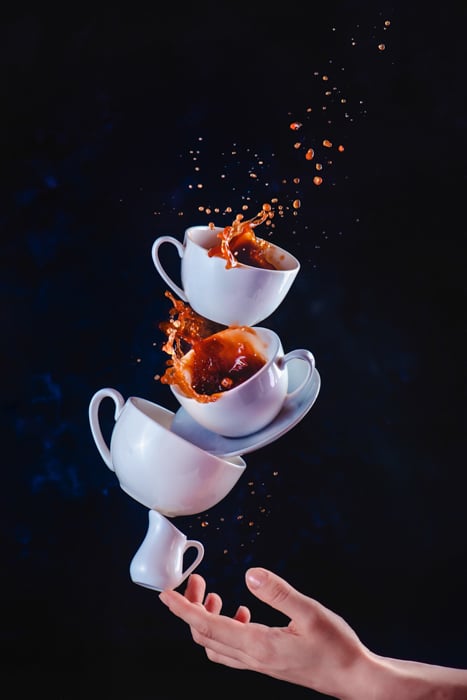
Color splash photography is always great fun, especially with coffee. It’s dynamic, eye-catching, and surprisingly easy to shoot!
High-speed photography makes the perfect recipe to get stunning creative coffee splash images.
Now, let’s see how it’s done!
Create a Story With Your Color Splash Photography
Even a simple image with a coffee (or tea! or lemonade!) splash brings me joy. But I tried to make it a bit more interesting and thought how I could add some twist to it.
Let’s not only freeze liquid in motion, but make it proper conceptual still life. Well, not literally still, but you got the idea.
Let’s create a story around it! Let it be about a stage magician who’s serving their friends coffee and balancing cups on the tip of their finger.
Props and Gear
I live in a small provincial town at the End of the World. I don’t have access to any fancy machinery or all the gear that can help in high-speed photography.
That’s why we’re going to work on a budget! We will create a dynamic image with balancing cups and flying coffee using the simplest gear and props. We’ll be using only two speedlights and a glue gun.
What you’ll need:
- A light source suitable for high-speed photography (a speedlight or strobes with a short flash duration)
- Camera and a tripod
- A transmitter or sync cable for your flashlight
- Still life items (coffee cups, saucers, and maybe a tiny milk jug)
- A glue gun
- Supports for balancing cups (skewers or knitting needles)
- Clamps (either professional clamps or handy household items)
- A dark background (preferably washable and waterproof)
Let’s look at these items one by one.
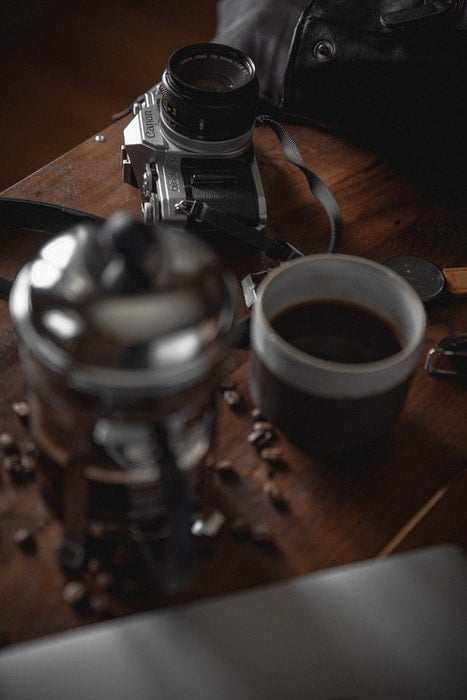
Photo by Leo Cardelli on Pexels
Light Source for High-Speed Photography
This is the most important thing we need for color splash photography. The magical thing that freezes water in motion is not short shutter speed. It is a short flash duration.
So the trick of high-speed photography is due to your light source, not your camera. The duration is exactly what it sounds like—the amount of time that the flash is actually emitting light.
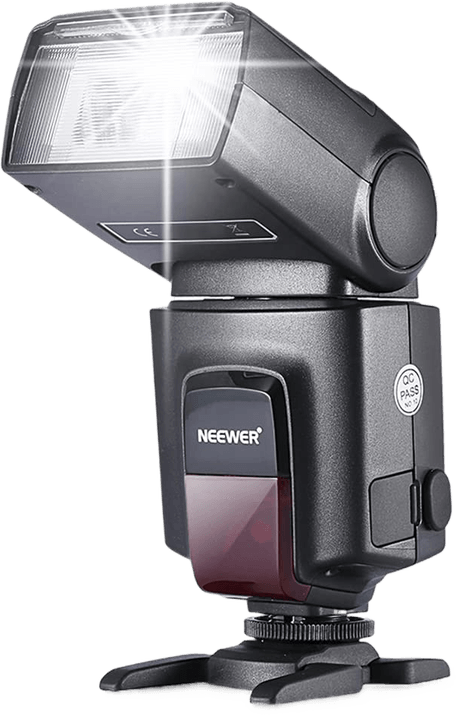
You can use strobes or hot shoe flashes (speedlights). Anything that gives a short enough flash (about 1/4000 s) will perform well. This is the speed that helps freeze liquid in motion with all the sharpness!
I use two SB-700 AF speedlights. They are affordable, easy to use, and provide the flash quick enough to give me the freezing effect I want.
The important thing to remember is to keep power settings reduced to 1/32 or 1/64 of full power. As power gets lower, the duration gets shorter and you can freeze motion better.
That results in low light, but that’s why I have two speedlights, not one. If you have only one light source, you can compensate by opening the aperture and increasing ISO.
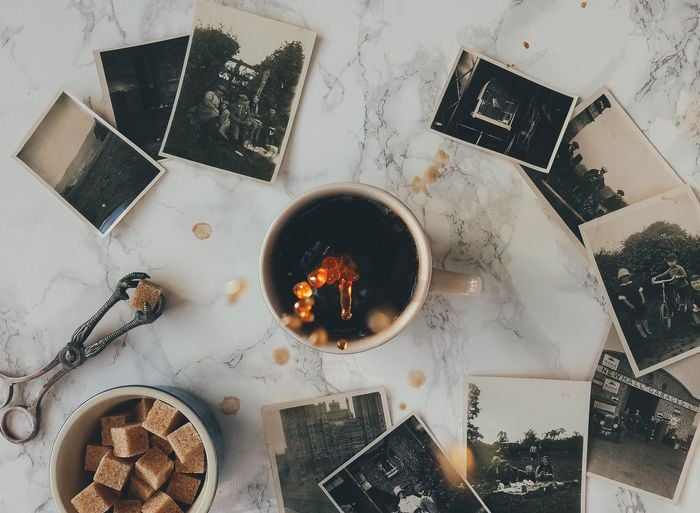
All these pictures were created with speedlights
Camera, Tripod, and Lens
Any decent camera that you can sync with a speedlight will do. It has to have manual focus and exposure control. But almost any camera these days has these options.
If you connect your camera to speedlights with wireless transmitters, you can use a spare one as a remote release. That’s not necessary, but it is convenient.
If you don’t have a transmitter, ask an assistant for help. Pouring coffee and trying to reach the camera to push the shutter button at the same time is tricky. (And it can move the tripod accidentally.)
Another thing to pay attention to is your lens. Any lens suitable for object photography will work. But opt for long focus ones if you have a choice.
For this scene, I used a 105 mm lens. It allows me to use a smaller background and also lets me stay farther away from the action. This keeps my camera safe from accidental water drops.
And a tripod is an obvious thing to use since you want to take several photos in a row and combine the best iterations later in post-processing. It keeps your camera steady and your hands free.
Still Life Items
Plan your still life photography in advance. Which cups are you going to use? How many? Do they look good together?
I like cups that are made from the same material but differ in form. They combine pretty well together but don’t look boring.
Porcelain cups are better than glass ones. They are not transparent, so you won’t have to worry about all the stuff glued to them in order to keep them balancing on each other.
If you like, you can add something else to this balancing composition, like a cookie, a marshmallow, or a small tower of sugar cubes. Anything that goes well with coffee.
Glue Gun
A still life photographer‘s best friend! It comes in handy where double-sided tape cannot. We’re going to use it to keep our balancing construction steady and immovable. The key element in shooting splashes is gaining as much control as possible.
It’s hard to archive precise control while pouring liquid. But at least we can keep the cups in place. So I borrowed a couple of knitting needles from my mom and glued them at the back of my cups.
If your cups are small and lightweight, one support will do the trick. But if they’re rather large, glue two parallel supports next to each other.
This way the cup won’t rotate when you suspend it in the air.
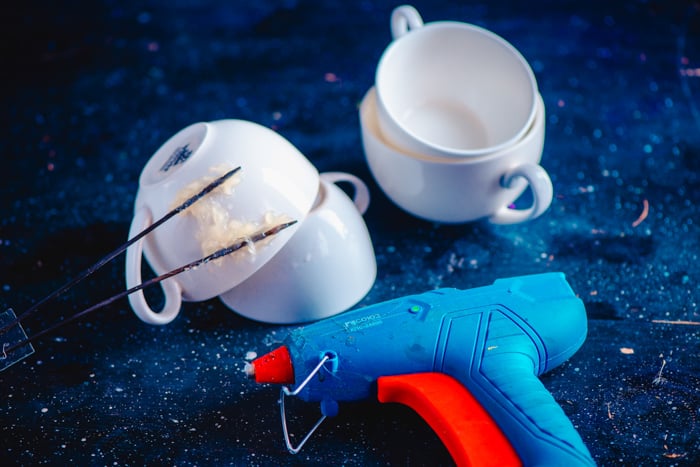
Looks messy, but that’s the side your camera won’t see!
Clamps and Supports
To hold our balancing construction in the air, we can use professional clamps like Wimberley Plamp II. This is an articulating arm with a clip at the end. It’s designed to hold flowers and reflectors, but can handle a small coffee cup.
Or you can choose a clamp used for needlework and other crafts. These clamps are as steady as professional ones. They’re not as flexible, but they are a bit cheaper.
I use both types. I clamp one end to my working table and holding cups with another, angling them to a perfect position.
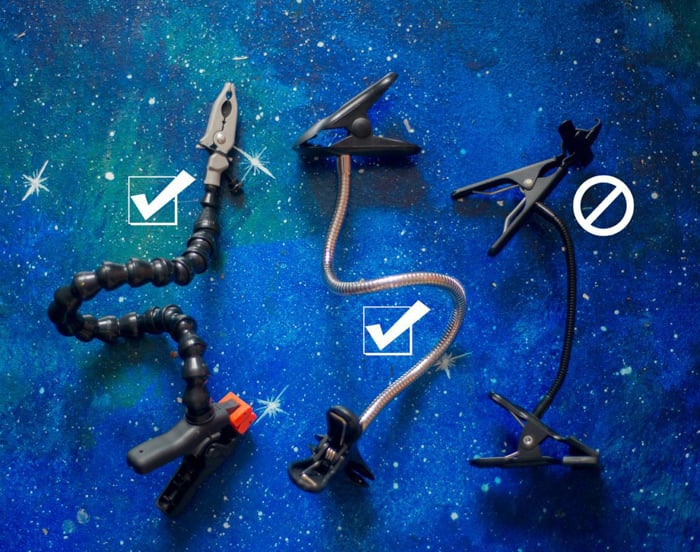
Avoid clamps with too thin and non flexible arms (like the last one)
Keep Your Gear Safe
It goes without saying, but always keep your equipment safe. Don’t put anything electric in the way of splashes, and keep all the cables away.
Prepare a towel. And another towel. You may even want to cover the floor with plastic film. There shouldn’t be too much coffee reaching your camera. But have a stack of napkins handy to be on the safe side.
I would also suggest trying to keep your workplace clean. But that’s almost impossible while shooting color splash photography. It’s going to get out of control. It’s going to get messy and make the floor wet. My suggestion is to stop worrying about it and have fun with it.
Embrace the mess! Let it unravel. You can clean up after shooting, and it’ll be a lot less stressful.
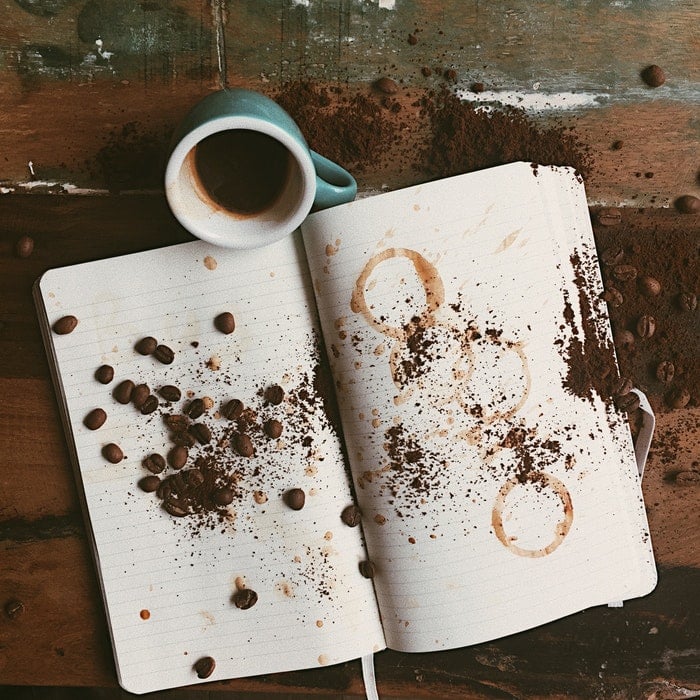
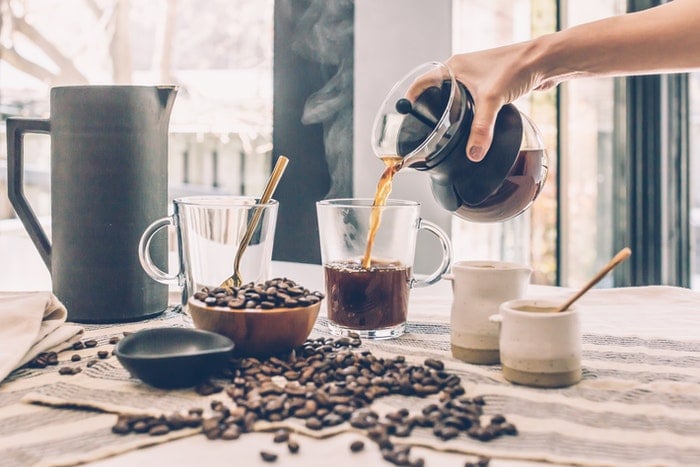
Photo by Viktoria Alipatova on Pexels
Plan the Composition for Your Splash
Let’s get back to our coffee cups! Begin by making a sketch.
I can’t overestimate how helpful this is. You won’t waste your time recombining cups over and over again. You only arrange them in a neat stack at the right angles one after another.
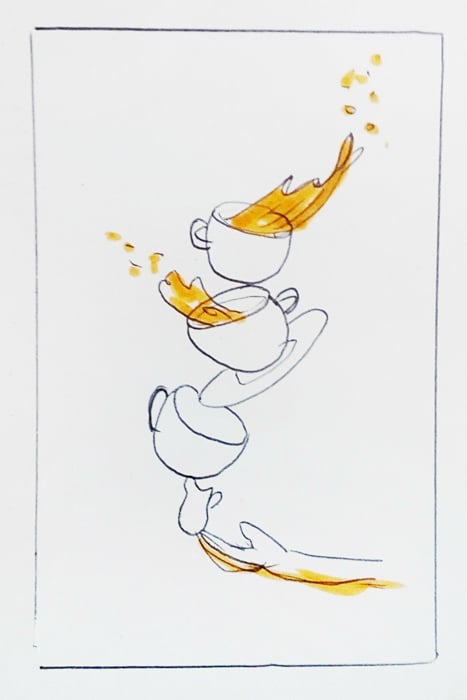
I started with the bottom cup, leaving some space for a little milk jug and my hand.
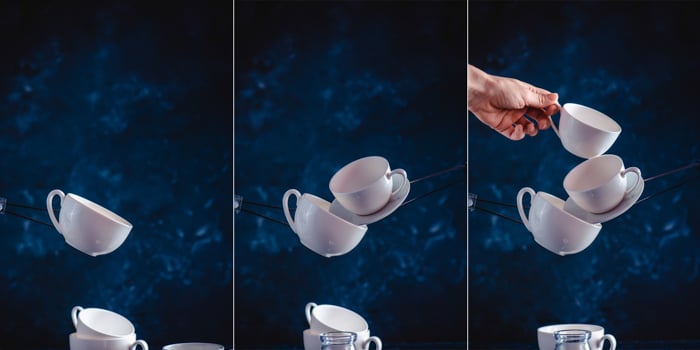
Glue one end of your supports to a cup, and fix their other end with a clamp at a desirable place.
Then add another cup. Try to play with angles and put cups in different positions. This will make your image more interesting to look at. Use saucers, teaspoons, and sugar cubes!
Don’t worry if the supports are visible. But make sure they stay in the background and don’t overlap with the main objects in the scene.
A knitting needle on a smooth background is very easy to retouch. But the same needle going all the way along the surface of the curved saucer is a headache!
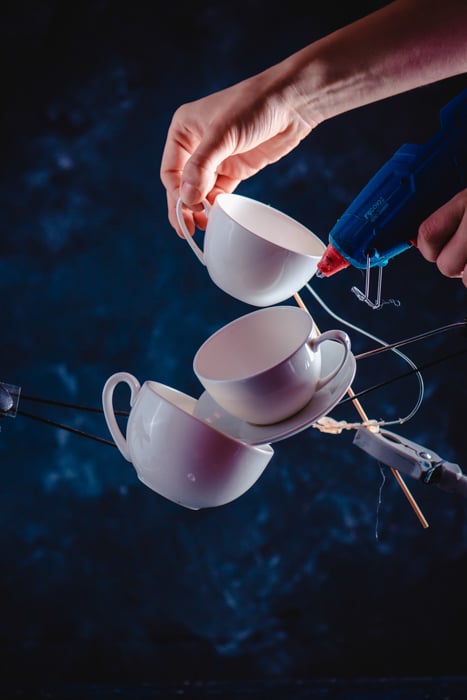
Fix everything with the glue gun. Literally glue the cups together. Don’t be afraid, you’ll be able to remove all the glue and use the cups again later. But now you really need the composition to be motionless.
Try not to make the glue visible, though. Keep it on the back of the cups.
It’s like embroidery—as long as your top side looks good, it doesn’t matter what happens underneath.
Lighting and Camera Settings
You can use any lighting scheme you like. Check out our one light setup or natural light food photography posts for inspiration! I prefer one with a backlight as a key light. It makes the coffee look shiny and transparent.
I used two speedlights. The key one was inside a strip box on the right and slightly behind the scene. The fill one was behind a large diffuser on the left side.
You may notice a sheet of paper at the bottom. That’s an improvised reflector that I needed to light up my hand a bit.
Adjust your speedlights to a low power setting (from 1/16 to 1/128 power will be enough to freeze the motion of liquid). Set your camera in burst mode to take a few shots in a row and focus manually.
Also, put your shutter speed to the flash sync speed (between 1/160 sec and 1/250 sec).
From there, take a test shot to establish what maximum aperture you can get without underexposing an image. That’s all, you’re ready to shoot!

You can see a small black flag on the right side. It cuts some light from the background, making it darker.
Shooting Your Coffee Splash Photos
Before creating a coffee mess, take a “blank canvas” shot. You’ll need it later when the entire scene is soaked in coffee.
With a clean canvas shot, you’ll be able to combine the splashes you like the best and take out the dirty background, cups, and saucers.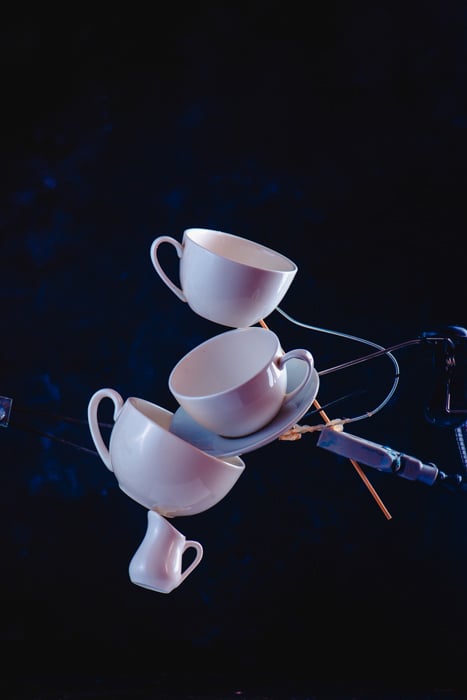
Take a shot with a hand touching the construction from below. Don’t hold it, only lightly touch it. Like it’s weightless and you’re balancing it on the tip of your finger.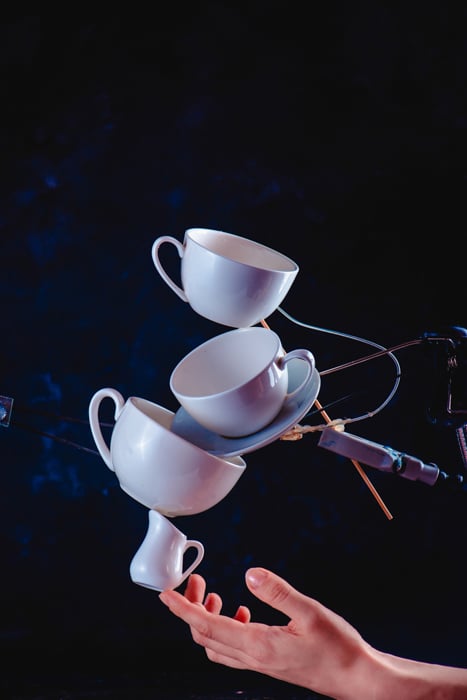
Now on to the most entertaining part! Fill a tiny glass with coffee (make sure you let it cool to avoid any burns).
Quickly pour some liquid into the top coffee cup and take a sequence of shots. If you throw coffee at the right angle, it will bounce off the bottom of the cup and create a pretty natural splash.
Note that the form of a splash changes depending on your speed, the glass you use, and the angle you splashed coffee at. Take your time practicing. The cups are fixed in place so you can make several tries without ruining the scene.
Try different amounts of liquid and different angles before you create a splash closest to an ideal one.

Post-Processing
It’s time to choose the best splash and tweak it a bit. Get your clean shot, the shot with your hand, and place shots with splashes you like best as separate layers above them. Use the Layer Mask to conceal parts that should be hidden.
Click on the Add Layer Mask button in the layer window. Invert the mask by pressing Ctrl+I (Cmd+I for Mac) to hide the entire layer.
Select a large, soft brush. Use it to change the foreground color to white and paint in the area you want to be visible. Or don’t invert the mask and paint the area you want to stay hidden with black.
Since our background is quite smooth, that should be nice and easy.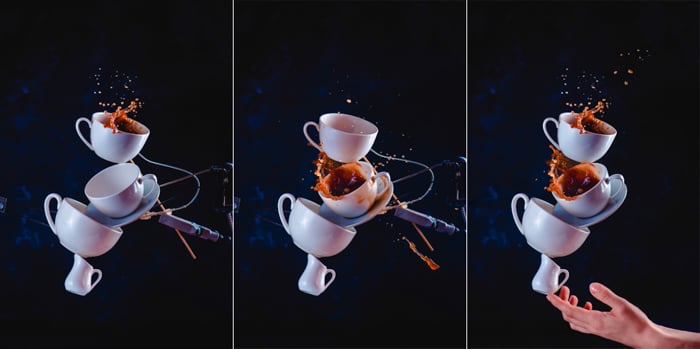
I combined two shots with the most beautiful splashes I got—a shot with my hand and a couple of shots with drops.
After that, I deleted all visible supports with the Clone Stamp and the Patch Tool, adjusted the colors and contrast, and voila!
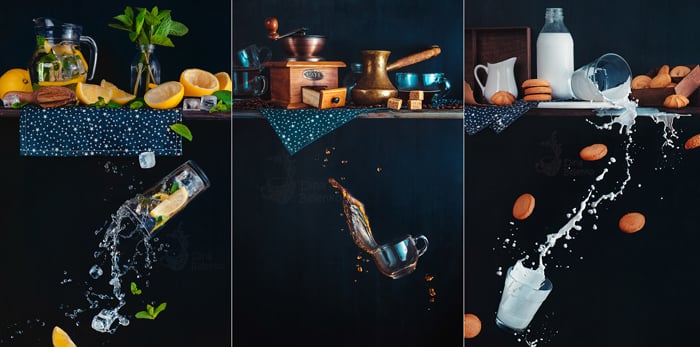
That’s it. Now it’s your turn, make this your own experiment! Here are a few more examples I made with the same trick.
Conclusion
Color splash photography is fun and offers various creative ideas. Create another setup with herbal tea or your favorite cocktail.
Shoot a falling martini glass. Catch a balancing smoothie jar. Add a cookie or some fruits. Change cups to laboratory glasses and drown your studio in colored water. Add some vintage labels and turn laboratory glassware into magical potions.
The possibilities are endless! But, most importantly, have fun!
Check out our Creative Photography Cookbook for more amazing photo ideas!


