If you’re looking to add a touch of the surreal to your photography, then editing infrared photos may be just what you need. Infrared photos are taken with a special type of camera filter that allows you to see light that is normally invisible to the naked eye. This makes them perfect for creating dreamlike images that seem almost otherworldly. But how do you edit infrared photos? Keep reading to find out.
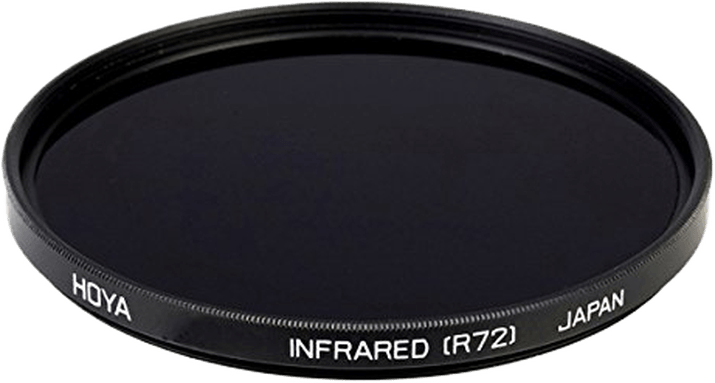
How to Edit Infrared Photos in Infrared Photography
We are used to seeing the world in colors. But there is more to colors than the so called visible light spectrum that our brains perceive. Visible light takes up a small fraction of the entire electromagnetic spectrum.
Infrared light starts right after the red light of visible spectra and is, therefore, invisible to us. In infrared photography, the sensor (or the film) reacts to infrared light while a filter will cut all visible and UV light. For the kind of infrared photography we are interested in, we use the so called near-infrared light.
We don’t usually see infrared images. Because of this, infrared photography can turn any view into an unexpected masterpiece.
All you need is a tripod, as you will be doing long exposures, and an infrared filter such as the Hoya R72. You don’t even have to rush out and invest in a modified camera yet. Just make sure your current camera can see infrared light (photograph the LED light on your remote control). If you want to know more on how to use your stock camera for infrared photography,read this article on how to start with infrared photography, and come back after.
In case you are wondering what some good targets are in infrared photography with a stock camera, landscape, architecture and tree photography are probably the easiest subjects to start with.
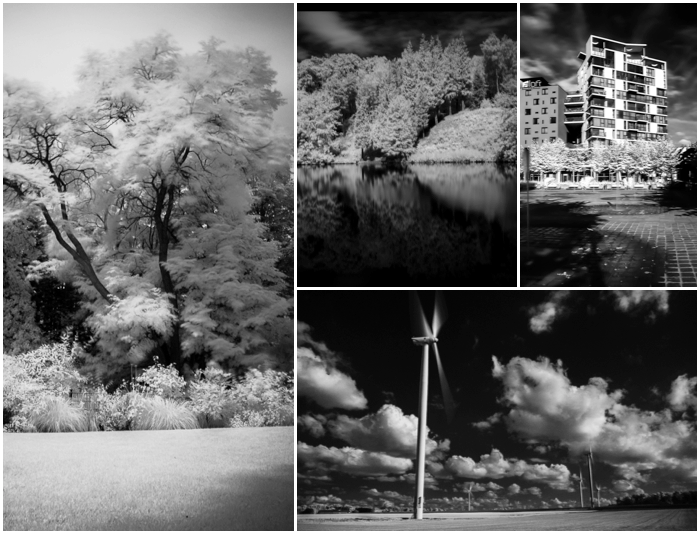
Some examples of infrared photography with stock Panasonic Lumix DMC-GF2 micro four thirds mirrorless camera.
What Do Unedited Infrared Photos Look Like
When you take an infrared photo with a filter, you will see a very red image on your screen or viewfinder. This is because the filter will let only light with wavelengths of 720nm (high reds) and longer pass.
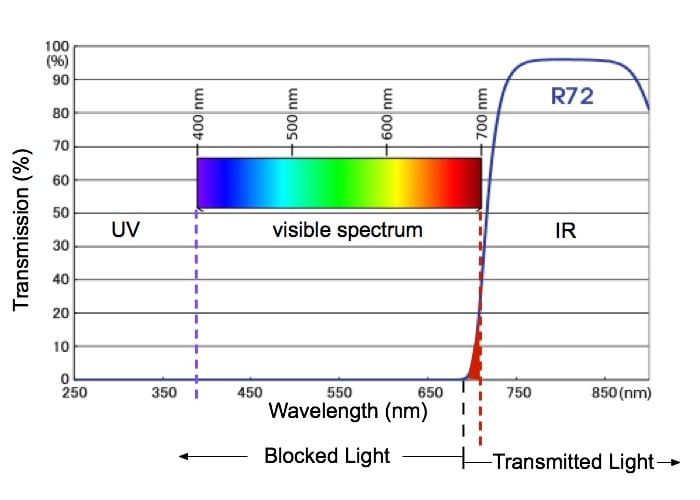
Transmission spectra for the HOYA R72 IR filter. Note how allows a bit of red light to pass.
The fact that the HOYA R72 (720nm) lets some visible red light pass is very useful. With IR filters that block light with longer wavelengths, such as those at 850nm, all visible light is blocked by the filter. This means you will see nothing of the scene you are trying to frame, focus and photograph.
Below is a typical infrared image straight from the camera, taken with the HOYA R72 filter. While it is unpleasantly red, I could easily compose and focus. Editing will make those red images more artistic and pleasing to the eye.
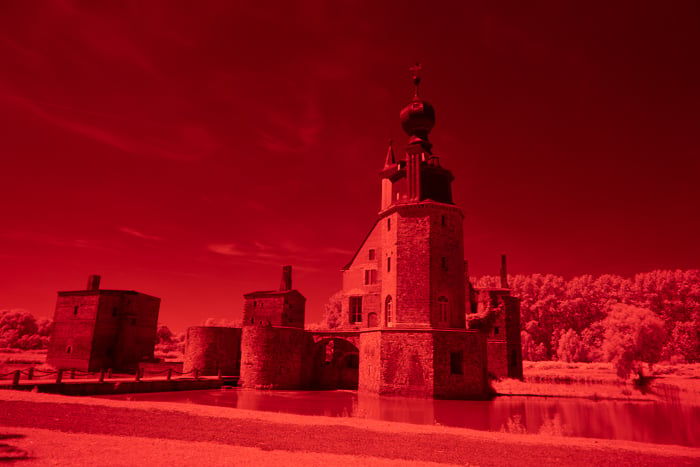
An infrared image taken with the HOYA R72 filter.
4 Easy Ways To Edit Your Infrared Images
We will use the red image above to illustrate the different ways you can edit your infrared photos. My editing software of choice is Adobe Lightroom.
Traditionally, Photoshop is used to edit infrared images. But for this introduction to editing infrared images, I decided to work with Lightroom. It can’t work with layers and it is not as omnipotent as Photoshop. However, it can get the job done with fewer headaches.
The main advantage of Lightroom over Photoshop is that the interface is much easier. There are no layers to understand, you can undo your changes at anytime, start over and batch develop with minimum effort.
And if some editing will require the use of the more powerful Photoshop, you can export your image(s) in Photoshop. Do what you need to and then automatically re-import them to Lightroom.
Black and White Infrared Photography
The easiest way to get rid of the red color is to convert your images to black and white. The image below shows a comparison between the B/W conversions for the same scene when photographed in color versus infrared.
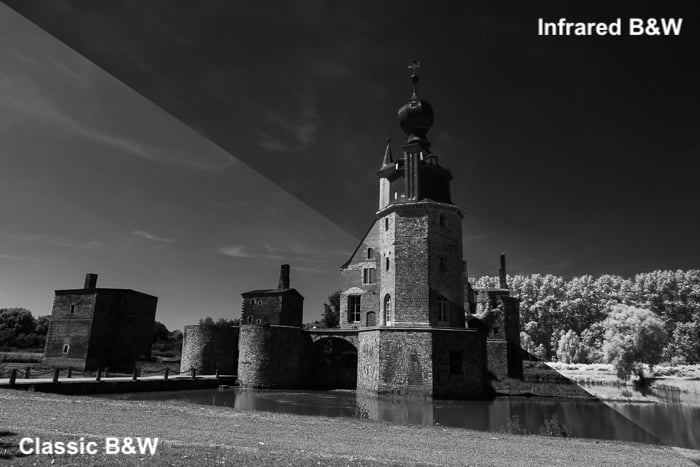
Comparison between a simple B/W conversion from color and infrared images.
As you can see the conversion will remove the red color, but it will not affect the infrared look on foliage, water etc.
The easiest way to convert an infrared image is to use one of the black and white presets available in Lightroom’s Develop module.
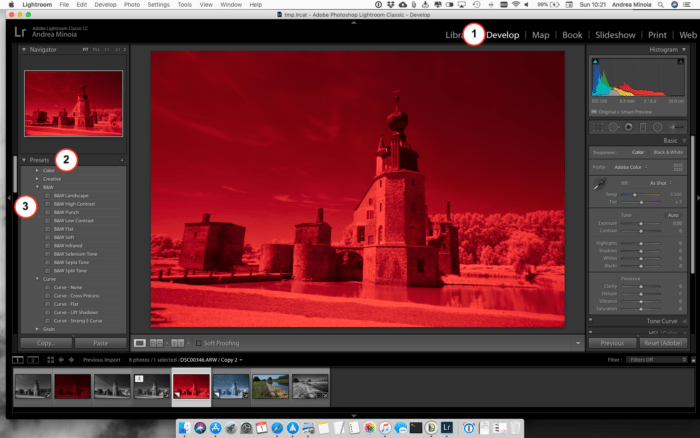
The preset menu in Lightroom Develop Module.
The presets are in the left panel of the Develop module. Click on B&W to open the drop down menu with the different black and white presets. By hovering over the different names you can see how they affect the image.
As you can see, there is a preset called “B&W Infrared” and you may think that it will take a classic image and turn it into an infrared one. It does not do it quite right, as you can see in the image below.
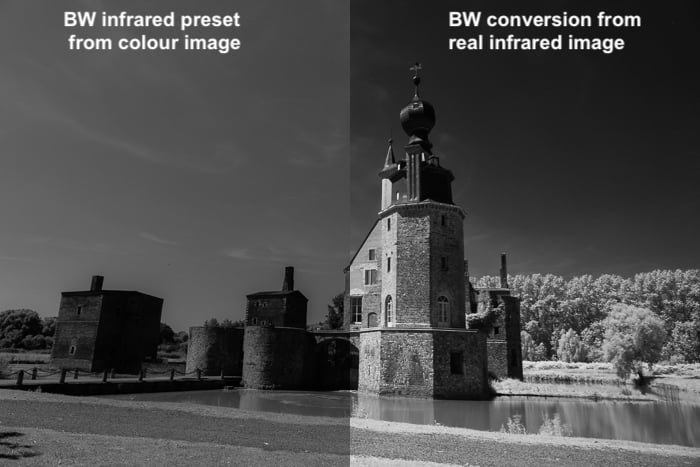
Comparison between the use of the B&W infrared preset on a color image and a monochrome conversion of a real IR image. The foliage is dramatically different.
As a general rule, in fact, if the filter modifies the kind of light reaching the sensor, like an infrared filter or a polariser, the effect cannot be reproduced in post in an easy and convincing way.
The image below shows how some of the B&W presets affect an infrared image. I found that the best ones for landscapes are the B&W Landscape, and B&W High Contrast presets.
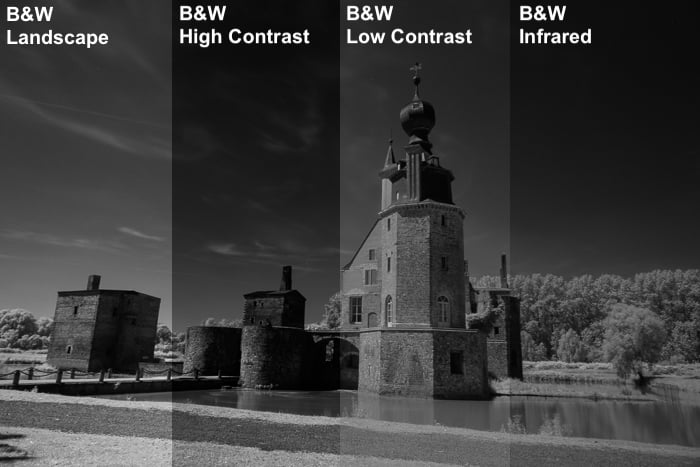
Comparison between some B&W presets on an infrared image.
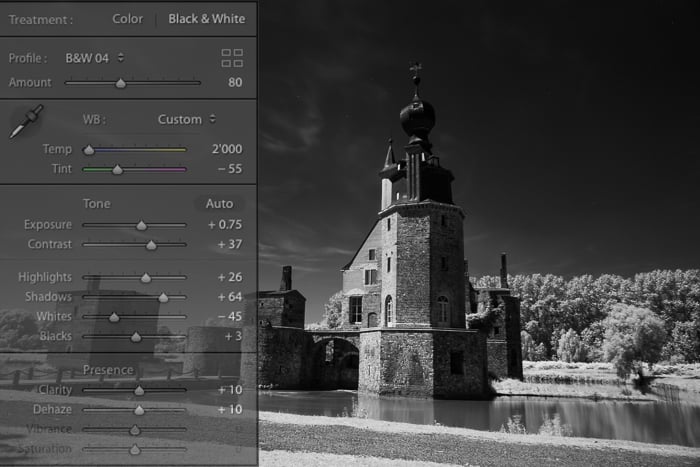
Once you have your image converted into black and white, all that remains to do is to use the white balance eyedropper tool to sample an area that should be white/black or grey.
Then tweak the exposure controls to make it pop, correct distortions and sharpen the image.
Blue and White Infrared Photography
If you have water in your image, it can be interesting to reintroduce the blue color in the sky and water. Basically, instead of a black and white image you will have a blue and white one.
There are many different ways to reintroduce colors in an infrared image, such as swapping the red and blue color channels with Photoshop channel mixer. But here we want to keep things simple. You can dig deeper in this kind of editing once you get more familiar with infrared photography.
Since in Lightroom there is no way to swap color channels, we can use the split toning function, where you assign a color to the highlights and another one for the shadows.
The easiest way is to start with the B&W Split Tone Lightroom preset, to create a basic image with some blue in the shadows.
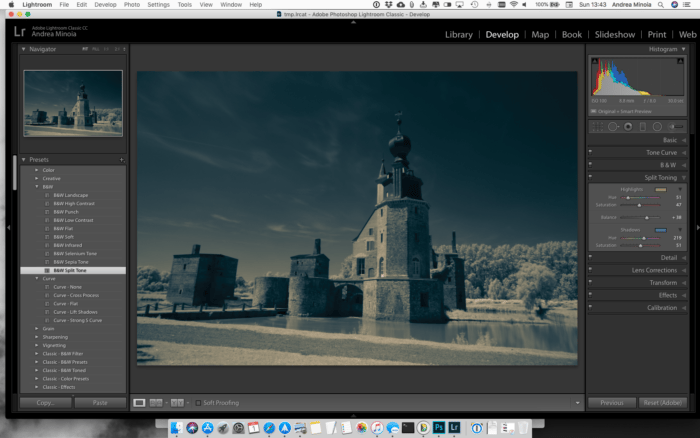
The effect of the B&W Split Tone preset.
This preset will convert the image to black and white, use the Tone Curve to add some contrast and split the tones by assigning a bluish color to the shadows and yellow-ish to the highlights, with a tone balance to weigh the shadows more.
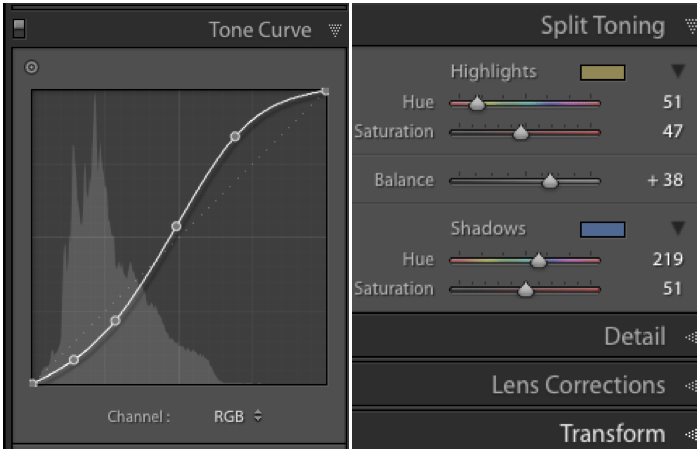
Default settings for the B&W Split Tone preset
Because the highlights are a bit too yellow, you should reduce the saturation of the highlights in the Split Toning panel. For this image I set the highlight saturation to 13 and the hue to 30.
Next, move the Balance slider to the positive value. This will make the highlight tone affect the shadows more.
Here I moved the slider up to +85 and boosted to +100 the saturation for the Shadows.
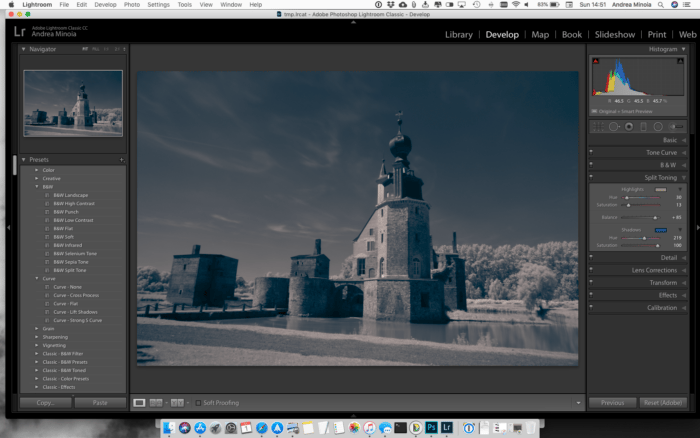
The effect of further tweaking the setting in the Split Toning panel to reduce the yellow color cast in the highlights and to boost the blue in the shadows.
What you are trying to do is to find the sweet spot where the more evident blue color is confined to the darker tone, which should be the sky and the water.
Finally, we can use a brush to selectively darken the water, thus making it more blue, and to brighten the foliage and the castle to reduce residual blue color cast.
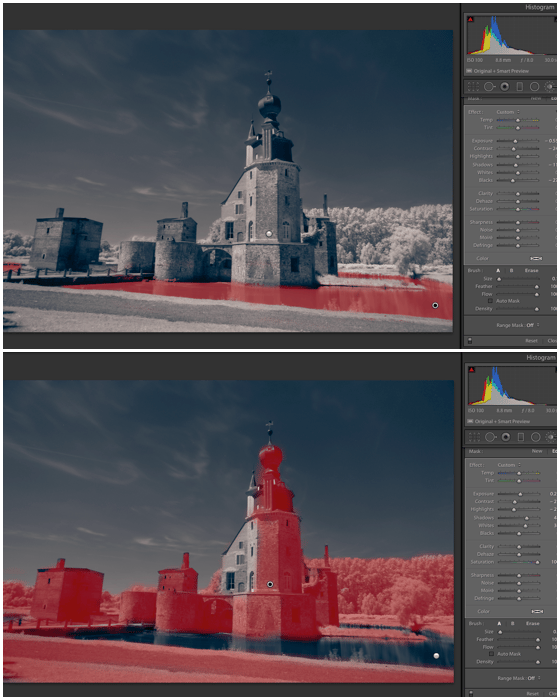
Use the brush tool to selectively affect the brightness in the different parts of the image.
Finally, tweak and sharpen the image to improve the contrast and exposure for the overall image. Be careful not to wash out the blue color by brightening blacks and shadows too much.
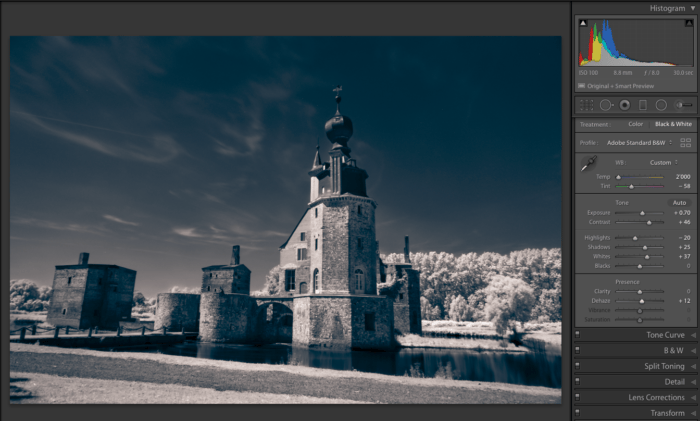
Final touches to add some punch.
This could reintroduce some color cast in the highlights, so go back to the Split Toning panel to remove it. In my case I changed the Highlight Hue to 42 and saturation to 5.
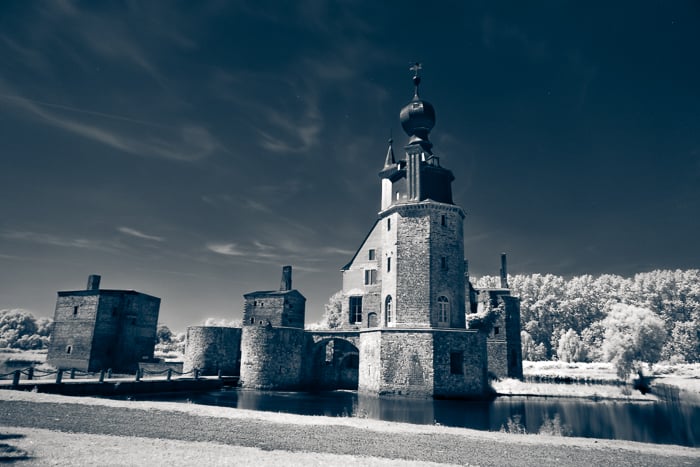
The best way to achieve pure white is to create both a black and white, and a blue and white image in Lightroom. Then open those as layers in Photoshop. Here you can mask the desired parts.
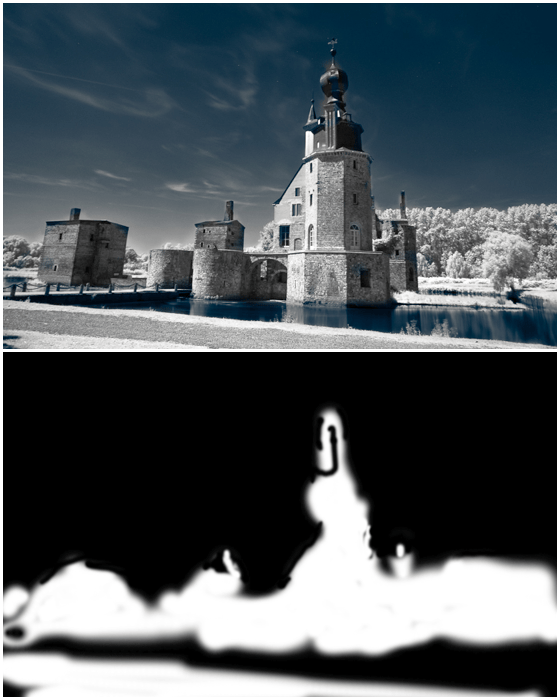
A rough mask done in Photoshop. It uses data from the black and white image to remove blue color cast from the foliage, grass and castle.
There are no rules with false colors. You can experiment with white balance and split toning to change the look of your image.
Custom White Balance
Use the eyedropper tool to set a custom white balance. Sample an area in your photo that should be white or neutral. This will likely turn the image from red to orange-ish.
If you are happy with the result, add a bit of contrast, tweak the highlights and shadows, sharpen the image and you are done.
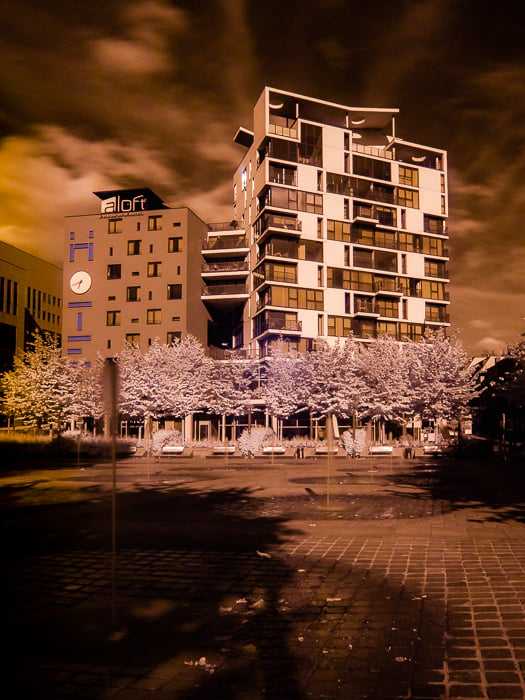
A false color infrared image using tones of orange, obtained by setting a custom white balance.
Photoshop and Levels: More False Colors
This one requires Photoshop. If you have Adobe Lightroom CC, you also have Photoshop CC. And if you haven’t installed it yet, this is the time to do it.
Let’s consider this photo of a pond.
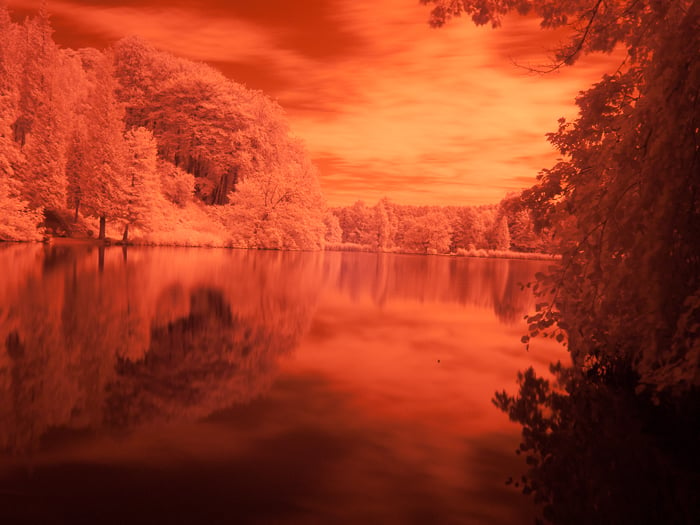
A nice pond in a popular family park near Brussels.
I found that you can create nice toning by using Levels in Photoshop. To fire up the level dialog window you can use the shortcuts cmd+L in Mac OS X or ctrl+L in Windows or go to the Image->adjustment menu and choose Levels.
Now, use the grey eyedropper in the Levels dialogue window to sample an area in your photo that should be a kind of dirty white or grey.
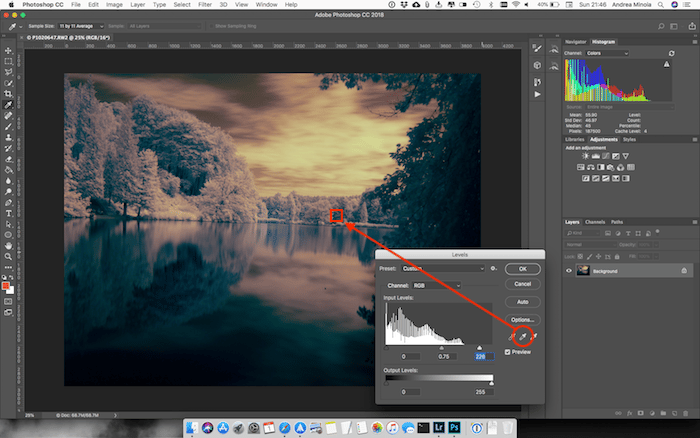
I used the grey eyedropper in the levels dialog window in Photoshop to affect the image colors.
This simple step often gives quite interesting results. You can try to sample different points to see how this will change your image. When happy with the colors, you can further tweak the image in Levels by moving the sliders under the histogram to brighten or darken the image and add or reduce contrast.
When happy I confirm and save the image. Back in Lightroom, I do the latest adjustments to produce my final image.
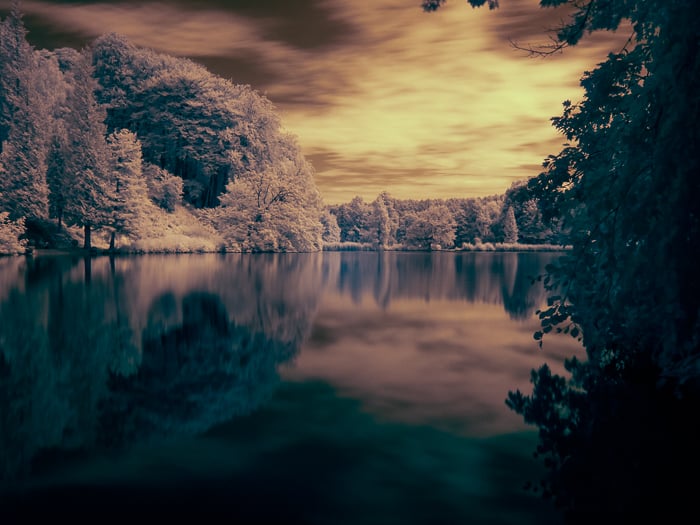
The final image has a kind of a sunset feeling, but is clear is not ordinary sunset.
Conclusion
This article has only scratched the surface of infrared editing. But I hope it will help you to edit your first images and to inspire you to dig deeper.
Experiment and try to learn other editing techniques for infrared photography.
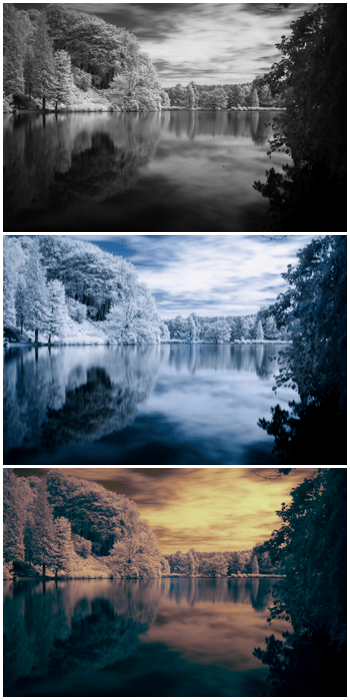
One image, three styles: don’t be afraid to experiment.


