If you’re looking to photograph the upcoming lunar eclipse, you’ll need to make sure your camera is set up properly. Here are the best camera settings for lunar eclipse photography.
Camera Settings For Lunar Eclipse: What Is a Lunar Eclipse?
A lunar eclipse happens when the Earth moves between the Moon and the Sun.
It should not be mistaken with a solar eclipse when the Moon positions itself between the Earth and the Sun.
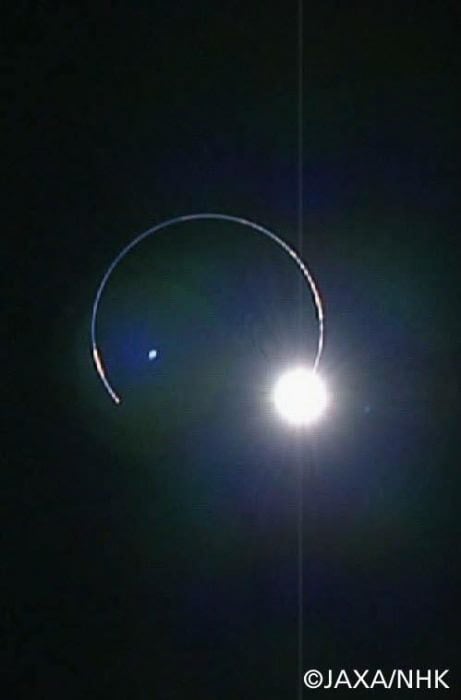
This photo was taken from a spacecraft orbiting the Moon, showing the Earth about to cover the Sun. For us here on Earth, this would be a lunar eclipse.
Why Does the Blood Moon Occur During an Eclipse?
Sometimes, a totally eclipsed Moon has a reddish color. The reddish tint of the Moon is the result of sunlight getting scattered in the atmosphere. This faint scattered light is what illuminates the Moon during totality.
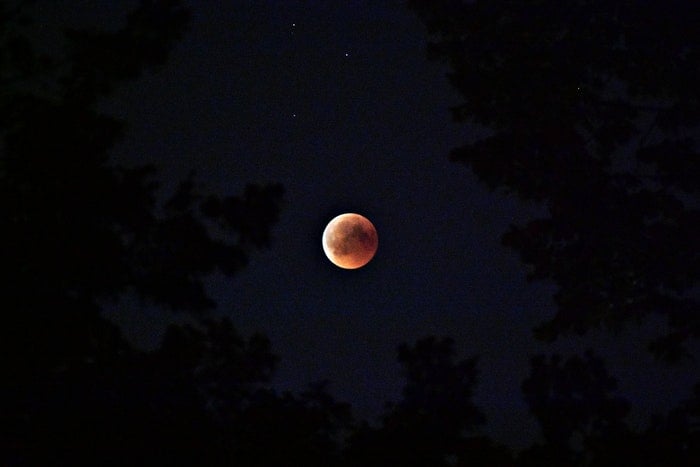
It happens because the Earth is completely blocking the direct sunlight from reaching the Moon. Because of its reddish color, this lunar phenomenon is called a blood Moon.
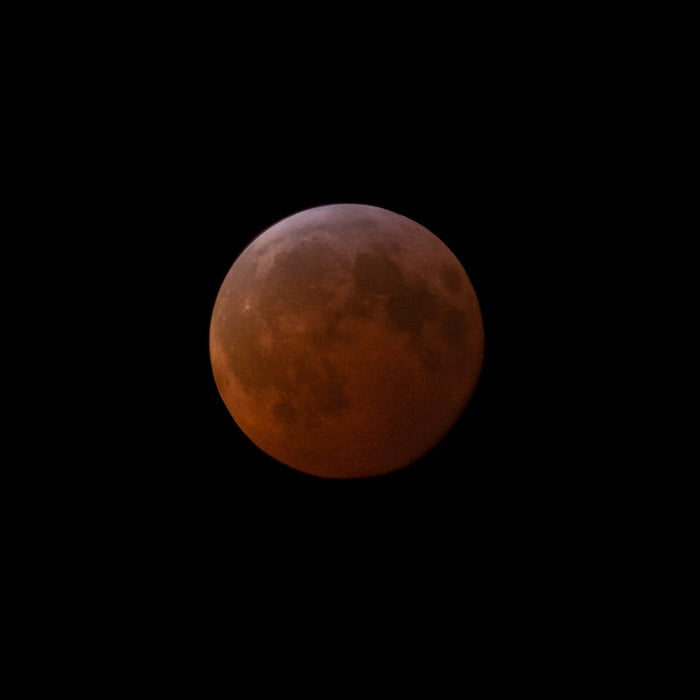
The Blood Moon
When Is the Lunar Eclipse Visible?
Two to five lunar eclipses happen every year. But not all of them are total lunar eclipses. Time and Date is an excellent website to check the date of the next eclipse. You can see when it will happen and from which part of the world you can see it.
Depending on where you are and the Moonrise/set time, you may not be able to witness the full eclipse. From your location, the Earth may not shadow the Moon completely. That way, you will witness only a partial lunar eclipse.
The number of solar and lunar eclipses is pretty much the same in a year. Because the Earth is much bigger than the Moon, lunar eclipses are visible from more places on Earth than solar eclipses.
The Earth’s shadow is rather large, so eclipses of the Moon can take a few hours to unfold.
This gives you plenty of time to both observe and work on your photography. You can test and adapt the camera settings to the ever-changing Moon brightness.
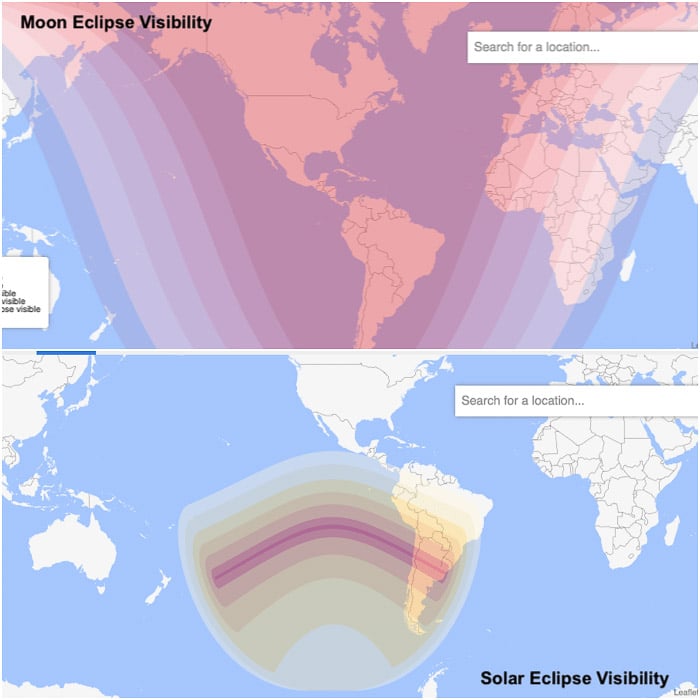
Comparison between worldwide visibility of a typical Lunar Eclipse (top) versus a Solar Eclipse (bottom). Source: timeanddate.com
Lunar Eclipse Timeline
A lunar eclipse unfolds in steps, as illustrated in the scheme below.
During the eclipse, the Moon will approach the Earth’s shadow. This is a Penumbral Eclipse. In time, the Moon will gradually enter the Umbra. This is the darkest part of Earth’s shadow (Partial or Umbral Eclipse).
When the Moon is inside the Umbra, you get the full eclipse. Because Earth’s shadow is larger than the Moon’s, this phase can last one hour. The Moon will continue to darken while getting red. It will gradually reach the maximum of the Eclipse.
After the maximum, the Moon will get brighter. The reddish color will vanish. This is the end of the full eclipse.
Next, the partial and penumbral eclipses will end and the Moon will be in full sunlight once again.
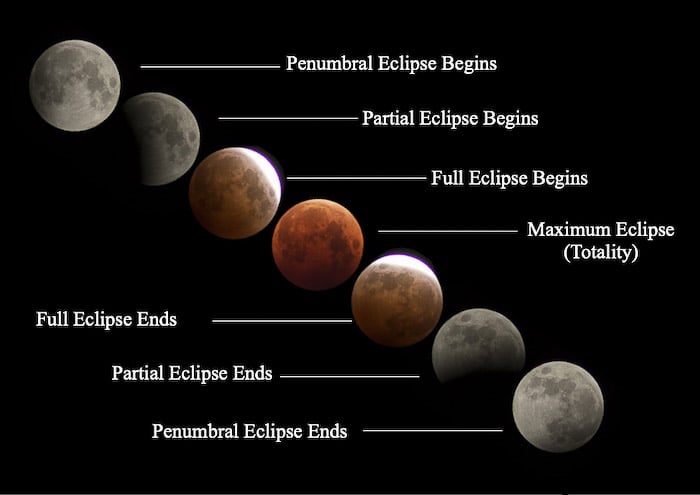
Timeline of a lunar eclipse
How to Photograph a Lunar Eclipse: The Gear
Binoculars
This is not a piece of specific photography equipment. But it’s good to observe the eclipse before taking the winning shot. A simple 8×40 binocular will allow you an immersive, 3D-like experience.
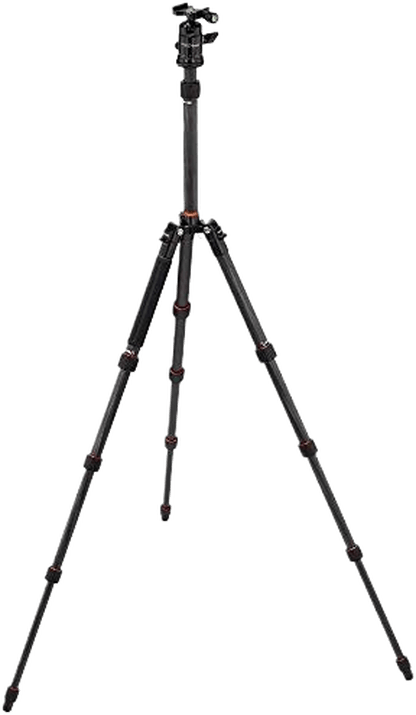
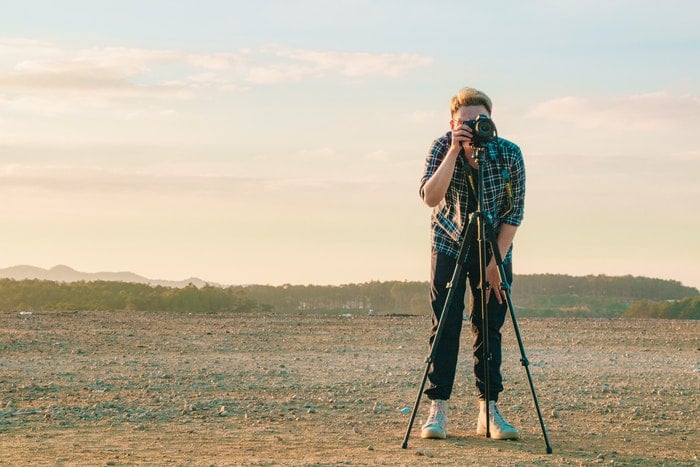
Tripod and Tracking Heads
A tripod is a must-have. It will allow you to set up your DSLR camera for amazing images.
You might have to compete for your photography spot. Particularly if you want to photograph the eclipse and the landscape using a wide-angle lens. Plan to be at your location well in advance.
The Moon moves quickly in the field of view of a long telephoto lens or telescope. If you want to follow the Moon during the eclipse, consider a 3-way pan head rather than a ball head. That way you can re-center the Moon in the frame with ease.
Better still, you can use a tracking head such as the SkyWatcher Star Adventurer.
Remote Shutter
A remote shutter/intervalometer will allow you to create a time-lapse of the event. It will also prevent camera shake.
Lens Heater
Lunar eclipses are long-lasting. If you are following one during the winter, fog and ice can form on your lens. This will soften your images and add haze.
A USB-powered lens heater wrapped around your lens will solve this problem. You can also strap a hand heater pad to the lens.
Whatever you use, take a test shot to ensure your focus is still good. If not, refocus.
What Lens Should You Use?
Wide-angle lenses are great for the lunar eclipse especially if the outcome is a stacked photo of the moon. You can capture it as it unfolds over an interesting landscape.
Even if you are interested in isolating the Moon, you still don’t need extreme focal lengths.
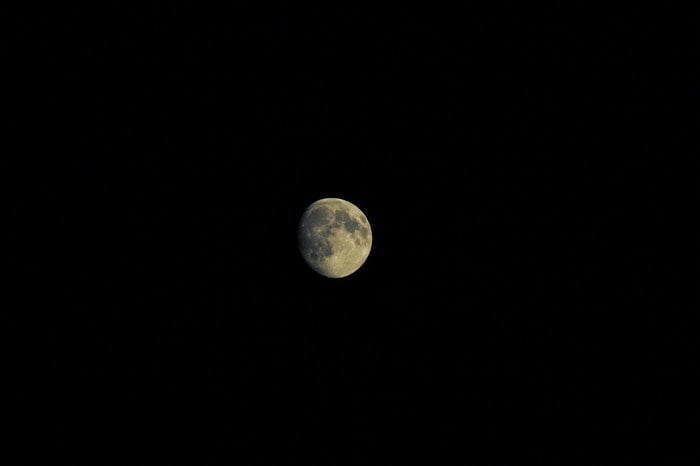
A telephoto lens or zoom lens of about 300-400 mm is a good starting point. The biggest features of the Moon surface will start showing with a decent amount of detail.
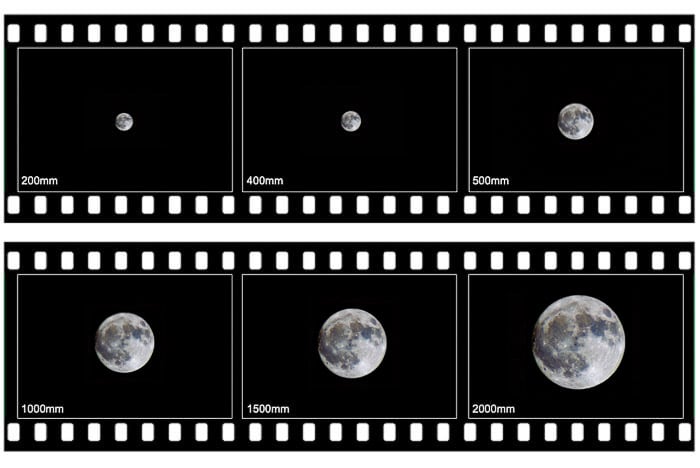
The full moon, at different focal lengths
If you are on a budget and don’t have a long focal lens, you may want to consider using an old, manual lens from the film era. They are rather cheap and still have good optics.
I took many of my lunar and solar images with an old Olympus Zuiko OM 200 f/4 with its 2X teleconverter. I used it on my micro four-thirds Olympus OMD camera.
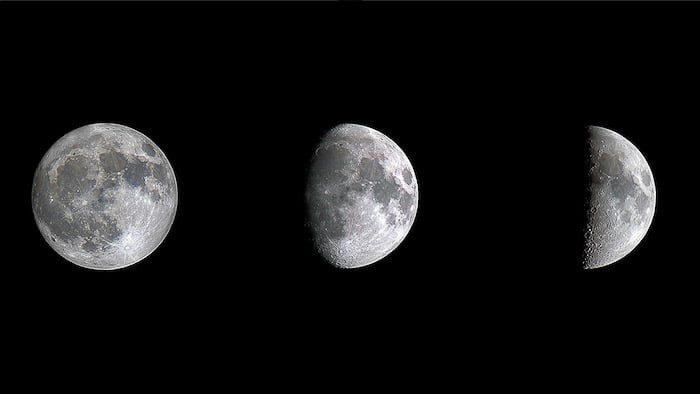
The Moon during different phases, photographed with a 40+ years old, fully manual, Olympus Zuiko OM 200 f/4 and Olympus Zuiko OM 2X-A teleconverter, on Olympus OM-D EM5 Mk ii camera.
What Camera Should You Use?
Any camera will do, as long as you can use a long focal length lens. Low light and high ISO performance are not much of an issue here.
Cameras with crop sensors have an advantage. They fill the frame better at any given focal length than full frame cameras.
This is because they will show a narrow field of view.
If you have only one setup, you have to decide whether you want to capture the unfolding of the eclipse on a landscape, using a wide-angle lens. Or if you want to zoom on the Moon, in a classic astrophotography style.
If you have two cameras, you can use two setups to capture both the Moon and the unfolding of the eclipse.
Camera Settings for Lunar Eclipse Photography
First of all, set your camera to shoot in RAW. Next, consider using an ISO value of about 400 or 800.
The Moon will get quite dark and you don’t want to risk motion blur with long exposures. Especially if you are not tracking its movement while using a telephoto lens.
If you are on a tripod, remember to disable any image stabilization. As for aperture, I rarely go wider than f/5.6.
White balance should be set to sunlight. By shooting in RAW you will be able to adjust it during the editing.
How to Focus on the Moon
When it comes to photographing celestial bodies, I prefer to use manual focus. Use the live view, magnify the lunar surface and try to get a contrasting region as sharp as you can. It is even better if your camera has focus peaking as a feature.
When I have to focus on the full Moon, I zoom in on the Plato region.
Plato is iconic and easy to find crater at the edge of Mare Imbrium. Below it, there are the Montes Teneriffe.
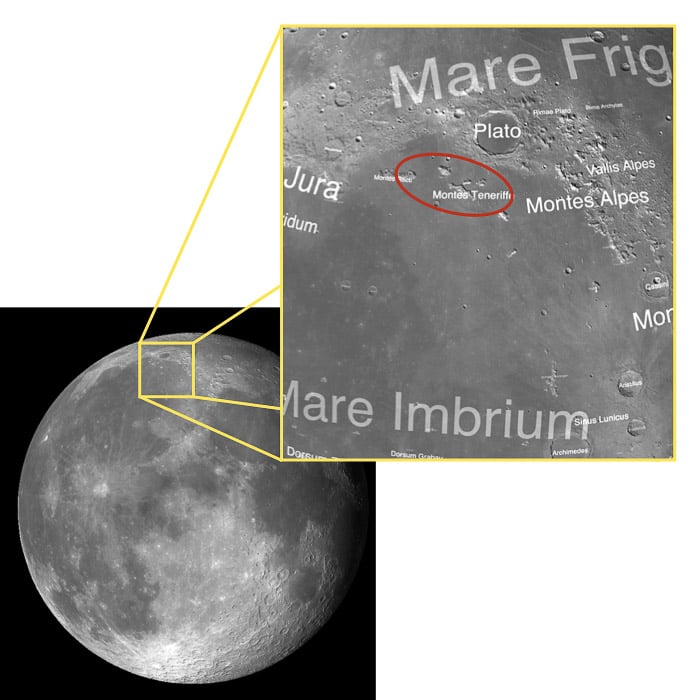
Montes Teneriffe (circled in red), near Plato is the perfect feature to manually focus on when the Moon is full.
How to Set Your Exposure for Eclipse Photography
If you are following the entire eclipse, the amount of shadow cast on the Moon will vary. So will the Moon’s brightness. This means that you will have to adjust your shutter speed from time to time.
Here is a handy formula to calculate the shutter speed in seconds, ss, for a given aperture, f, ISO value, I, and Moon brightness, b:
ss = f^2 / ( I * 2^b ).
Moon brightness for the different phases of a Lunar eclipse appear in the scheme below.
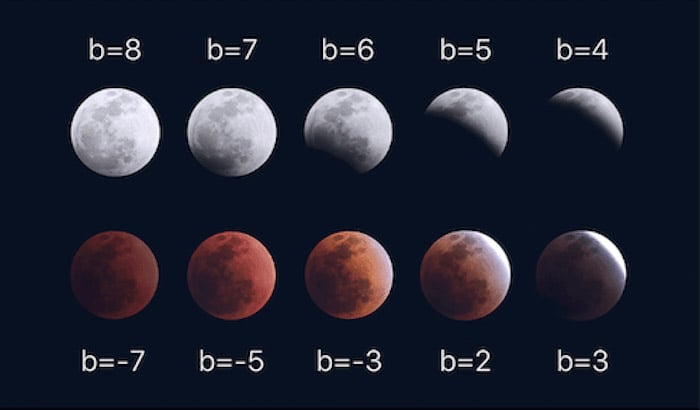
Moon brightness (arbitrary units) for the different phases of a lunar eclipse. Image Credit: Sky Guide App.
Say you are using ISO 400 and f/8. To expose the full Moon (b=8), keep your shutter speed at 1/1600s. With the same ISO and aperture settings, your shutter speed will drop to about 20 seconds during totality (b=-7).
These settings are indicative and not foolproof. The actual brightness of the Moon is affected by visibility conditions, i.e. haze, humidity and other atmospheric factors.
The Moon moves faster than the average star. If you are not tracking it with a tracking mount, you may need to use a more conservative version of the 500 rule (say, 300).
This will help you guesstimate the slowest shutter speed (ss) you can use without blurring the Moon with your setup.
In short, the rule reads like this:
ss = 300 / (CP * FL)
SS is the shutter speed in seconds, CP the sensor crop factor and FL the focal length.
If you are using a 12 mm lens on a micro four-thirds camera, for example, the slowest shutter speed you can use will be ss = 300 / (2*12) = 12.5 seconds.
With this in mind, you can use the formula with the Moon brightness ( ss= f^2 / ( I * 2^b ) ) to set the aperture and ISO value.
This is so that you will be able to shoot faster than 12.5s during totality, i.e. when the Moon is darkest.
Capturing the Eclipse and the Landscape
If you have only a moderate telephoto reach, it may be best to go for landscape composition. You have to get an interesting foreground to keep your image fresh and interesting.
The Moon is bright throughout the eclipse, except for the totality moment. Because of this, you can get away even with photographing from the city. Try capturing the path of the Moon during the eclipse over an iconic cityscape.
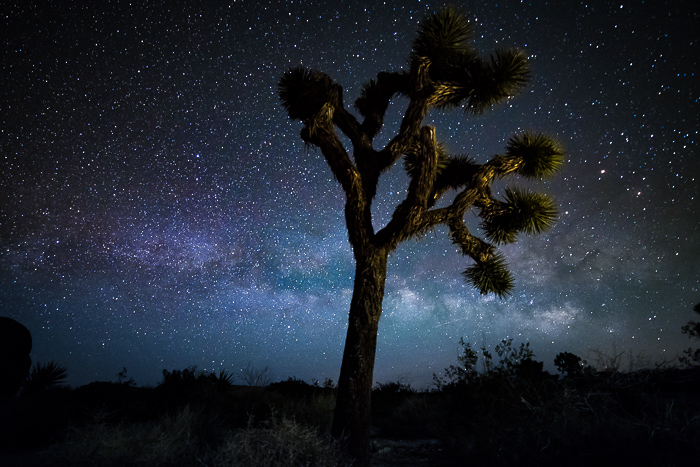
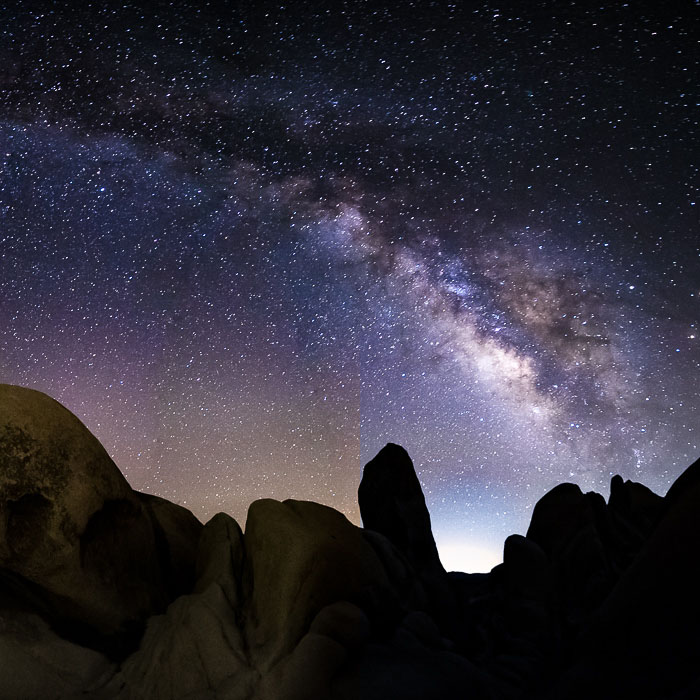
Interesting lone trees, mountain peaks, and rock formations make exciting foreground too.
In this case, since you want to show the path of the Moon across the sky, you don’t have to track the Moon. Its small size in the frame will allow you to stretch your shutter speed without introducing motion blur.
When you go for this kind of time-lapse, an intervalometer is a must. If your camera does not come with a built-in intervalometer, get an external one.
Also, bring a fully charged battery and an empty memory card. Take a frame every minute or so. This way you will have more images to choose from when creating your composite image.
Composite image of a total lunar eclipse during a Supermoon over Santa Fe, New Mexico, USA. Image Credit: bigstockphoto.com/Dean Fikar
How to Capture Moon Details
To isolate the Moon, you need a long focal length. This isn’t much of a problem when photographing the full Moon from a fixed tripod. But you may risk blurring the Moon during totality.
Using my setup with the old telephoto lens and 2X teleconverter (800 mm equivalent on a full frame camera), the 300 rule above will give me a slower shutter speed of less than half a second.
For this reason, it’s better to track the Moon or choose a shorter focal length.
In terms of editing your photos, check out this article for all you need to know about editing astrophotography shots.
How to Get Creative With Eclipse Photography
Let’s have a look at all the interesting things you can show in your lunar eclipse photography.
The Classic Composite Image
Let’s begin with the classic: create a composite image.
Choose your best images where the Moon is as sharp and detailed as it can get. Then, make a collage.
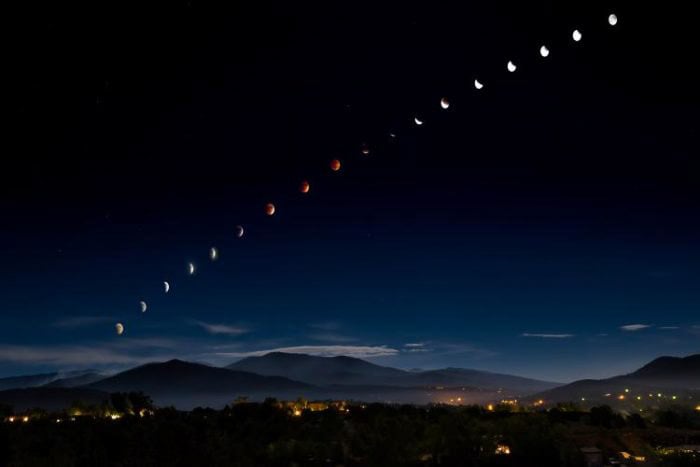
If you photographed a landscape, align the foreground for all your images. Reveal the Moon from each frame to create a path in the sky.
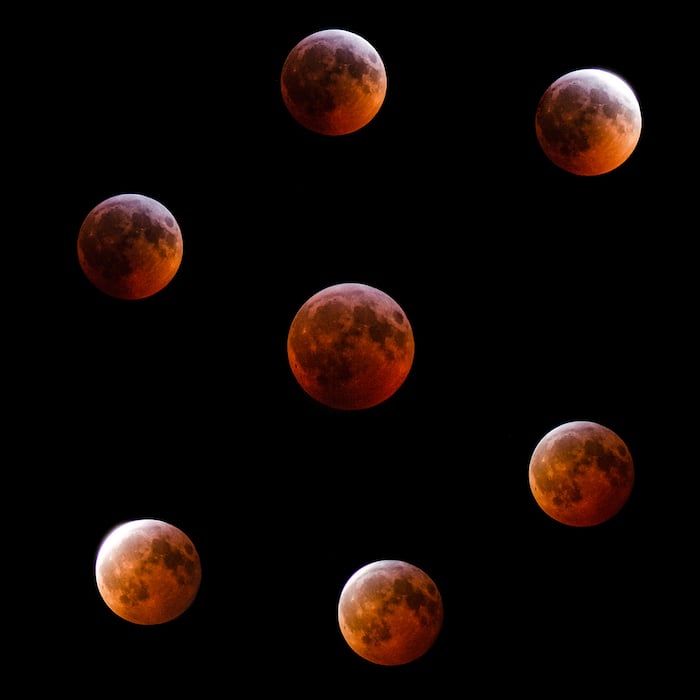
If you have isolated the Moon, try to keep your composite symmetric, both in shape and in Moon appearance.
In the composite below, I arranged my moons in an “S” shape. The darkest Moon (slightly magnified) is in the middle, to show the evolution of the full eclipse only.
The sequence begins with the top right Moon.
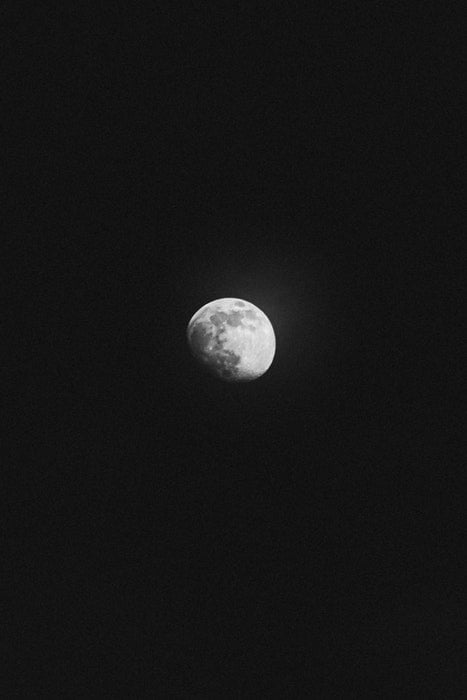
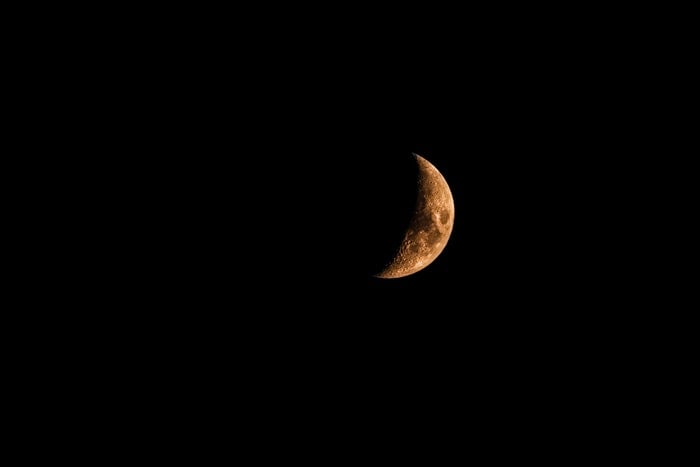
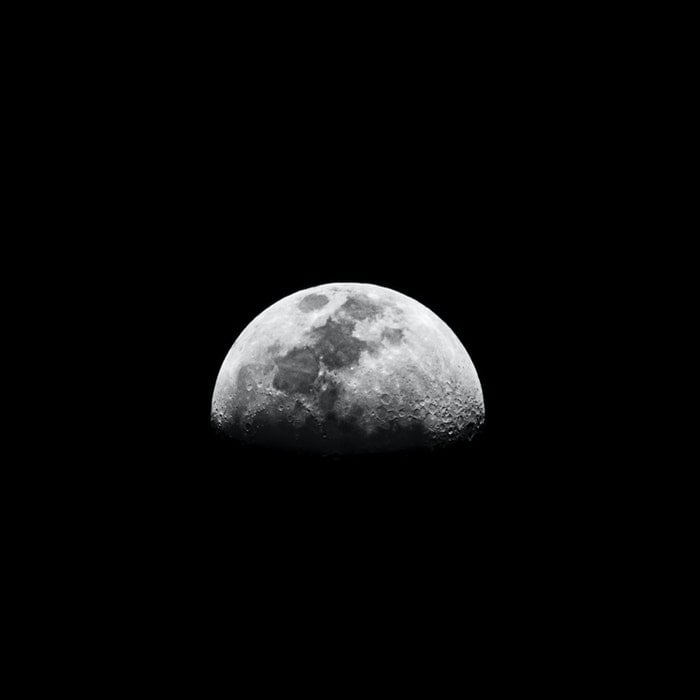
The Moon During the Partial Eclipse Phase
Before totality, the presence of the penumbra ensures a gentle gradient in Moon brightness.
This is a feature you don’t find during classic Moon phases. The transition between light and dark is much harsher.
Take advantage of the partial eclipse to create a more compelling, interesting and moody image of the Moon.
Here I have rotated the Moon, so to create a moody image that looks like the poster for a SciFi movie.
The Stars and the Moon
Often, you don’t get to see stars right next to the full Moon. But during a lunar eclipse, you can photograph both the full Moon and the stars. This is because the Moon gets so much darker than usual.
Depending on your gear and settings, you may need to edit the images twice. Once for the Moon and once for the stars. And then merge the two copies into a final image.
You can learn more about capturing the starry night sky with Milky Way Mastery!
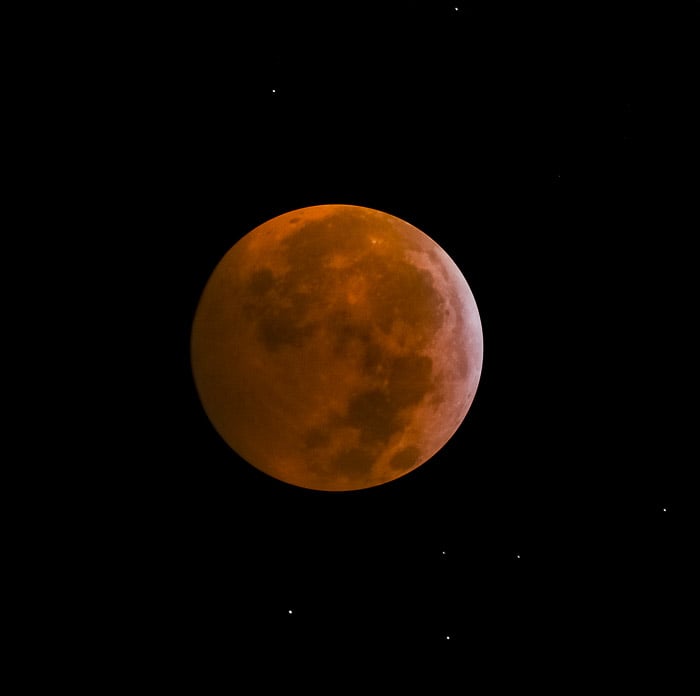
Blood Moon, during totality. Stars can be seen in the sky around the Moon.
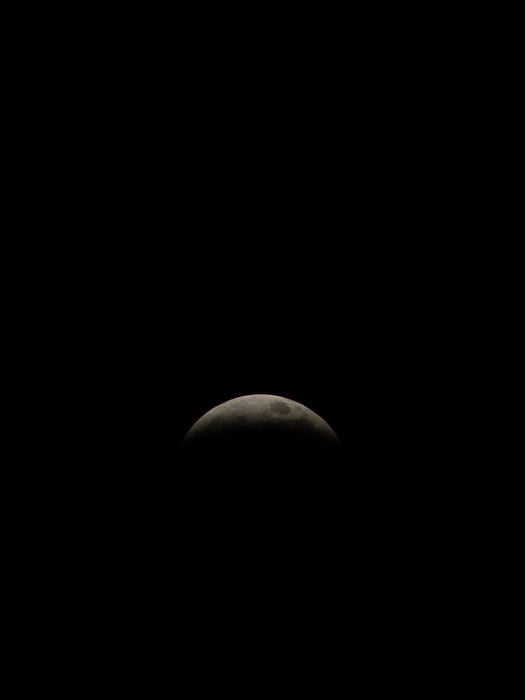
The Moon Before/After Totality: The Turquoise Effect
Near totality, when a bit of the Moon is still at the edge of the Umbra, the so-called Turquoise Effect takes place.
In this phase, you may notice a faint blue or purple area near the brightest region of the Moon.
Using auto white balance or doing it manually using a grey area of the Moon, should make the blue color pop.
This is not a fake effect. The bluish color is due to sunlight shining through the stratosphere and through the ozone layer.
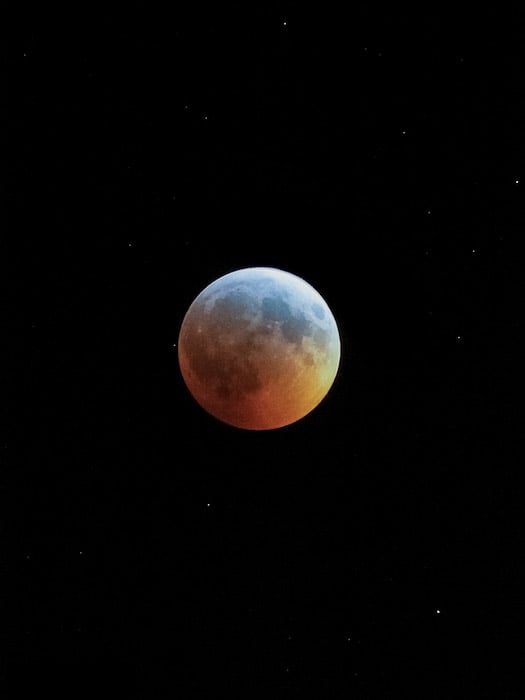
The Turquoise Effect, right before totality.
Stars and Planets
Getting close to totality, you will see stars around the Moon. It is worth checking if any notable star (or planet) is near the lunar disc.
In the image above showing the Turquoise Effect, you see a star near the left edge of the Moon. That is a faint star.
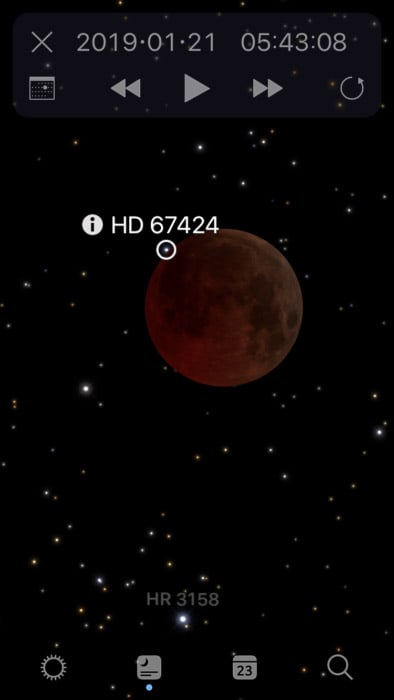
Checking with the Sky Guide App, I was able to determine that the Appulse in the previous image is with the star HD 67424.
Meteor Impacts
During the last lunar eclipse, a meteorite hit the darkest side of the Moon during totality.
Many people taking videos or very short exposures were able to capture it.
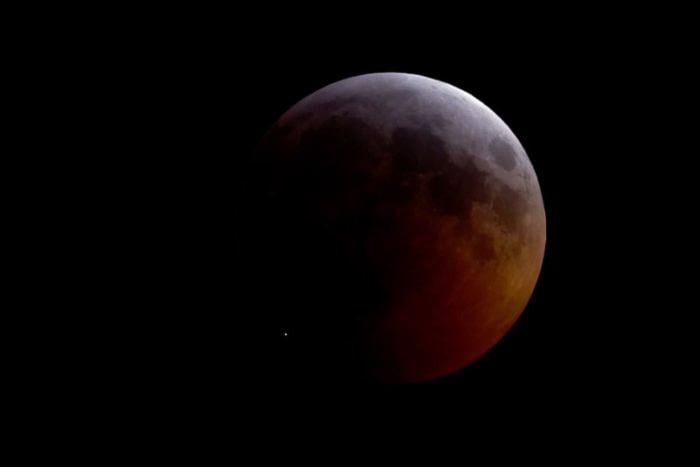
The flash from the meteorite that struck the Moon during totality, last January 21st 2019. Image Credit: Griffith Observatory.
Conclusion
There are many elements to consider when shooting a lunar eclipse. You only have a few opportunities in a lifetime to capture a total Lunar eclipse, so it’s essential to be prepared. Make sure you have all the gear, and brush up on our tips before you go!
If you are eager to try the tips in these articles, check the eclipse page of the Time&Date website.