Exploring the great outdoors is one of the best things about landscape photography. You can feel invincible when photographing the first rays of the sun rising over rolling hills.
But it is often challenging to know how to photograph these fantastic scenes. The light changes with the weather and time of day, and so should your camera settings. Let’s go through the best landscape photography settings you should be using.

A Guide to Landscape Photography Settings
Aperture is essential in landscape photography. Aperture helps determine how much of the world in front of you is in focus. You usually want everything in focus for landscape photos. This means that you want a wide depth of field.
Depending on the scene, anything from f/11 to f/16 will work. First, set the camera to f/16 and see how the photo looks.
If you need more light, f/11 works fine, especially when the foreground isn’t too far from the background. This way, you still get a wide depth of field. Sometimes, even f/8 is acceptable, depending on how far the background is from the foreground.
As a general rule, the larger the aperture number, the more in focus the scene will be front-to-back. You should select a focus point about one-third of the way into the image.
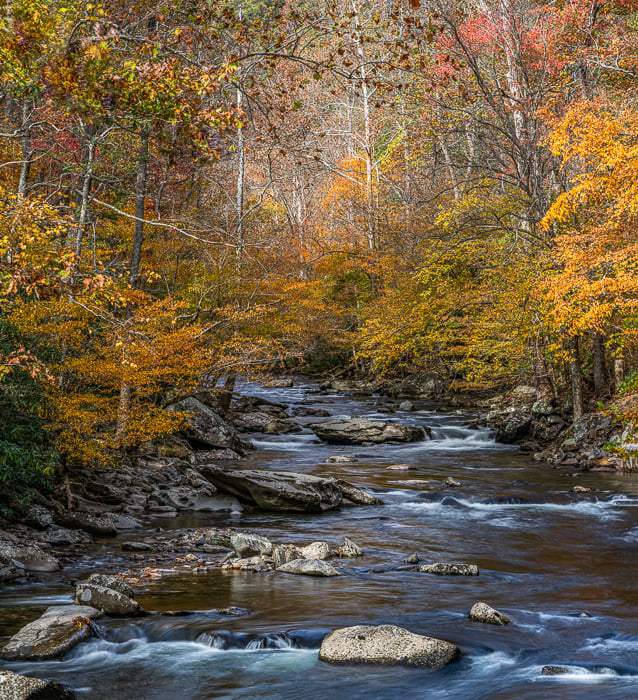
For this photo taken in the Smokey Mountains, my aperture was at f/11.
The day was overcast, and the scene was in the shade. The furthest trees were relatively close to the trees in the foreground, so I didn’t need an extensive depth of field.
I usually don’t use f-stops higher than f/16. Higher numbered f-stops sometimes create diffraction. This is an imperfection of the image that results in lighting distortion.
It occurs in the lens and makes your image less sharp after a certain aperture value. This value differs from lens to lens. So, even though my camera can photograph at f/32, I don’t use that setting.
Think of f/16 as the best compromise. It’s the aperture that gives the most focus but doesn’t risk distorting the image.
Camera Settings: 5 seconds, f/11, ISO 100
Best Shutter Speed Settings for Landscape Photography
I often start photographing a scene in Aperture Priority mode. This option may be labeled with an A or an AV on your camera. In Aperture Priority mode, I set the f-stop I want, and the camera chooses the best shutter speed.
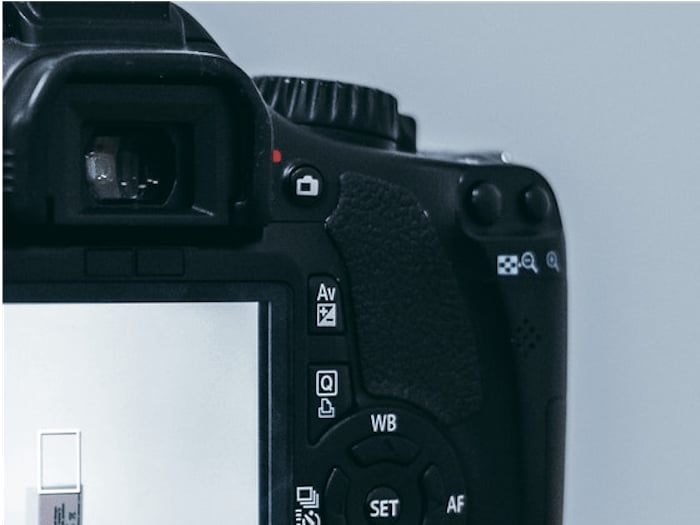
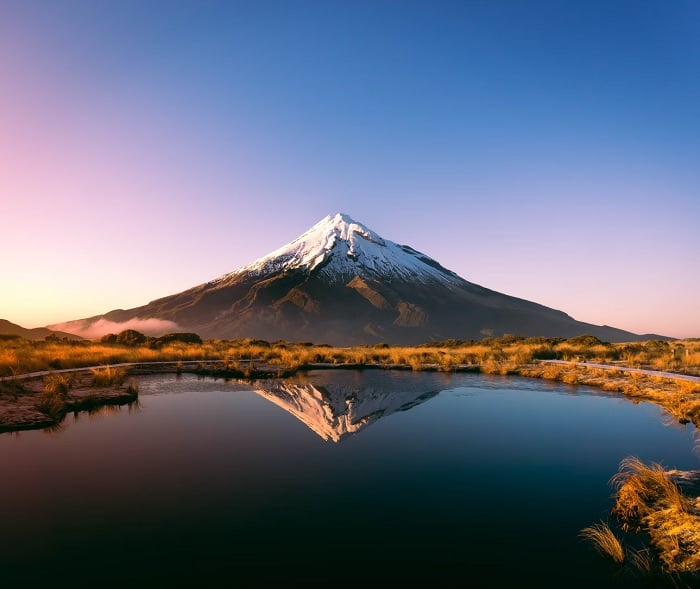
Photo by Luis Quintero via Pexels
When the light changes at sunrise or sunset, I set my aperture to f/16, and my camera figures out the best shutter speed.
I almost always have my camera on a tripod because the shutter speeds may be as long as 30 seconds. A remote can also come in handy. You don’t want the motion of pressing the shutter button to result in a blurry image.
Letting the camera decide the shutter speed is fine if nothing is moving and I have lots of light. But in landscape photography, I sometimes want to freeze motion or blur motion. What I want to do determines the shutter speed I choose.
If I’m photographing a waterfall or if the wind is blowing leaves around, my camera may not choose the shutter speed I want. In those cases, I set my shutter speed manually.
Best Shutter Speed Settings to Freeze Motion in Landscape Photography
In my landscape photos, any motion becomes blurry if my shutter speed is too slow. So, I want to freeze motion if the wind is blowing leaves or there’s moving wildlife in the scene. To freeze the movement, I need a fast shutter speed.
In Manual mode, I dial in f/16 with a shutter speed of 1/250th of a second. If you are underexposing a shot, it is easier to correct that in post-processing than overexposing a shot (given that you shoot in RAW). So do not be afraid to underexpose while maintaining the optimal f-stop, shutter, and ISO values.
For many landscape scenes, 1/250th of a second is fast enough. But some wildlife, like birds in flight, requires a faster shutter speed.
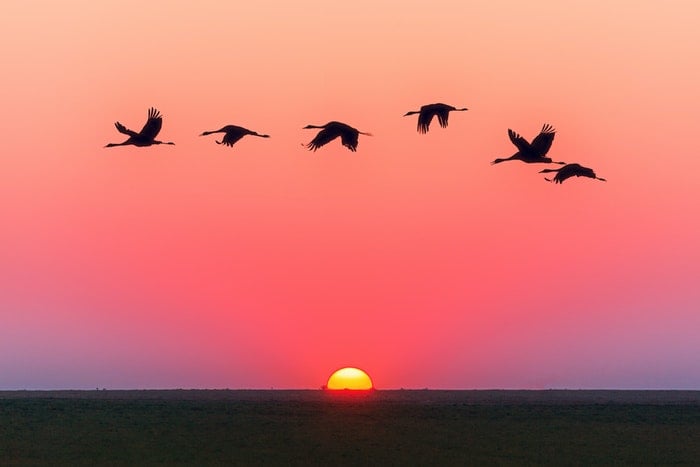
Photo by Johannes Plenio via Pexels
Best Shutter Speed Settings to Blur Motion In Landscape Photography
Most landscape photographers love the effect of intentionally blurring moving water or clouds.
I choose a slow shutter speed to blur motion, usually between 1/10th of a second and 10 seconds. The value I choose depends on how fast the water is moving and how much texture I want.
Best Shutter Speed Settings to Blur Water In Landscape Photography
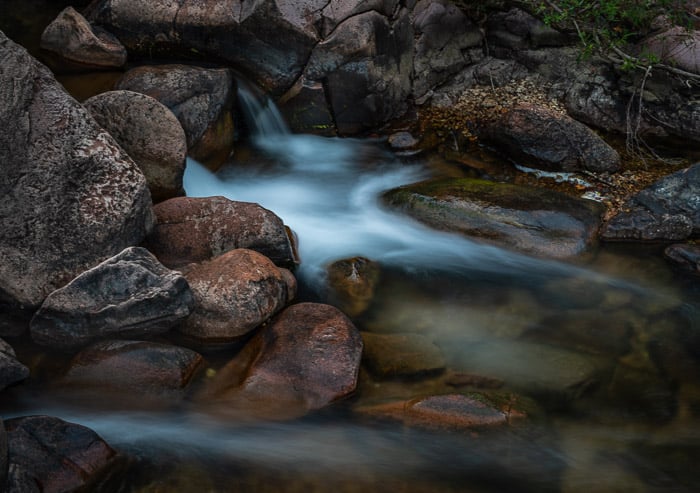
For a fast-moving waterfall, I may choose 1/10th of a second. For slower-moving water, I’ll need a slower shutter speed.

Camera settings: 0.5 s, f/11, ISO 250.
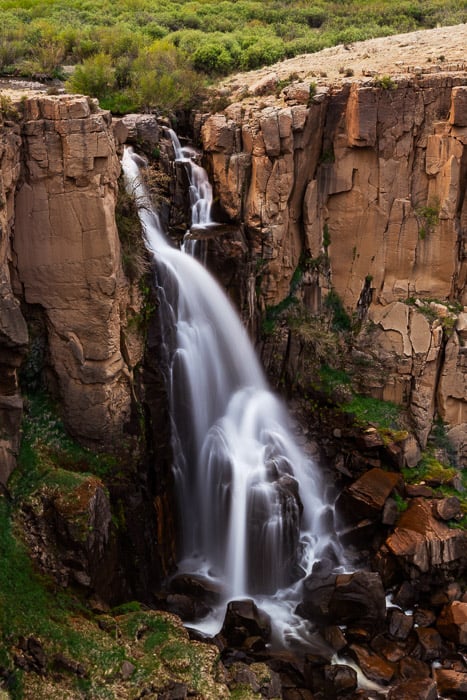
I like the silky water effect, but I don’t want to lose all the texture in the water.
If I choose a shutter speed that is too slow, the water will go completely white and smooth. In this image, I blurred the moving water too much at a shutter speed of 3 seconds. The water starts looking a little too hazy for my taste.
Camera settings: 3 seconds, f/11, ISO 100.
The speed of the water (or clouds) affects my shutter speed. So, I take many photos at different shutter speeds. That way, I can choose the texture I like best later.
In Manual mode, I dial in f/16 with a shutter speed of 1/10th of a second. I then change my shutter speed to 0.5 seconds or 1 second and take another photo. I can often tell on the back of my camera when the water is starting to blur and when it starts getting too creamy.
Best Shutter Speed Settings to Blur Clouds in Landscape Photography
For fast-moving clouds, 10 seconds will blur their motion. If the clouds are moving very slowly, my shutter speed may be more than 1 minute.
When photographing at slow shutter speeds, I use a tripod to stabilize my camera. I also use the built-in timer of 2 seconds, so I’m not shaking my camera when I push the shutter button.
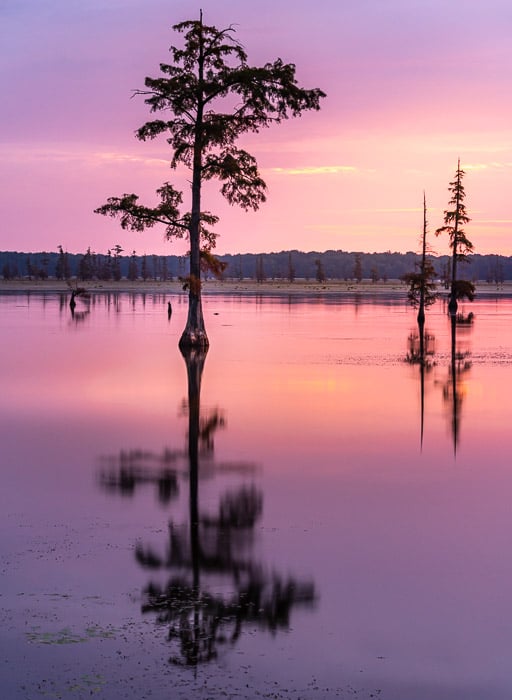
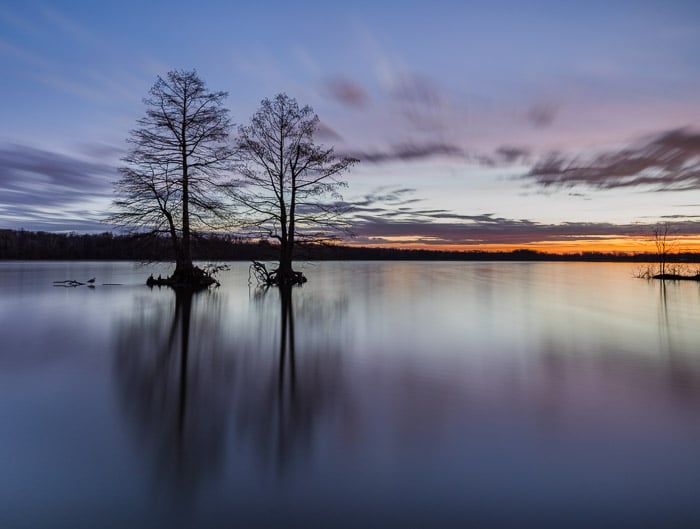
I set my camera to Bulb mode for this image at sunrise in Busch Conservation Area near St. Louis, Missouri. It allowed me to use shutter speeds longer than 30 seconds.
I used a remote control to open my shutter for 107 seconds. This was long enough to blur the clouds.
Use Neutral Density Filters for Even Exposure in Bright Landscape Photography
I’ve been talking about my ideal shutter speeds as if they are possible in every lighting condition. They aren’t.
On sunny days, there is too much light to set my shutter speed at 1/10th of a second to blur the motion in waterfalls, for example. The camera will let in too much sun, and the image will be too bright.
If I want to blur the motion of a waterfall on a sunny day, I need some help. I need a neutral density (ND) filter. ND filters reduce the amount of light coming into my camera. This allows me to choose camera settings for darker conditions.
Standard ND filters are measured in f-stops, which are 3-stop, 6-stop, and 10-stops. As the number of stops increases, the amount of light that enters the lens decreases. You can even stack filters on top of each other if you don’t mind losing a bit of image quality. I use the type of filter that screws onto the front of my lens, but there are other systems.
If you look at my camera settings, there is nothing that tells you whether I used an ND filter or not.
Camera settings: 3.2 seconds, f/16, ISO 100.
It is also important to use a circular or plain polarizing filter for even exposure. This is especially true when there is a bright sky.
Using a CPL means you don’t have to slow down the shutter and stop down your f-stop too much to get the correct exposure in the camera.
Best ISO Settings for Landscape Photography
About ISO
The two most important settings for photographing landscapes are aperture and shutter speed. Aperture determines the depth of field, meaning how much of the scene is in focus. Meanwhile, shutter speed either freezes or blurs motion. But what about ISO, the third aspect of the exposure triangle?
ISO adjusts the sensitivity of my sensor. Lower numbers mean the camera is less sensitive to light, and higher ISOs allow more light to be captured. More light is a good thing, except that with more light comes more grain. At higher ISOs, image clarity and sharpness suffer.
In the days of film photography, ISO was baked into the film. But with a digital camera, you can adjust your ISO from picture to picture. Most landscape photographers use the lowest ISO possible. You want the cleanest image you can get with no grain.
My ISO Settings for Landscape Photography
I will default to ISO 100 if all conditions are perfect, but sometimes circumstances aren’t ideal, and I need more light. The truth is that most modern cameras can shoot at ISOs of 800-1600 with no perceptible grain.
This is mostly true when shooting in RAW, which also gives you flexibility when editing. I can usually reduce any grain introduced at ISOs as high as 5000 with a few tweaks in post-processing.
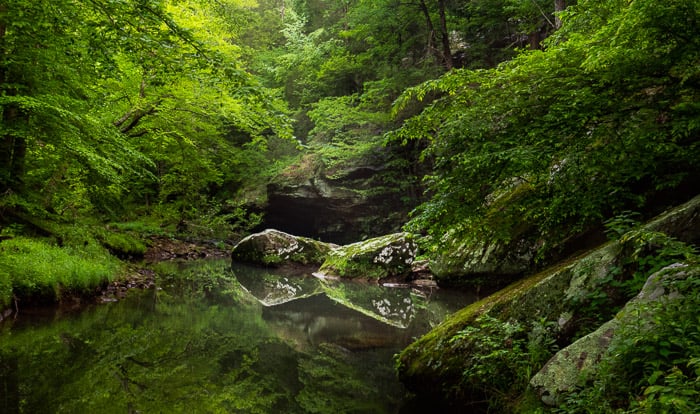
This means I can dial in the best aperture and shutter speed even when conditions are darker than I’d like. For instance, I don’t have to sacrifice the overall focus of my image by using a wide aperture on a stormy day or in shaded conditions.
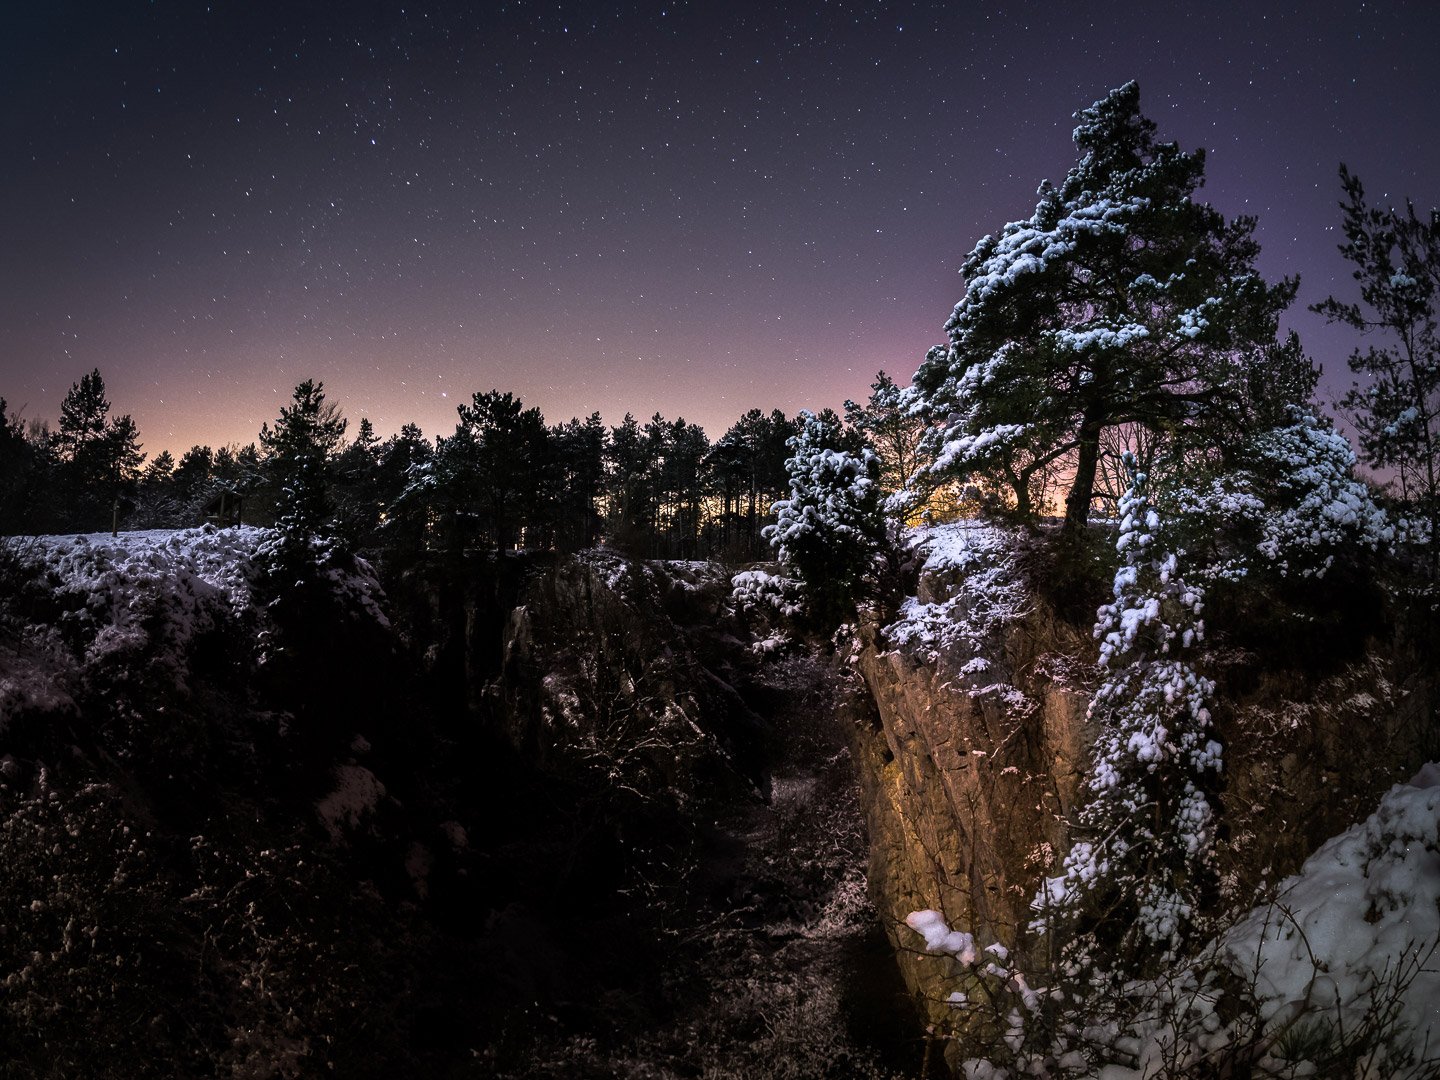
I used an aperture of f/11 to capture this scene in this image, but it was still too dark. There was a breeze, so I didn’t want my shutter speed to be too slow and show the leaves moving. Instead, I increased my ISO to 2500.
Recommended ISO Settings for Landscape Photography
Generally, the best ISO setting to use for landscape photography is ISO 100. But don’t be afraid to increase your ISO a bit to gather more light if you need it.
Of course, the performance of your camera at higher ISOs depends on the age and quality of your camera.
When I’m in conditions with changing light, I set my ISO to Auto but set a maximum ISO of 5000. At this value, noticeable grain would appear in almost any camera. However, I’m okay with my camera adjusting the ISO to compensate for low lighting because I’ve set a limit.
Use HDR Settings and Techniques for Landscape Photography
HDR stands for high dynamic range. I use this feature when the scene in front of me has a significant difference between its lights and darks. If I use one camera setting, some parts of the image will be too dark and others too bright.
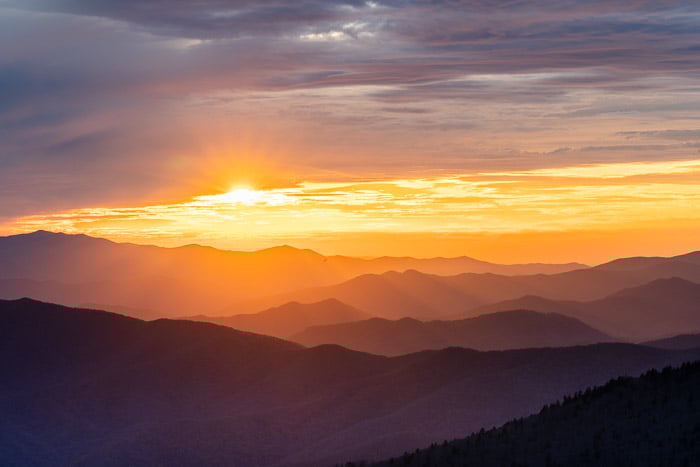
For instance, at sunrise, I sometimes shoot straight into the sun appearing over the horizon. The sun is very bright, but my foreground may still be in the shadows.
To get the best overall exposure, I need multiple settings. I need one camera setting for the sun. And for the foreground, I need a different setting. That’s why HDR is ideal for these situations.
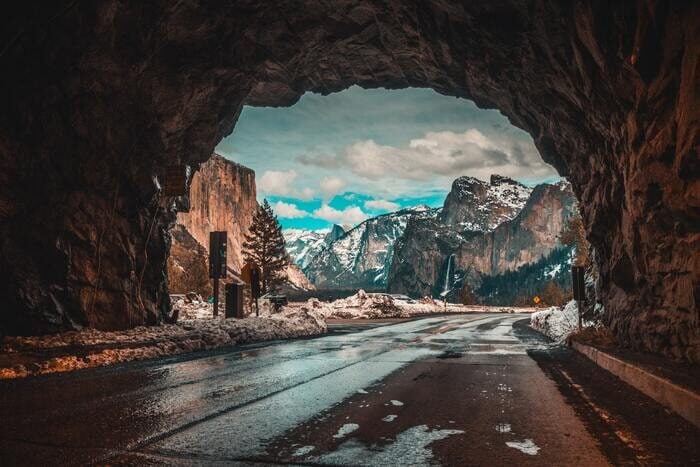
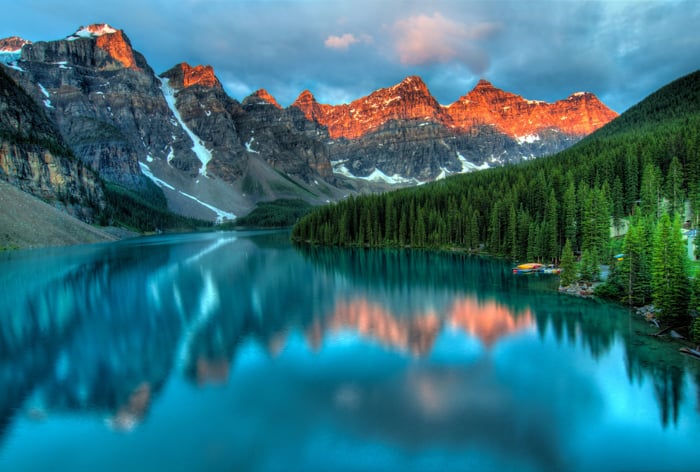
This image benefits from the HDR setting. The sun is peaking out of the clouds, and the mountains in the foreground are much darker. The sky can easily be overexposed, or the mountains in the foreground underexposed.
Built-In HDR Camera Settings for Landscape Photography
Most mid-to-high-end digital cameras have built-in HDR. The option is usually a menu setting rather than a button or dial. Many cameras allow you to set one of your function buttons to HDR for easy access.
When using the built-in HDR setting, my camera takes multiple images at different exposures. I can set how many photos to take (3, 5, or 7) and how far apart the exposures are (1 or 2 stops). This process is called bracketing.
If you look at the individual images, some will appear underexposed, some overexposed. The bracketed images must have the same composition, so using a tripod is a must when using HDR.
Manual Application of HDR Camera Settings for Landscape Photography
There is another way you can do this manually. It’s best if you shoot multiple images of underexposed, correctly exposed, and overexposed shots. And you should ideally shoot the same amount of under- and overexposed photos. After that, you can combine and edit your images in Lightroom or Photoshop.
In Lightroom, choose the photos and select Photo Merge > HDR. In Photoshop, you can use Merge to HDR Pro. There are also programs designed to merge HDR images, like the HDR Efex Pro in the Nik collection. The final image uses the best exposures of different parts of the scene from each photo taken. Your post-processing program makes the optimum choices for you.
For more information on how to take HDR photos, go to Anton Gorlin’s article about bracketing and how to use it in HDR.
The dynamic range of digital cameras improves with each generation, reducing the need for HDR bracketing. Nowadays, digital medium-format cameras and mirrorless full-frame cameras use the best possible dynamic range levels on the market.
Examples of these cameras with outstanding capabilities include Sony a7R III and Canon EOS R5.
Conclusion—Best Landscape Photography Settings
The best setting for landscape photography depends on the time of day, the weather, and what you are photographing. Knowing the best camera setting to capture the amazing world in front of you is not always easy.
In general, I recommend choosing an aperture between f/11 and f/16. To freeze motion, set your shutter speed to 1/250th of a second. To blur motion, set your shutter speed to 1/10th of a second or slower.
Finally, set your ISO to 100, but don’t be afraid to select a higher ISO if you need more light.