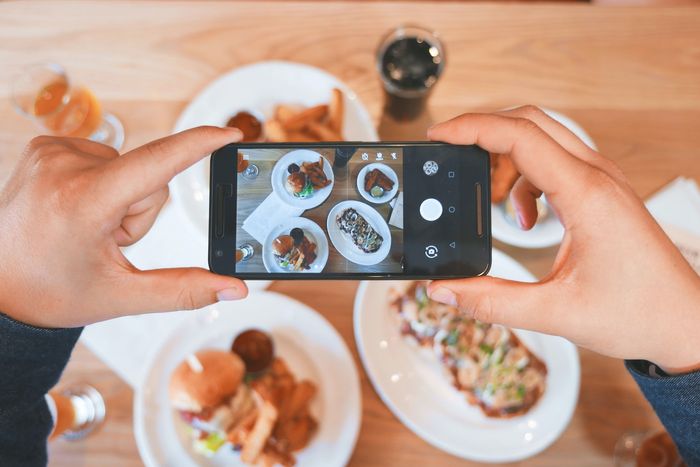
Food photography is a challenging and rewarding art form that can be a lot of fun to learn. Whether you want to spice up your social media or take photos for a cookbook, knowing the right food photography techniques is a must.
In this article, we’ll provide ten tips for taking professional food photos with a phone. We’ll discuss how to use your phone’s camera to take great photos. And we’ll provide some tips on how to edit them to wow your viewers.
Shooting food photography with a phone is similar to shooting with a DSLR or mirrorless camera. But there are a few differences. Continue reading to learn everything you need to know about food photography with a phone.
Succeeding on social media these days means having a consistent brand. Your images don’t have to look the same. But there should be certain elements that are consistent throughout your photos.
This could be a palette made up of two or three of the same colors or similar backgrounds in all of your images. It can also mean that all of your pictures are dark and moody or, conversely, light and airy.
If you look at the most successful Instagram accounts, you will find that most of them have repetitive elements. All of the images have a specific look and style.
Take a good look at your images and figure out the consistencies you see. Through that, you’ll develop a style over time. The more specific you are in your approach, the better your feed will look. This helps draw an audience that resonates with your style.
Close-up images and minimalist photos look great. But what about adding a narrative to your pictures?
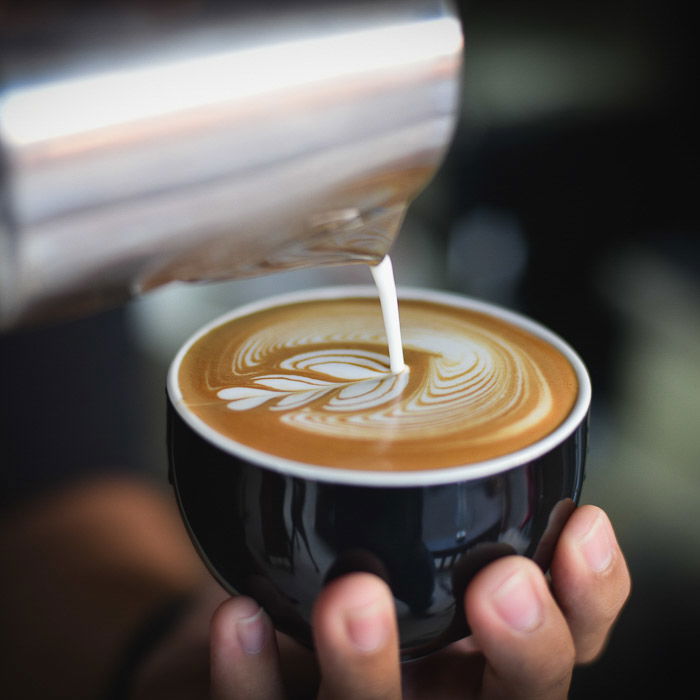
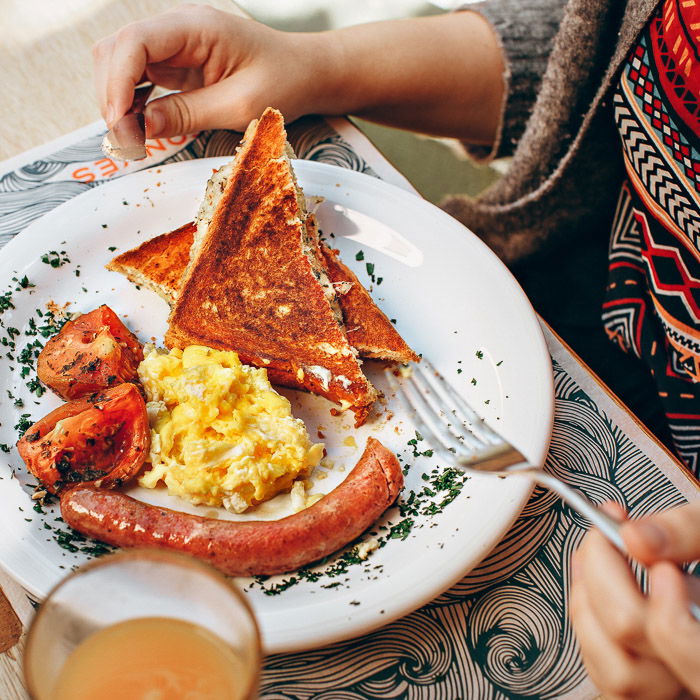
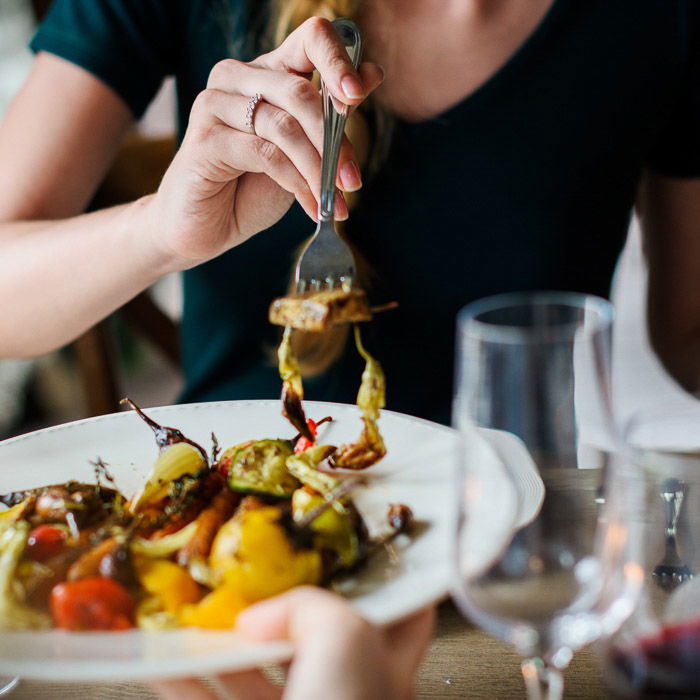
You can give your viewer an idea of a broader story taking place beyond the confines of the frame. It could be anything from a table setting with partially cropped-out elements or someone’s hands serving food. Including people in your food photography gives context to an image and makes it relatable.
The next time you are shooting lattes in a cafe, take a picture of your friend’s hands holding the mug. Or if you’re at a restaurant, take the shot just as they are tucking into their brunch.
It’s best not to use filters in food photography. But your pictures will likely still need some editing to look great.
The best approach is to use apps like Snapseed, VSCO, or Lightroom Mobile. Of course, there are many other great photo editing apps. But these are the three I would recommend the most.
Make sure to adjust your images for exposure, brightness, white balance, and saturation. If necessary, you can also add a bit of clarity for contrast.
If you find some filters that look good, don’t use them at full strength. Apply them and adjust the image as needed. Unfortunately, one-click edits don’t tend to work as well in food photography as in other photography genres.
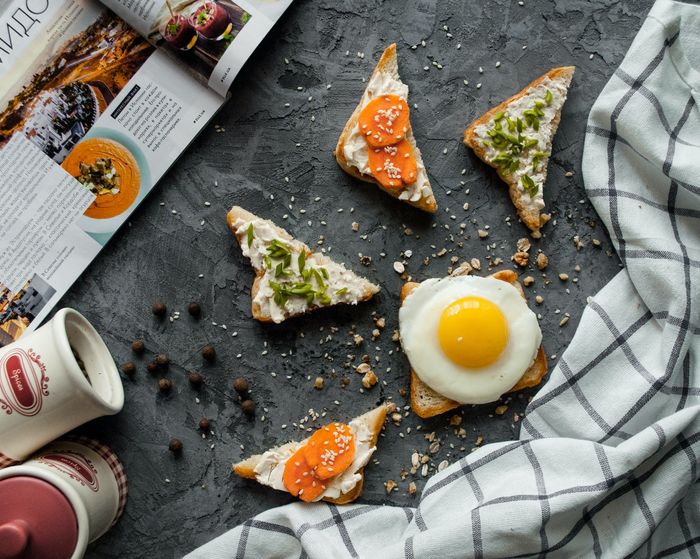
Food styling is essential in food photography. You can have the right angle, perfect exposure, and an excellent subject. But if the dish looks sloppy, the result will be unappealing.
If you’re shooting at home, use herbs and garnishes to elevate the aesthetic of your image. You can also use other food items like chunks of bread or extra sauce. Sometimes, I even sprinkle some coarse salt or pepper onto my food to give it texture.
Whether shooting with an iPhone or a DSLR, photographers usually bring items like vintage cutlery or squares of linen to restaurant shoots. Doing so adds a bit of pizzazz to what may be otherwise dull and typical flatware.
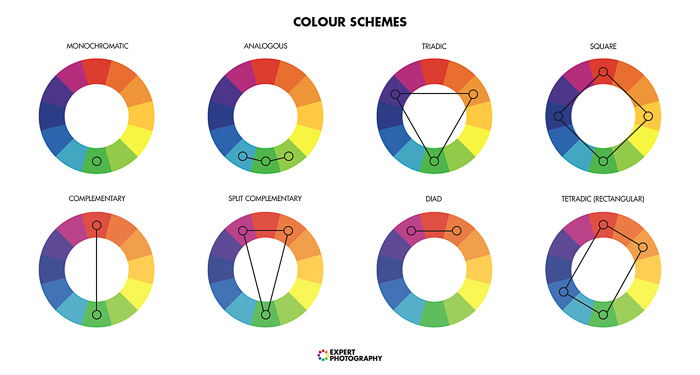
Food photography is unlike other kinds of photography in that it’s best not to use filters when editing. The colors need to be natural and work together for your images to look their best.
The color wheel shows you what colors complement each other. It is your guide to harmonious compositions.
I refer to mine all the time when I’m planning my shoots. You can move the arrows and triangles around to see which tones work best together.
Combinations that work very well are blue and orange, purple and yellow, or red and green. These colors are opposite each other on the color wheel.
Composition is a crucial skill you need to learn when it comes to taking pictures.
I think of composition rules as guidelines because they don’t always work for every image. But you should still keep them in mind to get the most out of your pictures.
First, you need to understand negative and positive space in the composition. Positive space is the area occupied by your subjects. Negative space is the empty area in the image.
Negative space allows the eye to rest as it moves through the images. In contrast, filling up your frame might give the viewer a claustrophobic feeling.
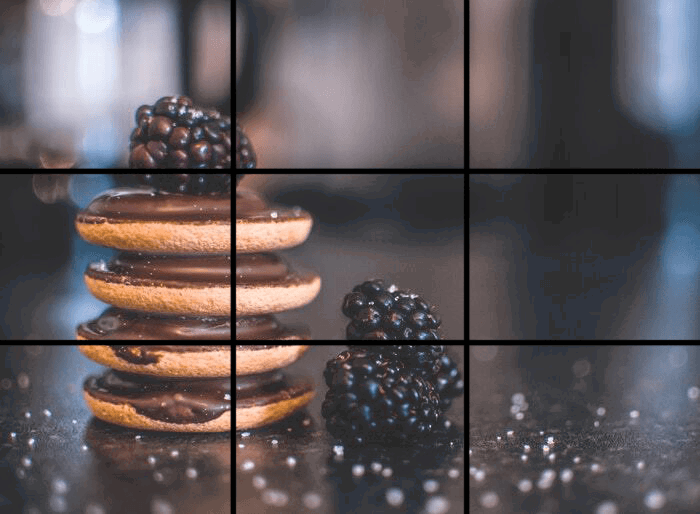
The rule of thirds is arguably one of the most useful food photography tips you’ll get for composition. It’s a compositional guideline that divides an image into nine equal sections using two horizontal lines and two vertical lines. The critical elements in the scene fall along these lines or at the intersecting points.
This grid helps add harmony to your images and will aid you considerably in creating your composition. Thankfully, your smartphone already has this grid as an overlay when you turn on your camera.
All you have to do is place your focal point where the lines intersect. Your main point of interest could be anything from a garnish to a piece of meat you want to showcase.
You can even use the golden ratio if you want to take this concept even further. It’s an even more powerful compositional tool that works particularly well for smartphone food photography.
In food photography, you want the backdrop to be neutral because the food is the star. Anything else in the image needs to support it, not detract from it. A background that is too colorful or textured draws the eye away from the main dish.
With smartphone food photography, it’s hard to get bokeh. If you have a more modern smartphone, you’ll likely have access to portrait mode. This will help you achieve some bokeh. If not, it’s a good idea to keep your background simple.
A bit of creativity will serve you well. You don’t always have to shoot food on the table. I sometimes put the dish on a concrete floor or neutral-colored tile with an interesting pattern.
Another thing is that a lot of food pictures on Instagram look messy. And I don’t necessarily mean the food itself, but the environment. Often, there are too many props that distract the viewer.
One of the best food photography tips I can give you is to go for a tight shot. Close-ups and macro shots of food can look great. Just be sure that you are not shooting so close that the viewer won’t be able to tell what food they are looking at.
Also, don’t overlook unintentional drips or smears on plates. They can be distracting and challenging to fix in post-production.
One of the biggest mistakes people make when shooting food with a smartphone is choosing the wrong angle. More basic smartphone cameras have a very wide-angle lens. This means that certain angles will cause your images to look distorted.
A 1x lens will typically look good. To get the best results, shoot overhead or straight on to your subject instead.
The reason flat lays and overhead shots have become so popular is because of the angle you shoot from. It eliminates depth and makes your photos pop. You can fit a lot more elements in the scene, and it’s relatively easy to compose.
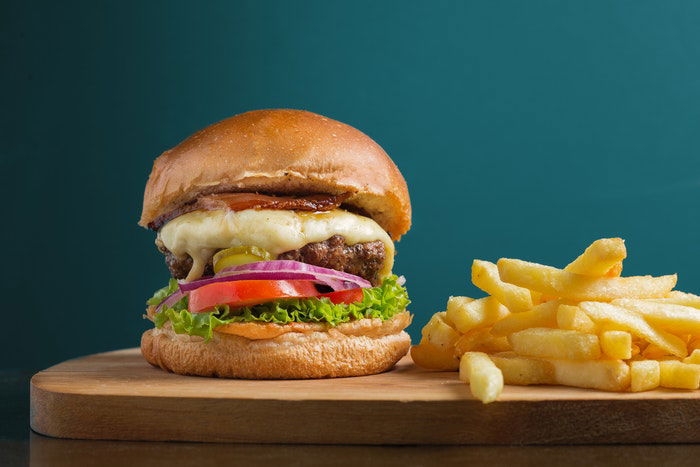
However, this angle doesn’t work for everything. It’s terrible when taking pictures of tall foods such as burgers.
When you shoot tall food like burgers, lay your camera on the table for a straight-on shot. That way, you showcase all the ingredients in the dish. From this angle, the wide-angle lens also helps make the food look bigger than in real life.
iPhones can correctly expose pictures when shooting in ideal conditions. But you don’t always get the best lighting in food photography.
Smartphone food photography requires constant problem-solving. But a bit of creativity combined with what’s already around you can go a long way!
You can boost the brightness of your scene by using a piece of white foam core as a bounce card. As the name suggests, a bounce card reflects some of the light from the main light source onto the set.
You can also invest in a reflector kit and bring it to a restaurant to diffuse the light. Or you can open reflectors to bounce more light onto the dishes.
Your smartphone also has a feature called “exposure lock.” It keeps the exposure at the level you want to create a well-lit image. Simply tap on the screen and you will see a sun icon appear. Move your finger up or down to adjust your exposure accordingly.
When you shoot with your smartphone, ensure that you are using natural light.
Most food pictures regular people take in restaurants look horrible because of artificial lighting. Fluorescent and other types of artificial lights create unwanted color casts. As a result, they cause your pictures to look hard and flat.
Your food needs to look as fresh as possible to look appealing. To achieve this, natural light is the way to go. Professional food photographers use large and expensive studio lights to mimic natural, diffused daylight.
But how can you shoot photos at home without strobes or expensive equipment? Simply bring your plate to a window with natural light or shoot outside in the shade.
Make sure you stay away from the bright sun as it creates hard shadows in your scene. If you can’t avoid it, shield your dish with a small diffusion disc or panel. It works much like a window in softening the light.
Smartphone photography should be fun! And food photography is no different. These tips will help you create some delicious-looking photos. Explore what works and what doesn’t. Experiment with different techniques for different dishes!