Flower photography is a fun and easy way to take fantastic pictures. Flowers are colorful and come in various shapes. Plus, you can find them almost anywhere.
Flowers make incredible photography subjects because of their colors, textures, and vibrance. Here, we cover everything from macro flower photography to lighting techniques. Continue reading for everything you need to know about flower photography.

- Learn to take stunning photos without stepping outside.
- Discover affordable ways to convert any lens for macro shots.
- Explore unique techniques for lighting and composing your subjects.
13 Flower Photography Tips for More Creative Photos
You can try these tips over a few weeks or all at once. You can even take a field trip to practice
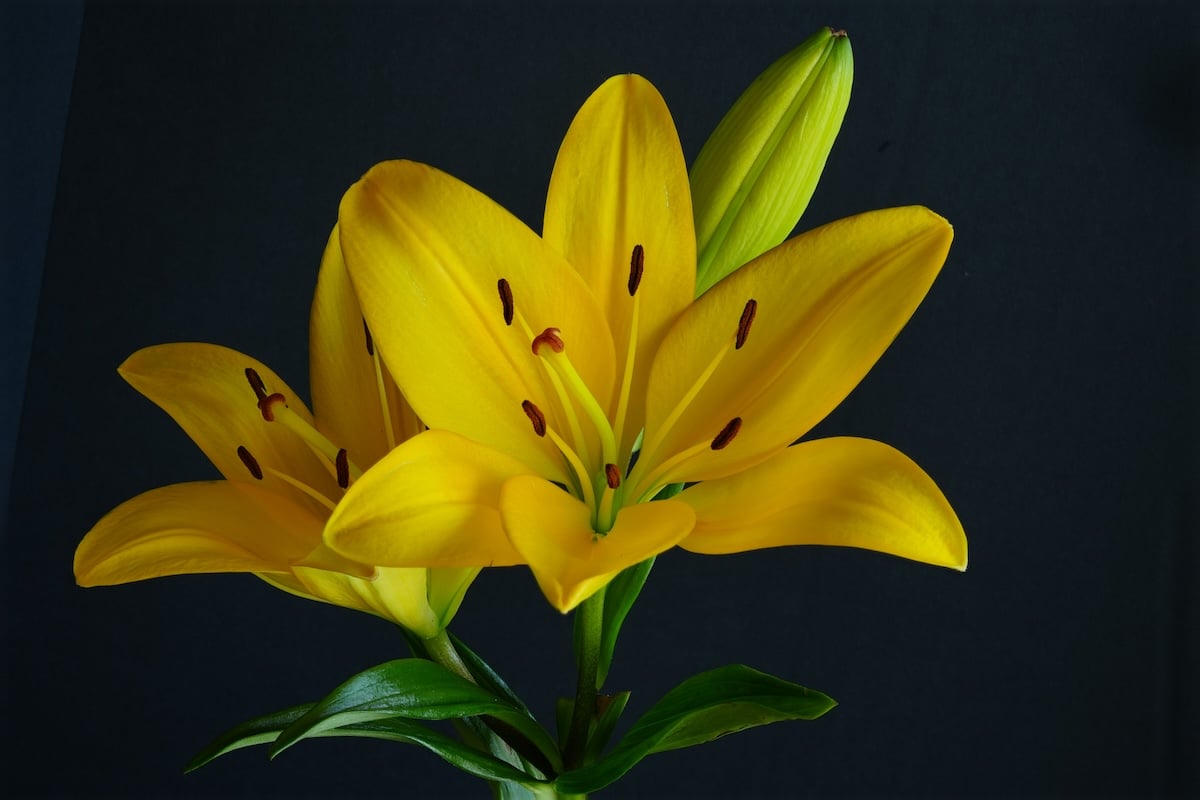
1. Try Indoor Flower Photography First
To make flower photography easier, try shooting indoors first. Taking pictures inside eliminates all the variables that come with shooting outdoors.
Your house is perfect for practicing shooting in Manual mode and experimenting with lighting. You can try different backgrounds and learn how to compose shots.
Buy some flowers at your local supermarket and put them in a vase. You can place them near a window or a lamp, depending on your lighting preference. Then, set up your camera on a tripod and start taking photos.
You can shoot in any room or studio and try lighting variations to create different effects. For instance, you can use a spotlight or a softbox to illuminate flowers with hard or soft light. You can also experiment with a color gel flash to achieve different colors and moods.
The good thing about shooting indoors is that you control your environment. It lets you manipulate your setup and create consistent shots.
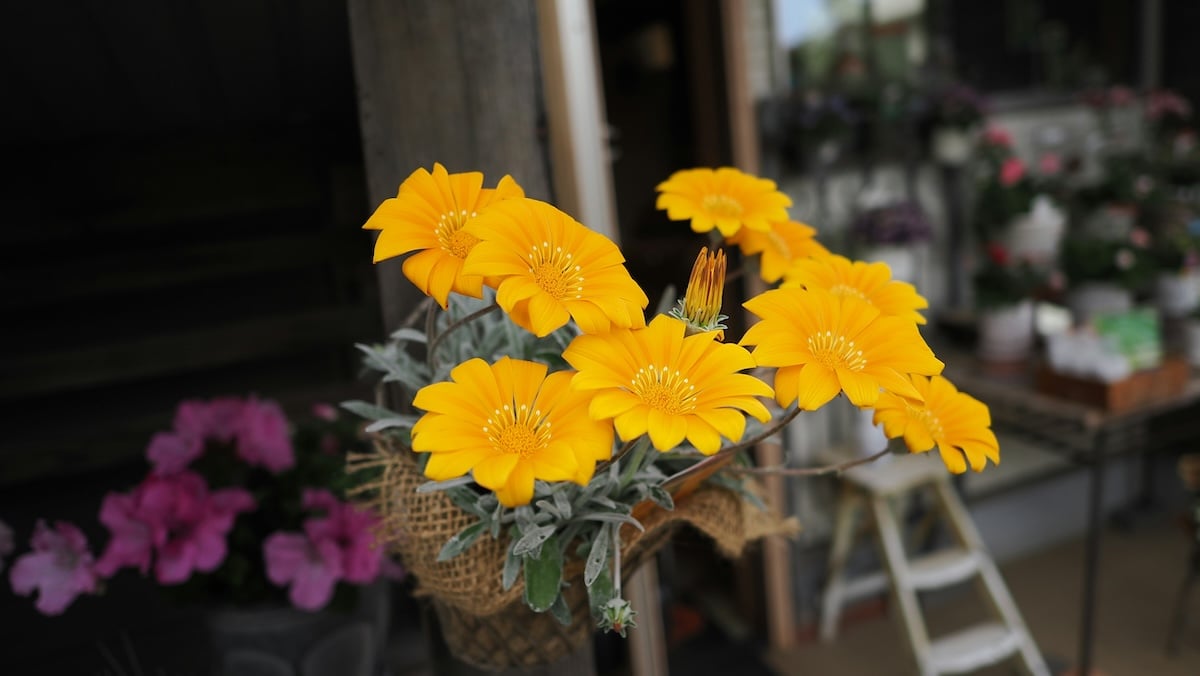
OM System Olympus OM-D E-M1 Mark II, 12mm, f/2.0, 1/2,500 s, ISO 200. Kazuyuki Aoki (Unsplash)
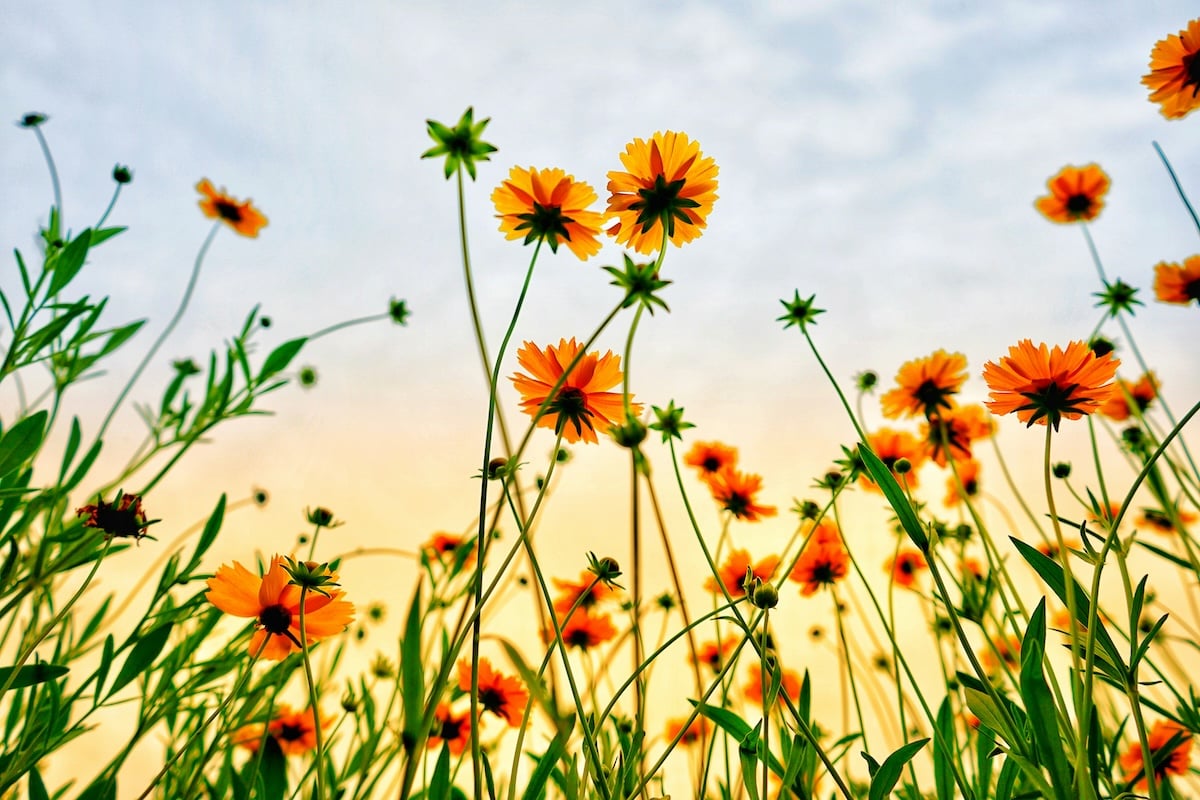
2. Photograph Flower Fields
Consider the bigger picture. Try shooting a whole field of flowers instead of capturing a single flower. You can find flower fields in different settings, from meadows to coastal cliffs.
Use a wide-angle lens to capture as much of the landscape as possible. You can also apply a few landscape photography tips to improve your composition. You might use flowers as unique foregrounds, which can lead to even more impressive views in the background.
Flower fields’ color, shape, and texture can elevate any landscape photo. Shooting flower fields as foregrounds gives your images an extra touch of nature.
So, how do you photograph a flower field? If you want your foreground to be as sharp as your background, you need a deep depth of field. Thus, choose an aperture between f/11 and f/16. This aperture keeps both the foreground and background in focus.
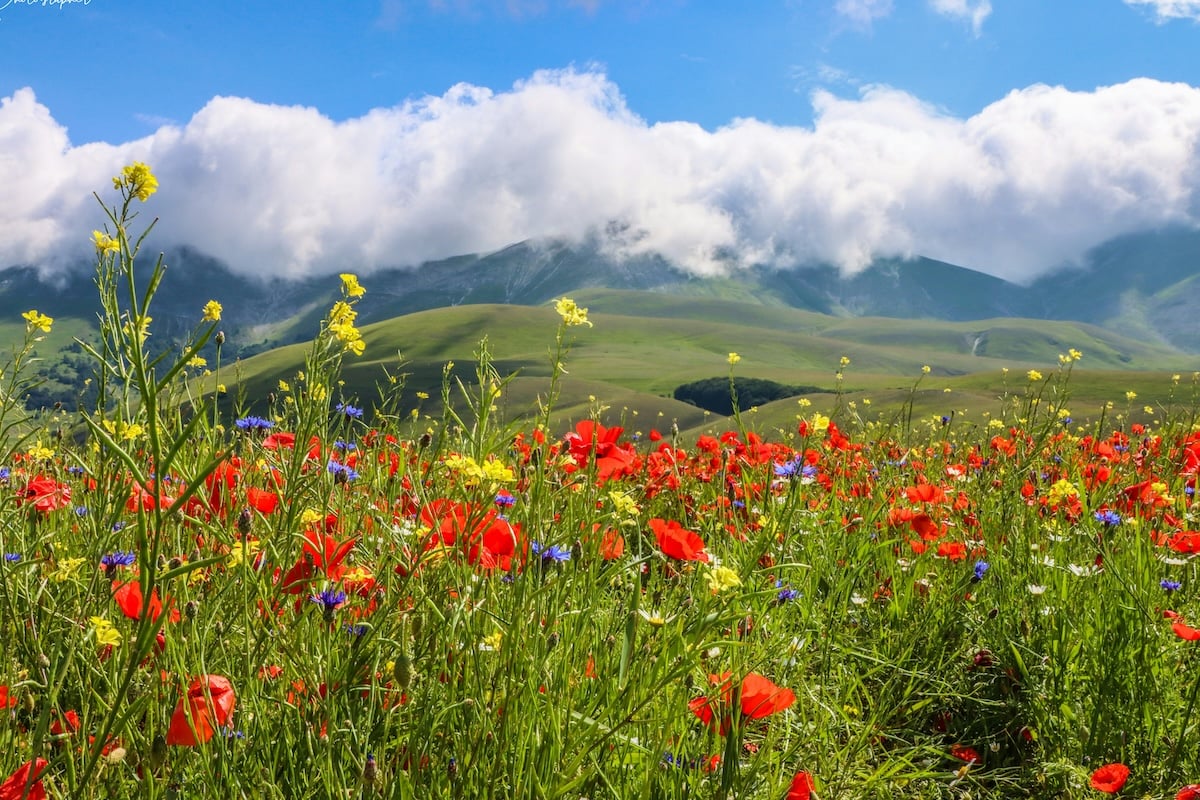
Canon EOS 90D, 25mm, f/22, 1/160 s, ISO 400. Angelo Casto (Unsplash)
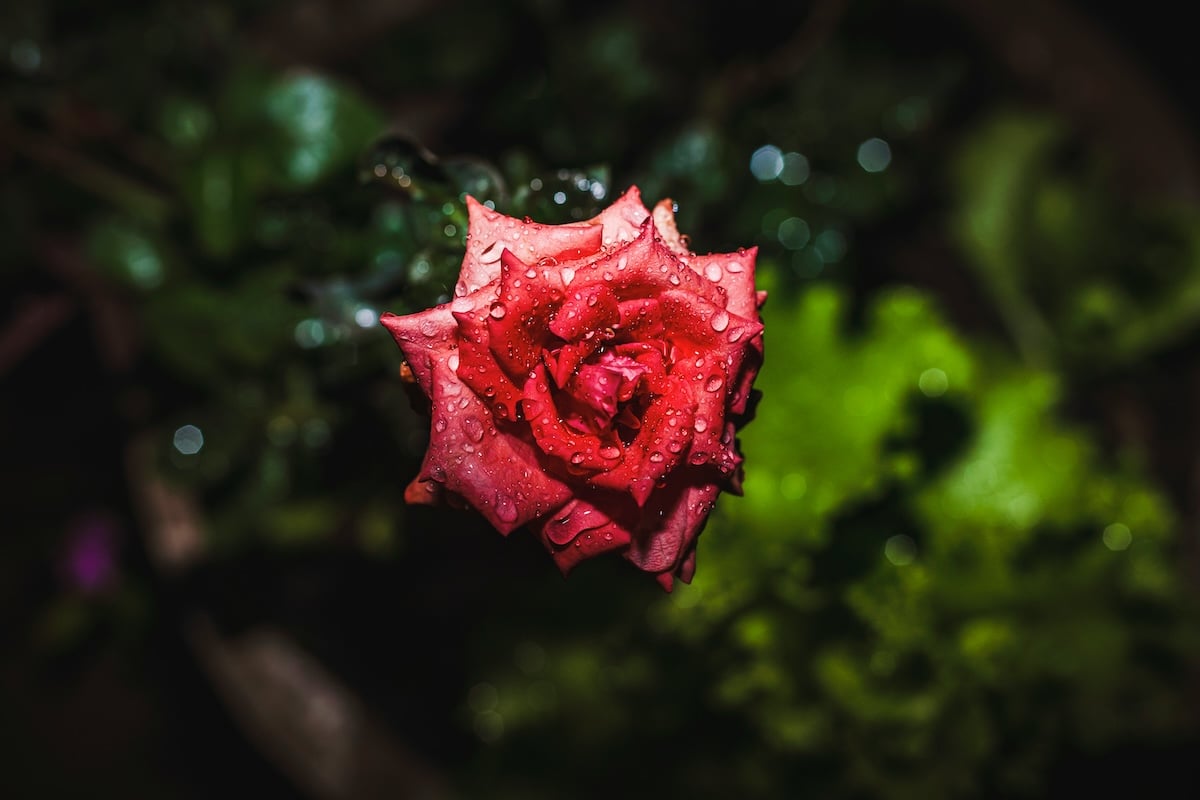
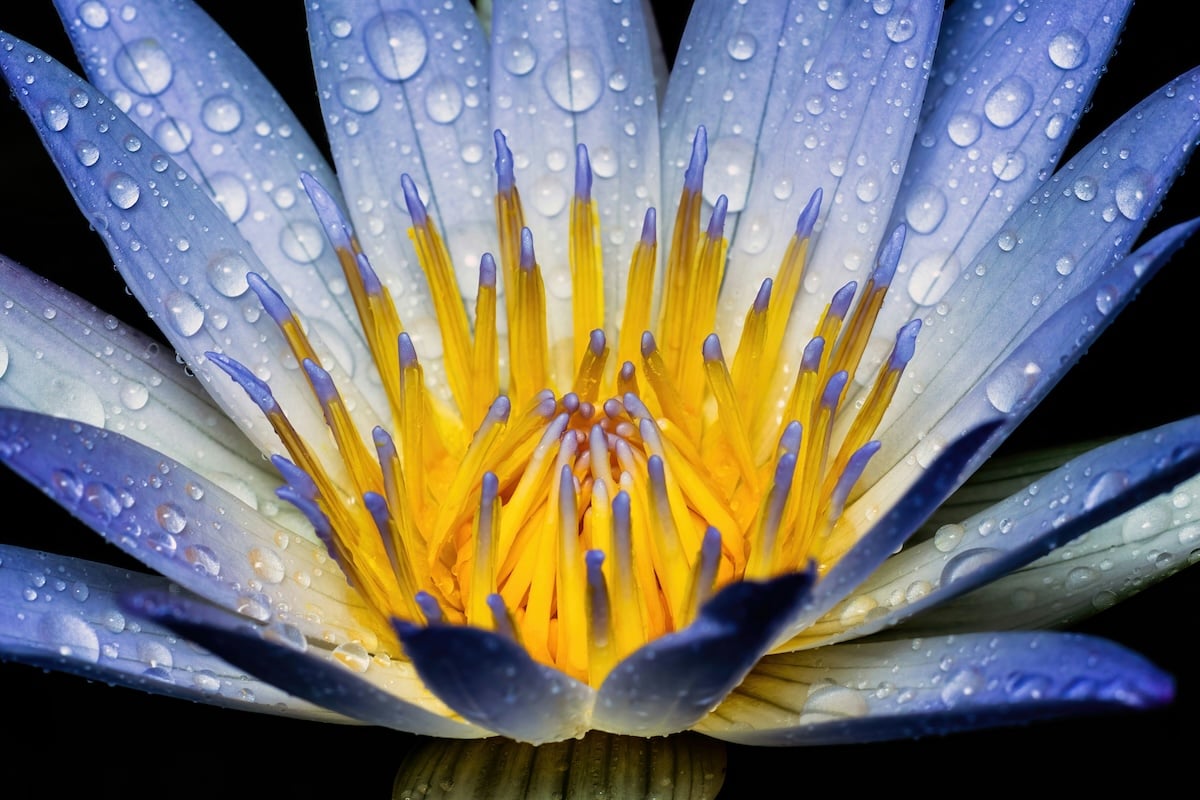
3. Liven Up Photos With Butterflies, Bugs, or Water Droplets
Including butterflies or insects can make your macro flower photography look more natural. It can sometimes be challenging to find insects interacting with flowers. Other times, you get lucky and find bugs flying around flower beds.
Most of the time, there’s a good chance you won’t find any bugs. But you can always use bait to attract tiny critters to your garden. One effective solution is to spray sugar water onto your plants. For a more organic approach, use smashed fruit instead.
Getting good photos of tiny insects on the move can be tricky. But you can use burst mode and shoot a sequence to ensure you get at least one good shot.
You can photograph flowers with water droplets if you don’t want to include insects. Take a picture of flowers right after a rain shower or spritz water on the flowers yourself. The water droplets on the flower petals add interesting details to your image.
Play around with the light a bit. The droplets create unique reflections, giving you a nice sparkling effect.

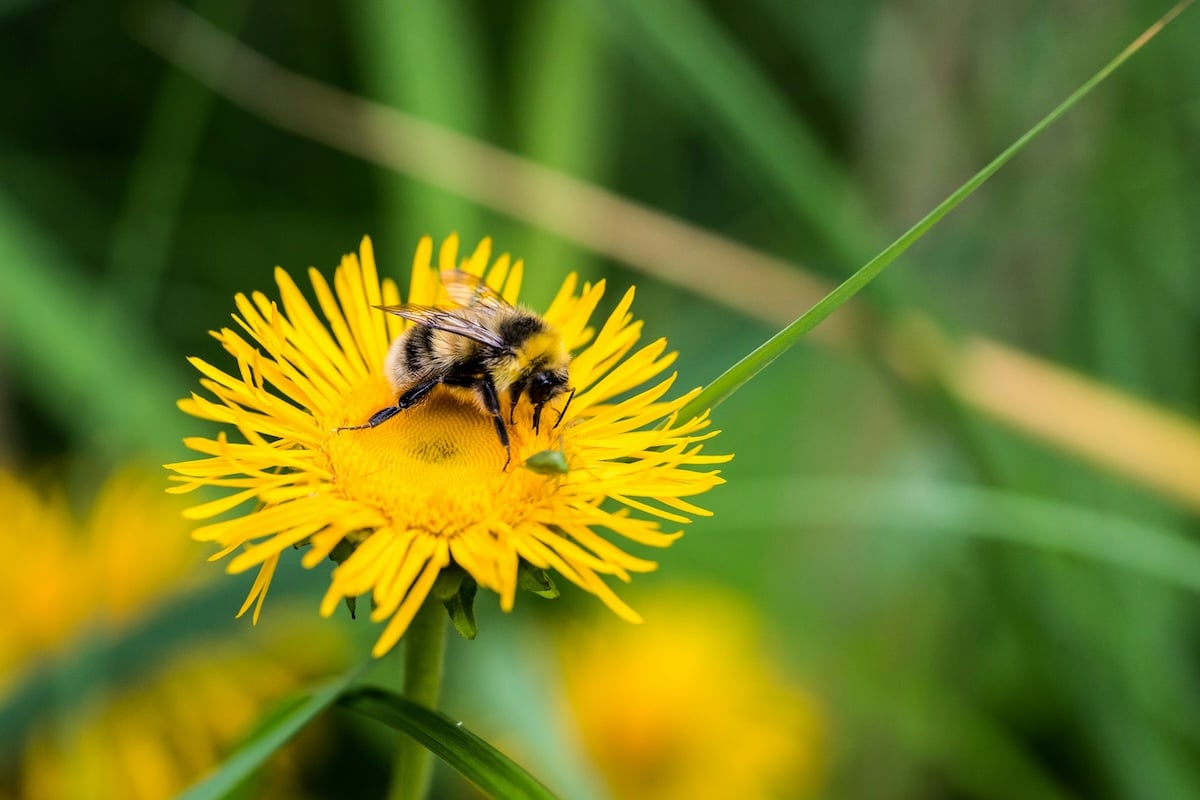
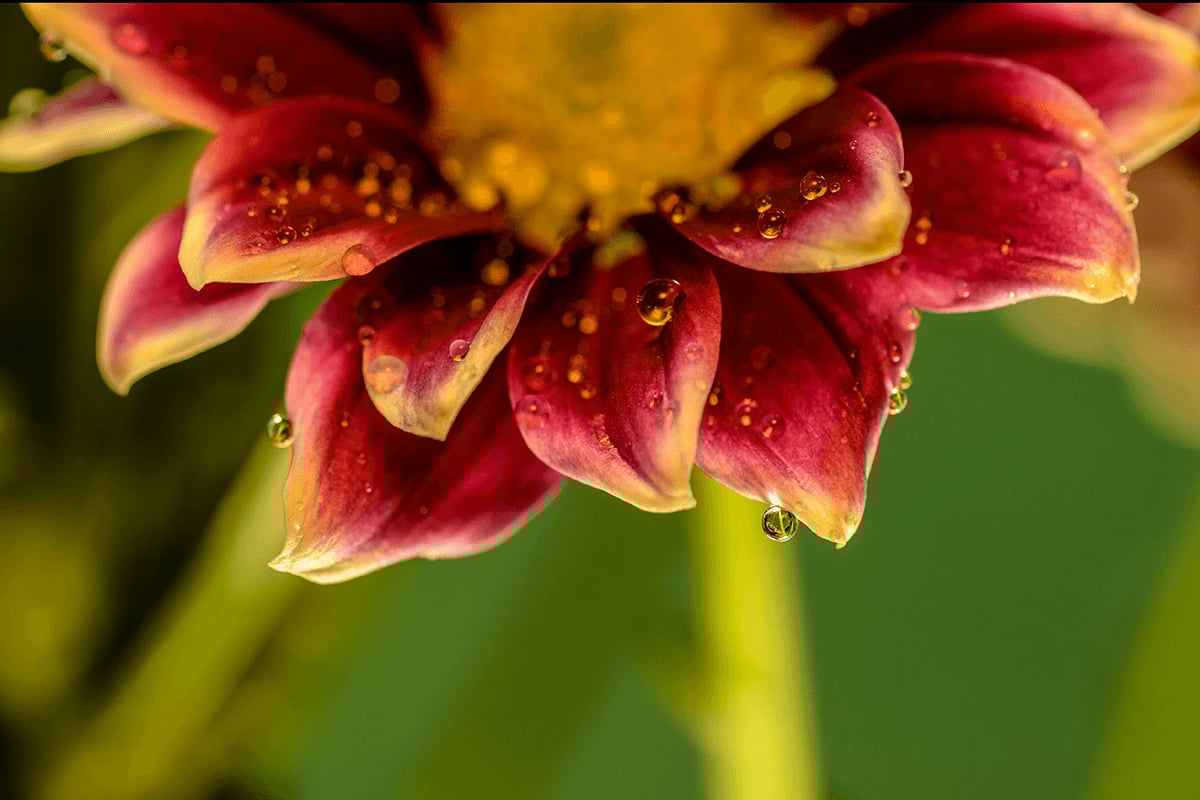
Unsplash photos: Ag Pic (left), OM System Olympus OM-D E-M1 Mark II, 141mm, f/5.6, 1/250 s, ISO 500. Stefan Steinbauer (middle), Sony a7, 90mm, f/5.0, 1/800 s, ISO 800. Dominik Scythe (right), Nikon D7000, 150mm, f/5.6, 1.3 seconds, ISO 200.
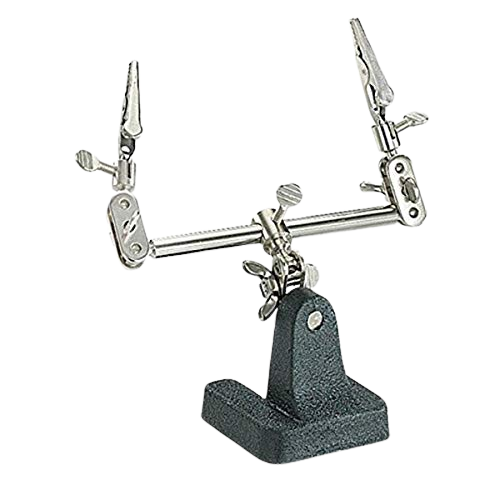
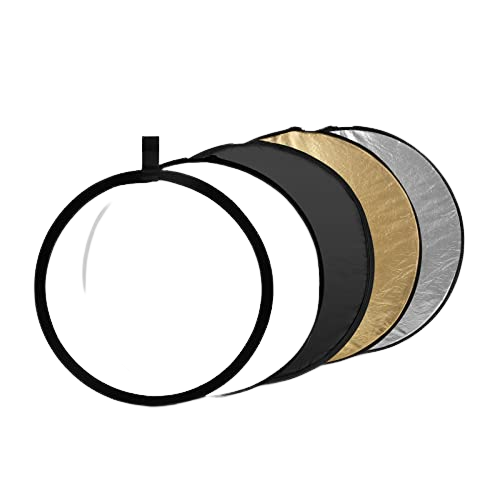
4. Use “Helping Hands” and a Reflector
The Pro’sKit Helping Hands tool can be your best friend for macro photography. This tool has two adjustable arms with clips. So you can use it for a variety of tasks.
You can use it as a stand for a small reflector to provide fill light in locations with poor lighting. Or, you can clip a reflector diffuser to the stand to create a bounce flash.
Ensure your setup is catching the sun at the right angle. You can move the adjustable arms until the light hits the right spot.
You can also use this tool or clips to “pose” your flowers if they’re standing at a strange angle. But it’s best to prevent the clip’s sharp teeth from damaging the plant you want to shoot.
Wrap a paper towel around the flower stem and attach the clips. Then, pull it toward your preferred position. This technique is perfect for making withering plants stand more upright. It also works to isolate subjects from the background.
Recommended Flower Photography Accessories
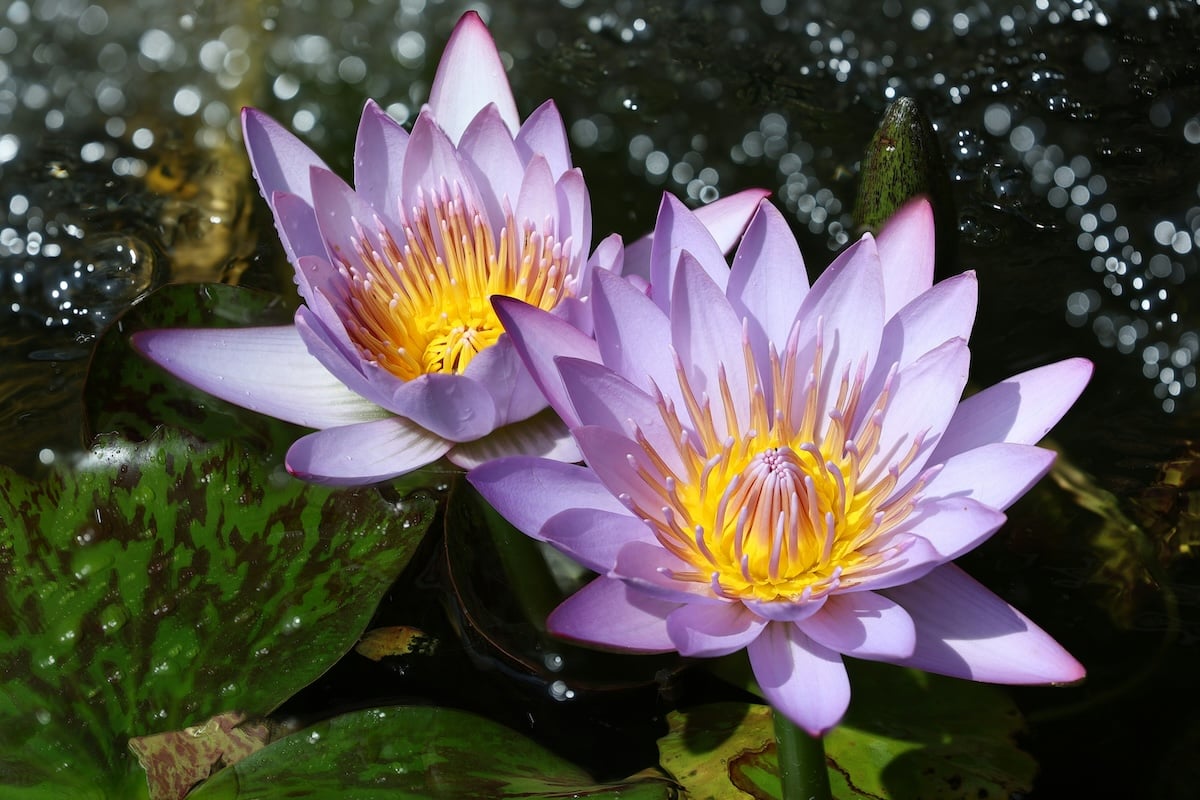
5. Use a Simple Background or Make Your Own
When taking flower photos, you want your subject to stand out. Creating a blurry background is one of the best ways to do this.
The easiest way to achieve this is to use a wide aperture for a shallow depth of field. But a blurry background doesn’t mean you should ignore whatever is behind your subject.
People still notice distracting visual elements if they’re in focus or not. So, make sure you don’t have anything that stands out too much and distracts the viewer.
Using a backdrop is a simple way to direct the viewer’s attention to the main subject. Try incorporating elements that give the viewer clues about where you took the shot.
Move around the flower to see how the background changes with different angles. If you’re shooting outdoors, include other plants or the sky in the background to add authenticity to the image.
Canon EOS R, 50mm, f/1.4, 1/1,000 s, ISO 100. Eberhard Grossgasteiger (Unsplash)
When you’re outside, there’s a good chance you might find a good subject in a terrible location. Maybe it’s on the side of the road or even beside a trash bin.
If you find yourself in that situation, create a backdrop. You can use decorative paper or even plain white or black cardboard. Then, clip the cardboard onto a stand or Helping Hands, and you have a beautiful background.
If you want to create a more dramatic contrast, use black backgrounds. Place a black bucket, felt, textile, or any black backdrop behind the flower. Vivid colors pop out from the dark background. Your flower picture will be very artistic!
Sony a7 IV, 90mm, f/14, 1/6 s, ISO 400. Pedro Vit (Unsplash)
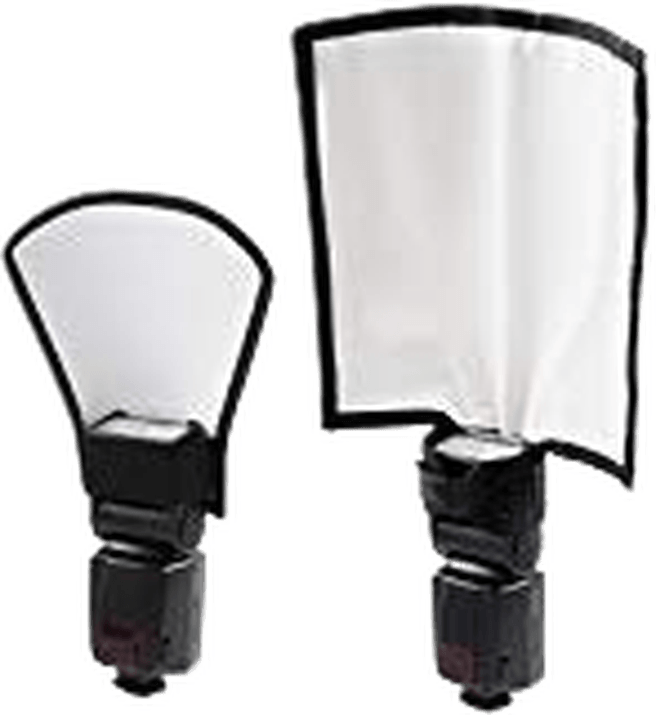
6. Light Up Flower Photography With Fill Flash
The best time to take photos is right after sunrise or before sunset. This time of day is called golden hour and provides ideal light.
But when working outdoors, you won’t always have good lighting. If the location of the flowers is a little too dim, use an external macro flash to add light.
A built-in pop-up camera flash won’t work for macro photography. It doesn’t provide a good angle of light and is often too bright, resulting in a blown-out exposure.
Using an off-camera flash from the side is usually your best option. If it can’t stand alone, put it on a mini tripod to keep it stable. You can also add a diffuser to make the light look less harsh.
Because the flash is not attached to your camera’s hot shoe, you need a remote flash trigger to fire it. Attach the transmitter to your camera’s hot shoe and the receiver to your flash unit to install it. Once installed, the flash fires in sync with the camera.
Canon EOS 5D Mark III, 50mm, f/5.6, 1/100 s, ISO 800. Josh A. D. (Unsplash)
7. Try Different Perspectives for More Unique Shots
Don’t limit yourself to eye-level shots. Experimenting with different angles is a great way to create unique shots.
Think of a butterfly’s point of view and shoot from a higher angle. This angle is quite easy to execute since you’re taller than most flowers. But don’t use the same angle all the time. Looking down is a popular perspective, but it can get boring if you overuse it.
Imagine an insect’s point of view and go lower. You have to stay close to the ground. But the shots you get are worth it.
You might have to lie down on the ground or in the dirt. To help you stay clean, you can also bring a blanket or an old yoga mat you can lay on.
Sony a7 II, 28mm, f/4.5, 1/1,600 s, ISO 100. Lee 琴 (Unsplash)
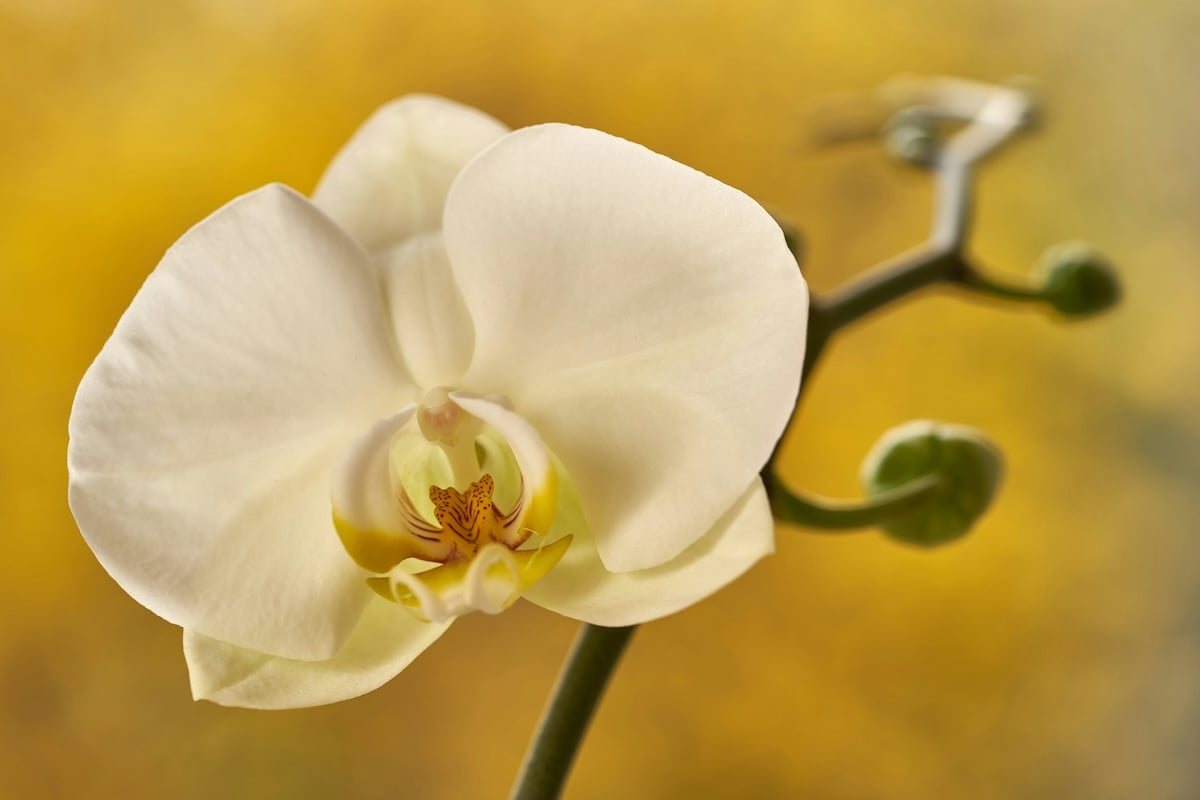
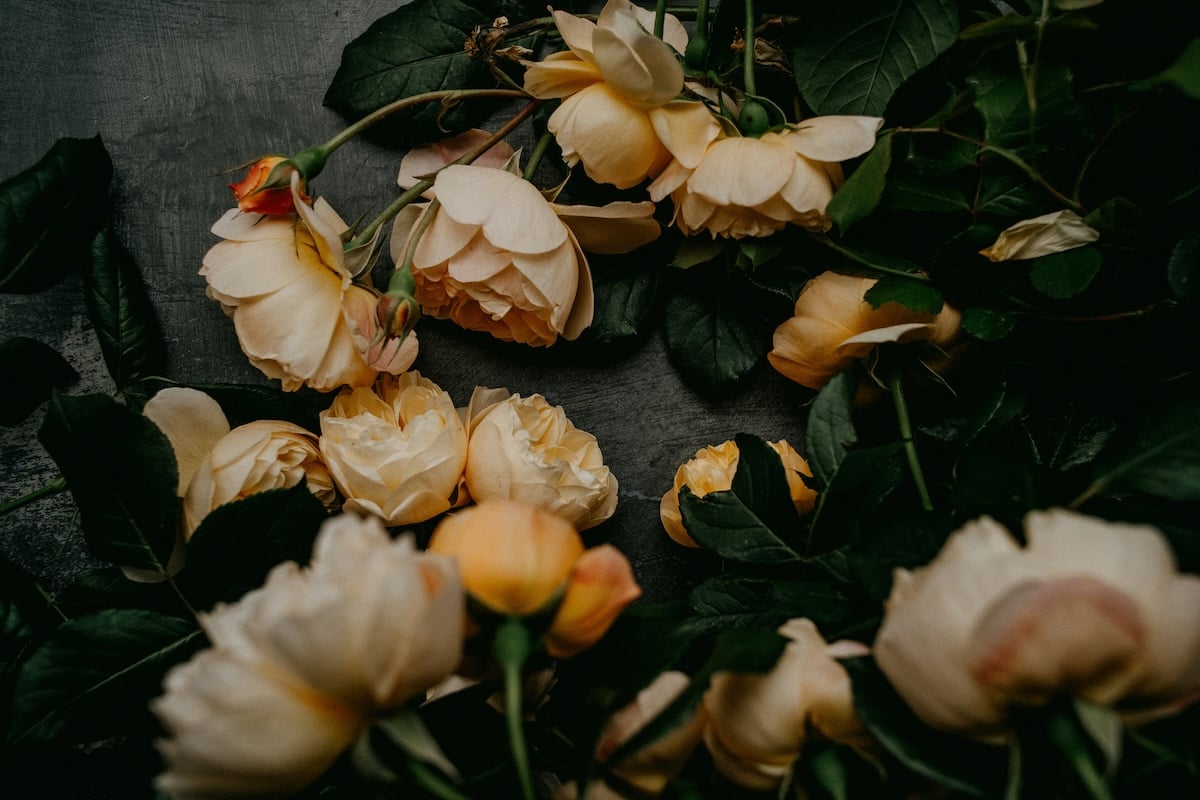
8. Compose Flower Shots Like Portraits
Creative flower photography can be challenging when it comes to composition. Where do you place a single flower in your frame? How about a group of flowers or a flower field?
One good technique is composing your shots the same way a portrait would. Like portrait photography, look for a flower’s unique features. Focus on the most beautiful parts of the flower, like the petals or the stamen. Bring attention to these features to create more engaging photos.
It’s best to use composition guides like the rule of thirds. Turn on your camera’s grid lines, then place your subject where any of those lines intersect. This composition technique helps create balanced images.
If you’re shooting indoors, you can experiment with floral flat-lay photography.
Unsplash photos: Wolfgang Hasselmann (left), Sony a7 III, 90mm, f/5.0, 1/125 s, ISO 100. Annie Spratt (right), Nikon Z7, 1/1,600 s, ISO 400.
9. Try to Minimize Camera Shake
Photographing flowers using a shallow depth of field can be difficult when windy. A small breeze could throw off your focus, so choose a place with calm weather.
Shooting flower photography handheld can be tricky. Any camera movement causes some camera shake and results in blurry photos.
To add stability, you can use a tripod and remote shutter. A remote shutter is perfect since you don’t need to touch your camera to take a shot. It also helps to choose a high shutter speed (at least 1/125 s) to avoid motion blur.
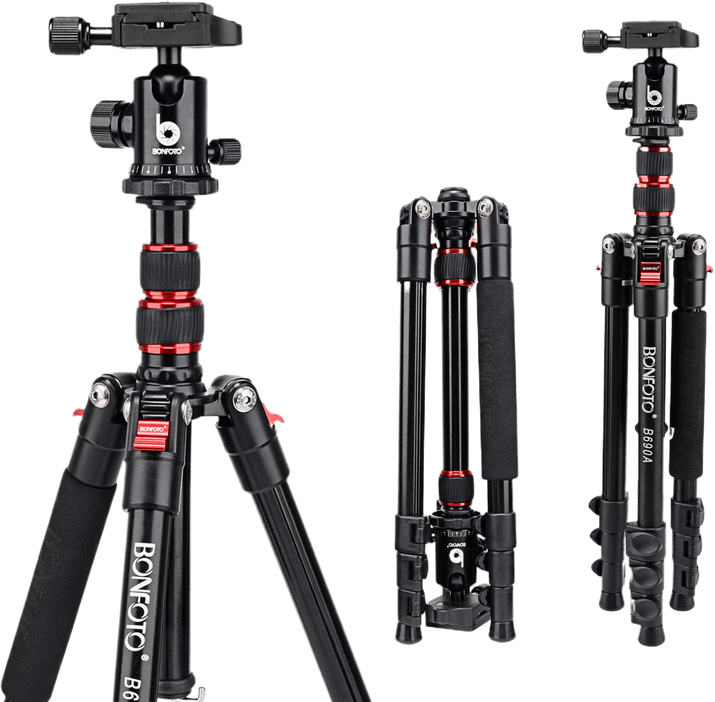
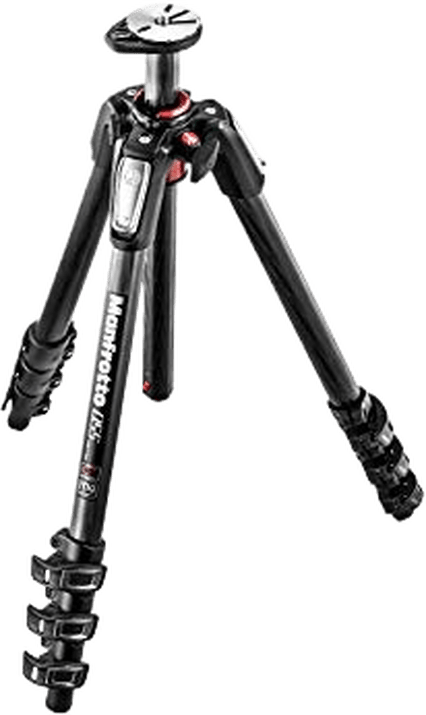
Our Top 3 Flower Photography Tripods

10. Keep Flowers in Focus
It can be challenging to keep flowers in focus because you have to take photos at close range for macro shots.
Fortunately, lenses let you change the depth of field to improve focus. You can control how deep or shallow the focus is by choosing an appropriate f-number. Lens length also affects this.
Select smaller apertures like f/5.6 or f/8. This setting creates a deeper depth of field but still keeps the background blurry enough to minimize distractions.
You will have difficulty keeping your subject sharp if you select a wide aperture like f/1.8 or f/2.8. The area in focus will be too narrow, and you won’t capture the full flower.
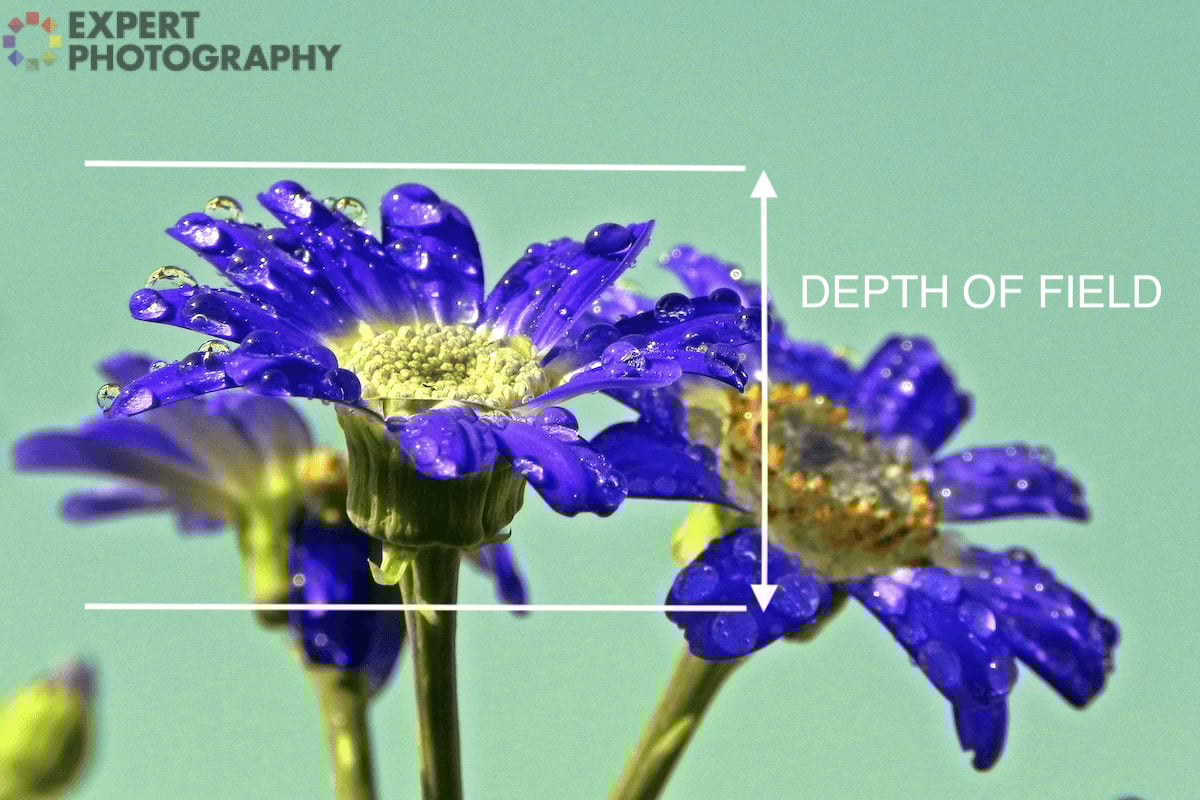
Nikon Coolpix P100, 25.7mm, f/6.3, 1/640 s, ISO 160. Krivi (Unsplash)
11. Use Single-Point Focus for Sharper Photos
Focusing can be challenging due to the shallow depth of field produced by a macro lens. Even slow movements can throw it off.
Try using single-point focusing when taking flower photos. This setting lets you pinpoint exactly which part of the flower you want to focus on. But this isn’t foolproof. Sometimes, your camera struggles to focus, like when your subject moves too much.
If your camera isn’t focusing correctly, turn off your camera’s autofocus and switch to manual focus. Manual focus gives you total creative control over your image’s focus point.
Canon EOS R7, 100mm, f/11, 1/200 s, ISO 200. David Clode (Unsplash)
12. Use Focus Stacking for Sharp Images
Despite using a small aperture, your lens will still produce a relatively shallow depth of field. This small focus area is due to the close shooting distance. And it will lead to some of your images being blurry.
Focus stacking is useful if you want your entire subject in focus. You take multiple photos with different focusing distances. Then, in post-production, you “stack” them on top of each other, creating a single image that’s entirely in focus.
Canon EOS R6 Mark II, 191mm, f/7.1 , 1/500 s, ISO 100. Srivenkata Subramanian (Unsplash)
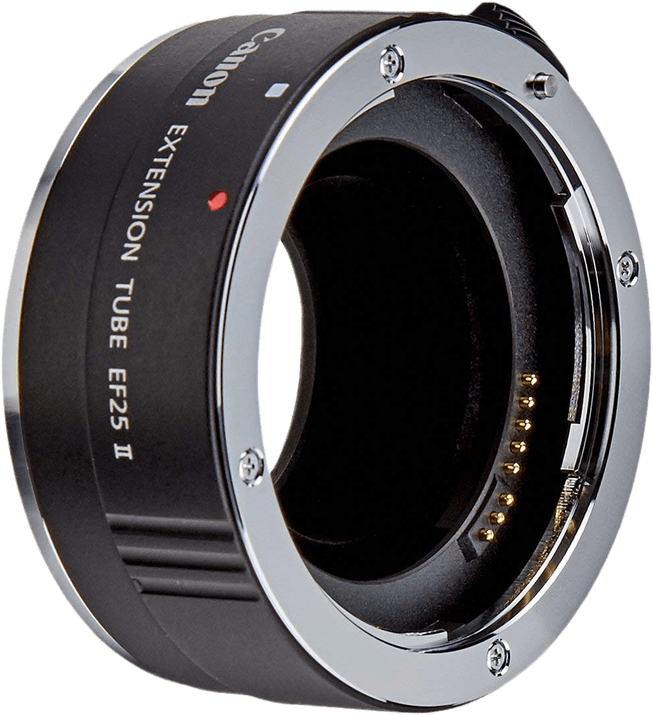
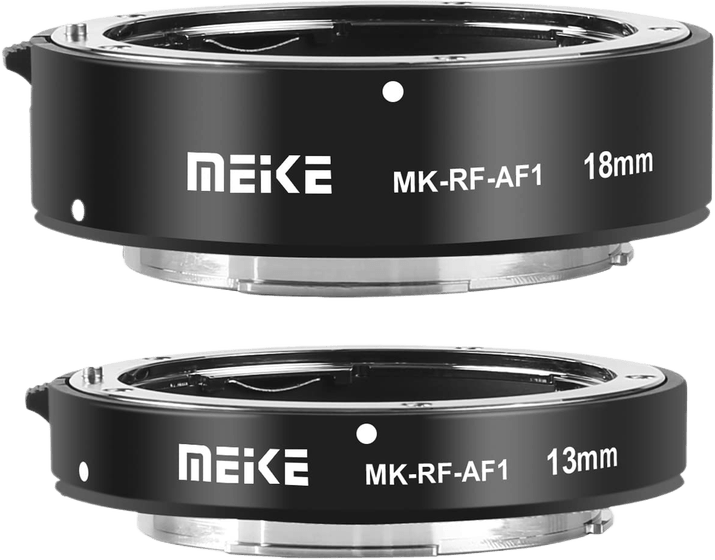
13. Use Macro Accessories for More Detail
If you have the budget, a modern digital camera with a macro lens makes flower photography easier. The results are high-quality flower photos with lots of details.
But if you’re not ready to invest, you can always use macro accessories instead of macro lenses. Bellows, extension tubes, and reversing rings are all good ways to lower the cost of entry into macro photography.
I take most of my flower photos using a reversing ring. This accessory lets you screw ordinary lenses on backward. It creates extra magnification that lets you shoot macro images.
Our Top 3 Flower Photography Extension Tubes

Conclusion: Flower Photography Tips
As long as you know the right techniques, getting creative in capturing flowers can be easy. Since they’re static subjects, you can always keep shooting if you’re unsatisfied with your images.
Try our flower photography tips for unique flower photos next time you go out. Have fun, and you may surprise yourself with the results.
- Learn to take stunning photos without stepping outside.
- Discover affordable ways to convert any lens for macro shots.
- Explore unique techniques for lighting and composing your subjects.


