You'd think that the best time to shoot portrait photography would be during the day. Plenty of light, contrast and shadows. Right?
Yes and no. As an artist, there's no reason to limit yourself. If you focus only on daytime photography, you'll miss out on the chance to photograph some amazing night portrait photography.
Your camera and lenses are capable of more than you'd think in low light conditions.
Here are our handy tips for taking advantage of those dark evenings for night portrait photography.
Night Portrait Photography: What Camera Should You Use?
You're going to want a camera that does well in low light. Other factors matter too, such as megapixel number. But low light capabilities are the most important.
Look for models with less noise at higher ISO levels and sensitive sensors. These will do best in difficult lighting situations.
Before settling on one, you should compare the low light abilities of several models.
A camera with a higher megapixel count will pick up more detail. This can make a difference when post-processing the final images.
But there is a downside to higher megapixel counts. The higher this number is, the larger the file size. Invest in some large SD or compact flash cards.
A couple camera bodies that excel at low light include the Canon 5D and 1Dx lines, as well as Sony's Alpha line.
Best Lens(es) for Nighttime Portrait photography
The type of lens you use has a great effect on the quality and look of your final image.
You're shooting in low light, so I suggest only looking at lenses with a maximum f/stop of 2.8. Lower is even better.
If you want to take a well exposed photo in low light, you need a lens with a wide enough aperture. This will let in as much light as possible and make the frame bright.
I've worked with an f/4 lens for many years. When I finally moved to a f/2.8, the difference was significant. The f/4 was much harder to use in low light situations.
The wider aperture also allowed for a shallower depth of field. This is great for night portraits because of the beautiful bokeh nighttime lights can produce. Luxury glass, prime, ART, and such higher end lenses are sharper and clearer than otherslenses.
These lenses are also faster and more reliable. As a general rule, fixed millimeter lenses tend to be sharper than lenses with a range.
The downside to fixed is you having to physically move yourself in order to adjust the composition.
The most common lenses used for night photography include the 24-70mm f/2.8, 50mm f/1.2, and 85mm f/1.4 lenses.
How to Bypass the Focus Problem with Wide Apertures
The problem that some run into with wide open apertures is focus, especially if the camera tends to hunt for focus in low light! There are a few things to keep in mind when it comes to getting really sharp images (i.e. perfect focus) at wide apertures.
To get your subject in focus, it has to be on the focal plane. The problem with wide apertures is that this focal plane is quite small. The wider the aperture (smaller number), the smaller the focus plane. You have much less wiggle room when it comes to getting a sharp photo.
Distance from the subject plays a key role here.
When shooting wide open, even the smallest diversion from either of the focal plane axes will cause your subject to be out-of-focus. You cannot take a step forward or back without having to refocus if you're shooting at a wide aperture.
By keeping this in mind, you can adjust your photography technique to better accommodate the small focal plane.
A trick to help make sure that what you want in focus is indeed sharp, is to use single point autofocus. By default, your camera will probably select either the object that's closest to the camera or what's in the center of the frame.
By using single point autofocus, you tell the camera exactly where to focus. This is extremely helpful with low aperture numbers. Refer to your camera model's manual to find out how to change the focus setting!
Best Settings for Nighttime Portrait Photography
I suggest shooting in RAW mode if you have the right editing software . RAW captures all image data recorded by the sensor when you take a photo.
When shooting in a format like JPEG, image information is compressed and lost. The benefit of RAW is the ability to edit every single aspect of the image with a lot more control than usual.
You can adjust the highlights, shadows, and everything in between and recover lost data.As for other settings, keep your ISO high and your shutter speed as low as possible.
This will allow you to achieve a good exposure for a difficult lighting situation. And this goes without saying but keep the aperture as wide as possible.
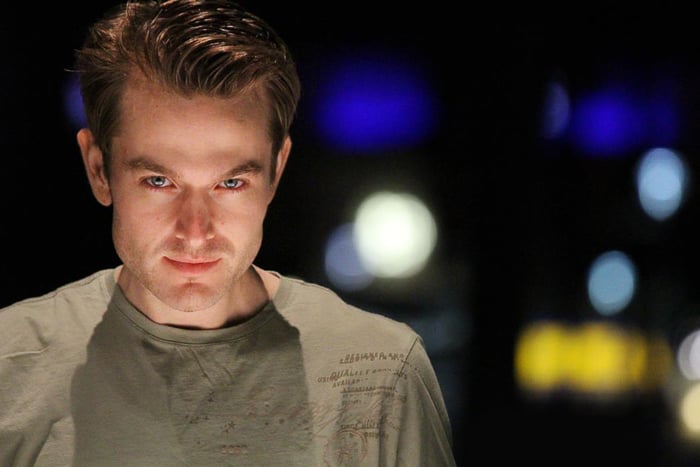
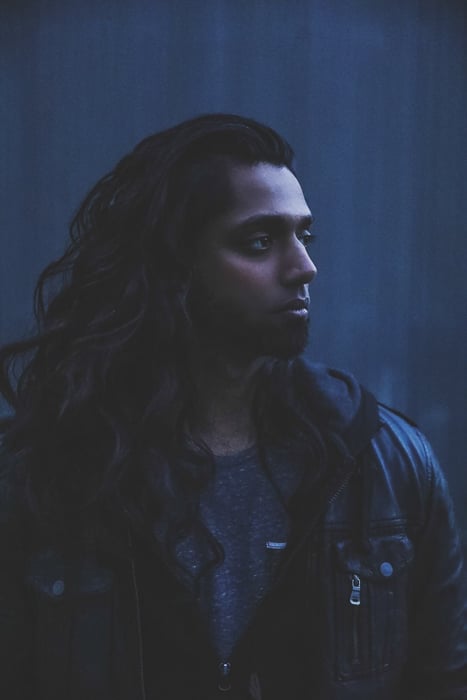
Lighting for Nighttime Portrait Photography
This is where things get more complicated. You can either the light that is available within your shooting space or bring artificial lights with you.
I suggest using available light but bring some additional lighting gear with you just in case.
The primary problem is that your lighting is going to need to be battery-operated. There won't be any outlets for you to use when shooting outdoors at night.
Some photographers purchase generators, so I suppose that is also an option.
Here are the lighting varieties that I have used in night photography.
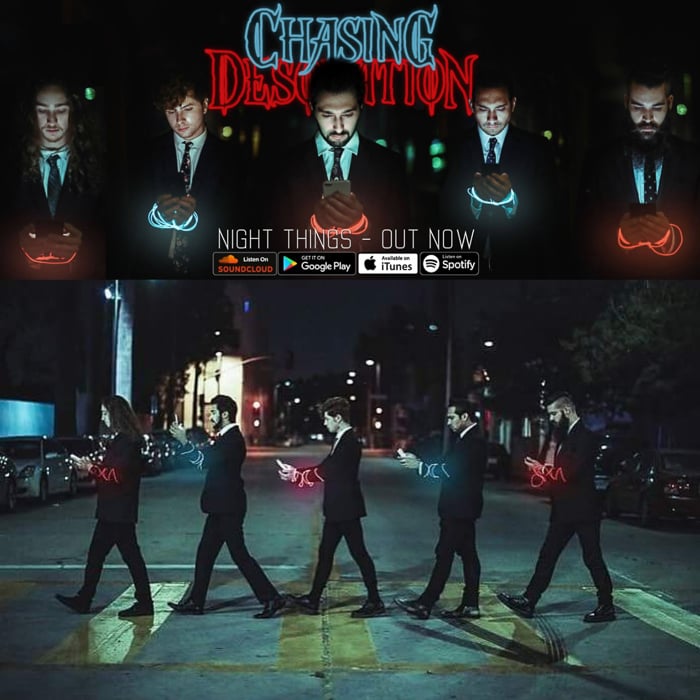
4. Off-Camera Flash
The most popular artificial light for portraits in low light settings is an off-camera flash. This is often attached to the hot shoe at the top of your camera.
Consumer-level cameras come with a built-in flash. But this flash tends to not be a good option due to its limited ability.
Off-camera flashes can be positioned or pointed in almost any direction. You can also bounce them off of various surfaces.
And you can also add a softbox mount to your off-camera flash to soften the light.

3. Battery-Operated Lights
LED lights, commonly used in ring lights, are another good option. They are often battery operated.
The light can be a bit harsher and does not typically have room for a diffuser. But you can get very nice accentuated cheekbones with LED battery-operated lights.
LEDs also tend to last a long time and can run cold instead of hot.
A popular LED kit that I like to use is the Spekular Modular LED light, created by SpiffyGear. They have a battery operated version where you can add a battery adapter to take your kit on the go.
Some softboxes might also be battery operated, or have the option of being converted to battery operated lighting.
2. Reflectors
If you don't want to carry a light with you, a reflector can work just as well. A reflector bounces available light where you want it, essentially allowing you to control the light around you.
Placing a reflector below your subject and shooting up at their face can help make the most of what is available.
If you don't have a professional photography reflector, you can actually use the car windshield sheets instead.

1. Alternative Ideas
Sometimes you have to get creative. Using a flashlight or the light on your phone can work as alternative remedies to not having enough fill light.
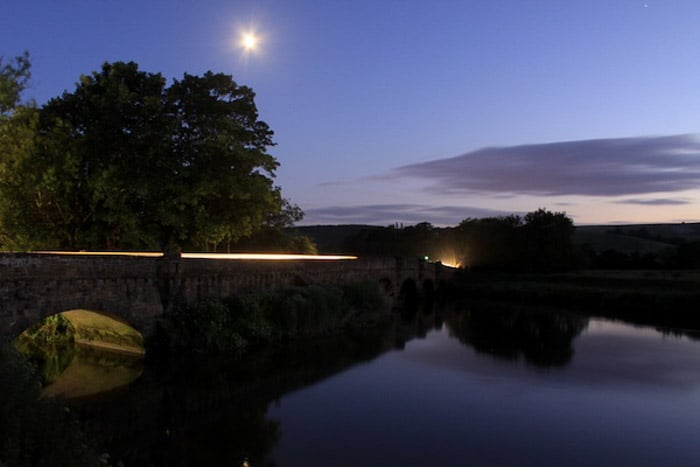
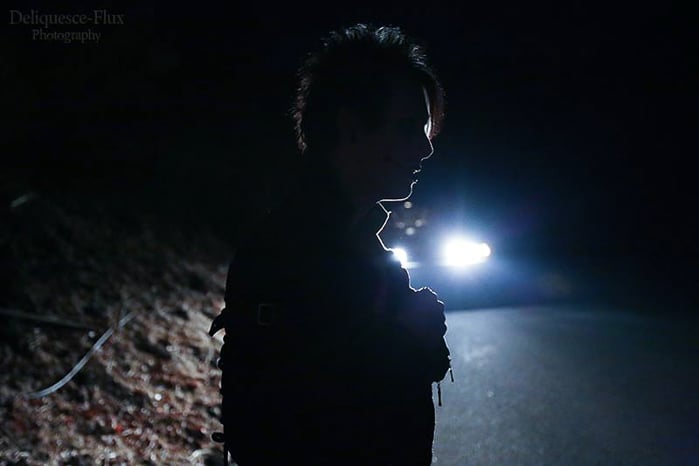
And what about a car headlight, like I used below?
How to Scout Locations for Nighttime Photography
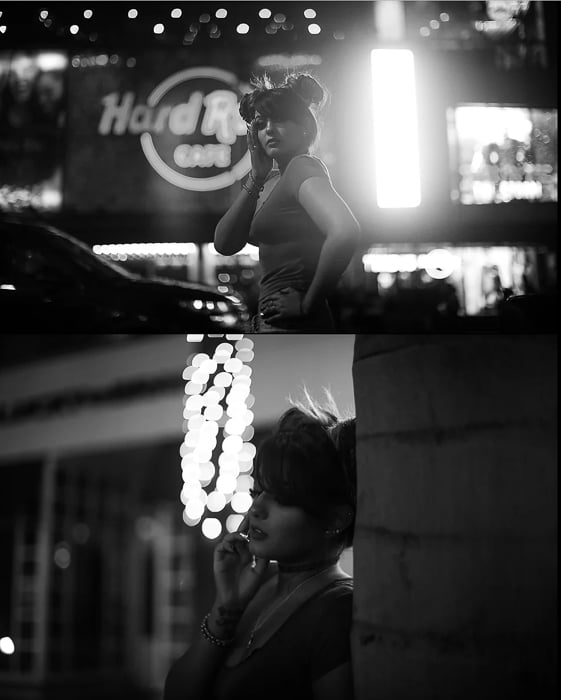
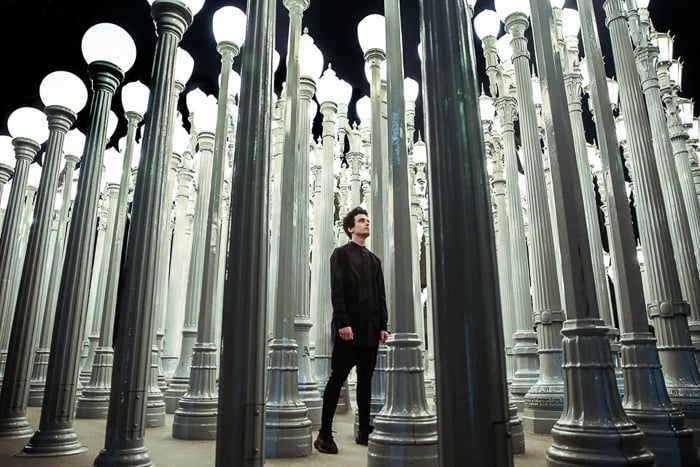
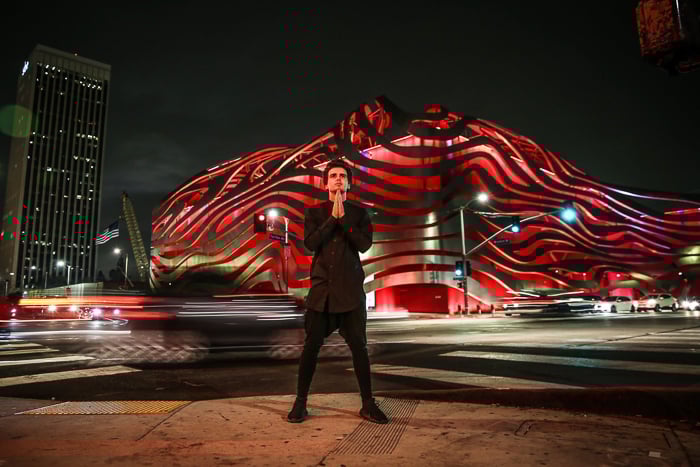
The location will really make your night portraits shine. Try to find spots that have some illumination to them already. This can be due to brightly lit storefronts or neon lights.
I live in Los Angeles, and the nightlife in the city provides a brilliant backdrop for night portraits. Especially walking down the famous Hollywood Boulevard!
If you are using a lens with a very wide aperture (which you should be), nighttime city lights can make for an absolutely brilliant bokeh.
If you are shooting in a location with no ambient light, such as the desert, an artificial light or a long exposure will be your friend.
Capturing images in a location that has no real lighting can be very eye-catching and shocking for viewers. It's not what they think of when they think photography.
Try to find spots that really come to life in the evening hours, and something that has a vast background.
A nighttime portrait in front of a brick wall may not be as interesting. It could come off as just an odd exposure portrait and not an impressive image captured at night.
Take Advantage of Long Exposures
Photographers often think that long exposures are too difficult to bother with. But when it comes to nighttime photography, these are your best friend.
They'll allow you to take advantage of movement and life when the sun goes down. Use a tripod or monopod for stability and direct your subject to stand as still as possible. You will wow your friends and viewers with the result.
Try standing on the sidewalk of a busy intersection and get the light lines of cars moving quickly behind.
For long exposures, you’ll generally want your shutter speed somewhere between 5 to 30 seconds.
Remember that you may need to lower your ISO sensitivity to account for the significant brightening of the frame!
This works out brilliantly as you won't have to worry about noise reduction.
Post Processing to Get Rid of Noise
Even with the highest quality gear on the market, you will still likely see at least some noise in your night photography portraits.
With most cameras and lenses, noise becomes a very prevalent issue in low light photography.
But with the power of editing software, noise doesn’t have to be an issue.
There are two approaches when it comes to noise in images: you either embrace it, or you get rid of it.
My philosophy on the matter is simple. If you have a lot of noise, embrace it. If you have a reasonable amount, get rid of it.
This is just a general idea. You have to determine whether or not noise can become a storytelling element in your image or it's just a technical distraction.
If the noise is adding character and texture to your shot, I would actually suggest making it stand out even more. You can do this by sharpening or using “clarity” to define the specs more.
Turning the image black and white can really add a beautiful film-grain element to your shot.
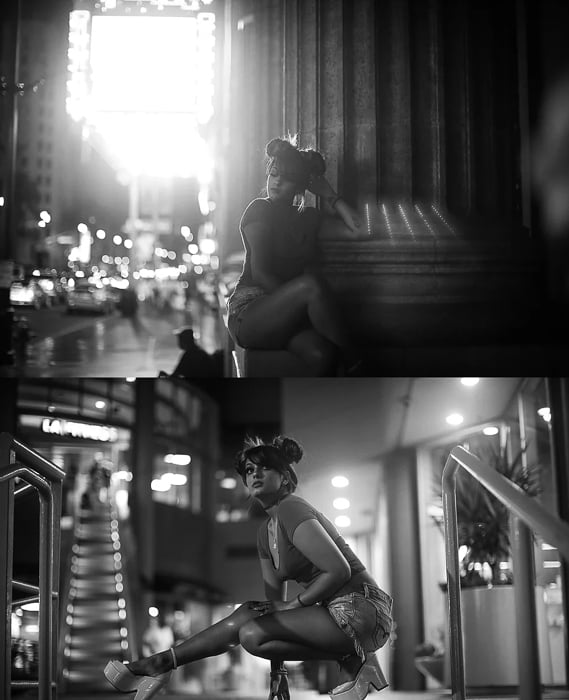
For example, this photo shoot I did for a Los Angeles singer was intended to mimic 35mm film as she is deeply inspired by the vintage. I made sure that the noise was very prominent.
If the noise is simply a distraction to an otherwise sharp and modern image, get rid of it!
Adobe is the industry leader of post-processing software and they have a rather brilliant noise removal engine in both the Lightroom and Photoshop programs.
Here is a quick overview of how to remove noise in these two flagship programs.
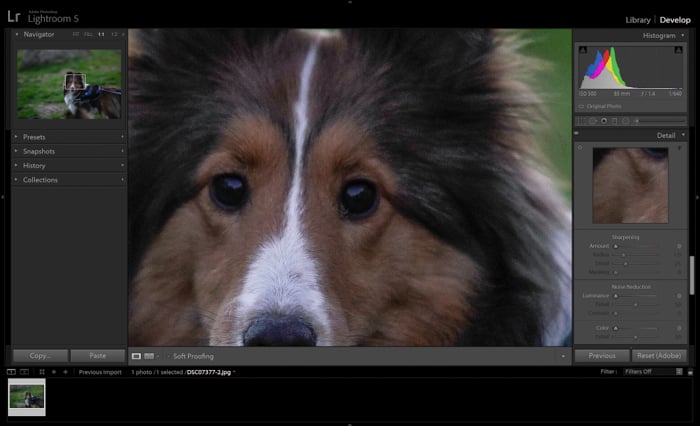
Here is our original image:
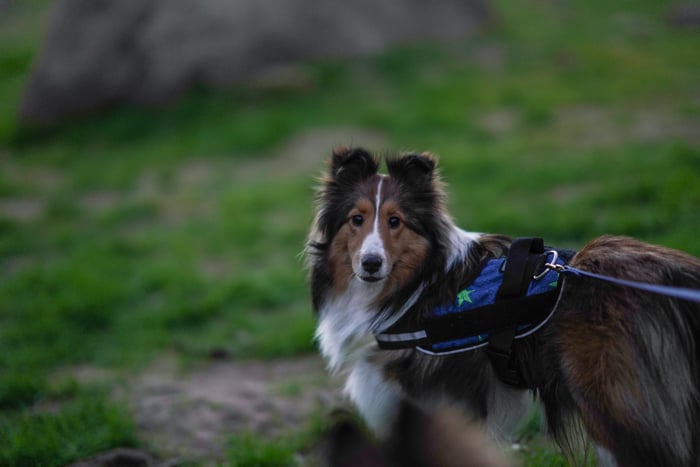
This image was not taken in complete darkness, but the sun had already set well below the mountain.
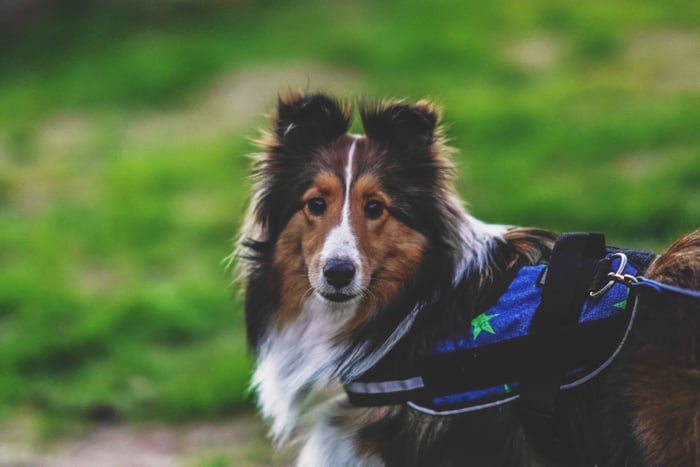
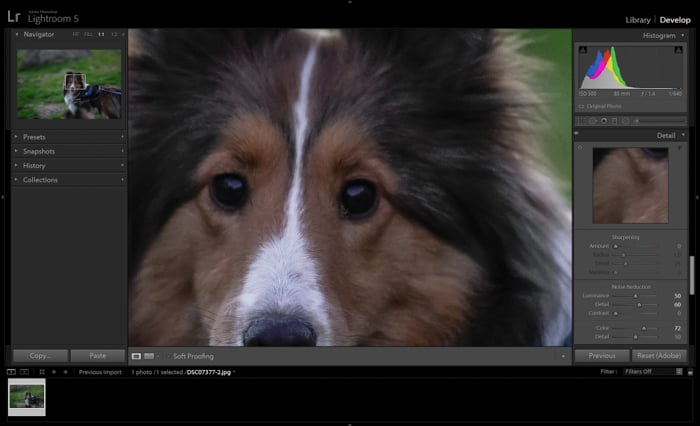
This will be our finished result:
Adobe Lightroom
Step 1: Import the image into Lightroom and click “Develop” in the upper right hand corner.
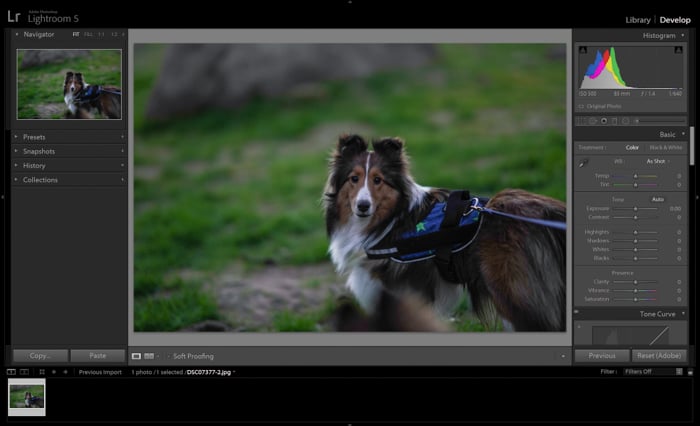
Step 2: Locate the “Detail” panel in the right hand panels. I believe this panel will require expanding (by clicking the downward facing arrow) by default!
From here, you are able to use the sliders to reduce the noise. This particular image suffered from quite a bit of color noise, due primarily to the lens being used.
Mess around with these sliders until you achieve the desired look. What I suggest doing is bringing the detail back via the “Clarity” or “Sharpness” sliders.
Do this after bringing the noise levels way down.
Step 3: Export the image.
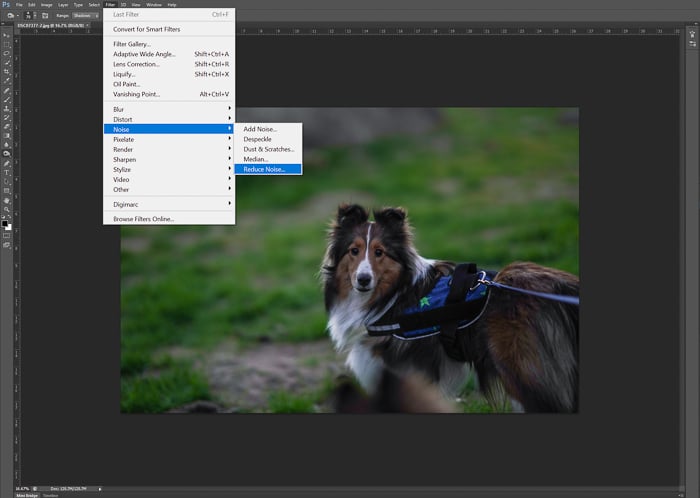
Adobe Photoshop
Step 1: Open the image in Adobe Photoshop. In the upper left hand of your screen, go to Filter > Noise > Reduce Noise.
I suggest turning this into a Photoshop Action and adding a hot key to it for easier access!
Step 2: Just like in Lightroom, use the sliders to achieve the desired effect. The sliders are a bit different in Photoshop but they work the same way as Lightroom sliders do!
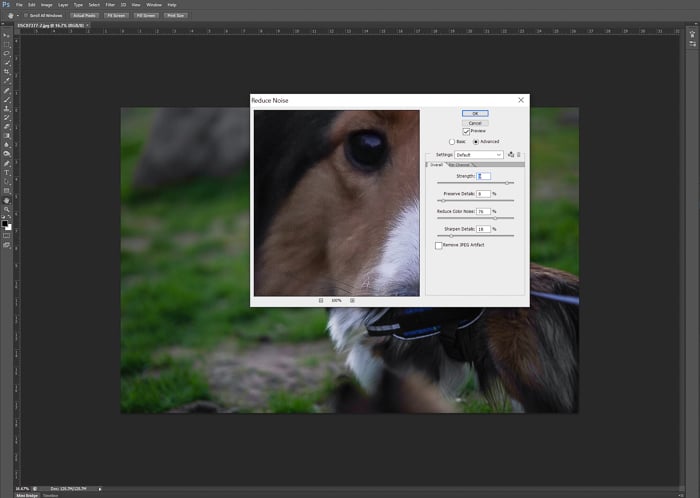
Step 3: Save the image.
Conclusion: Night Portrait
If you are looking to wow your photographic audience, night portraits are the way to do it. Take a unique and visually stunning perspective in the darkest hours.
With these tips, you’ll be able to dazzle anyone who comes across your work.