Need to shoot clothing photography for social media, an e-commerce store or your product photography business? It’s important to take pictures that are inviting, so your customers want to buy what you’re selling!
Time to make your outfits shine through beautiful photography with these simple steps.
The Benefits of Conceptualising Your Clothing Photography Shoot Beforehand

A crucial step in clothing photography that a lot of people don't do is conceptualizing the photo shoot.
First, you need to ask yourself why you need to take photos of the outfit. Is it going to be for an e-commerce website, a social media post, or a lifestyle shoot?
Knowing the purpose of the shoot allows you to narrow down your requirements. For instance, if it's going to be for e-commerce, you might need to use a white background.
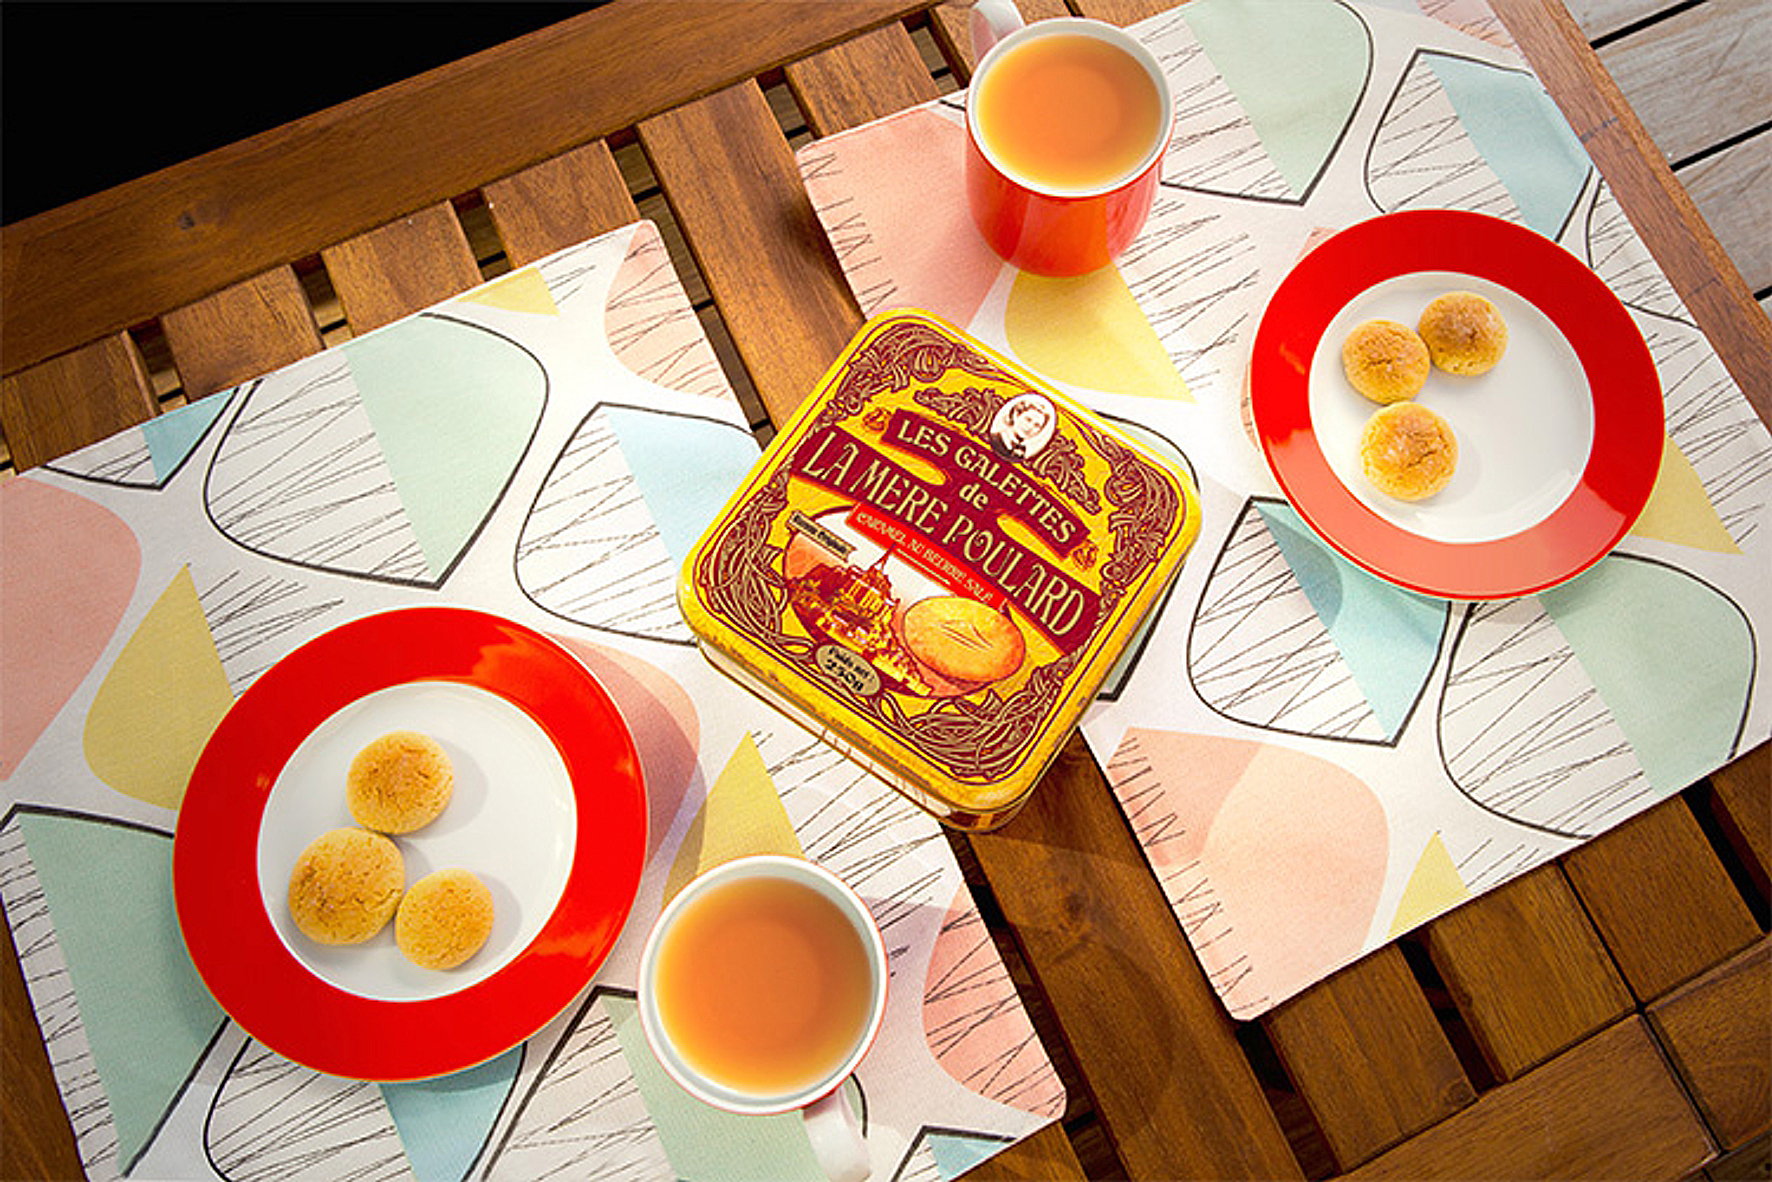
If it's for social media or lifestyle, you might need a few props to style your images.
Next, think of how you're going to photograph the clothes. Look at style, color, and texture to help you decide which props or background to use. Feel free to sketch your ideas on paper.
Pick a Background That Matches the Clothing Style
The type of backdrop you use depends on where you plan to use the images. While e-commerce requires a plain background, lifestyle photos often demand realistic settings.
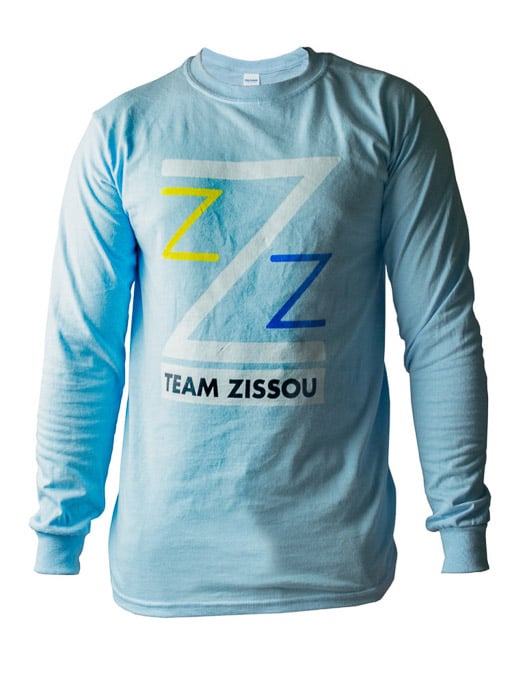
When it comes to e-commerce, a white background is often the standard. The main reason is that it creates uniformity in all the listings from different sellers. But its plain profile also makes it less distracting and makes the outfits stand out.
Don't worry if you don't have a studio with a white background. You can always use all sorts of DIY photography backdrops such as a wall or even a blanket.
If you want a consistent look, you can also get a seamless paper backdrop as well. You can buy one at craft stores for as low as ten dollars. All you have to do is tape it to your wall, and you have yourself a photo shoot studio.
For lifestyle, you can use just about anything as your backdrop. You can shoot in front of walls for eye-level shots or even on floors or tables for flay lay (overhead) images.
The option you choose has to work well with your outfit. So, if you have a modern dress, don't pick a rustic brick wall because their styles don't match.
The colors of your backdrop also shouldn't overpower the clothes. If in doubt, refer to the color wheel and look for options that complement the tones of the outfit.
Keep a Lint Roller Nearby to Ensure the Clothes Look Great
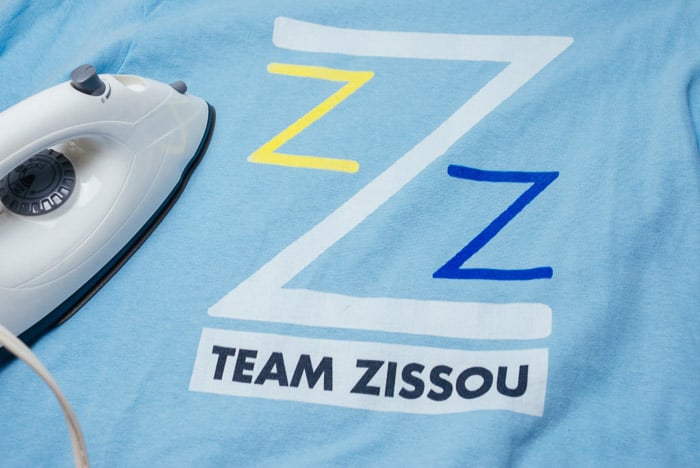
Paying attention to details is essential in product photography. So you need to take time your outfits look perfect before you start clicking that shutter.
The main issue you'll encounter with clothes are wrinkles. To avoid having to edit out creases in Photoshop, try to iron them before you shoot. Or consider using a steamer if you can't apply direct heat to the garment.
Lint is another problem you'll find when shooting clothing photography. Always bring a lint roller to pick up the tiny particles clinging onto your outfits.
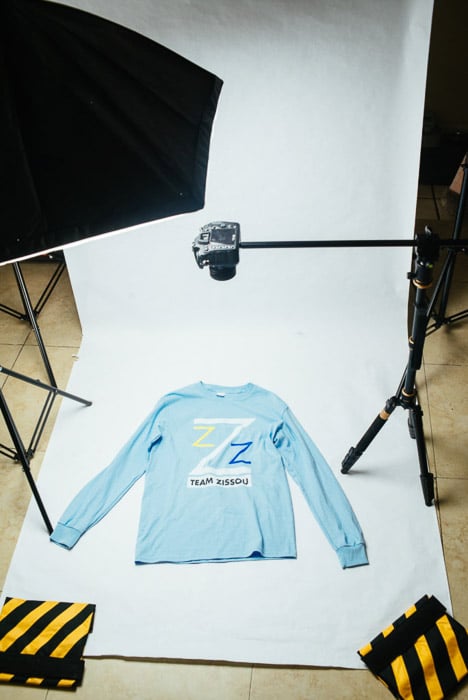
Lighting Setup for Clothing Photography
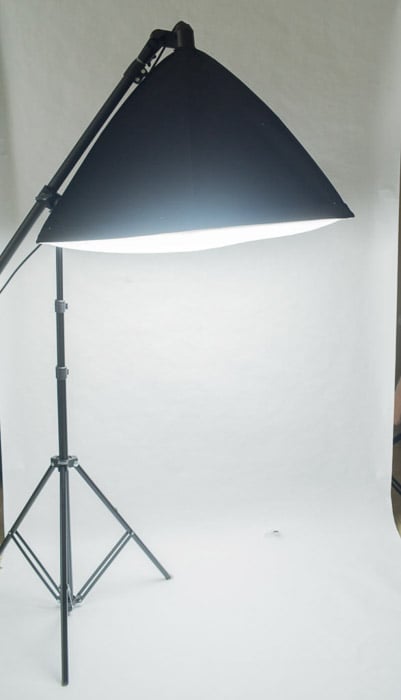
Lighting doesn't have to be a challenge when it comes to DIY clothing photography. We'll show you tricks to achieve professional results without expensive lighting kits.
The first solution is to shoot beside a wide window during the daytime. Doing so allows you to diffuse the light coming from the sun, producing even lighting.
But what if you need to shoot at night? Consider buying a small work light, instead. For about twenty dollars, you'll have a powerful kit that would let you shoot indoors.
For best results, hang a white curtain about a meter away from the work light to diffuse the harsh beam. Position your DIY kit about 45 degrees from the outfit to ensure even lighting.
If you have a few extra dollars, then think about buying a small softbox. Each one runs about 50 US dollars and up. It may not be that cheap, but it's a great investment. Especially if you see yourself shooting a lot of clothing photography in the future.
Use Lenses With Focal Lengths Over 50mm
Lenses can affect the perspective of your image. If you use short focal lengths such as 18mm or 35mm, expect your photos to have a fisheye effect. In other words, it makes the outfit look much bigger than it is.
Make it a point to avoid wide-angle lenses. Stick to focal lengths from 50mm and above. This will help you better capture the correct dimensions of your product.
It's okay if you have an 18-55mm kit lens. Just set the zoom all the way up to 55mm, and you're good to go. You may have to step back to get everything in the frame, but at least the clothes won't look distorted.
If you have the money, you can also invest in a portrait lens such as the 85mm or 135mm. They not only reduce distortion, but they also make outfits look slim.
Camera Settings for Clothing Photography
Now that you have your lens, it's now time to learn how to photograph clothes using the correct camera settings.
First, let's start with the aperture. Use a narrow f-stop such as f/8 or f./11 if you want both your backdrop and the outfit to look sharp. Now if you like your background to look blurry, then choose a low aperture such as f/4 or 5.6.
Try not to go all the way down to f/1.8 or f/2, or you could risk blurring some parts of the clothes you're photographing.
Feel free to switch to Aperture Priority, so you don't need to tweak with the shutter speed anymore. Just make sure the value doesn't go any lower than 1/60th of a second if your hand-holding it.
Otherwise, you might end up with motion blur in your image.
Finally, keep your ISO to 100 to reduce image noise. Especially since the higher ISO values you use, the more visible the grain you’ll have in your photo. If there isn't enough light available, adjust the shutter speed, instead.
Since you're dealing with a static subject, you can always use a tripod so you can work with anything slower than 1/60th.
Popular Composition Setups for Apparel and Clothing Photos
Now that your camera, backdrop, and lights, are ready, it's time to start setting up the clothes. There are several ways to photograph outfits.
The most common ones are flat lay, eye level, and ghost mannequin. We'll go through each method to help you figure out what you need to use for your photo shoot.
The first one is the flat lay. As the term suggests, it involves laying the clothes flat on a surface such as a table or a floor. You can take photos of the garments either folded or open.
You also have the option to include a few small props to make your photo appear authentic. Once everything is set up, shoot with the camera facing down 90 degrees.
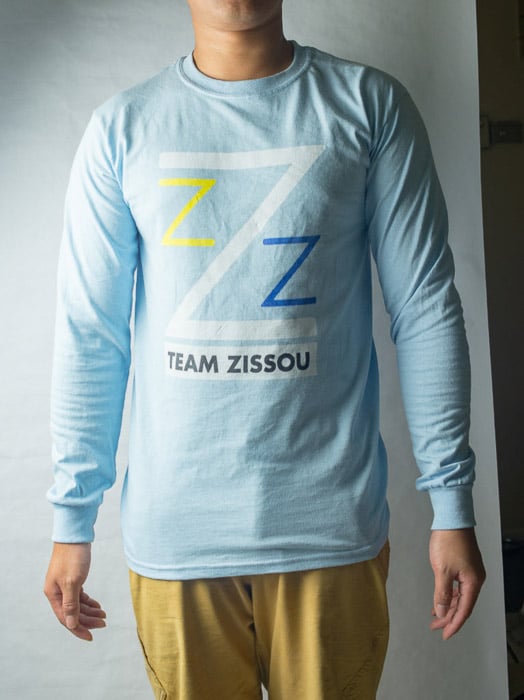
The next popular method is the eye-level shot. It involves positioning your lens at the same level as the outfit. To display the items you're shooting, you can either hang it on a hanger, use a DIY mannequin, or a live model.
Try different angles to make sure you show all the details in the garment. Take photos of the front, the back, and the sides.
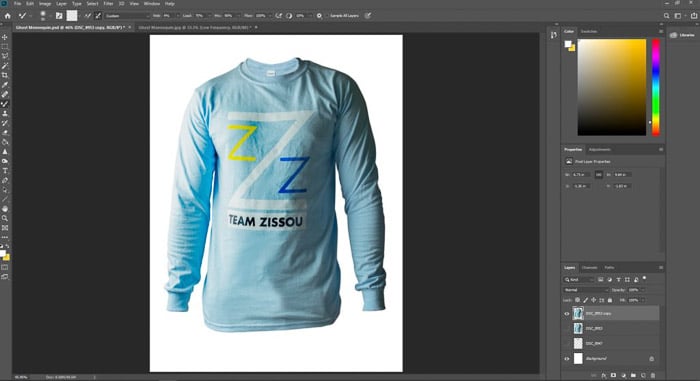
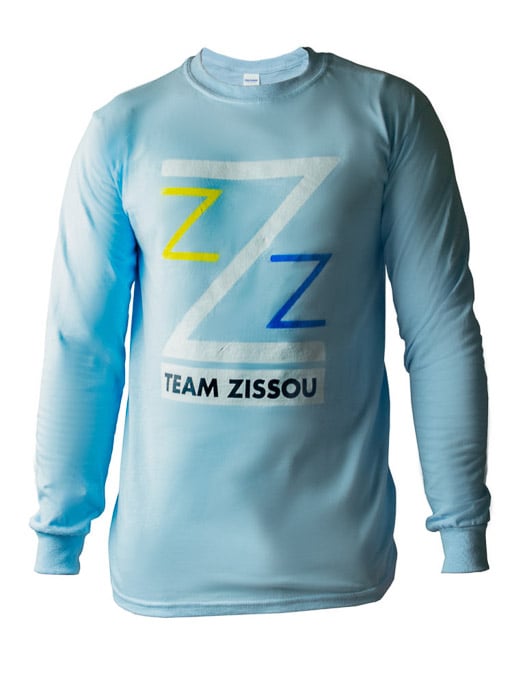
The ghost mannequin is a variation of the eye-level shot. What makes it different is that it makes the outfit look like someone's wearing it except you don’t see the person at all.
So how do you take clothing photography without mannequins? It's easier than you think.
First, take a photo of a person or a mannequin wearing the outfit.
Next, turn the garment inside out and photograph the reverse side of the collar.
You then load the files onto Photoshop. Use the pen tool to cut away the wearer's limbs in the first image.
Finally, paste the image of the reverse side of the outfit behind, and that's it!
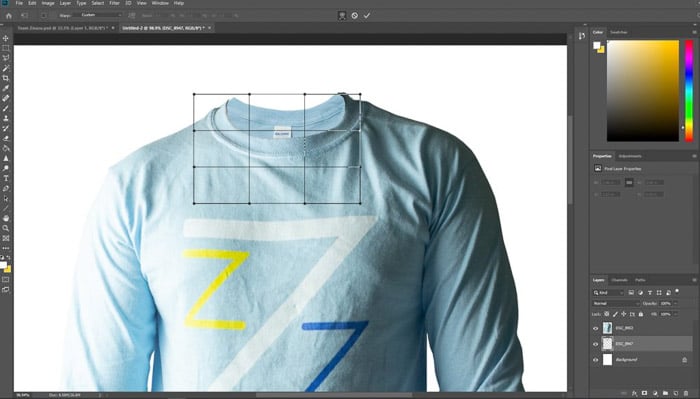
Use the Spot Healing Tool to Remove Blemishes
No matter how much you iron the clothes, you'll never be able to remove every single wrinkle. And that's where editing comes in. There are three main ways to get rid of any blemishes on garments, and we'll go through how to use each one.
The first and most common method is using the spot healing brush tool. Once you select it, all you have to do is to click on the blemish, and Photoshop automatically removes it for you.
Sometimes, the spot healing brush tool leaves ugly blotches in the edited areas. So when this happens, you can use the patch tool instead. Click and hold down your mouse as you draw around the blemish.
Once you create a selection, click it again and drag it to a clean region in the photo. Photoshop then copies that section to cover the ugly parts.
If you're dealing with huge wrinkles, consider using the clone stamp tool. Alt+click to copy a smooth section and click again to apply it on the creases. It might leave a few marks, so feel free to apply the spot healing brush or the patch tool after.
Remove Wrinkles With Frequency Separation
If you have tiny creases that seem impossible to remove, then try frequency separation to make your outfit appear smooth. It sounds complicated, but it's easy to do.
First, create two duplicates of your image. Name the first one Low Frequency and the second one High Frequency.
Next, hide the High-Frequency layer and select the Low-Frequency layer. Go to Filter, click on Blur, then Gaussian Blur. Increase the radius of the pixels until the wrinkles aren't visible, anymore.
Now, go to High-Frequency and click the box where the eye icon used to be to make it visible again. Go to Image and select Apply Image. Choose Low Freq as your Layer, then go to Blending and click on Subtract, then Okay.
Once the dialogue box closes, go to the Layers Panel and select Linear Light for the Blending Mode.
Click on Low-Frequency, then go to the Tools Panel, right click on the Brush Tool, and choose the Mixer Brush Tool.
Go to Options Bar and change the wet value between 3 to 5. Now paint on the wrinkles and see them slowly disappear.
Conclusion: Clothing Photography
Learning how to photograph clothing can be fun whether you're doing it as a hobby or for business. So start going through your closet and start practising what you learned today.
Once you get the hang of it, you'll see the difference in the quality of your images.