Creating an iPhone time-lapse is much easier than most people think. Time-lapse sequences may appear too technical for regular smartphone photographers to do. But that’s not true.
With the newest iPhones, you can do it without any experience in a few simple steps. And we'll show you how to make an iPhone time-lapse video.
What Is an iPhone Time-Lapse?
Before we show you how to make a time-lapse, let's look at a few facts you should know about the technique.
Photographers and filmmakers use time-lapse in movies and television shows. They help depict time passing by in any particular location. It appears sped up. It shows different elements such as the sun or clouds moving across the sky in a matter of seconds.
Time-lapse is video footage composed of hundreds or even thousands of images. The reason why it looks sped up is that the camera takes one picture every few seconds.
Regular video footage needs at least 24 fps to create smooth and realistic movement.
Back in the day, you could do a time-lapse on your camera using an intervalometer. This triggers the shutter automatically every few seconds. Then you’d have to collect all the photos. Then stitch them together using a traditional editing suite such as Adobe Premiere.
These days, smartphones have built-in intervalometers. These allow you to shoot time-lapse photography without any extra hardware. This makes the process easy for even beginners.
Keep reading because we'll show you the entire process of how to shoot a time-lapse on your smartphone. We will also teach you a few tips and tricks to help you create cinematic footage.
What You’ll Need for iPhone Time-Lapse Photography
Your iPhone, of course. And then there’s some more equipment you’ll need for professional-quality time-lapse photos.
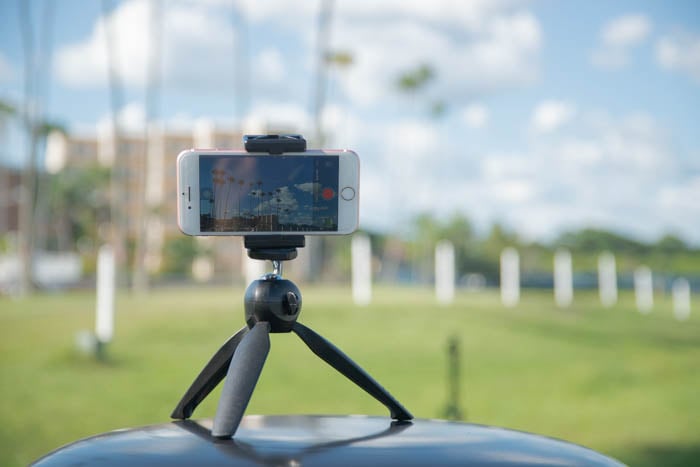
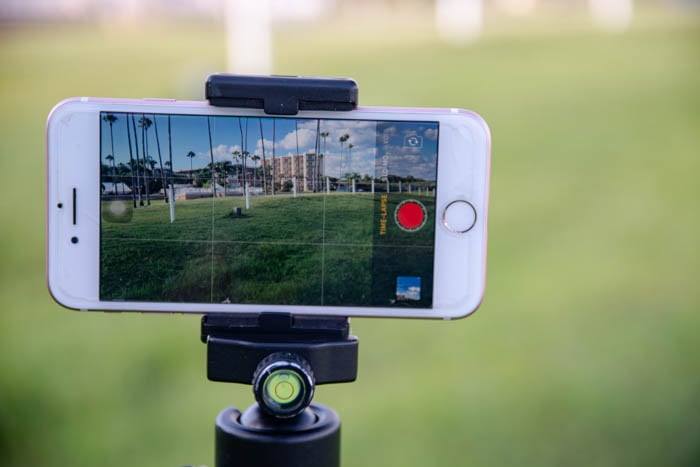
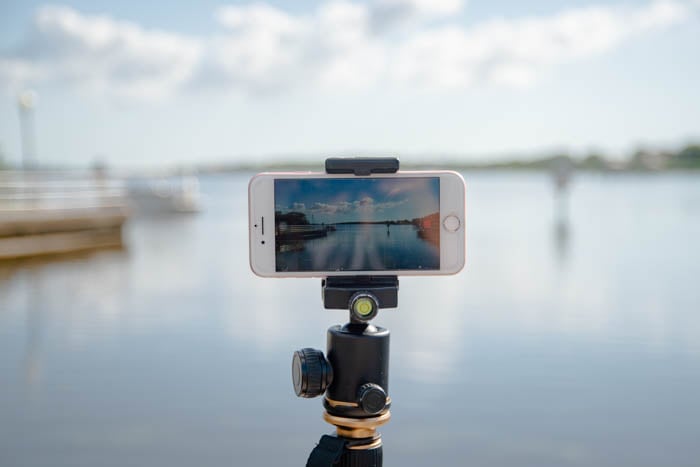
First, you'll need a tripod. Using it ensures that your phone stays steady while you're shooting. After all, your time-lapse is not going to look as dramatic if everything looks shaky.
You will also need a phone mount to let you attach your phone to your tripod. All you have to do is clip it onto your phone and thread the mount onto the tripod.
You're most likely shooting landscapes for your iPhone time-lapse. It would help if you have a fisheye lens as well. Because it makes everything look wider than in real life, it will make your shots look more engaging.
Finally, consider getting a remote for your phone. When you touch your device in any way, you risk moving it, even if it's on a tripod.
Trigger your iPhone time-lapse with a remote. This prevents you from jolting the camera and ruining your shot.
How to Use the Time-Lapse Function on Your iPhone
The earlier generations of iPhones didn't have a native time-lapse function at all. So to create one, you had to download a time-lapse app. Or you had to press the shutter at certain times manually. This was quite inconvenient.
Beginning with the iPhone 7, each iPhone now has its own Timelapse Mode. And the good news is that the feature is so easy to use.
All you have to do is open your phone's native camera app. Then scroll through the modes and select Time-lapse. Once you press record, your phone starts taking photos every few seconds. To stop, all you have to do is press it again.
What makes the time-lapse app awesome is that it does everything automatically. When you stop recording, your device stitches the photos together into a video. From there, you can either send it via email, save it to the cloud, or post it on social media.
To create an effective time-lapse, try to record at least 30 minutes worth of footage. Since your phone is taking photos and not videos, the end product would only be a few seconds long.
Using Third-Party Apps to Create a Time-Lapse
The iPhone's Time-lapse Mode works well in most situations. But it may not always be enough. That's why if you're serious about creating cool videos, it would help to use third-party apps.
For instance, if you want to shoot a hyperlapse (which we'll teach you how to do), you may need image stabilization. This will help you avoid shaky videos. iPhone doesn't have that option in Time-lapse Mode, but the app Hyperlapse does.
Another great app for time-lapse is Frameographer. What makes it different from the iPhone's native time-lapse app is that it has manual controls. That means you can change the aperture and shutter speed to adjust exposure. You can also create cool effects such as light streaks.
Finally, there's NightCap Camera for shooting time-lapse videos at night. Apart from an Auto Mode, it has a long exposure mode for creating trippy light streaks in the dark.
It also has noise reduction which is useful for night photography. Especially since high ISO produces too much image noise in low light conditions.
Ideal Spots for Time-Lapse Photography
With a simple press of a button, learning how to take a time-lapse on an iPhone is so easy. But the real challenge is to figure out how to create one that looks like a Hollywood flick.
The secret is to look for a good place to shoot a time-lapse. Like anything else in photography, the lighting has to be good. Whenever possible, try to shoot during the golden hour. This happens after sunrise or before sunset.
You can also shoot any other time of the day as long as the shadows don't look too distracting. For nighttime time-lapses, capture lights from buildings and moving vehicles.
Apart from the lighting, you should also look for a place with a lot of movement. This helps since you're creating video footage. The most popular shots for time-lapse often involve traffic, people, or the sky. The reason why they work well is that they create beautiful moving patterns on the screen.
Using Stationary Subjects
Now that you know how to create a regular time-lapse, here are a few techniques to take your videos to another level.
First, you can try shooting a stationary subject in front of a place with plenty of movement.
For instance, you can have a friend stand in the middle of a crowded sidewalk. You can also shoot inanimate objects such as trees or buildings as long as there is movement around them.
When using this technique, you'll make people feel like your main point of interest is not affected by the movement of time. It's effective especially when you shoot subjects that are usually always on the move. That's why people, animals, or vehicles work well for this type of time-lapse photography.
You don't have to do anything special to pull off this seemingly complicated iPhone time-lapse. All you have to do is set up your camera on a tripod and ask your friend to stay still.
The real challenge is to make sure your subject doesn't move around. Small movements such as leaning from one foot to another are okay. But your subject can't be walking or turning around the timeline because it will ruin the effect.
Hyperlapse
Another seemingly complicated type of smartphone timelapse you may encounter is hyperlapse. This technique involves a moving camera instead of being stationary on a tripod.
The fact that the camera moves to create this effect intimidates a lot of beginners. But all it takes is walking while holding up your iPhone with Time-lapse Mode turned on.
A problem you may encounter when shooting a hyperlapse is a jittery video. Since you're walking around, the framing may be slightly different in each shot. You end up with camera shake like you would when filming with regular video.
For a smooth hyperlapse, the secret is to walk in synchrony with your iPhone's shutter. So time your steps to coincide with your device taking a photo. Although it's not necessary, it would help cut the jitter in your video.
If you find it too difficult to walk in synchrony with your shutter, try walking slower instead.
Of course, you can also use third-party apps such as Hyperlapse, instead. You can record your video straight from the app without having to access your native iPhone Time-lapse Mode.
It features built-in image stabilization. This eliminates the shaky movements in your footage. The only caveat is that it crops the frames a bit to achieve clean footage.
If you don’t want to crop your footage, another option is to use a gimbal. It stabilizes your camera mechanically so you don’t have to rely on software to cut off the edges of your video.
When doing a hyperlapse, you need to choose a good subject to focus on. It could be anything from a building to a beautiful vista or even another person. The point is to take your audience on a journey that will take them to what you want them to see.
Conclusion
Time-lapse photography is so easy with an iPhone. All you have to do is press the shutter and technology takes care of the rest. But you also shouldn’t forget that it takes more than your device to create content.
Like anything else in photography, it's crucial to create a tight composition for your iPhone time-lapse. Be mindful of your framing while you’re shooting. If you follow the steps in this article, everything else will go smoothly.
Check out our Total Time-Lapse course to take your time-lapse photography to the next level!